Welcome!
You'll find over 470 of my favorite recipes here, including ideas for Quick meals, Cooking for 2, Feasting on Leftovers, and cooking with 5 Ingredients or Less. I'm adding new posts regularly; you can subscribe by email or RSS feed if you'd like to receive the latest recipes. Bon appétit!
Noodles with Ginger Scallion Sauce
By Kath Dedon
.
I was aware of David Chang’s popular cookbook, Momofuku, but it was Ben Rhau’s video on his You Fed a Baby Chili? blog that introduced me to Chang’s Ginger Scallion Sauce. Ben made the sauce sound so amazing – I just had to try it!
.

~
The recipe couldn’t be easier. You simply combine scallions (green onions), fresh ginger, oil, soy sauce, and a bit of vinegar and salt. And that’s it! Ben said that Chang recommends letting it sit for 15 – 20 minutes before using it. I found that the leftover noodles were possibly even better the next day.
I used fresh noodles that I got at a local Asian market, but you could use dried noodles, too. I couldn’t find the usukuchi sauce, so I substituted soy sauce.
We first had this for lunch on Christmas Eve and I served it with a bit of Steeped Chicken. I made it again yesterday. It makes a great vegan dish on its own, or you can add vegetables or protein. This recipe is definitely a keeper!

.
Noodles with Ginger Scallion Sauce
(Adapted from the recipe posted by Ben Rhau (youfedababychili.com), who got the recipe from David Chang’s Momofuku)
.
.
Makes enough for 2 pounds of fresh noodles (or 1 pound of dried)
~
2½ cups thinly sliced scallions ( greens and whites, about 2 large bunches)
½ cup finely minced peeled fresh ginger
¼ cup extra light olive oil (or grapeseed oil or other neutral oil)
1½ teaspoons usukuchi sauce (or 1 teaspoon regular soy sauce, not light or low sodium, plus a little extra salt)
¾ teaspoon rice vinegar
¾ teaspoon kosher salt, or more to taste
2 pounds fresh noodles, or 1 pound of dried noodles (use spaghetti or linguine if you can’t find Asian noodles)
~
Mix all of the sauce ingredients together. Let sit for 15 – 20 minutes. Cook the noodles; drain them and toss with the Ginger Scallion Sauce. (My fresh noodles took 1 minute to cook. Follow the package directions for your noodles.)
.


Share this:

Buttermilk Fried Chicken
By Kath Dedon
.
Bob doesn’t get to have Buttermilk Fried Chicken as often as he would like because I consider it an occasional treat, not something to have in my regular recipe rotation. (Isn’t it all the more special if you don’t eat it very often?) We were headed to Metropolitan Market after lunch yesterday to buy chicken when Bob talked me into making Buttermilk Fried Chicken instead of roast chicken.
.

~
I selected a small (3 pound) chicken. Smaller chickens work best because they cook quickly and you can fit all of the pieces in a 12-inch skillet. The best size for frying is 2½ – 3 pounds, but it can be hard to find small chickens. Many of them weigh 4½ – 5 pounds! If you use a larger chicken, you may need to cook the pieces in two batches.
You can cut up a whole chicken yourself*, or buy 2½ – 3 pounds of chicken pieces. (That’s the way to go if everyone in your family likes the same pieces; it will save fights over the drumsticks or wings!)
I was recently given Thomas Keller’s Ad Hoc at Home for my birthday (thank you, S & B!) and I have heard wonderful things about his fried chicken. I checked the recipe when we got home at about 2:00 and found that Keller calls for an “essential” 12 hour brine. Since we wanted to be eating fried chicken within 4 or 5 hours, I decided to save his recipe to try another day.
This Buttermilk Fried Chicken is adapted from the one in The Best Recipe from the editors of Cook’s Illustrated. Their chicken marinates in yogurt for “at least 2 hours”, so I had plenty of time to make it. I had my chicken marinating in the refrigerator by 3:00. I let it marinate for 3 hours, and we enjoyed a Buttermilk Fried Chicken dinner at 7:00!
.
Today’s lunch: leftover fried chicken and “smashed” Yukon Gold potatoes! 
~
Buttermilk Fried Chicken
(Adapted from the recipe in The Best Recipe by the editors of Cook’s Illustrated)
.
In true Cook’s Illustrated fashion, the editors tested all types of cooking fats for frying chicken. In the end, they preferred shortening. If you have shortening, by all means, try it with this chicken. I don’t ever have it on hand and don’t want to buy it for 1 recipe. I’ve had good results using coconut oil, or a combination of coconut oil and mild olive oil.
.
.
Serves 4
.
1 (2½ – 3 pound) chicken, cut into pieces*
1½ cups buttermilk
Salt and pepper
2 cups flour
2 – 3 cups oil or shortening for frying (I used half coconut oil and half extra light olive oil)
~
1. Cut the breast halves in half with a sharp knife so you have 4 pieces of breast meat so they will cook more evenly.
2. Put the chicken pieces in a gallon-sized Ziploc® bag.
.
Chicken in the bag, and salt and pepper ready to be stirred into the buttermilk ~
~
3. Combine the buttermilk with 1 teaspoon salt and ½ teaspoon pepper and pour in the bag with the chicken. Seal the bag, put it in a dish, and refrigerate for at least 2 hours. It can marinate for up to 24 hours.

4. Bring the chicken out of the refrigerator about 30 minutes before you plan to cook it to take the chill off.
5. Put the flour, 1 teaspoon salt, and ½ teaspoon pepper in a large double paper bag. Put half of the chicken pieces in the bag, fold the ends over and shake vigorously. Put the coated chicken pieces in a rack over a baking sheet and repeat with the rest of the chicken.

~
6. Put enough oil or shortening in a 12-inch skillet until it is about 1/3 -1/2 inch deep. Heat the oil to 350˚.
7. Put the chicken pieces in the oil, skin-side down. Cover the pan with a lid or a baking sheet and cook for 5 minutes.

~
8. Check the chicken and rearrange it in the pan if necessary to cook the pieces evenly. The oil should be 250˚- 300˚ at this point. Adjust temperature if necessary. Cover and cook another 5 minutes.
9. Turn the chicken pieces over and cook, uncovered, for 10 – 12 minutes longer. While the chicken is cooking, wash the rack and baking sheet you had used for the coated pieces.

~
10. Remove the chicken from the pan and put on the rack over the baking sheet for a few minutes before serving.
Leftover fried chicken for today’s lunch! 
Mmmm...mmmm good!

♥ ♥ ♥ ♥
*How to Cut Up a Chicken

1. Using a sharp knife, cut the wings off. Place the knife slightly into the breast and bend the wing back to find the joint.

2. Cut through the skin between the legs and the breast. Bend the legs back to help find the joint, and cut the legs from the chicken. Cut the drumsticks from the thighs.

3. Using poultry shears, cut the back bone from the breast.
4. Put the breast skin-side down. Using a large, sharp knife, press down on the breast bone to cut it in half and separate the breast into 2 halves.

5. Cut each breast half in half so you have 4 pieces.
6. You’ll now have 10 pieces for frying: 4 breast pieces, 2 wings, 2 drumsticks, and 2 thighs. Freeze the back piece to use for making chicken broth.

Share this:

Ginger Crinkle Cookies
By Kath Dedon
.
When Carrie was home for Christmas, she made one of her favorite cookies – Ginger Crinkle Cookies! The spices in ginger cookies are, of course, wonderful for holiday desserts, but these cookies are welcome any time of the year. They’re perfect in a packed lunch or with a cup of tea!
These Ginger Crinkle Cookies are so easy to make, and they’re very attractive because they spread into lovely round cookies. Carrie said that when she made them for co-workers they found it hard to believe that she hadn’t bought them at a bakery because they looked too perfect!
I’m not sure of the origin of the recipe. About 10 years ago, Carrie compiled a collection of dessert recipes for a school project and this recipe for Ginger Crinkle Cookies is one of them. So if you know the source, please let me know and I will give full credit.
Update October 15, 2013: I found the source of this terrific recipe! Going through some recipes I had saved, I found a photocopy of this recipe. The recipe is from Seattle chef and cookbook writer, Sharon Kramis. The recipe had been printed in one of our local papers.
.
 ~
~
Ginger Crinkle Cookies
(Adapted, barely, from a recipe by Sharon Kramis)
.
.
If your spices are old they will not be very flavorful. If they don’t have much of a scent, it may be time to replace them. Find a store that sells spices in bulk so you can buy a small amount and you’ll also save a ton of money.
a
Makes 2½ – 3 dozen
a
2 ¼ cups (270 g) flour
2 teaspoons baking soda
1½ teaspoons ground ginger
1½ teaspoons ground cinnamon
½ teaspoon ground cloves
¼ teaspoon salt
1 cup brown sugar, packed
½ cup cooking oil
¼ cup melted butter, cooled
¼ cup blackstrap molasses
1 large egg
Granulated sugar
~
1. In a medium bowl, stir together the flour, baking soda, ginger, cinnamon, cloves, and salt.
2. In a large bowl, beat together the brown sugar, oil, melted butter, molasses, and the egg.
3. Gradually add the flour mixture to the brown sugar mixture, and beat until well-blended.
4. Divide the dough into 2 balls and refrigerate for 1 hour.
5. Preheat oven to 375˚.
6. Shape the chilled dough into 1½-inch balls. Roll the balls in the granulated sugar and place 2 inches apart on an ungreased baking sheet.
 ~
~
7. Bake for 10 to 12 minutes.

.
8. Cool on a wire rack.

Share this:

Greek Black-Eyed Peas Salad
By Kath Dedon
.
Did you have black-eyed peas for New Year’s? I made a Greek Black-Eyed Peas Salad to take to a New Year’s Day party.
Black-eyed peas on New Year’s are supposed to bring prosperity. Green leafy vegetables are eaten to attract money. (In this recipe I used spinach.) The salad was one of many side dishes served with the hosts’ ham. Pork is also considered good luck on New Year’s Day because, according to Wikipedia, “pigs root forward when foraging, representing positive motion”. So I think we covered all of the bases.
The recipe is from a post by Hank Shaw on simplyrecipes.com. I followed his method for cooking the dried black-eyed peas, but I left them in the pot a bit too long. Some were a little too mushy, but they still tasted great!
The only oil in the salad is the oil from the sun-dried tomatoes. Not knowing exactly how much oil was in the jar, I was concerned that it would be too much. I took the tomatoes out of the jar and found that there really wasn’t that much oil, so I used it all and it was perfect.
If you don’t want to bother with cooking dry beans (although it really is easy), you can substitute 2 cans of black-eyed peas.
Happy New Year!
.
 ~
~
Greek Black-Eyed Peas Salad
(Adapted from Hank Shaw’s recipe on simplyrecipes.com)
.
.
Serves 8 – 10
.

~
1 pound dry black-eyed peas
Salt
5 ounces baby spinach, washed and larger leaves torn in half
1 package of feta cheese, about 7 ounces
1 jar of sun-dried tomatoes in oil, about 8 ounces
1 cup black olives, preferably Kalamata or oil-cured (I used ½ cup oil-cured; 1 cup would have been better.)
1 finely chopped green onion
1 finely chopped garlic clove
Zest and juice of 1 lemon
~
1. Rinse the black-eyed peas.
2. Heat a large pot of water to boiling. Add a heaping tablespoon of salt. Add the black-eyed peas and immediately turn the heat to low. It should be below the simmering point. Cook, uncovered, until they are done. It should take 30 minutes to an hour. The timing will depend on how old the black-eyed peas are. (I left mine for 1½ hours, which was too long.)
3. When the black-eyed peas are done, drain and let them cool down.

~
4. Put the spinach in a large bowl.

~
5. Add the feta cheese, the sun-dried tomatoes and their oil, the olives, green onion, garlic, and lemon zest to the spinach. Toss to combine.

~
6. Add the black-eyed peas to the salad and toss well.
7. Just before serving, add the lemon juice and toss again.

Share this:

Pepper-Cumin Cookies
By Kath Dedon
.
Bob gave me The Essential New York Times Cookbook by Amanda Hesser a few days before Christmas. I know I’ll have a lot of fun exploring the recipes; I love reading the bits of history that Amanda adds to each one.
Carrie was home for Christmas and found a cookie recipe that she had to make: Pepper-Cumin Cookies. She was intrigued by the combination of pepper, cumin, lemon zest, and sugar in a cookie so she quickly made a batch.
With the help of a food processor, the cookies are a snap to put together. I think you could make them by hand, mixing the dough as you would a pie crust, but I haven’t tried it.
Carrie used a mortar and pestle to crack the pepper and the cumin. A quick search online produced another technique. Real Simple suggests using a garlic press to crack seeds, which I thought was a clever idea.
So how did we like the Pepper-Cumin Cookies? Carrie and I loved them! They’re quite tender and we enjoyed the interesting combination of flavors. Laura was not as impressed; she didn’t like the cumin in the cookies.
If you are a cumin lover, I encourage you to give Pepper-Cumin Cookies a try.
~
This photo doesn’t do these cookies justice, but I feel lucky to have gotten it. I had to label these last 3 cookies “Do not eat – need photo”!

~
Pepper-Cumin Cookies
(Adapted from a recipe in The Essential New York Times Cookbook by Amanda Hesser, originally published on December 1, 1996 in a Molly O’Neill column)
.
.
Makes about 2 ½ dozen cookies.
.
2 cups flour
6 tablespoons sugar
1 teaspoon kosher salt
2 teaspoons grated lemon zest
1 teaspoon black peppercorns, cracked
1 teaspoon cumin seeds, cracked
½ pound (2 sticks) unsalted butter, cut into pieces and softened slightly
1 teaspoon vanilla extract
~
1. Heat the oven to 350˚.
2. Put the flour, sugar, salt, lemon zest, peppercorns, and cumin seeds in a food processor and process quickly to blend.
3. Add the butter and vanilla and process until the dough forms a ball.
4. Form the dough into 1-inch balls and put them on 2 parchment-lined baking sheets. Keep them about 2 inches apart and flatten each one so they’re about 1/4-inch thick.

~
5. Bake for about 15 minutes, until lightly browned. Cool on wire racks.
Share this:

Happy New Year and my 1st Blogiversary!
By Kath Dedon
.
One year ago today I launched In the kitchen with Kath with my first “Hello World” post. I can’t believe it’s been a whole year, but today is my 1st Blogiversary! (“Blogiversary” is actually a word in the online Urban Dictionary.) 🙂

~
I love the fact that my Blogiversary is also New Year’s Eve; it’s a great time to look back to some of the favorite posts of the year.
Here are the Top 5 of 2010:

~
4. Maui Ribs
 ~
~
 ~
~
2. Slow Cooker “Barbecued” Pork Shoulder Roast and Southern Barbecue Dry Rub

~
And the #1 post for 2010 – the one that had 10 times as many views as the #2 post?
Melt-in-your-mouth Homemade Cheese Crackers!
 ~
~
I want to say a big “thank you” to all who have followed along during the year. I love your comments and feedback, and this wouldn’t be nearly as much fun without you!
Happy New Year!

Share this:

Mock Mincemeat Pie
By Kath Dedon
.
“Real” Mincemeat Pie is made with finely minced meat. This Mock Mincemeat Pie is made with apples, raisins, and spices. I prefer it to the “real thing”, which I did actually make once – many years ago.
I once followed Julia Child’s advice (in The Way to Cook) for Mincemeat Pie. Julia suggested using a jar of commercial mincemeat, and then freshening it up with chopped apples, raisins, nuts, and spices. It was quite good, but I decided I wanted to make it without using the jarred mincemeat.
This is the Mock Mincemeat Pie that I came up with, and the mincemeat lovers in my family always enjoy it as part of our Christmas dinner.
 ~
~
Carrie was home from Boston for a week, so she helped me make the pie. She made the pie crust and I made the filling. (Carrie’s flight back to Boston was canceled on December 27 due to the “Blizzard of 2010” in the Northeast. She managed to snag the one and only standby seat on a flight on the 28th and made it home.)
 ~
~
We did a lattice-top crust, which is really quite easy. This is the method I use, although I arrange the dough strips at a 90˚ angle instead of the 45˚ angle demonstrated on the link. You can certainly just make a regular double crust pie, if you prefer.

~
Mock Mincemeat Pie
.
.
4 large Granny Smith apples, peeled and chopped
1 cup raisins
Pinch of salt
1 teaspoon cinnamon
¼ teaspoon cloves
½ teaspoon ginger
Zest of 1 large orange
½ cup honey
2 tablespoons maple syrup
3 tablespoons flour
.
1. Place a large cookie sheet in the oven and preheat to 375˚.
2. Combine apples, raisins, salt, cinnamon, cloves, ginger, and orange zest in a large bowl.
3. Stir the honey, maple syrup, and flour together. Stir into the fruit mixture.
4. Turn the fruit mixture into the pastry shell.

~
5. Roll out the top crust and cut into ½-inch strips to make a lattice-top crust. (Or roll out the top crust, arrange over the filled pie and cut a few slits in the crust with a sharp knife.)
6. Finish the edge around the pie.

7. Bake for 55 minutes or until the crust is golden.
8. Cool on a wire rack before serving.

Share this:

Superb Grilled Ham and Cheese Sandwich!
By Kath Dedon
.
Do you have leftover holiday ham in your refrigerator? How about using some of it for a superb Grilled Ham and Cheese Sandwich?
I hesitated to share this sandwich with you. Doesn’t everyone know how to make a Grilled Ham and Cheese Sandwich? But this one was the perfect blend of flavors – truly fabulous! And I thought….maybe you haven’t thought of making a Grilled Ham and Cheese Sandwich lately, and you’re wondering what to do with leftover ham. So, here it is!
~
This photo made it on the Foodbuzz Top 9 for December 28! 🙂

~
The secret to a superb Grilled Ham and Cheese Sandwich? It all starts with the best ingredients:
♥ Snake River Farms Kurobuta Ham – Simply. The. Best. If you live in the Seattle area, Metropolitan Market sells whole and half hams, as well as ham slices when you just want a small amount.

♥ 1000 Islands River Rat Extra Sharp Cheddar Cheese. Our good friend Dennis, who owns Ontario Orchards in Oswego, NY, brought us some when he visited recently. It is fantastic!

♥ Grey Poupon Dijon Mustard – a classic which was perfect on this sandwich.
♥ Good sandwich bread. I used A la Francaise Sourdough. I love it for grilled sandwiches.
♥ And, of course, Butter for grilling!
Those are the ingredients I used. I know there are other fine hams, cheeses and bread out there. The point is to use the best ingredients available to you for a Superb sandwich!
~
Here’s how I made the sandwiches:
1. Heat a cast iron skillet or griddle over medium heat.
2. Spread Dijon mustard on slices of good sourdough bread.
3. Put slices of good ham and cheddar cheese on the sandwiches.
4. Put the top slice of bread on the sandwiches and then spread softened butter on the top.
5. Put the sandwiches, butter-side down, in the skillet.
6. While the first side is grilling, spread butter on the top side of the sandwiches.
7. Turn the sandwiches over with a spatula, and brown the second side.
8. Grill until both sides are nicely browned and the cheese is melted.
Share this:

Toffee Squares
By Kath Dedon
.
Toffee Squares have been one of my favorite holiday cookies since I was a teenager. There have been many Christmases at our house when Toffee Squares were the cookies we chose to leave for Santa. The plate was always empty on Christmas morning.

~
The recipe is adapted from Betty Crocker’s Cooky Book. Originally published in 1963, it was most recently published as an “authentic reproduction” in 2002. I have fond memories of paging through it as a teenager, but I haven’t actually made that many cookies from it. I just can’t get beyond the Toffee Squares when I use this book!
What’s not to love about them? They are so quick and easy to make. The toffee cookie base paired with chocolate is fantastic, and everybody loves them. (Yesterday a six-year-old boy told me it was the best cookie he had ever had in his life!) 🙂
If you have never tried Toffee Squares, I encourage you to try them this holiday season. I can assure you that Santa will be thrilled to find a plate of Toffee Squares awaiting him when he comes down your chimney!
.

~
Toffee Squares
(Adapted from a recipe in Betty Crocker’s Cooky Book)
.
~
1 cup butter, left at room temperature a while to soften
1 cup dark brown sugar, packed
1 egg yolk
1 teaspoon vanilla
2 cups (240 g) flour
¼ teaspoon salt
4 ounces (about 1 cup) chocolate chips
½ cup finely chopped nuts (I usually use walnuts)
~
1. Preheat the oven to 350˚.
2. Put the butter, brown sugar, egg yolk, and vanilla in a mixing bowl.
 ~
~
3. Beat at medium speed until well blended.
 ~
~
4. Add the flour and salt and mix well.
5. Spread the dough on a lightly greased baking sheet so it is a about a 13×10-inch rectangle.* Leave about an inch between the dough and the sides of the baking sheet. (Instead of greasing the pan, you can use parchment paper, as I did.)
*Update 12/22/15 I have found that it is easiest to spread the dough if you place a sheet of plastic wrap over it and then push it out.

a
 ~
~
6. Bake for 20 – 25 minutes until it is golden brown.
 ~
~
7. Remove from the oven and immediately sprinkle the chocolate chips over the hot cookie.
 ~
~
8. Let them sit for just a few minutes until softened, and then spread the chocolate over the cookie.
 ~
~
8. Sprinkle with the nuts.
 ~
~
9. Cut into small squares while still warm.
 ~
~

Share this:

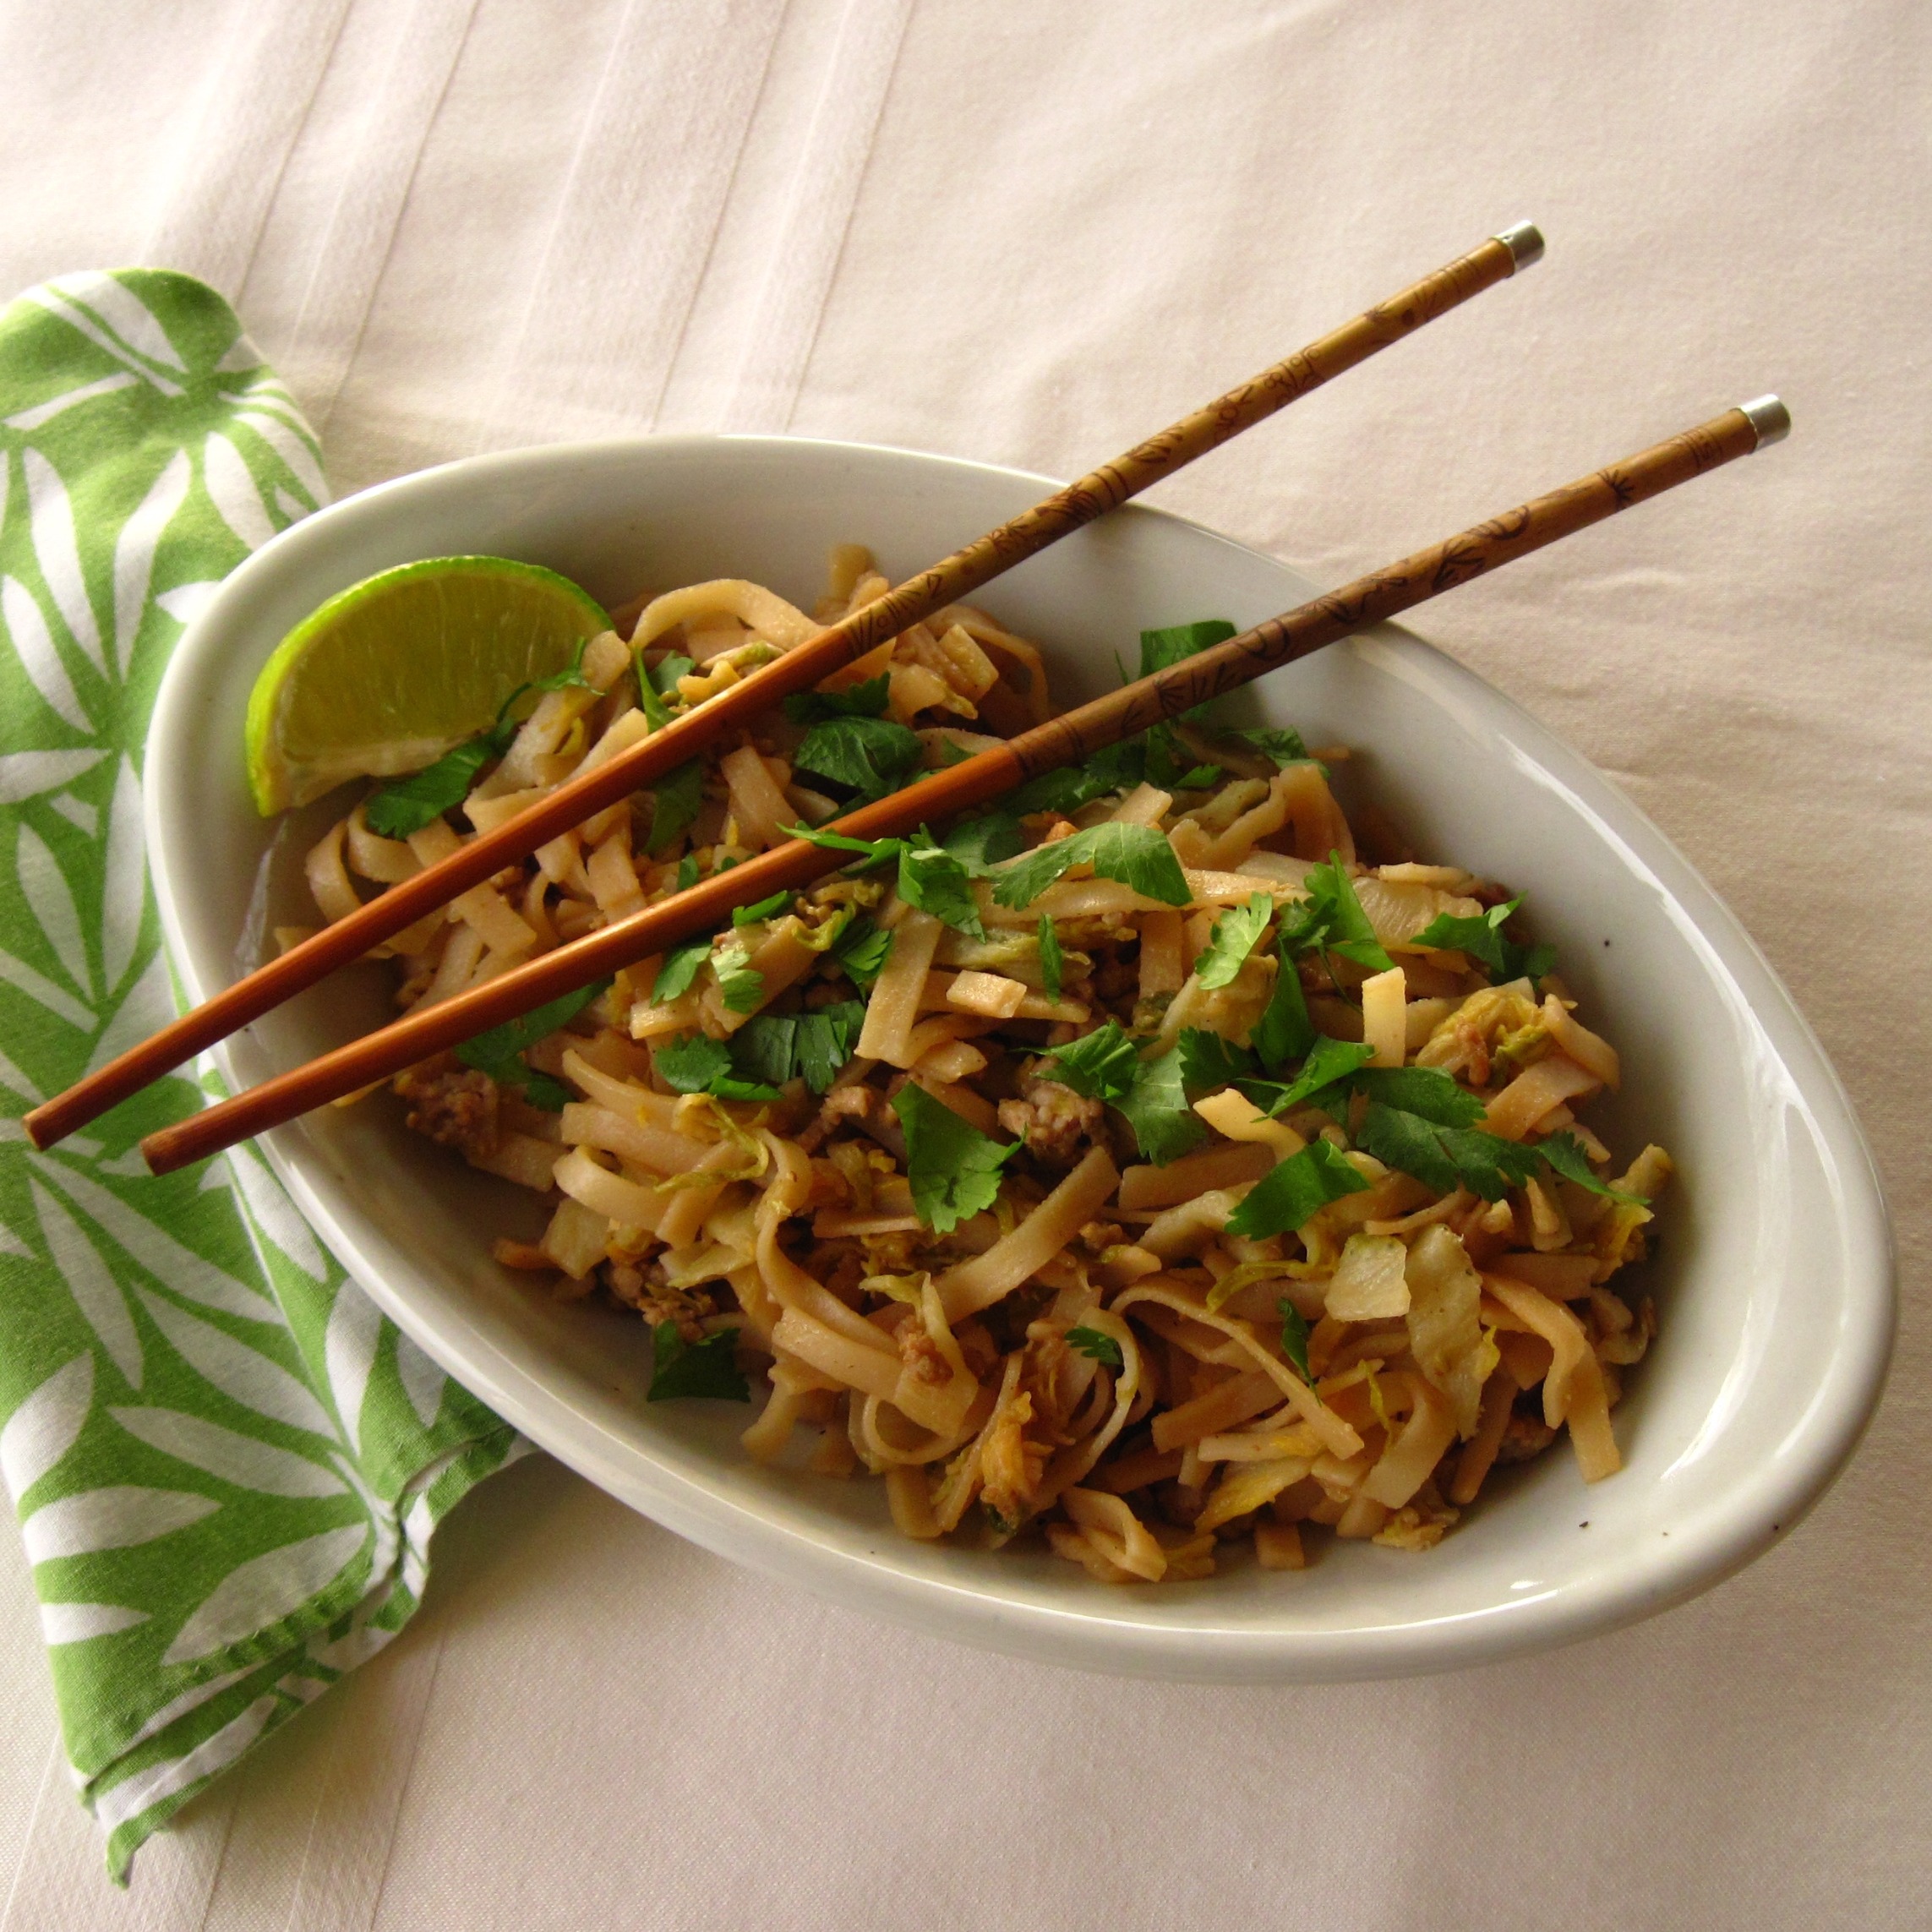
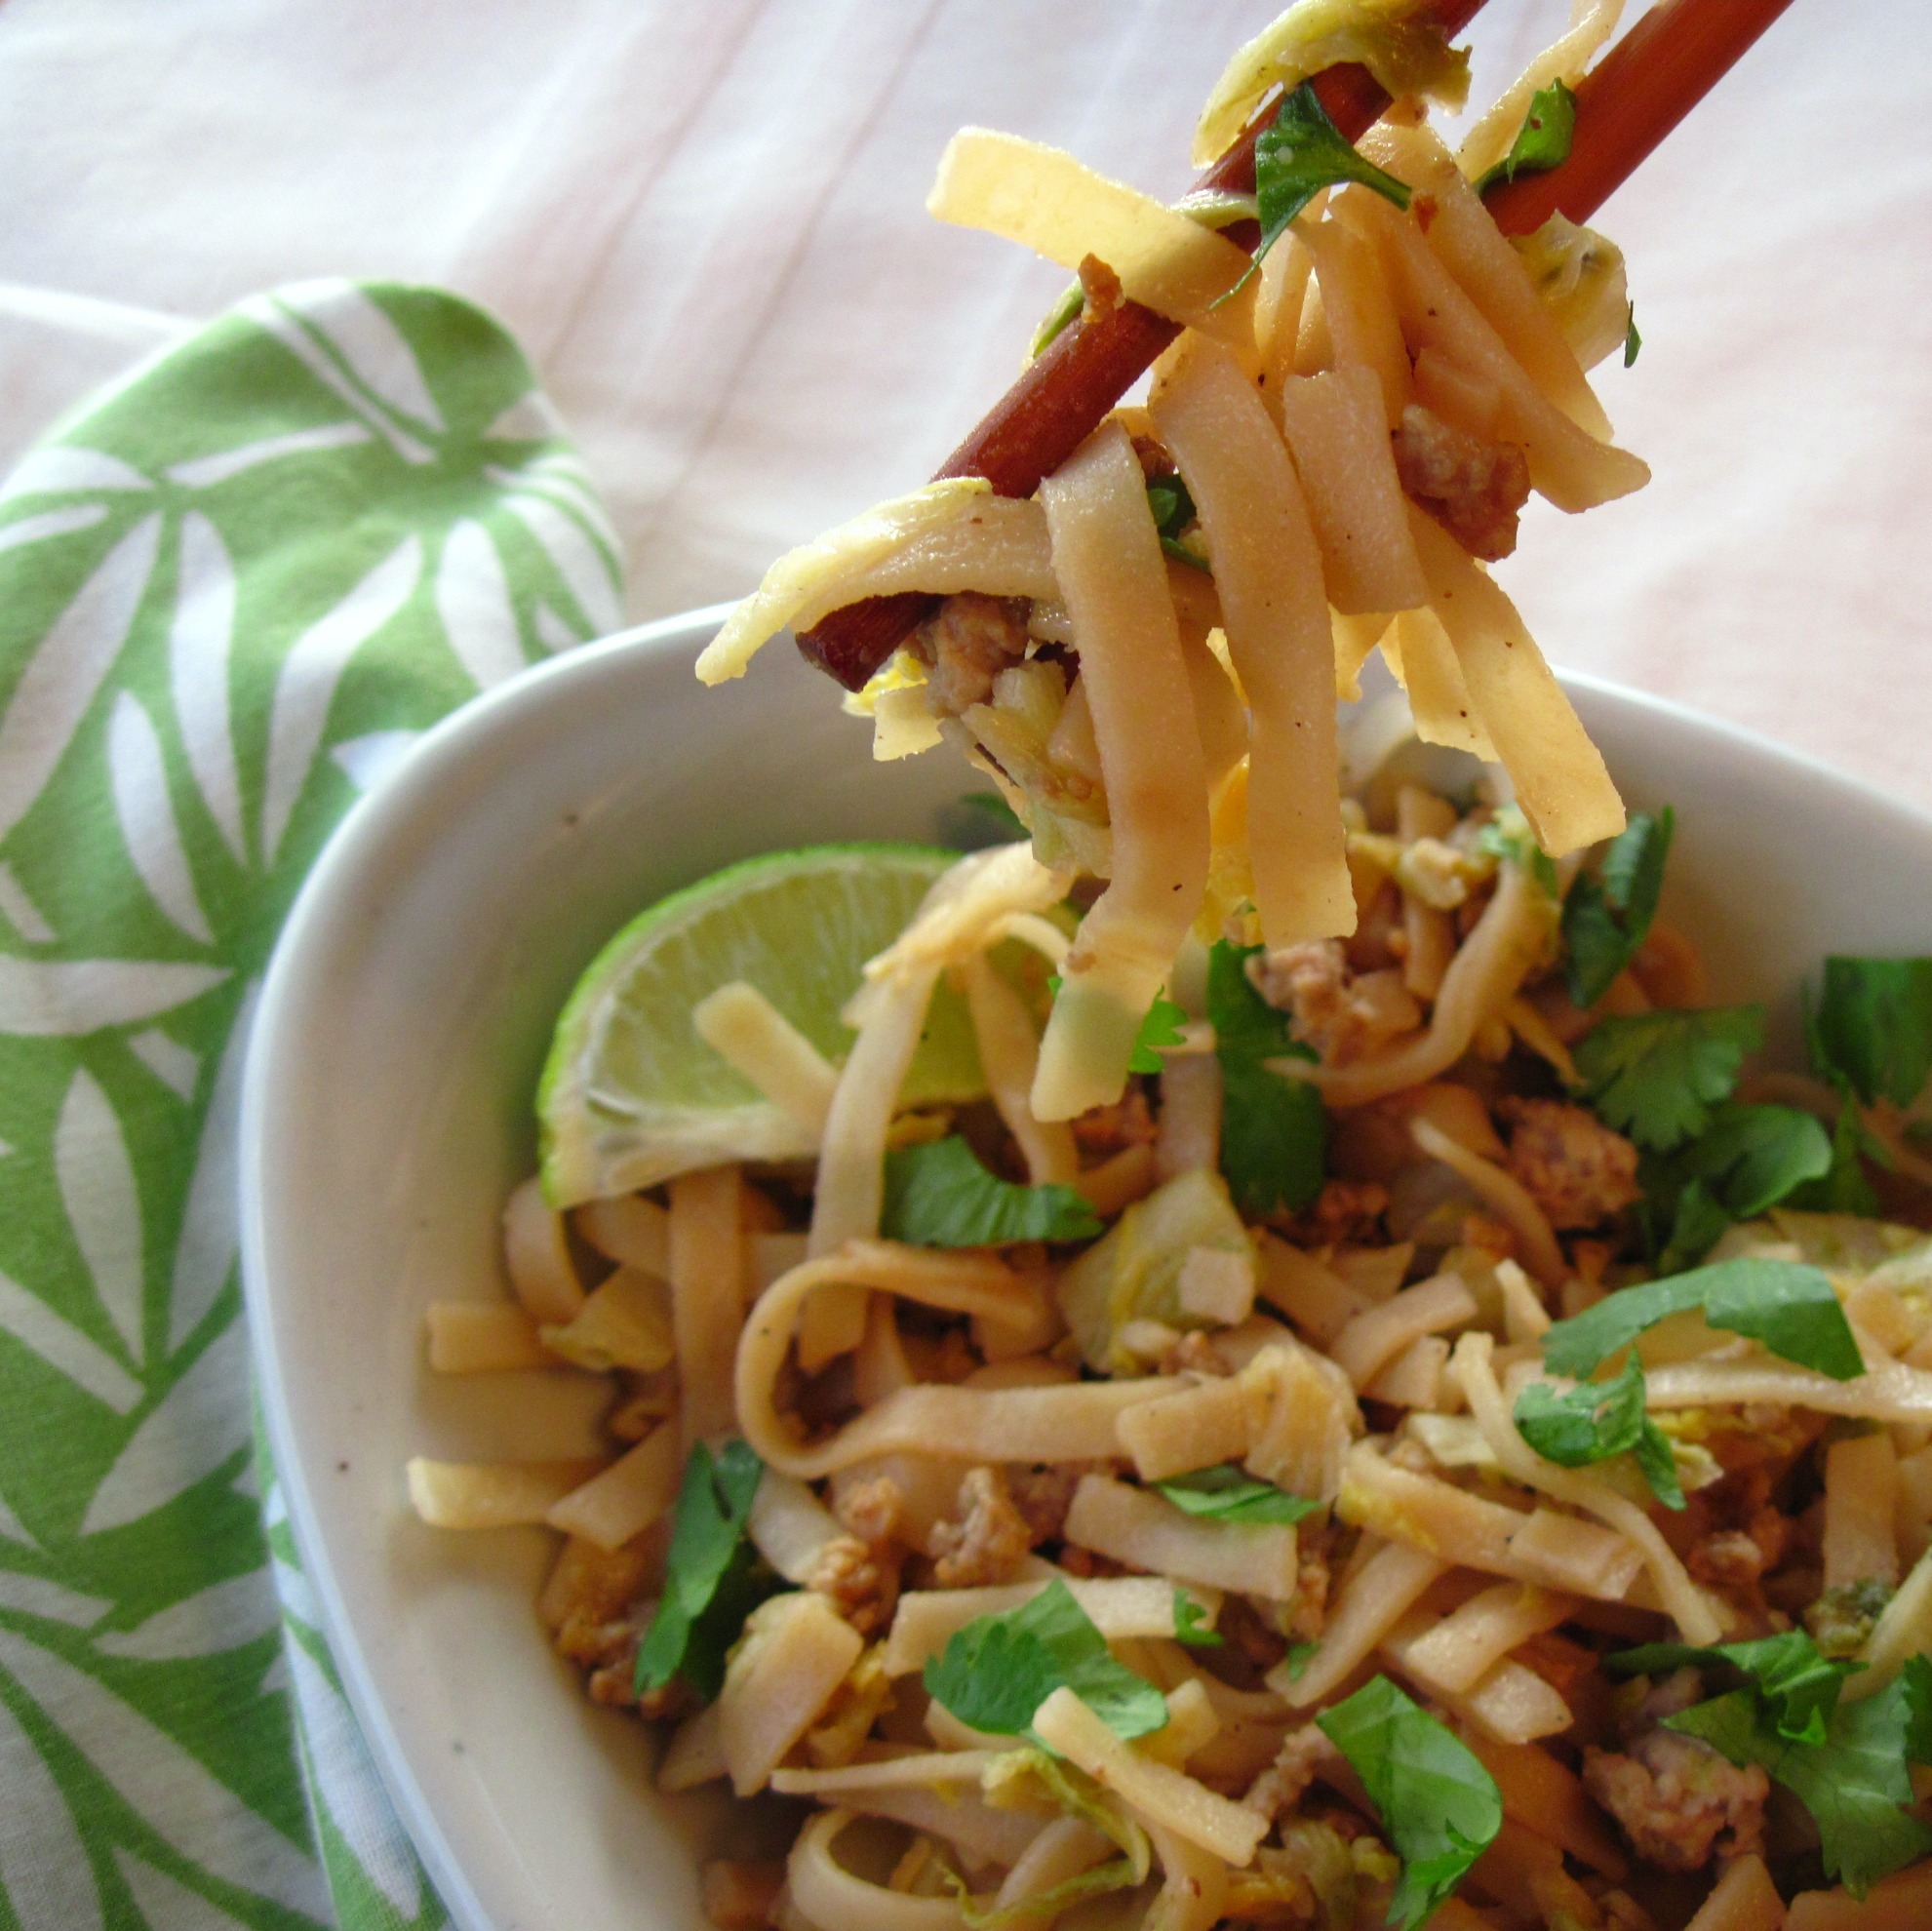
Noodles with Spicy Cabbage and Pork
By Kath Dedon
.
This Noodles with Spicy Cabbage and Pork is unbelievably good! I’ve made it twice in the past week. Made with only ½ pound of ground pork, 1½ to 2 pounds of Napa cabbage and rice noodles, it’s a great sample recipe from Mark Bittman’s new Food Matters Cookbook.
This latest collection from Mr. Bittman focuses on recipes that use more vegetables and less meat. He points out, without being preachy, that it’s better for you and better for the planet. I’m looking forward to exploring this book. If most of the recipes are as good as the Noodles with Spicy Cabbage and Pork, it’s a winner!
When I first made it I was skeptical about all of the cabbage. I was amazed to find that it worked out perfectly, so don’t be put off by the humongous pile of chopped cabbage.
I used twice as much garlic and three times as much ginger when I made it, and we thought it was perfect. It serves 4. If you have leftovers, it makes a fabulous lunch! It can be heated up in a microwave, but, honestly, it’s even delicious as a cold noodle dish.
I can’t recommend Noodles with Spicy Cabbage and Pork enough. Try it…you’ll like it!

~
Noodles with Spicy Cabbage and Pork
(Adapted from a recipe in Mark Bittman’s Food Matters Cookbook)
.
`
Serves 4
`
2 tablespoons oil (I used coconut oil, but other cooking oils are fine)
8 ounces ground pork
2 tablespoons minced garlic
3 tablespoons minced ginger
1 head Napa cabbage (1½ to 2 pounds), chopped
½ cup water
8 ounces medium rice noodles, cooked according to package directions*
3 tablespoons gluten-free tamari sauce (or use soy sauce if you don’t need gluten-free)
1 tablespoon sesame oil
2 teaspoons chili oil
Black pepper
¾ cup chopped fresh cilantro (really good, but optional)
Lime wedges (optional)
.
Medium size rice noodles, chili oil, and ginger
 ~
~
A 2-pound Napa cabbage

1. Heat the oil in a large skillet over medium-high heat.
2. Add the ground pork. Sprinkle with salt. Cook, stirring occasionally until the pork is cooked and has browned, 3 to 5 minutes. Remove the pork from the pan.


3. Turn the heat down to medium-low. Add the garlic and ginger to the pan. Cook, stirring, for about 1 minute.

4. Add the cabbage to the pan with the ½ cup of water. (If the cabbage doesn’t all fit, put as much as you can in the pan. Cook, stirring occasionally, until it cooks down and then add the rest.)
5. Cook the cabbage until it has softened and all of the water has evaporated, about 15 – 20 minutes. Continue cooking until it starts to brown a bit, about 5 minutes more.
My pan was over-flowing with cabbage.
This is how it looked after it had cooked down.
6. When the cabbage is almost done, cook the rice noodles. Follow the package directions.
*If there are no directions for cooking the noodles, here’s how I cooked my medium rice noodles. Bring about 4 cups of salted water to a boil in a 2 or 3 quart pan. Remove from the heat. Immerse the rice noodles in the pan. Stir and then let them stand for 8 – 10 minutes. Reserve about ½ cup of the water, and then drain and rinse with cold water.
7. Add the noodles, pork, soy sauce, sesame oil, chili oil, and some black pepper to the cabbage. Stir well. If it seems a bit dry, add some of the water that was reserved from cooking the noodles.

8. Taste and adjust seasoning, if needed.
9. Serve topped with the cilantro and with lime wedges, if desired.


