Sous Vide Beef Back Ribs
By Kath Dedon
.
These Sous Vide Beef Back Ribs taste like they’ve just been cut from a Perfect Ribeye Roast. And that was my goal!
The Anova recipe that I used as a guide used a barbecue rub. I’m sure that would be delicious, but I really wanted the taste of a ribeye roast. I just used salt and pepper and finished the ribs with a bit of garlic powder. I also cut the sous vide bath time from 48 to 30 hours and that worked perfectly.
I’ve had my Anova Culinary Sous Vide Precision Cooker for a little over a year, and I have just recently become comfortable using it. I don’t know why it took so long, because it’s really quite easy to use. I’m using it more and more often, but I don’t post all of the recipes to this blog. I recognize that probably most of you are not using a sous vide cooker.
I couldn’t find a lot of information on the Internet about using a sous vide cooker for beef back ribs. Bob and I enjoyed these Sous Vide Beef Back Ribs so much that I had to post this recipe so I would have it for the future. 🙂
.
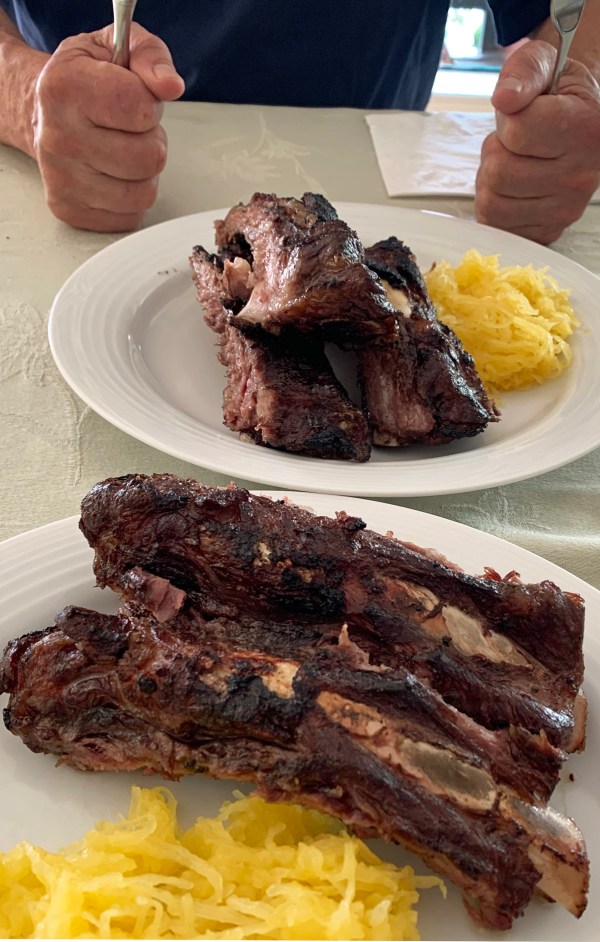
Bob’s ready for his beef ribs, seen served with spaghetti squash.

.
Sous Vide Beef Back Ribs
(Adapted from an Anova recipe online for Sous Vide Dry Rubbed Beef Back Ribs)
.
.
Note that I did not add the garlic powder until I was ready to grill the ribs. I was concerned that it might develop an odd flavor after 30 hours in the sous vide bath.
.
Serves 3 – 4
.
1 (3.3 pound) rack of beef back ribs (sometimes referred to as prime rib bones)
Kosher salt and freshly ground black pepper
Garlic powder, for finishing
.
- Fill a large container with hot tap water. Put your sous vide cooker in the container and set the temperature to 141°F (60.5°C). Set the timer for 30 hours.
- Generously season both sides of the ribs with salt and pepper.
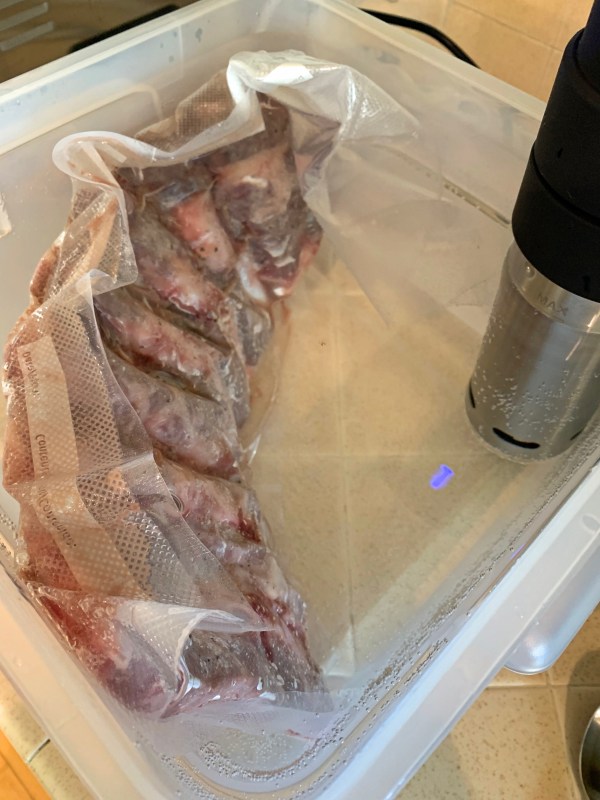
- Seal the ribs in a vacuum seal bag, or use a 2-gallon Ziploc bag. (If using a Ziploc bag, use the water immersion technique to seal the bag.)
.

.
4. When the sous vide water has reached the cooking temperature, put the bag of ribs in the water, making sure the ribs are fully submerged.
.
.
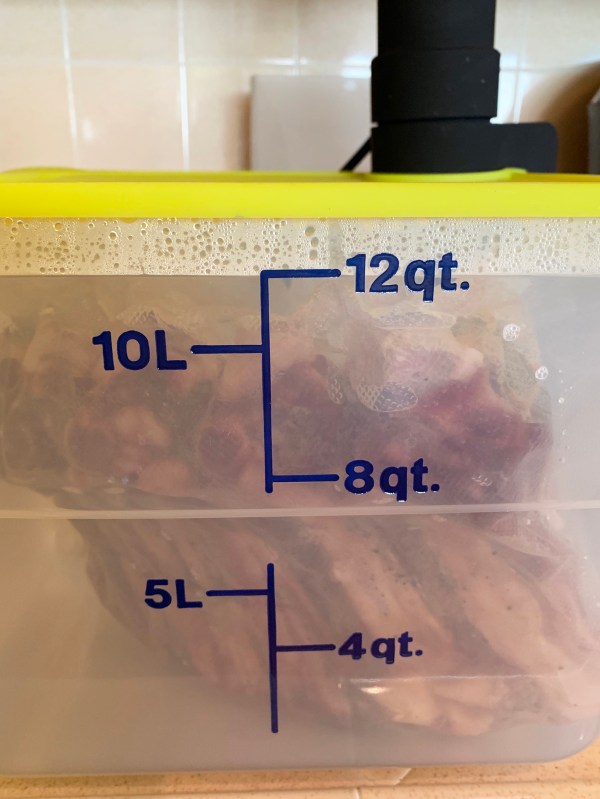
5. Use a lid, as I did, or cover the top of the container with aluminum foil to minimize water evaporation. (If your water does evaporate, you will have to add more water to keep the ribs submerged. I had no evaporation with my 12-quart container and silicone lid.)
.
.
6. Just before the 30 hours are up, heat your grill to high. (Or heat your oven to 450°F, 232°C.)
7. When the sous vide timer goes off, remove the ribs from the bag and pat them dry with paper towels.
8. Season the ribs with more salt, pepper, and the garlic powder.
9. Keeping your grill at the highest heat, grill the ribs for about 1 minute on each side. (Or roast in the oven on a baking sheet for about 10 minutes.)
10. Cut into individual ribs and enjoy!
.

.
.


I’ve been meaning to dabble in sous vide cooking for years now. Never seem to find the right time to try it, but the look of these ribs certainly does inspire me to try… !
I was slow to warm up to it, Frank, but I love it now. There’s no easier way to get perfectly cooked steaks or pork chops.