Welcome!
You'll find over 470 of my favorite recipes here, including ideas for Quick meals, Cooking for 2, Feasting on Leftovers, and cooking with 5 Ingredients or Less. I'm adding new posts regularly; you can subscribe by email or RSS feed if you'd like to receive the latest recipes. Bon appétit!
Green Bean Salad with Cilantro Sauce
By Kath Dedon
.
Instead of a tossed green salad, I served this Green Bean Salad with Cilantro Sauce as a side dish with Tortilla Soup. They paired together quite well, and we all loved the beans!
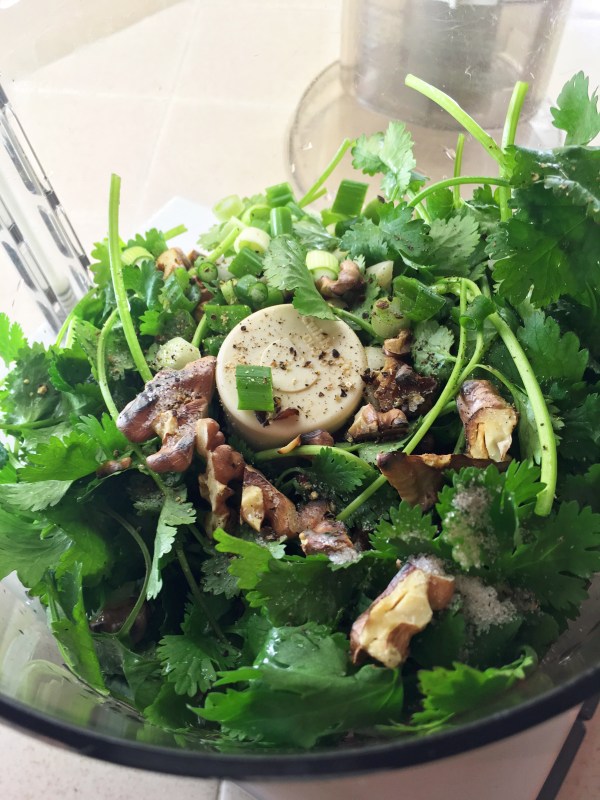
The cilantro sauce is kind of like a cilantro pesto but, unlike traditional pesto, it does not include cheese. Cilantro, walnuts, garlic, olive oil, lemon juice, and a green onion are processed in a food processor to make the tasty sauce. Very easy. Very good!
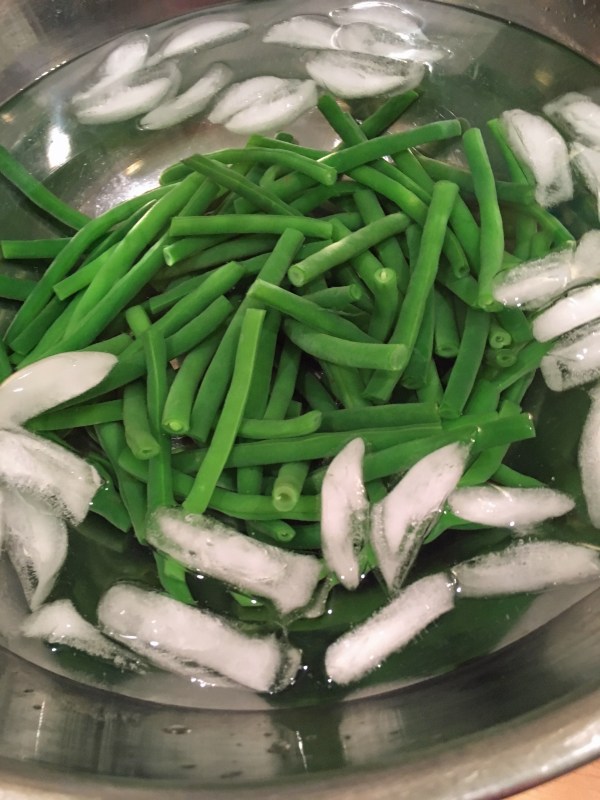
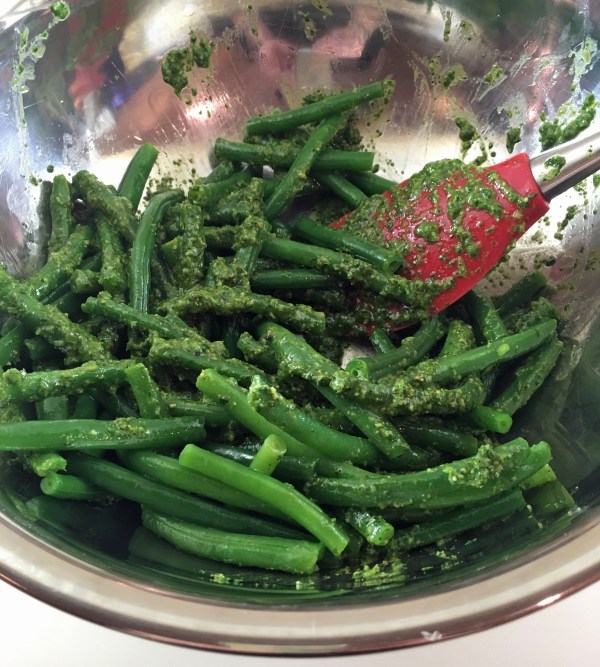
The green beans are boiled and then plunged in an ice bath to stop the cooking. After tossing the beans with the cilantro sauce, they’re ready to eat.
The recipe, which is adapted from a recipe in America’s Test Kitchen’s The Complete Mediterranean Cookbook, says the salad can be made up to 4 hours before serving. I think you could easily stretch it to more than 4 hours, though, based on how great the leftover salad tasted the next day. It still tasted fantastic and was still a vibrant green color.
I have made this Green Bean Salad with Cilantro Sauce twice in the last couple of weeks. I made the whole recipe, which generously serves 8, the first time. The second time, I cut the recipe in half for 4 servings. Bob and I enjoyed it for dinner two nights in a row.
At dinner, Bob wondered if it wouldn’t also be good hot. I had been thinking the same thing. I may try that next time. I would skip the ice bath and just drain the hot beans and toss them with the cilantro sauce. If I do that, I’ll update it here to let you know how it went.
.

.
Green Bean Salad with Cilantro Sauce
(Adapted from a recipe in America’s Test Kitchen’s The Complete Mediterranean Cookbook)
.
.
Serves 4 (double to serve 8)
.
2 tablespoons walnuts, chopped a bit
1 garlic clove, unpeeled
1¼ cups fresh cilantro leaves and stems, tough stem ends trimmed (about 1 bunch)
1/4 cup extra-virgin olive oil
2 teaspoons lemon juice
1 green onion, sliced thin
¼ teaspoon salt
A grind or two of black pepper
1 pound green beans, trimmed
.
I like to line the beans up along the edge of a knife to cut the tips off several at the same time.

1. Heat a small skillet over medium heat. Add the walnuts and garlic clove. Cook, stirring often, for about 5 minutes or until toasted and fragrant. Transfer to a small plate.
2. Let the garlic cool for a couple of minutes and then peel the clove and chop it up.
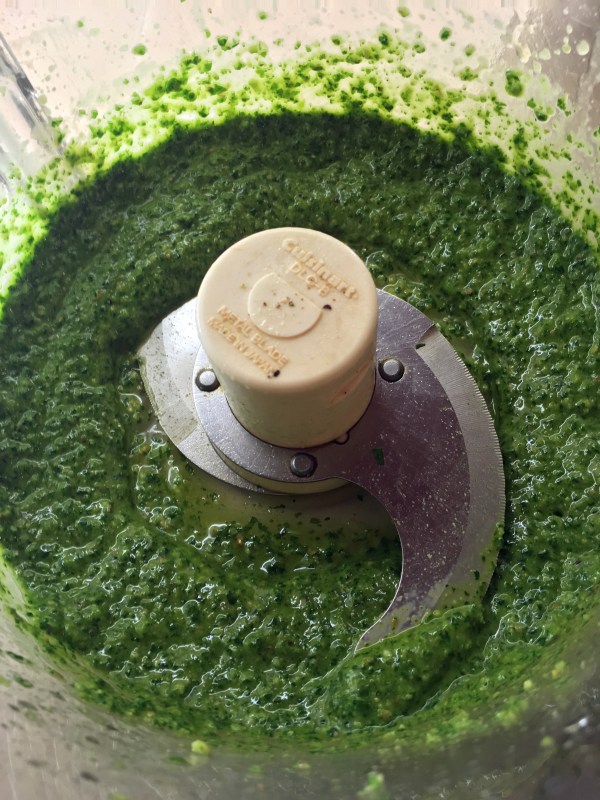
3. Put the cilantro, walnuts, garlic, olive oil, lemon juice, green onion, salt and pepper in the bowl of a food processor. Process for about 1 minute, or until it’s smooth. You may have to stop the processor to scrape down the sides. Put the cilantro sauce in a large bowl.
.
.
4. Fill a second large bowl halfway with ice and water.
5. Bring 4 quarts of water to a boil. When it’s boiling add 1 tablespoon of salt and the green beans. (If you double the recipe, still use 4 quarts of water and 1 tablespoon of salt.) Cook the beans for 4 minutes, then drain them and add them to the ice bath.
.
6. Let the beans chill for about 5 minutes. Drain and pat dry a bit with paper towels.
7. Put the drained beans in the bowl with the cilantro sauce. Gently toss so the sauce is distributed well. Season to taste with salt and pepper. Serve immediately, or cover and refrigerate until ready to serve.
.

.
Share this:

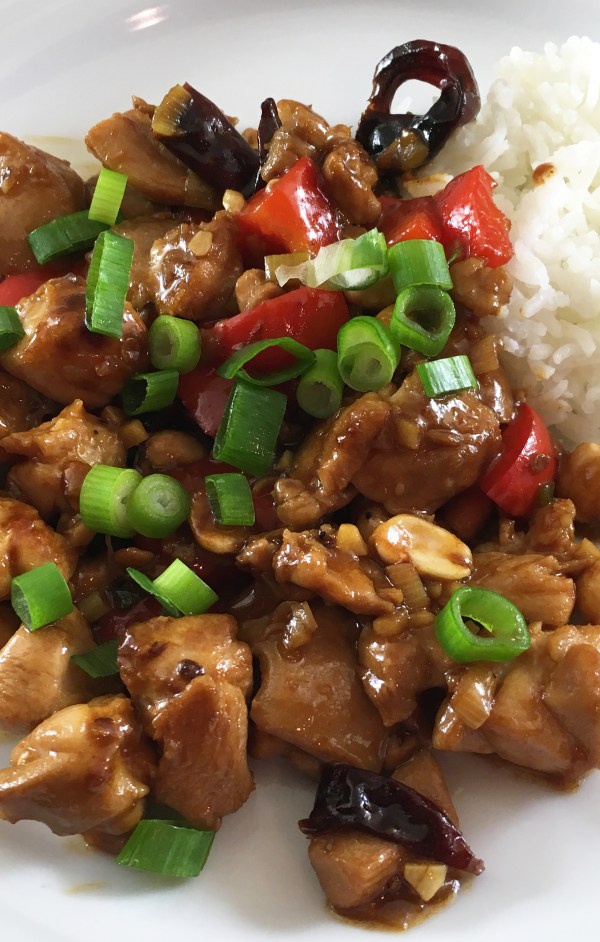
Kung Pao Chicken
By Kath Dedon
.
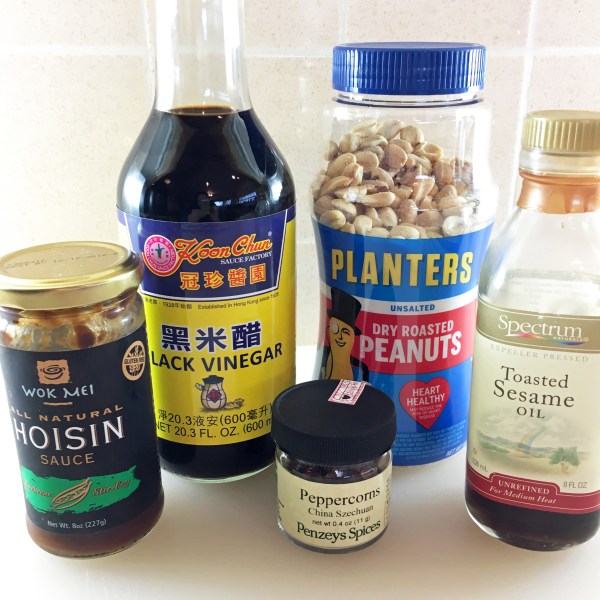
This recipe for Kung Pao Chicken is seriously delicious! I found it on epicurious where it was credited to Diana Kuan (The Chinese Takeout Cookbook). Almost all of the ingredients are easy to find, but I did have to go to our local Chinese grocery store to find the Chinese black vinegar. The recipe says you can substitute “good-quality balsamic vinegar”. I also already had Sichuan pepper which I had ordered from Penzey’s a while ago. (You may see it spelled “Szechuan” peppercorns. It’s the same thing.)
The recipe says it serves four as part of a multicourse meal. As main course served with a bit of rice it really serves three at the most, and two hungry people could easily polish off the whole thing. I added a red bell pepper to include a tasty vegetable that went well with it, served it with rice and a tossed salad. We had just a small serving of the Kung Pao Chicken left.
If your dried red peppers are really hot and you don’t like 5-star heat, use them anyway for their flavor; just pick them out of your serving. That’s what I do. Bob, Mr. 5-star plus, eats his.
The ingredient list for Kung Pao Chicken looks long, but the recipe is very easy to execute. Give this a try the next time you’re hungry for Chinese takeout. It’s sure to satisfy your craving!
.

.
Kung Pao Chicken
(Adapted from Diane Kuan’s recipe on epicurious from her The Chinese Takeout Cookbook)
I actually had some Sichuan pepper on hand, which I had ordered from Penzey’s. There’s no real substitute for it. It’s been described as having a slight citrusy or piney flavor. If you don’t have it for the sauce you could try subbing about ¼ teaspoon of ground black pepper.
Serves 2 – 3 (more if part of a multicourse Chinese dinner)
.
Some of the ingredients for Kung Pao Chicken
.
Marinade and chicken
1 tablespoon tamari sauce (or soy sauce)
2 teaspoons Chinese rice wine or dry sherry (I used sherry)
1½ teaspoons cornstarch
1¼ pound boneless, skinless chicken thighs, cut into 1-inch cubes (can substitute breasts)
Sauce
1 tablespoon Chinese black vinegar, or substitute good-quality balsamic vinegar
1 teaspoon tamari sauce (or soy sauce)
1 teaspoon hoisin sauce
1 teaspoon toasted sesame oil
2 teaspoons honey (or sugar)
1 teaspoon cornstarch
½ teaspoon ground Sichuan pepper
For the stir fry
2 tablespoon peanut or vegetable oil
1 red bell pepper, cut into 1-inch squares
8 to 10 dried red chilies
3 green onions, white and green parts separated, thinly sliced
2 garlic cloves, minced
1 teaspoon minced or grated fresh ginger
¼ cup unsalted dry-roasted peanuts
Steamed rice for serving (optional)
- Stir the marinade ingredients together in a medium bowl. Add the chicken and stir to distribute the marinade well. Marinate for 10 minutes.
- Combine all of the ingredients for the sauce and set aside.
- Heat a large skillet (or wok) over high heat until a drop of water instantly sizzles.
- Add the oil. Add the chilies and stir fry for about 30 seconds, or until they are starting to blacken. (You may need your exhaust fan on because chilies can smoke over high heat.)
- Add the chicken and cook, stirring, until it is just done and no longer pink in the middle (3-4 minutes). (Cut a larger piece to check.)
- Add the red bell pepper and continue to cook, stirring, for about 1 minute.
- Add the white part of the sliced green onions (reserve the green part), garlic, and ginger and cook, stirring, for about 30 seconds.
- Add the sauce and stir. Add the peanuts and cook for another 1 – 2 minutes. Top with reserved sliced green onions and serve with steamed rice.
.
.
Share this:

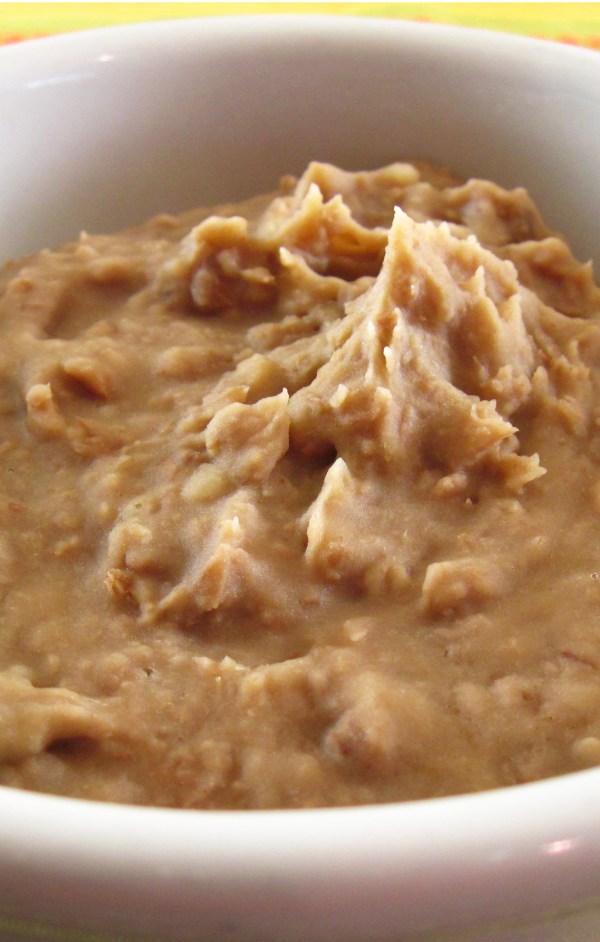
Instant Pot Refried Beans
By Kath Dedon
.
Do you have an Instant Pot? If so, you can make Instant Pot Refried Beans in about 2 hours. No kidding!
There’s no need to soak the beans. Just rinse them well and look for any bits that should be removed.
I used Michael Natkin’s recipe on Serious Eats as my guide. He used a stovetop pressure cooker and cooked the beans under pressure for 35 minutes. Knowing that the Instant Pot cooks at a lower PSI than stovetop pressure cookers, I added 10 minutes and set the time for 45 minutes. The beans were cooked perfectly!
When cooking dried beans in any type of pressure cooker you should add some oil to the pot. The beans froth and foam less when oil is added so the steam vent won’t get clogged.
It’s also important not to fill the pot more than halfway when cooking starchy foods that tend to foam (like dried beans or rice). A pound of beans worked well in my 6-quart pot. I would not try to double it.
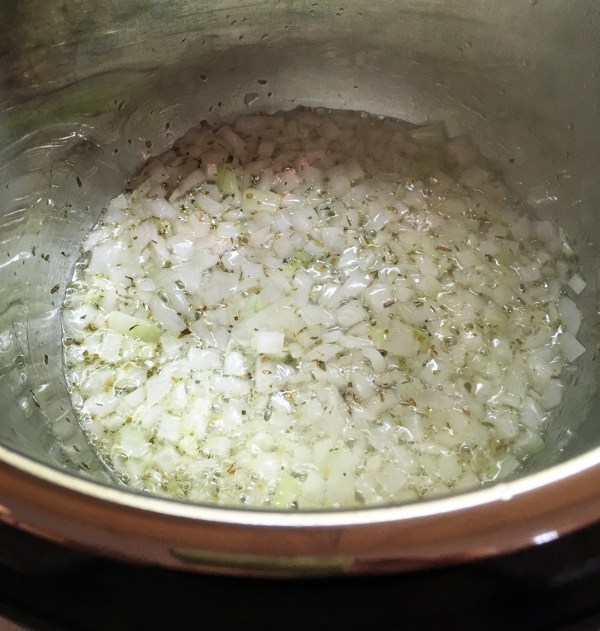
I followed Michael’s lead and used the sauté button to quickly cook the onion, garlic, and oregano before adding the beans and water and sealing the pot. I think this step may be unnecessary. Next time I will simplify and just put everything, except the salt and bacon grease, in the pot!
You may have heard that people love the Instant Pot because they can get rid of other appliances like their slow cookers. I, for one, will not be doing that. While my Instant Pot Refried Beans were cooking, my slow cooker was busy making Slow Cooker Mexican Pulled Pork. It was very handy to have both to prepare our Mexican feast!
Speaking of slow cookers, Laura and Carrie wanted to know if these beans could be prepared in a slow cooker. A quick Internet search brought up Sommer Collier’s guest post on The Pioneer Woman blog all about making refried beans in a slow cooker. Although I haven’t tried it, I am sure you could do it with this recipe. I would put all of the ingredients, except the bacon grease, in a 6-quart slow cooker, including the 8 cups of water. Cook on HIGH for 8 – 10 hours. Drain the beans, reserving a couple of cups of the liquid. Put the beans and 1 cup of the liquid back into the slow cooker. Blend with an immersion blender or a potato masher. Add more cooking liquid, ¼ cup at a time, if needed to get the desired consistency. Stir in a tablespoon or two of bacon grease or butter, if desired.
.
Update 4/10/21: I made this using Mayocoba beans from Rancho Gordo. They made exceptionally creamy and delicious refried beans.
.
.

.
Instant Pot Refried Beans
(Adapted from Michael Natkin’s recipe on Serious Eats)
.
.
Serves 10 – 12
.
1/4 cup oil (I used avocado oil)
1 medium white onion, diced (about 1 cup)
2 cloves garlic, minced
1 teaspoon dried oregano
¾ teaspoon ground cumin (optional, I forgot to add it the first time I made them and the beans were still great)
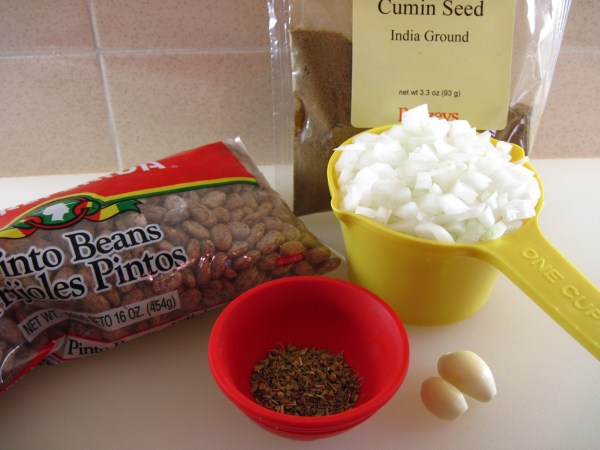
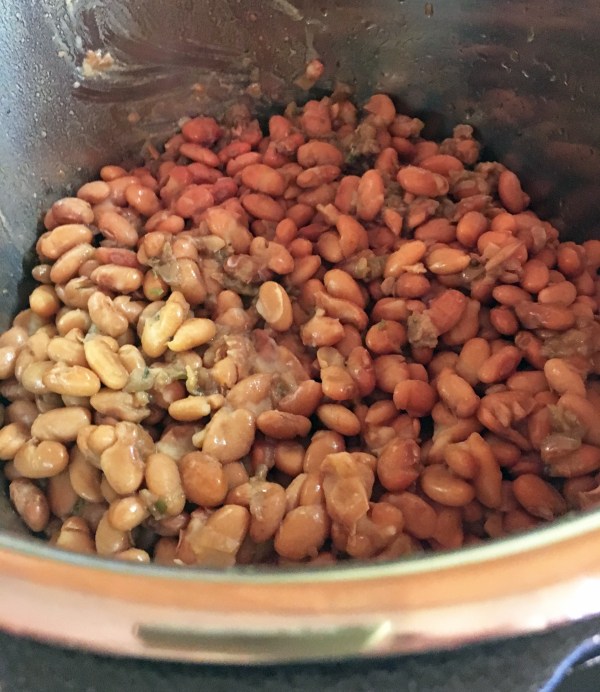
1 pound (about 2 cups) dried pinto beans, rinsed and picked over for stray material
8 cups of water
.
To add after cooking:
1½ teaspoons salt
1 – 2 tablespoons bacon grease or butter (optional, but good!)
.
Onions, garlic, dried oregano, pinto beans, and the cumin that I forgot to add 😉
.
- Press the Sauté button on the Instant Pot. Add the oil and onion. Cook, stirring often, for about 5 minutes.
- Add the garlic, oregano, and cumin and cook, stirring, for about another minute.
.
3. Press the Keep Warm/Cancel button to turn off the Sauté function.
4. Add the beans and the water to the pot. Stir and seal the pot. Make sure the pressure release handle is in the sealing position.
5. Press the Manual button and set the time for 45 minutes.
6. When the 45 minutes of pressure cooking is up, press the Keep Warm/Cancel button to turn off the pot and let the pressure release naturally. (This will take up to 40 minutes. I noticed the float valve was down at 40 minutes, but it may have popped down 5 or 10 minutes before that.)
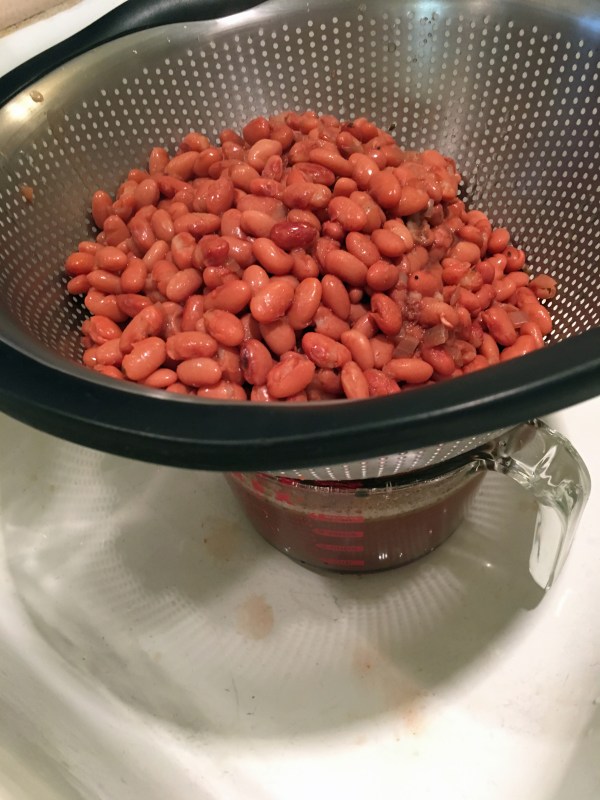
7. Open the pot and use good pot holders to remove the stainless steel cooking pot. Drain the beans, reserving the cooking liquid.
Draining the beans over a Pyrex pitcher in the sink
.
8. Put the beans back in the pot.
.
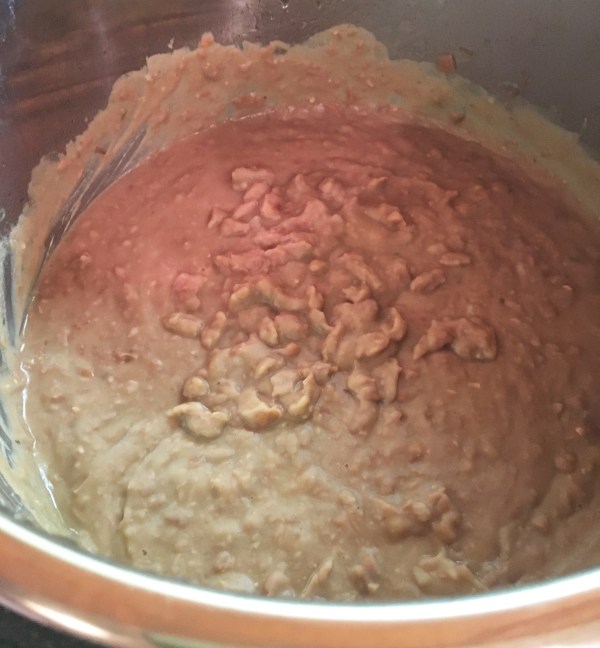
9. Add the salt, bacon grease, and 1 cup of the cooking liquid. Using an immersion blender or potato masher, blend the beans to the desired consistency. Add more cooking liquid, ¼ cup at a time, if needed. (I didn’t need additional liquid.)
.
10. The beans can be kept warm in the Instant Pot. Put the lid on and press the Keep Warm/Cancel button. My beans kept fine for a couple of hours.
.
.
Share this:

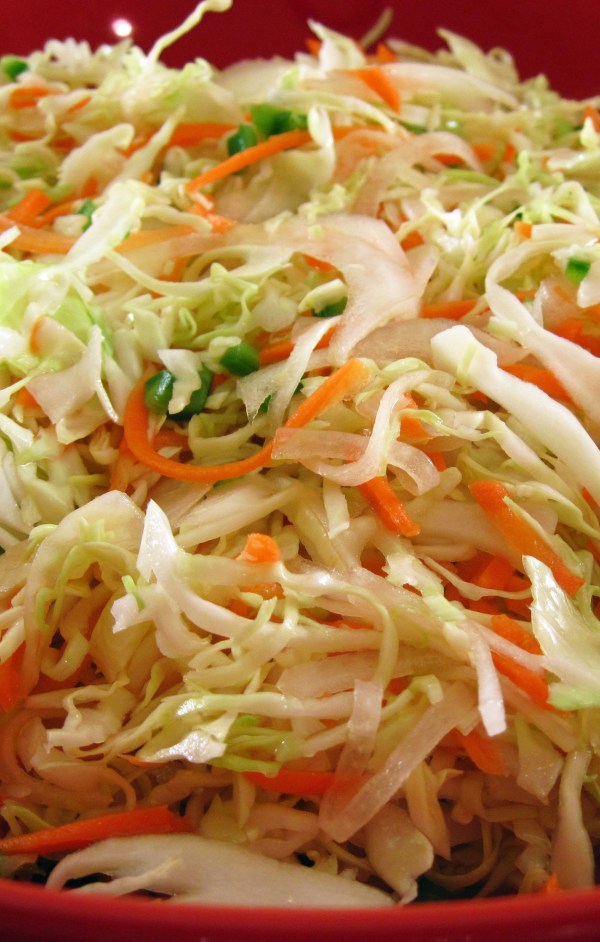
Quick Curtido (Salvadoran Cabbage Slaw)
By Kath Dedon
.
Quick Curtido (Mexican Salvadoran Cabbage Slaw) is a recipe that I found on Serious Eats. Author Lauren Rothman says that Curtido is popular in many Latin American countries and it adds a welcome freshness to many rich, long-simmered meat and bean dishes.
Traditionally, Curtido is made days in advance, but this quick version can be made the same day you serve it. Leftovers keep well, and stay crispy, for several days in the refrigerator.
The original recipe calls for 2 teaspoons of sugar. I decided to swap the sugar for Truvia, a stevia and erythritol sweetener that I had never used before. I was amazed at how well it worked. I recommend it if you have any concerns about using sugar.
We had a Mexican feast for Carrie’s birthday dinner last night. Dinner included Slow Cooker Mexican Pulled Pork tacos, Instant Pot “refried” beans, homemade guacamole, and this Quick Curtido. The Curtido, as simple as it is, really was terrific with the other dishes.
I know I’ll be making Quick Curtido again. It’s so quick to make if you have a food processor to do the slicing for you. It’s great with Mexican food, but I’m thinking it would also be welcome at summer barbecues!
.

.
Quick Curtido (Mexican Salvadoran Cabbage Slaw)
(Adapted from Lauren Rothman’s recipe on Serious Eats)
.
In the comments below, Jennifer, who is from El Salvadore, pointed out that jalapeño peppers are not traditionally used. Feel free to leave it out if you want a non-spicy curtido.
.
.
Makes about 5 cups (Serves 8 – 10)
.
½ small (2-pound) green cabbage, cored and thinly sliced (about 4 cups)
½ medium white onion, peeled and thinly sliced
2 carrots, peeled and shredded
1 small jalapeno pepper, ribs and seeds removed, minced (optional)
3 tablespoons apple cider vinegar
2 teaspoons sugar (or 1 packet of Truvia, or ¾ teaspoon bulk Truvia)
1 teaspoon kosher salt
- Put the cabbage, onion, carrots, and jalapeno in a large bowl.
- Heat the cider vinegar, sugar (or Truvia), and salt in a small saucepan, stirring just until the sugar and the salt is dissolved.
- Pour the vinegar mixture over the vegetables and toss well to distribute.
- Cover and refrigerate for at least 1 hour.
- Remove from the refrigerator to bring to room temperature before serving.
.
.
Share this:

By Kath Dedon
.
Butter Chicken (Murgh Makhani) is a very popular Indian dish that is said to have been developed by the Moti Mahal restaurant in Daryaganj Delhi, India. The original recipe is made with dairy cream and garnished with butter. Most recipes for Butter Chicken are made with cream. Most Butter Chicken recipes also call for marinating the chicken in yogurt with spices for 4 – 24 hours before completing the recipe.
This Butter Chicken is adapted from Ashley Thomas’ recipe on her My Heart Beets blog. Ashley decided to streamline the recipe for her Instant Pot version and eliminated the step of marinating the chicken in yogurt; she mentioned in the comments that she thought it was just as good. She substitutes coconut cream for the dairy cream. It is a fantastic adaptation that we all enjoyed.
I have made Ashley’s Instant Pot version a couple of times since getting my Instant Pot in November and just loved it. The chopping, mincing and measuring take a bit of time but, once you have everything ready to go, it cooks so quickly in the Instant Pot.
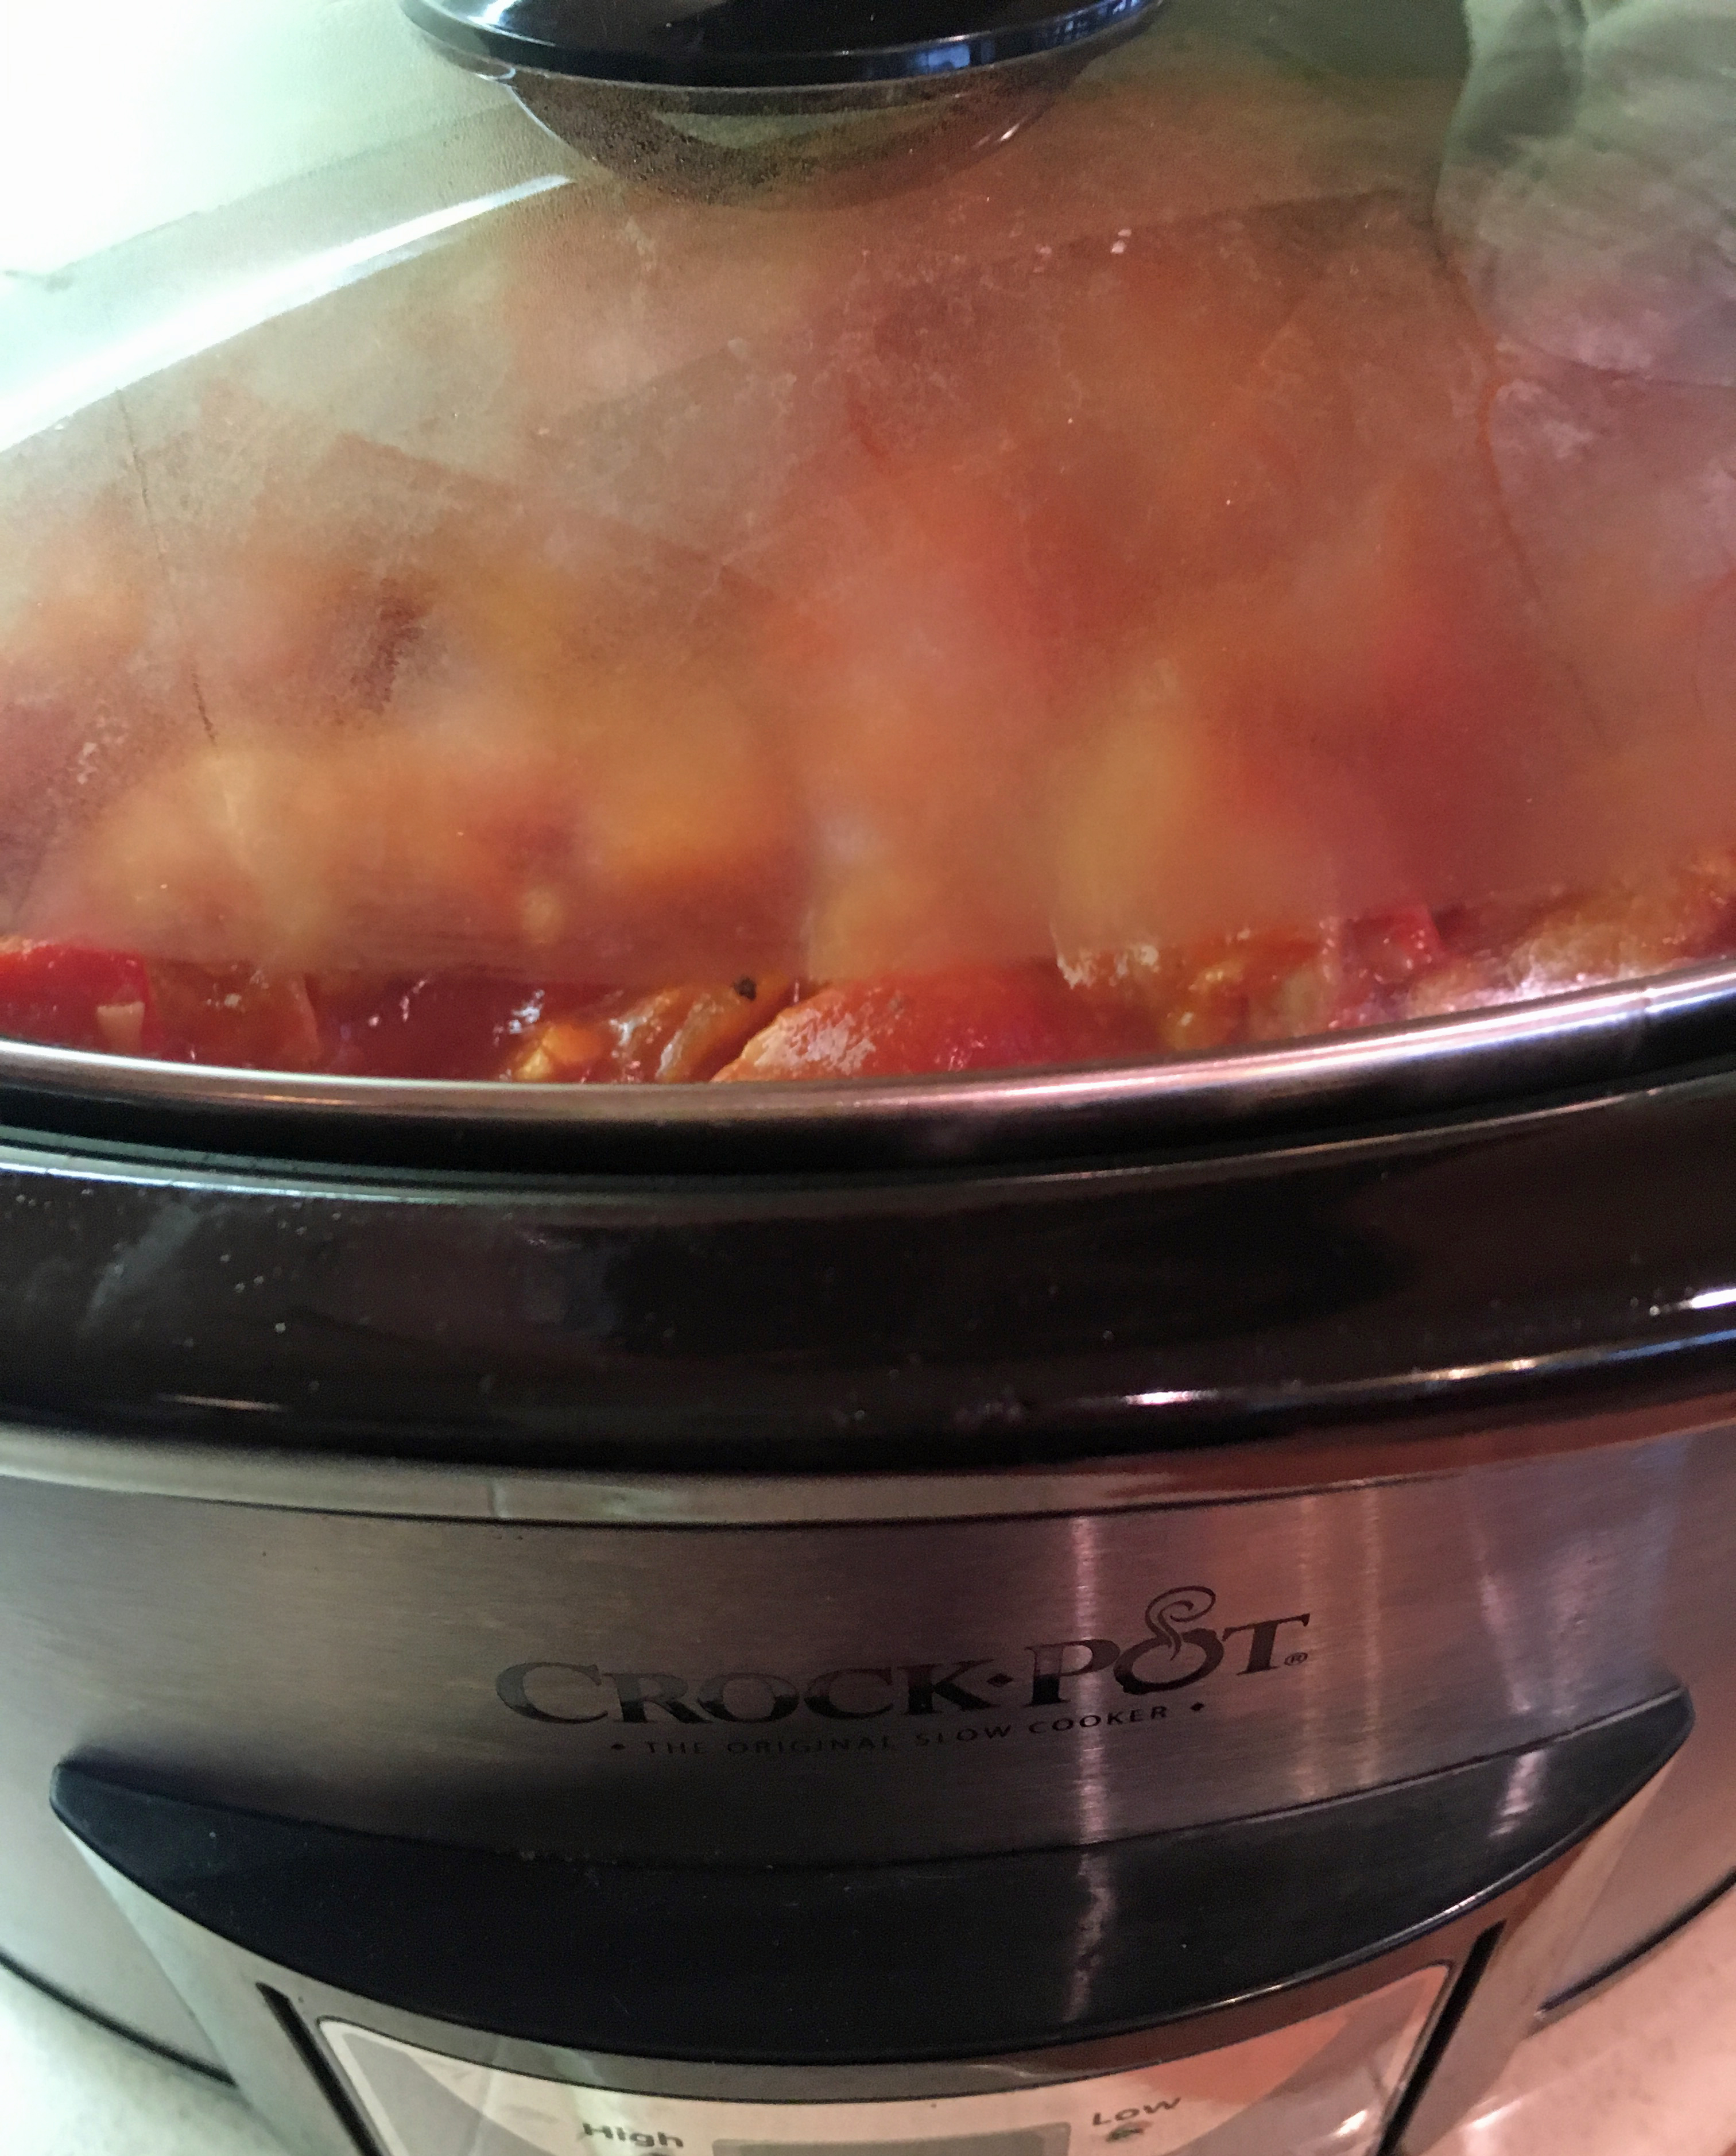
I decided I wanted to make it for Christmas Eve dinner because it’s delicious, but also because it would work for everyone’s food preferences and allergies. I needed to double the recipe to serve 9 people and thought that it might be too much for my Instant Pot, so I made a slow cooker version and it turned out great!
If you don’t have an Instant Pot or a slow cooker, or you just want to make a stovetop version, click here for Ashley’s stovetop version of Paleo Butter Chicken. (In her stovetop version she does give the chicken a quick marinade in coconut cream and spices.)
The recipe uses a rather long list of spices, but the spices plus the garlic and ginger make it so flavorfully seasoned without being spicy “hot”.
Ashley uses a green pepper and that’s what I used the first time I made Butter Chicken. I prefer red peppers so that’s what I’ve used since. Green pepper does add a nice contrasting color, so use that if you like green peppers.
You can use either canned coconut cream or canned coconut milk. Coconut milk may be easier to find and I find the recipe is just as tasty made with coconut milk.
I really can’t recommend this Butter Chicken enough. It is just so good! Just writing this blog post is making me crave it. Whether you make it in a pressure cooker, slow cooker, or in a pot on the stove, I think you will love it!
And do check out Ashley’s blog if you love Indian food. She calls her recipes “real food, gluten-free/Paleo-ish”, but I find they’re just plain delicious!
.
Butter Chicken, served here with rice

.
Instant Pot Butter Chicken
(Adapted, barely, from Ashley Thomas’ recipe on myheartbeets.com)
.
(print the Instant Pot version of the recipe)
.
Generously serves 4
.
1¾ pounds pounds boneless skinless chicken thighs, cut into bite-sized pieces
2 tablespoons butter(or ghee or oil)
½ large onion, diced (about 1½ cups)
5 garlic cloves, minced
1-inch knob ginger, minced
1 teaspoon garam masala
1 teaspoon paprika
1 teaspoon ground coriander
1 teaspoon turmeric
1 teaspoon salt
¼ teaspoon cayenne pepper
¼ teaspoon ground cumin
¼ teaspoon black pepper, freshly ground
1 red bell pepper, chopped in large pieces (or green bell pepper)
1 (15-ounce) can tomato sauce
1 cup canned coconut cream(or canned coconut milk)
½ teaspoon of dried fenugreek leaves(“kasoori methi” – I ordered it online. Ashley says it gives butter chicken its unique taste. There’s no substitute that I know of, so just omit it if you don’t have it.)
Cilantro for garnish, optional
.
- Use the Saute button on the Instant Pot. Add the butter and onions and cook, stirring often, until the onions are starting to brown. (This will take 6 – 8 minutes.)
- Add the garlic and ginger and cook, stirring for about 30 seconds.
- Add the spices and cook, stirring for about 30 seconds.
- Add the chicken. Stir so it is well coated with the spices. Then cook, stirring often, for about 4 – 5 minutes.
- Add the tomato sauce and red pepper. Stir and press the Keep Warm/Cancel button to stop the Saute function.
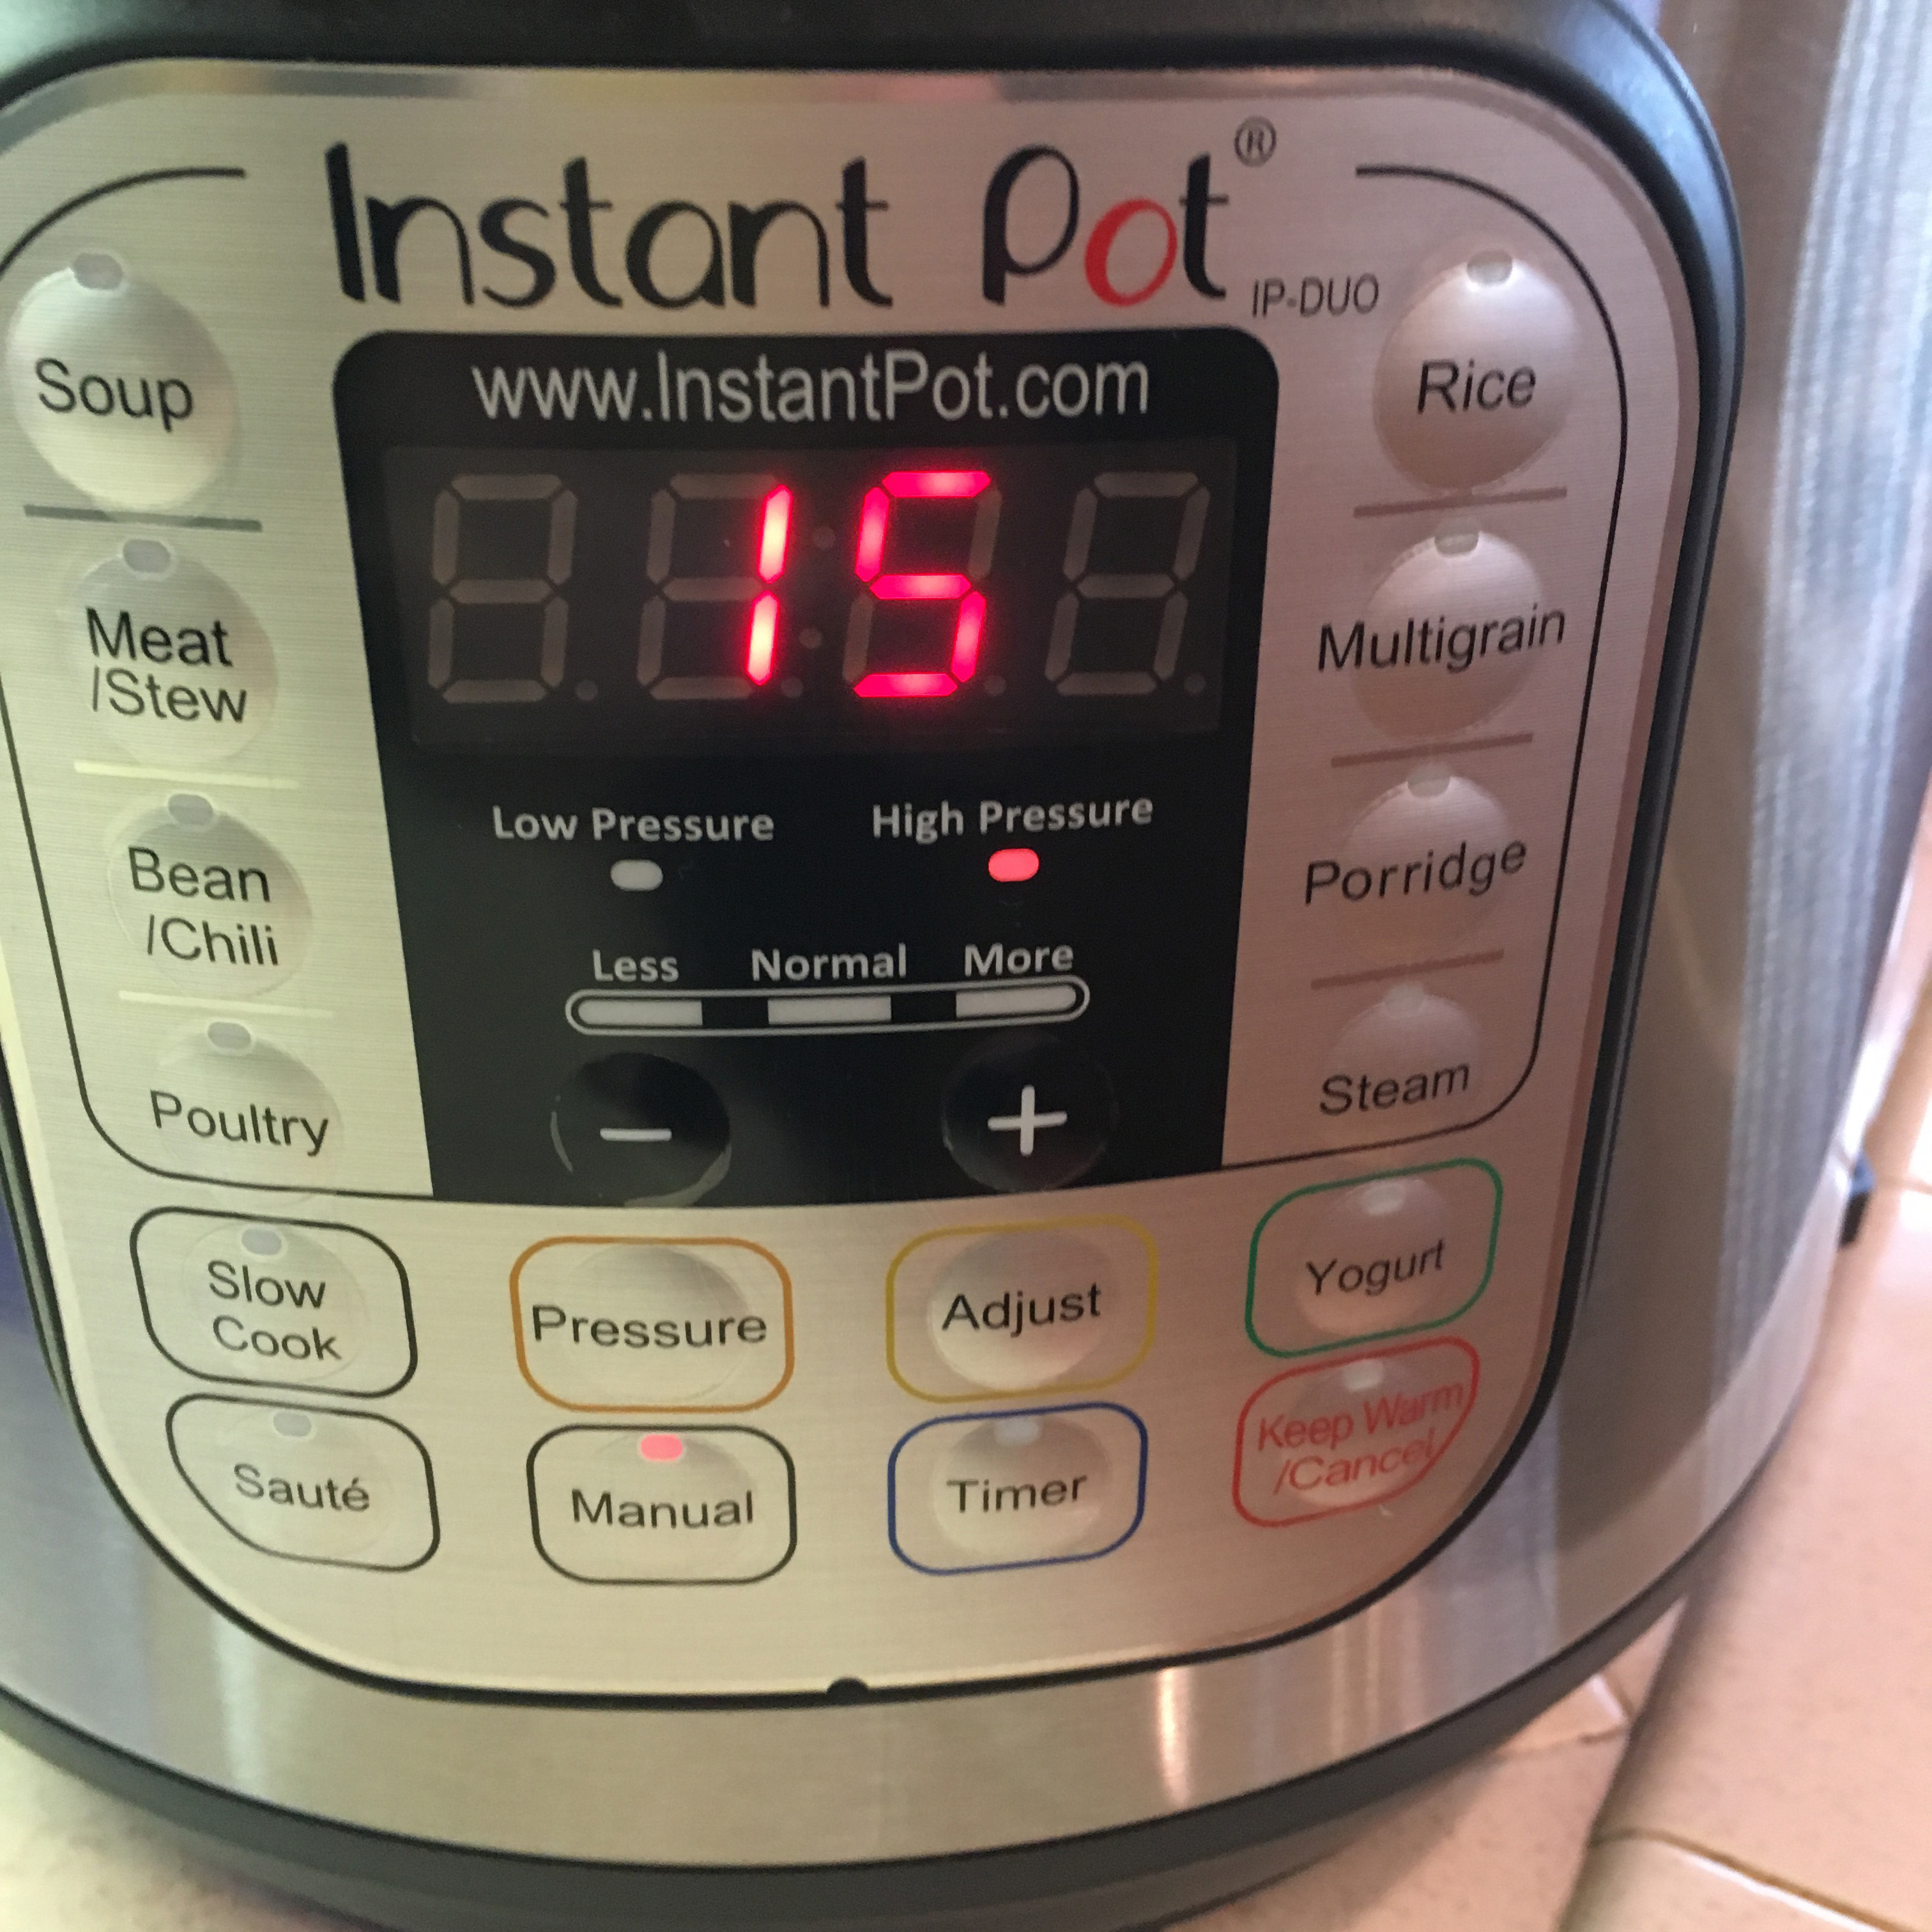
- Put the lid on in the locked position and turn the steam release handle to the sealing position. Press the Manual button and set the time for 15 minutes. (The Instant Pot will show ON until it is up to pressure and then it will display 15 minutes.)
.
Steam release handle set to Sealing

.
Instant Pot has reached pressure and will cook for 15 minutes.
.
7. When it is done, press the Keep Warm/Cancel button to turn the pot off and let the pressure release naturally. After 10 minutes you can turn the steam release handle to Venting to quickly release the rest of the pressure.
8. When the pressure is fully released, the float valve will drop down. Open the pot and stir in the coconut cream and fenugreek leaves.
.
The float valve has dropped down indicating that the pressure is released

.
9. Serve in a bowl and garnish with cilantro, if desired. (It’s great served with rice or naan.)
.
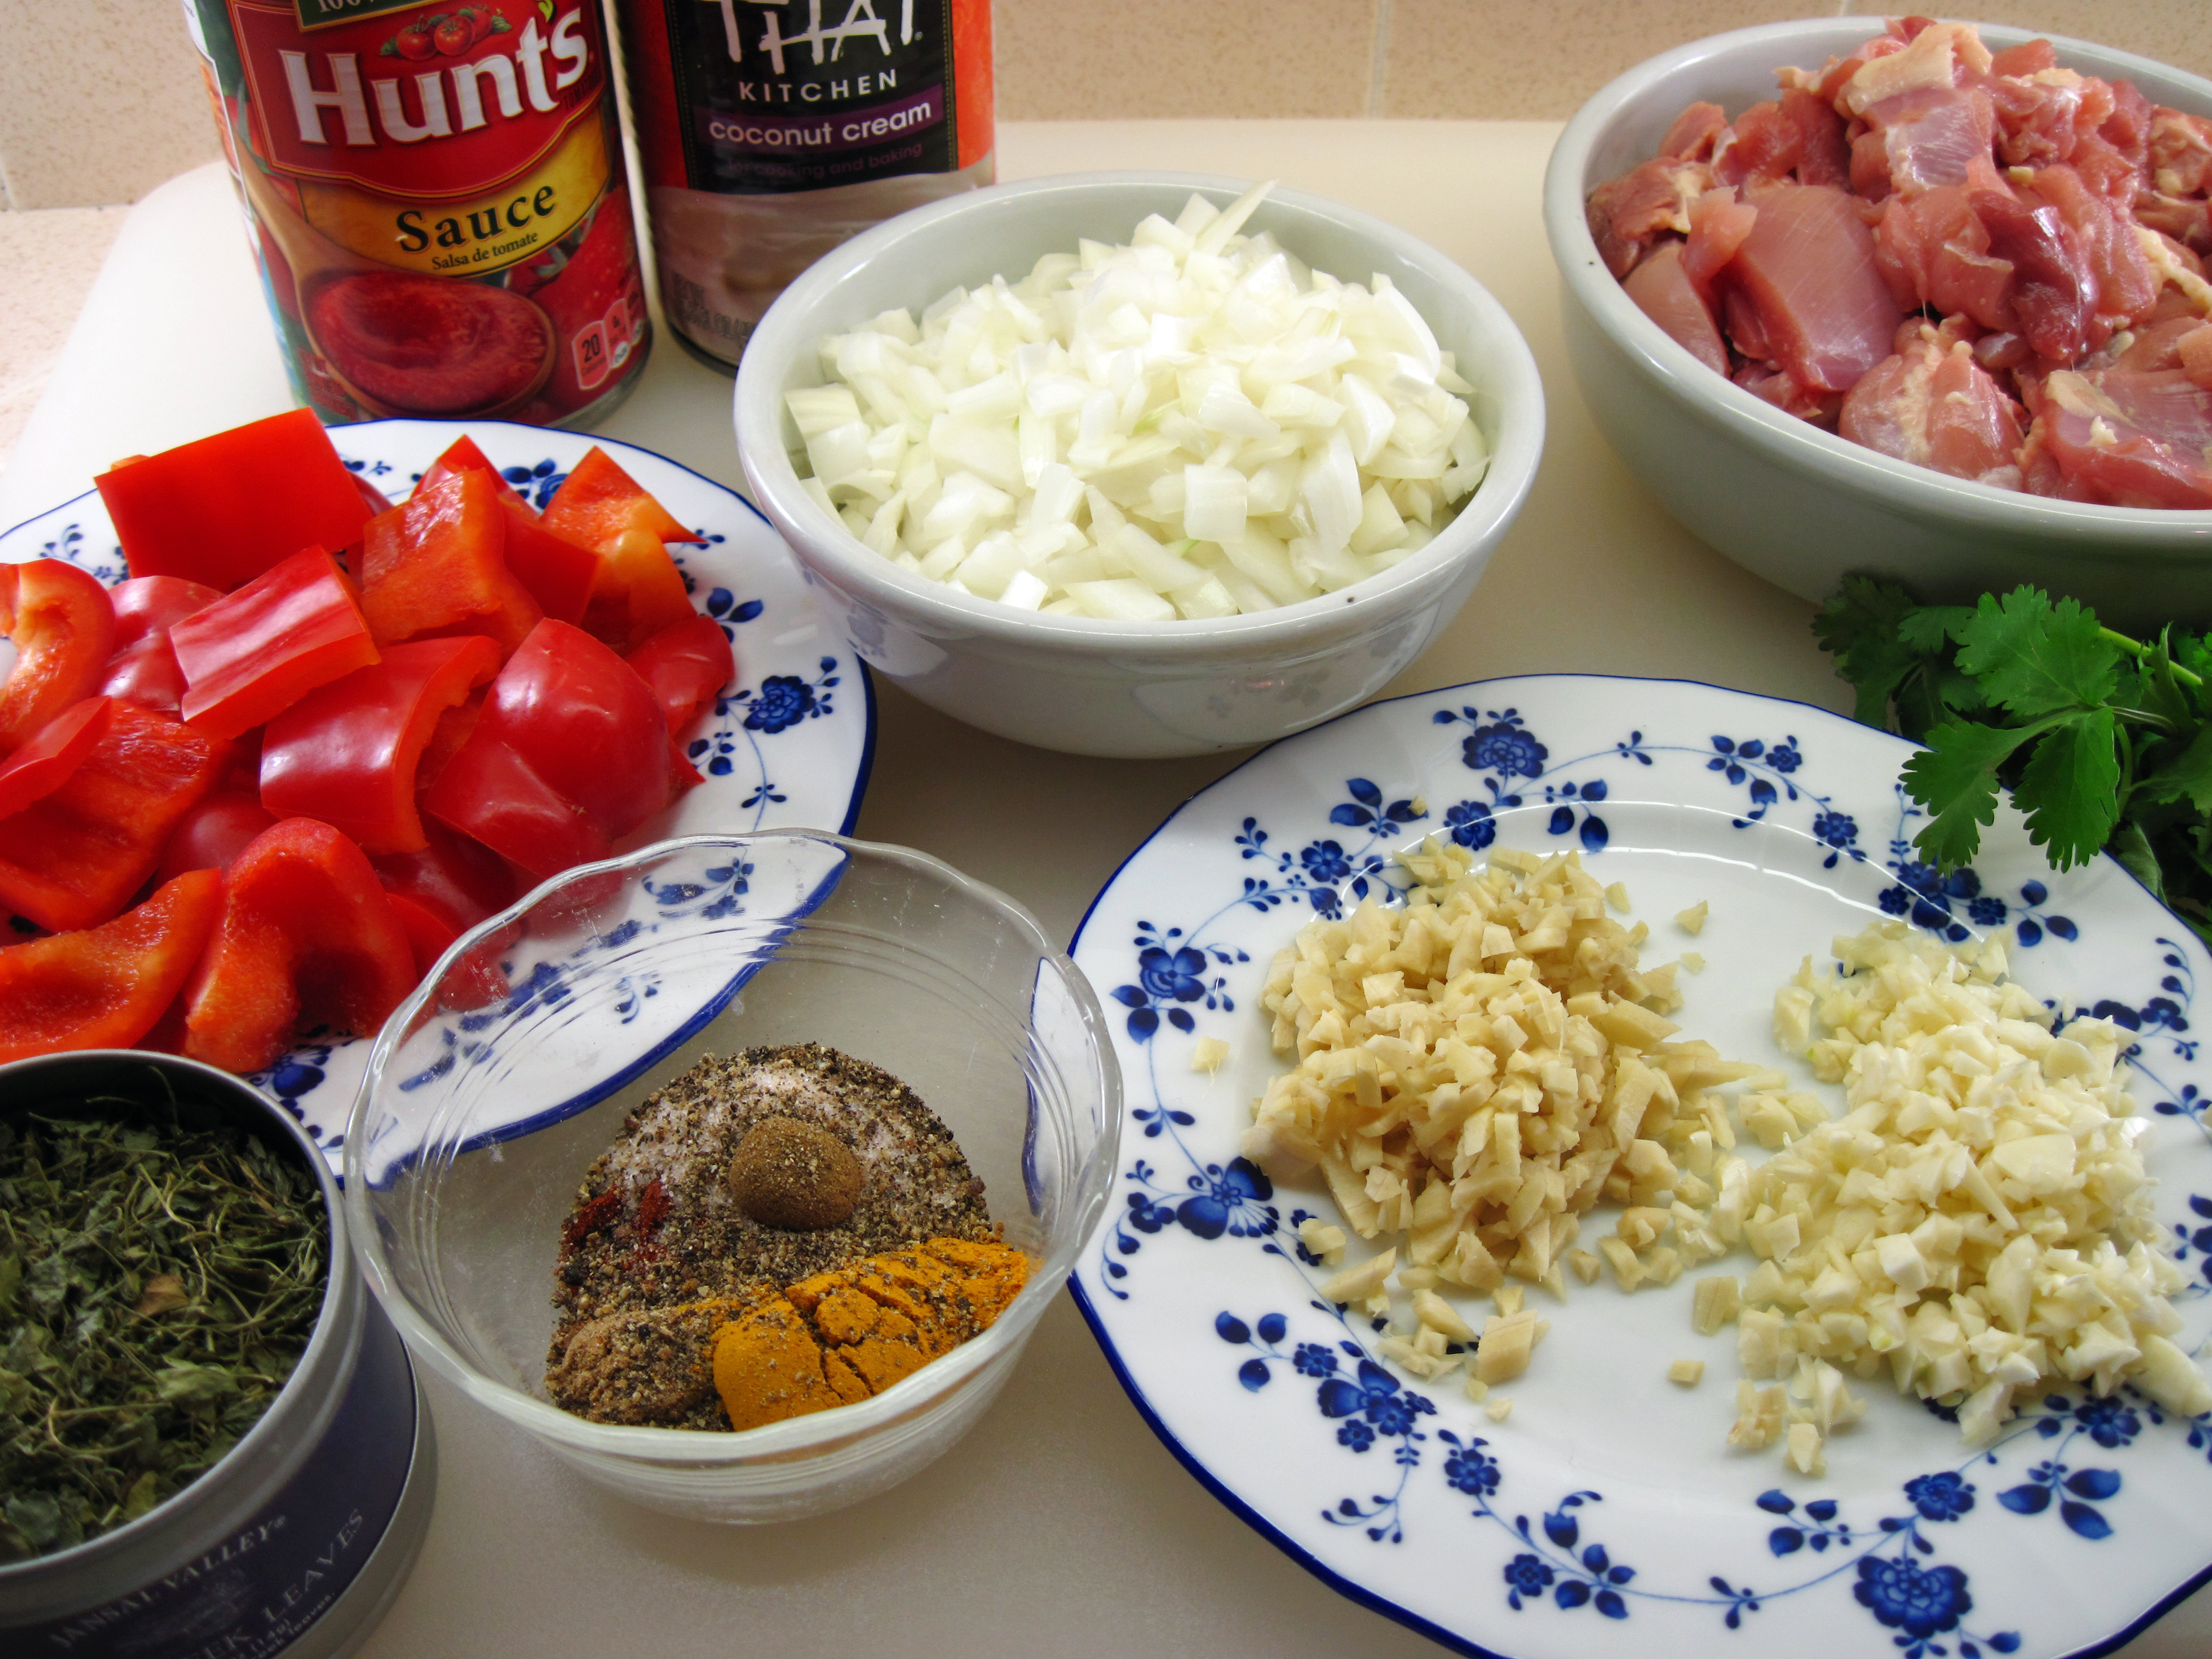
Butter Chicken ingredients
(Clockwise from lower left-hand corner: fenugreek leaves, red pepper, tomato sauce, coconut cream, onions, chicken, cilantro, garlic and ginger, spices)
.
.
Slow Cooker Butter Chicken for 8 – 10 People
(Adapted from Ashley Thomas’ Instant Pot Butter Chicken recipe)
.
(print the Slow Cooker version of the recipe)
.
Serves 8 – 10
.
Use a 6-quart or larger slow cooker.
.
3½ pounds boneless skinless chicken thighs, cut into bite-sized pieces
¼ cup butter(or ghee or oil)
1 large onion, diced (about 3 cups)
10 garlic cloves, minced
2-inch knob ginger, minced
2 teaspoons garam masala
2 teaspoons paprika
2 teaspoons ground coriander
2 teaspoons turmeric
2 teaspoons salt
½ teaspoon cayenne pepper
½ teaspoon ground cumin
½ teaspoon black pepper, freshly ground
2 red bell peppers, chopped in large pieces (or green bell pepper)
2 (15-ounce) cans tomato sauce
2 cups canned coconut cream(or canned coconut milk)
1 teaspoon of dried fenugreek leaves(“kasoori methi” – I ordered it online. Ashley says it gives butter chicken its unique taste. There’s no substitute that I know of, so just omit it if you don’t have it.)
Cilantro for garnish, optional
.
- Heat a large skillet over medium heat. Add the butter and onions and cook, stirring often, until the onions are starting to brown. (This will take 6 – 8 minutes.)
- Add the garlic and ginger and cook, stirring for about 30 seconds.
- Add the spices and cook, stirring for about 30 seconds.
- Add the chicken. Stir so it is well coated with the spices. Then cook, stirring often, for about 4 – 5 minutes.
- Transfer the chicken and spices to a 6-quart (or larger) slow cooker.
- Add the tomato sauce and red pepper to the slow cooker. Stir to combine.
- Set the slow cooker to cook on Low for 5 hours.
- Stir in the coconut cream (or milk) and fenugreek leaves.
- Serve in a bowl and garnish with cilantro, if desired.
.
Butter Chicken in my slow cooker. It is FULL!
.
.
Easy Stovetop Butter Chicken
(Adapted from Ashley Thomas’ Instant Pot Butter Chicken recipe)
.
(I have not actually tried this version, but I am confident that it will work well.)
.
(print the stovetop version of Butter Chicken)
.
Generously serves 4 (easily doubles)
1¾ pounds pounds boneless skinless chicken thighs, cut into bite-sized pieces
2 tablespoons butter(or ghee or oil)
½ large onion, diced (about 1½ cups)
5 garlic cloves, minced
1-inch knob ginger, minced
1 teaspoon garam masala
1 teaspoon paprika
1 teaspoon ground coriander
1 teaspoon turmeric
1 teaspoon salt
¼ teaspoon cayenne pepper
¼ teaspoon ground cumin
¼ teaspoon black pepper, freshly ground
1 red bell pepper, chopped in large pieces (or green bell pepper)
1 (15-ounce) can tomato sauce
1 cup canned coconut cream(or canned coconut milk)
½ teaspoon of dried fenugreek leaves(“kasoori methi” – I ordered it online. Ashley says it gives butter chicken its unique taste. There’s no substitute that I know of, so just omit it if you don’t have it.)
Cilantro for garnish, optional
.
- Heat a large skillet over medium heat. Add the butter and onions and cook, stirring often, until the onions are starting to brown. (This will take 6 – 8 minutes.)
- Add the garlic and ginger and cook, stirring for about 30 seconds.
- Add the spices and cook, stirring for about 30 seconds.
- Add the chicken. Stir so it is well coated with the spices. Then cook, stirring often, for about 4 – 5 minutes.
- Add the tomato sauce and red pepper. Stir to combine. Bring to a boil then cover. Reduce heat to a slow simmer and simmer for about 20 minutes.
- Stir in the coconut cream and fenugreek leaves and simmer for another minute or so.
- Serve in a bowl and garnish with cilantro, if desired.
.

.
Share this:

Happy New Year!
By Kath Dedon
.
Wow! I just got a notice from WordPress wishing me a Happy Anniversary! I guess that’s right. I started this little blog 7 years ago today. 🙂
So going into my 8th year, here are the 8 recipes that got the most buzz from you. Just click on the names of the recipes and you’ll be taken back to the original blog posts for the recipes.
.
Faux Potato Salad
I was so skeptical of this one, but it is really good. I love it when I serve it to family and friends for the first time. They are usually amazed and go back for seconds.

.
Superb Black Bean Dip and How to Cook Black Beans in the Slow Cooker
Learning how easy it is to cook black beans in the slow cooker was a revelation. And Laura’s Superb Black Bean Dip is a wonderfully balanced combination of flavors.

.
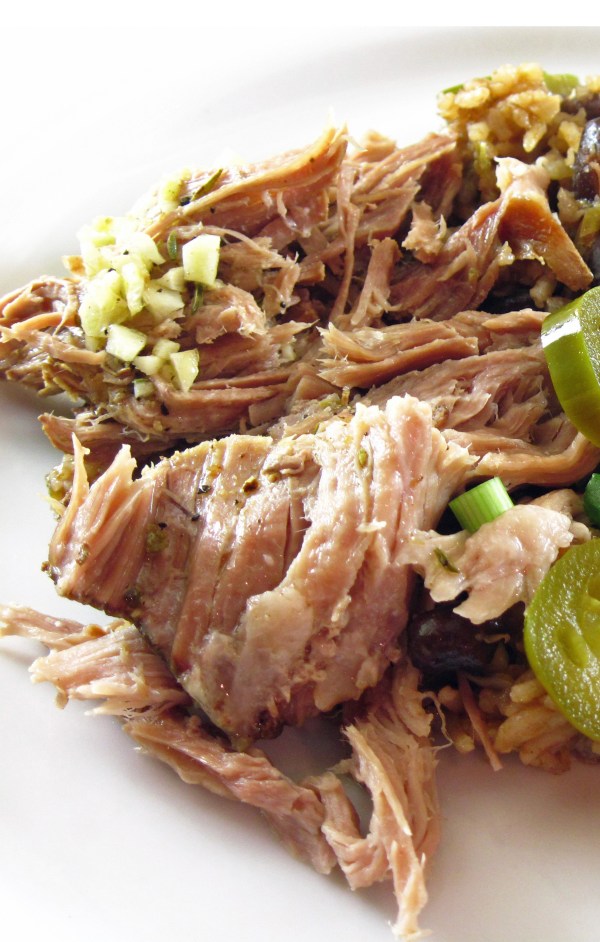
Slow Cooker Cuban-Style Pork Roast with Mojo Sauce
This was another slow cooker recipe that is great for entertaining. The flavorful Mojo Sauce takes it over-the-top.
.
Small Batch Chewy Chocolate Chip Cookies
Sometimes you just need a few good chocolate chip cookies. This recipe, adapted from one from America’s Test Kitchen, couldn’t be easier. You don’t even need a mixer. Just stir everything together in a bowl and bake 12 – 14 delicious cookies.

.
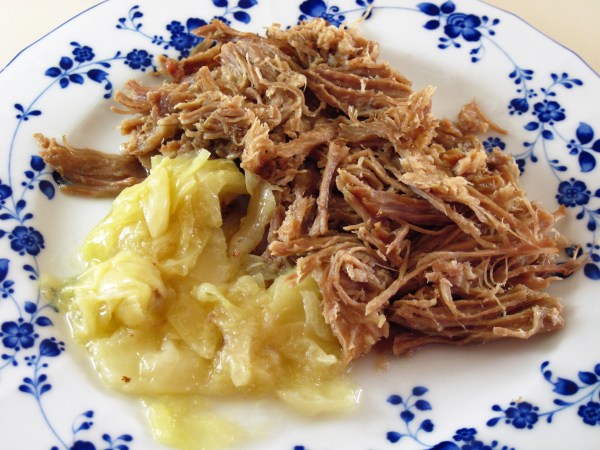
Instant Pot Kalua Pork
I just got a 6-quart Instant Pot last month and I am in love. The Kalua Pork was the first thing I made in the pot and it made me a total convert to modern electric pressure cooking. What’s not to love about having fabulous Kalua Pork in about 3 hours instead of having to wait 10 – 12 hours? It’s so easy-peasy!
(If you don’t have an Instant Pot, here’s a link for a slow cooker version from Nom Nom Paleo’s Michelle Tam: Slow Cooker Kalua Pig.)
.
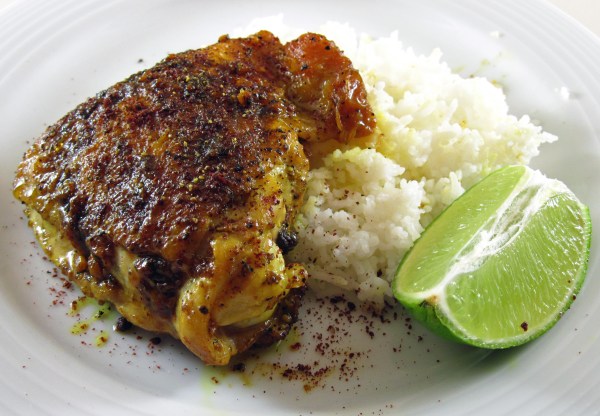
Turmeric Chicken with Sumac and Lime
This is definitely a new favorite in our permanent rotation. Turmeric Chicken is so easy; it’s a perfect quick weeknight dish. And it’s so flavorful! We love it.
.
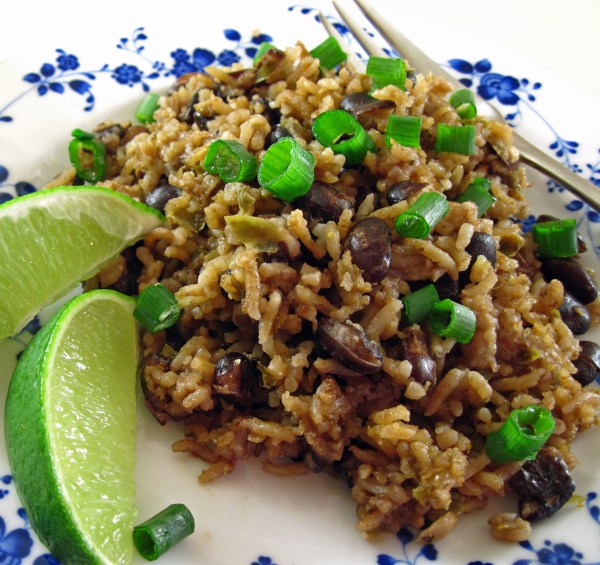
Cuban-Style Black Beans and Rice
Cuban-Style Black Beans and Rice was so good that it makes a terrific vegan meal on its own. Pair it with the Slow Cooker Cuban-Style Pork Roast with Mojo Sauce and you have a real Cuban feast!
Gluten Free Lemon Bars
Even if you don’t need to eat gluten-free, you probably know at least one person who avoids gluten. These Gluten Free Lemon Bars are a terrific treat for all. No one will miss the gluten.

.
So these are the ones that got the most buzz. They are also probably my favorites of the year, too. I know they’ll be popping up on the menu in 2017 and beyond at Chez Dedon! If you try any of them I’d love it if you let me know how you like them!
*****************
The best of 2016 for me? That would be Carrie and Rhett’s wedding! It was a joyous weekend celebrated with friends and family!

(Photo by Luzco Photography)
.

(Photo by Luzco Photography)………………..(Flowers by Terra Bella Flowers)
.
Happy New Year!! ❤
.
Share this:

Perfect Hard Cooked Eggs
By Kath Dedon
.
I thought I had found Hard Boiled Egg perfection, but I’m here to tell you that there’s a better way.
In my quest for perfect eggs, I even bought a cute little electric egg cooker earlier this year. It did turn out beautiful eggs every time that were easy to peel. It seemed miraculous!
Then I stumbled upon a 2014 Serious Eats article by J. Kenji Lopez-Alt that proclaimed the secret to perfect hard-cooked eggs – steam! He steamed eggs for 6 minutes to make soft-cooked eggs and 12 minutes for hard-cooked.
So there was nothing magical about my egg cooker. (womp womp) It just steamed eggs for the appropriate amount of time.
I decided to try steaming eggs in a pan for 12 minutes. They were very easy to make and peeled like a dream, but sometimes they were not quite done enough to our liking.
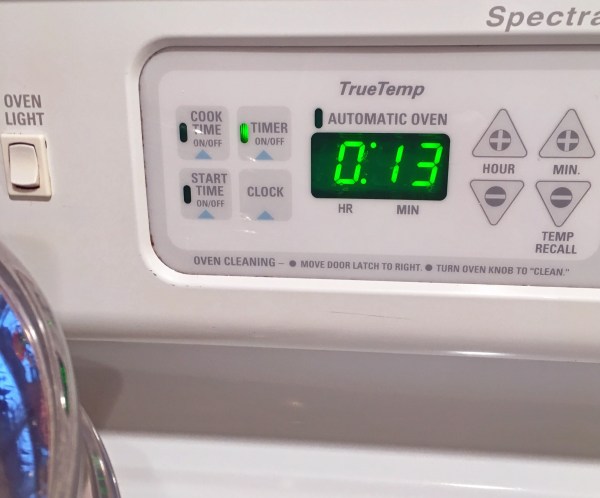
I was pondering all of this and decided I would try steaming them for 13 minutes. Nothing radical here, it just seemed like the next logical step. Then Byron gave me a copy of Cook’s Illustrated 2016 Annual recipe collection. And right there on the cover was “Easy-Peel Hard-Cooked Eggs”! And what do you know? Andrea Geary reported that she steamed her eggs for 13 minutes!
I tried it and it works perfectly every time. The eggs peel more easily than any method I have ever tried, including my egg cooker. They’re cooked just the way we like them. I love having hard-cooked eggs on hand for a quick breakfast or snack.
New Year’s Eve is right around the corner. Are you trying to come up with an easy appetizer to take to a party? Nearly everyone loves deviled eggs; they disappear quickly at any gathering. Now you can make them without fear about how your eggs are going to turn out. Just get out your steamer and you’ll have easy-to-peel perfect Hard Boiled Steamed Eggs in minutes!
.

.
Perfect Hard Cooked Eggs
(Inspired by Serious Eats’ J. Kenji Lopez-Alt and Cook’s Illustrated’s Andrea Geary)
.
.
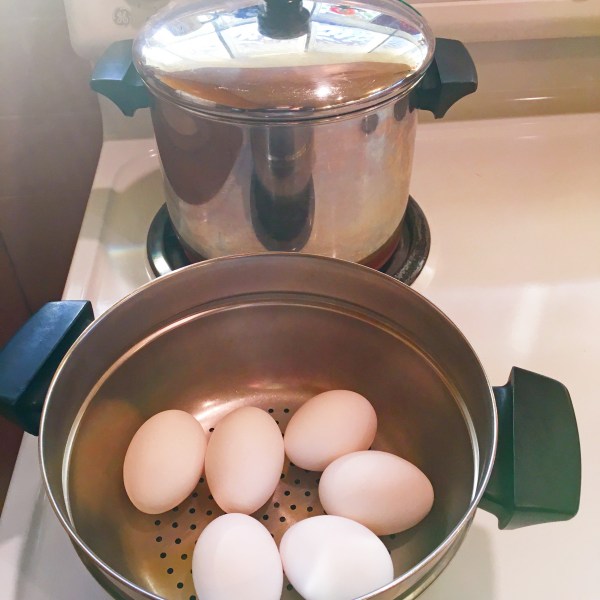
You do need a steamer. My pan has a steamer insert, but you can use a collapsible steamer. To protect your hands from the steam, I would put a collapsible steamer in the pan and let the water come to a boil. Then lower the eggs onto the steamer with a large spoon.
.
Eggs
.
- Bring ¾ – 1 inch of water to a boil in a pan.
.
Eggs ready to go over boiling water.
.
2. When the water is boiling, add the eggs in a steamer. Reduce heat to medium-low, cover, and set the timer for 13 minutes.
.
3. When the eggs are almost done, prepare an ice bath.
4. When the timer goes off, remove the eggs from the steamer and place them in the ice bath for 15 minutes.

.
5. Eggs can be used right away or refrigerated in their shells until needed.
6. Too peel, gently pound the egg on a flat surface and roll it a bit and then slip off the shell!
.
The shells just slips off!

.

.
(Thanks, Byron! 🙂 )

.
Share this:

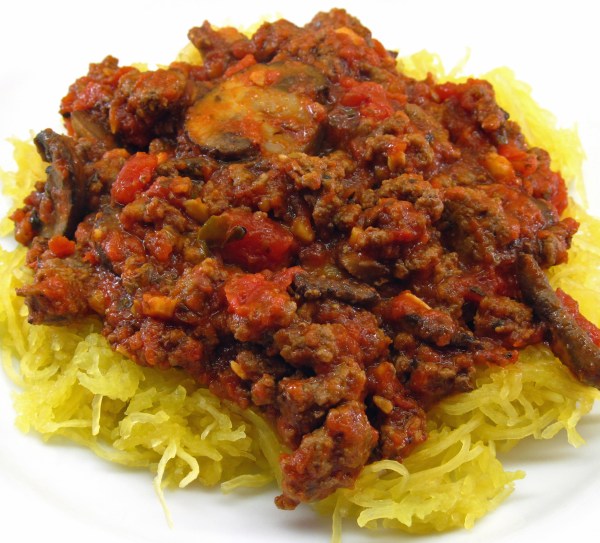
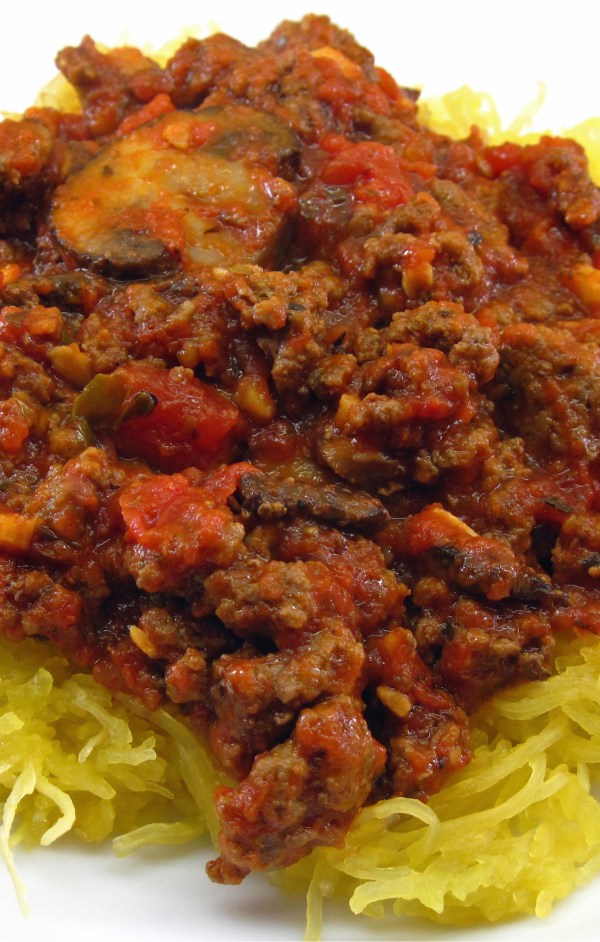
Quick Beef Tomato Sauce with Spaghetti Squash
By Kath Dedon
.
This Quick Beef Sauce with Spaghetti Squash is an easy recipe that lets you get dinner on the table fast during this busy season! I hesitated to share this because it’s so simple, but thought some of you might appreciate this quick idea.
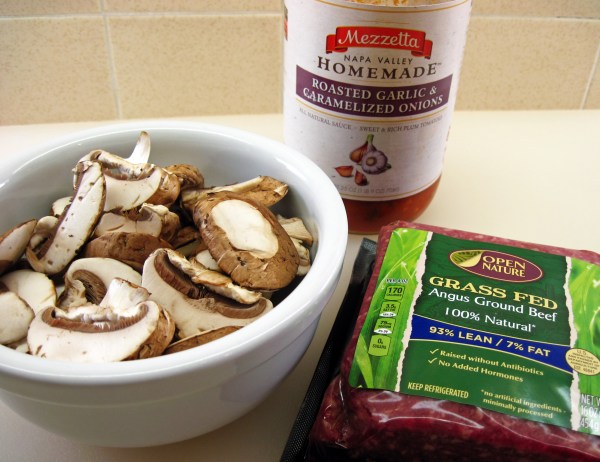
Using a top quality jarred tomato sauce is the key to making a tasty sauce without any fuss. I really like Mezzetta’s Roasted Garlic & Caramelized Onions sauce. I find it’s well-seasoned and needs no “doctoring”. The ingredients are California plum tomatoes, imported olive oil, fresh onions, roasted garlic, fresh basil, sea salt, and spices. There’s no added sugar, no dehydrated vegetables, just good fresh ingredients.
I was able to cook the spaghetti squash very quickly with my Instant Pot. I was inspired to give it a try after reading Michelle Tam’s blog post on Nom Nom Paleo. Using the Manual setting, I set the time for 7 minutes. It took 13 minutes to get up to pressure, then 7 minutes under pressure, and less than a minute for a quick pressure release. So it took just twenty-one minutes to cook the squash. While the Instant Pot was doing its thing, I put the sauce together. Quick and easy!
What? You say you don’t have an Instant Pot and/or you’re afraid to attempt to cut the hard squash in half? Here are a couple of good alternatives for you.
- You could roast spaghetti squash halves in the oven. It’s easy. I’ve used the same method that Chungah Rhee describes on her damndelicious.net blog. It works great but does involve cutting that hard squash in half.
- Apparently, you can roast the whole squash. I haven’t tried it. Here’s Martha Stewart’s recipe for a whole Roasted Spaghetti Squash.
Spaghetti squash does NOT taste like spaghetti. It’s squash. But it pairs very well with tomato sauce. Bob and I both enjoy it and it has become part of my regular rotation when I want to make a quick and easy meal.
.
.
Quick Beef Sauce with Spaghetti Squash
(Inspired by Michelle Tam’s recipe on Nom Nom Paleo)
.
.
Serves 2
(I had leftover squash that I refrigerated to use later. To serve 4, use all of the squash and double the sauce ingredients.)
.
1(2½ – 3 pound)spaghetti squash
1 cup water
1 tablespoon olive oil
3 – 4 ounces sliced mushrooms
½ pound ground beef
1½ cups good quality jarred tomato sauce
Salt and pepper, to taste
.
To cook the squash in an Instant Pot (I have suggested a couple of links in the blog post above if you want to bake the squash in the oven.)
.
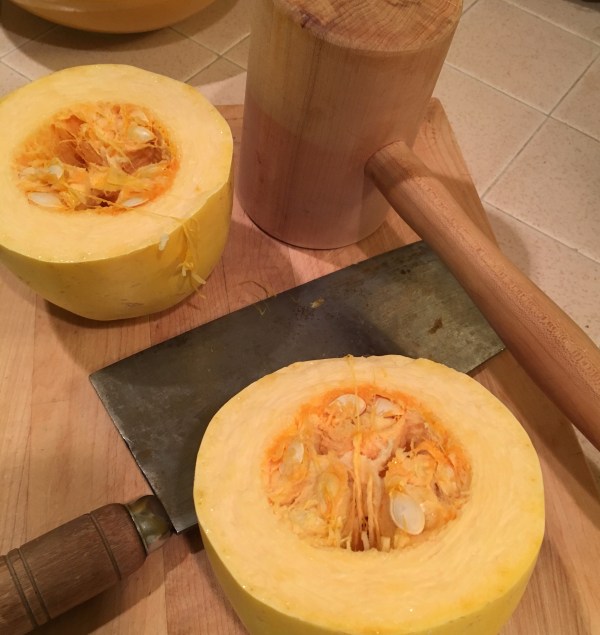
- Wash the squash and cut it in half across the diameter. (I have read that you get longer strands when you cut it this way instead of end-to-end.)
.
I find it easy to cut the squash using my cleaver and mallet.
.
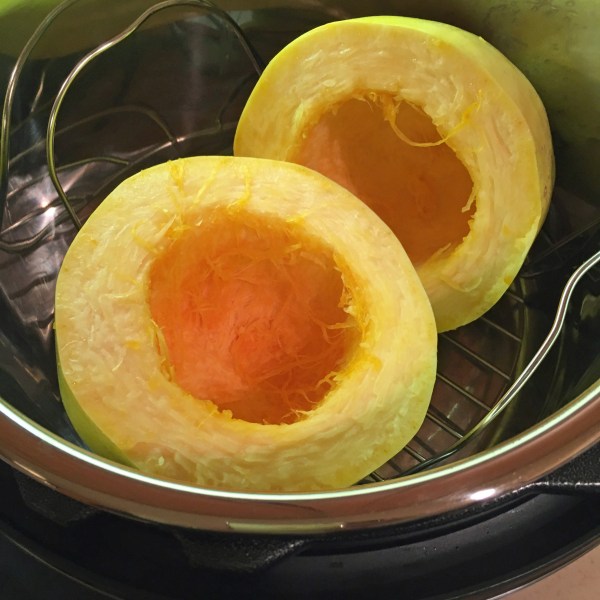
2. Scoop out the seeds.
3. Put the squash cut-side up on the Instant Pot rack in the pot.
.
4. Add the 1 cup of water to the pot.
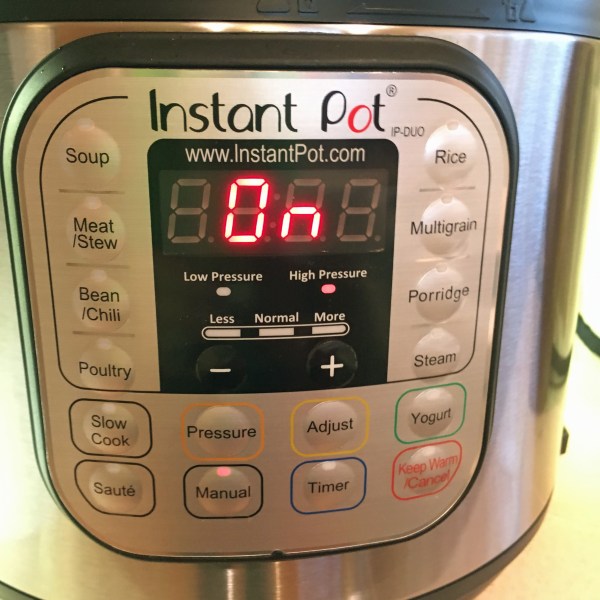
5. Seal the lid. Using the Manual mode, set the time for 7 minutes.
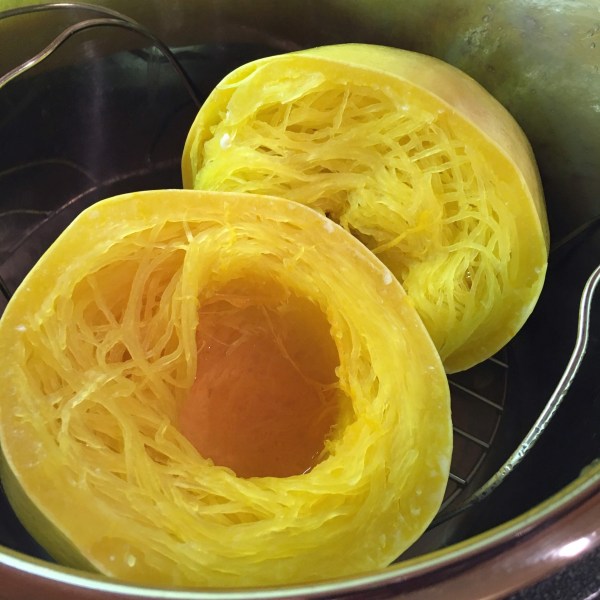
6. In about 20 minutes, when the Instant Pot is done cooking, use the quick release.
.
7. Using a fork, scoop out the squash strands.
Prepare the sauce while the squash is cooking
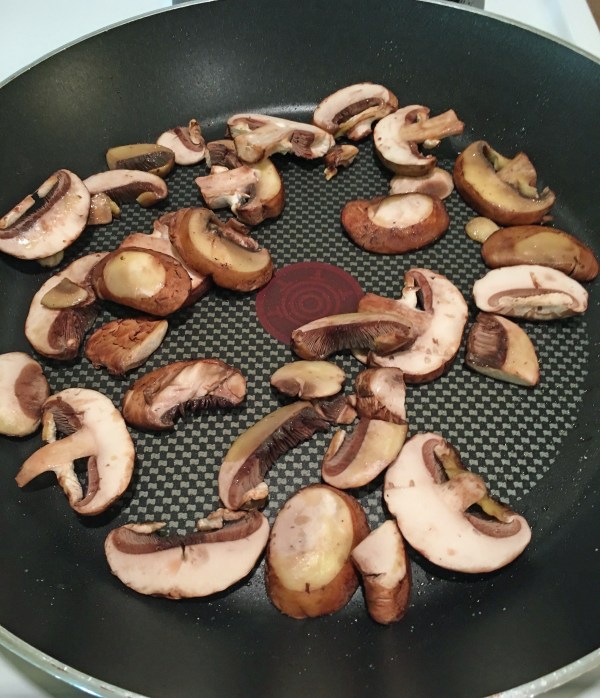
- Put about a tablespoon of olive oil in a skillet over medium heat.
- Add the mushrooms and cook, stirring occasionally, until they are browned a bit.
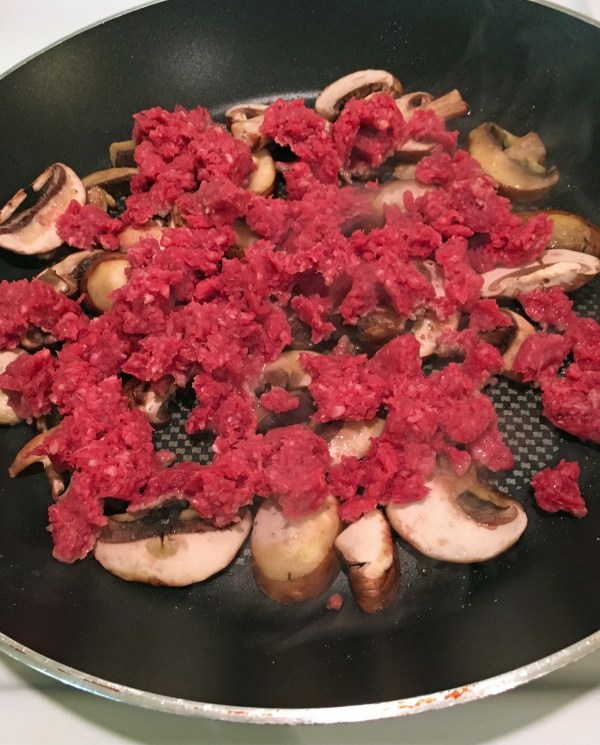
.
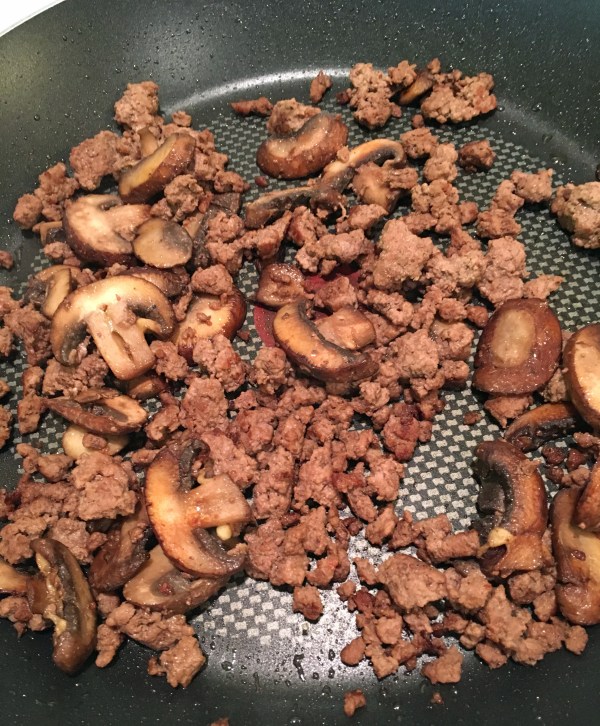
3. Add the ground beef to the pan, breaking it up as you put it in. Cook, stirring occasionally, until the beef is cooked through and browned a bit.
.
Beef cooked
.
4. Add the tomato sauce and reduce heat to medium-low. Stir and cook until the sauce is hot.
5. Taste and season with salt and pepper, if necessary.
6. Serve the sauce over the spaghetti squash.
.
.
Share this:

Instant Pot Kalua Pork
By Kath Dedon
.
Yep. I treated myself to an Instant Pot. I had a perfectly good 30+ year-old stainless steel stovetop pressure cooker, but I never used it. Older pressure cookers need to be monitored closely. Plus, while I’ve read that some people find the jiggling top comforting, I found the jiggling sound a bit disconcerting. To me, it was a constant reminder that my pot could blow its top if I did something wrong.
So, after seeing thousands of positive reviews, I started an Instant Pot board on Pinterest to collect online recipes. It wasn’t long before I was convinced that I needed one. I’m now the owner of an automatic electric Instant Pot and I LOVE it! Although it’s touted as a multi-functional cooker (Pressure Cooker, Slow Cooker, Rice Cooker, Sauté/Browning, Yogurt Maker, Steamer, and Warmer), I am most excited about its pressure cooking abilities. I won’t be getting rid of my slow cooker or rice cooker just yet.
(Bonus: This newfangled pressure cooker cooks SILENTLY!)
The first thing I decided to make was Instant Pot Kalua Pork. I chose Michelle Tam’s recipe on her nomnompaleo.com blog. It was SO easy and we all loved it! The total time to make it is about 2¼ – 2½ hours, but since only about 10 minutes of that time is active cooking time it didn’t seem that long. And because I did keep my rice cooker, I made some rice. The pork and cabbage were great served with the rice.
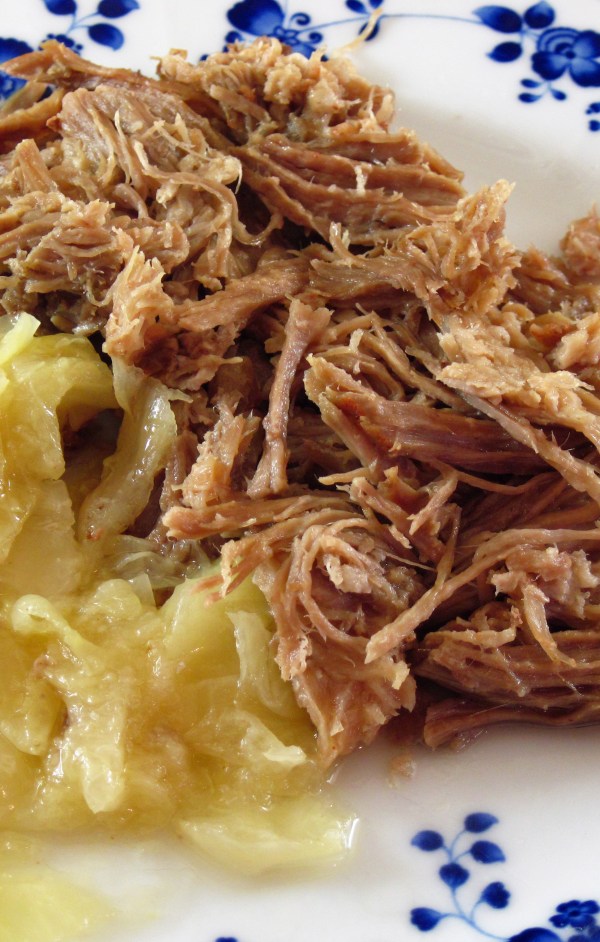
I cooked the cabbage as Michelle suggests, but I only cooked ¾ of a head (6 wedges) since there were only 5 of us for dinner. Once I tasted it, I wished I had cooked the whole head of cabbage. It was melt-in-your-mouth delicious. Truly.
If you don’t have an Instant Pot, you could try Michelle’s Slow Cooker Kalua Pig. She cooks it for 16 hours, but says if you have a newer slow cooker it will probably be done in 9 – 12 hours. My 6-quart Crock-Pot cooks hot even on the Low setting and I’m sure the pork would be done in 9 hours. If you try the slow cooker version, I’d love to hear how it turned out for you.
.
.
.
Instant Pot Kalua Pork
(Adapted from Michelle Tam’s recipe on nomnompaleo.com)
If you have a stove top pressure cooker reduce the pressure cooking time to 75 minutes instead of 90 minutes. Stove top cookers cook at a higher psi than electric pressure cookers. If cooking a stove top pressure cooker recipe in an Instant Pot add 15% more time under pressure. Conversely, if cooking an Instant Pot recipe in a stove top pressure cooker reduce the cooking time by 15%.
.
Total time to make the pork and the cabbage is about 2½ hours, mostly unattended.
.
.
Serves 8
.
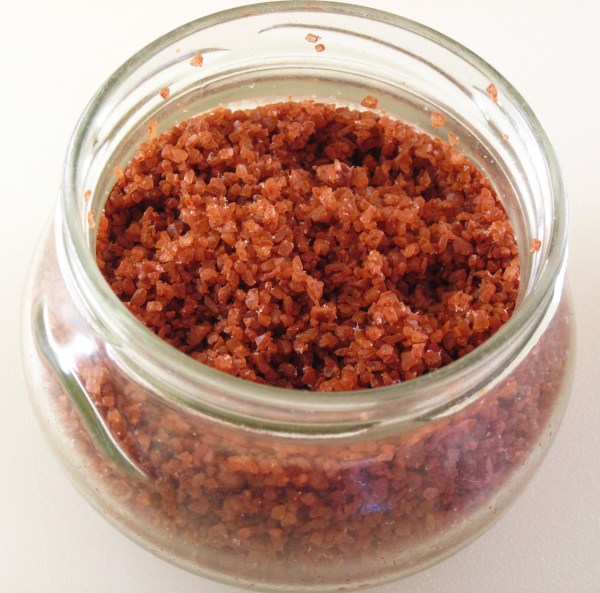
Hawaiian Alaea Salt
.
3 slices bacon
5 pound pork shoulder roast(I used boneless; you could use bone-in)
5 peeled garlic cloves
1½ tablespoons of Alaea Red Hawaiian Course Sea Salt(or 1 tablespoon of Alaea Red Hawaiian Fine Sea Salt. Michelle suggests you can sub smoked salt or kosher salt.)
1 cup water
1 cabbage, cored, and cut into 8 wedges
.
- Put the bacon in the Instant Pot. Press Sauté.
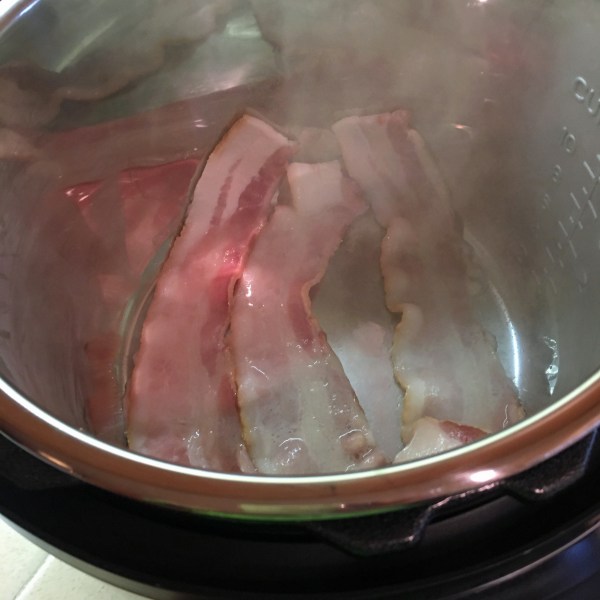
.
2. While the bacon is cooking (turn it with tongs occasionally), cut the pork roast into 3 pieces. Cut the garlic cloves into thinner slivers, cutting each one into thirds or fourths. Cut slits in the roast and press the garlic pieces into the slits. Sprinkle half of the salt over the pork pieces and rub it in a bit. Turn the pork pieces over and sprinkle the rest of the salt on the pork rubbing it in.

.
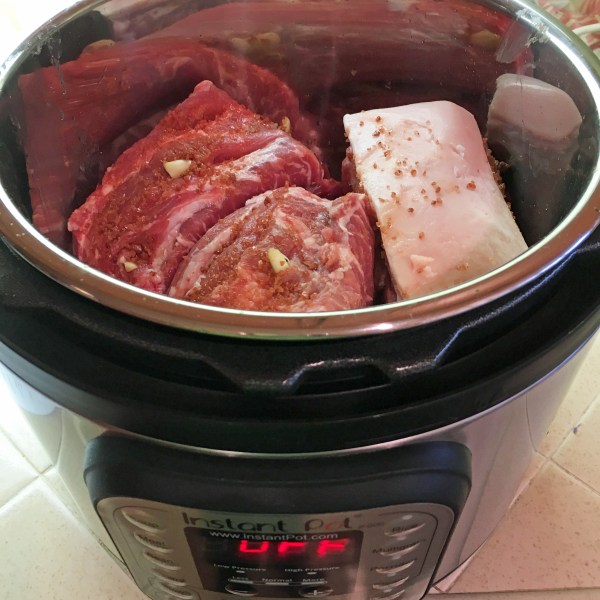
3. By this time the bacon should be nicely browned. Put the pork on top of the bacon slices. Stop the Sauté function by pressing the Keep Warm/Cancel button.
.
4. Add the water to the pot, put the lid on and lock it in place. Make sure the pressure release handle is in the sealing position.
5. Select Manual. Press the “+” button until it shows 90 minutes. It will come up to pressure and the float valve will rise up. In a minute or two you’ll notice the time decreasing. The 90 minutes is the time it cooks once it’s under pressure. (If using a stove top pressure cooker time it for 75 minutes once the pot comes up to pressure.)
6. When the 90 minutes is up, press the Keep Warm/Cancel button to turn it off. Let the pressure release naturally. This will take about 15 – 20 minutes. The float valve will pop back down when the pressure is released and you can then open the pot.
7. Remove the pork from the pot.
8. Put the cabbage in the cooking liquid in the pot. Put the lid on and make sure the pressure release handle is in the sealing position, select Manual and press the “-” button to change the time to 3 minutes. While the cabbage is cooking, shred the pork with two forks.
9. When the cabbage is done, carefully move the pressure release handle to the venting position to quickly release the pressure. Use a good pot holder, or push it over with tongs or some other tool to protect your hand. The steam will release immediately.
10. When the pressure has released (the float valve will pop back down), open the pot.
11. Serve the pork with the cabbage. You can stir a bit of the cooking liquid into the pork if you would like it a bit juicier.
.
.
Share this:

Wasabi Shrimp
By Kath Dedon
.
It’s Halloween. I always feel that Halloween marks the entry into the holiday party season. I’m always on the lookout for easy dishes that can be made for entertaining or can easily be taken to a potluck party. Wasabi Shrimp is perfect for the holiday season!
To make Wasabi Shrimp you simply stuff cooked, peeled, and deveined shrimp with cream cheese blended with wasabi paste. The result is a tasty sushi-like shrimp appetizer.
Most markets carry shrimp that is already cooked and ready to eat. Buy cooked shrimp if you prefer to keep it extra simple.
If you start with raw shrimp, you’ll need to poach them. I used an easy method that I found on Serious Eats. I put the shrimp, still in their shells, in a pot of cold water with the juice of one lime and a heaping tablespoon of kosher salt and turned on the heat. While the water was heating I got a bowl of ice water ready. Using an instant read thermometer, I checked the temperature of the water in the pot. When it reached 170° I removed the shrimp from the water and put them in the ice water to cool quickly. The shrimp were cooked perfectly!
The recipe is adapted from one by Rozanne Gold in Cooking 1-2-3. I find the most difficult thing about the recipe is getting the shrimp to look beautiful and not messy. Rozanne suggests stuffing the shrimp using a pastry bag. I don’t have one, but I think that may be the secret to creating a more neatly-stuffed appetizer.
Do give Wasabi Shrimp a try, even if you don’t have a pastry bag. I think you’ll agree that it’s a perfect recipe for the holiday party season.
.

.
Wasabi Shrimp
(Adapted from a Rozanne Gold recipe in Cooking 1-2-3)
.
.
2 pounds cooked shrimp, peeled and deveined
8 ounces cream cheese, at room temperature
2 tablespoons wasabi powder
2 tablespoons water
¼ teaspoon salt (I used sea salt.)
.
- In a small bowl, mix the wasabi powder with the water to form a paste.
- Put the cream cheese, wasabi paste, and salt in the bowl of a small food processor. Process until well blended.
- Cut a slit in the back of each shrimp, cutting almost all the way through.
- Use a small spoon or a pastry bag to stuff each shrimp with some of the wasabi cream cheese.
- Refrigerate until serving time.
.

.


