Welcome!
You'll find over 470 of my favorite recipes here, including ideas for Quick meals, Cooking for 2, Feasting on Leftovers, and cooking with 5 Ingredients or Less. I'm adding new posts regularly; you can subscribe by email or RSS feed if you'd like to receive the latest recipes. Bon appétit!
Easy Penuche Frosting
I thought I would attempt to make a homemade angel food cake for Laura’s birthday. I had tried it once before, years ago, and it hadn’t turned out well. This time I studied recipes and watched a video on YouTube that showed how to beat the egg whites.
I’m not going to give the recipe that I tried. There were so many people who claimed to have had great results with it; I think it was my failure, not the recipe’s. In hindsight, I probably didn’t beat my egg whites long enough.
It was obvious that it had seriously collapsed when I took it out of the oven, but I cooled it upside-down on a bottle. I thought that maybe it could be salvaged.
When I took it out of the pan, this is the way it looked:

~~
I had no time to fiddle around trying to make another homemade cake. I needed to get it done that night.
So off to the store I went to recruit Betty Crocker to save the day!
(Carrie’s comment about having to resort to a cake mix: “It’s OK. The cake is just to hold the frosting!”)
While homemade angel food cakes can be very tricky, angel food cake mixes are one of the easiest cakes to bake. In less than an hour I had a cake that would work to hold my Penuche Frosting.

~~
My mom started using Penuche Frosting on angel food cakes when I was a kid, and it’s been a family favorite ever since. The recipe I use is adapted from the one in the 1981 edition of the Better Homes and Gardens New Cook Book.
So here’s Laura’s birthday cake and the recipe for Penuche Frosting!
Happy Birthday, Laura!

Penuche Frosting
Makes enough to frost an angel food cake, the top of a 13×9-inch cake, or the tops of two 8- or 9-inch layers.
~~
(Adapted from the recipe in the 1981 edition of the Better Homes and Gardens New Cook Book)
~~
Be sure to sift the powdered sugars so the frosting doesn’t turn out lumpy. If you don’t have a sifter, you can press it through a fine mess strainer with a spoon.
~~
½ cup butter
1 cup packed brown sugar
¼ cup milk
3 cups sifted powdered sugar
~~
1. Melt the butter in a medium saucepan. Add the brown sugar. Cook, stirring, until it is bubbly and well blended. Remove from the heat.

2. You can either continue the recipe with a hand mixer and mix the frosting right in the pan, or you can use a spatula to put the butter/sugar mixture into the bowl of a stand mixer, which is what I did.
3. Add the milk and mix well. Add the sifted powdered sugar and mix until it is all blended and a good spreading consistency.
4. Work quickly to frost the cake right away.
Share this:

Corn on the Cob
By Kath Dedon
,
I could not resist the display of corn at Metropolitan Market yesterday. It was from California and looked so fresh! So we had corn with last night’s Quick Roast Chicken Parts with Carrots.

.
This can’t really be called a “recipe”. It’s a tip for cooking corn. When we lived in Minnesota, my mom would buy the best corn EVER at local farm stands. I think she got this tip from one of the farmers.
Cut a lemon in half and squeeze the juice into the pot of water for the corn. Then toss the lemon halves in the water.
 ~~
~~
Bring to a boil; add the corn and boil the corn for 1 minute. Fresh corn does not need more than a minute. Remove it immediately from the water and serve.
The corn tasted pretty darn good, though it was not quite as good as fresh, local corn in the summer.
Share this:

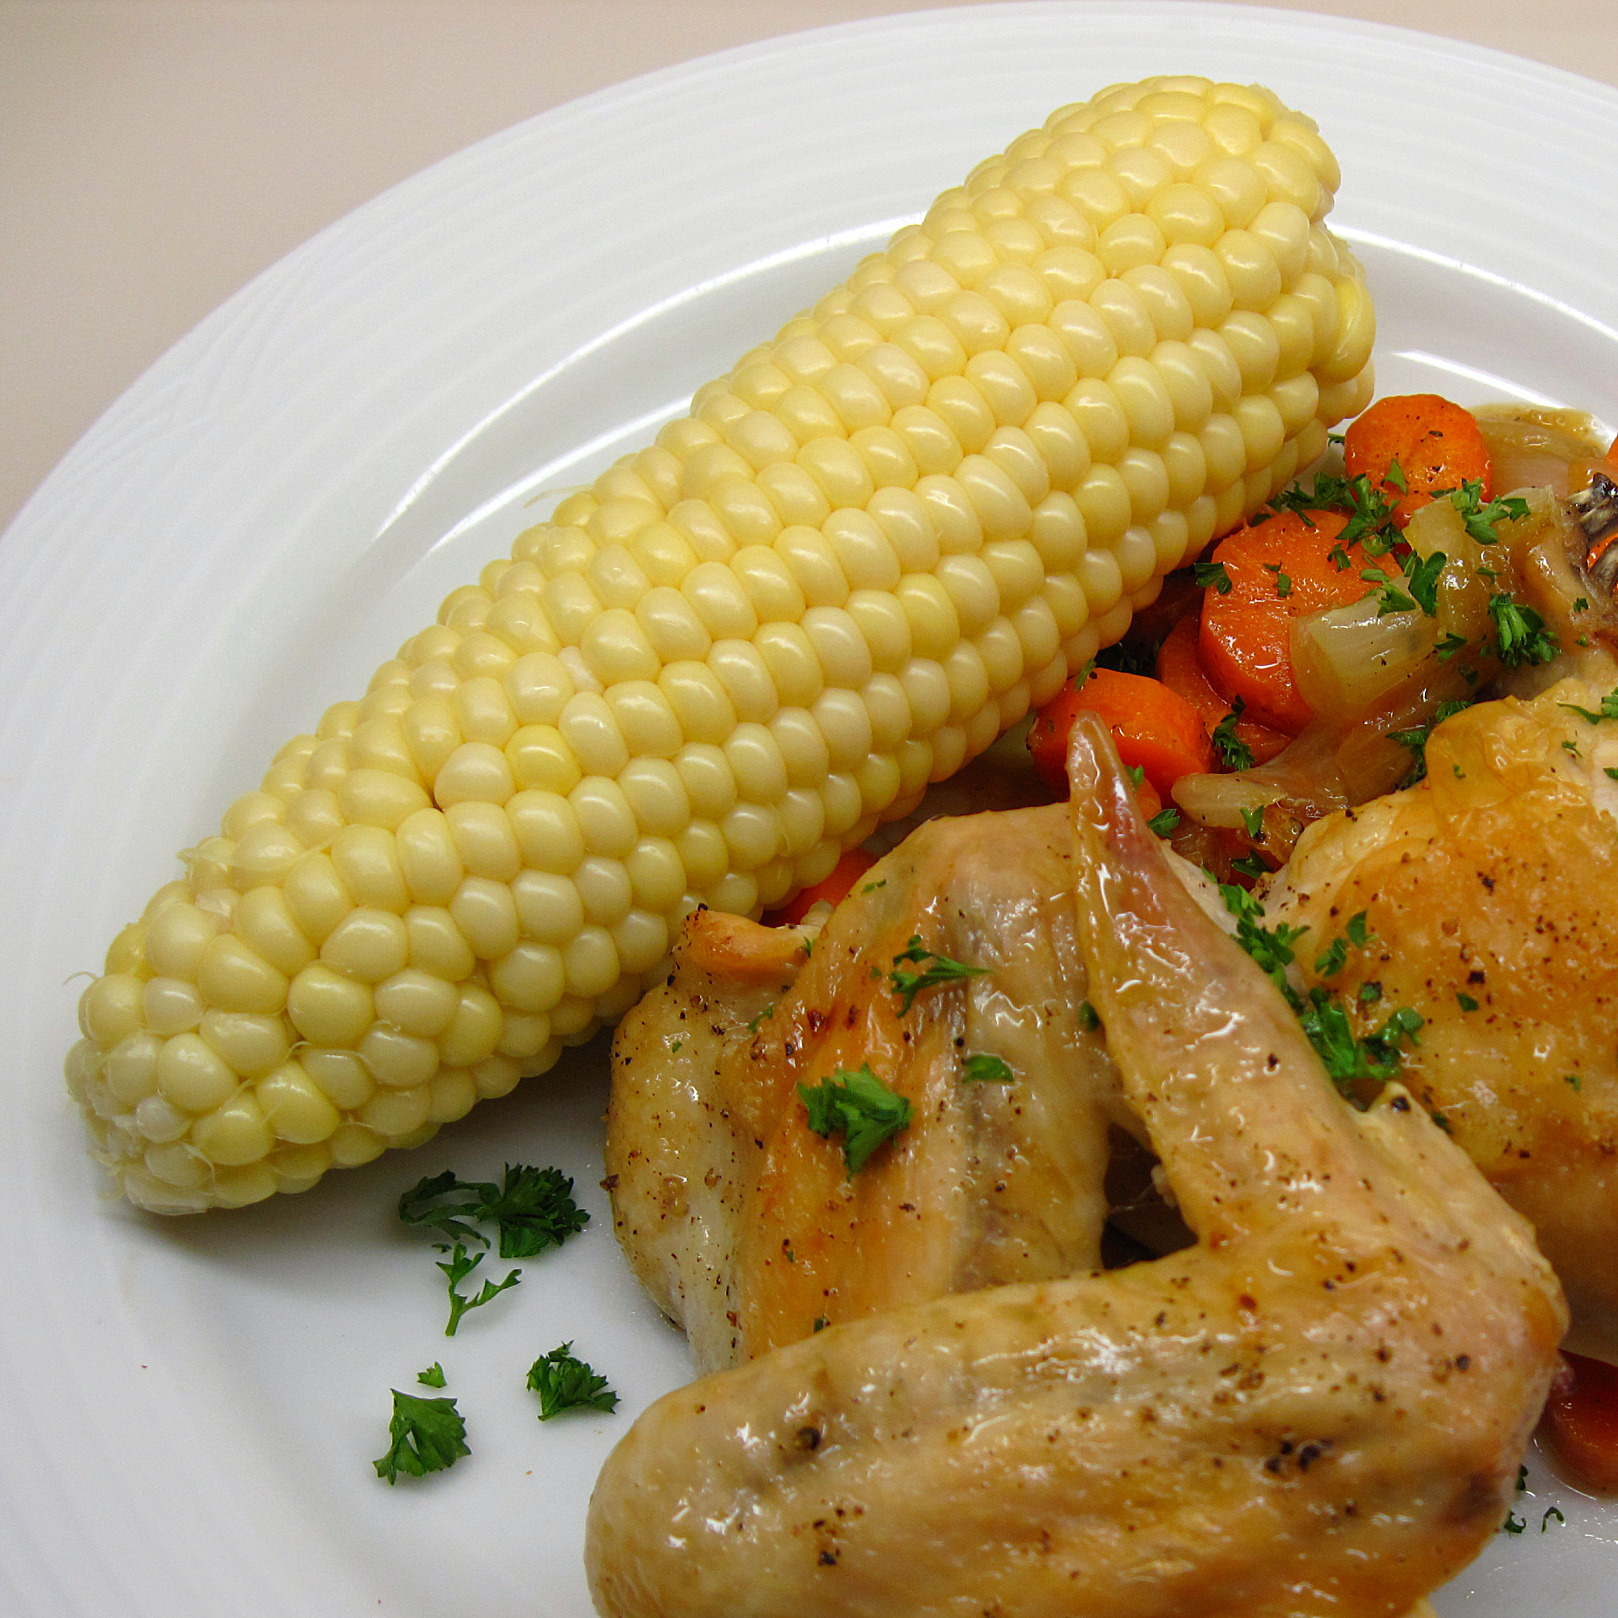
Quick Roast Chicken Parts with Carrots
By Kath Dedon
.
Roasting chicken parts instead of a whole chicken gets dinner on the table a lot faster. I adapted a recipe from Mark Bittman’s How to Cook Everything, which he calls “Roast Chicken Parts with Fennel, Celery, or Carrots”. Since I had carrots, I went with that; I also added a few slices of onion for extra flavor.
In my oven, his timing was perfect.
.

.
Quick Roasted Chicken Parts with Carrots
(Adapted from a recipe in Mark Bittman’s How to Cook Everything)
a
a
Serves 4
a
3 – 4 pounds chicken parts (cut large breast pieces in half)
About 3 tablespoons olive oil
1 pound carrots, cut in ¼-inch rounds
¼ onion, cut in slices
Salt
Pepper
Chopped parsley for garnish (optional)

1. Preheat oven to 450˚.
2. Put about 2 tablespoons olive oil in a large shallow roasting pan. (My broiler pan was perfect.)
3. Add the carrots and onions to the pan and stir to coat in the olive oil. Lightly salt them.
4. Put the carrots and onions in the oven to roast for 10 minutes.
5. Stir the vegetables, and then arrange the chicken pieces on top, skin side up. Drizzle 1 tablespoon of olive oil over the chicken. Salt and pepper the chicken pieces.

6. Roast the chicken for 15 minutes. Remove from oven and stir the vegetables a bit.
7. Roast an additional 15 minutes. The chicken should now register 165˚ with an instant read thermometer and be ready to serve. Garnish with chopped parsley, if desired.
Share this:

Broccoli Salad
By Kath Dedon
..
Various versions of Broccoli Salad have been showing up at potluck gatherings for quite some time now. They always seem to be popular. Some people who don’t like cooked broccoli (I won’t name any names) will eat it this way.
West Seattle’s St. John the Baptist Episcopal Church celebrated its centennial year in 1992 with a little cookbook of favorite recipes. I was inspired by a recipe in the book called “Marilyn’s Broccoli Salad”. My version will serve 4. The recipe can be easily doubled, or even tripled, if you want to feed a crowd or take it to a potluck.
This salad keeps quite well if you want to make it ahead of time. If you do, though, I would keep the peanuts out and stir them in at the last minute. They will lose some of their crunch if they sit in the dressing too long.
(Update 4/27/10: I made this last weekend and added 3 tablespoons of raisins to the salad. I made it today without the raisins, and I think I prefer it this way.)

Broccoli Salad
Inspired by a recipe in the St. John the Baptist Episcopal Church Cookbook
.
.
Serves 4 (Easily doubles to serve 8)
.

.
4 slices bacon
14 ounces (4 – 5 cups when cut up) broccoli
1/3 cup red onion, diced
3 tablespoons chopped peanuts
(3 tablespoons raisins, optional)
¼ cup mayonnaise
1 tablespoon honey
1 tablespoon rice vinegar
~~~~~~~~~~~~
1. Fry the bacon until crisp. Set aside.
2. Wash the broccoli. Peel off the tough outer layer of the stalks and cut the stalks into small pieces. Cut the florets into smaller pieces. Put the broccoli in a bowl.
3. Crumble the bacon. Add the bacon, red onion, peanuts, and raisins, if you’re using them, to the broccoli.
4. Stir the mayonnaise, honey and vinegar together. Pour over the salad and toss well to distribute the dressing throughout the salad.
Share this:

Baked Chutney Chicken Thighs
By Kath Dedon
.
Baked Chutney Chicken Thighs is a very easy and flavorful chicken dish. I adapted the recipe from the one in Sunset’s Quick Meals with Fresh Foods, and I’ve been making it for years. The salty/sweet combination of the soy sauce and chutney is perfect with chicken.
I use Patak’s Major Grey Chutney; I like the fact that it’s made with sugar instead of corn syrup. If you’d like to add some heat, you could use Patak’s Hot Mango Chutney. Both are available at Safeway and other grocery stores in my area.
Prepare a simple side dish and salad while the chicken is baking, and you’ll have an easy weeknight dinner.
~~~~~~~~~~~~
(The original recipe calls for 1 whole chicken (3 – 3 ½ pounds) cut into pieces, and 1/3 cup each Major Grey chutney and soy sauce. Use those proportions if you’d like to serve 4 – 6 people.)
~~~~~~~~~~~~

Baked Chutney Chicken Thighs
Adapted from a recipe in Sunset’s Quick Meals with Fresh Foods
.
~~~~~~~~~~~~
Serves 2 – 4, depending on the size of the chicken thighs
~~~~~~~~~~~~
4 chicken thighs
3 tablespoons gluten-free tamari sauce (substitute soy sauce if you don’t need gluten-free)
4 tablespoons Major Grey chutney (Patak’s brand is good and gluten-free)
Parsley sprigs (optional)
~~~~~~~~~~~~
1. Preheat the oven to 350˚.
2. Put the chicken thighs in a baking dish and cover with the tamari sauce. Turn the thighs in the tamari sauce and let them marinate for about 15 minutes. Turn them once or twice while they’re marinating.
3. Drain the tamari sauce from the chicken and discard.
4. If the chutney has large chunks of mango, cut the pieces into smaller pieces. Spread 1 tablespoon over each of the chicken thighs.

.
5. Bake the thighs, uncovered, for 45 minutes, and then check them to see if they’re done. The juices should run clear and the internal temperature should have reached 165˚. Very large chicken thighs can take up to an hour.
6. Serve the Chutney Chicken garnished with parsley, if desired.
Share this:

Neapolitan Pizza Margherita
By Kath Dedon
.
Naples at Table, by Arthur Schwartz, is a wonderful cookbook if you’re interested in the cooking of Campania. The recipes are great, and I find the stories he tells about them very interesting.
I love the way he starts his introduction to Pizza Napoletana (Neapolitan Pizza):
You can’t make the best pizza at home, but you can make very, very good pizza, and whatever it may objectively lack is made up for by the pleasure and satisfaction of producing it yourself.
I don’t have a wood-burning pizza oven. I don’t even have a pizza stone, but I made a very, very good pizza last night!

Neapolitan Pizza Dough
(Adapted from the recipe by Arthur Schwartz in Naples at Table)
.
.
Makes enough dough for 2 10-inch pizzas. Double for 4 pizzas.
~~~~~~~~~~~~
1¼ teaspoons dried yeast
½ cup warm (105˚ – 115˚) water
2 cups all-purpose flour (I used Italian “00” flour, but regular flour would have been better. See Jonas’ helpful comment about it below.)
3/8 teaspoon salt (1/4 + 1/8)
¼ cup warm water
~~~~~~~~~~~~
1. Stir the yeast into the ½ cup warm water in a 1 cup measuring cup. Stir in ½ cup of the flour. Cover with a towel and let it sit for 30 minutes.
.
(Yes, I did use Caputo “00” flour, but it turns out that was a mistake which I learned from one of the people who commented below. It will not brown in a home oven. I should have used all-purpose flour. My crust would have browned better.)

.
2. It will just about double in volume and have bubbles. (If it doesn’t, your yeast is dead. Off to the store, or do it another day.)

3. Combine the remaining 1½ cups flour with the salt in a large bowl. Stir in the yeast mixture and the ¼ cup warm water.
4. Put a bit of flour on cutting board and knead the dough with the heel of your hand for about 10 or 12 minutes. Add more flour to the board if it starts to stick, but not too much. Just enough to keep it from sticking. As you knead, fold the dough over and turn it. When it has been kneaded enough, it won’t stick to the board and it will be smooth and elastic.

.
5. Shape the dough into a ball and put it in bowl; cover with a towel and let it rise for about an hour, or until it has doubled in bulk. To test it, put water on your finger and stick it in the dough. It’s ready if the indentation stays.
6. While the dough is rising, at least 30 minutes before you’re going to bake the pizza, put an oven rack in the lowest position and preheat the oven to 500˚.
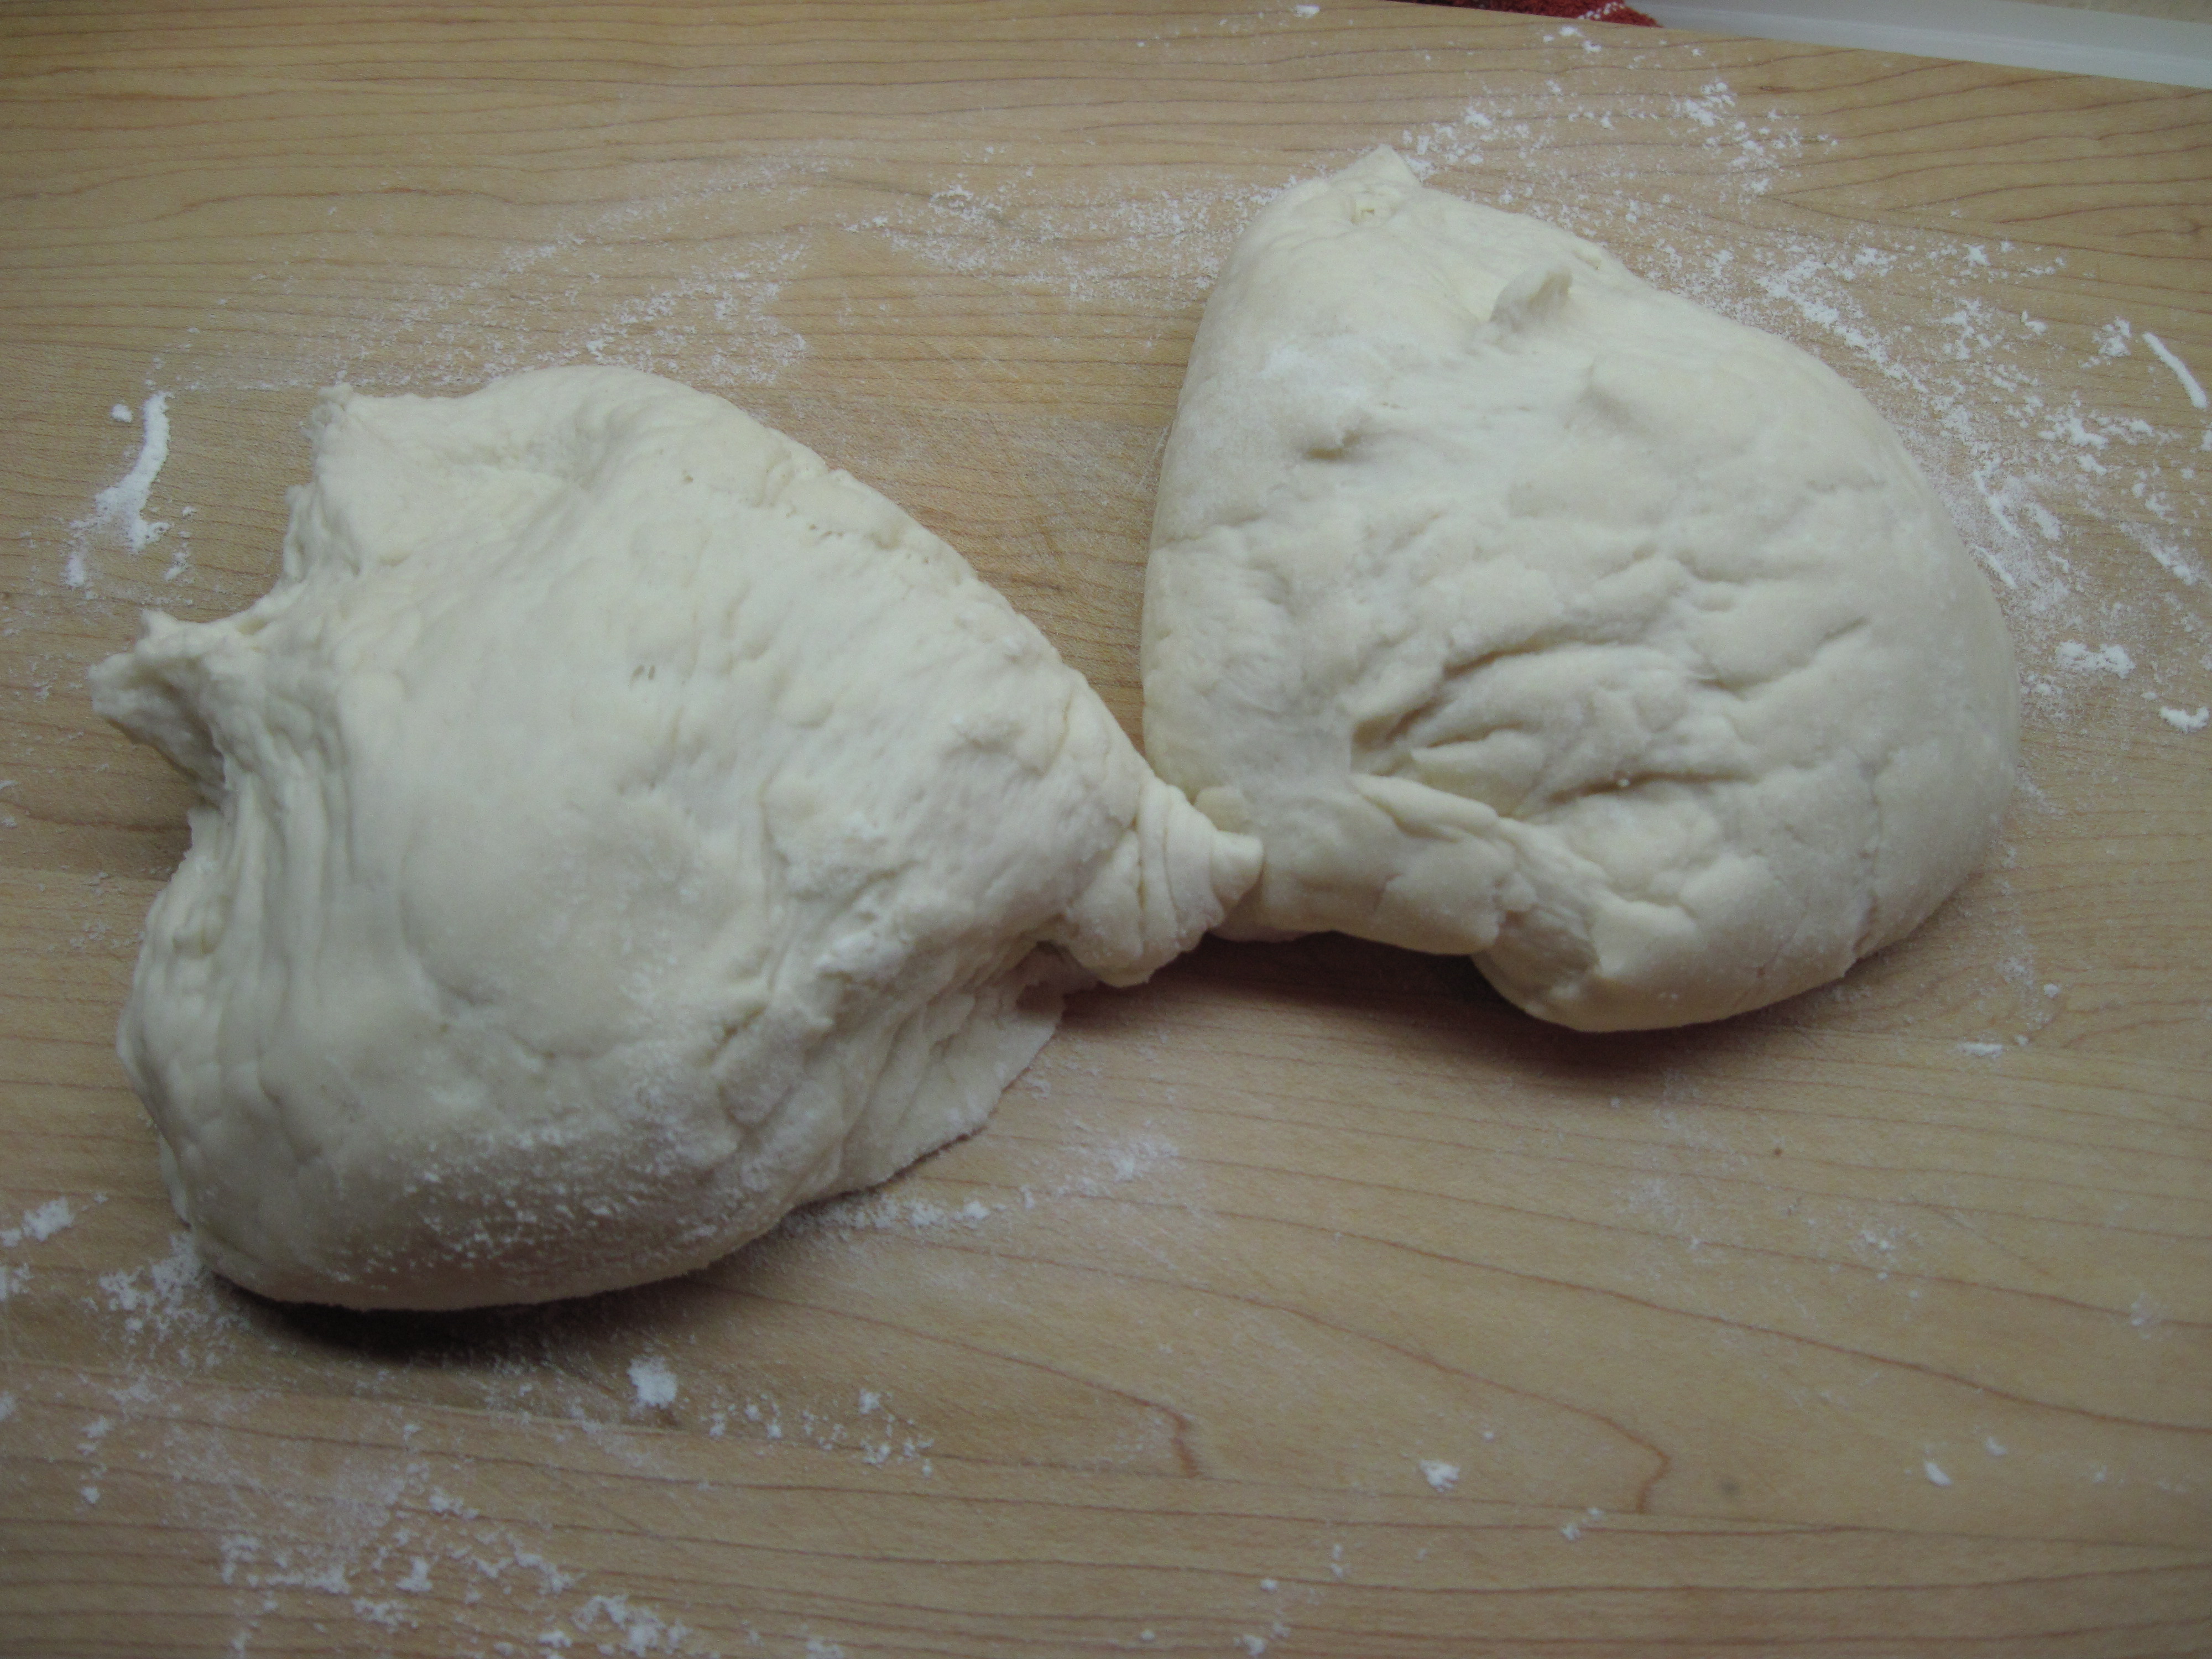
7. When the dough is ready, divide it into two pieces. You can make two pizzas, or refrigerate or freeze one of the pieces.

8. To shape the pizza, flatten the dough into a disk. Use your fingers to press it out bigger and to form a ridge around the edge. Lift the pizza with both hands and let the weight of it stretch it out. Keep turning and pulling until you have a pizza that is 10 or 11 inches in diameter.
You’re ready to top the pizza for baking!
.
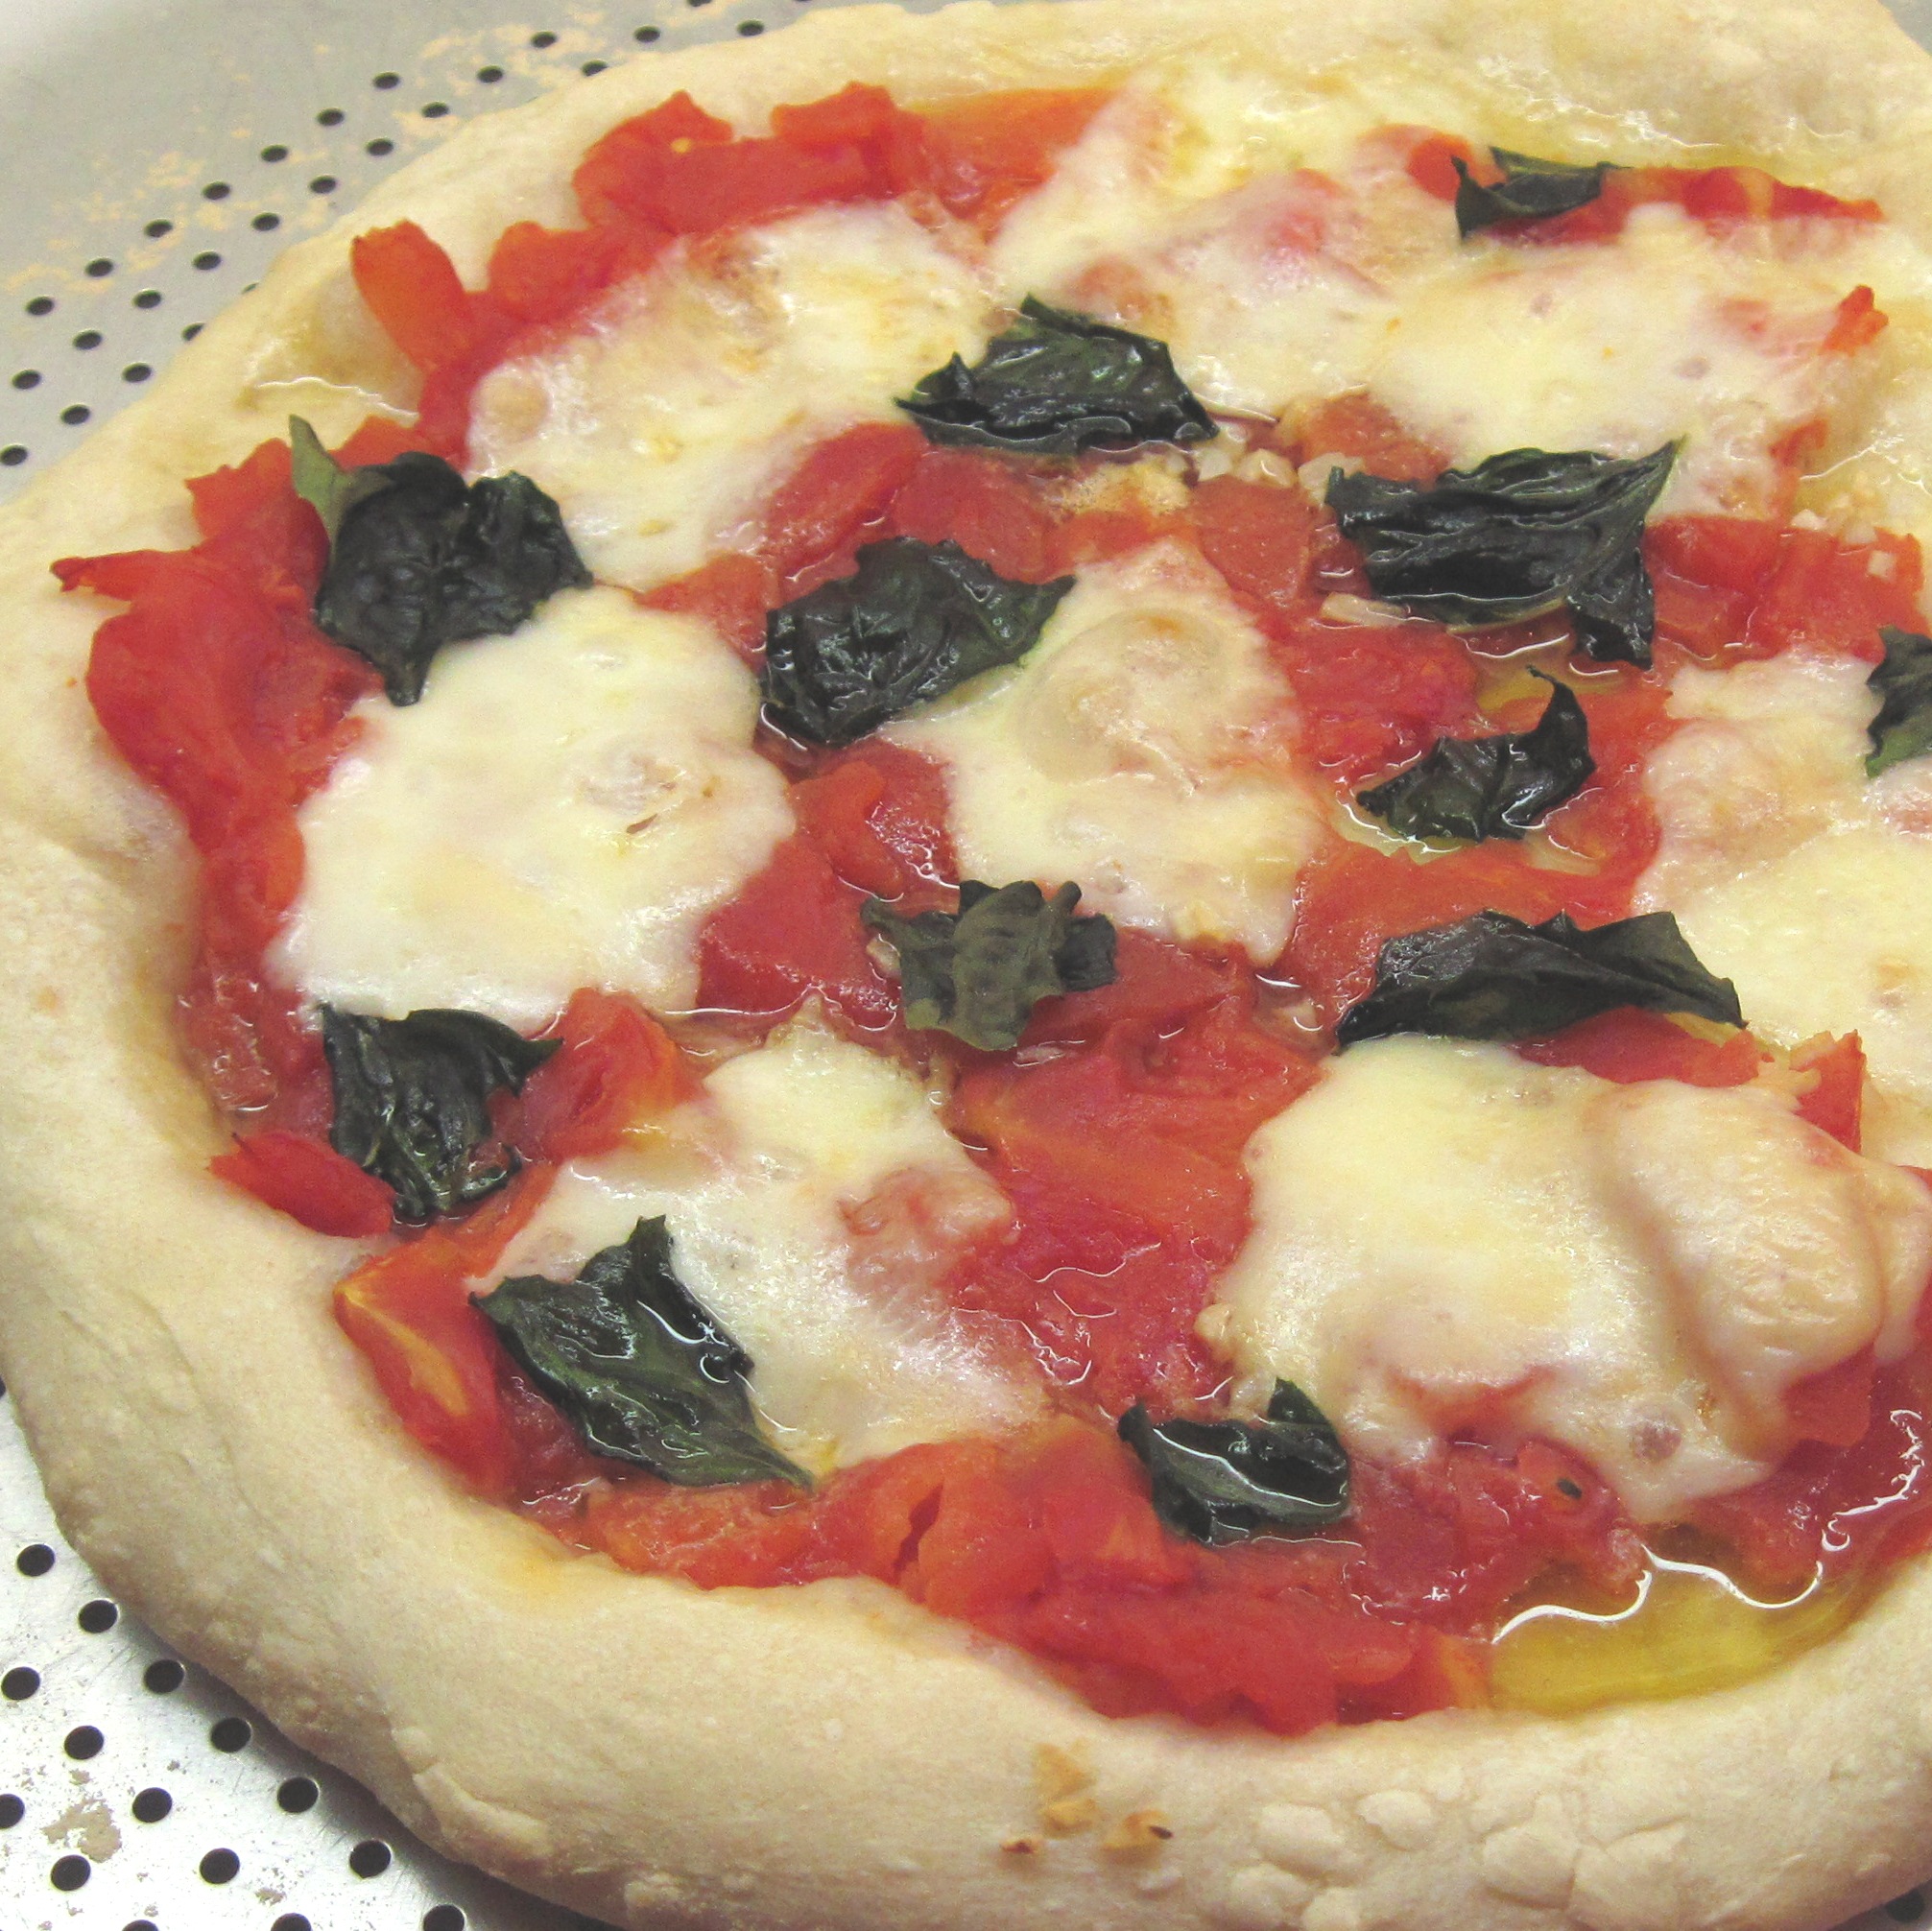
Pizza Margherita
(Adapted from the recipe by Arthur Schwartz in Naples at Table)
.
Dough for 1 pizza
5 canned plum tomatoes, seeded and chopped
½ teaspoon minced garlic
Salt, to taste
1½ – 2 ounces mozzarella, sliced or coarsely shredded
2 tablespoons olive oil
1 or 2 basil leaves, torn
.
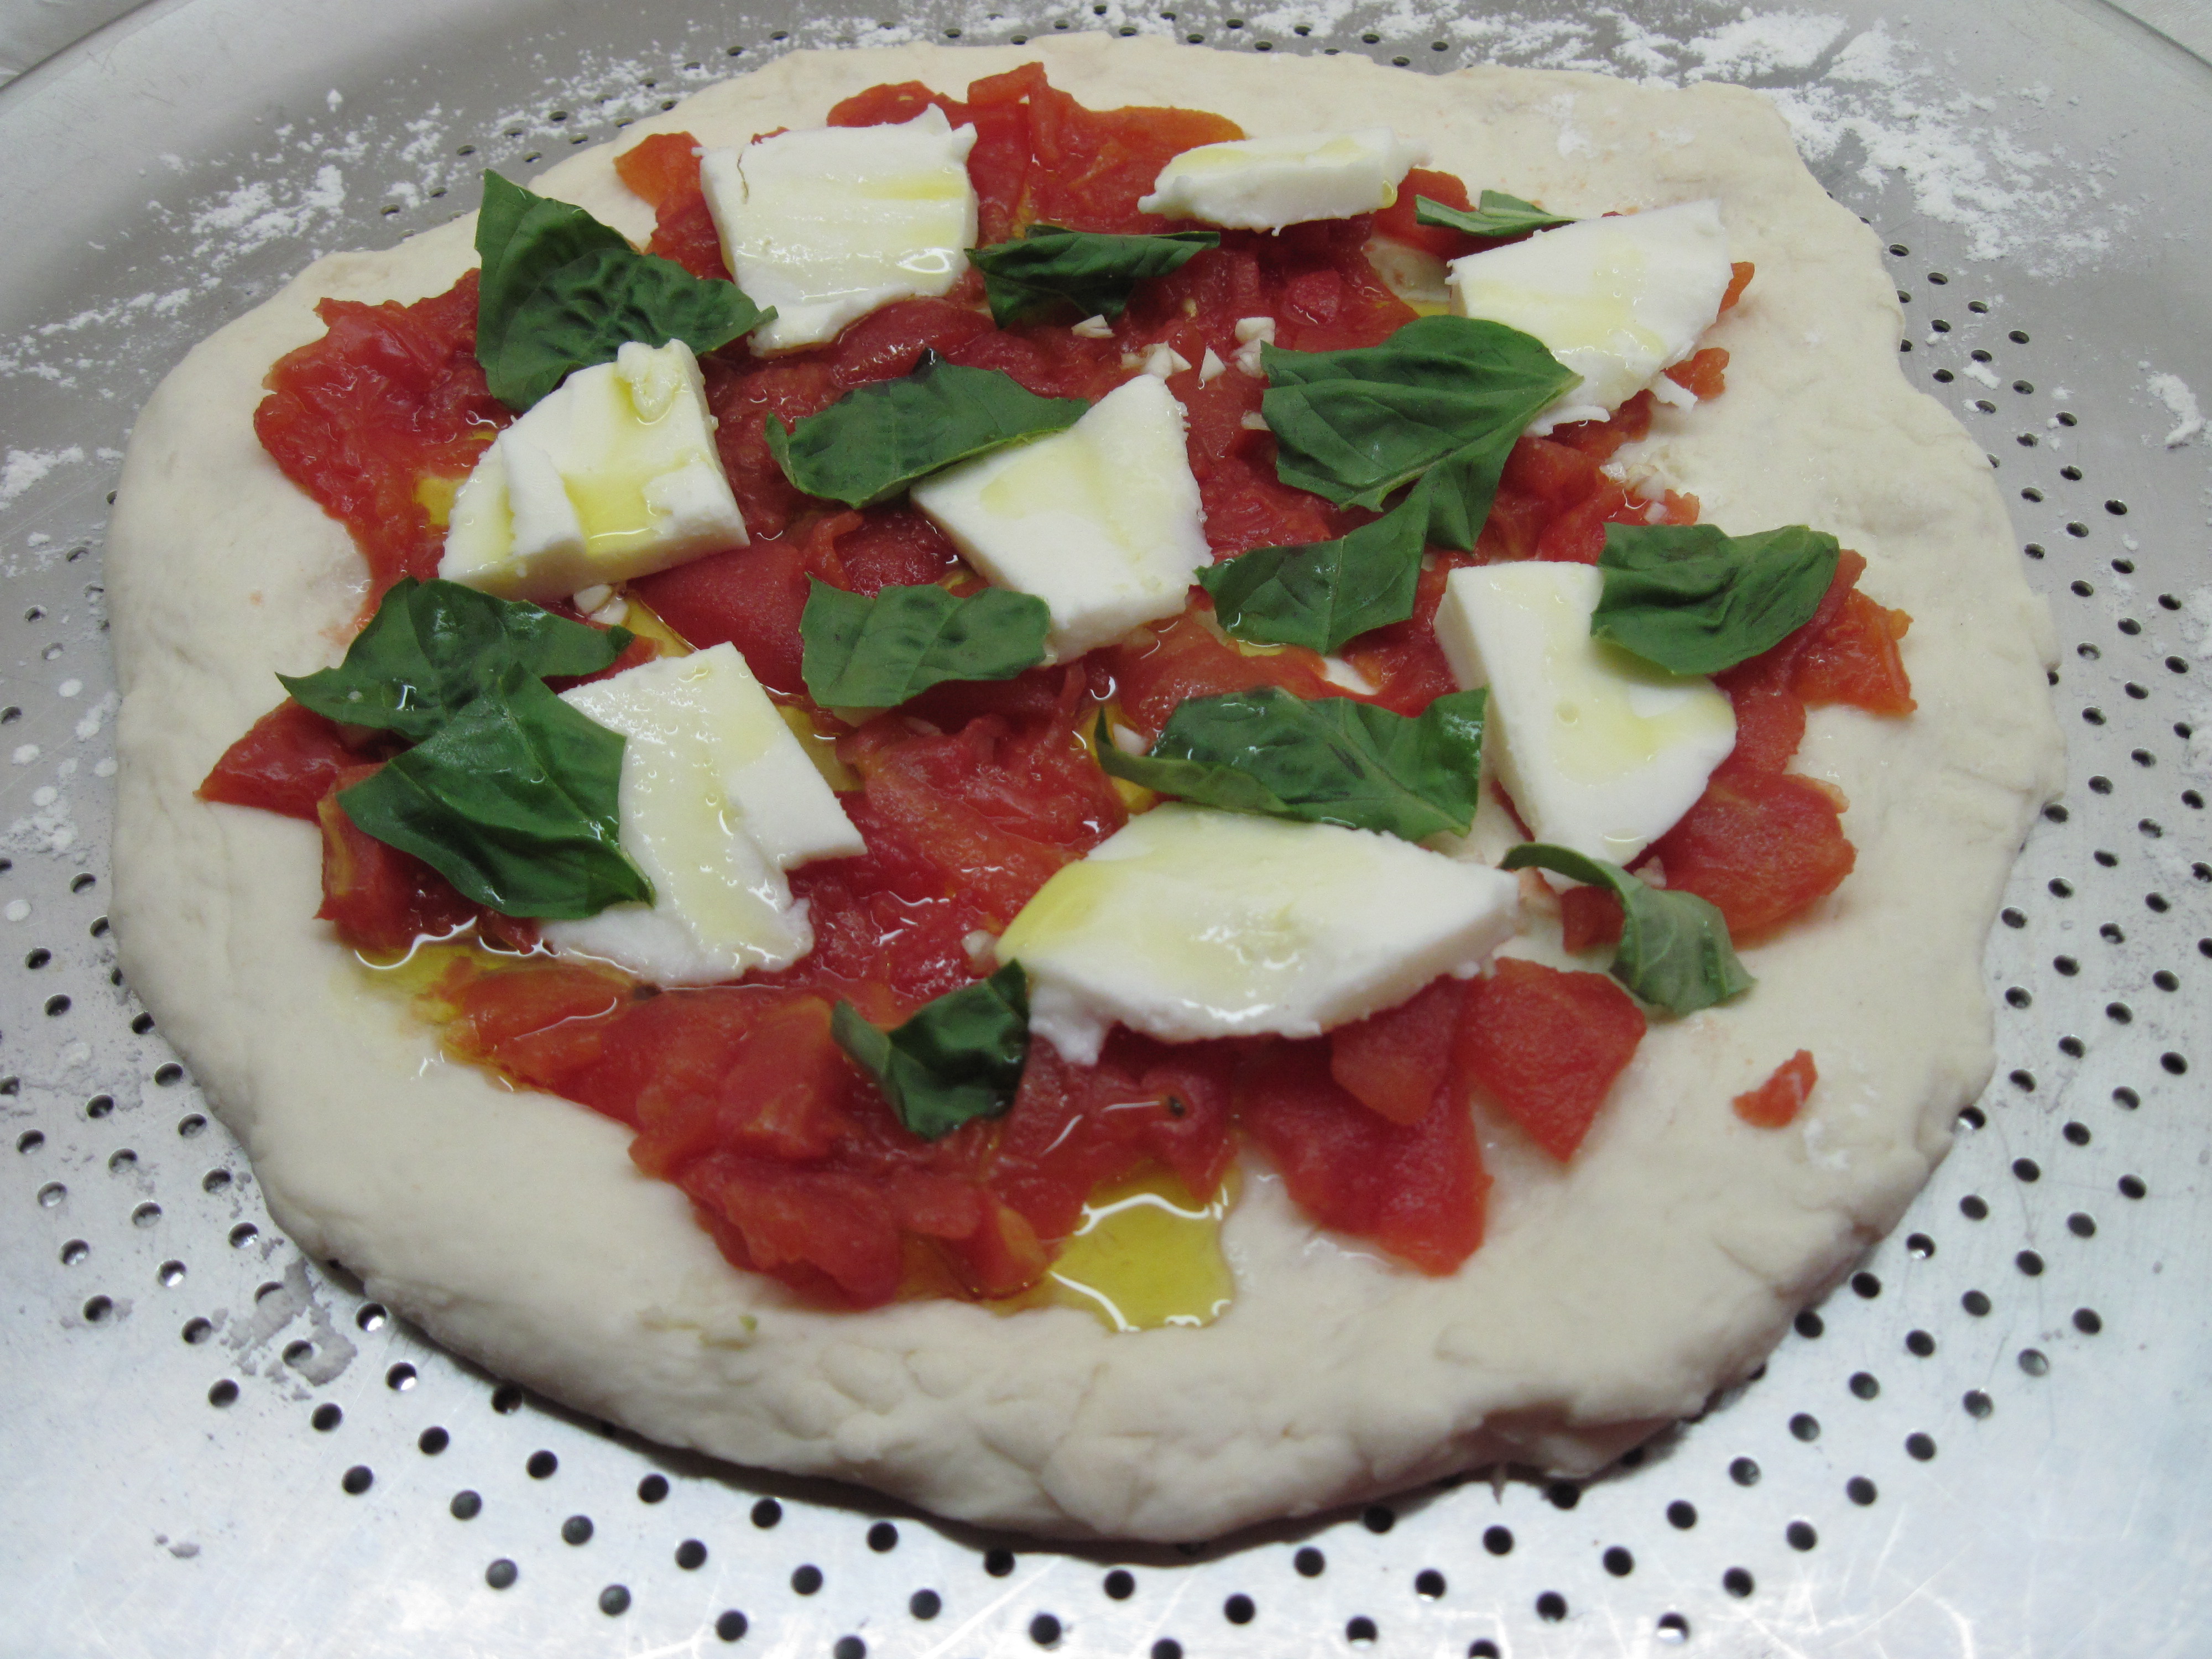
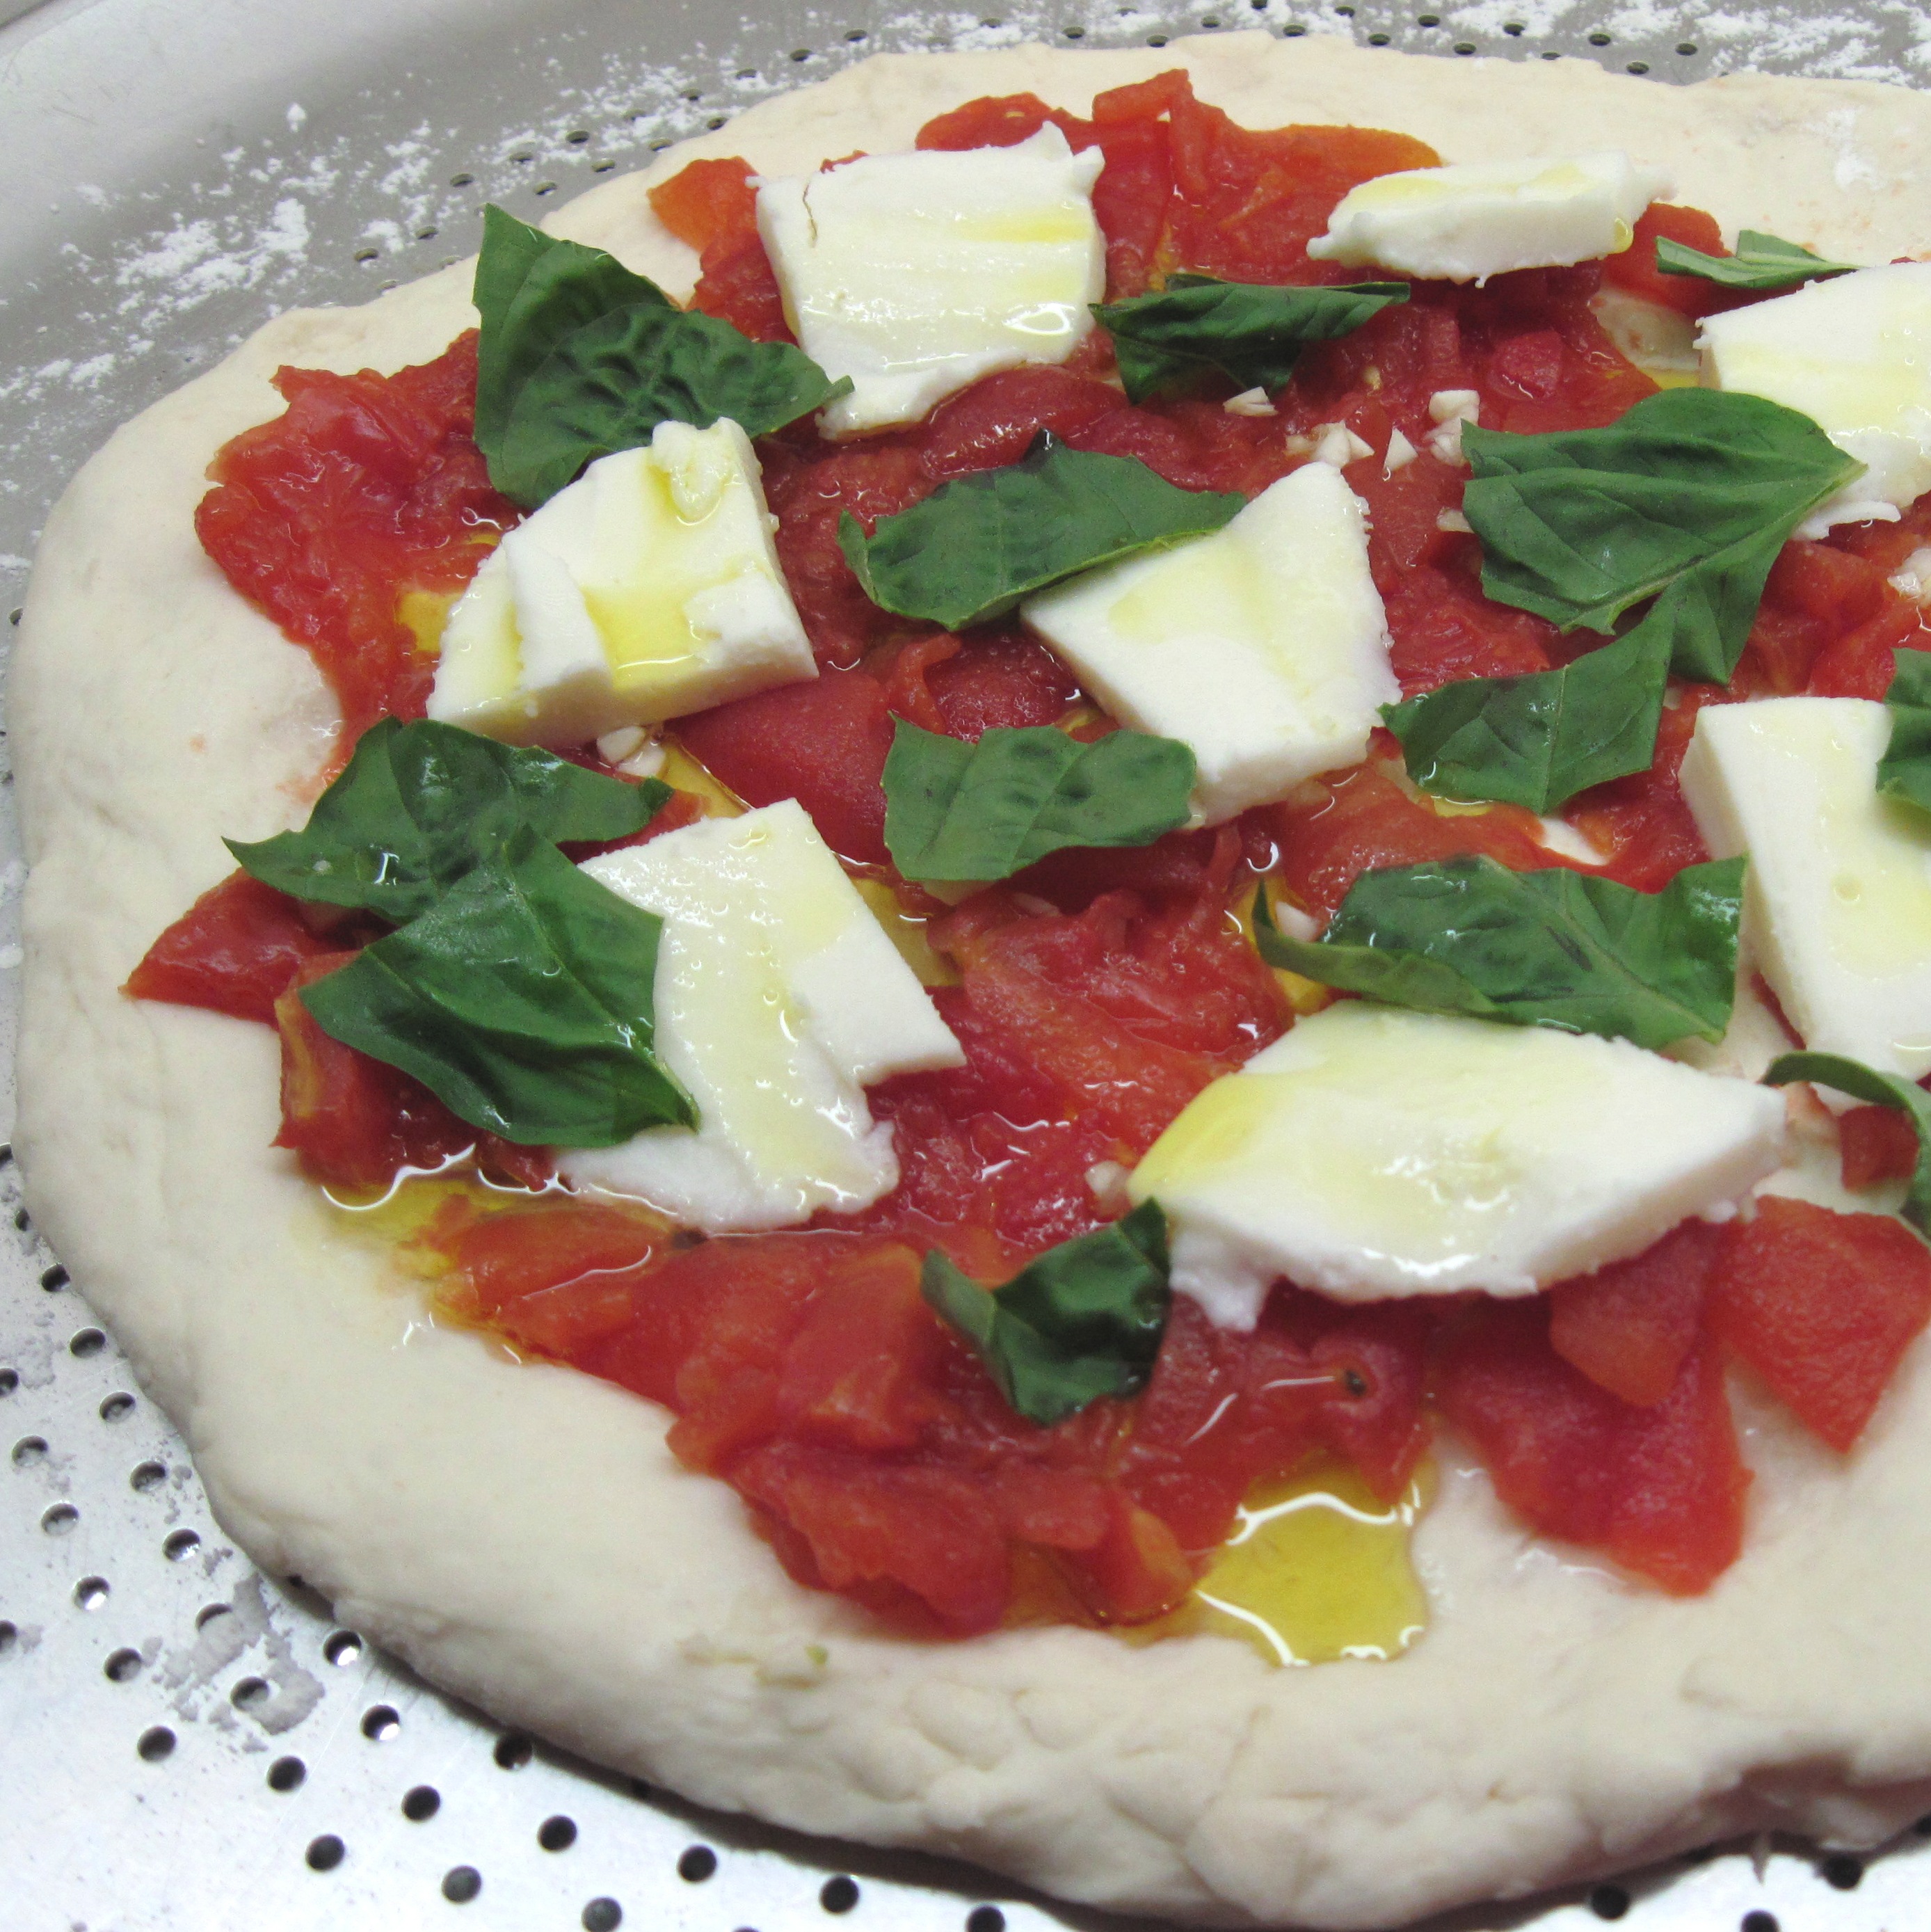
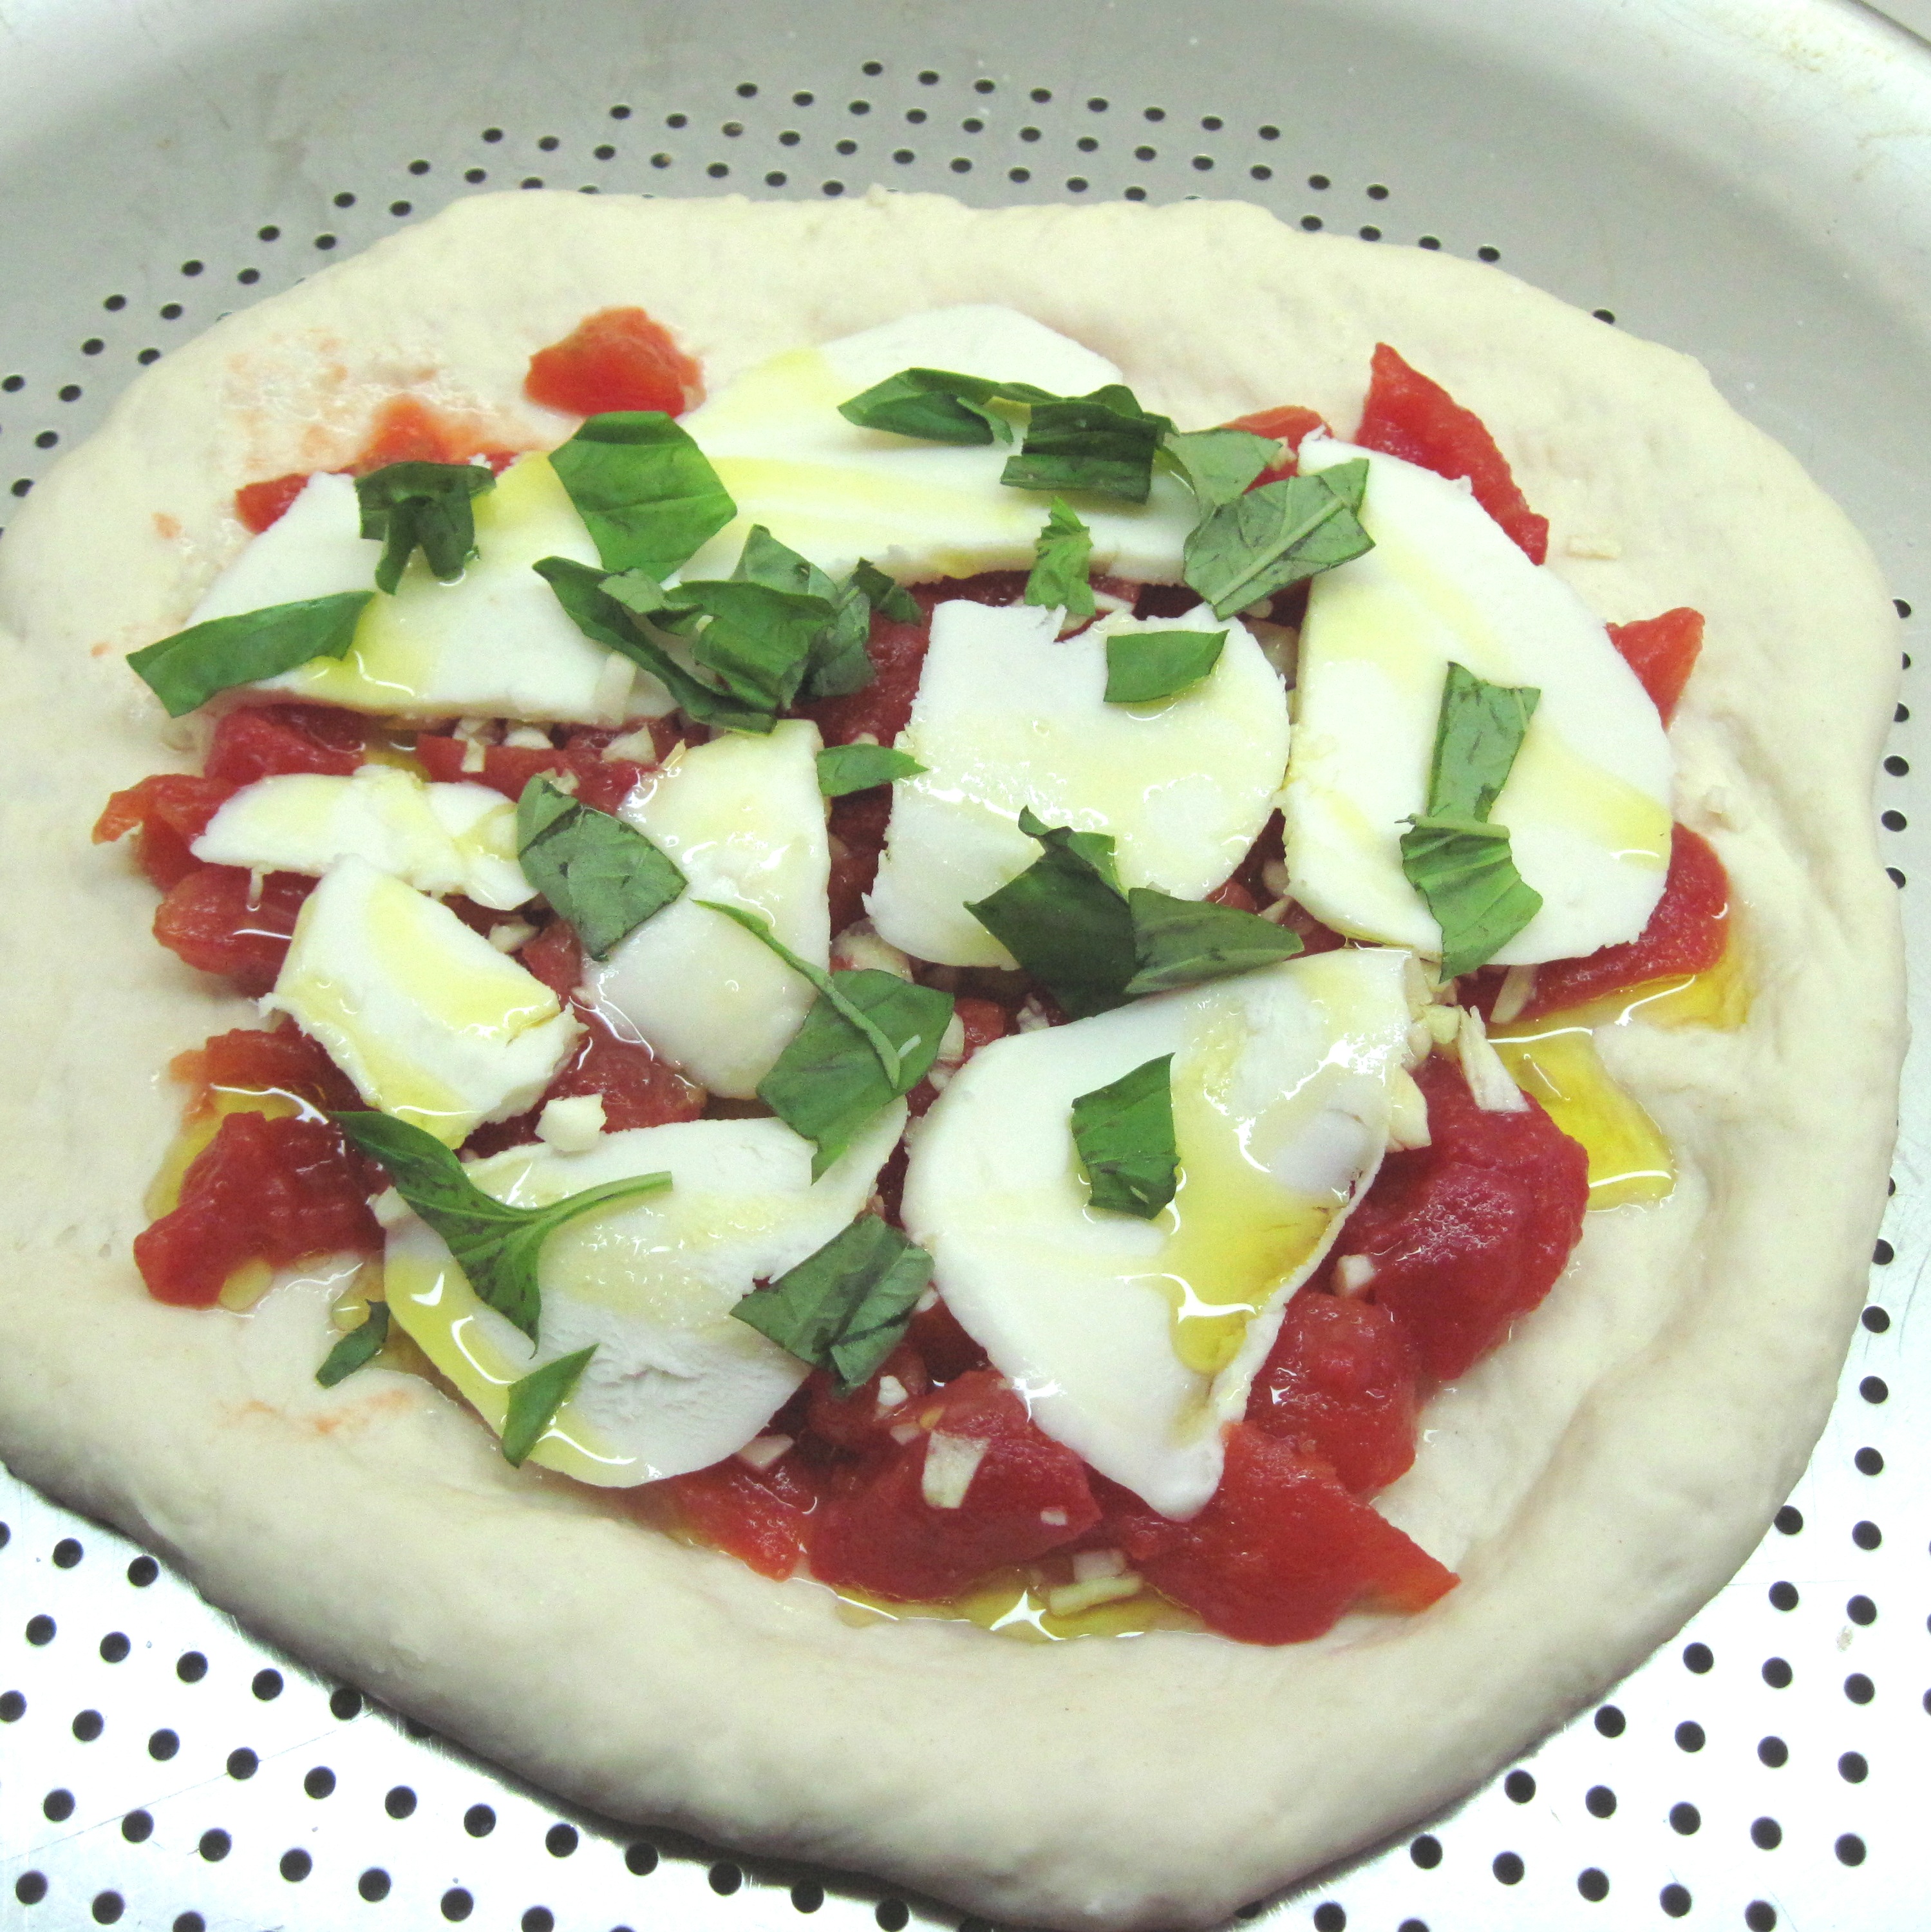
1. Top the pizza with the ingredients in the order given.
2. Bake in the preheated oven for 7 – 8 minutes.
~~~~~~~~~~~~
Neapolitan Pizza Margherita ready for the oven:

.
2. Bake in the preheated oven for 7 – 8 minutes.
Share this:

Simple Whole Wheat Bread
By Kath Dedon
.
We have so many great artisan breads to choose from in Seattle, but sometimes I crave a good whole wheat bread for sandwiches. I have yet to find a commercial one that I love, so I decided to try making a couple of loaves.
Being a novice bread maker, I was drawn to a recipe at allrecipes.com that’s called Simple Whole Wheat Bread. Simple is what I needed. And I noticed that it has over 600 mostly 5 star reviews! Their recipe makes 3 loaves; I pared it down to make 2.
If I had followed their recipe exactly for my 2 loaves, I would have used 3 1/3 cups bread flour and 2 1/3 cups whole wheat flour. I decided to use King Arthur’s White Whole Wheat Flour instead. If you have a kitchen scale, use that to measure the flour.
I consulted The Laurel’s Kitchen Bread Book for tips on the rises and shaping the loaves, and I pulled out the little recipe book for my KitchenAid stand mixer to figure out the timing for the bread hook.
Putting it all together, I baked my two loaves of bread. And here they are!! This is the first time that I made a loaf of whole wheat bread that wasn’t a brick!
This recipe really is simple. It takes some time for the risings and the baking, but the results are very rewarding!
.

.
Simple Whole Wheat Bread
(Adapted from Nita Crabb’s recipe at allrecipes.com, with guidance from The Laurel’s Kitchen Bread Book)
.
.
Makes 2 loaves
.
2 cups warm water (110˚)
3 teaspoons active dry yeast or 1⅓ packages of yeast
¼ cup honey
3 ⅓ cups (455 g) King Arthur White Whole Wheat Flour
________________
2 tablespoons butter, melted
3 tablespoons honey
2 teaspoons salt
2 ⅓ cups (280 g) King Arthur White Whole Wheat Flour
1 tablespoon butter, melted
Plus butter to butter the bowl and 2 8×4-inch loaf pans.

1. In a large bowl, mix the dry yeast and the water together and then stir in the ¼ cup honey and the 455 g of flour. (I used my KitchenAid mixer bowl since I was planning on using the dough hook for kneading.)
2. Let the bowl sit for 30 minutes. The dough will rise up and be a bit bubbly.
3. Stir in the 2 tablespoons melted butter, the 3 tablespoons honey, the salt and the 280 g of flour.
Kneading the dough
(You can, of course, knead the dough by hand if you don’t have a KitchenAid mixer, or if you just prefer to knead it by hand.)
4. Using the dough hook, and with the speed set at 2, knead the dough until it clings to the hook, about 5 minutes.

5. Knead for another 7 minutes or so, until the dough appears smooth and is elastic.
6. Put the dough on a floured board and knead by hand for about 30 seconds to bring it all together.
7. Butter a large bowl; put the ball of dough in the ball and turn it around to cover with the butter.

The first rise
8. If your kitchen is a bit cool, you can create a warm environment for the first rise with this method. Turn the oven on Warm for 1 minute. Turn the oven off. Put a container with about 2 cups of hot water in the back of the oven. Cover the bowl of dough with a towel, and put it in the oven, leaving the door ajar.
9. Let the dough rise until doubled. To check if it’s ready, wet your finger and stick it into the dough. If the indentation stays, it’s ready. (Mine was ready in about 45 minutes with the oven method.) Remove the loaves from the oven. (And remember to take the container of water out, too!)

10. Punch the dough down and divide in half.
Shaping the loaves
11. Butter two 8×4-inch loaf pans well.
12. Flatten the loaf into a rectangular shape slightly longer than the bread pan.
13. Fold the ends into the center a bit.

14. Fold the top half over into the center; then fold the bottom half over the center. Press down a bit to release any air.


15. Turn the loaf over and place in the pan, seam side down. Press the dough down with your fingers so it fits in the pan.
16. Repeat with the second loaf.

The rise in the pan
17. Cover the loaves with a damp towel and set on the counter to rise. Check after about 45 minutes. The dough will rise about an inch over the top of the pans. Wet your finger and stick it in on the side of the loaf; if an indentation remains, it’s ready.
18. At some point, while the loaves are rising, preheat the oven to 350˚.

Baking and cooling the loaves
19. When the loaves are ready, put them in the oven and set the timer for 25 minutes. Check the loaves with a thermometer. They should be 190˚ when they’re done. (Mine were in for 30 minutes, and their temperature was 203˚.)

20. Remove the loaves from the pan immediately and put them on a wire rack to cool.
21. Brush the tops of the loaves lightly with 1 tablespoon melted butter. (This is supposed to keep the crust from getting too hard.)

Share this:

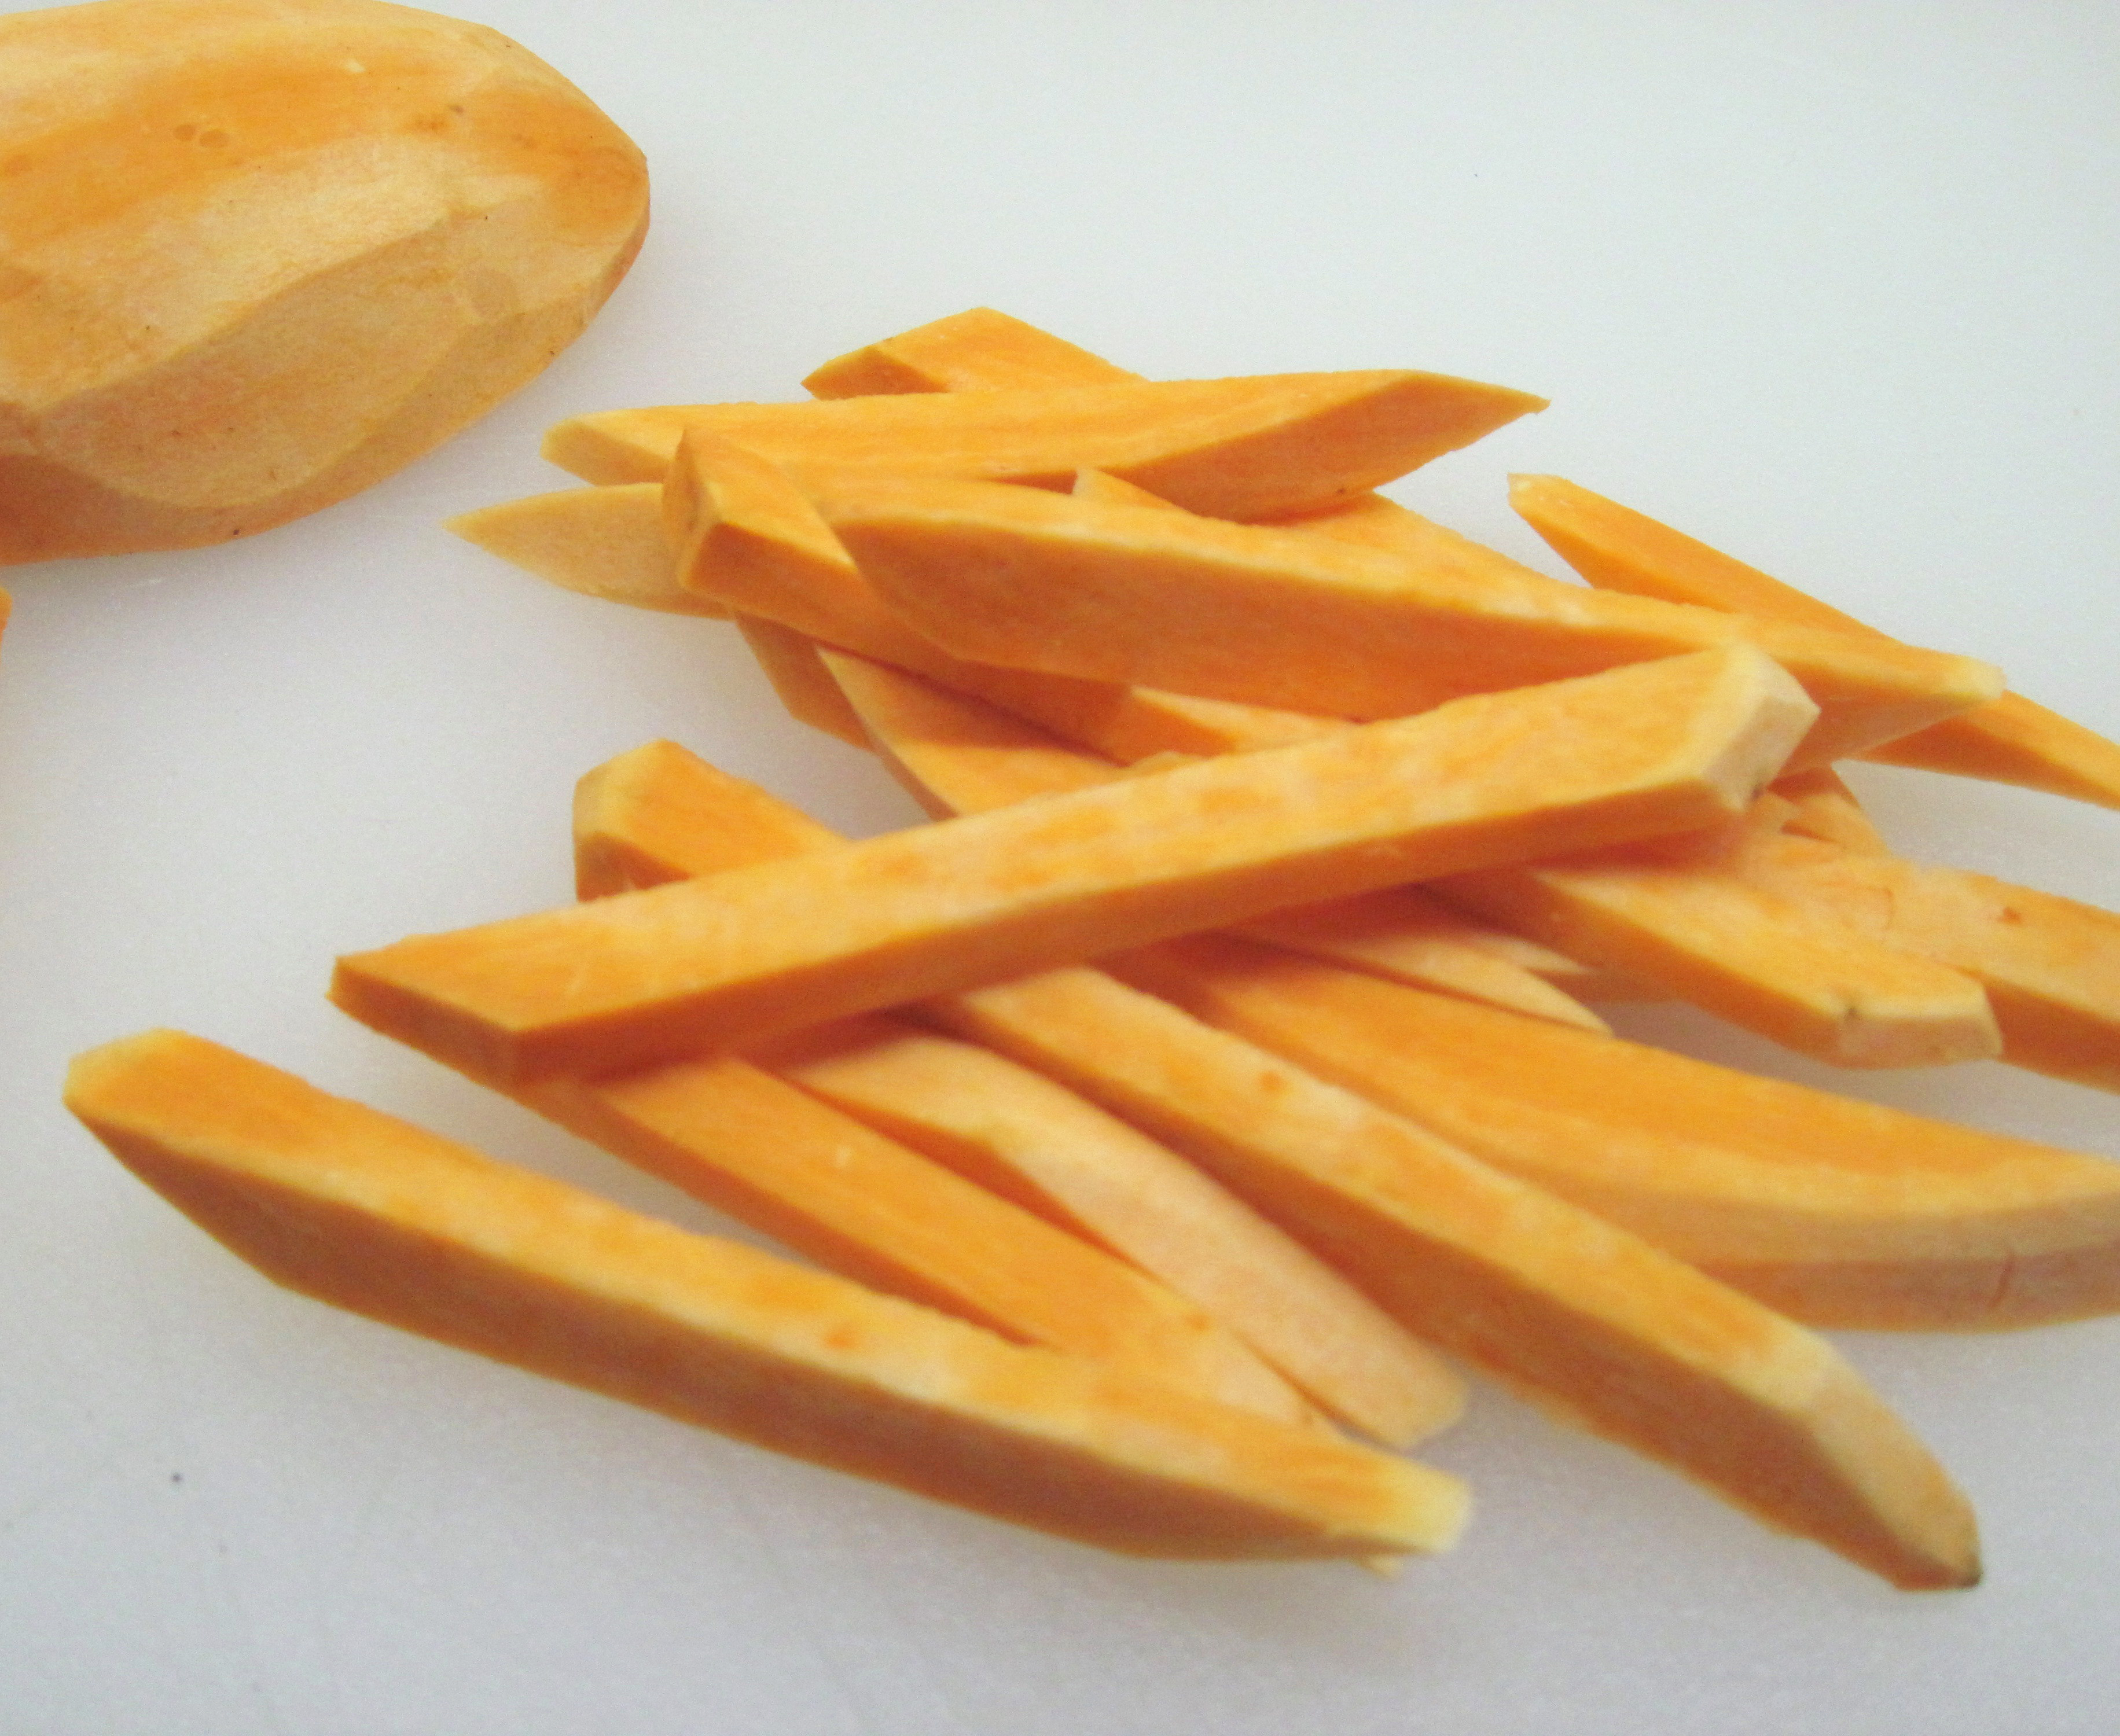
Oven “Fried” Sweet Potato Fries
By Kath Dedon
.
Sweet potato fries are a nice change from French fries and they’re easy to make. Serious Eats shared Mollie Katzen’s recipe from The Vegetable Dishes I Can’t Live Without.
I gave it a try and had delicious sweet potato fries with my lunch. I did follow the last step of drying and crisping the fries a bit in a 200˚ oven; it turned out to be a great tip!
a

a
Oven “Fried” Sweet Potato Friesa
(Adapted from a recipe found at seriouseats.com, attributed to Mollie Katzen’s The Vegetable Dishes I Can’t Live Without)
a
a
Serves 1 – 2
a
One small sweet potato
2 teaspoons oil
Salt
a
1. Preheat oven to 375˚.
2. Wash and peel the sweet potato. Slice it into long, thin pieces.
a
3. Line a baking sheet with aluminum foil. Put the potatoes on the foil and toss with the oil. Sprinkle salt over them.
4. Bake for about 10 minutes. Gently turn them with a spatula.
5. Bake until done, about 5 or 10 more minutes. (Timing will depend on how thick your sweet potatoes are sliced.) Watch them, because sweet potatoes burn more easily than regular potatoes.
At this point, they could be eaten right away, but if you want a slightly drier, crisper result, add this last step:
6. Gently turn them again and put back in the oven. Turn the oven temperature down to 200˚ and leave them in the oven for up to 20 minutes.
Share this:

Brazilian Collard Greens
Collard greens are often cooked for at least an hour, which makes them very tender. I found a totally different take on this nutritional powerhouse at epicurious.com. Brazilian Collard Greens (originally published in the September 2007 issue of Gourmet) is a quick stir-fried version.
My recipe served 2, and was a tasty side dish with our grilled steak.

(10 ounces will look like a lot of greens for two people, but they cook down a lot.)
Brazilian Collard Greens
(Adapted from a recipe at epicurious.com, originally published in the September 2007 issue of Gourmet)
Serves 2
~~~~~~~~~~~~
10 oz. collard greens
1 tablespoon oil
2 cloves garlic, minced
½ teaspoon salt
Freshly ground pepper, to taste
~~~~~~~~~~~~
Wash the collard greens well. Remove the stems and thick center ribs from the greens. Cut the leaves in half, lengthwise. Stack several leaves and roll them up; then slice the rolled leaves into ¼ inch slices.

Heat the oil in a large skillet over medium heat. Add the garlic and cook, stirring, for about 30 seconds. Add the greens, salt, and pepper to the pan. Cook and stir for 3-4 minutes, until the greens are just done.

Share this:

Chicken Enchiladas
When you roast a chicken for 2 people, you can make great meals with the leftover chicken. Last night I made chicken enchiladas. I made the enchilada sauce; for a really quick and easy meal you could substitute canned enchilada sauce.
I found a recipe in Joy of Cooking, and cut it in half to make 3 servings; you could double it and use a larger baking pan and cookie sheet to serve 4 – 6.

a
Chicken Enchiladas
(Adapted from a recipe from Joy of Cooking)
a
a
Serves 2 – 3
a
1 large onion, chopped
2 medium jalapeno peppers, seeded and chopped
2 tablespoons chopped garlic
2 tablespoons oil + oil for brushing on the tortillas
2 tablespoons chili powder
1 teaspoon ground cumin
¼ teaspoon cayenne pepper
1 28-ounce can diced tomatoes, drained
1 ½ cups cooked chicken, shredded
6 corn tortillas
½ cup shredded Monterey Jack cheese (2 ounces)
a
1. Preheat the oven to 400˚.
2. Heat the 2 tablespoons oil in a large frying pan. Add the onion, jalapeno peppers and garlic; cook, stirring often, over medium heat until just starting to brown, about 7 minutes.

3. Add the chili powder, cumin, and cayenne pepper; cook, stirring, for another minute.

4. Add the tomatoes and cook for 3 or 4 minutes.
5. Put the sauce in a blender and blend until smooth. (As always, when blending hot foods, hold the top on with a potholder to keep the top on and don’t fill it too full.)

6. Combine 1/3 cup of the sauce with the chicken.
7. Spread half of the remaining sauce in a baking pan.
8. Brush the tortillas with oil and place them in a foil-lined baking sheet. Cover with foil and put in the oven for 5 minutes.

9. You can make the enchiladas right in the baking sheet when the tortillas are warm. Put about ¼ cup of the chicken on each tortilla. Roll up and place seam-side down in the sauce in the pan.


10. Cover the enchiladas with the remaining sauce. Sprinkle the cheese over the enchiladas and bake for about 15 minutes, or until hot.


