Welcome!
You'll find over 470 of my favorite recipes here, including ideas for Quick meals, Cooking for 2, Feasting on Leftovers, and cooking with 5 Ingredients or Less. I'm adding new posts regularly; you can subscribe by email or RSS feed if you'd like to receive the latest recipes. Bon appétit!
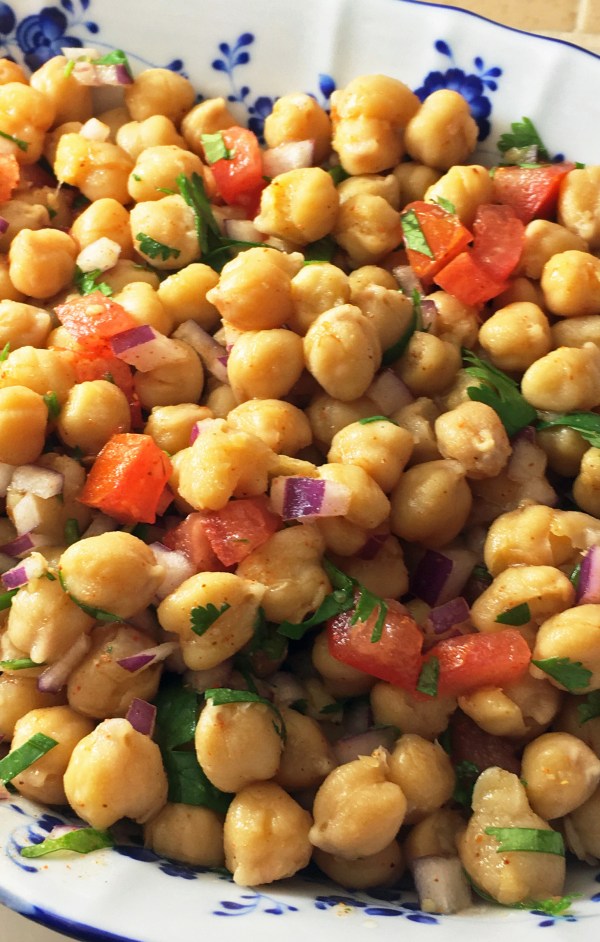
Chana Salaad (Chickpea Salad)
By Kath Dedon
There are already several chickpea salad recipes on my blog. We like chickpeas. This new recipe, though, for Chana Salaad (Chickpea Salad) is the one that we find is perfect. Bob is actually quite smitten with it, saying that I should be making it all the time.
Urvashi Pitre’s recipe in Indian Instant Pot Cookbook uses the Instant Pot to cook the chickpeas. I think freshly cooked chickpeas really make a big difference. If you don’t have an Instant Pot, you could cook the chickpeas on the stovetop, or substitute 2 cans of chickpeas.
The first time I made this Chana Salaad I did wonder about Urvashi’s instructions to cook the dried chickpeas under pressure for 20 minutes, but I followed her directions. Sure enough, the beans weren’t done. That was really no problem. I simply sealed the pot again and cooked them for another 20 minutes and they were perfect.
In hindsight, I think she might have meant to have you cook soaked chickpeas for 20 minutes. Since I love to skip the soaking step with my Instant Pot, the next time I made this I cooked the dried chickpeas for 40 minutes. Perfect!
Give this Chana Salaad a try! Leftovers keep well. (We might have had leftover Chana Salaad for breakfast.)
If you have an Instant Pot and love Indian food, I highly recommend Urvashi’s book!

.
Chana Salaad (Chickpea Salad)
(Adapted from Urvashi Pitre’s recipe in Indian Instant Pot Cookbook)
Serves 4 – 6 (depending on how many other courses are served)
The olive oil added to the beans helps to keep the foam down. Foam can clog the pressure valve.
While you can use canned chickpeas, I think you’ll find this recipe is vastly improved if you use freshly cooked beans.
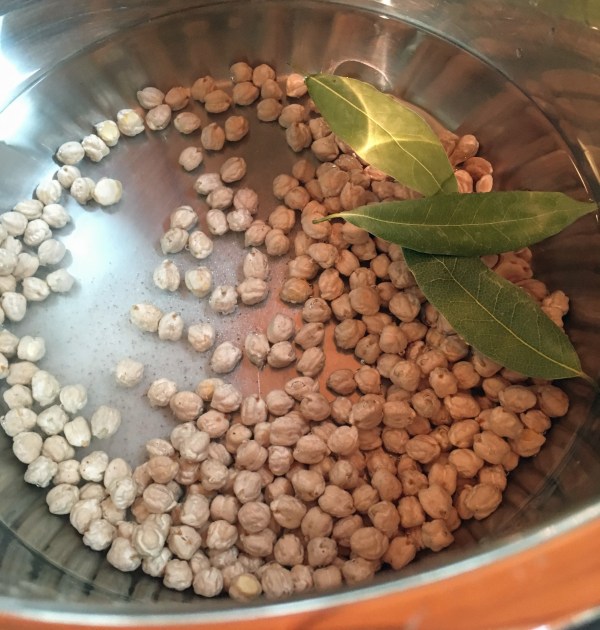
To cook the chickpeas
1 cup dried chickpeas, rinsed and drained
3 bay leaves
4 cups water
1 teaspoon salt
1 tablespoon olive oil
For the salad
1 cup finely minced red onion
1 large plum tomato, seeded and diced
½ cup chopped fresh cilantro
Drained cooked chickpeas (or 2 cans rinsed and drained chickpeas)
1 teaspoon salt
½ teaspoon ground cayenne pepper
¼ cup freshly squeezed lemon juice
- Combine the chickpeas, water, bay leaves and salt in the Instant Pot.
.
2. Stir in the olive oil. Seal the lid. Use high pressure with the Bean/Chili function, and set the time for 40 minutes.
3. When the time is up, use the natural pressure release (in other words, don’t do anything) for at least 10 minutes. (Longer is OK.) Then use the quick release and remove the lid. Drain the chickpeas and discard the bay leaves.
4. Combine the red onion, tomato, and cilantro in a large bowl.
5. Add the chickpeas to the bowl with the salt, cayenne pepper and lemon juice. Stir well to distribute the lemon juice and seasonings and serve.
.
Share this:

Air Fryer Chicken Wings
By Kath Dedon
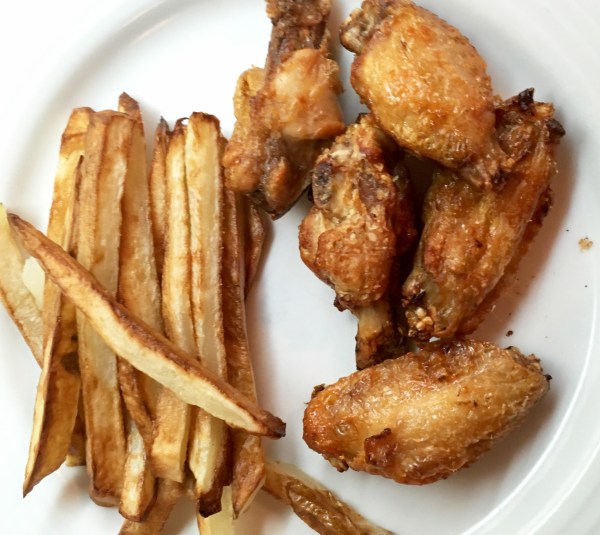
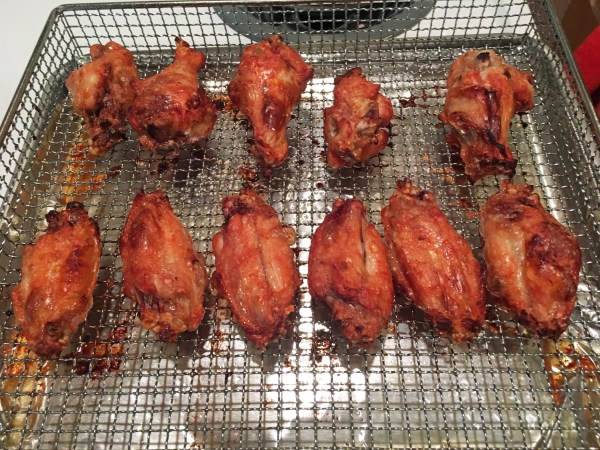
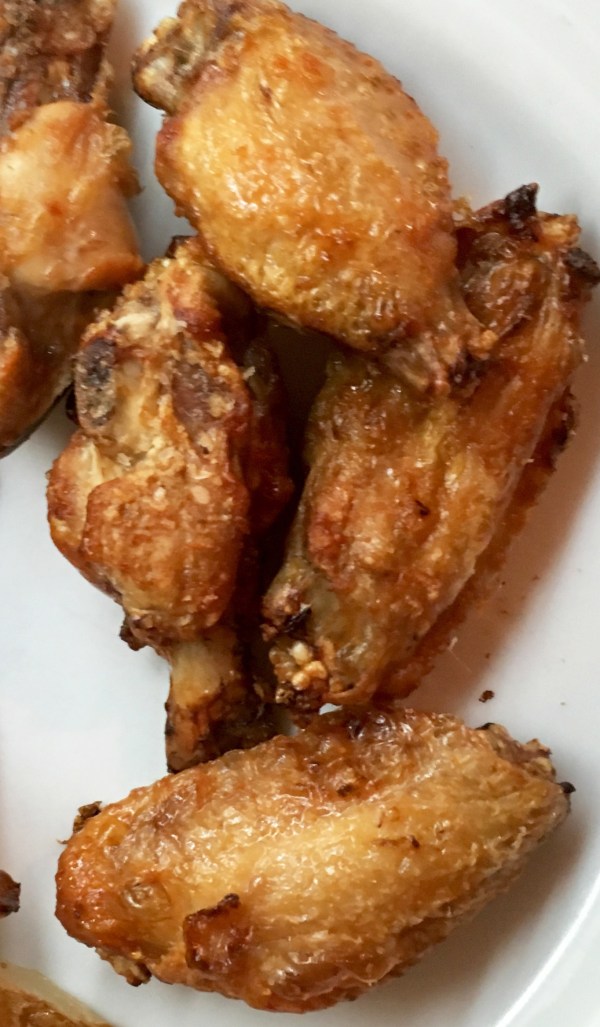
Air Fryer Chicken Wings are the best chicken wings I have ever had! They are crispy, not at all greasy, and the meat is moist and cooked perfectly.
My family will tell you that I was pretty clear that I really, really wanted the Cuisinart® AirFryer Toaster Oven. Bob “surprised” me with it for my birthday, which happens to be a few days before Christmas. That meant I could make 3 batches of chicken wings for an afternoon snack on Christmas Day!
The reason I wanted this particular air fryer is because it’s a multi-talented toaster oven that not only air fries, but it also bakes, convection bakes, broils, convection broils, warms, and makes toast. I also like the fact that it has a window and an oven light, so it’s easy to check on how things are going.
So far, I’ve only used the air fryer, baking, and warming functions. I baked perfect potatoes. I warmed some leftovers. I made a batch of cookies with a large, full sheet of cookies in my regular oven, and I was able to bake the few cookies that were left at the same time in my toaster oven. They were perfect. It’s really nice to have a second oven that works well.
These Air Fryer Chicken Wings were the first thing I made. I just followed the recipe in the small Cuisinart cookbook that came with the oven. We were amazed at how good they were. Using no oil and seasoning them only with kosher salt made the perfect wings.
Air Fryer Chicken Wings and Fries
.
Air Fryer Chicken Wings
(Adapted from the recipe that came with the Cuisinart AirFryer Toaster Oven)
Makes about 11 wing sections
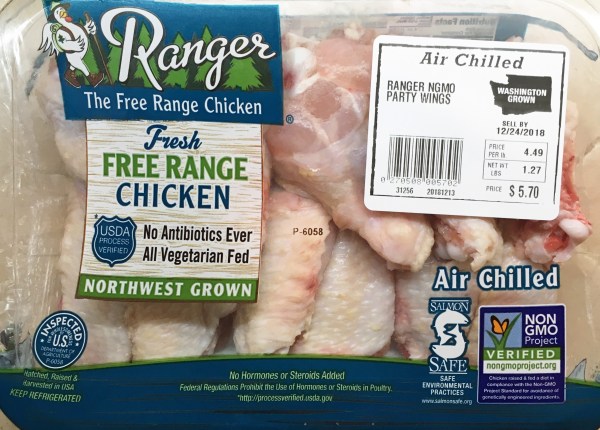
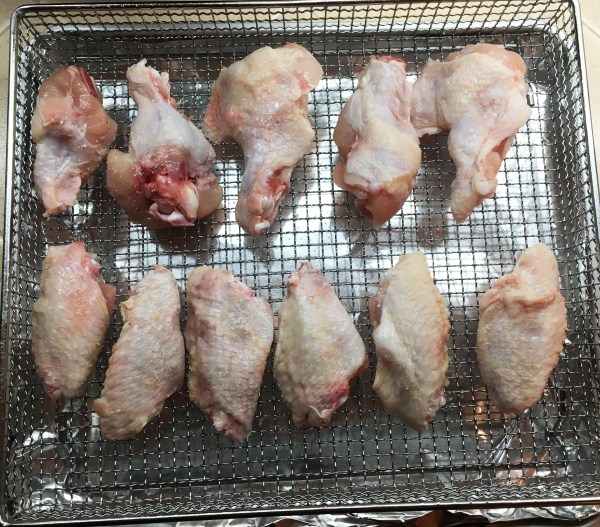
1¼ pounds “party” chicken wings (drumette and flat sections)
Kosher salt
,
- Sprinkle kosher salt over both sides of the chicken wings.
- Put the air fryer basket on the baking pan. (Line the baking pan with foil, if desired, for easier clean up.) Put the salted chicken wings in the basket.
.
.
3. Put the pan and basket in the middle position of the oven. Set the oven to the Air Fry function and 400°.
4. Set a timer for 10 minutes. (I use my cell phone timer because the one complaint that people seem to have about this air fryer is that the timer is not accurate.)
5. When the timer goes off, take the pan out of the oven and turn the wings over.
6. Return to the oven and set the timer for 10 minutes. Enjoy!
Some of my family liked Frank’s Red Hot Sauce with the wings, but Bob and I both loved them plain.
.
Share this:

The Best Yorkshire Pudding
By Kath Dedon
.
J. Kenji López-Alt calls this “The Best Yorkshire Pudding”. I found his recipe on Serious Eats and made it to serve with our Christmas dinner. I made my Perfect Rib Eye Roast for the main attraction.
Yorkshire puddings typically call for using beef drippings from the roast, but my roast never produces enough drippings. Kenji suggests using drippings, lard, shortening, or vegetable oil. I used a couple of tablespoons of drippings from the roast and added melted duck fat to make the ½ cup of fat needed to finish the Yorkshire pudding.
This Yorkshire Pudding recipe is SO easy to make and it drew rave reviews at the table. I had to share it on the blog to keep the recipe handy for future feasts at Chez Dedon.
The secret is to make the batter the day before. Kenji did all of the scientific experiments, and found that Yorkshire Pudding rises much higher if the batter has been made ahead of time. You just whisk the ingredients together and refrigerate overnight. When the roast is done, you take it out of the oven to rest and make the Yorkshire Pudding. Simple!
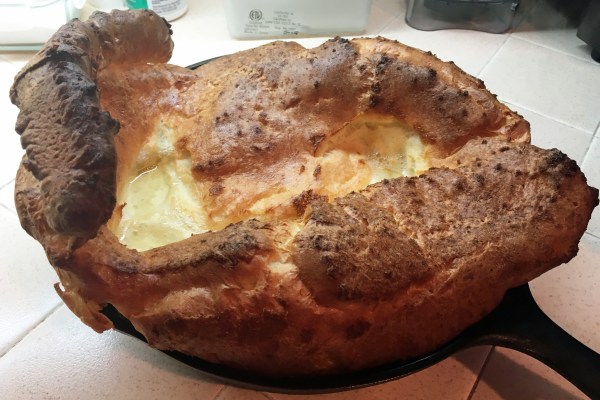
I made mine in my 10-inch cast iron skillet. If you have a 10-inch skillet that is oven-safe it is clearly the easiest pan to use because you don’t have to divide the fat and batter between multiple wells. According to Kenji, you can also use two 6-well popover tins, one 12-well standard muffin tin, one 24-well mini muffin tin, or two 8-inch cast iron skillets.
I know I’ll be making The Best Yorkshire Pudding again. There’s no reason not to with such an easy recipe! I might try it in my 12-inch cast iron skillet next time. I think it would work. If you try that, please let me know how it works for you!
My pudding rose so high! I think it would work in my 12-inch skillet next time.
The Best Yorkshire Pudding
(Adapted from J. Kenji López-Alt’s recipe on Serious Eats)
Makes one 10-inch skillet-sized, or two 8-inch skillet-sized, 8 popover-sized, 12 muffin-sized, or 24 mini muffin-sized puddings
For the batter
4 large eggs (200g)
1 cup plus 2 teaspoons (150g) all-purpose flour
¾ cup (175g) whole milk
1 tablespoon plus 2 teaspoons (28g) water
½ teaspoon (2g) kosher salt
To finish the Yorkshire Pudding
½ cup beef drippings, lard, shortening, vegetable oil, or duck fat (I used about 2 tablespoons of beef drippings and then added duck fat to make ½ cup.)
- Whisk the eggs, flour, milk, water, and salt together to make a smooth batter. Pour into a container, preferably something like a Pyrex quart measuring cup. Cover and refrigerate overnight, or for up to 3 days.
- Put the oven rack in the center position and heat the oven to 450°.
- Put the ½ cup drippings or other fat in the 10-inch skillet. (Or microwave the fat to liquefy it if it is solid, and divide it between the two 8-inch skillets, 8 popover cups, 12 muffin cups, or 24 mini muffin cups.)
- Put the skillet (or muffin tins) in the hot oven and heat for about 10 minutes, until the fat is “smoking hot”.
- Pour the batter into the skillet. (Or divide it between the wells of the tins. Each one should be between ½ and ¾ full. The skillet should be about ¼ filled.)
- Bake until the Yorkshire pudding has quadrupled in size, is browned, and sounds hollow when tapped. My 10-inch skillet took 24 or 25 minutes. Smaller muffins will take about 15 minutes; popover-sized or 8-inch skillets will take about 25 minutes.
- For the 10-inch skillet pudding, cut into 8 pieces and serve immediately.
Share this:

The Best Greek Chicken and Potatoes
By Kath Dedon
.
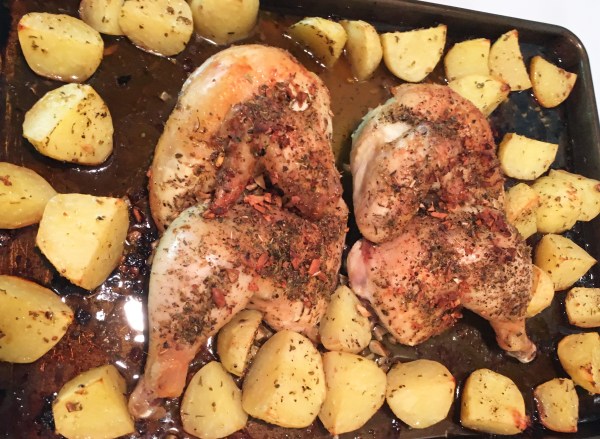
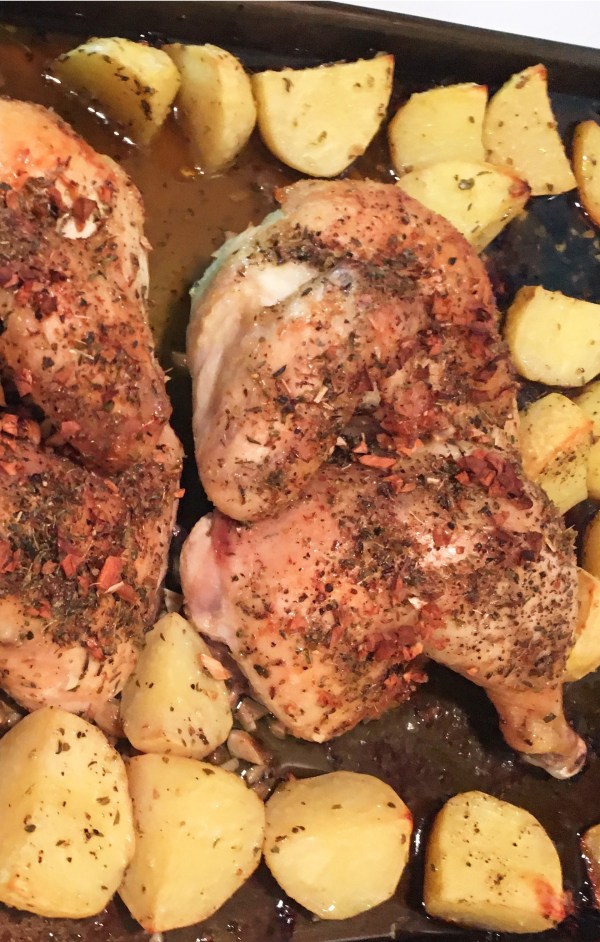
The Best Roast Greek Chicken and Potatoes is pretty darn good! Heather Christo posted it on her blog, heatherchristo.com, saying it’s one of her most popular recipes. I decided to make it for Laura and Byron and took it over to their house, along with Chopped Greek Salad with Feta Cheese. (They had their adorable baby boy, our grandson, 3 weeks ago today!*) They declared that it was a “winner winner chicken dinner”! It’s so easy to make, I know it won’t be too long before I make it again.
I used a 4.5-pound whole chicken and cut it in half. I don’t see why you couldn’t use about 4 pounds of your favorite chicken pieces if you don’t want to split a whole chicken.
Don’t skimp on the lemon juice, olive oil, oregano, or garlic. They are the key flavor ingredients.
.
The Best Roast Greek Chicken and Potatoes
(Adapted from Heather Christo’s recipe on heatherchristo.com)
Serves 4 – 6
1 whole 4 – 4.5 pound chicken split in half
2 large lemons
11 garlic cloves
2 tablespoons dried Greek oregano
1 cup olive oil
6 medium Yukon gold potatoes
Kosher salt and pepper
- Preheat the oven to 350°.
- Place the chicken halves on a sheet pan.
- Cut one of the lemons in half and squeeze all of the juice over the chicken. Rub the lemon halves over the chicken.
- Pour ¼ cup of the olive oil over the chicken.
- Season the chicken generously with salt and pepper. Sprinkle 1 tablespoon of the oregano over the chicken.
- Peel and mince 5 of the garlic cloves and sprinkle over the chicken.
- Peel and quarter the potatoes and put them in a large bowl.
- Peel and mince the remaining 6 garlic cloves and sprinkle over the potatoes.
- Add the remaining ¾ cup olive oil, 1 tablespoon oregano, and the juice of the second lemon to the bowl of potatoes. Sprinkle with salt and pepper and gently toss so everything is evenly distributed.
- Put the potatoes and all of the seasoned olive oil around the chicken on the sheet pan.
- Roast until the chicken is done (165°, measured with an instant read thermometer), about 1 hour and 10 – 15 minutes.
- Remove the chicken and potatoes to a serving dish. Pour all of the remaining sauce in the sheet pan over the chicken and potatoes.
.
.
.
* Emerson, 16 days old, and his dog, Louie (photo by Laura)

.
Share this:

Chopped Greek Salad with Feta Cheese
By Kath Dedon
.
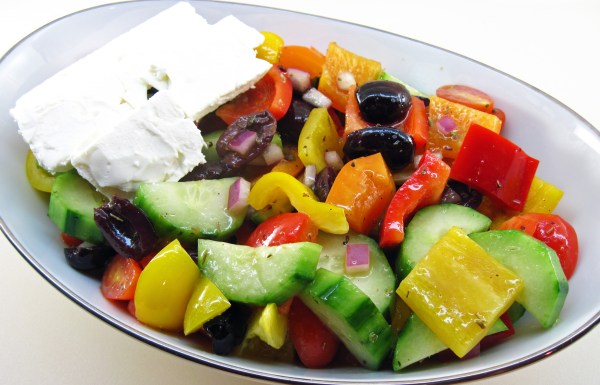
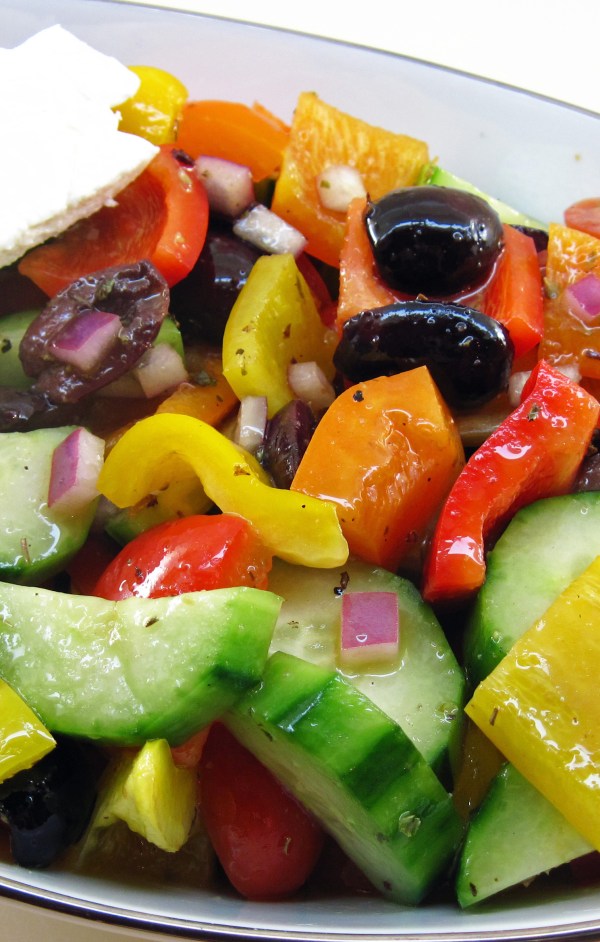
This Chopped Greek Salad with Feta Cheese is colorful and delicious! It’s best made ahead of time, so it’s perfect for entertaining, potluck parties, or your holiday table.
The recipe is adapted, barely, from Kalyn Denny’s recipe on her blog, Kalyn’s Kitchen. Kalyn uses Newman’s Own Olive Oil and Vinegar Dressing. I made a quick batch of Zesty Homemade Italian Salad Dressing and used that instead.
Kalyn cuts the Feta cheese into cubes and stirs it into the finished salad. I served it on the side. If it’s served on the side, people who like Feta can add it to their servings, and people who avoid dairy or who are vegan can enjoy the salad without it.
I highly recommend this Chopped Greek Salad with Feta Cheese for this busy holiday season!
.
.
Chopped Greek Salad with Feta Cheese
(Adapted from Kalyn Denny’s recipe on Kalyn’s Kitchen)
Serves 3 – 4
1 cup grape tomatoes, cut in half
1 English cucumber, peeled, cut in half lengthwise, and sliced
½ red bell pepper, cut into ¾-inch squares
½ yellow bell pepper, cut into ¾-inch squares
½ orange bell pepper, cut into ¾-inch squares
½ cup pitted Kalamata olives, cut in half (or sliced Kalamata olives)
¼ cup chopped red onion
½ cup diced Feta cheese (or more), or sliced Feta served on the side
Dressing
½ cup Zesty Homemade Italian Salad Dressing (or Newman’s Own Olive Oil and Vinegar Dressing)
1 teaspoon dried oregano
- Mix the oregano into the salad dressing and set aside.
- Put the tomatoes, cucumber, peppers, olives, and red onion in a bowl.
- Pour the desired amount of salad dressing over the salad. (I used almost all of it.) Gently stir the salad so the dressing is well-distributed.
- If adding the Feta cheese to the salad, stir the cheese into the salad. Otherwise, serve it on the side.
- The salad can be served immediately, but it’s even better if it’s allowed to marinate at room temperature for an hour or two. Refrigerate leftovers; it keeps well.
.
.
The Chopped Greek Salad with Feta Cheese was part of a meal that I delivered to Laura and Byron. They welcomed our little grandson, Emerson, into the world 20 days ago. He was born on November 25.
That’s right! I’m a first-time Grammy! Of course, Emerson is the most beautiful baby ever born! GrandpaDude (Bob) and I are thrilled!! (I’m speaking with a lot of exclamation points these days. 😉 )
(Oh, and Laura wanted me to let you know that they loved the salad! 🙂 )
.
Laura, Byron, and Emerson

Photo by Bella Baby Photography
.
.
Share this:

A Few of Our Favorite Holiday Treats
By Kath Dedon
.
Can you believe that Christmas is just two weeks away?
We don’t have desserts on a regular basis, but this is one time of year when we like to indulge in a few favorite treats. A few days ago Laura suggested that I should post some of our holiday favorites. I thought it was a great idea. So without further ado, here they are. (Just click on the names of the desserts for the recipe.)
.
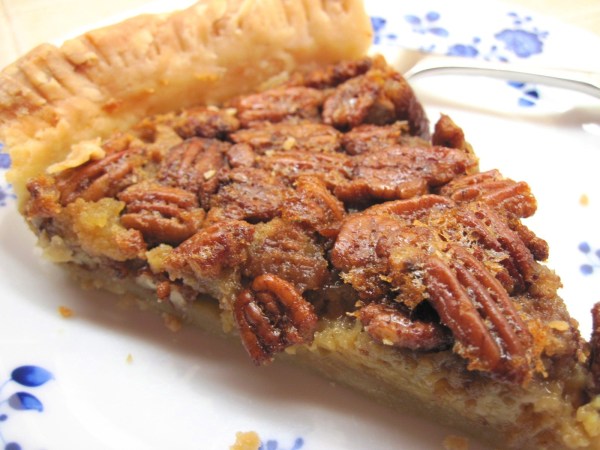
Our favorite holiday pies!
.


.
,
Naturally Sweetened Pumpkin Pie

.
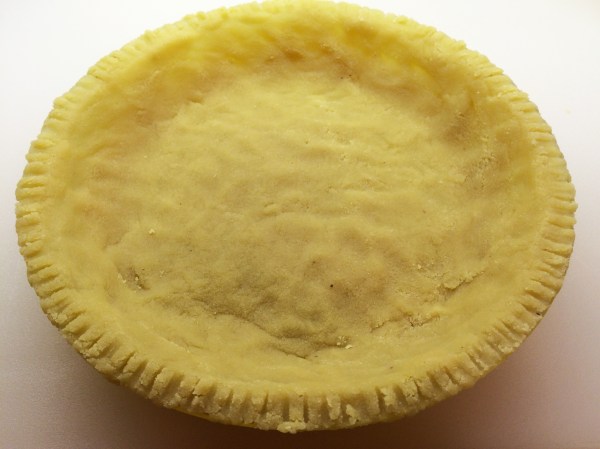
If you need a gluten-free option, this Almond Flour Pie Crust works very well with the pecan or pumpkin pie recipes.
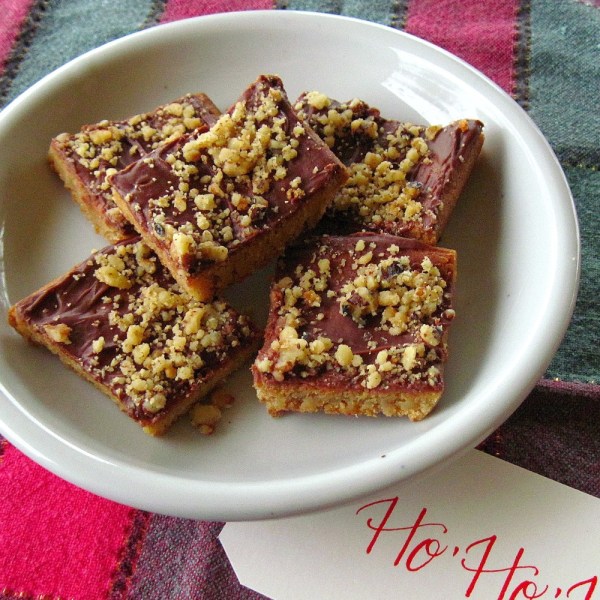
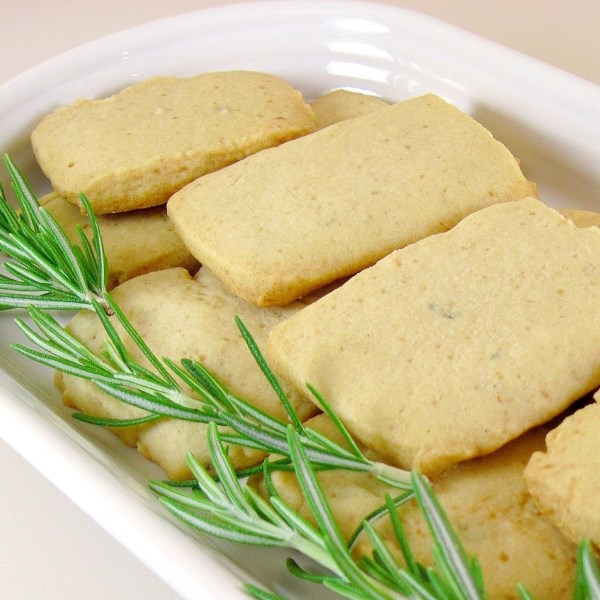
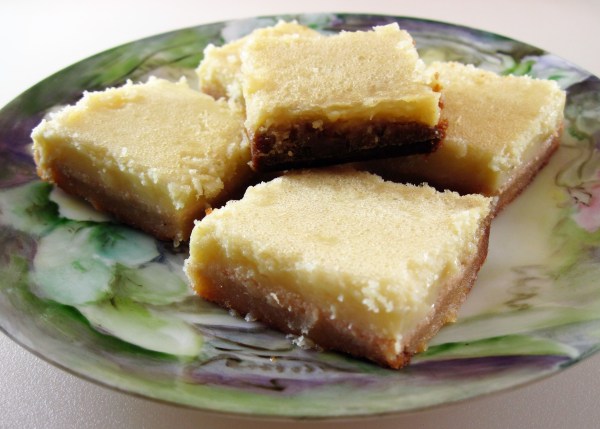
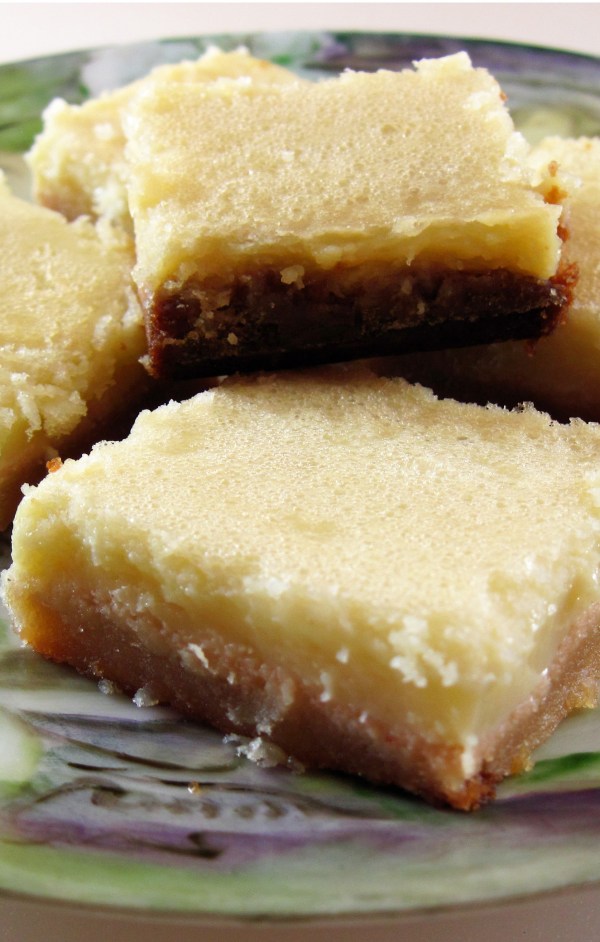
Our Favorite Holiday Cookies!
.
.
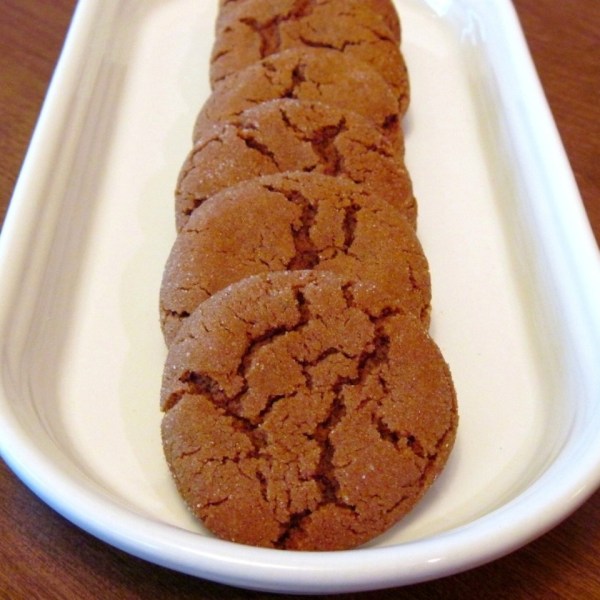
Sugar Cookies….aka Million Dollar Cookies


.
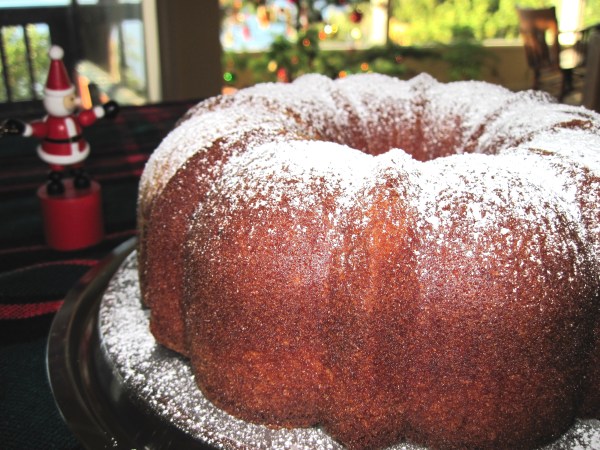
And one spectacular holiday cake!
.
This Portuguese Orange Olive Oil Cake should be made a couple of days before serving, and it deliciously serves a lot of people. A holiday win-win!
Wishing you and yours a very happy and tasty Holiday Season!
.
.
Share this:

The Simplest and Best Shrimp Dish
By Kath Dedon
.
The Simplest and Best Shrimp Dish is my take on a Mark Bittman recipe. It is indeed simple, but is it the best? I don’t know about that, but it certainly is good enough that I made it twice in one week. Bittman calls it a Spanish tapa-style dish and says that everyone he’s served it to has loved it. Perhaps it is the Best!
The most time-consuming part of this recipe is peeling the shrimp, but even that doesn’t take too long. And if you buy shrimp that’s already peeled and deveined, the recipe is even simpler!
Be sure to have all of the ingredients ready to go (mise en place) because the cooking goes really quickly.
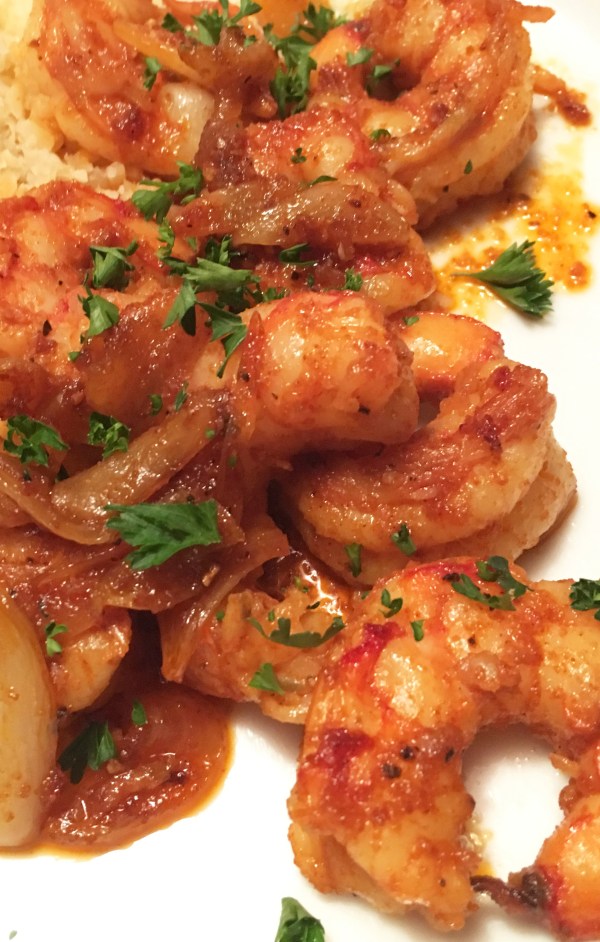
Bob and I really did enjoy this Simplest and Best Shrimp Dish! Just writing about it is making me crave it. The first time I made it I just served it by itself on a plate. The second time I served it with cauliflower rice. It would be great served over rice or by itself with a good bread to sop up the flavorful sauce. I’ll be making this again soon; it’s sure to be part of our regular rotation.
.
Served with cauliflower rice

.
The Simplest and Best Shrimp Dish
(Adapted, barely, from Mark Bittman’s recipe on his website and in the 10th Anniversary edition of How to Cook Everything)
.
n
Serves 4
.
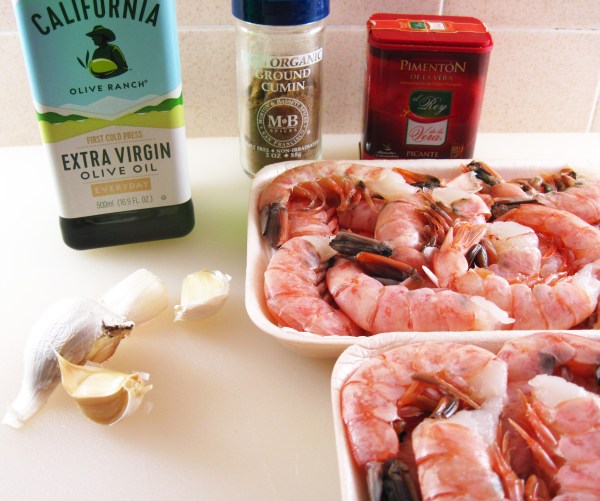
1/3 cup extra virgin olive oil
4 cloves garlic, peeled
1½ pounds shrimp
1 teaspoon ground cumin
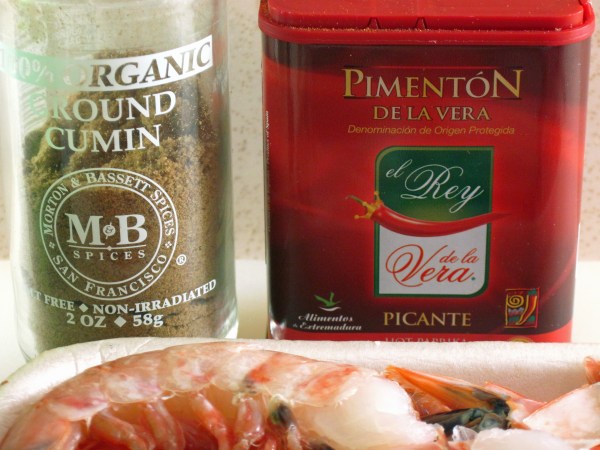
1½ teaspoons hot smoked paprika (Look for the word “picante” on the label.)
Salt and freshly ground black pepper
Chopped fresh parsley leaves, for garnish (optional)
.
Ingredients for the Simplest and Best Shrimp Dish
.
.
- If the shrimp aren’t already peeled and deveined, do that first and set aside.
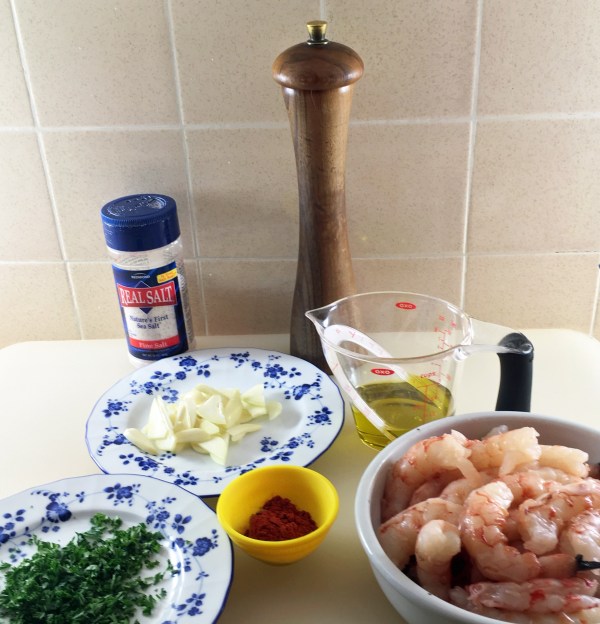
- Slice the garlic into thin slivers. Measure out the cumin and paprika. (You can put them both in the same dish.) Prep the parsley, if using.
.
Ingredients “mise en place” (ready to go)
.
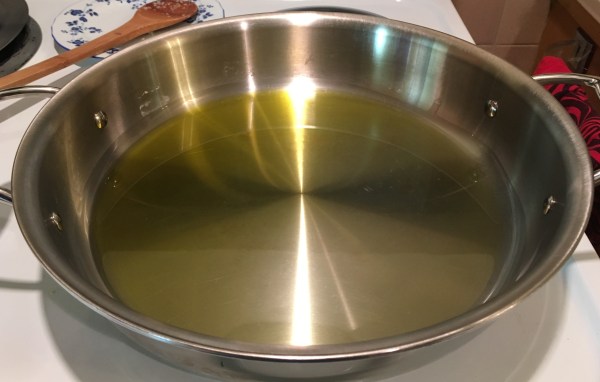
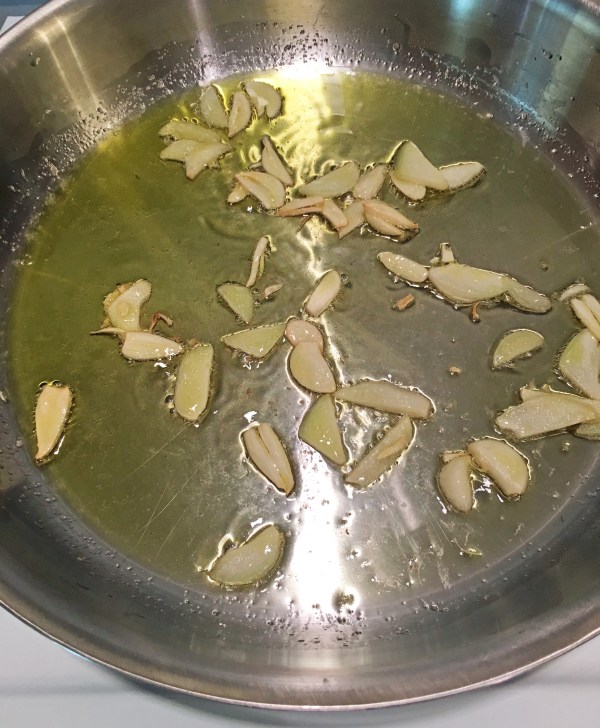
3. Heat a large skillet over low heat. When hot, add the olive oil and let it heat up.
4. Add the garlic to the pan and cook, stirring often, until it is starting to brown.
5. Raise the heat to medium-high. Add the shrimp, the cumin and paprika, and a bit of salt and pepper.
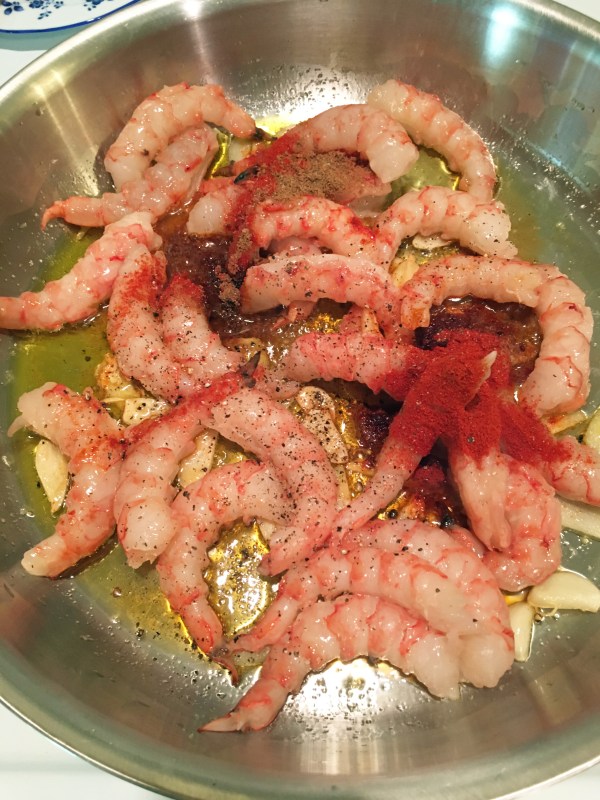
6. Stir to distribute the spices.
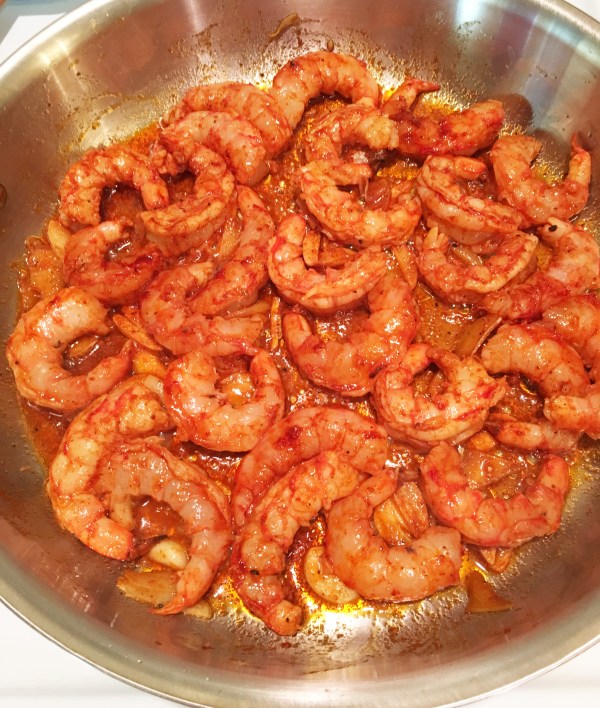
7. Cook, stirring often, until the shrimp are done. It will take 5 -10 minutes. (Timing will depend on the size of your shrimp and the heat of the pan.)
8. Serve, garnished with parsley, if desired.
.
.
Share this:

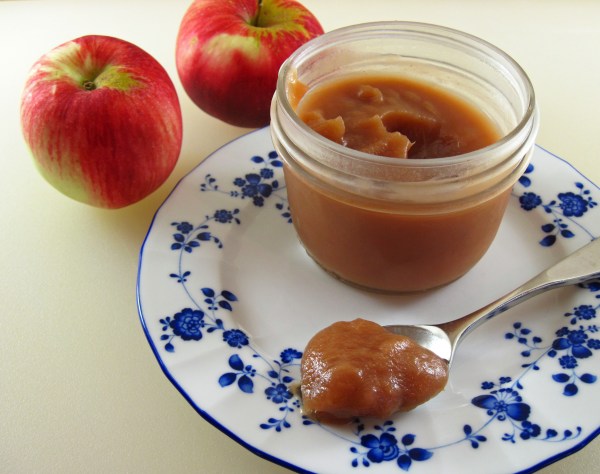
Instant Pot Apple Butter
By Kath Dedon
.
We had a big crop of Akane apples this year. I decided to use some of them to make Ashley Singh Thomas’ recipe for Instant Pot Apple Butter. I found the recipe on her blog, My Heart Beets. I had had my eye on her recipe for a while. When Carrie told me she made it with some of the apples we gave her and how fabulous it is, I had to make it!
I love the fact that Ashley leaves the peels on. That really simplifies the prep work. I treated myself to a Cuisipro Apple Corer which worked great. I had 4½ pounds of apples prepped in under 30 minutes.
Ashley said she used 5½ pounds of apples in her 6-quart Instant Pot, but mine was looking pretty full with just 4½ pounds so that’s what I used. I did not reduce the other ingredients.
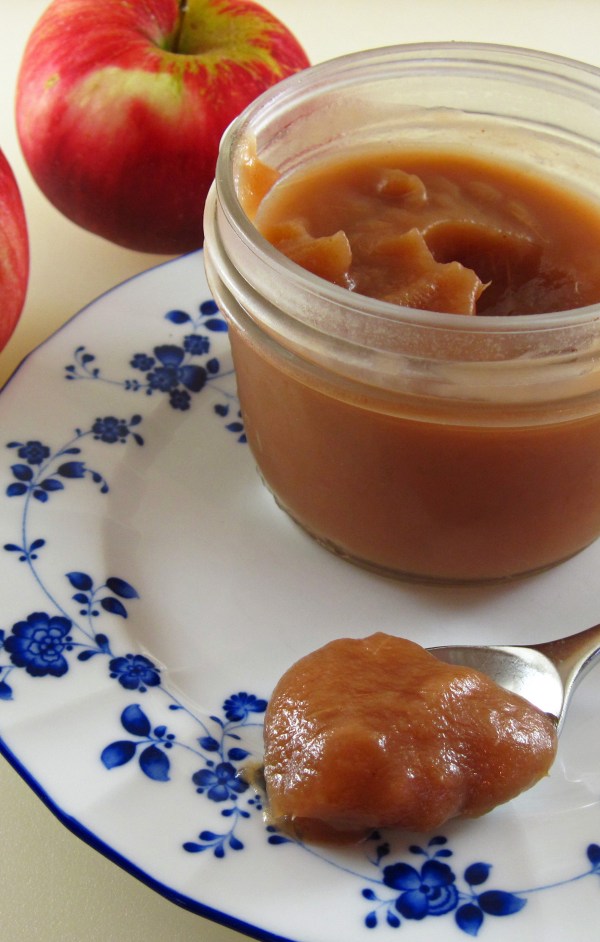
I put the finished apple butter in half-pint jars. I have one jar in the refrigerator to eat now and the others are in the freezer. I understand that apple butter freezes really well. We can look forward to enjoying Instant Pot Apple Butter over the next few months.
If you have an abundance of apples and an Instant Pot, I highly recommend this recipe!
.
A couple of Akane apples from our tree and Instant Pot Apple Butter
.
Instant Pot Apple Butter
(Adapted from Ashley Singh Thomas’ recipe on My Heart Beets)
.
.
The final quantity will depend on how much you cook it down in the last step. I ended up with a little over 5 cups of apple butter.
.
You may wonder why this recipe only uses ¼ cup of water when Instant Pot recommends at least 1 cup of liquid. Amy + Jacky, in the comments on their version of Instant Pot Apple Butter, say that the apples release a lot of juice as they’re heated, so ¼ cup of water is enough. Indeed, it worked fine for me.
.
4½ pounds of apples
¼ cup water
½ teaspoon cinnamon
Pinch of ground cloves
Pinch of freshly grated nutmeg, optional (I didn’t use it.)
Sugar, optional (I used 1 tablespoon of coconut sugar, but I think it would have been great without any sweetener.)
.
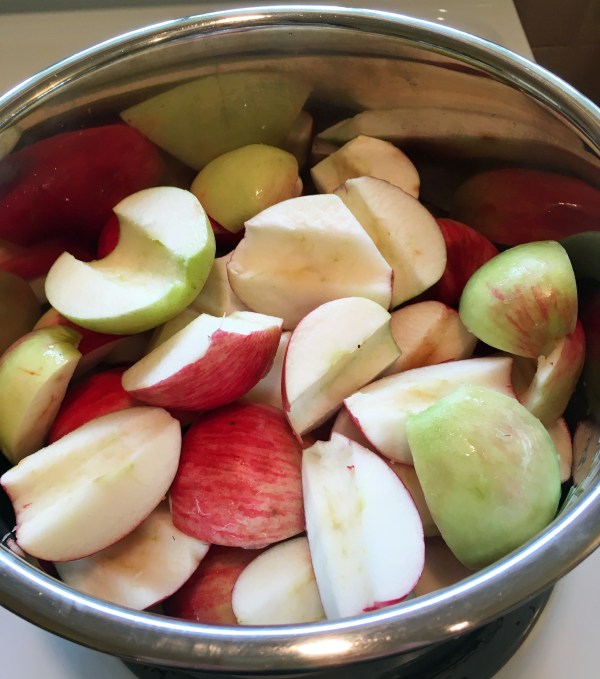
- Wash, core, and quarter the apples.
- Put the apples in the Instant Pot and add ¼ cup water.
.
.
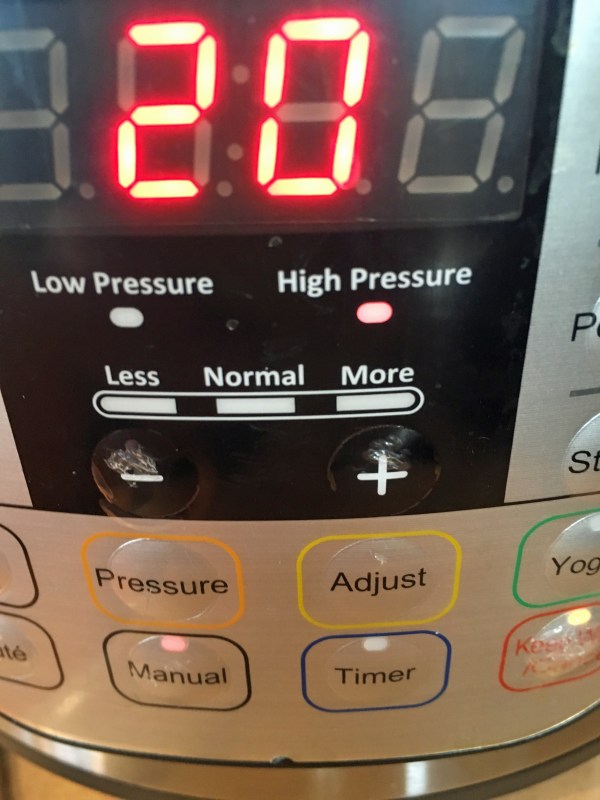
3. Put the lid on the pot, and turn the pressure regulator to Sealing. Use Manual, High Pressure and select 20 minutes of cooking time.
.
.
4. When the time is up let the pressure release naturally.
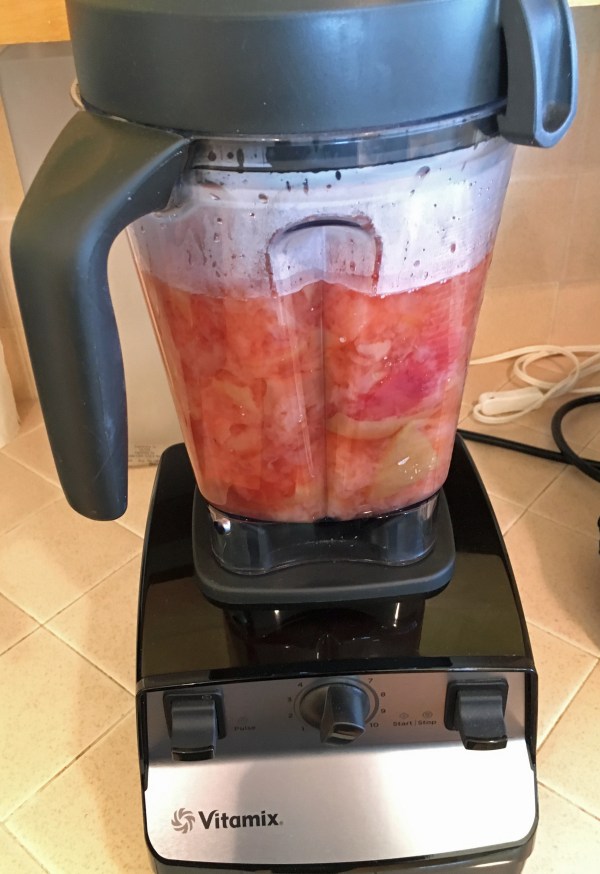
5. Use a high speed blender or an immersion blender to puree the apples. (If using a blender, put the apple puree back in the Instant Pot.)
.
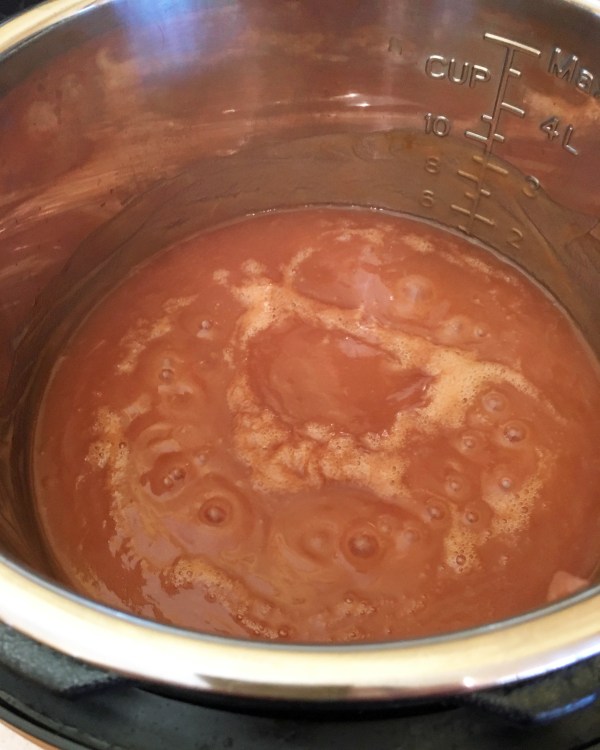
Cooked apples, just before I blended them
.
6. Stir the spices and sugar into the apple puree.
7. Press Sauté and set it to Low. Cook for 30 minutes, without the lid on, stirring occasionally.
.
Simmering on Low, without the lid
.
8. When the 30 minutes are up the Instant Pot will turn off. You’ll probably want to cook it down a bit more, so Press Sauté to cook for another 30 minutes.
.
Tips:
- The apple butter will sputter when it’s cooking down. I used a splatter screen to keep it from splattering all over.
- If you want to freeze the apple butter in jars, be sure to leave about ½ inch of space to allow for expansion.
.
.
Share this:

Purple Plum Torte
By Kath Dedon
.
I adapted Deb Perelman’s recipe for a Purple Plum Torte to make an almost sugar-free version. Deb wrote in her Smitten Kitchen blog post that her recipe was an adaptation of the very popular version made famous by Marian Burros.
Amanda Hesser, author of The Essential New York Times Cookbook, says the Marian Burros recipe is the most often requested and published recipe in the New York Times. When she was looking for recipes to include in her book, she had 265 people rave about the Purple Plum Torte. So now it can be forever found in The Essential New York Times Cookbook.
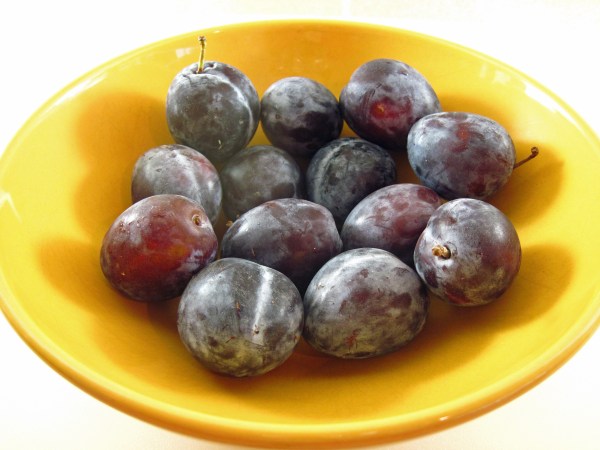
Both Deb and Amanda point out that you can really use any fruit for this torte, but purple Italian plums are especially good when they’re in season.
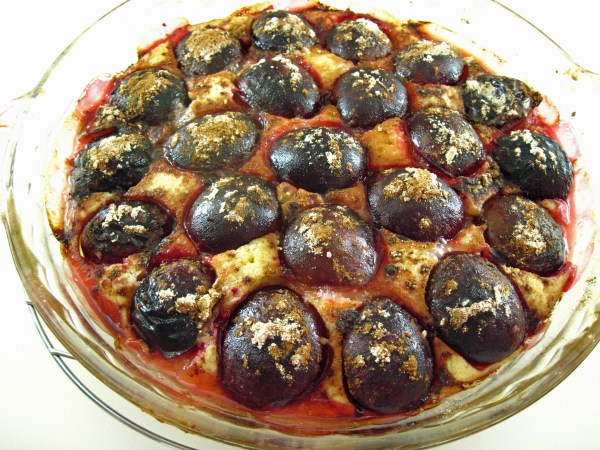
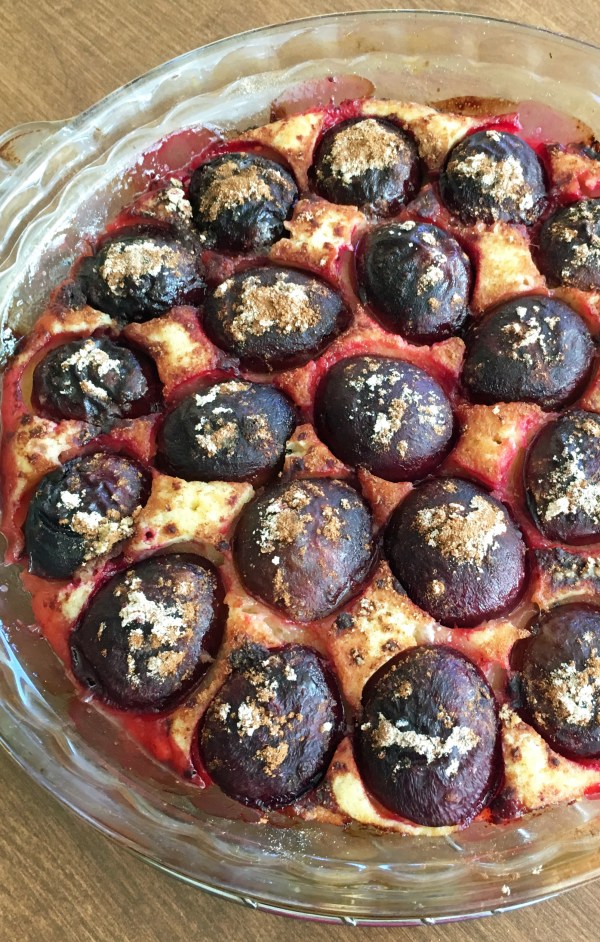
This Purple Plum Torte is best made the day before you serve it, making it a perfect dessert for entertaining.
(Be sure to check out Deb’s photos of her Purple Plum Torte to see how lovely it can be when it’s baked in a springform pan instead of a pie plate.)
.
.
Purple Plum Torte
(Adapted from the Smitten Kitchen version, which is adapted from the Marian Burros recipe. Amanda Hesser included the Marian Burros recipe in The Essential New York Times Cookbook.)
.
.
I used granulated Swerve sweetener in the cake batter and maple sugar to sprinkle on the top. Substitute regular sugar if you wish.
A 9-inch springform pan is recommended for this recipe. I used my 9½-inch pie plate. It worked fine, although the presentation would be better if a springform pan were used.
.
13 purple Italian plums (I could only fit 11 on my cake)
.
1 cup (125g) all-purpose flour
1 teaspoon baking powder
Large pinch of salt
½ cup (1 stick) unsalted butter, softened
2/3 cup granulated Swerve sweetener (or ¾ – 1 cup sugar)
2 large eggs
11 – 12 smallish purple Italian plums, halved and pitted
2 teaspoons fresh lemon juice
2 teaspoons ground cinnamon
2 teaspoons of maple sugar (or 1 tablespoon sugar)
.
- Heat the oven to 350°.
- Whisk the flour, baking powder, and salt together in a medium bowl.
- Cream the butter and sweetener (or sugar) together with an electric mixer for about 5 minutes, until it is fluffy and light.
- Add the eggs, one at a time, mixing after each one.
- Add the flour mixture and beat until it is just combined.
- Spread the cake batter into an ungreased 9½-inch pie pan (or ungreased 9-inch springform pan) and smooth out the top.
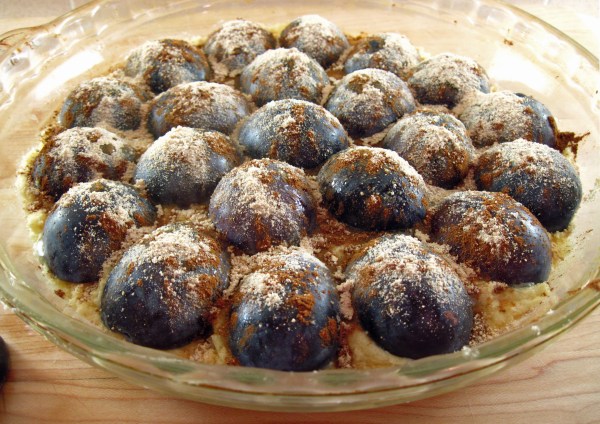
- Put the plums, skin-side up all over the cake.
- Sprinkle the cake with the lemon juice, and then the cinnamon and maple sugar (or sugar).
Ready to bake
.
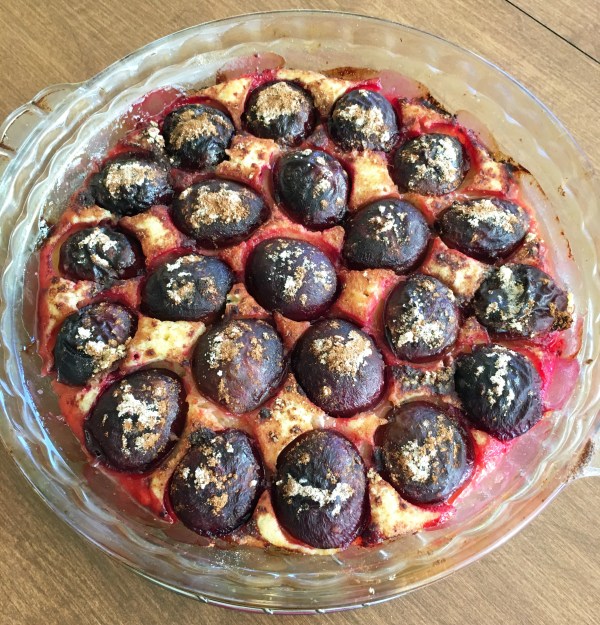
9. Bake the cake for 45 – 50 minutes, until a toothpick inserted in the center comes out with no cake batter. (If you have an instant-read thermometer, the cake’s temperature will be 210° when it’s done.)
10. Cool the cake on a rack and then cover it and leave it overnight at room temperature before serving the next day.
.
.
.
Share this:

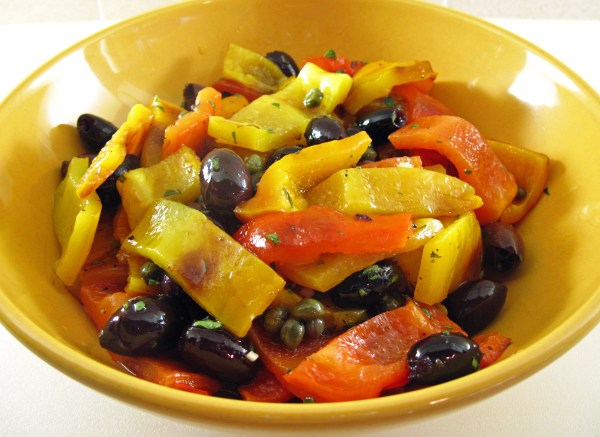
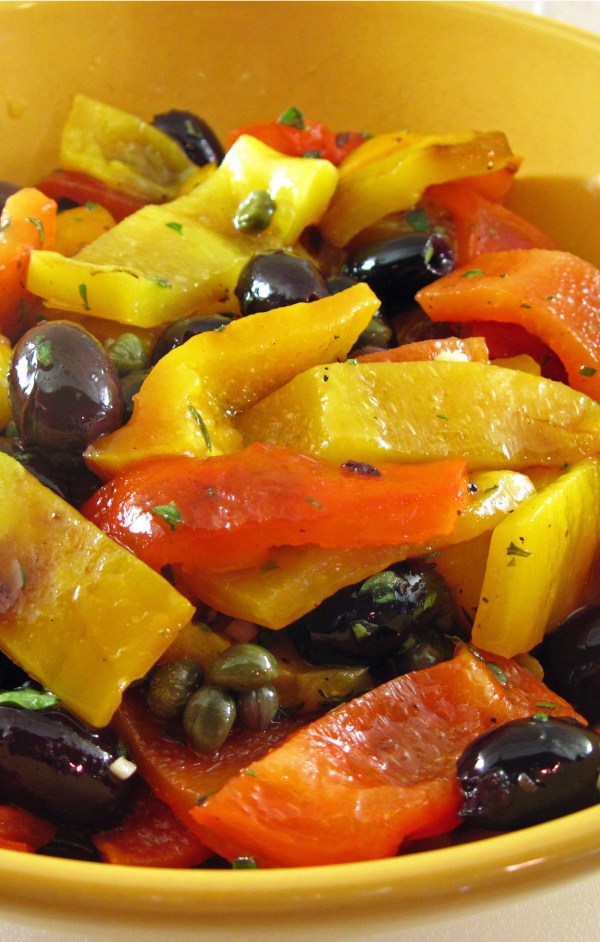
Tapas Salad with Grilled Bell Peppers, Olives, and Capers
By Kath Dedon
.
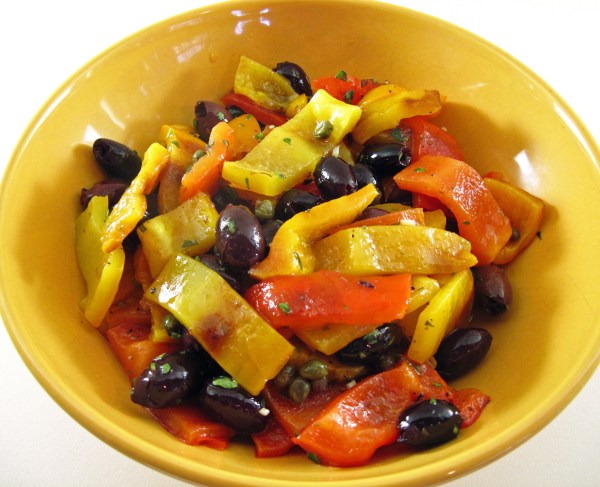
I recently made this Tapas Salad with Grilled Bell Peppers, Olives, and Capers for a potluck party. I loved it, and several people commented on how much they enjoyed it.
The recipe is adapted, barely, from a recipe by Kalyn Denny on her Kalyn’s Kitchen blog. It’s a very easy recipe to make, and it’s perfect when you need a recipe that you can make ahead of time.
Kalyn used canned black olives. I used a jar of pitted Kalamata olives instead and liked the swap.
Next time you need an easy salad for entertaining, give this Tapas Salad with Grilled Bell Peppers, Olives, and Capers a try.
.
Tapas Salad with Grilled Bell Peppers, Olives, and Capers
(Adapted from Kalyn Denny’s recipe on her Kalyn’s Kitchen blog.)
.
.
Serves 4 – 6 (You could easily double it for more servings.)
.
1 large red bell pepper
1 large yellow bell pepper
1 large orange bell pepper
1 jar pitted Kalamata olives (6 – 6.5 oz., drained)
2 Tablespoons capers, rinsed and drained
.
Dressing
2 Tablespoons + 2 teaspoons olive oil
1 Tablespoon + 1 teaspoon sherry vinegar (or substitute white wine or white balsamic vinegar)
1 teaspoon caper brine
2 – 3 Tablespoons chopped fresh marjoram (or substitute fresh basil or oregano)
½ teaspoon minced garlic
Salt and fresh ground black pepper, to taste
.
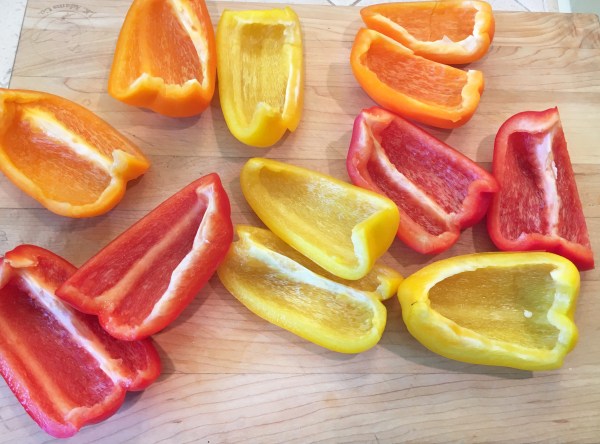
- Preheat your grill with the burners on high.
- Wash and dry the peppers. Cut the peppers into fourths, removing the seeds and large pieces of white membrane.
.
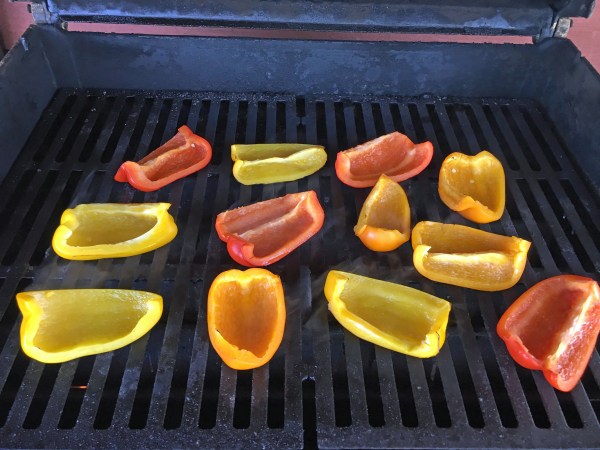
3. Put the peppers, skin side down, on the hot grill. Grill for 15 – 20 minutes until they are charred. As they get finished, remove them to a large bowl.
.
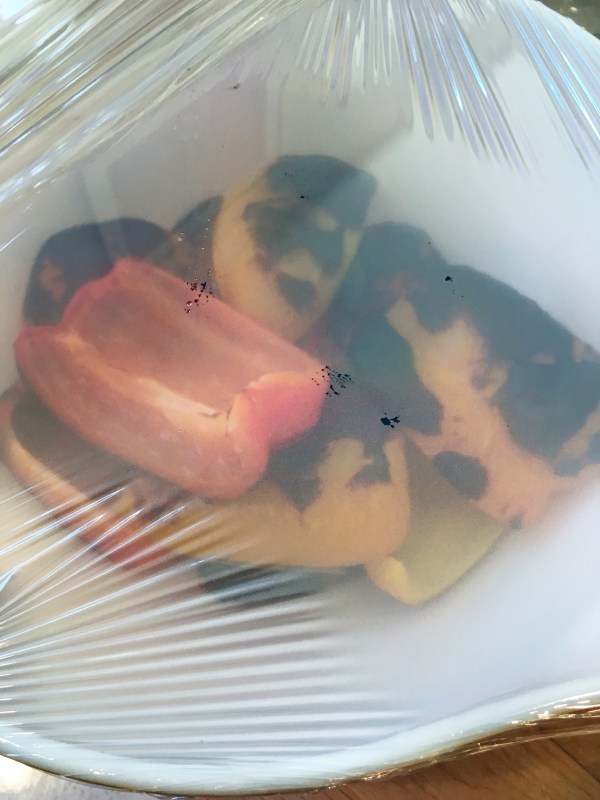
4. When all of the peppers are done, cover the bowl with plastic wrap so they can steam for at least 15 minutes.
.
5. Put the olives in a strainer to drain.
6. Whisk the dressing ingredients together.
7. After the peppers have steamed for at least 15 minutes, remove the charred skins. Cut the peppers crosswise into bite-size strips.
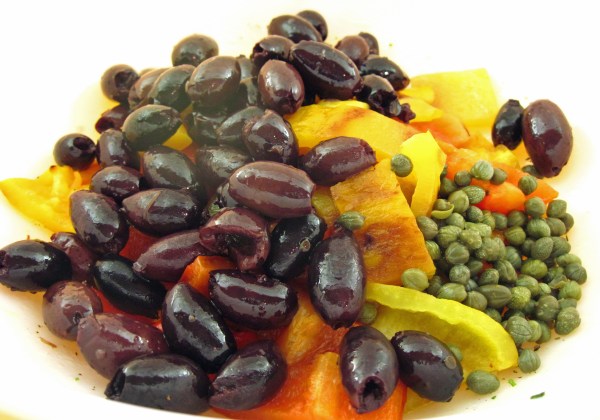
8. Put all of the salad ingredients in a bowl.
.
9. Add the dressing and toss well. Taste and season with salt and pepper to taste. (The olives and capers are salty, so you may not need much salt.)
10. The salad can be kept at room temperature until you’re ready to serve.
.
.


