Welcome!
You'll find over 470 of my favorite recipes here, including ideas for Quick meals, Cooking for 2, Feasting on Leftovers, and cooking with 5 Ingredients or Less. I'm adding new posts regularly; you can subscribe by email or RSS feed if you'd like to receive the latest recipes. Bon appétit!
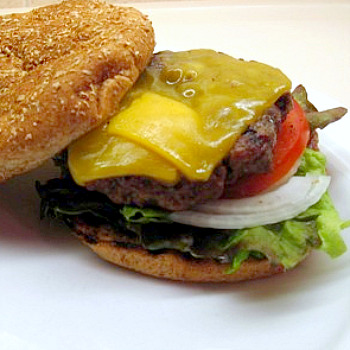
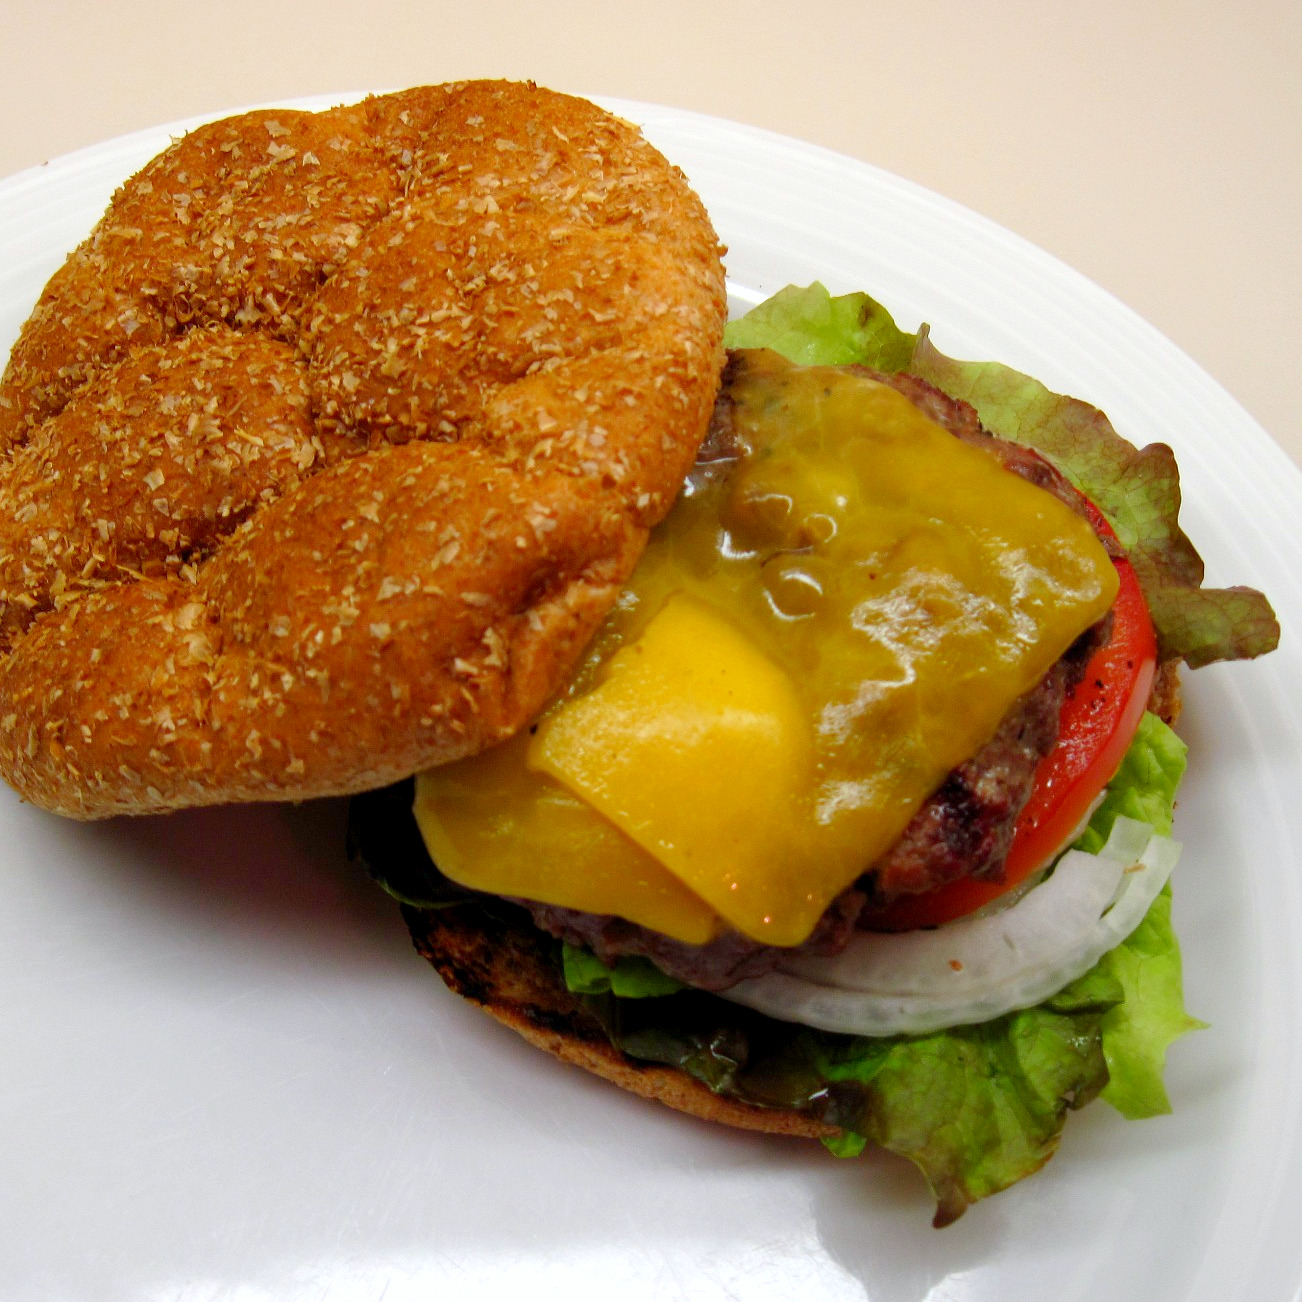
Memorial Day Burgers
This is a long post. If you’re new to cooking, I hope you’ll find it helpful.
We had hamburgers and cheeseburgers at our house for Memorial Day with Laura and Byron. We also had Oven Fried Potatoes and our Dedon House Salad. Laura and Byron thought it would be helpful I give suggestions for timing the meal so everything is ready at the same time.


Timing can be one of the trickier things about cooking. This post is about how I timed the burgers, potatoes and salad last night. (One way to simplify things would have been to make a potato, vegetable or pasta salad that can be made in advance. Then you can concentrate on the burgers.)
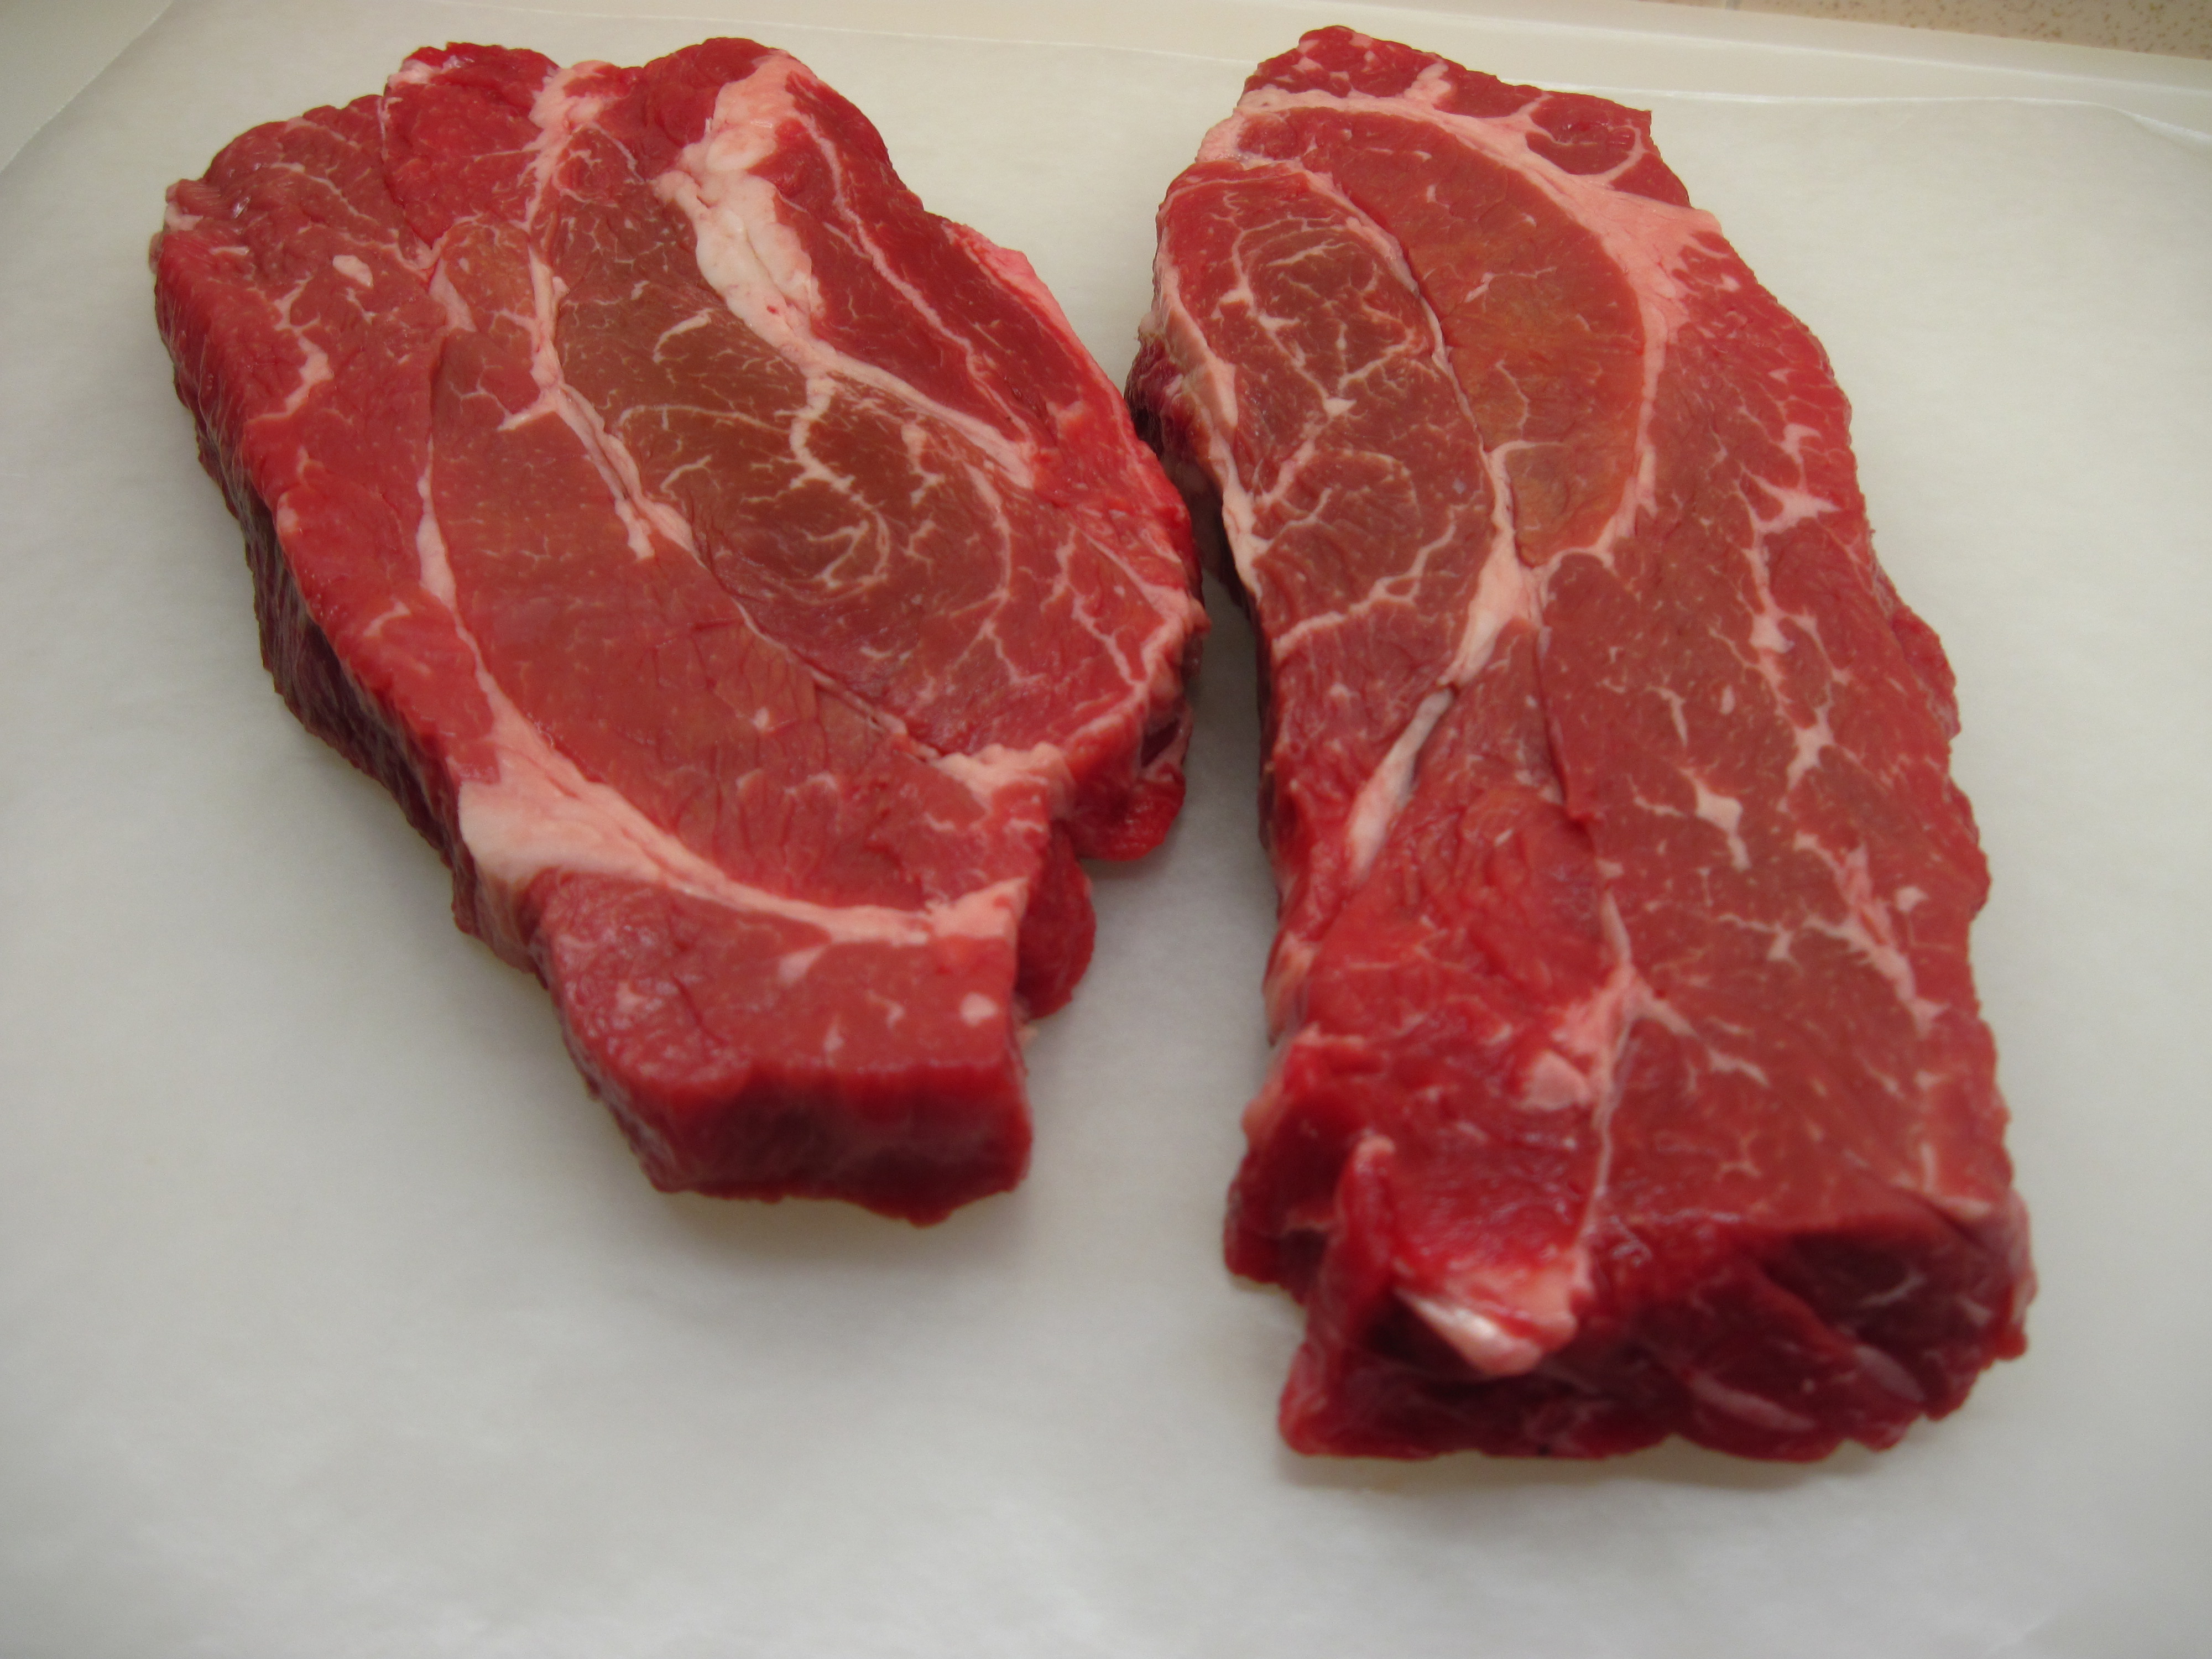
Here’s how it roughly came together last night. First, the burgers. After all these years, I have finally learned that for the very best results, you need to grind your own meat. If you have a food processor, it’s actually very easy to do. And it’s so worth it! You’ll find that your burger has a much better texture and is much more flavorful if you grind the meat yourself.
You do not want to get the leanest cut of beef. Hamburgers need some fat. You can use chuck roast or chuck steaks. I found 1½ pounds of chuck steak; that was precisely the amount of meat I wanted.

I processed the meat in two batches; it seemed that 1½ pounds might be too much to do at once in my average size Cuisinart. Cut the meat into 1½ – 2 inch cubes. Put half of the meat in the food processor and pulse it until it is ground to the consistency you want. It happens very quickly. Check during the process to see if it needs to be redistributed. Remove the ground beef and add the other half to grind it.
Voila! Ground beef!

Before shaping the burgers, gently blend 1 teaspoon sea salt into the meat. Try to distribute the salt evenly, but handle the meat as little as possible.
Shape the beef into patties about 3/4-inch thick. (I like to make them on squares of wax paper. It makes it easy to transfer them to the grill.) With 1½ pounds of beef, you can make four 6-ounce burgers or six 4-ounce burgers. (Using my kitchen scale, I actually made two manly 6-ounce burgers and three daintier 4-ounce burgers.)
So here’s your tip of the day for shaping the burgers. Don’t pack them too tightly. Just shape them enough so they hold together. Make an indentation in the center of the burgers. When burgers cook, they swell up in the center. If you make an indentation, you’ll end up with a nice, even flat burger, instead of a puffy burger. (Thank you to the food scientists at Cooks Illustrated for the indentation tip!)

Once your burgers are shaped, it’s time to get the rest of the dinner ready.
1. If you’re not planning on toasting the buns on the grill, toast them under the broiler before you start the potatoes.
~
2. Preheat the oven to 425˚ for the potatoes. Scrub the potatoes and cut each into 8 or 10 wedges. Put on a baking sheet and toss with a bit of olive oil. Arrange them skin-side down and sprinkle with salt and a bit of paprika. Put in the oven and set the timer for 20 minutes.
~
3. Get the condiments ready for the burgers. Wash and dry lettuce, slice onions and tomatoes, slice cheese for cheeseburgers. (Slice pickles, if you have them. We were out. A “pickle emergency” as Bob says.) Get the ketchup and mustard out.
~
4. Wash and dry lettuce for the salad, and add whatever salad vegetables you’re using. (The lettuce could have been washed and dried in advance and stored in the refrigerator, wrapped in paper towels in a plastic bag.)
~
5. After the potatoes have cooked for about 10 minutes, turn on the gas grill to preheat. (Or preheat a large cast-iron skillet over medium heat, if you’re cooking the burgers on the stove. If you’re using a charcoal grill, you’re on your own figuring out when to start the fire. It should have been a while ago, though, for the coals to have time to cook down.)
~
6. When the 20 minutes are up for the potatoes, take them out of the oven. Gently stir them, and put them back in the oven for about 10 minutes more.
~
7. Now it’s time to start cooking the burgers. Put the burgers on the grill (heat lowered to medium works on mine) and set the timer for 5 minutes. (Or generously sprinkle the pan with salt and put the burgers in the pan.)
~
8. While the burgers are cooking, you can toss the salad. Use a bit of olive oil and toss well. Add salt and pepper and a bit of vinegar or lemon juice and toss again. Slice up an avocado if you’re using it for your salad or burgers.
~
9. Put the salad bowl and condiments on the table.
~
10. After five minutes, flip the burgers. Cook for an additional 3 – 5 minutes, depending on how well done you want them. I cook them for about 5 more minutes, but check them. If your fire is too hot, you may need less time. Add cheese slices, if you’re using them, for the last minute or so.
~
11. Put the burgers together; take the potatoes out of the oven and serve them with the burgers.
~

Share this:

Kath’s Special Cheese Melt Sandwich
It was time for lunch and I was wondering what I could find in the cupboard or the refrigerator that would be tasty. Then I realized that I had the fixings for a pretty yummy sandwich.
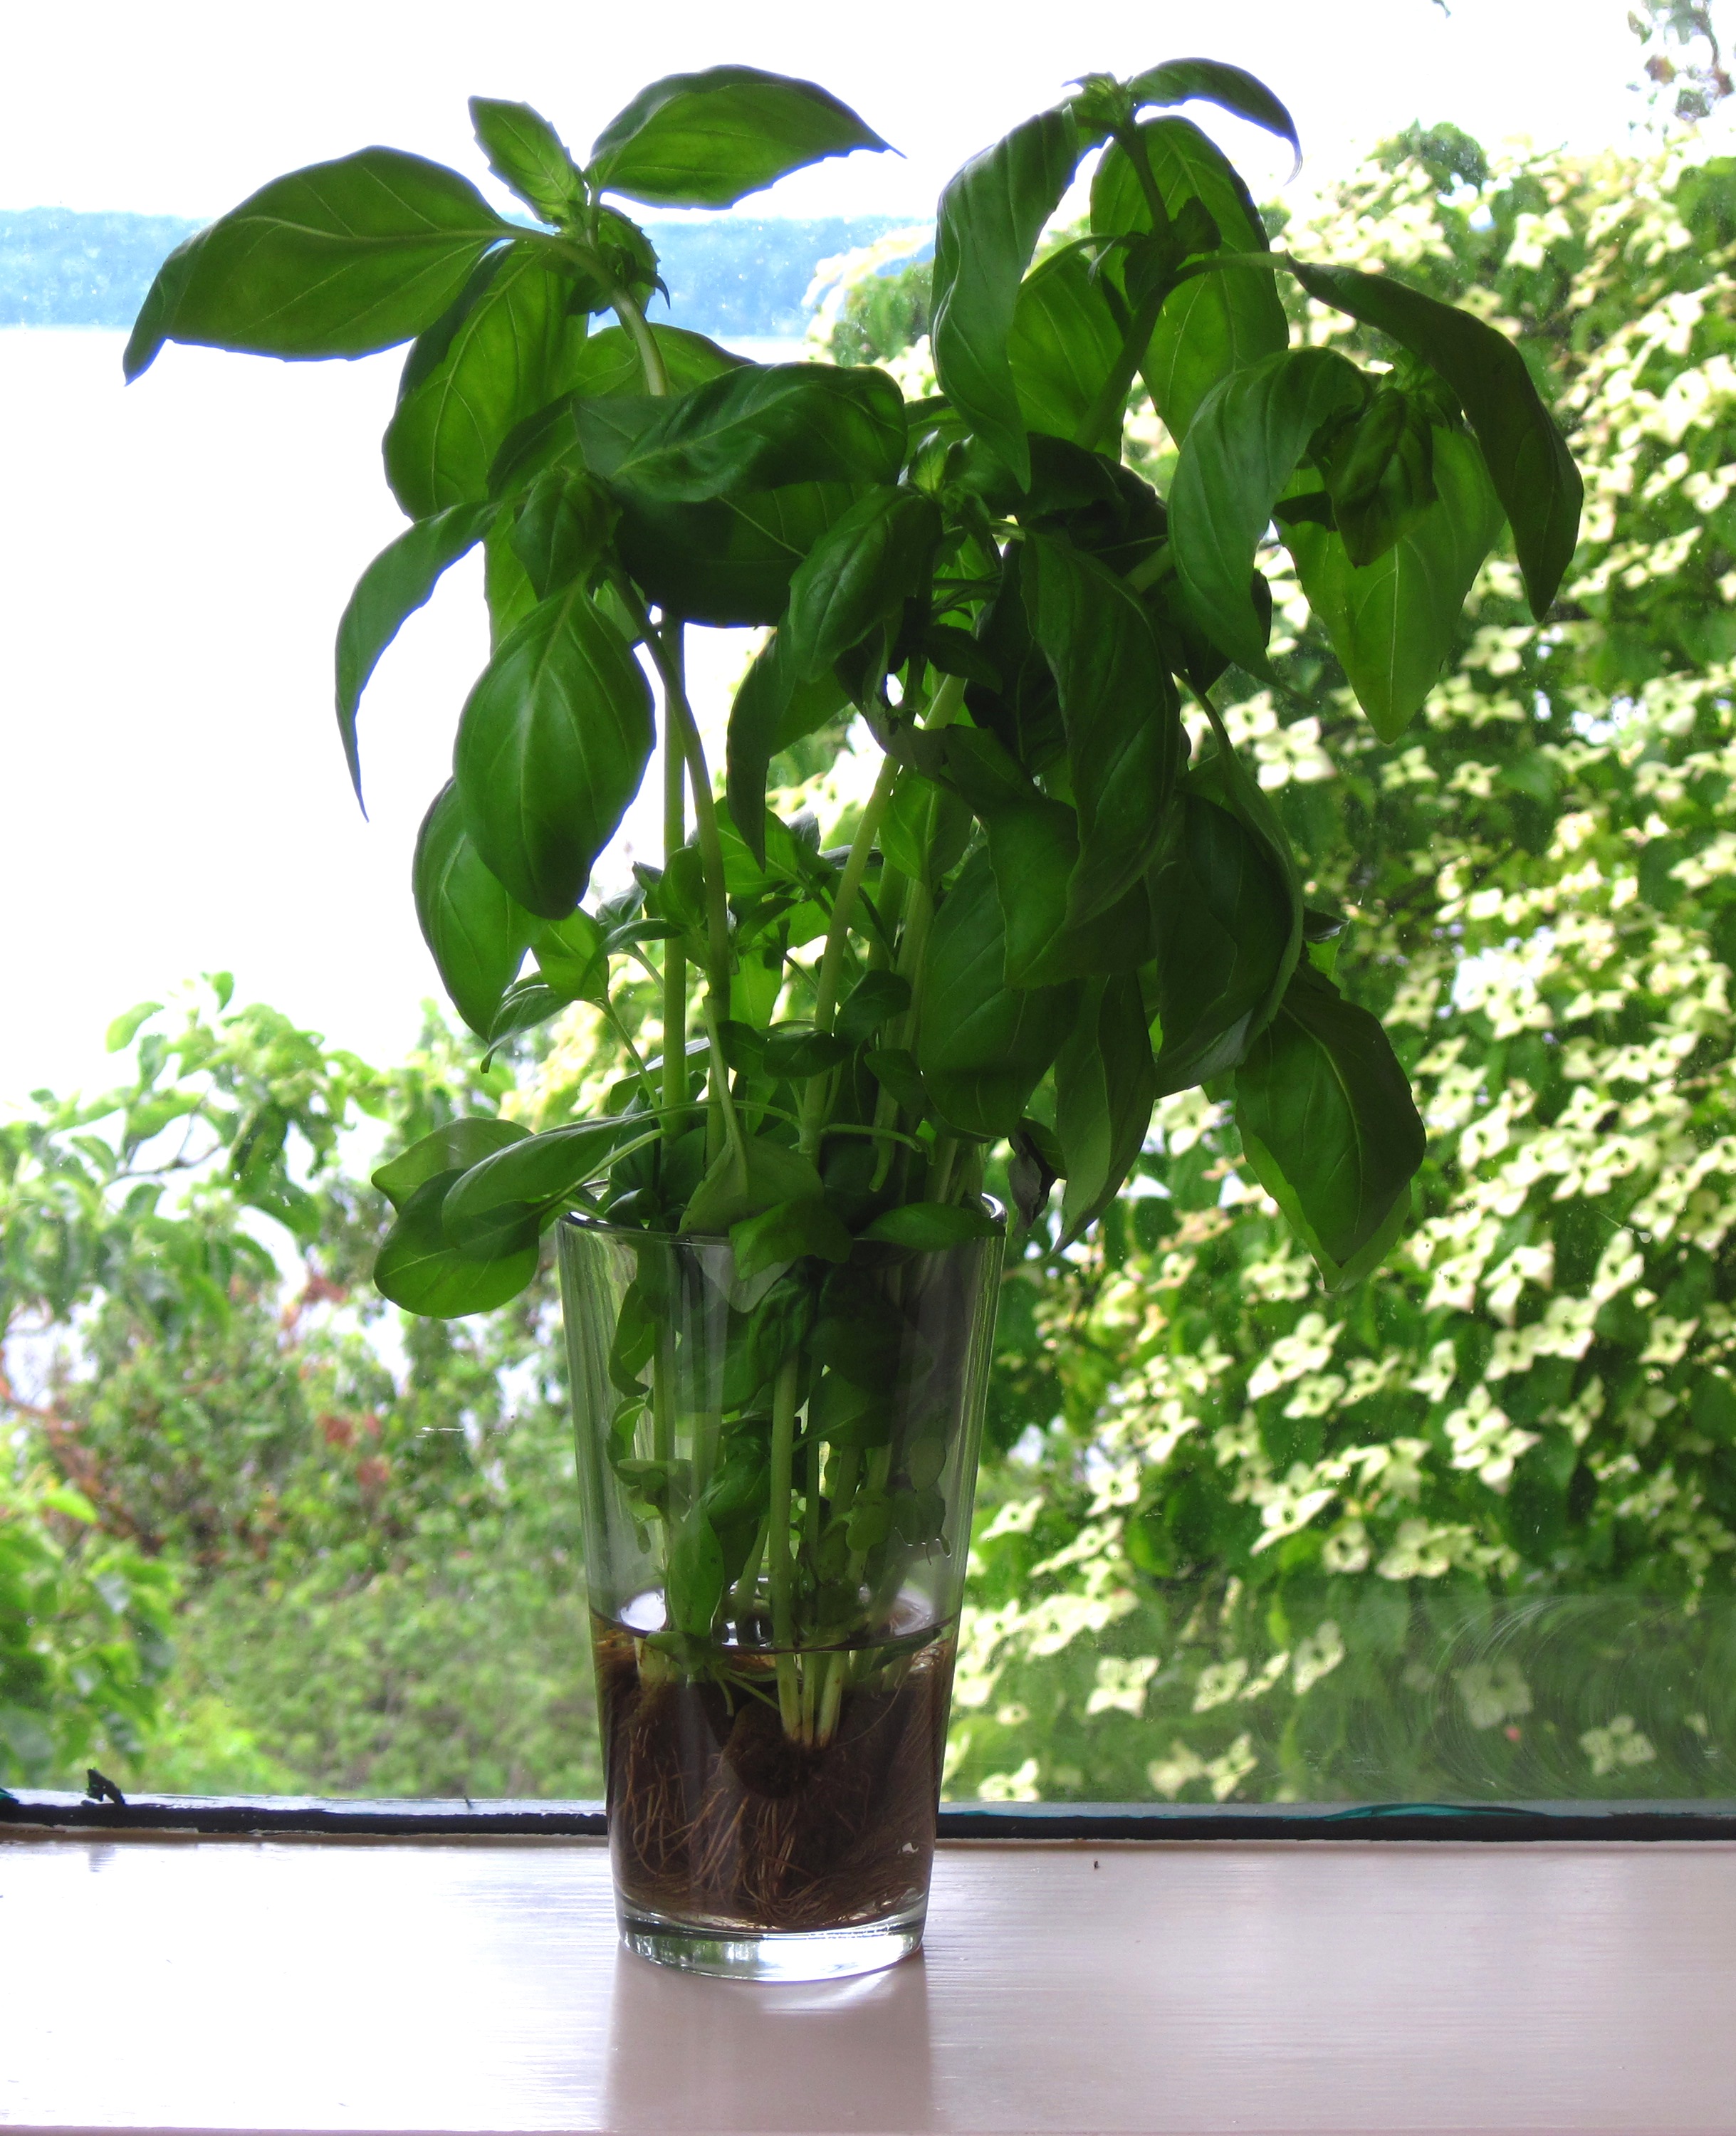
I had live fresh basil in a glass of water.

There were some Roma tomatoes.

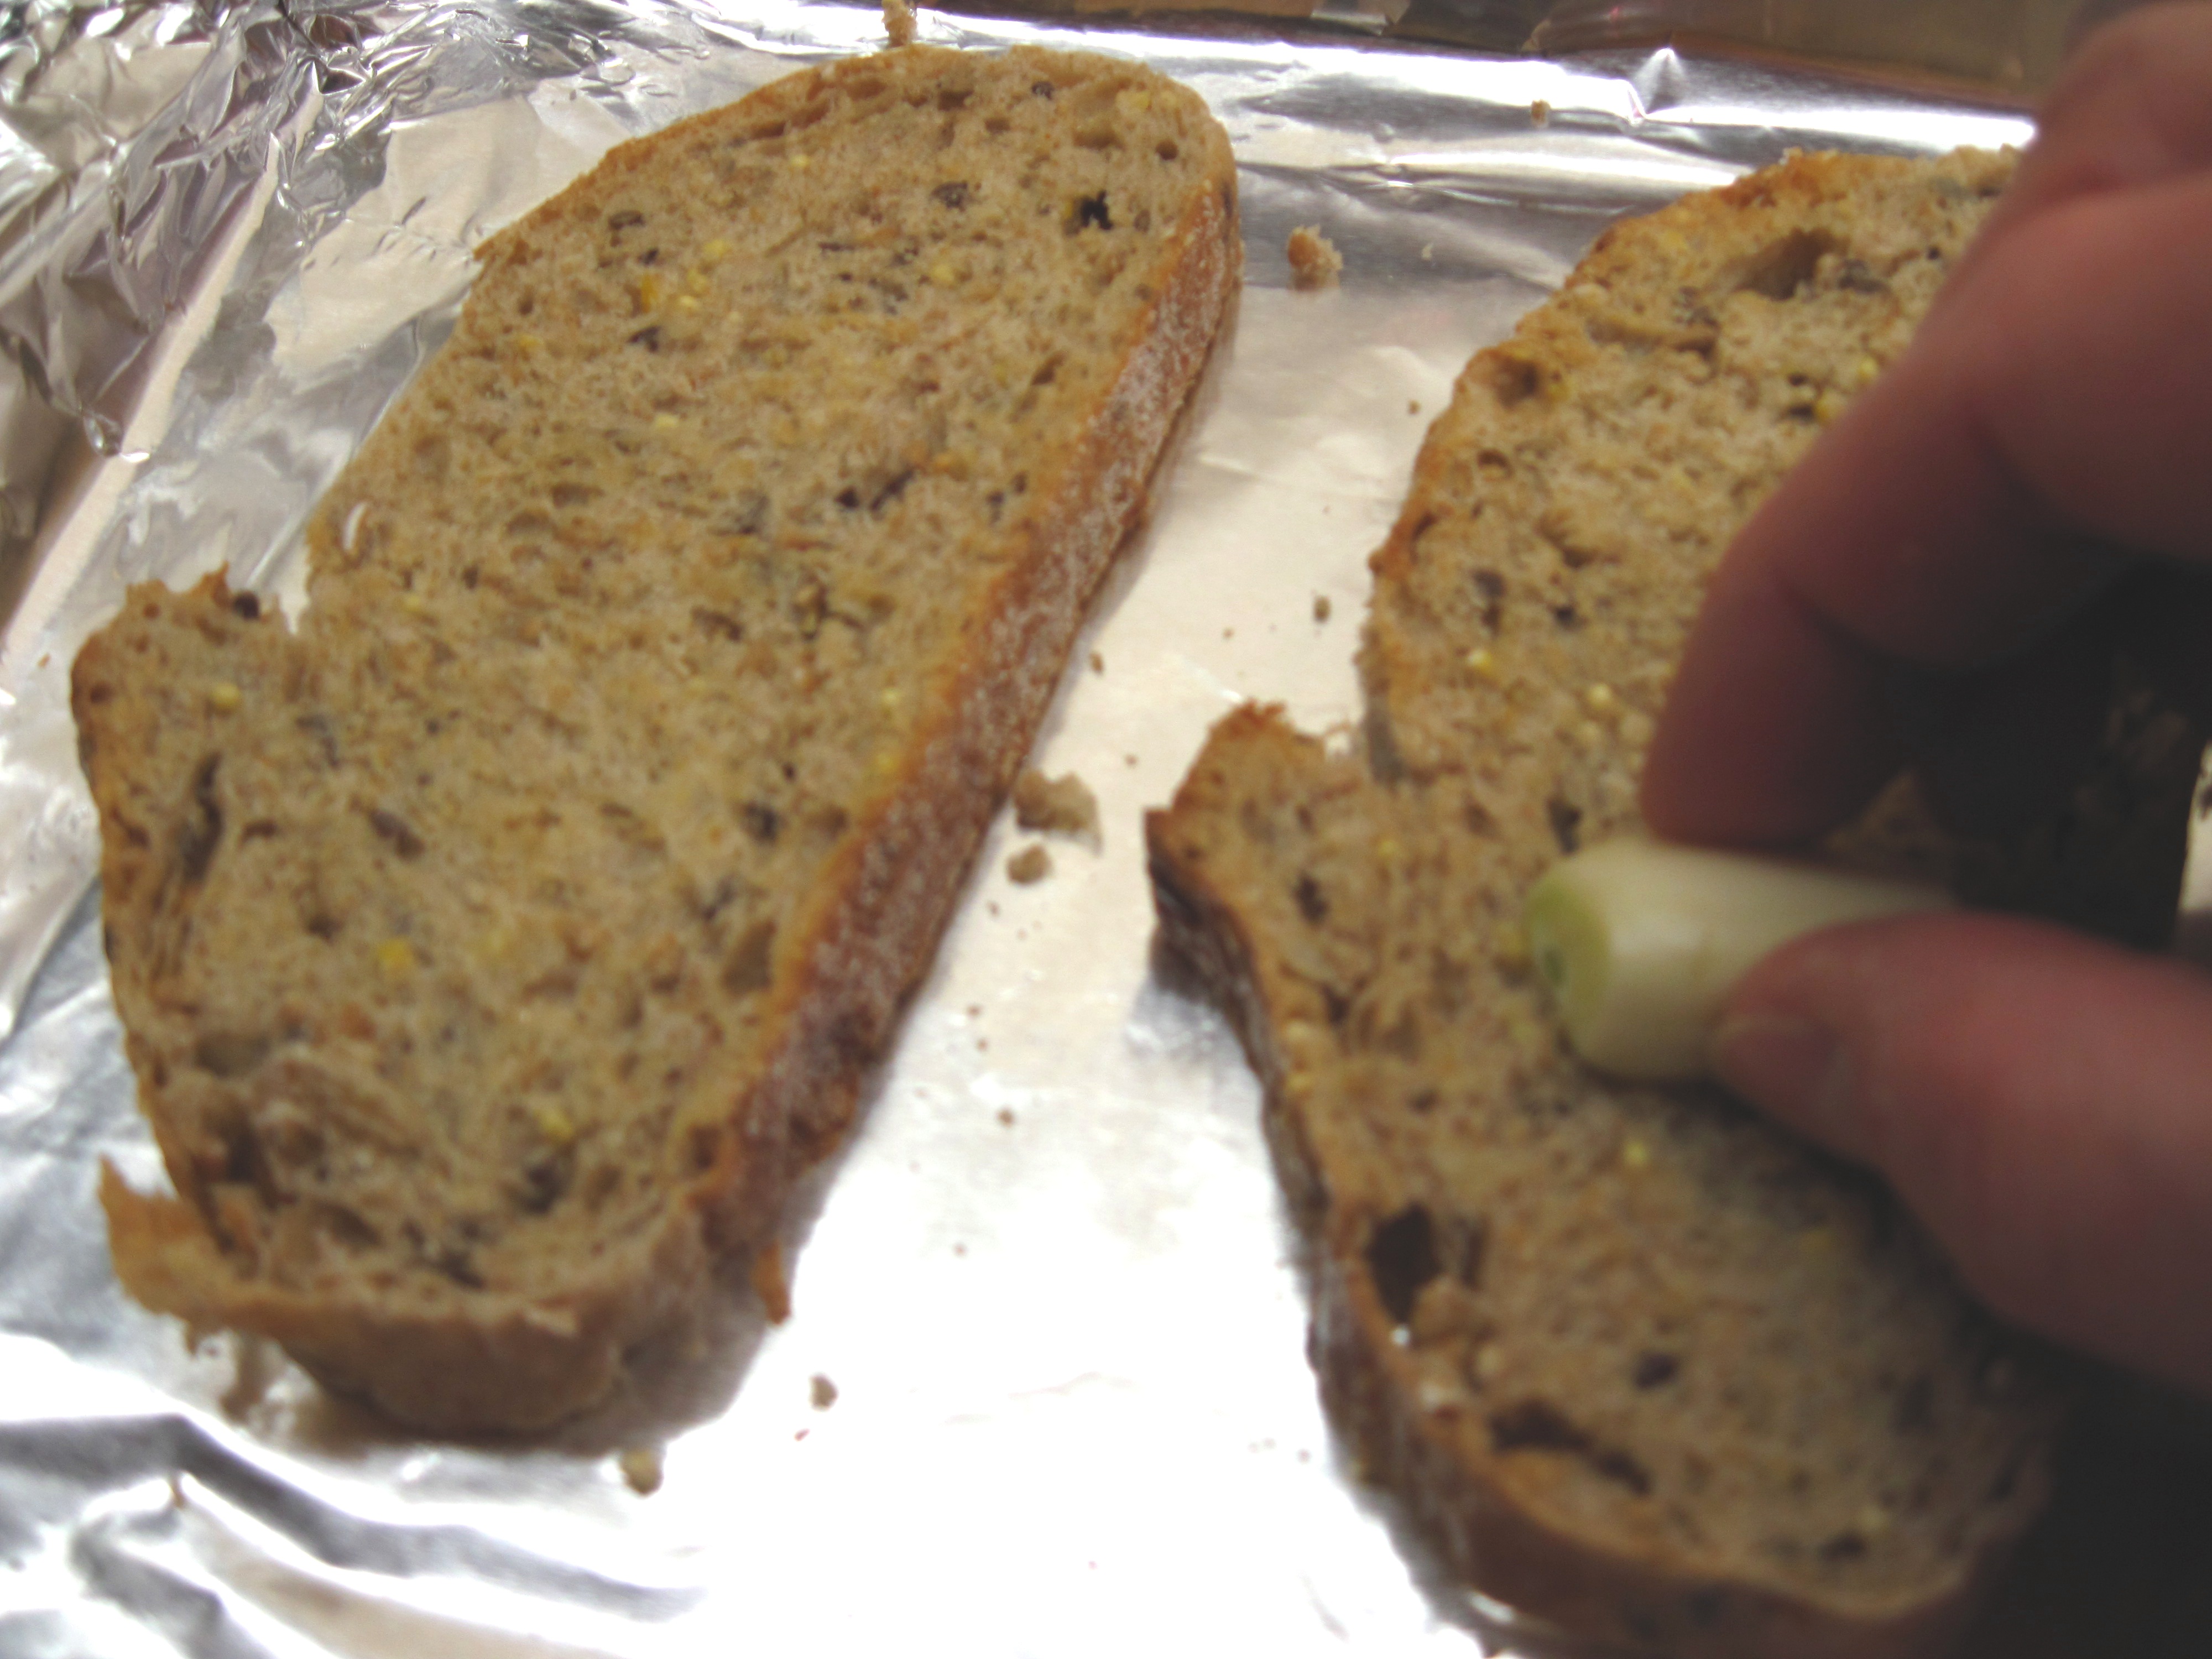
I had some La Brea Whole Grain Bread.

And there was a small piece of New York cheddar from Ontario Orchards in the refrigerator! (How I wish we had Ontario Orchards in Seattle!)
 ~~~
~~~
I was all set!
Here’s how to make Kath’s Special Cheese Melt Sandwich. At least it’s how I made it today. There could be many variations on the theme. You can be creative with this one. I think the only constants are some type of bread product and some type of cheese. Bob thought anchovies would be good on it. Maybe.…
~
Kath’s Special Cheese Melt Sandwich
You’ll notice in the photos that I covered a baking sheet with foil. I thought it would make clean-up easier. It wasn’t such a great idea. The sandwiches stuck a bit to the foil. Next time I would just use the baking sheet without the foil.
~
1. Preheat the oven to 350˚.
2. Toast the bread.
3. Peel a clove of garlic. Cut it in half and rub the cut half all over the toasted bread.
~

~
4. Drizzle with olive oil and sprinkle with salt.

~
5. Sprinkle with chopped sweet onions, if desired.
 ~
~
6. Cover with thin slices of a Roma tomato. (1 tomato was enough for the three slices of bread.) Then tear some basil leaves to put on the tomato slices.
 ~
~
7. Cover the sandwiches with slices of cheese. (Your choice. The New York cheddar was very good.)
 ~
~
8. Bake for 5 – 6 minutes, until the cheese melts.
9. Enjoy!

Share this:

Chiles Rellenos Bake
By Kath Dedon
.
Better Homes and Gardens® The Dieter’s Cook Book is a cookbook I’ve owned for over 25 years. It’s not one that I use often, but there are 2 or 3 recipes in it that I like to make now and then. This is one of them.
I’ve never tried making real chiles rellenos. Maybe I will someday. I’ve always appreciated how this casserole gives you the flavors of chiles rellenos without having to fry individual stuffed and battered chiles.
Served with a good tomato salsa, this makes a tasty vegetarian meal.
If you’re cooking for 1 or 2, leftovers reheat well in the microwave for a quick breakfast or lunch.

.
Chiles Rellenos Bake
(adapted from a recipe in Better Homes and Gardens® The Dieter’s Cook Book)
.
.
Serves 4
~~~
1 (7-ounce) can whole green chile peppers (there were 5 peppers in the can)
5 ounces Monterey Jack cheese
4 beaten eggs
1/3 cup milk
½ cup flour
½ teaspoon baking powder
½ teaspoon salt
¾ cup (about 3 ounces) shredded cheddar cheese
~~~
1. Preheat the oven to 350˚.
2. Drain the peppers; slit them lengthwise and remove the seeds.
3. Cut the Monterey Jack cheese into long pieces, and put it in the peppers. (The peppers won’t totally surround the cheese, which is okay.)

.
4. Put the peppers in a greased 10x6x2-inch baking dish.
5. Combine the eggs and milk; add the flour, baking powder, and salt and beat until smooth.
6. Pour the egg mixture over the chiles. Cover with the shredded cheddar cheese.

.
7. Bake for 30 minutes.
8. Serve with your favorite salsa or pico de gallo.

Share this:

Quick Manhattan Clam Chowder
By Kath Dedon
.
Of course, the very best Manhattan clam chowder will be made with fresh clams. But you can make a very good version with canned clams. I turned to Cook’s Illustrated The Best Recipe Soups and Stews for their “Quick Pantry Manhattan Clam Chowder”.
The original recipe serves 8 people; I pared it down to serve 4.
I wanted about 16 ounces of canned clams, so I thought I’d get 1 (10-ounce) can of baby clams and 1 (6.5-ounce) can of chopped clams. When I discovered my store no longer carries the 10-ounce cans, I got 3 (6.5-ounce) cans of chopped clams. So there were a lot of clams in the chowder! It was quite good, if I do say so myself.
.

.
Quick Manhattan Clam Chowder
(Adapted from a recipe in Cook’s Illustrated The Best Recipe Soups and Stews)
.
.
Serves 4
~~~
2 slices of bacon
¾ cup chopped onion
½ red pepper, seeded and chopped into small pieces
1 small, or ½ large, carrot, chopped small
½ stalk celery, chopped small
4 medium cloves garlic, minced
½ teaspoon dried oregano
¼ cup dry white wine (or substitute water)
2 (8-ounce) bottles of clam juice
¾ pound Yukon Gold potatoes, peeled and cut into small pieces
1 large bay leaf
1 (14½-ounce) can diced tomatoes
3 (6.5-ounce) cans chopped clams, drained, with juice reserved
~~~
1. Cook the bacon in a large pot over low heat until the fat is rendered and the bacon is done.
2. Remove the bacon from the pan and set aside. Add the onions, red pepper, carrot and celery. Cover and cook, stirring occasionally, until softened. This takes about 10 minutes.
3. Add the garlic and oregano and cook for about 1 minute.

.
4. Add the white wine and cook for 2 minutes.
5. Add the bottles of clam juice, the potatoes, the bay leaf, and the reserved juice from the clams. Cover and cook over medium-low until the potatoes are done, about 10 minutes.
6. Using the back of a spoon, smash some of the potatoes against the side of them pot. Stir and cook about a minute more.
7. Crumble the reserved bacon into the pot. Add the tomatoes with their juice, and simmer for about 5 minutes.
8. Remove the pot from the heat. Stir in the clams and season to taste with salt and pepper. Serve immediately.
Share this:

Mom’s Oatmeal Crispies
By Kath Dedon
.
Oatmeal Crispies were one of my mom’s favorite cookie recipes to make. She often had a batch ready for visiting kids and grandkids. The recipe is from one of her old cookbooks, but I can’t remember which one. Fortunately, Carrie got the recipe from her when she was compiling a collection of dessert recipes for a middle school project.
These are so easy to make, but you have to plan ahead to allow time for the dough to chill in the refrigerator.
I made half of the recipe and ended up with over 3 dozen cookies. You could also make the whole recipe and freeze a roll to use later. (Mom would often do that.)
I baked the cookies this morning, and must admit I had two of them for breakfast. (You’ve got your oats; you’ve got your egg…..) Delicious!

.
Oatmeal Crispies
(Origin unknown)
.
.
Makes 5 – 6 dozen (cut in half for a smaller batch)
~~~
1 cup (2 sticks) butter
1 cup brown sugar
1 cup granulated sugar
2 beaten eggs
1 teaspoon vanilla
1½ cups (180 g) flour
1 teaspoon salt
1 teaspoon soda
3 cups (240 g) quick-cooking oats
½ cup finely chopped walnuts (Finely chopped pecans can be substituted for the walnuts.)
.

.
1. Thoroughly cream the butter and the sugars together. (I mixed them at medium speed in my stand mixer for about 5 minutes.)
2. Add the eggs and vanilla and beat well.
3. Stir together the flour, salt and soda. Add the flour mixture to the dough and mix well.
4. Stir in the oats and the chopped walnuts.
5. Shape into 2 or 3 logs and wrap with wax paper. Refrigerate overnight. (You can also put the wrapped logs in freezer bags and freeze to use later.)

6. Preheat the oven to 350˚.
7. Slice cookies ¼ inch thick. Place on an ungreased baking sheet and bake for 8 – 10 minutes. (The exact time will depend on your oven and the thickness of your cookies.)

8. Let cool on the baking sheet for a minute or two; then remove to a wire rack to cool.
Share this:

Shrimp Scampi
By Kath Dedon
.
The Minimalist (Mark Bittman) does it again! I’ve made Shrimp Scampi before, but this is the first time I’ve tried his version from How to Cook Everything. Other recipes use butter, but he uses all olive oil. We loved it! Very simple and all of the flavors shine. It’s delicious served over rice.
The parsley is a really important ingredient in this recipe; for best results, don’t omit it.
.

.
Shrimp Scampi
(Adapted from Mark Bittman’s recipe in How to Cook Everything)
.
Serves 4
.
1/3 cup olive oil
3 – 4 large cloves garlic, sliced into thin slices
1½ pounds shrimp, peeled, rinsed, and dried
Salt
Pepper
¼ cup chopped fresh parsley, plus more for garnish
1 tablespoon lemon juice
.
1. Heat the oil in a large skillet over low heat.
2. Add the garlic, and stir until it is golden.
.
Garlic turning golden in the olive oil

.
3. Raise the heat to medium. Add the shrimp and sprinkle with salt and pepper.

.
4. Cook for a few minutes until the shrimp is pink on one side. Turn them over and sprinkle with the ¼ cup parsley.
5. Cook a few minutes more until done. (Total cooking time will be 5 – 10 minutes, depending on the size of your shrimp.)

.
6. Stir in the lemon juice, stir and cook for about 30 seconds more.
7. Serve and garnish with additional parsley.

Share this:

Roasted Carrots with Cumin
By Kath Dedon
.
This recipe is definitely a keeper! I was looking for something different to do with carrots and turned to Mark Bittman’s How to Cook Everything. I was intrigued by Roasted Carrots with Cumin. The recipe was so simple, but I had never thought of pairing carrots with cumin seeds. The carrots were a delicious side dish with leftover Slow Cooker “Barbecued” Pork Roast.
We ate the carrots hot, but they can also be served at room temperature—a great make-ahead dish.
.

Roasted Carrots with Cumin
(Adapted from Mark Bittman’s How to Cook Everything)
.
.
Serves 2 (easily doubles)
~~~~~
¾ pound carrots, peeled and cut into sticks
1 tablespoon olive oil
1 teaspoon cumin seeds
Salt
Pepper
.

1. Heat the oven to 425˚.
2. Toss the carrots with the olive oil on a baking sheet.
3. Sprinkle the cumin seeds over the carrots; add salt and pepper.
4. Roast for about 25 minutes, stirring once after about 15 minutes, until the carrots are tender and starting to brown.
Share this:

By Kath Dedon
.
The Southern Barbecue Dry Rub in Joy of Cooking is so easy to put together; there is no reason to pay a high price for a commercially blended rub. The original recipe calls for brown sugar, which I don’t use. It’s good without it, but add it if you want a bit of sweetness. I have used this rub on pork country ribs with good results. I decided to try it with a pork shoulder roast.
A pork shoulder roast is best cooked at a low temperature for a long time. This can be done in the oven or, even better, in a barbecue. I decided to try it in my slow cooker since I was going to be gone for most of the day.
I followed Rick Rodgers’ suggestion in The Slow Cooker Ready & Waiting Cookbook and used a collapsible vegetable steamer in the slow cooker to elevate the roast above the liquid. The roast turned out quite tasty.
We had the roast with corn and a salad. You could also shred the pork, add your favorite barbecue sauce and make pulled pork sandwiches. Yum!
.

.
Slow Cooker “Barbecued” Pork Shoulder Roast and Southern Barbecue Dry Rub
(Southern Barbecue Dry Rub adapted from a recipe in Joy of Cooking)
.
~~~
Southern Barbecue Dry Rub
¼ cup sweet smoked paprika (pimenton de la vera)
2 tablespoons chili powder
1 tablespoon cayenne pepper
1 tablespoon ground cumin
2 tablespoons salt
2 tablespoons ground pepper
2 tablespoons brown sugar (optional – I’ve made it with and without sugar.)
.
Combine all ingredients in a small bowl. The rub can be used with pork or beef.

~~~
Slow Cooker “Barbecued” Pork Shoulder Roast
1 (3–3½ pound) pork shoulder roast
Southern Barbecue Dry Rub
½ cup water
~~~
Generously rub the Southern Barbecue Dry Rub all over the pork roast.

Put a collapsible vegetable steamer in the slow cooker. (If you don’t have a vegetable steamer that will work, wad up some balls of aluminum foil, put them in the bottom of the slow cooker with the roast on top of them.)

Pour ½ cup water in. Put the pork roast on the steamer.

Cook on Low until very tender, 9-10 hours. (It would be hard to overcook the roast on Low; mine cooked for 11 hours and was perfect.)
Remove the roast to a platter and cover with foil to keep warm. Strain the liquid from the slow cooker into a pot. Bring to a boil and cook until it reduces into a sauce. Pour over the roast and serve.
Share this:

Pantry Clam Spaghetti à la John Hinterberger
John Hinterberger is retired now, but he was the restaurant critic and columnist for The Seattle Times for 25 years. He wrote about his favorite Clam Spaghetti that uses canned clams. I clipped it from the paper years ago, but lost it. Searching online, I found it and was glad to have it again.
I have posted my version of Mario Batali’s Linguine con Vongole. Made with fresh clams and lots of olive oil, it is sublime. John’s recipe is very different; the beauty of his is that it can pretty much be made with pantry items.
I used John’s method and cooked the mushrooms separately in butter and then added them to the sauce. I think next time I’ll simplify and cook the mushrooms with the onions, and omit the butter.
I had some fresh parsley and used it, but I have made it many times without the parsley and it’s still good.

John Hinterberger’s Clam Spaghetti
(Adapted from John Hinterberger’s recipe in The Seattle Times)
3 – 4 servings
~
¼ cup olive oil
¼ teaspoon red chili flakes
1 cup chopped onions
2 large cloves garlic, minced or pressed
1½ teaspoons dried basil (or ¼ cup fresh basil leaves, chopped)
1½ teaspoons dried oregano
Salt
Pepper
¼ cup dry white wine
1 10-oz. can baby clams, drained with liquid reserved
3 ounces mushrooms, sliced
2 teaspoons butter
½ pound spaghetti
½ cup chopped parsley (optional)
¼ cup black olives, sliced
3 tablespoons grated Parmesan or Pecorino Romano cheese
~~~
1. Heat the olive oil in a large skillet. Add the chili flakes, and onions and cook slowly until very soft, 20 – 25 minutes. (Add the mushrooms, too, if you want to cook them with the onions instead of cooking them separately.)
2. Put a large pot of water on to boil for the spaghetti.
3. When the onions are just about ready, add the garlic and cook it with the onions for a minute or two.
4. Add the basil, oregano, white wine, and the liquid from the clams to the skillet. Cook, stirring occasionally until the sauce cooks down a bit. Add salt and pepper to taste.
5. If you’re cooking the mushrooms separately, cook them in the butter in a separate pan while the sauce is cooking down. When done, add them to the sauce.

6. Add a tablespoon of salt to the boiling pasta water. Cook the spaghetti according to package directions.
7. While the spaghetti is cooking, add the clams, olives, cheese and parsley to the sauce.

8. Drain the pasta, and add it to the sauce. Stir well and serve with additional cheese.
Share this:

I recently rediscovered Pierre Franey’s 60-Minute Gourmet in my cookbook library. Born and trained in France, Franey became a successful chef in New York. In 1975 he started writing a regular column for the New York Times, called 60-Minute Gourmet. The cookbook is a collection of many of the recipes from his column.
Browsing through the book, I found his recipe for Aubergines au Four “Parmigiana” (Baked eggplant parmigiana). It sounded so delicious that I had to make it.
This French take on eggplant parmigiana uses butter instead of olive oil. It is very easy to make, and it was fantastic! (Please don’t judge it by my photo; it does not do it justice. If you like eggplant, do try this version.)

Aubergines au Parmigiana (Baked Eggplant Parmigiana)
(Adapted from a recipe in Pierre Franey’s 60 Minute Gourmet)
Serves 4
1 1½-2 pound eggplant
4-5 tablespoons butter at room temperature
3 tablespoons grated Parmesan cheese
Salt
Pepper
Chopped parsley for garnish (optional)
~~~
1. Preheat oven to 400˚.
2. Wash the eggplants and trim off the ends. Slice the eggplant into ½-inch slices.

3. Combine the butter and Parmesan cheese; spread the mixture on both sides of the eggplant. Sprinkle both sides with salt and pepper.

4. Bake on a baking sheet for 15 – 20 minutes, until tender. Sprinkle with parsley, if desired.


