Welcome!
You'll find over 470 of my favorite recipes here, including ideas for Quick meals, Cooking for 2, Feasting on Leftovers, and cooking with 5 Ingredients or Less. I'm adding new posts regularly; you can subscribe by email or RSS feed if you'd like to receive the latest recipes. Bon appétit!
Lemon-Raspberry French Toast Strata
By Kath Dedon
.
A couple of years ago Laura and her friend, Mary, made a wonderful Mother’s Day brunch for their lucky moms—me and Julie! They researched recipes at epicurious.com and found Lemon-Raspberry French Toast Strata. Well, it was a big hit, and has been in our family’s brunch repertoire ever since.
I have always made it with regular whole milk, but last Sunday (Father’s Day) I tried it with unsweetened vanilla flavored almond milk. I had noticed that several reviews of the recipe at epicurious mentioned adding vanilla or almond extract; the vanilla almond milk seemed like it would be a good substitution. It worked really well with the almond milk, so that’s a great option if you are cooking for someone who is lactose intolerant. (I had leftover almond milk and found that it was very tasty on my Go Nutty Granola!)
The original recipe serves 8 – 10 people; I made half of the recipe last Sunday because I didn’t want a lot of leftovers. It probably would have been quite good, though, reheated the next day in the oven or microwave oven.
The Lemon-Raspberry French Toast Strata was part of our Father’s Day brunch that included scrambled eggs, lots of bacon, and fresh Bing cherries. Yum!
~
Update June 25, 2013: Make it Gluten Free!
Udi’s Gluten Free has developed a similar recipe using Udi’s GF White Sandwich Bread instead of regular bread. I think that would work quite well with this recipe if you need a gluten free option. 🙂

~
Lemon-Raspberry French Toast Strata
(Adapted from a recipe at epicurious.com, attributed to Tracey Seaman, March 2007)
.
.
Serves 4 – 6 (Double and make in a 9×13-inch pan to serve 8 – 10)
~
¼ cup pure maple syrup, plus additional for serving
3 cups 1-inch cubes of white bread (crusts optional, I left them on)
¾ cup fresh raspberries
3 large eggs
2 cups whole milk (or almond milk)
½ teaspoon finely grated lemon zest
1/8 teaspoon salt
~
~
1. Preheat the oven to 350˚.
2. Butter an 8×8-inch baking pan; pour the maple syrup in the pan.
3. Distribute the bread cubes and the raspberries in the pan.

~
4. Beat the eggs, milk, lemon zest and salt together and pour over the bread cubes.

~
5. Bake until puffy and golden brown, about 50 minutes. Let sit for 5 minutes before cutting.
6. Serve with additional maple syrup.
Share this:

Cobb Salad
By Kath Dedon
Deb’s Smitten Kitchen blog is one of my favorites. It’s fun to read, the recipes are inspiring, and the photos are outstanding. I’m sure it was Deb’s post about Classic Cobb Salad that inspired me to make my own version of Cobb Salad. It was probably what inspired me to make Steeped Chicken so I would have perfectly cooked chicken for the salad.
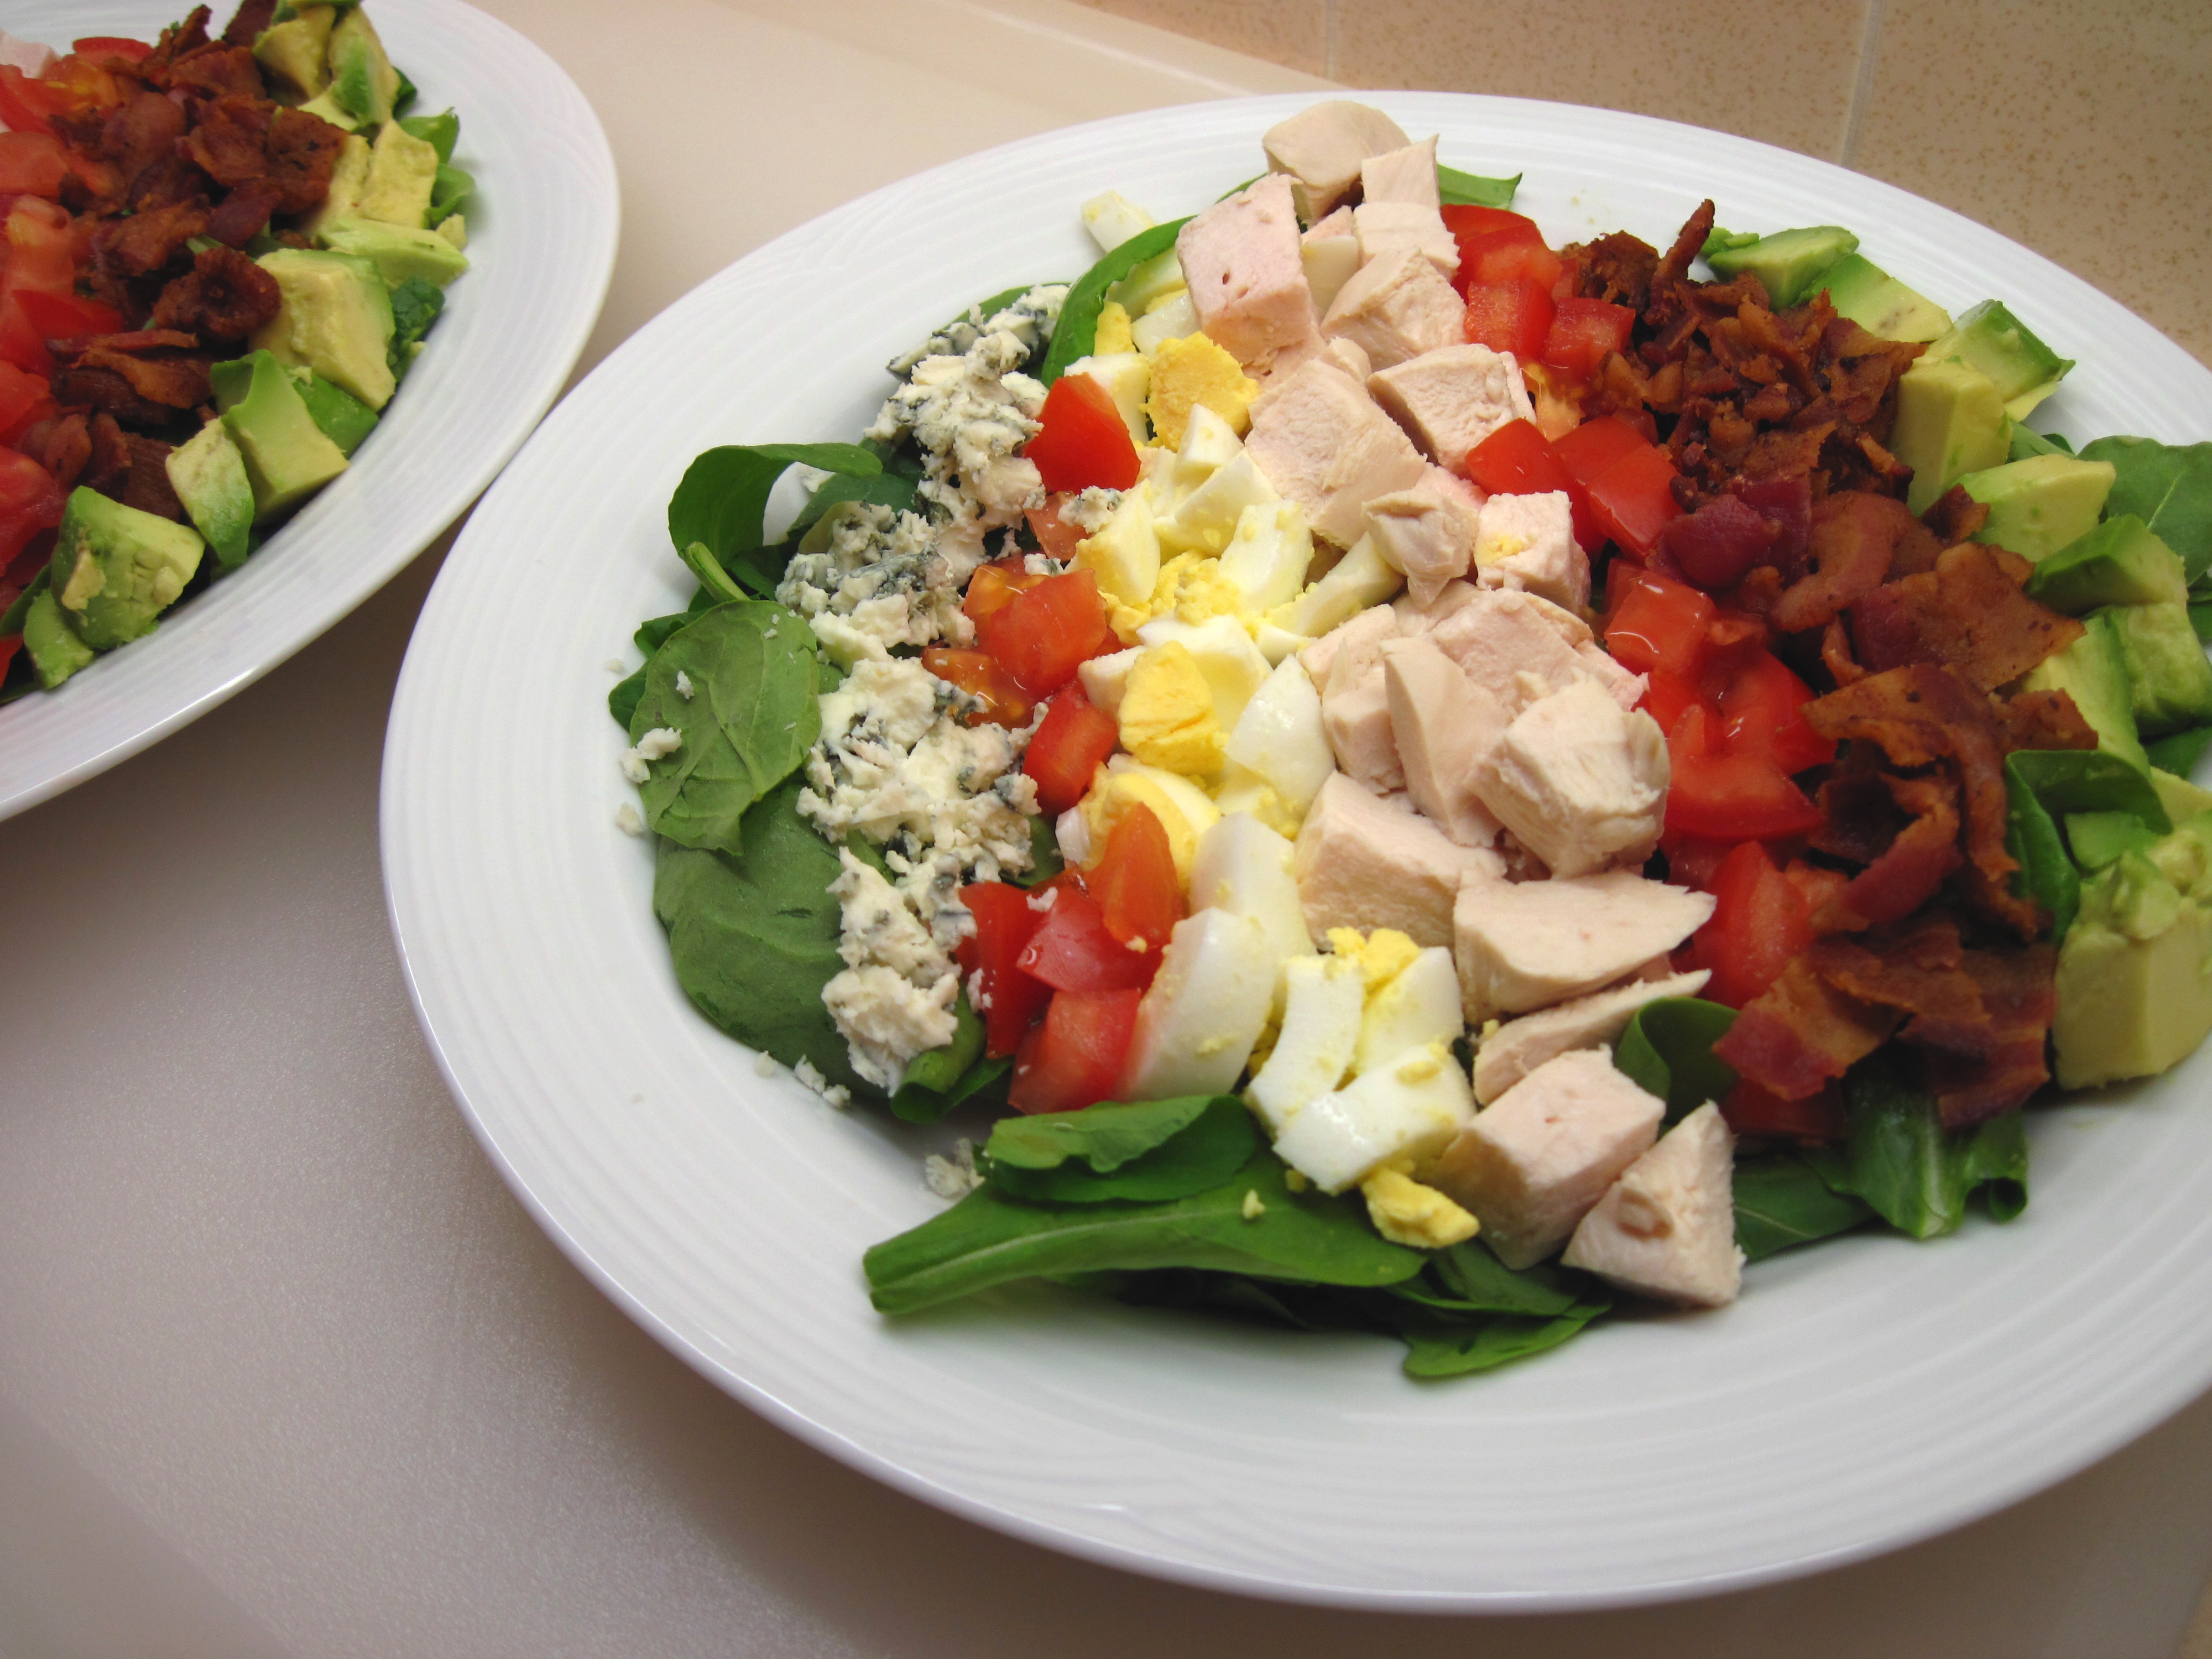
Deb used the classic greens: iceberg lettuce, Romaine lettuce, and watercress. Well, watercress was not available at my store, and the iceberg looked pathetic. I could have gotten Romaine, but I decided to go with arugula. I love arugula, it looked fresh, and I knew it could hold its own with all of the other flavors. It worked for me!
So here is my not-so-classic Cobb Salad.
.

.
Cobb Salad
(Inspired by the recipe in Smitten Kitchen for Classic Cobb Salad)
.
.
Serves 2
~
Dressing:
2 tablespoons white balsamic vinegar
2 teaspoons Dijon mustard
1/8 teaspoon salt
2 tablespoons olive oil
~
Whisk the vinegar, mustard and salt together in a bowl. Slowly drizzle the olive oil into the vinegar mixture while whisking constantly.
~~~
Salad:
About 4 cups arugula, washed and dried
8 – 10 ounces cooked chicken breast, cut into cubes
4 – 5 slices bacon, cooked until crisp
2 hard boiled eggs, diced
1 small tomato, diced
½ avocado, diced
About 2 ounces blue cheese (I used Maytag blue)
~
Divide the arugula between two plates. Divide the remaining ingredients between the two plates, arranging them in rows. Drizzle the dressing over the salads and serve.

Share this:

Steeped Chicken and a Tasty Chicken Sandwich
By Kath Dedon
.
I think I first learned about “steeping” from Sunset magazine many years ago. Steeping is a Chinese method of cooking lean cuts of meat, like chicken breasts or pork tenderloin. The meat is put in boiling water; the pot is immediately removed from the heat and covered. The meat “steeps” in the hot water until done. The result is very tender, moist meat; it doesn’t get tough like it would if you were to boil it.
It’s important to use plenty of water (the meat should be covered by at least an inch), and the individual pieces of chicken (or pork tenderloin) should be no larger than 3/4 pound.
Boneless skinless chicken breasts are ideal for this method. The steeped chicken will be ready in 20 – 25 minutes and is perfect to use for sandwiches, salads, or casseroles that call for cooked chicken.

.
Steeped Chicken
(Adapted from an article published in Sunset’s Summer 1997 Special Issue—Quick, Light and Healthy)
.
.
1½ pounds chicken breast halves, boned and skinned
~
1. In a large pot, bring 4 quarts of water to a boil.

.
2. When the water is boiling, put the chicken breasts in the water, cover the pot, and remove it from the heat.
3. Set the timer for 20 minutes. (The exact time will depend on the size of the chicken breasts.)

.
4. At 20 minutes, check the chicken breasts. Quickly remove them from the pot and put the lid back on. (You want to maintain the temperature of the water in case you need to put the chicken back in.) You can use a meat thermometer (the internal temperature should be 165˚) or just cut the largest one in half to see if it’s done.
5. If the breasts are not quite done (mine were not), put them back in the pot, cover with the lid and check again in another 5 minutes. (25 minutes was the perfect timing for my chicken breasts.)
6. When done, you can use the meat right away for any recipe calling for cooked chicken, or refrigerate it to use later.
~
I used some of the chicken to make tasty chicken (lightly salted), onion, avocado, and “just a bit” of mayonnaise sandwiches on lightly toasted whole wheat bread. I saved the rest to be used in a Cobb salad later.

Share this:

Go Nutty Granola
By Kath Dedon
For years I bought our favorite granola, Breadshop’s “Honey Gone Nuts”, at PCC. It has lots of nuts, hence the name, including almonds, walnuts, and cashews. It’s sweetened with honey and doesn’t have any dried fruit. It was our favorite!
Then, for some reason, PCC stopped carrying it. I searched and found it available at amazon.com, so I ordered a case of 6 boxes. It was good to know we could still get it.
We recently ran out of our supply, and I decided to try making my own version instead of ordering it. I must say I’m quite pleased with the way it turned out.
The great thing about making your own granola is that you can truly make it your own! Mark Bittman’s version in Food Matters is called “Anything Goes Granola”. He points out that you can use other rolled grains besides oats, and you can use different nuts. If you like dried fruit in your granola, you can add that, too; just stir in 1 to 1½ cups dried fruit after the granola has baked.
Using Mark’s recipe as a guide, I made my “Go Nutty Granola”. He calls for ½ to 1 cup honey or maple syrup. I used ½ cup of honey, which made it subtly sweet. Use more if you like a sweeter granola.
Mark’s granola doesn’t have any added oil, and you can certainly make it without oil. The Breadshop’s Honey Gone Nuts lists canola oil as the third ingredient, right after oats and honey. I decided to add just a bit of oil and used 2 tablespoons coconut oil. You could use canola oil, or omit the oil.
I had walnuts to use, but I would also use pecans, almonds, or cashews.
So here is Kath’s “Go Nutty Granola”! (Or at least it is this week’s version of my Go Nutty Granola!) It was delicious with yogurt this morning.
~~
Update: August 21, 2010
I just made a new batch of Go Nutty Granola. I used 1/4 cup coconut oil (heat the coconut oil in the microwave oven for about a minute to make it liquid) and 3/4 cup honey this time, and I baked it for about 23 minutes. I think it’s even better this time! Keep in mind, though, that you can use as little or as much oil or honey as you want. The recipe is extremely flexible! 🙂
Update: December 5, 2010
Same method, but I used: 5 cups oats, 1½ cups chopped walnuts, 1½ cups chopped pecans, 1 teaspoon cinnamon, ¼ cup coconut oil, ½ cup honey, ¼ cup pure maple syrup, salt (to taste) Mmmm….good! 🙂
.

.
Go Nutty Granola
(Adapted from Mark Bittman’s recipe in Food Matters)
.
~
Makes 8 – 9 cups
~
5 cups rolled oats (regular, not quick-cooking or instant)
3 cups of chopped walnuts (or 3 cups of your choice of chopped nuts and/or seeds)
2 tablespoons sesame seeds
1 teaspoon cinnamon
2 tablespoons ¼ cup coconut oil
½ – 1 cup honey or maple syrup, or to taste (I used ½ cup honey the first time and 3/4 cup the second time)
Salt, to taste
Optional: dried fruit to stir in after the granola is done baking (We prefer it without fruit.)
~
1. Heat oven to 350˚.
2. Combine the oats, nuts, sesame seeds and cinnamon in a large bowl.

.
3. Melt the coconut oil in the microwave oven.
4. Add the honey to the coconut oil and stir together.
5. Pour the honey and oil over the granola and stir well so everything is well-coated. Sprinkle lightly with salt and stir again.
6. Spread the granola on a large rimmed baking sheet and set the timer for 25 20 minutes.
7. Stir the granola occasionally; remove from the oven when it is toasted the way you like it. It should take about 20 – 25 minutes; it took 25 23 minutes for my granola to be done.

.
8. Stir in dried fruit, if you’re using it.
9. Let the granola cool on a wire rack. When it’s cooled off, store it in the refrigerator. It keeps indefinitely.


Share this:

Tostada Salad for 2
By Kath Dedon
.
This Tostada Salad from Sunset Cooking for Two…or Just for You has been a family favorite for over 25 years. It’s quick, easy, and flavorful. It’s a main dish salad that can be enjoyed year-round. The recipe doubles easily if you’re serving four people.
The original recipe calls for red kidney beans, which I have used. It’s pretty easy to find an 8-ounce can of kidney beans; it’s a convenient size. I have decided, however, that I prefer pinto beans or black beans. I just use half a can and save the rest to use later.
Ketchup may seem like a weird ingredient, but it works to bind the ground beef mixture together, and the ketchup is pretty much undetectable in the finished dish. You can substitute a tomato-based salsa that is “saucy” for the ketchup. I have done that and it works well.

~
Tostada Salad
(Adapted from a recipe in Sunset Cooking for Two…or Just for You)
.
.
Serves 2 (easily doubles)
~
½ pound lean ground beef
½ cup chopped onions
1 can (8 oz.) beans (or ½ 15 oz. can)
¾ teaspoon chili powder
¼ teaspoon ground cumin
3 tablespoons ketchup
About 3 cups iceberg lettuce, torn into bite-size pieces
½ cup shredded Monterrey Jack or cheddar cheese
1 small tomato, cut into wedges
1 small avocado, cut into wedges
Tortilla chips for serving
A chunky fresh salsa for serving (optional)
~
1. Cook the ground beef and onions together in a pan until the ground beef is done. Drain off any extra fat.

2. Add the beans, chili powder, cumin, and ketchup. Cook, covered, over medium-low heat for about 5 minutes.
(I used pinto beans this time.)

~
3. Divide the lettuce between two plates.
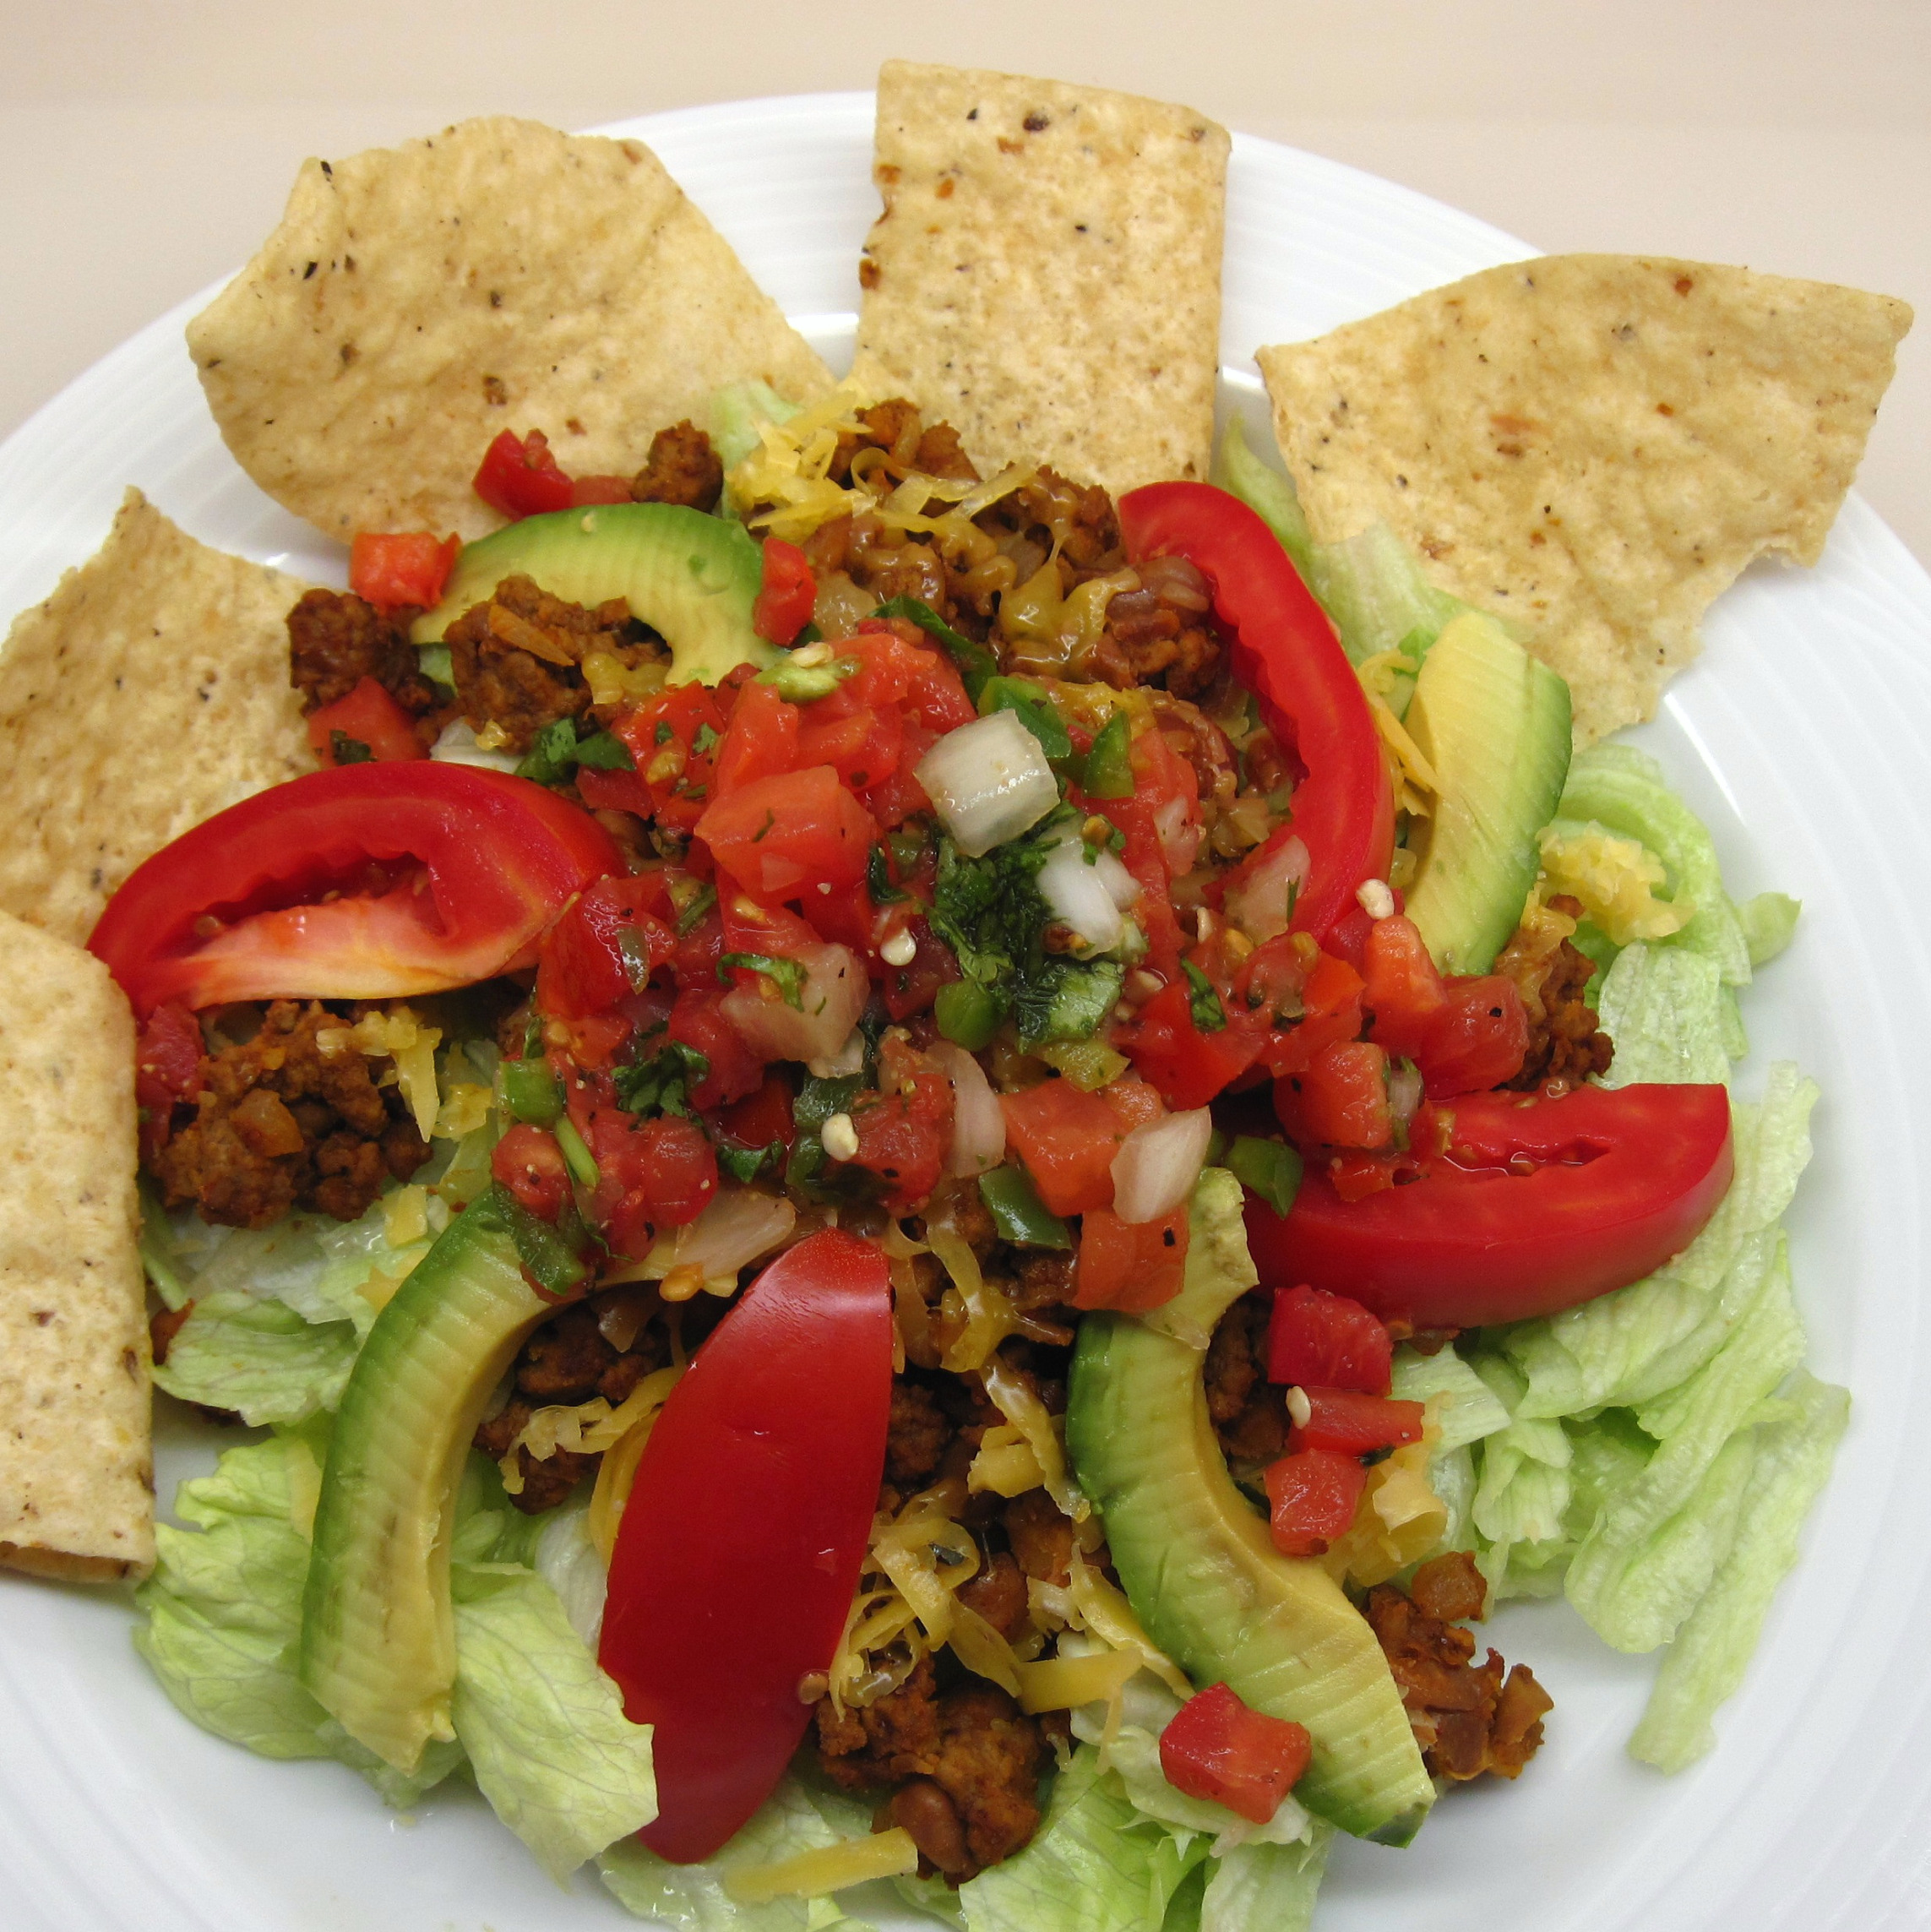
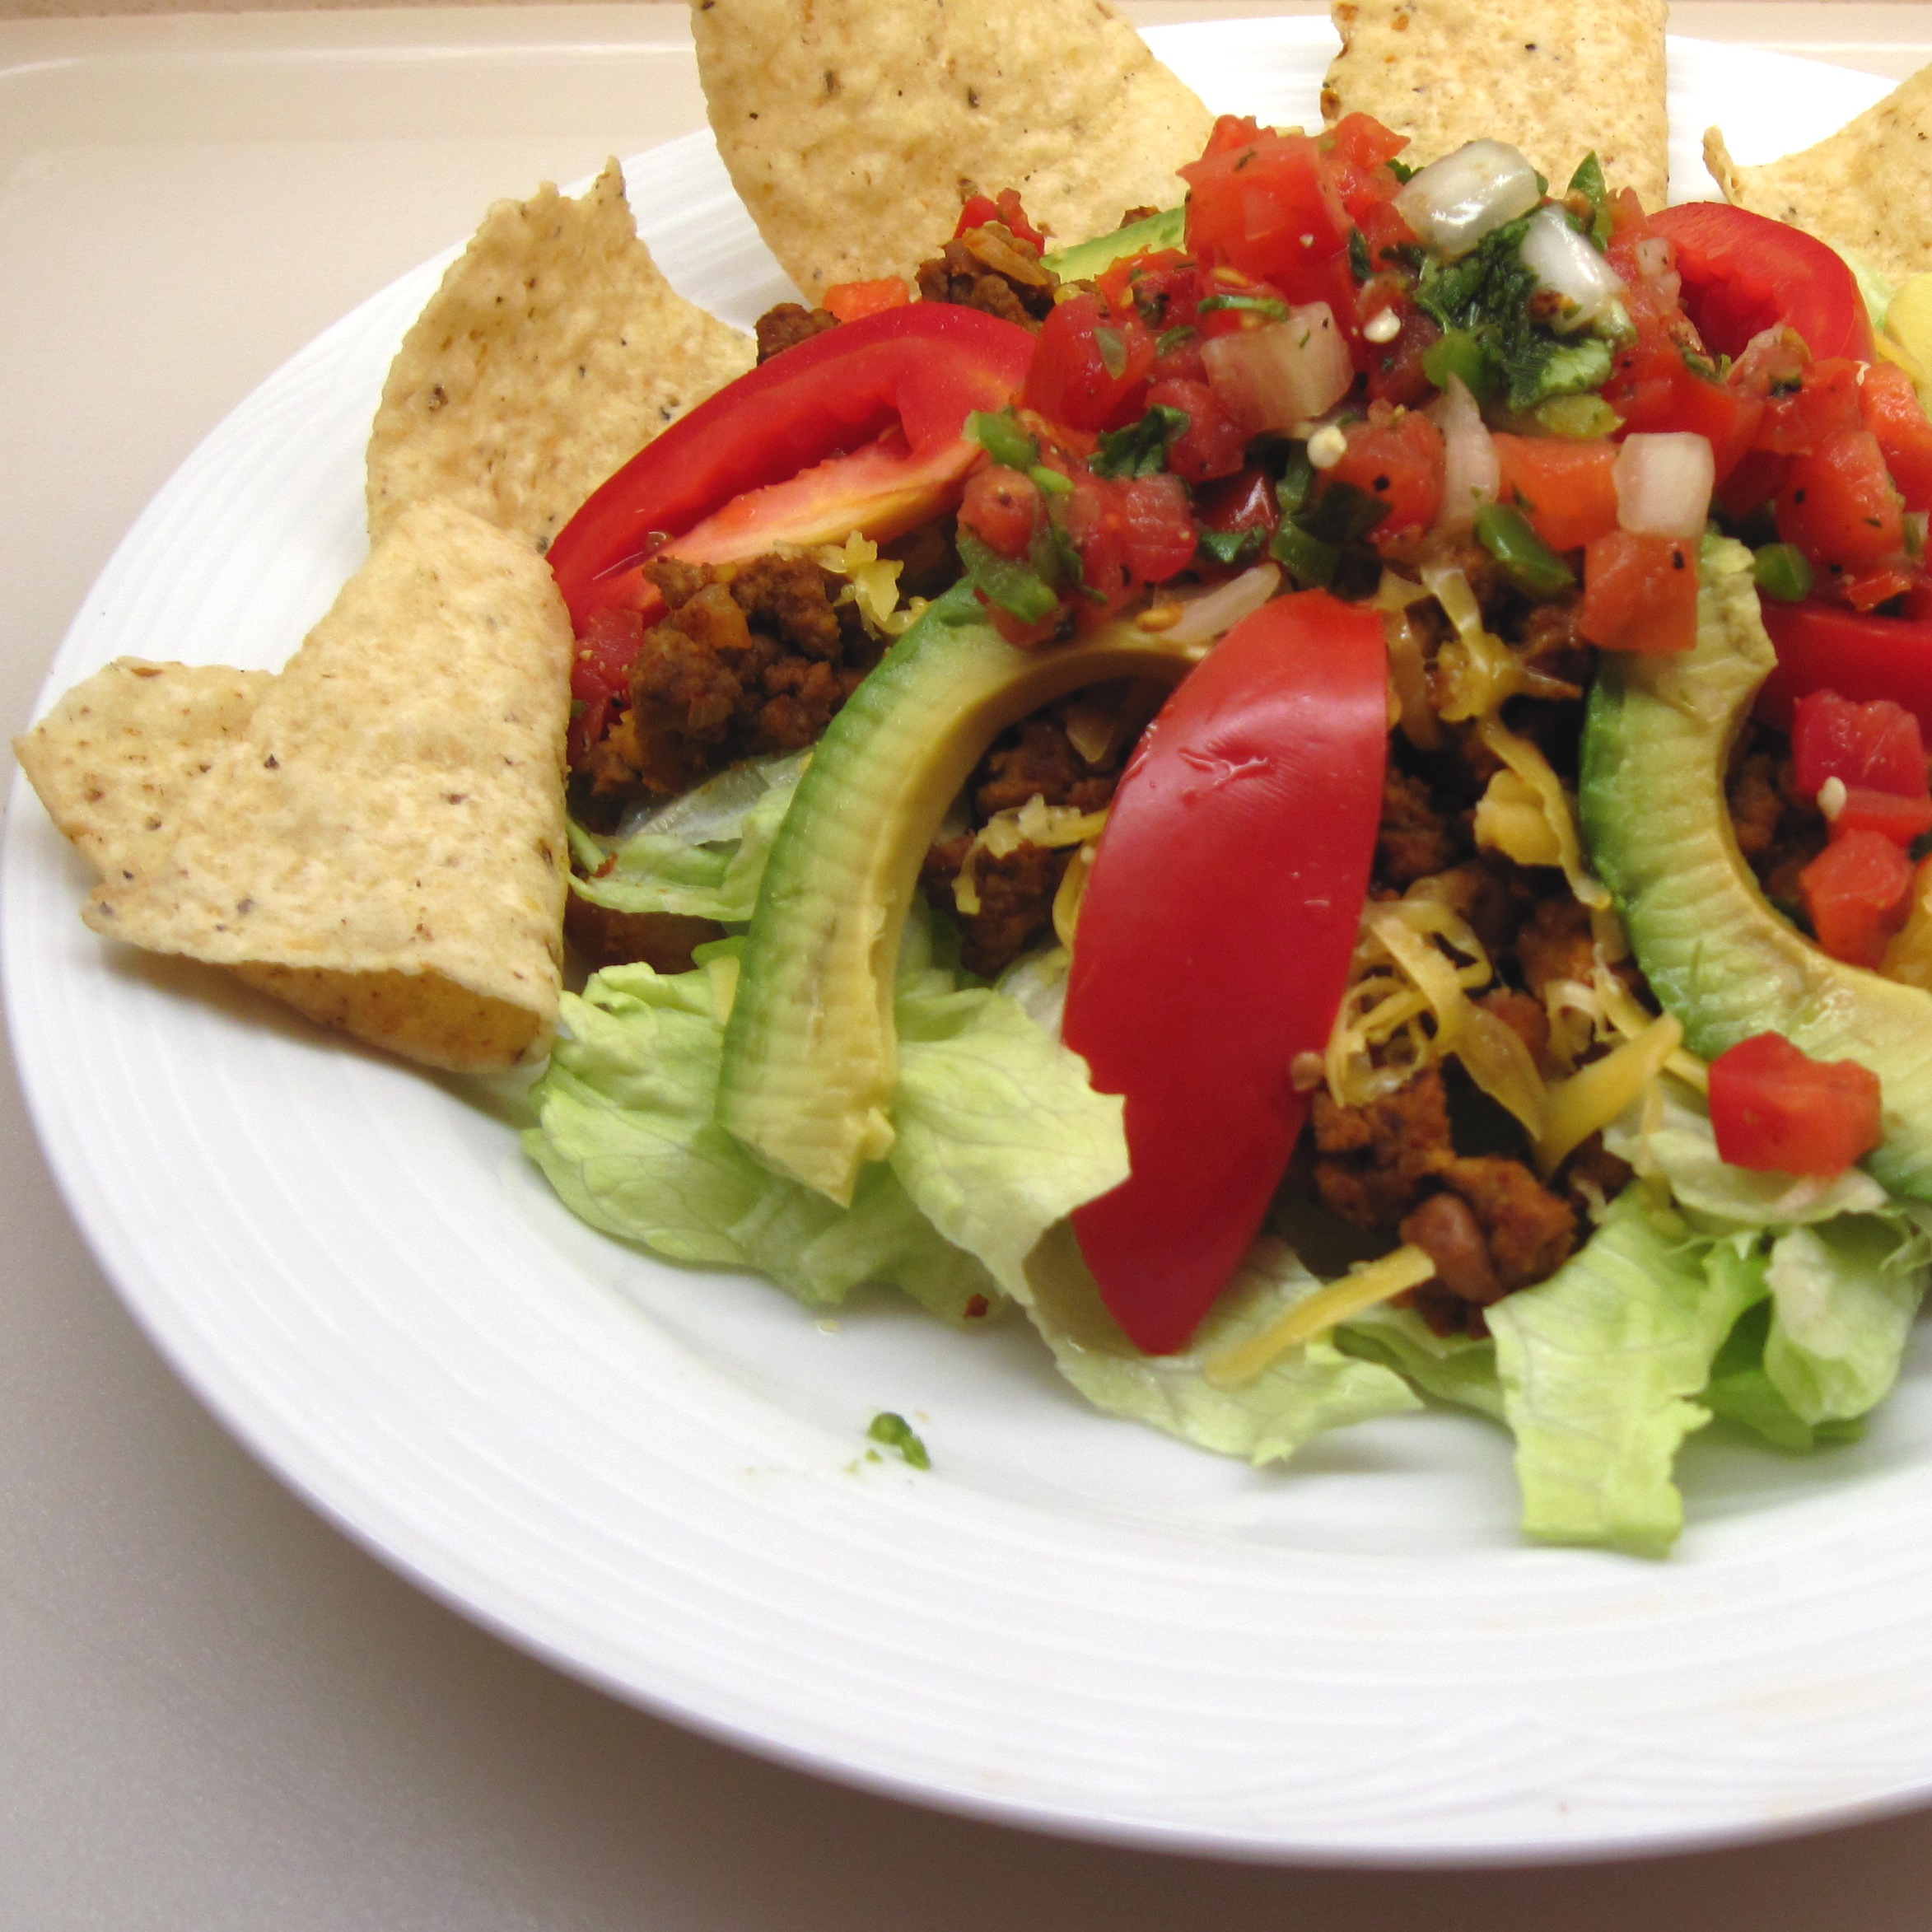
4. Top the lettuce with the ground beef and beans mixture. Sprinkle the cheese on top. Arrange the tomato and avocado slices on top. Serve with a few tortilla chips. Top with a bit of chunky fresh salsa, if desired.
Here is the finished salad, topped with a bit of chunky fresh salsa.

Share this:

Sunday Morning French Toast
Sunday morning breakfast is most often bacon and eggs at our house. Today, however, I had a small leftover baguette of French bread that needed to be used ASAP. I also had just two eggs. So I decided to make French toast.
I needed one egg for the French toast, and I cooked the other for Bob. Bacon, of course, rounded out the meal.
I cooked the bacon first, poured out the bacon grease, and cooked the French toast and egg right in the same pan. The French toast tasted great with pure maple syrup.
This recipe makes enough for 3 – 4 slices of French toast, depending on the size of your slices of bread. It can easily be doubled to make more.

French Toast
Serves 2 (doubles easily)

~
3 or 4 slices of bread
1 egg
¼ cup milk
A bit of cinnamon (I used less than 1/8 teaspoon)
A bit of butter for the pan
~
1. Heat a large pan or griddle over medium heat.
2. Beat the egg.

~
3. Beat the milk and cinnamon with the egg.
(You can see that I used less than an 1/8 teaspoon of cinnamon.)
~
4. Melt the butter in the pan or on the griddle.
5. Dip the bread in the egg mixture.
 ~
~
6. Cook the French toast over medium heat, turning it over once or twice, until done.
(I made four pieces of French toast, but the 4th piece had to wait for room in the pan.)

Share this:

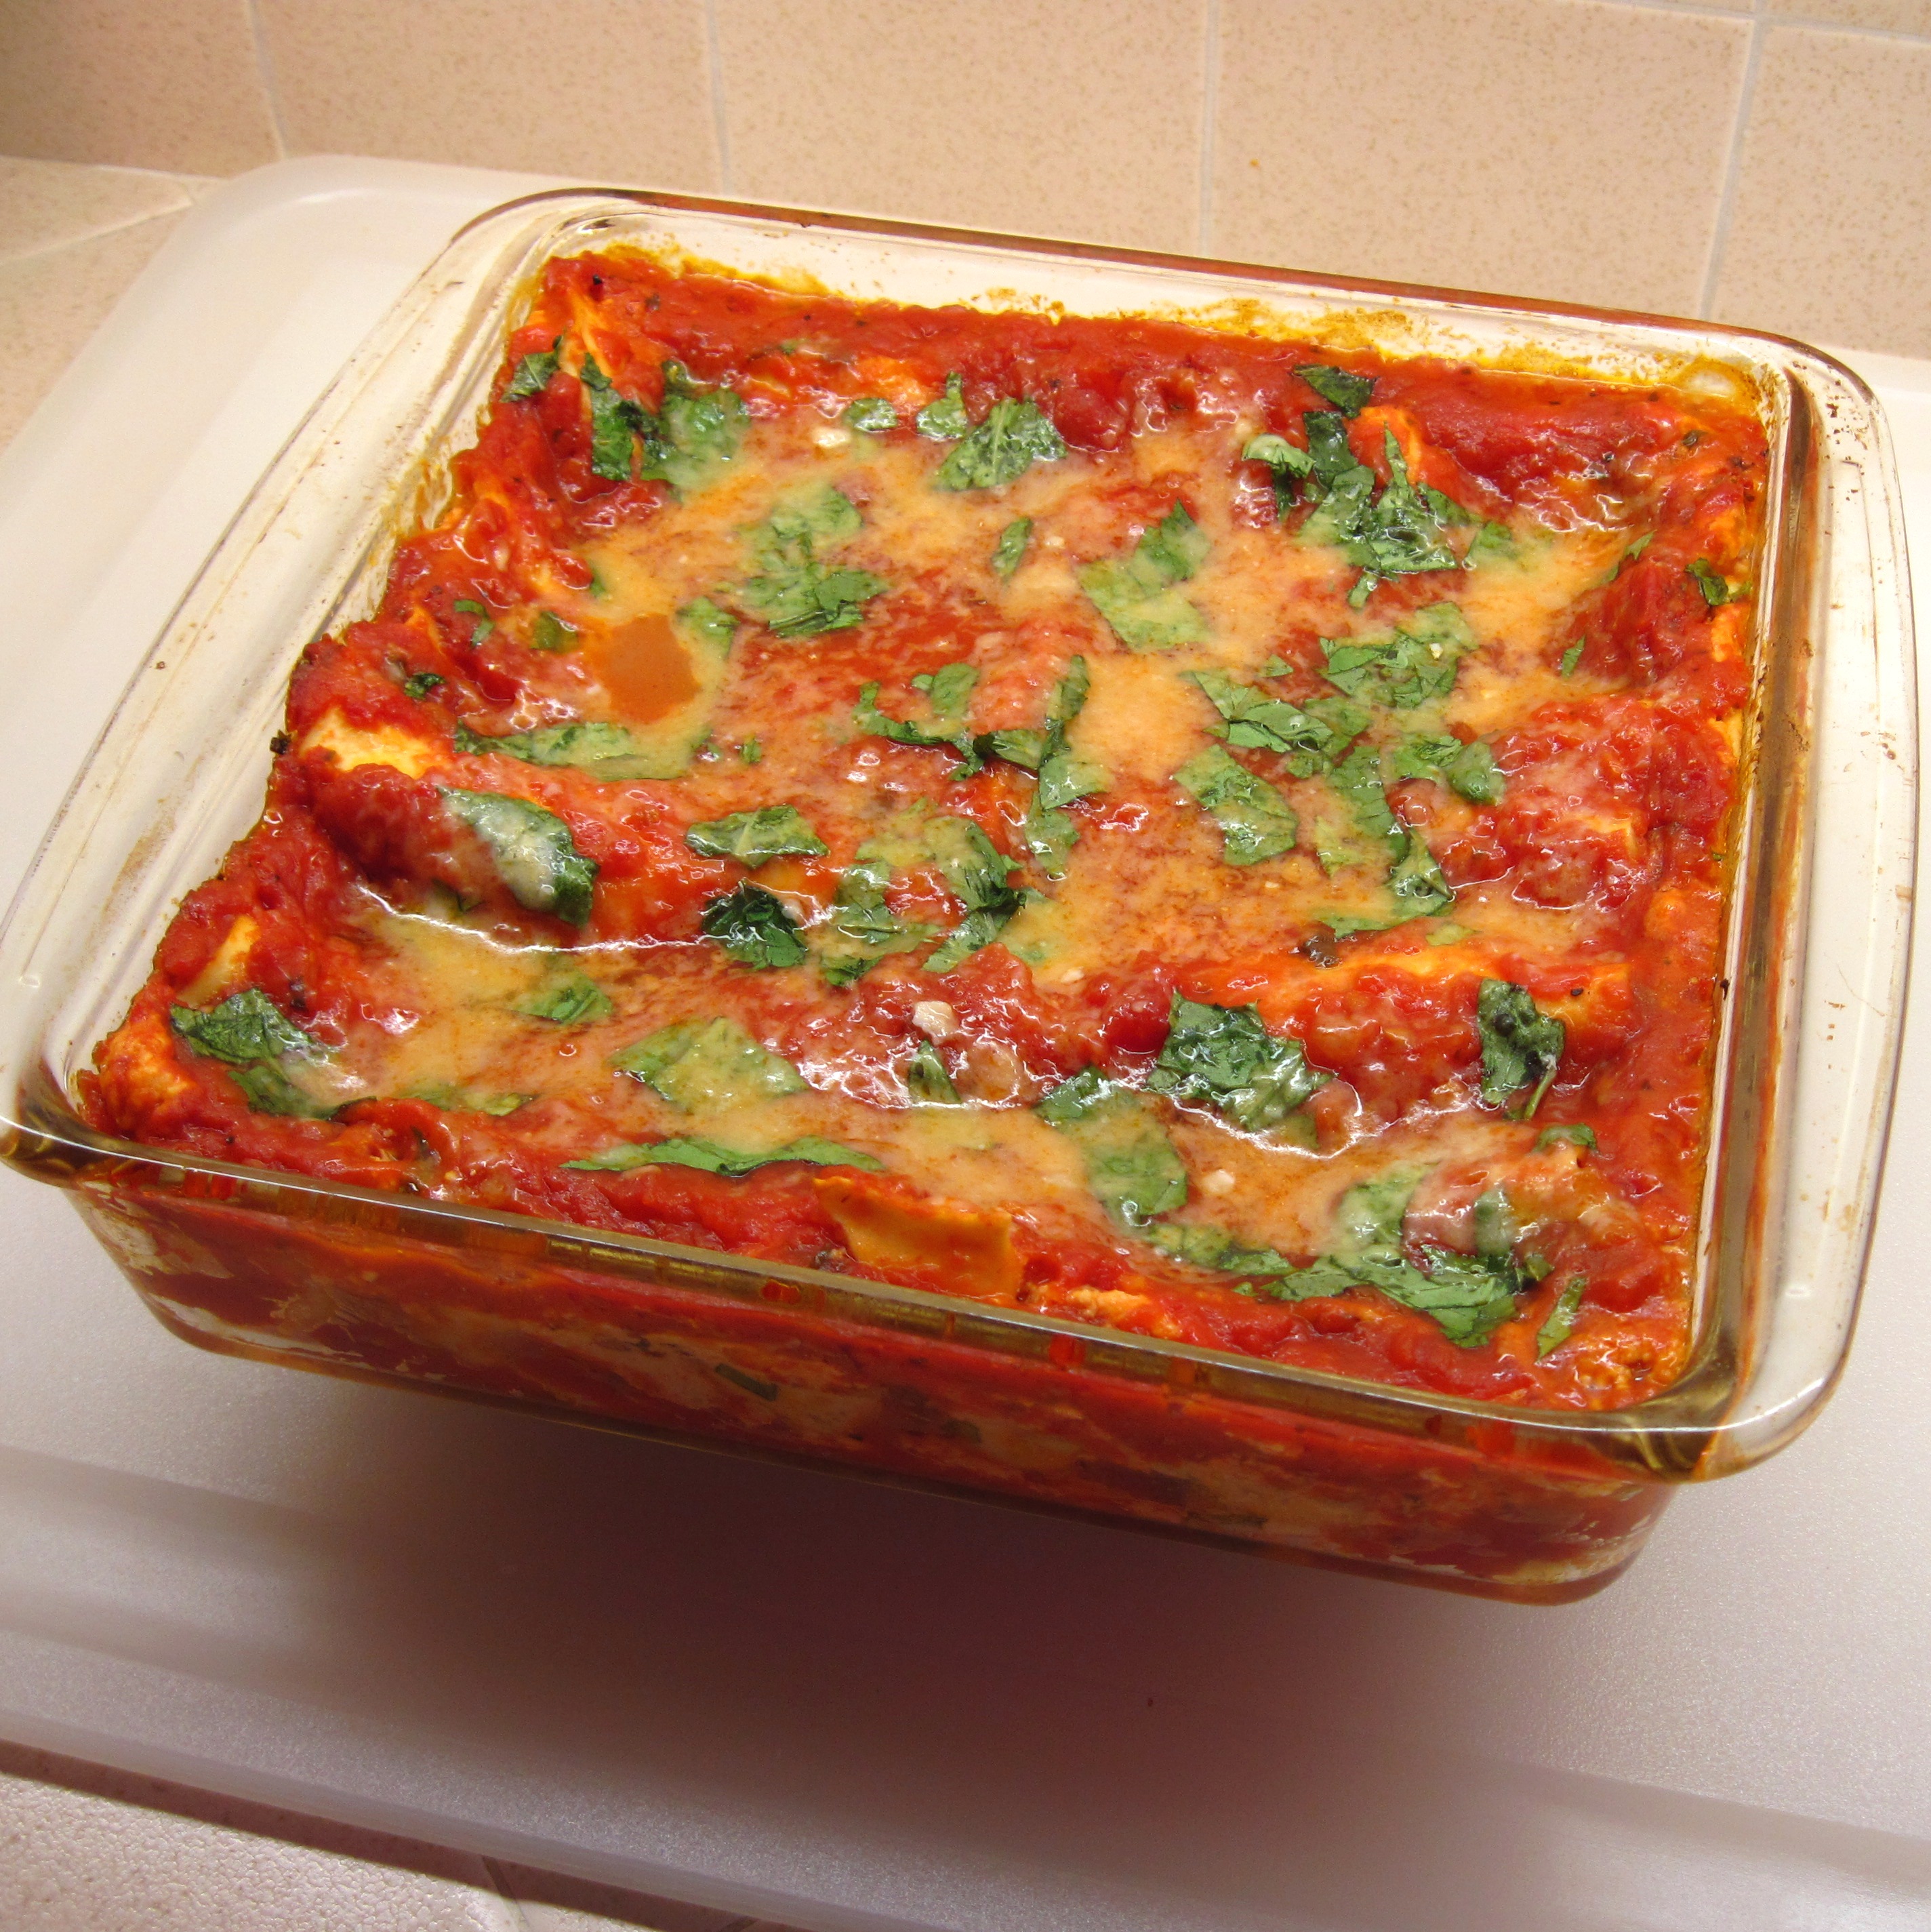
Lasagna Margherite
When you’re cooking for two most lasagna recipes are just too much. Sure, you can freeze some of it, but a full-size recipe for lasagna seems best for a group of friends or family.
Still, I love lasagna, and that’s why I was drawn to this recipe from Cooking Light. It’s quick, easy, and makes just 4 servings. It’s perfect for two, with just the right amount of leftovers.
With such a simple recipe, it’s important to use the best ingredients. Mezzetta Napa Valley Bistro Homemade Style Marinara truly does have a homemade taste. When you read the list of ingredients, it’s clear why it is so good.
“Imported Italian plum tomatoes from the San Marzano region, imported olive oil, fresh onions, sea salt, fresh garlic, Napa Valley Cabernet Sauvignon wine, fresh basil, black pepper, oregano.”
That’s it. No sugar, high fructose corn syrup, citric acid, natural flavoring, soybean oil, calcium chloride, soy lecithin, fractionated coconut oil, xanthan gum—all of which can be found in other brands.

So start with a great pasta sauce and use Barilla’s No-Boil Lasagna, which is “rolled flat like homemade”. It is the best no-boil lasagna I’ve ever tried.
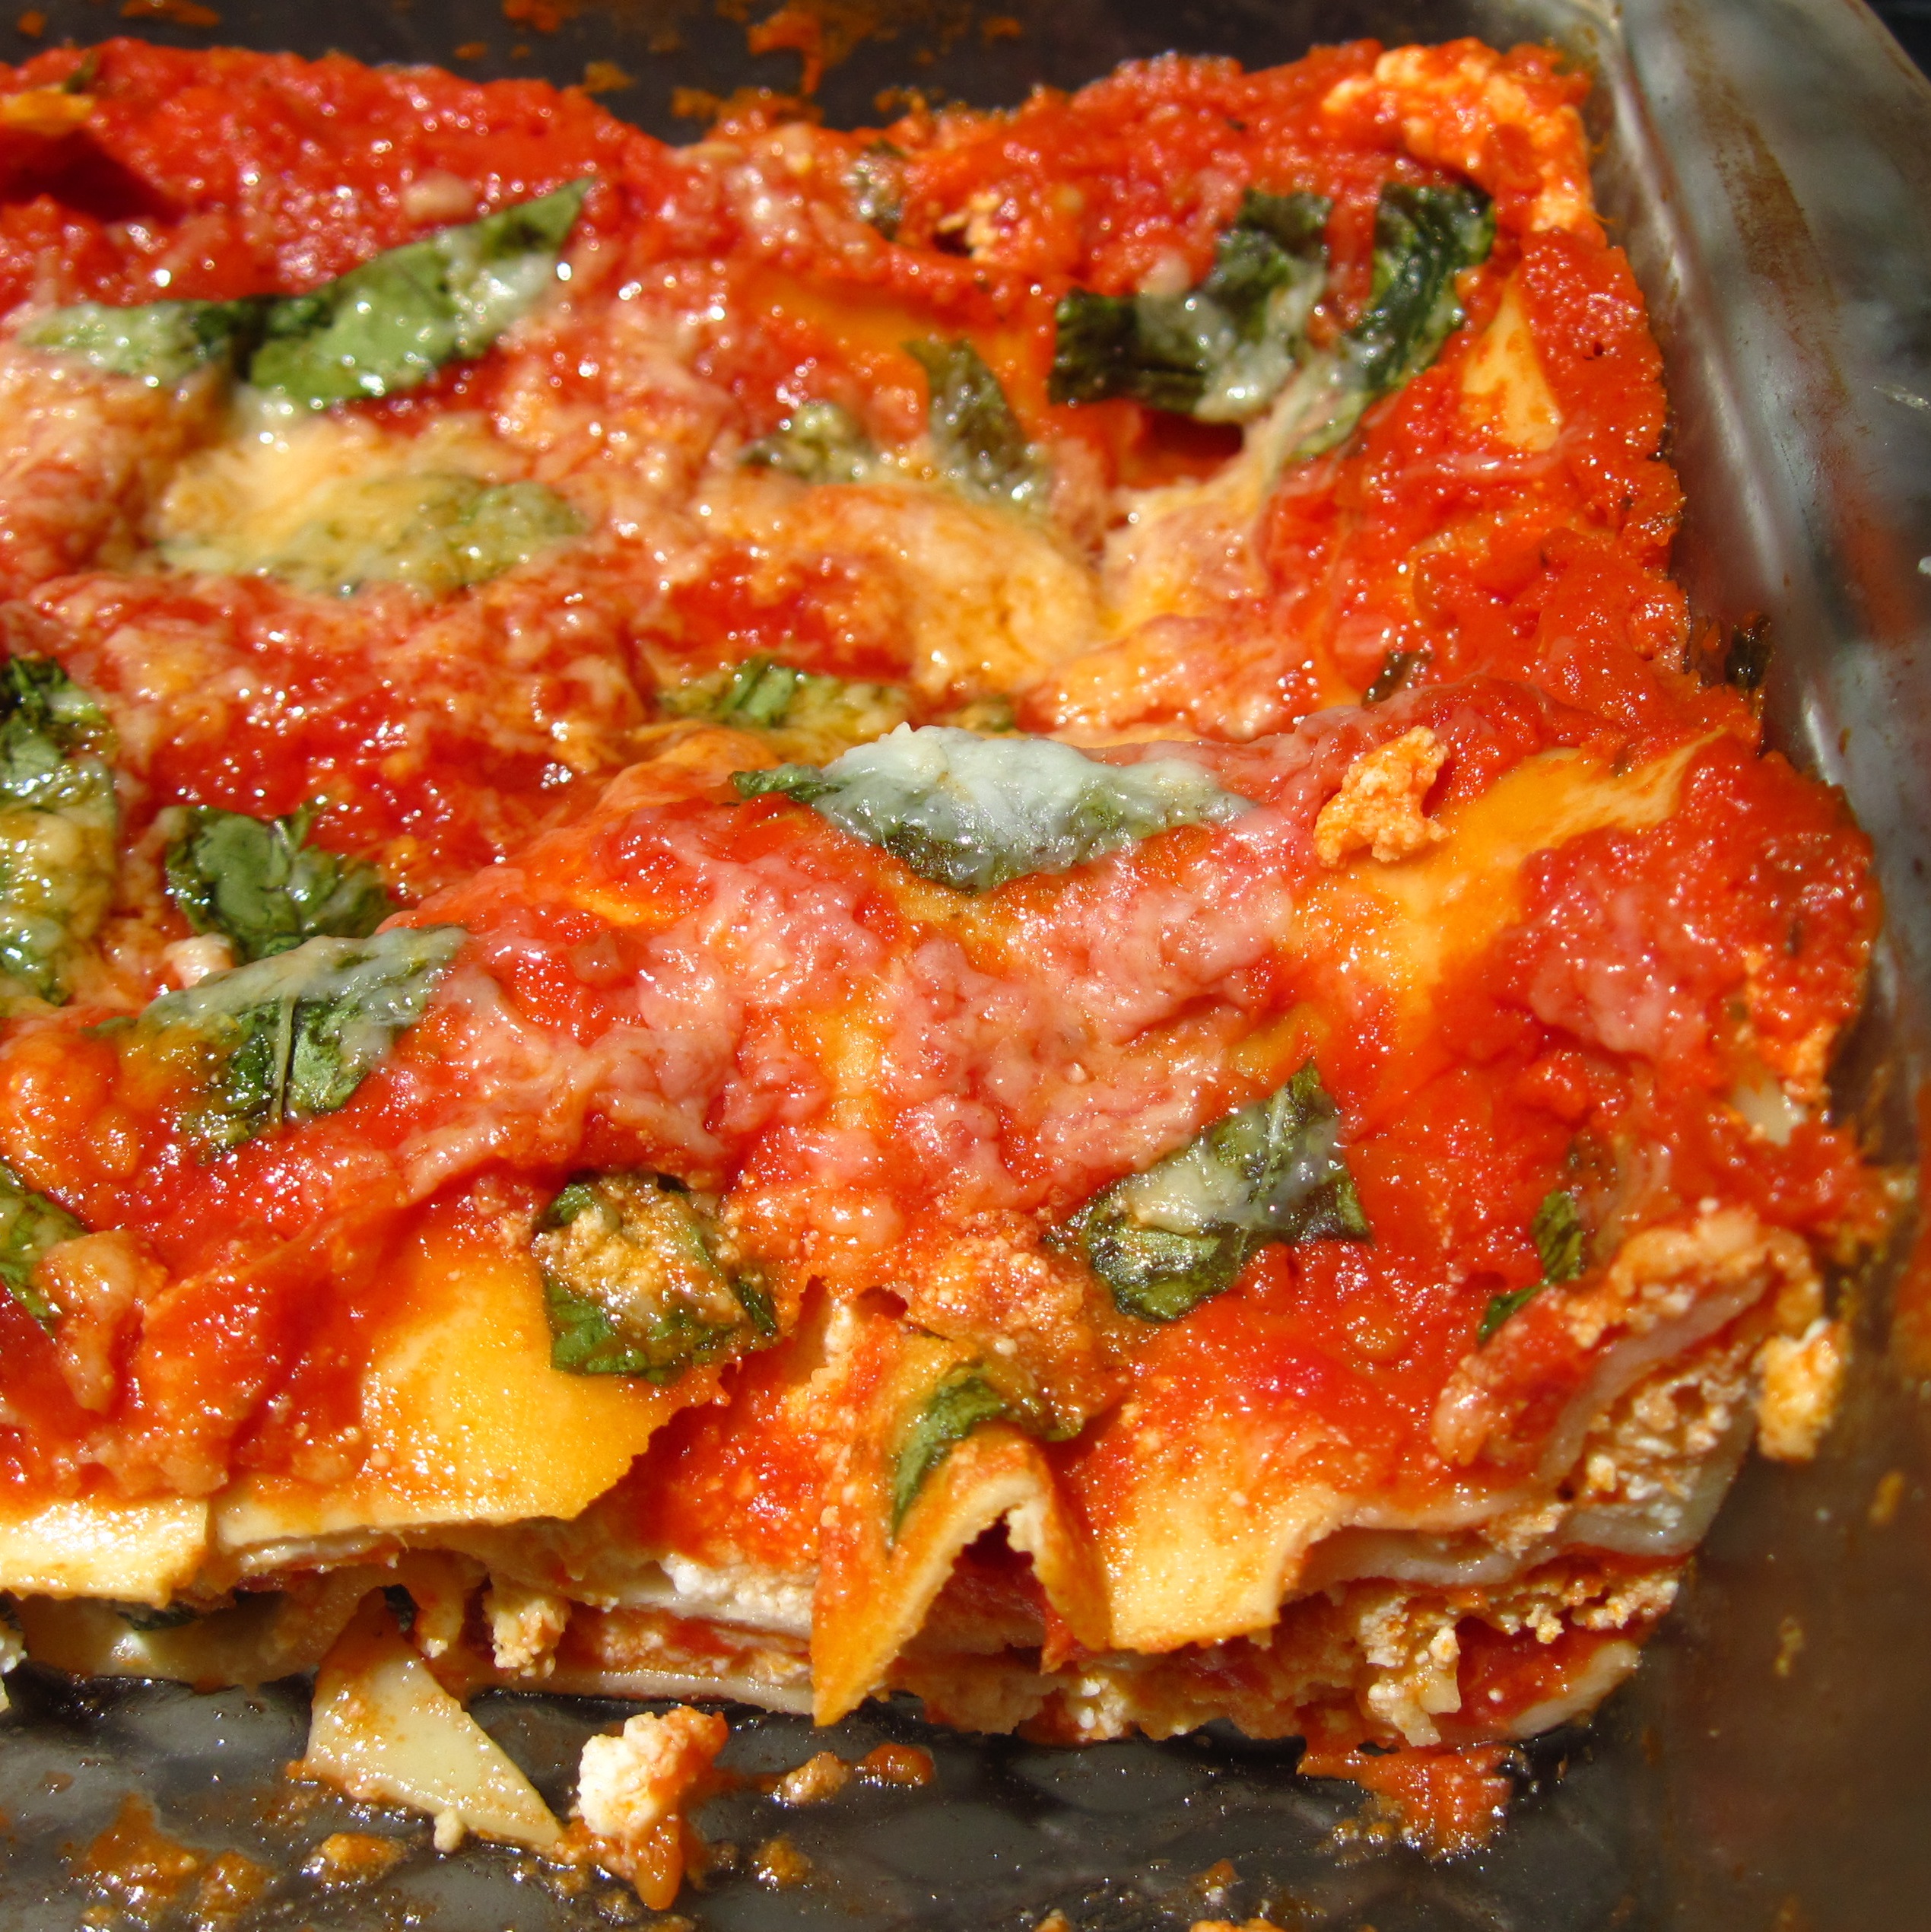
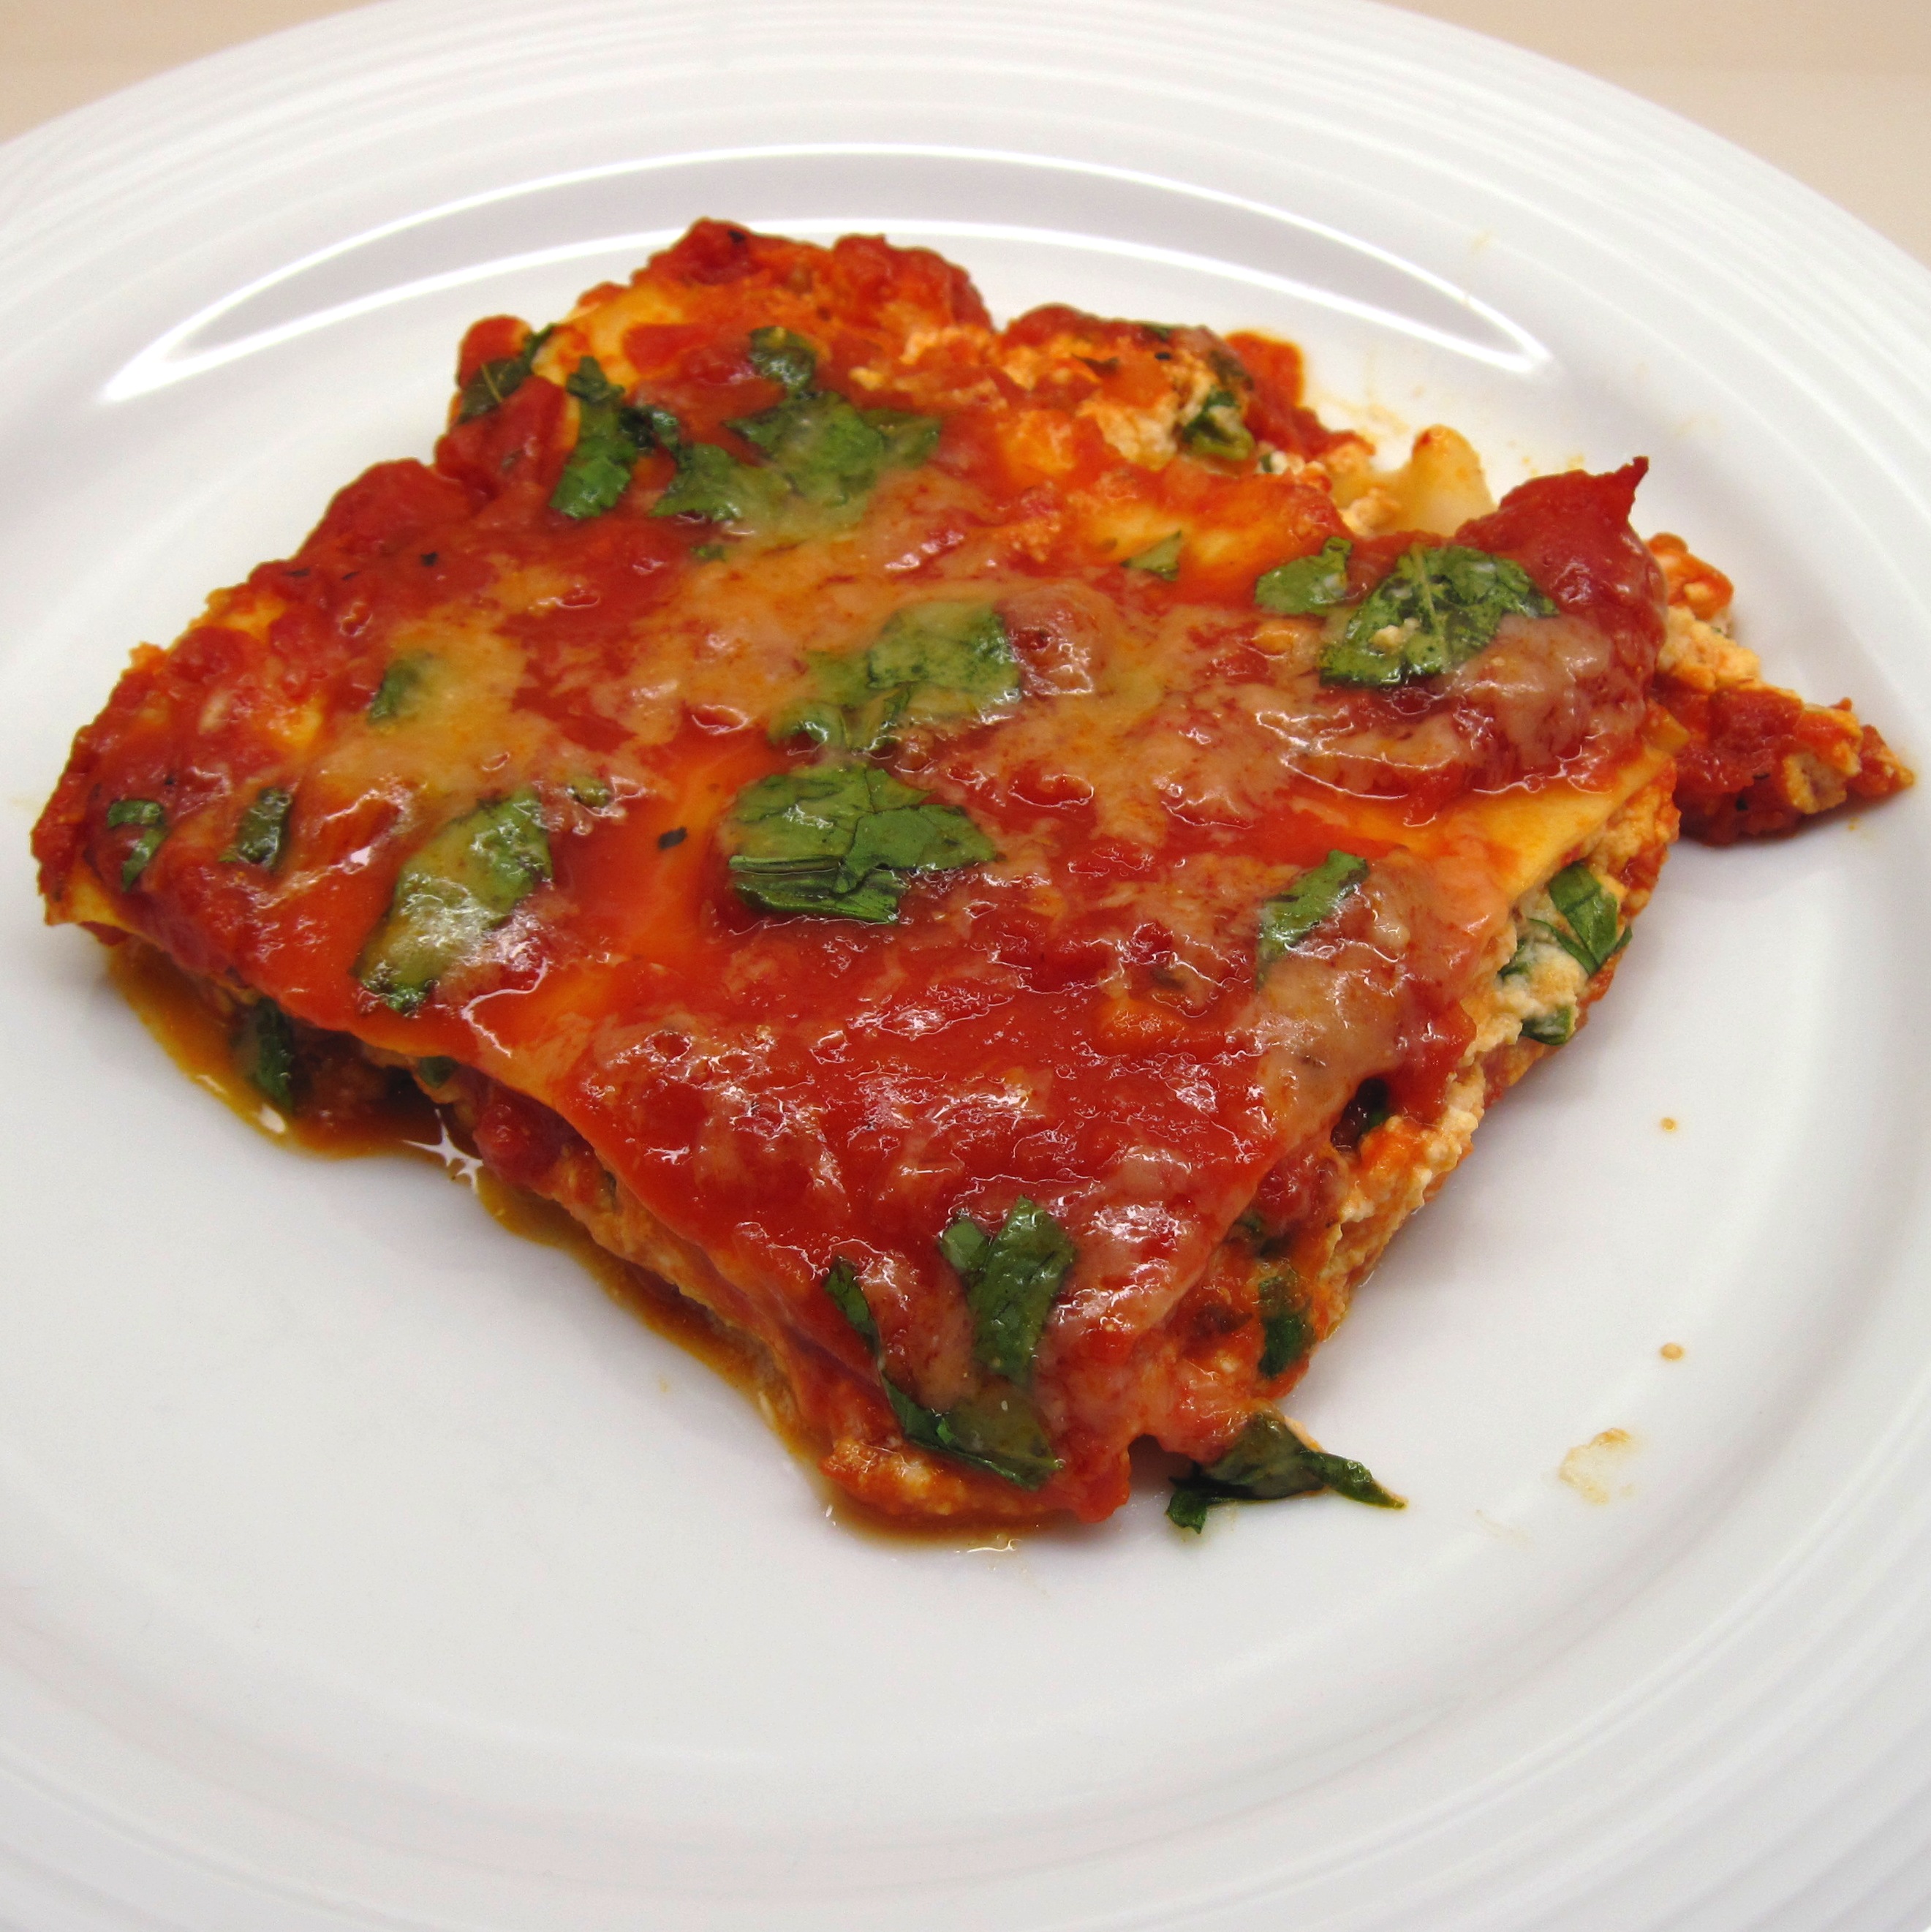
I added a layer of Mozzarella cheese to the original recipe, which makes it not quite so “light”, but it is a tasty addition.
Lasagna Margherite can be quickly put together and in the oven for a delicious weeknight lasagna.

Lasagna Margherite
(Adapted from a recipe in the November 1998 issue of Cooking Light)
~
Serves 4
~
1 teaspoon olive oil for the pan
1 (24-26 ounce) jar tomato sauce
1 (15-ounce) carton ricotta cheese
1/3 cup + 2 Tablespoons chopped fresh basil
½ teaspoon crushed red pepper
¼ teaspoon salt
6 no-boil lasagna noodles
½ cup (2 ounces) grated Parmesan cheese
2 – 3 ounces sliced Mozzarella cheese
~
1. Preheat the oven to 450˚.
2. Put the olive oil in an 8×8 inch baking pan and spread it around with a paper towel.
3. Combine the ricotta, 1/3 cup basil, crushed red pepper and salt in a bowl.

4. Put about ½ cup tomato sauce in the baking pan. Put 2 lasagna noodles on top.

~
5. Top the noodles with 1 cup of the ricotta mixture and the slices of Mozzarella cheese.

~
6. Cover with about ¾ cup of tomato sauce.
7. Put 2 more noodles on the sauce and cover them with the remaining ricotta mixture.

~
8. Top the ricotta mixture with another ¾ cup of tomato sauce.
9. Place 2 more noodles on top and cover them with the remaining tomato sauce.
10. Cover with foil and bake for 25 minutes.
11. Remove the foil and sprinkle the 2 tablespoons basil and the Parmesan cheese over the lasagna.

~
12. Return to the oven, uncovered, and bake for 5 minutes more.
13. Let the lasagna stand for 5 minutes before serving.
~


Share this:

Oven Barbecued Country-style Ribs
By Kath Dedon
a
Here’s another favorite from Sunset Cooking for Two…or Just for You. It takes a bit of time, but it’s easy to make. It’s worth the wait, and you’ll be rewarded with the wonderful smell of pork ribs baking in your oven.
I make the recipe’s barbecue sauce substituting fruit-sweetened ketchup and maple syrup for regular ketchup and brown sugar. I really like the barbecue sauce; it adds great flavor without being overwhelming. It starts out thin, but thickens as the ribs bake. If you really want to simplify the recipe, you could use your favorite commercial barbecue sauce.
The ribs were great served over steamed Yukon Gold potatoes with a big salad.
 ~
~
Oven Barbecued Country-Style Ribs
Adapted from the recipe in Sunset Cooking for Two…or Just for You
~
Serves 2 (easily doubles)
~
1 – 1½ pounds country-style pork ribs (bone-in or boneless)
½ lemon, thinly sliced
½ onion, thinly sliced
~
Barbecue sauce:
3 tablespoons maple syrup
1 teaspoon chili powder
½ teaspoon chipotle chili powder
¼ teaspoon celery seed
¼ teaspoon garlic salt
½ cup water
1/3 cup ketchup
2 tablespoons vinegar
1 ½ teaspoons Worcestershire sauce
1 ½ teaspoons soy sauce
(¼ teaspoon salt, if needed)
 ~
~
1. Preheat the oven to 350˚.
2. Arrange the ribs in an 8×8-inch pan. Cover with the lemons and then the onions. Cover with aluminum foil and bake for 1 hour and 15 minutes.
 ~
~
3. While the ribs are baking, make the barbecue sauce. Combine all sauce ingredients (except the ¼ teaspoon of salt) in a sauce pan and cook, uncovered, over medium heat for 5 minutes.
 ~
~
4. Taste the sauce for seasoning, and add the ¼ teaspoon of salt if needed. (It will depend on the saltiness of your brands of ketchup and soy sauce.)
5. After the ribs have baked for 1 hour and 15 minutes, remove the pan from the oven. Discard the lemon and onion slices. Remove the ribs from the pan and pour out the accumulated pan drippings.
6. Return the ribs to the pan and pour the barbecue sauce over the ribs. (You can see how thin the sauce looks in the photo below. It thickens as it bakes.)
 ~
~
7. Bake the ribs, uncovered, for 45 minutes more. Spoon the sauce from the pan over the ribs 2 or 3 times during this 45-minute baking time.
Share this:

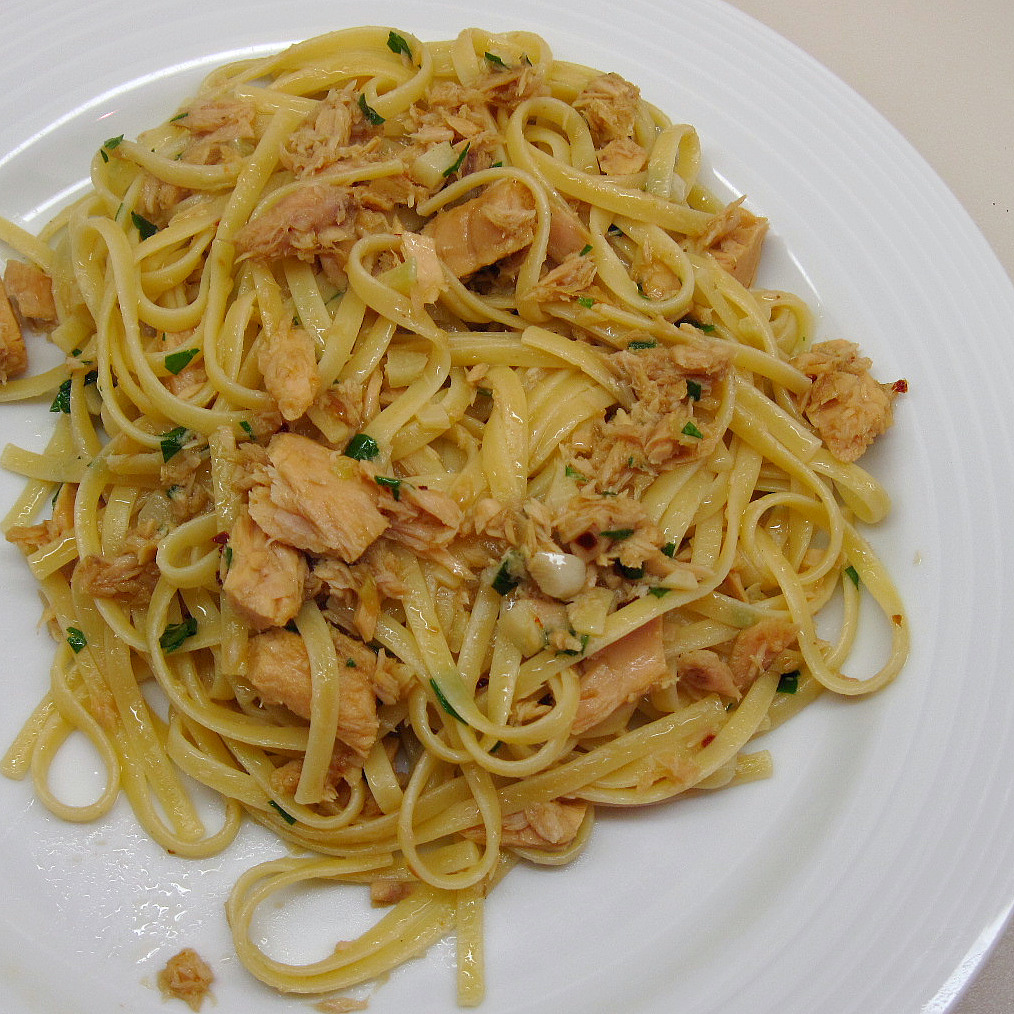
This is a simple, but very satisfying, pasta dish. The recipe is adapted from one in Arthur Schwartz’ Naples at Table. Arthur used spaghetti; I substituted linguine because that’s what I had on hand.
It’s important to use the right canned tuna. Solid, light tuna packed in olive oil is recommended. The olive oil is drained from the tuna and used to sauté the garlic. Because it is infused with tuna flavor, it adds a lot to the finished dish. I chose Genoa brand tuna; it’s one of the brands Mr. Schwartz recommended.

I made a salad while the water was coming to a boil for the pasta. Then I chopped the garlic and the parsley. Everything was ready to go when I put the linguine in the boiling water. The sauce comes together very quickly while the pasta cooks.

Linguine con Tonno sott’ Olio (Linguine with Canned Tuna)
(Adapted from a recipe in Arthur Schwartz’ Naples at Table)
Serves 2 (doubles easily to serve 4)
~~~
5 ounces linguine
1 5-ounce can tuna packed in olive oil
2 large cloves garlic, finely chopped
¼ teaspoon red pepper flakes
2 tablespoons finely chopped parsley
1 tablespoon extra virgin olive oil
~~~
1. Put a large pot of water on the stove to boil for the linguine.
2. Drain the tuna, reserving 2-3 tablespoons of the oil.
3. When the water is boiling for the pasta, add 2 tablespoons salt to the water, and then add the linguine. Stir and set the timer for 10 minutes.
4. Heat the reserved oil in a small skillet. Add the garlic and red pepper flakes and cook over medium-low heat until the garlic is fragrant and starts to color.

5. Remove the garlic from the oil with a spoon, and reserve.
6. Use a fork to break the tuna into chunks in the oil. Stir gently as it heats up.
7. When the pasta is done, reserve ½ cup of the cooking water, and then drain.
8. Toss the pasta, parsley, reserved garlic, and the tablespoon of extra virgin olive oil with the tuna. Add a few tablespoons of the reserved pasta water if it seems a bit dry. (I added about 3 tablespoons.)
9. Serve immediately.

Share this:

Quick and Easy Chicken Noodle Soup
By Kath Dedon
a
I have a “killer” chicken noodle soup recipe that I sometimes make when I feel like spending the day making soup. It really is outrageous, but it should be because it involves a long process for making delicious chicken broth. It isn’t difficult, but it takes a bit of time. It’s “Long but Easy Chicken Noodle Soup”. I’m sure I’ll make it someday and add it to the blog.*
This chicken noodle soup recipe is one of the recipes I turn to when I want good soup that’s quick and easy. It can be made on a weeknight after work. Using canned chicken broth is the big time-saver with this one, and cooking the raw chicken in the broth adds extra flavor. You can use boneless breasts or thighs.
It’s still soup weather in Seattle, so this “hits the spot” on a cool June evening.
.
* Update November 3, 2010: I made my “killer” chicken noodle soup, and you can find it here.
~

Quick and Easy Chicken Noodle Soup
(Adapted from a recipe in the January/February 1998 issue of Cooking Light)
Serves 4
~~~
1 Tablespoon butter
1 cup chopped carrot
1 cup chopped celery
1 Tablespoon flour
3 ½ cups chicken broth (2 cans—Swanson Natural Goodness™ is good)
1 cup water
½ teaspoon salt
¼ teaspoon pepper
2 cups uncooked egg noodles (about 4 ounces)
1 pound skinned, boned chicken breast or thighs, cut into 1-inch pieces

Melt butter in a large pot over medium-high heat. Add carrots and celery; sauté 3 minutes. Stir in the flour and cook, stirring, for about 1 minute. Remove from heat and gradually stir in the broth, water, salt, and pepper. Return to the heat and bring to a boil. Cover; reduce heat and simmer 5 minutes. Add noodles and chicken, and bring to a boil. Cover, reduce heat, and simmer 10 minutes.


