Welcome!
You'll find over 470 of my favorite recipes here, including ideas for Quick meals, Cooking for 2, Feasting on Leftovers, and cooking with 5 Ingredients or Less. I'm adding new posts regularly; you can subscribe by email or RSS feed if you'd like to receive the latest recipes. Bon appétit!
Rosemary Mustard Grilled Chicken Breasts
I’m sure Rosemary Mustard Grilled Chicken Breasts would be appreciated at any 4th of July get-together. After a few hours in an easy-to-make marinade, boneless chicken breasts are quick to grill. The result is chicken that is flavorful and not overcooked and dry.
The recipe is from Kalyn’s Kitchen. Kalyn writes that it is one of the most requested recipes on her blog, and I can see why. It’s so easy and it tastes great! In the summer, all you need is a big salad to accompany the grilled chicken.
I cut Kalyn’s recipe in half and made just 4 chicken breasts, but you can certainly double it to make 8. Kalyn says the Spike seasoning is optional, so you can leave it out. I omitted the celery seed; if you want to add it, use ½ teaspoon.
Kalyn advocates trimming the chicken breasts for grilling so they are about the same thickness overall. She also cuts slices into them at about ½-inch intervals when she’s using a marinade. The slices enable the marinade to more thoroughly penetrate the chicken, and they also help the breasts cook more evenly. I had never tried this method before but it seems to work quite well.
I found that my chicken was perfectly cooked after just 11 minutes on my gas grill, which was a much shorter time than Kalyn’s recommended 25 minutes. Timing will depend on the thickness of the chicken breasts and the heat of your grill. I use a meat thermometer to insure that the internal temperature has reached a safe 165˚.
Rosemary Mustard Grilled Chicken Breasts is definitely a recipe I’ll be making again! Next time, though, I’ll give the chicken more time to marinate. They were very good, but I think a few extra hours in the marinade would have made them even better!
Happy 4th of July!

Rosemary Mustard Grilled Chicken Breasts
(Adapted from a recipe on Kalyn’s Kitchen)
.
.
Serves 4
.
4 boneless, skinless chicken breasts
Marinade:
¼ cup Dijon mustard
2 tablespoons fresh lemon juice
1/3 cup extra virgin olive oil
1 teaspoon fresh garlic, pressed
1½ tablespoons minced fresh rosemary (or 1 tablespoon dried)
½ teaspoon coarsely ground black pepper
1½ teaspoons Spike Original Seasoning (optional)

1. Combine the ingredients for the marinade in a bowl or measuring cup.
a

a
2. Trim the tenders from the chicken breasts. If the breasts have thin, narrow tips, trim them off, too. You can save the trimmings to make chicken broth.
3. Cover the breasts with wax paper and pound the thicker side. (I just used my fist to flatten them a bit.)
4. Make slices in the chicken breasts at about ½-inch intervals.

5. Put the chicken breasts in a Ziploc bag and add the marinade. Distribute the marinade around the chicken as evenly as possible.

6. Refrigerate the chicken for 6 – 8 hours, turning the bag over occasionally during the day. (I actually only marinated mine for about 4½ hours and it was still good!)
a
Ready to grill

a
7. If using a gas grill, turn it on high to heat up for about 10 minutes.
8. Turn the heat to medium and grill the chicken, slit side down, for about 6 minutes.
9. Turn the chicken breasts over to cook for an additional 5 minutes.
10. Using an instant meat thermometer, check to make sure the internal temperature is 165˚.
11. When done, remove to a platter, cover with foil, and let the chicken rest for about 5 minutes before serving.
a
Share this:

A Weekend Getaway to Zillah
When summer is slow to arrive in Seattle, Bob and I sometimes head to the east side of the Cascades where it’s almost guaranteed to be hot and dry in June. This spring has been especially cool, so we went to Zillah for a one-night getaway.
The first stop of our trip was just 2½ miles from home. We had lunch (actually, for us it was an 11:00 brunch) at Zippy’s Giant Burgers. Zippy’s first opened on May 1, 2008 in West Seattle, but they found a larger space in White Center. They closed for a few months this spring to remodel the new space causing many of their loyal fans to go into a Zippy burger withdrawal. They reopened on May 31 and were so swamped on their first five days back in business that they had to close on June 5 because they ran out of food! Presumably they have learned to order more supplies. We are glad that they are now even closer to us.
At Zippy’s the chuck is freshly ground each day and the beefy flavor of their burgers is what makes them so fantastic. I usually get the Zip Burger w/cheese, which is a classic. I have also tried their house-made Black Bean Burger, and it is the best vegetarian burger I have ever tasted! Saturday I decided to try something different so I ordered the No. 11. The No. 11 features Mama Lil’s Kick Butt Peppers (new to me, locally grown and pickled peppers that are my new obsession), chipotle mayonnaise, lettuce, and Monterrey jack and smoked cheddar cheese. Perfection on a bun! This was easily my favorite meal of the weekend!
a
Zippy’s fantastic No. 11
a
After our burgers we headed to I-90 to make the 2½ hour journey over Snoqualmie Pass to Zillah.
The weather in the Yakima Valley did not disappoint. It was perfect – sunny, temperatures in the upper 70s and no humidity. It’s always a nice dry heat in eastern Washington.
Zillah is about 20 miles southeast of Yakima and is right in the heart of the Yakima Valley’s fruit and wine country. The climate is perfect for growing fruit, and the surrounding land is full of beautiful orchards and vineyards. With several cherry festivals on the calendar, we should have been able to find some at the fruit stands, but the season is a bit slow on the east side, too. The cherries appeared to be almost ripe on the trees, but it will probably be a week or two before they’re ready.
I learned from the Yakima Valley Visitor Guide in our hotel room that Zillah was named for Miss Zillah Oakes. Her father was the president of the Northern Pacific Railway. Zillah “would scream and cry on the way to the new town”. Her father promised to name the town after her if she stopped. I guess she did.
If you want fancier accommodations, you’ll probably be happier in Yakima, which is much a much larger town with a lot more options. We’ve always been happy being out in the middle of nowhere out in the country in Zillah. The Comfort Inn has all that we need; it’s clean, quiet, and has comfortable beds.
After checking in we went out on our tour of the wineries. For the most part, the people at the wineries in this area are very approachable and unpretentious. Tasting the different varieties of wine and learning a bit about how the grapes are grown is a great way to learn more about wines.
Kn
We went first to one of our favorite wineries, Portteus. Portteus is family-owned. It was started by Paul Portteus; his adult children are now helping to run it as well. We were happy to find Paul pouring at the tasting bar on Saturday; it’s really fun to chat with him. He noticed Bob’s NW Explorations shirt so we talked about cruising in the Pacific Northwest as well as about Portteus wines. We really enjoyed the 2009 Bistro Red. The price was so reasonable that we bought a case of it, along with a couple of bottles of 2008 Malbec.
After Portteus, we followed the google map I had printed to find some other wineries in the area. There were a couple of them that we went into that just didn’t click with us for one reason or another, so we left without tasting. Two others that we did enjoy, though, were Tanjuli and Knight Hill.
Tanjuli was new to us and was a great discovery. Their wines are a little pricier than our usual, but they were luscious. The one we loved, and apparently it is very popular with their fans, is the 2006 Petit Verdot. Here’s the description on their website: It’s a “bold, full bodied red that demands bold, full flavored foods”. We couldn’t leave without a couple of bottles. I will have to research to find the perfect meal to pair with it.
Knight Hill Winery is one of the newer wineries in the area, but the owners, Anne and Terry Harrison, are not new to the Yakima valley. After retiring from a career in farming they decided to start the winery. They grow some of the Syrah and Cab Franc grapes that they use, but purchase most of their grapes from other growers. Although it’s a lot of work to operate a winery, they are enjoying it. We thoroughly enjoyed talking with them and bought 3 bottles of their 2008 Dry Riesling.
Knight Hill Winery
 a
a
When we were done with our winery tours, we returned to the hotel to take the wines inside (you don’t want to leave wine in a hot car) and it was then time to think about dinner.
One reason we had always enjoyed staying in Zillah was the fact that it was home to our favorite Mexican restaurant and tortilla factory, El Ranchito. The food was authentic and excellent, and we always felt as if we had been transported to Mexico. Sadly, the restaurant and factory closed 3 or 4 years ago after having been in operation for about 50 years.
Without El Ranchito, the dining options in Zillah are limited. El Porton is right next door to the Comfort Inn. Apparently it is one of 4 restaurants. The other 3 El Porton restaurants are in Yakima. The online reviews for it were quite good and there was a large crowd on Saturday night. It may have fantastic food, but the décor and the menu seemed too much like any upscale Mexican chain in Seattle. We decided to venture out to find something else.
Three miles away is the town of Toppenish; with a population of about 9,000, it is larger than Zillah. It’s located entirely in the Yakama Indian Nation. (The “Yakama” spelling was reintroduced in 1994 to return to the original spelling.) The town is proud of its Native American and Western heritage and is known for the 73 murals throughout the town that depict scenes from its history.
We decided to try Villasenor’s Mexican restaurant in Toppenish. I had a “small” plate with one tamale and a chicken enchilada. It included refried beans and rice, so it was plenty of food. Bob had the Chile Verde with refried beans, rice, and corn tortillas. You can watch the excellent corn tortillas being made at the front of the restaurant. Our dinners were very good, but we still miss El Ranchito.
After dinner we went into a Mexican bakery down the street called El Porvenir to buy some bolillos (Mexican crusty rolls) for the picnic we were planning for Sunday. The bakery was just like one you would find in Mexico. There were all kinds of sweet treats, but we just bought 2 bolillos. After a quick trip to the grocery store in Zillah for salami, cheese, mustard, and bottled water, we were all set for a picnic lunch for our drive home.
~~~~~~~~~~~~~
The first thing on the agenda the next day was to find breakfast. Now, if El Ranchito were still in business, that is where we would have gone just as we had done in the past. We had to find a new place. We packed our cooler with our picnic lunch, checked out of the hotel and headed out.
I had seen a full-page ad in the Yakima Valley Visitor Guide for The Branding Iron Restaurant in Toppenish. They’re open 24 hours and they have a large breakfast menu. It sounded like a good local place to try.
The Branding Iron definitely felt like a piece of Americana. Inside, it looked like a typical ‘50s or ‘60s diner; I think it has been the way that it is today for decades. A friendly waitress took our orders. Bob ordered the pork steak and eggs. The pork steak was about the size of his head! I tried it and it was cooked perfectly. I had basic eggs, hash browns and an English muffin.
For our return trip we took Highway 97 through the farmland until it joined back in with Interstate 82 just south of Yakima. We took Highway 12 through Naches and then continued on 410 towards Chinook Pass.
Highway 410 goes along the American River. We pulled over and found a spot for our picnic lunch. Before eating, Bob had to try fly fishing. The rivers were all running pretty high from the record snowfall over the winter. Bob didn’t expect to have any luck, and he didn’t. But he did get a line wet!
a
The American River
 a
a
a
Fisherman Bob ready to go
 a
a
a
Getting a line wet
 a
a
While Bob was fishing, I took pictures of flowers

a
When Bob was finished fishing, we sat on some of the numerous shopping bags that I keep in my car (Note to self: bring a tarp next time!) and started to make sandwiches with the bolillos when the black ants arrived. They are fairly large and they are biters! We quickly gathered up our lunch and ate in the car. We still had a view of the river and the nice breeze blowing through the car.
After lunch we headed for the pass. We were amazed at how much snow is still left. It was definitely 12 feet deep at one point. When we reached the summit we parked and got out to look around. There were so many people who had come to see and play in the snow. We met one man from Seattle who had just finished hiking to the top and skiing down. He said he found some fantastic snow! The area really looked like a winter scene, although the temperature was probably in the 60s.
a
Snow at Chinook Pass, June 26!

a
A man from Seattle who had just hiked up and skied down

a
This is June?

a
Back in the car, we headed down into western Washington where it was getting cloudy. Today in Seattle, the day after getting home, it’s 67 and raining. I really do like living in Seattle, but it is nice to escape to the great summer weather in eastern Washington.
Share this:

Boston!
I know…. It’s been awhile since I’ve posted a recipe. An end-of-the-year 7-week gig as a substitute teacher in a kindergarten class kept me very busy until the last day of school on June 17. I relied on quick and easy recipes that are already posted on my blog.
The day after school got out I went to Boston for a few days. If you’re planning a visit to Boston, you may find this post interesting. If not, I promise I’ll be back in the kitchen soon to try something new!
~~~~~~~~~~~~~~~~~~~~~~~~~~~~~~~~~~~~~

Last summer, after graduating from Pomona College, Carrie moved to Boston. Last Saturday, I finally had a chance to visit her. I was excited to see her, and I was excited to explore Boston since I had never been there before.
My sister, Joan, joined me on the trip. After going through security at Sea-Tac Airport, we stopped at Kathy Casey’s Dish D’Lish for some food to take on the flight. We both got a cup of the couscous salad which turned out to be a great choice. It was surprisingly filling and loaded with great flavor with chickpeas, nuts, and fruit.
Boston has a great public transportation system, so on our arrival we took the bus from Logan Airport to the South Station in downtown Boston. Carrie met us there and joined us as we continued on to our hotel.
After checking in, we headed to Cambridgeto see Carrie’s apartment and then it was time to find dinner. I remembered the favorable review of Garden at the Cellar that Jen of Tiny Urban Kitchen had written. The restaurant was only 2 short blocks from Carrie’s apartment so we decided to try it.
There were so many interesting appetizers and small plates at Garden at the Cellar! We had a hard time choosing, but finally settled on Bacon Wrapped Dates, Crispy Lobster Tempura, Char Grilled Baby Octopus, Seared Scallops, and the Rosemary-Truffle Fries. Everything was great, but I especially loved the lobster and the fries. Although the restaurant didn’t seem too busy for a Saturday night, we noticed that the downstairs bar was packed. It’s apparently a very popular place for a drink and something to eat from the bar menu.
After dinner, we walked to Harvard Square to go to Grendel’s Den, a popular place for inexpensive food and drinks. We had an after-dinner drink, talked about plans for the next day, and then called it a night.
~~~~~~~~~
On Sunday we met Carrie at her apartment and then headed to Zoe’s for breakfast. What a fantastic breakfast spot! There were so many choices on the menu; Carrie loves the Sweet Potato Pancakes. I decided to keep it simple, though, and chose eggs with homefries and an English muffin.
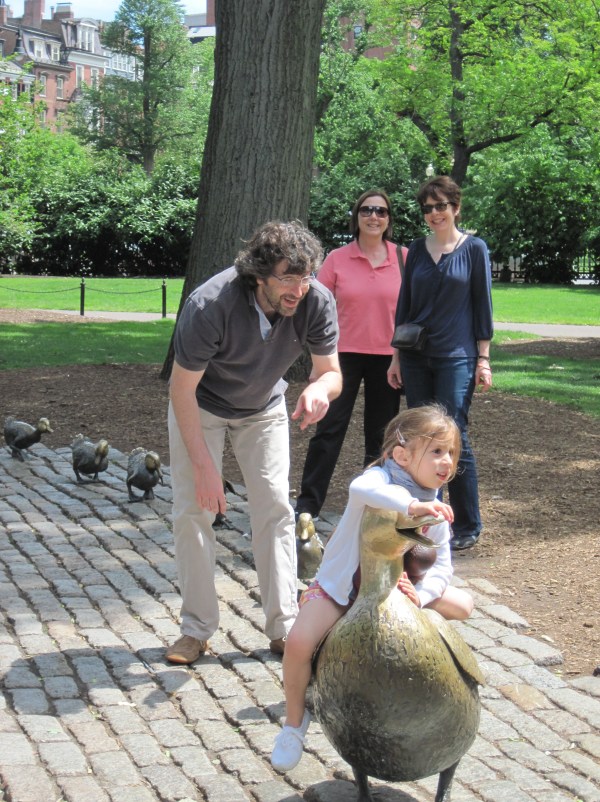
Our first activity was a stop at the Boston Public Garden where we saw the famous Swan Boats and the statues of the ducklings from Robert McCloskey’s Make Way for Ducklings. It was a beautiful day and Father’s Day, so there were many families enjoying the park.
Swan Boat at Boston Public Garden a
a
Joan and me and an anonymous father and child – Make Way for Ducklings on Father’s Day
a
Next we headed to The Boston Common to walk The Freedom Trail. It winds through Boston and takes you to many of the historic sites in the city. Some of the highlights for me were:
The State House, which is called the “New State House” by Bostonians. During our visit it was decorated with a large banner congratulating the Stanley Cup Champions – the Boston Bruins. The Bruins had just days earlier defeated the Vancouver Canucks in game 7 of the championship.
 a
a
The Granary Burying Ground is where many famous Bostonians are buried, including Paul Revere and Mother Goose (Mary Goose) who died at the age of 42 in 1690.
The small marker on the right marks Paul Revere’s grave.
 a
a
The grave of Mother Goose
 a
a
The Old State House was originally the seat of the British government, but before the Revolution it became the Commonwealth’s first capitol building. It is from this building that the Declaration of Independence was read to the people. Today it is surrounded by the modern buildings of downtown Boston.
(To my fellow Seattleites – doesn’t the white tower on the left look like our own Smith Tower?) a
a
We walked to the Boston Harbor where I had hoped to see the USS Constitution (“Old Ironsides”), but she was not in port when we were there. Next time.
 a
a
 a
a
a
At this point on the Freedom Trail we were in North Boston, which is a large Italian neighborhood. There are many Italian restaurants, but we chose to have lunch at Neptune Oyster. Our mission was to try their lobster rolls after reading about them in a Gourmet article from 2008. They don’t take reservations so a wait is not unusual. On Sunday (Father’s Day) we were told the wait would be 1½ hours. They took my cell phone number and we headed off to explore some more of The Freedom Trail.
Since we had to wait so long for lunch, we decided to have dessert first. We made a quick stop in Modern Pastry Shop (which Carrie likes better than the more famous Mike’s) and got cannoli to go. We found a bench at the nearby Paul Revere Mall and ate our cannoli by the statue of Paul Revere on horseback. After our dessert break we headed to The Old North Church.
 a
a
The Old North Church was Paul Revere’s destination on his midnight ride on April 18, 1775. From the steeple, he hung two lanterns to let the patriots know that the British were arriving by boats on the Charles River. (“One if by land, two if by sea” – Longfellow) The interior is quite beautiful. It is painted white and the pews are divided into individual family boxes. Today The Old North Church is an active Episcopal Church.
 a
a
We decided to head back towards Neptune Oyster. When we were less than a block away my cell phone rang. Our table was ready!
I was tempted to try one of the many varieties of raw oysters that they have, but I knew I would have plenty of food with the lobster roll. Carrie, who doesn’t like mayonnaise, ordered the “Connecticut-style” warm roll with melted butter. I ordered the cold roll, Joan ordered the warm roll, and we split them. The cold, traditional roll was very good, indeed. It was just lobster, and lots of it, tossed with just a bit of mayonnaise and served in a brioche roll. We all agreed, though, that we liked the warm lobster roll best. It was incredible! People around us were ordering other things from the menu and everything looked fantastic. I highly recommend Neptune Oyster if you’re ever in Boston.
After lunch we headed to the Isabella Stewart Gardner Museum. Isabella Stewart (1840 – 1924) was from New York City. She married John Lowell Gardner, Jr., who was from Boston, in 1860. Isabella and Jack, as he was known, travelled the world and loved art; in 1891 Isabella inherited a fortune from her father and she and her husband used the money to collect art. They planned a building to house the art, but Jack died in 1898. Isabella completed the project and she moved in to the 4th floor (not open to the public) in 1901. In 1903 she opened the museum to the public. Isabella decided how the art should be displayed in the museum; in her will she stipulated that everything should remain as it was and that nothing could be identified by labels. I thoroughly enjoyed visiting this unusual museum. The building, with its beautiful courtyard, is as fascinating as the art that it houses.
As we were walking out of the museum, Carrie got a call from her friend, Mairead. She and her mom were just pulling up across the street from the museum to meet us. We had planned this rendezvous, and the timing was perfect! I had met Mairead in Italy when she and Carrie were studying abroad, and again at Pomona College where they went to school. I was excited to meet Mary Kate! She generously let Carrie stay with them in Andover when Carrie first moved to the Boston area. Carrie lived with them for about a month while she found a job and then an apartment in Cambridge. She is Carrie’s “Massachusetts Mom”. Plus we have the same name! We’re both Mary Kathleens!
Carrie, Joan, and I hopped in their car and we headed to Brookline where we went to J.P. Licks, a local “homemade ice cream café” that features their own roasted coffee as well as their ice cream. They have several locations in the Boston area and are very popular. I was still too full from lunch to try the ice cream, but I had an excellent iced coffee latte. Carrie’s boyfriend, Rhett, who lives in Brookline, took a brief break from work to meet us.
After our coffee/ice cream break, Mary Kate took us on a bit of a driving tour around Brookline, Allston, and as far west as Boston College. It was fun to see some of the neighboring areas of Boston. We ended up back at Carrie’s apartment to relax and visit before Mary Kate and Mairead headed back to Andover. It was so great to finally have a chance to meet Mary Kate, and it was fun to see Mairead again.
Dinner Sunday night was at one of Carrie and Rhett’s favorite Italian restaurants in North Boston, Ristorante Limoncello, and Rhett was able to meet us there for dinner. It was excellent! I thoroughly enjoyed the Taglionini al Limoncello, which was fresh homemade pasta with shrimp and a tasty tomato cream sauce. Carrie enjoyed her Rosette al Montasio ed Olio di Tartufo (pasta with Montasio cheese, prosciutto, and white truffle oil). Joan had the homemade cheese ravioli with a flavorful tomato sauce, and Rhett chose a stuffed pork chop that looked terrific! Dinner at Ristorante Limoncello was the perfect end to a full day.
~~~~~~~~~~~~
Monday morning we met Carrie and headed off to the Central Square Flour in Cambridge for breakfast. I had heard of Flour, and I thought the Cambridge location was the original. I learned from the website, though, that Joanne Chang opened her first Flour in South Boston; the Cambridge restaurant is her third location. If you are in Boston, I highly recommend Flour for a breakfast or lunch stop. Everything looked so good! There were sweet and savory choices in the morning. For lunch there are several sandwiches to choose from. Carrie says the cookies are addictive. I chose the sticky bun and a latte for my breakfast. It was, without a doubt, the best sticky bun I’ve ever had! I’m really not much of a yeast baker, but I have requested Chang’s Flour cookbook from the library (there’s a waiting list here in Seattle) and it may be one I have to add to my own cookbook library. The sticky buns are featured on the cover!
a
I had eaten almost half of the sticky bun before I thought to take a picture!
 a
a
Our plan after breakfast was to take the Red Line and then transfer to the Green Line to go to Boston University where Carrie will be starting graduate school in September. When we got there, though, we heard that an elderly man had fallen on the tracks and the Red Line was shut down. (We were glad to learn later that he had been rescued and was recovering in a hospital.) So we walked through the MIT campus and across the Boston University Bridge to BU’s campus. It was a bit of a hike, but it was interesting to see some of the MIT buildings.
Boston University is a large private research university with over 31,000 students. It is the fourth largest employer in Boston. Carrie’s personal university world, however, all lies just east of the Boston University Bridge.
We first stopped in the George Sherman Union, the student union which is quite attractive inside with several restaurants in the food court for a quick meal or a cup of coffee. It was here that we learned that BU’s Boston terrier mascot is named Rhett.
 a
a
a
Mugar Memorial Library, the main campus library, is right next to George Sherman Union. Just a few steps east of the library is the College of Arts and Sciences where Carrie will be taking her graduate courses in Art History.
College of Arts and Sciences
a
It was a beautiful afternoon, so we checked out the “beach” behind the College of Arts and Sciences. There was no sand to be found, but it is a nice park-like area overlooking the Charles River. Carrie commented that grassy areas by water are often called beaches in Boston. We enjoyed sitting on a bench in the shade and watching the crazy squirrels.

After a walk through Carrie’s graduate school building it was time to start thinking about lunch! (It’s all about the food.)

a
We headed to The Publick House in Brookline. For some reason, macaroni and cheese is a big deal in Boston. Carrie said it’s featured on a lot of menus. She especially likes the “award-winning” mac and cheese at The Publick House, so I was looking forward to trying it. Alas, it is not open for lunch. We must have had bewildered “where now?” looks on our faces because a man passing by said, “Try The Abbey across the street!”
The Abbey appears to be a relatively new restaurant. The interior was quite nice and we were greeted by good smells when we walked in. The waitress informed us that they were out of the burgers and the chicken sandwiches, which seemed a bit odd at 1:00, but there were plenty of other choices on the menu. Joan chose the smoked cod fritters and arugula salad from the Small Plates and Appetizers. Carrie went for the spicy tomato bisque and grilled cheese Panini. I was actually in a burger mood, so I settled for the 4 oz. filet mignon sandwich with crispy shallots, horseradish aioli and hand-cut French fries. It was so good that I was glad I hadn’t been able to order the burger. The steak was tender and cooked to perfection. The fries were outstanding and there were plenty to share with Joan and Carrie.
At this point we decided it was a good idea to go back to Carrie’s apartment for an afternoon rest before going to Fenway for a Red Sox game! Joan and I actually took short naps.
After a short walk around Harvard Square we went to Rhett’s office building in the Coolidge Corner area of Brookline to get our Red Sox tickets. Since he had to work a bit longer, he would meet us at Fenway.
After iced coffee and iced tea at Finagle-a-Bagel we boarded a very crowded Green Line train. Besides being the train to take to Fenway, it was rush hour. Fortunately, it was a short ride.
Dinner was, of course, kielbasa on a bun with onions, peppers, and mustard from one of the vendors just outside of the stadium. Bob is still talking about the kielbasa he had at Fenway when he visited Carrie in April. He calls it the best “hot dog” he has ever had…. In his life…. I don’t think I could have gone home if I hadn’t tried one. It was actually very good and substantial enough to be a filling dinner. We ate it standing up watching the Red Sox fans stream by.
Once inside the stadium I could see why it’s a favorite. The small size makes it feel much more intimate than most baseball stadiums. I felt close to the action even though we were in the bleachers behind the outfield. For the most part, the advertisements in the stadium are subtly painted signs. The weather was perfect, and it was a great baseball experience! I cheered for the Red Sox (since they weren’t playing the Mariners), we joined in singing “Sweet Caroline” just before the bottom of the 8th, and the Sox beat the Padres 14 to 5.
 a
a
After the game we walked away from Fenway to find a less crowded spot for buses, trains, and taxis. We bid adieu to Rhett, and walked to a spot where Carrie could catch her bus. Since we had an early morning flight, we said our goodbyes to Carrie, and Joan and I got a taxi back to our hotel.
~~~~~~~~~~~~~
Our trip to Boston was too short, but we crammed a lot into a couple of days. I’m looking forward to my next visit to see more!
Share this:

Mandarin Orange Cake
If you want a super-easy cake that people will rave about, Mandarin Orange Cake is the recipe for you! This is the cake to make when you’re in charge of taking a dessert to a potluck event. It’s easy to make, it travels well, and everyone is crazy about it!
Mandarin Orange Cake will not be the most beautiful cake at the party, but its homely looks are quickly forgotten as soon as people taste it. It really is that good! The mandarin oranges are the “secret” ingredient…they are not detectable in the finished cake.
I think my family got the recipe from the The Arboretum Restaurant in Chaska, MN. My mom enjoyed having lunch there in the ‘70s; she either got the recipe from the restaurant, or it may have been published in the Minneapolis paper.
Last weekend I made half of the recipe for Laura’s birthday and I baked it in a 9-inch round cake pan. An 8×8-inch square pan would have worked equally well. The full recipe is baked in a 9×13-inch pan.

Mandarin Orange Cake
(Adapted from a recipe from The Arboretum Restaurant in Chaska, MN)
a
a
Makes a 9×13-inch cake (cut the ingredients in half to make a 9-inch round or an 8×8-inch square cake)
a
For a 9×13-inch cake:
2 cups flour (240 g)
2 eggs
2 teaspoons baking soda
2 cups sugar
2 teaspoons vanilla
1 teaspoon salt
2 cups drained mandarin oranges (two 11-oz cans)

a
1. Preheat oven to 350˚ and grease the cake pan.
2. Combine all of the cake ingredients in a bowl and beat with a mixer until well blended, about 3 or 4 minutes. Pour into a greased 9×13-inch pan.
a
 a
a
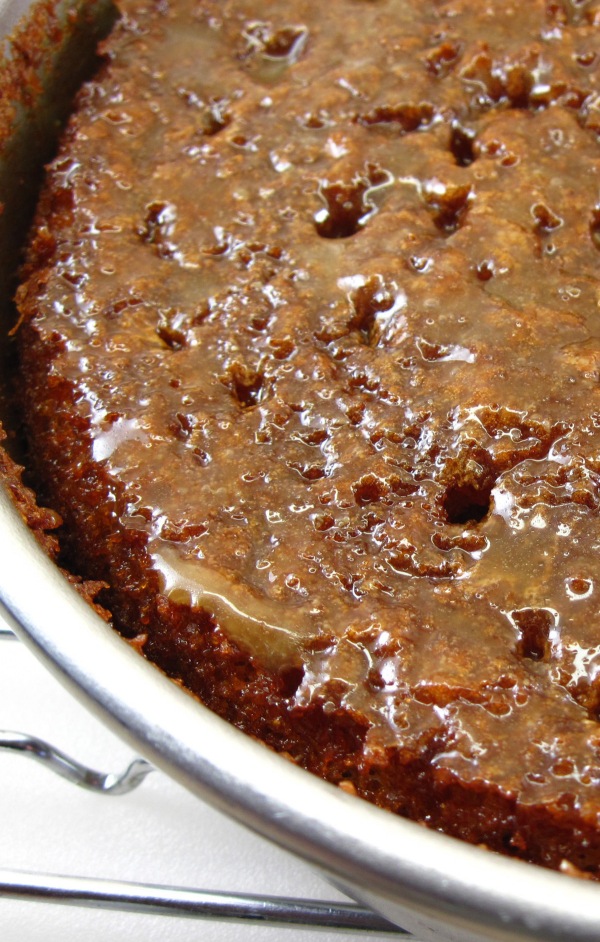
Half of the recipe in a 9-inch round pan
a
3. Bake for 35 minutes. When the cake is almost done, make the glaze.
a
For the Glaze: (This is for a 9×13 inch cake; cut in half for a 9-inch round or an 8×8-inch square cake)
1½ cups brown sugar
6 tablespoons butter
6 tablespoons milk
a
Combine the glaze ingredients in a saucepan and boil for 3 minutes. Poke holes in the hot cake and ladle the hot glaze onto it until all of the glaze has been used.
.
Hot brown sugar and butter glaze

a
Pouring the hot glaze over the hot cake

a
Ready to eat!

.
.
Share this:

Joan’s Eggs
Joan’s Eggs is a fantastic breakfast casserole! It couldn’t be easier and everyone seems to enjoy it. I’ve been making Joan’s Eggs for almost 30 years and it’s always well-received. It would be a great choice for a Mother’s Day brunch!
It’s actually best if it’s assembled the day before and then baked the next morning. Last weekend I made it in the morning and baked it right away. It was very good, but I discovered that it really does have a better custardy consistency if it is allowed to sit overnight before baking.
I got the recipe years ago from a close friend who happens to be named Joan; she claims, however, that it is not named after her. In my mind, though, it’s her recipe and whenever I make it I always think of our friend, Joan.
This recipe makes 4 servings. Double the ingredients and bake it in a 9×13-inch pan to serve 8.
Joan’s Eggs, baked and ready to be cut for brunch:
Joan’s Eggs
a
Serves 4 (double the ingredients and bake in a 9×13-inch pan to serve 8 people)
a
4 slices white bread (crusts removed, buttered)
4 eggs
1 cup milk
½ pound cheddar or jack cheese, grated, or a combination of both
½ teaspoon dry mustard
½ teaspoon basil
½ teaspoon turmeric
¼ teaspoon cayenne

 a
a
1. Tear the bread into small pieces and place in a greased 8×8-inch casserole.

2. Beat eggs, milk, seasonings, and cheese together. Pour over the bread.

a
3. Cover and refrigerate overnight.
The next morning:
4. Take the casserole out of the refrigerator and preheat oven to 350˚.
5. Uncover the eggs and bake for 45 minutes.
Share this:

Scotch Teas
By Kath Dedon
a
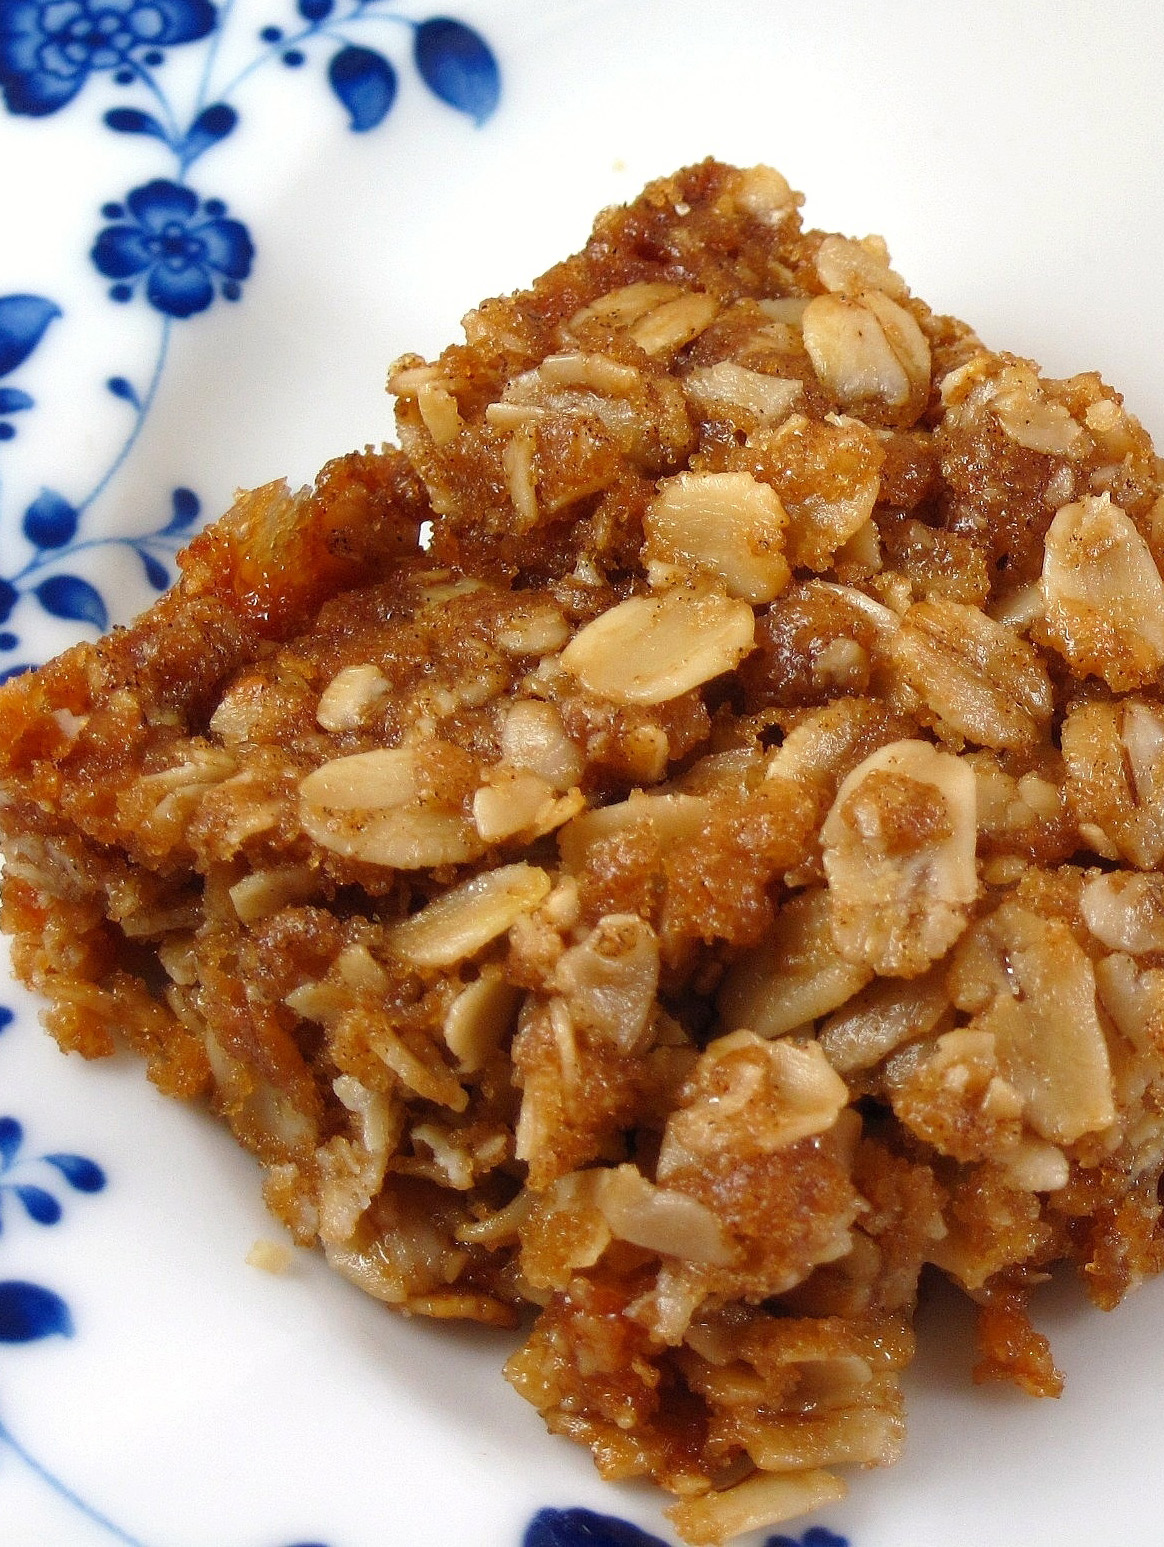
How about a quick treat that’s perfect for tonight’s dessert or tomorrow’s lunch box? Scotch Teas are made with only 5 ingredients….and you probably already have them at home!
My mom used to make Scotch Teas when she wanted to make a quick cookie. I’m not sure of the exact origin of her recipe, but my notes say that it’s from a pre-1946 Better Homes & Gardens cookbook.
With butter, brown sugar, and rolled oats for the main ingredients, Scotch Teas deliver rich, delicious flavor for very little effort. Enjoy!
a
Update (4/8/13): I made these again yesterday using King Arthur’s maple sugar instead of brown sugar. They were delicious and quickly gobbled up after dinner last night. Which is unfortunate, because I would have dearly enjoyed one with my morning coffee today!
a
 a
a
Scotch Teas
(Adapted from one of my mom’s recipes, attributed to an old Better Homes & Gardens recipe)
a
(Made with gluten free rolled oats, Scotch Teas can be enjoyed on a gluten-free diet.)
aa
a
Makes 16 – 20 squares
a
½ cup butter
1 cup brown sugar (or 1 cup maple sugar)
2 cups rolled oats (regular oatmeal, not quick-cooking) quick-cooking oats
¼ teaspoon salt
1 teaspoon baking powder
a
1. Preheat the oven to 350˚.
2. Melt the butter in a pan.

3. Add the brown sugar, and stir until it is dissolved and well-blended.

4. Stir in the oats, salt, and baking powder.

5. Spread in an 8×8-inch baking pan.

6. Bake for 20 – 25 minutes, until lightly browned.

7. Cool in the pan for about 15 minutes; cut into squares while still warm. Allow to cool completely before serving.

Share this:

Boiled (or Steamed) Artichokes
One of the signs of spring is seeing large artichokes in the market! Some people may be intimidated by them, but they are actually very easy to prepare.
a
Boiled artichoke with Mustard Sauce

a
For years I have steamed artichokes because it seems that steaming is the method preferred by many chefs today. However, I recently read James Beard’s take on artichokes in his classic cookbook, American Cookery. Beard says, “Advocates of this method [steaming] say the vegetables taste better, but I am not convinced of this.”
So, in the interest of science, I recently tried both methods.
About a week ago I steamed a large artichoke. Kalyn, of Kalyn’s Kitchen recommends removing the choke before steaming, so I decided to try this. It worked pretty well, although the artichoke discolored fairly quickly where the choke had been removed. I peeled the long stem and also steamed it. The artichoke was very good served with some melted butter. The stem was also delicious. (Kalyn’s recipe also gives directions for pressure cooking artichokes. Be sure to check it out if you have a pressure cooker.)
Artichoke with choke removed, ready to be steamed

a
.Steaming the artichoke

First I cut off the top of the artichoke.
.Steamed artichoke served with melted butter

a
~~~~~~~~~~~~
Yesterday, I decided to try boiling an artichoke, and I prepared it in the more traditional way.
First I cut off the top of the artichoke.

a
I trimmed the leaves with scissors. Then I cut the long stem off and peeled it.

a
Ready to boil

While doing all of this trimming, I had a large pot of water coming to a boil. When it was boiling, I added some vinegar and a bit of oil (as suggested in Sunset Fresh Produce). I added the artichoke and the stem and boiled for 45 minutes.
After boiling, I let the artichoke drain, upside down, for a few minutes.

a
Artichokes are often served whole – one per person. It makes a great presentation, but then each diner has to deal with cutting out the choke when they get to it. That’s not really a big deal, but it is a bit messy at the table.
This artichoke was large enough to serve two, so I cut it in half and removed the choke just before serving. It makes it much easier to eat at the table. The choke is easily removed with a spoon.
Choke still in the half on the right; it’s removed from the half on the left

.
The stem of this artichoke was fibrous and inedible except for the very interior. I don’t think the difference was the cooking method; I think the second artichoke may have been a bit older.
So which method did I prefer? I actually found the boiled artichoke to be perhaps a bit tastier and a bit more tender. Maybe the vinegar and oil in the boiling water made a difference. It’s certainly an easier method for people who don’t have a large steaming pot. In the end, though, either method works.

a
.
Boiled (or Steamed) Artichokes
(Adapted from ideas in James Beard’s American Cookery, Kalynskitchen.com, and Sunset Fresh Produce)
.
a
Allow ½ – 1 artichoke per person.
¼ cup vinegar
2 tablespoons oil
a
For serving:
Melted butter
And/or
Mustard Sauce – For 2 servings, combine 2 tablespoons mayonnaise, 1 teaspoon Dijon mustard, and ½ teaspoon vinegar.
1. Bring a large part of water to a boil. Add the vinegar and oil.
2. While the water is coming to a boil, prepare the artichoke(s). Cut the stem from the bottom of the artichoke so it will sit flat. Peel the stem.
3. Cut the top from the artichoke.
4. Trim the leaves with scissors.
5. When the water is boiling, add the prepared artichoke and stem. Boil for 45 minutes.
(Alternatively, steam the artichoke over boiling water for 45 minutes.)
6. Drain the artichoke, upside down, for a few minutes.
7. If desired, cut the artichoke in half and remove the choke.
8. Serve the artichoke and stem with melted butter or mustard sauce for dipping.
Share this:

Pasta e Fagioli….or Pasta e Ceci
The ingredients in Arthur Schwartz’s recipe for Pasta e Fagioli in Naples at Table are very humble – beans and pasta are the main ingredients. When combined, however, as they are in this classic dish from Naples, they become a comforting meal that is full of flavor. It makes you think you are in an Italian trattoria.
The night before making it, I soaked some chickpeas and then cooked them the next day. Ready to prepare Pasta e Fagioli, I pulled out Naples at Table and realized that the recipe calls for cannellini beans, not chickpeas! Oops! I had so wanted to make a classic version of Pasta e Fagioli.
I turned to Frank Fariello’s excellent blog, Memorie de Angelina. Frank has a recipe for Pasta e Fagioli and he also uses cannellini beans. However, he points out in his notes that other beans can be used, and chickpeas are a wonderful choice! Yay! When made with chickpeas it is called Pasta e Ceci! That works for me!
You could use canned beans, although this is one recipe where cooking your beans really does make a difference. The cooked dried beans are much more tender than canned beans; they have a better texture for this dish. The chickpea broth from cooking the beans is so fantastically delicious – I can just eat it with a spoon. It contributes a lot to the excellence of this Pasta e Ceci. So…for the best flavor and texture, get dried beans and cook them. 😉
At a typical meal in Italy, Pasta e Fagioli, or Pasta e Ceci, would be served as a Primo (first course) followed by the Secondo (the main course, usually featuring meat). At our house, though, it made a fantastic vegetarian dinner served with bread and a salad!
a
Such a humble-looking dish, yet so delicious – Pasta e Ceci!
 a
a
Pasta e Fagioli, or Pasta e Ceci
(Adapted from a recipe in Naples at Table, by Arthur Schwartz)
a
a
Serves 4
a
¼ cup extra-virgin olive oil, plus ¼ – ½ cup more to make the Hot Pepper Oil*
2 large cloves garlic, finely minced
1/8 teaspoon red pepper flakes
3 canned and peeled plum tomatoes
½ teaspoon salt (perhaps a bit more if your tomatoes are unsalted)
2½ – 3 cups cooked cannellini beans or chickpeas, with enough of their cooking liquid to barely cover them
6 ounces large tubular pasta, like rigatoni, or ziti, penne, or ditali
Hot Pepper Oil, for serving
aa
Hot Pepper Oil
Break 1 or 2 dried hot chilies (any variety), seeds and all, into ¼ – ½ cup extra-virgin olive oil. Let soak for several hours.
Hot Pepper Oil
 a
a
Cooking the Beans
Makes almost 3 cups.
Put 1 cup cannellini beans or chickpeas in a large pot. Cover with water so there is at least 2 inches of water over the beans and soak overnight.
If you don’t want to soak them overnight, cover with water so there is at least 2 inches of water over the beans. Bring to a boil and boil for 5 minutes. Remove from heat and let them sit, covered, for 1 hour.
Drain the beans and cover with plenty of water again. Bring to a boil and boil for 10 minutes. Lower the heat and simmer for 40 minutes. Add 1½ teaspoons salt and simmer until tender, 10–15 minutes more. (Optional: Add a sprig of rosemary when you add the salt. Remove when the beans are done.)
Drain the beans, reserving enough broth to cover them.
Cooked chickpeas, just covered with cooking broth
 a
a
Rigatoni and chickpeas ready to be transformed into Pasta e Ceci

Pasta e Ceci
1. Heat a large pot of water for the pasta.
2. Put the ¼ cup olive oil, garlic, and pepper flakes in a 2½ – 3 quart pan.
 a
a
3. When the garlic starts sizzling (don’t let it brown), crush the tomatoes into the pan with your hands. (Or cut the tomatoes up roughly and add them.)
Three canned tomatoes ready to be crushed into the pan
 a
a
4. Add the salt and simmer the tomatoes for about 5 minutes, stirring occasionally and breaking up with the back of a wooden spoon, if necessary.
 a
a
5. Add the beans and their liquid, and simmer for about 5 minutes, stirring occasionally. Using a spoon, smash a few of the beans against the side of the pan.
 a
a
6. While the beans are simmering, add a tablespoon of salt to the boiling water and cook the pasta until it is almost done. (My rigatoni box said to cook for 10 minutes; I cooked it for 8 minutes.)
7. When the pasta is done, reserve ½ cup of the cooking water and then drain the pasta. Add the pasta to the beans; stir and cook for about 2 minutes so the pasta can finish cooking and absorb some of the flavors. Add a bit of the reserved pasta water if it seems too dry.
8. Cover the pot, remove from the heat and let it sit for 5 – 10 minutes.
9. Serve and pass the Hot Pepper Oil at the table to drizzle on top of individual servings.
Molto squisito!! (Very delicious!)

Share this:

Lamb Shanks Braised with Tomato
In all my years of cooking, I had never prepared lamb shanks. That’s kind of surprising to me because I do love lamb. I have now added lamb shanks to my repertoire; yesterday I made Cooking Light’s version of Lamb Shanks Braised with Tomato and it was fantastic!
I researched many recipes before deciding on this one. I liked its simplicity. I felt confident that a slow braise would marry the flavors together beautifully, and I was right! Although the ingredients are very simple, the sauce was incredibly flavorful after the long braise. Smashed Yukon gold potatoes made a great accompaniment, but polenta or pasta would be equally good.
Most recipes call for four 12-ounce lamb shanks. The ones I got at QFC were huge! They were 1½ pounds each, so I bought two for 4 servings. Smaller ones may have made a nicer presentation, but the large ones worked just fine.
The recipe called for 2 (14-ounce) cans of diced tomatoes with basil, garlic, and oregano. I’m not a big fan of seasoned canned tomatoes, so I substituted a large (28-ounce) can of Italian plum tomatoes. I cut them up and added my own garlic, salt (they were unsalted), basil, and oregano.
You could easily cut the recipe for Lamb Shanks Braised with Tomato in half if you just want 2 servings, but this is one of those recipes that tastes even better heated up later. You might as well cook the whole thing and savor the leftovers!
a

a
Lamb Shanks Braised with Tomato
(Adapted from a December 2009 recipe from Cooking Light)
a
a
Serves 4
a
4 (12-ounce) (or two 1½ pound) lamb shanks
½ teaspoon salt
¼ teaspoon black pepper
4 garlic cloves, minced
¾ cup dry red wine
2 (14.5-ounce) cans diced tomatoes with basil, garlic, and oregano*
¼ cup chopped fresh parsley
a
*Or substitute for the seasoned tomatoes:
1 (28-ounce) can Italian plum tomatoes and their juice (cut into small pieces)
½ teaspoon dried basil
2 cloves garlic, pressed
½ teaspoon dried oregano
1 teaspoon salt, if the canned tomatoes are unsalted
a
These two lamb shanks are 1½ pounds each! That is huge, but to be fair I have to point out that this is a small baking sheet. 😉

a
1. Heat a large Dutch oven over medium heat. Add a small amount of olive oil, just to cover the bottom of the pan.
2. Season the lamb with the ½ teaspoon of salt and ¼ teaspoon of pepper.
3. Put the lamb in the hot pot and brown on the first side for about 4 minutes.
4. Turn the lamb over and brown the second side for about 4 minutes.

5. Remove the lamb from the pan and add the minced garlic. Stir and sauté for about 15 seconds.
6. Add the wine, stirring to bring up any browned bits. Cook for about 2 minutes.
 a
a
7. Stir in the tomatoes (along with the seasonings if you are using unseasoned tomatoes) and cook for about 2 minutes.
8. Return the lamb to the pan. Spoon some of the sauce over it. Cover and reduce the heat so it is simmering. (I had to turn the burner down to the lowest setting and it was still simmering pretty vigorously.) Simmer for 1 hour.

9. Turn the lamb over and spoon some sauce over it. Simmer for 1 – 1½ hours more until the meat is very tender.
10. Remove the meat to a plate and cover with foil.
11. Skim some of the fat off of the sauce. Bring the sauce to a boil and boil for about 10 minutes, until it is reduced a bit and thickened.
12. Return the lamb to the sauce and cook for 3 or 4 minutes until it is heated.
13. Stir in the parsley and serve.
a

Share this:

Date-Nut Muffins
By Kath Dedon
.
I love making goodies sweetened with pure maple syrup, maple sugar, or honey. Today I found a recipe for Date-Nut Muffins in The Laurel’s Kitchen Bread Book and decided to give them a try.
Of course, I did make a few substitutions. Instead of whole wheat pastry flour, I used King Arthur Unbleached White Whole Wheat Flour, and I substituted quick oats for the wheat germ because that’s what I had on hand. I processed the oats in my mini food processor for a few seconds so they were more like wheat germ in texture. The original recipe uses light molasses; I used grade B pure maple syrup instead.
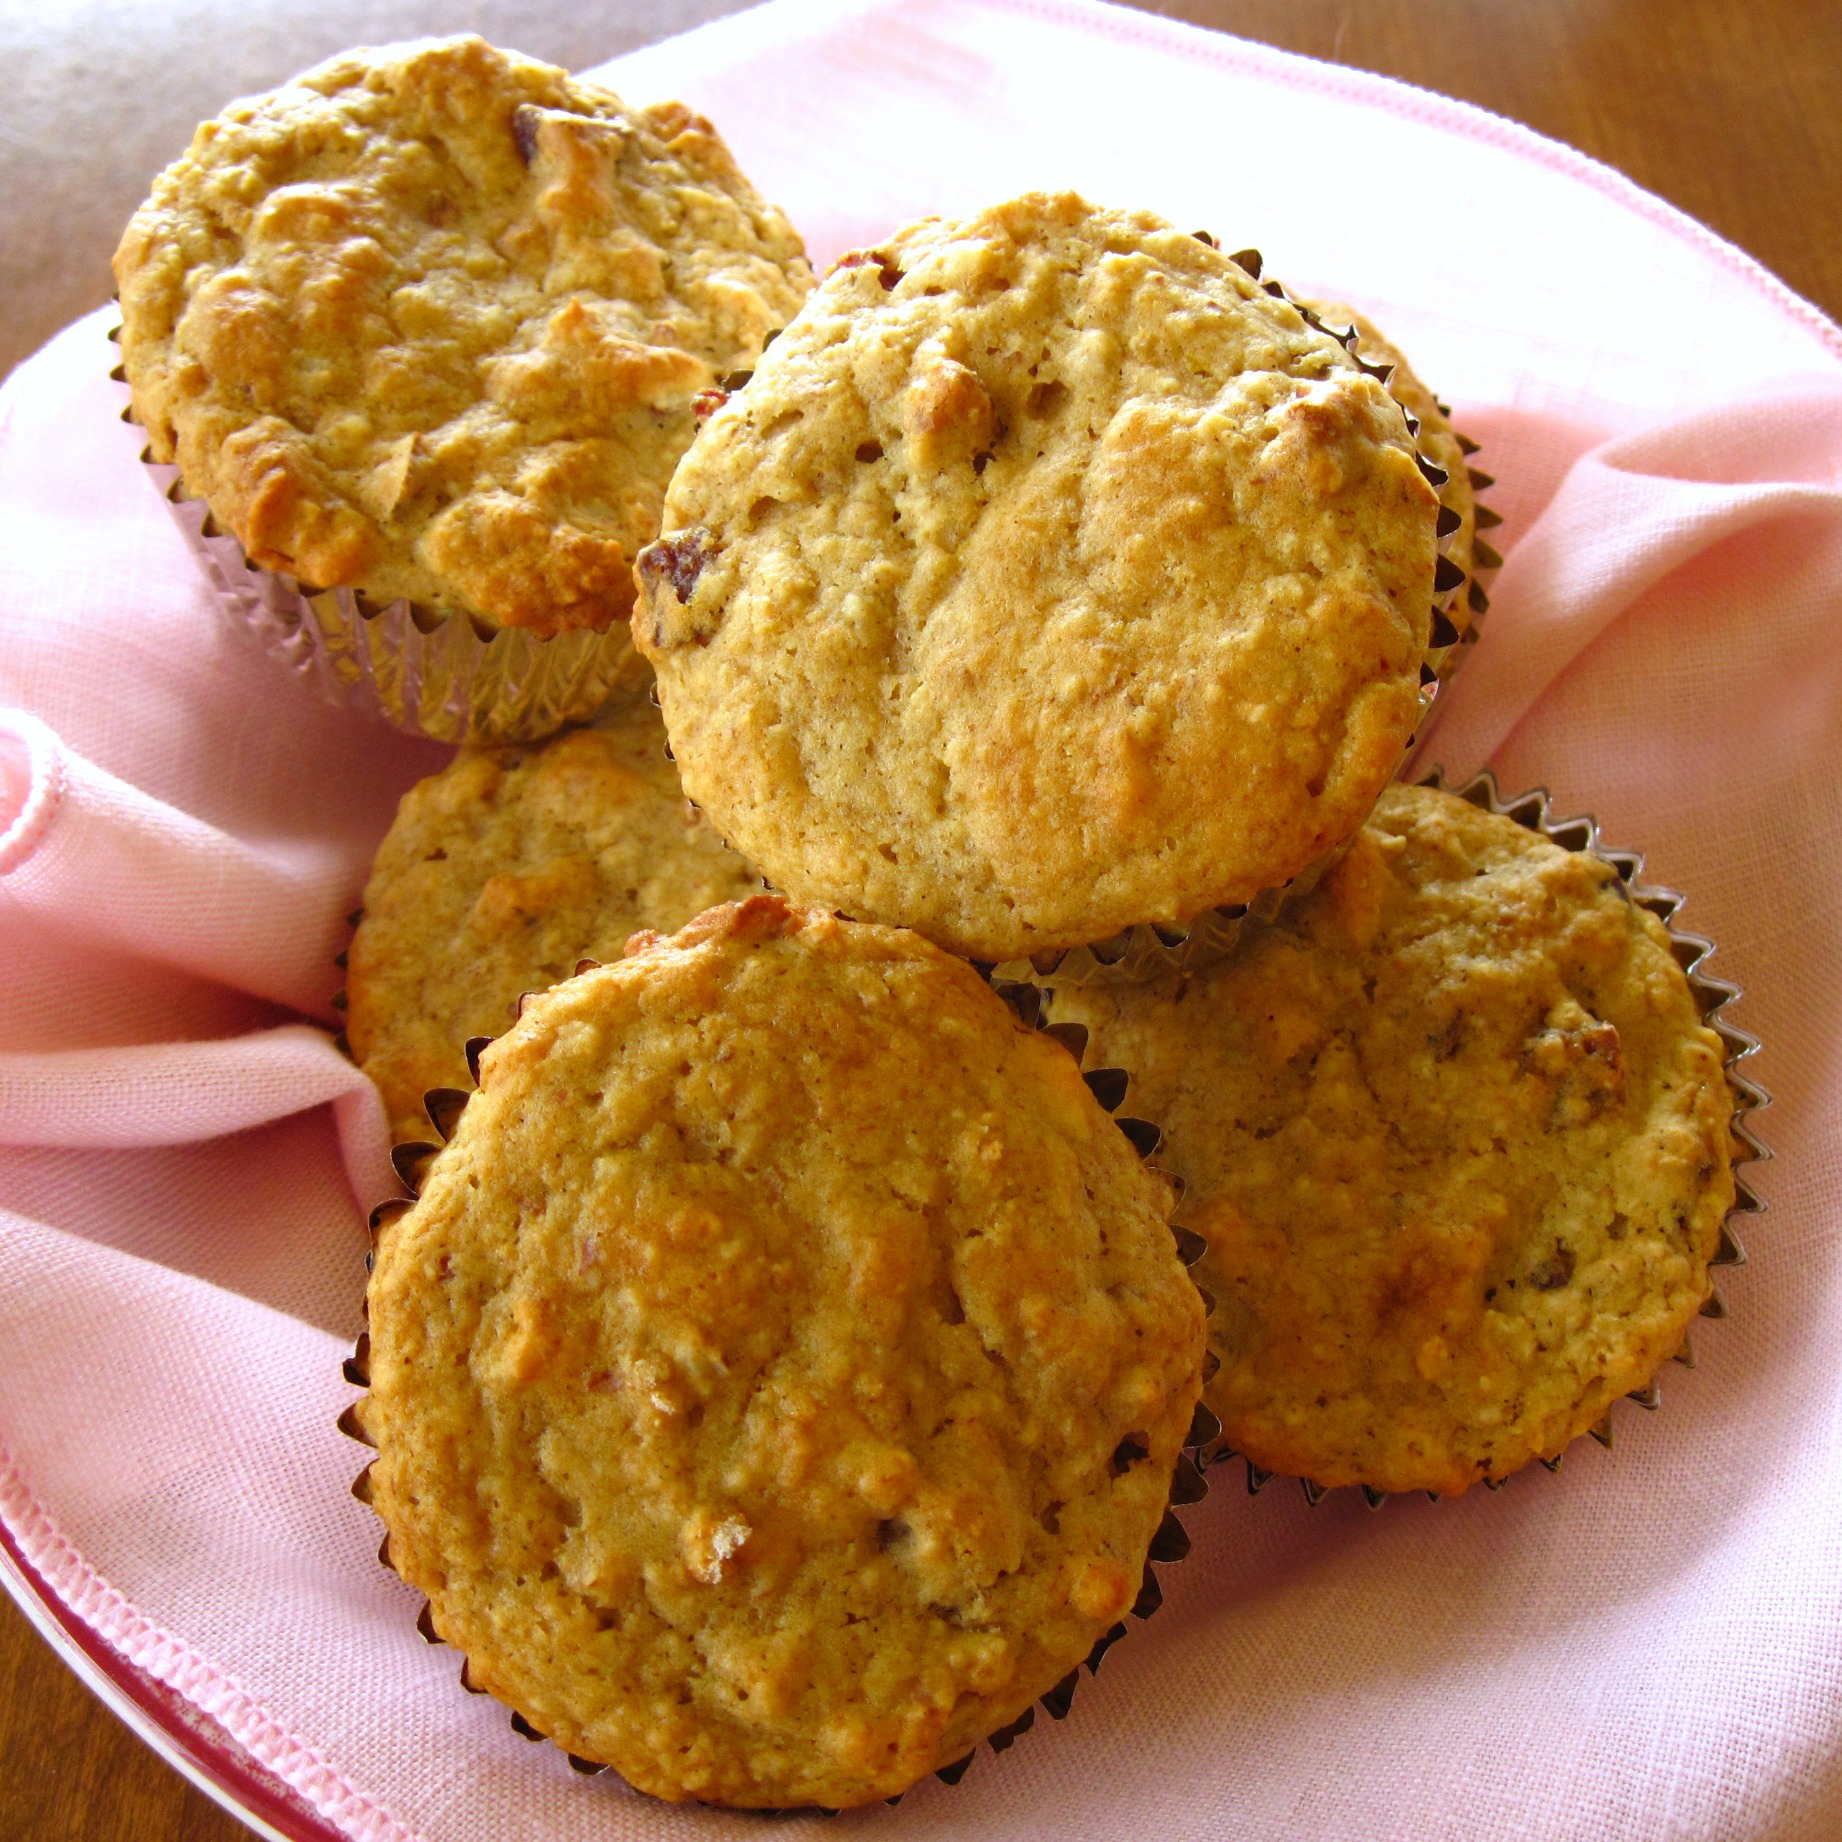
I’m quite pleased with the way these muffins turned out! They’re subtly sweet; they taste like muffins, not like cupcakes! The amount of dates and nuts provide the perfect amount of interesting tidbits. And, for anyone who cares, each muffin has only 110 calories!
Muffins are so quick and easy to make….I don’t know why I don’t make them more often. They’re a perfect addition to a quick breakfast and are excellent for snacking. I like to put them in a freezer bag and freeze them so I can pull them out for a quick treat when I want one.

~
Date-Nut Muffins
(Adapted from a recipe in The Laurel’s Kitchen Bread Book)
.
~
Make 12 muffins
~
1¼ cups white whole wheat flour (the weight is 150g for King Arthur flour)…………………….. …………..or 1¼ cups whole wheat pastry flour
¼ teaspoon salt
2 teaspoons baking powder
½ teaspoon baking soda
~
½ cup chopped dates
½ cup chopped nuts (I used pecans and almonds)
½ cup quick-cooking oats (processed until it resembles bran) or wheat germ or bran
~
1 egg
3 tablespoons pure maple syrup (or light molasses)
2 tablespoons oil
1 cup buttermilk
1 teaspoon lemon rind
¼ teaspoon allspice
~
1. Preheat the oven to 375˚. Grease 12 muffin cups, or line them with cupcake papers.
2. Stir the flour, salt, baking powder, and baking soda together in a medium bowl.
3. Stir in the dates, nuts, and oats.
4. Break the egg in a second medium bowl, and beat well.
5. Add the maple syrup, oil, buttermilk, lemon rind, and allspice to the egg and beat until everything is well-blended
6. Pour the buttermilk mixture into the dry ingredients; stir until just mixed.
7. Fill the muffin cups and bake for 18 – 20 minutes.
q


A bit of butter never hurts….. 🙂


