Welcome!
You'll find over 470 of my favorite recipes here, including ideas for Quick meals, Cooking for 2, Feasting on Leftovers, and cooking with 5 Ingredients or Less. I'm adding new posts regularly; you can subscribe by email or RSS feed if you'd like to receive the latest recipes. Bon appétit!
Filo’s Delicious Chicken
By Kath Dedon
a
Filo was Carrie’s house mom when she was studying in Florence. Carrie and her roommate really lucked out because Filo, who is originally from Naples, is a fabulous cook. Filo’s Delicious Chicken was one of Carrie’s favorites.
This is one of the recipes that Filo jotted down for Carrie – in Italian. The recipe did not include measurements; it just had a list of ingredients and some simple instructions. Carrie translated it for me and I played with the amounts. When I made it for Carrie when she was home for Christmas, she declared that it was just right!
Filo’s recipe called for smoked provolone, which I have not been able to find. I substituted smoked mozzarella and it worked well.
I don’t know what this recipe would actually be called in Italy. It may be Pollo Marsala con Formaggio (Chicken Marsala with Cheese) or something like that. We just call it Filo’s Delicious Chicken!
a

a
Filo’s Delicious Chicken
a
a
Serves 2 (doubles easily to serve 4)
a
8 ounces boneless skinless chicken breast
2 ounces smoked provolone or smoked mozzarella, cut into very thin slices
1 large yellow onion
2 Tablespoons olive oil, divided
¼ cup flour
1/3 cup dry Marsala wine
a
1. Slice the onion and cook it over medium-low heat in 1 tablespoon olive oil until soft and starting to brown a bit, about 25 – 30 minutes. Stir it occasionally as it’s cooking.
The onions are done.

a
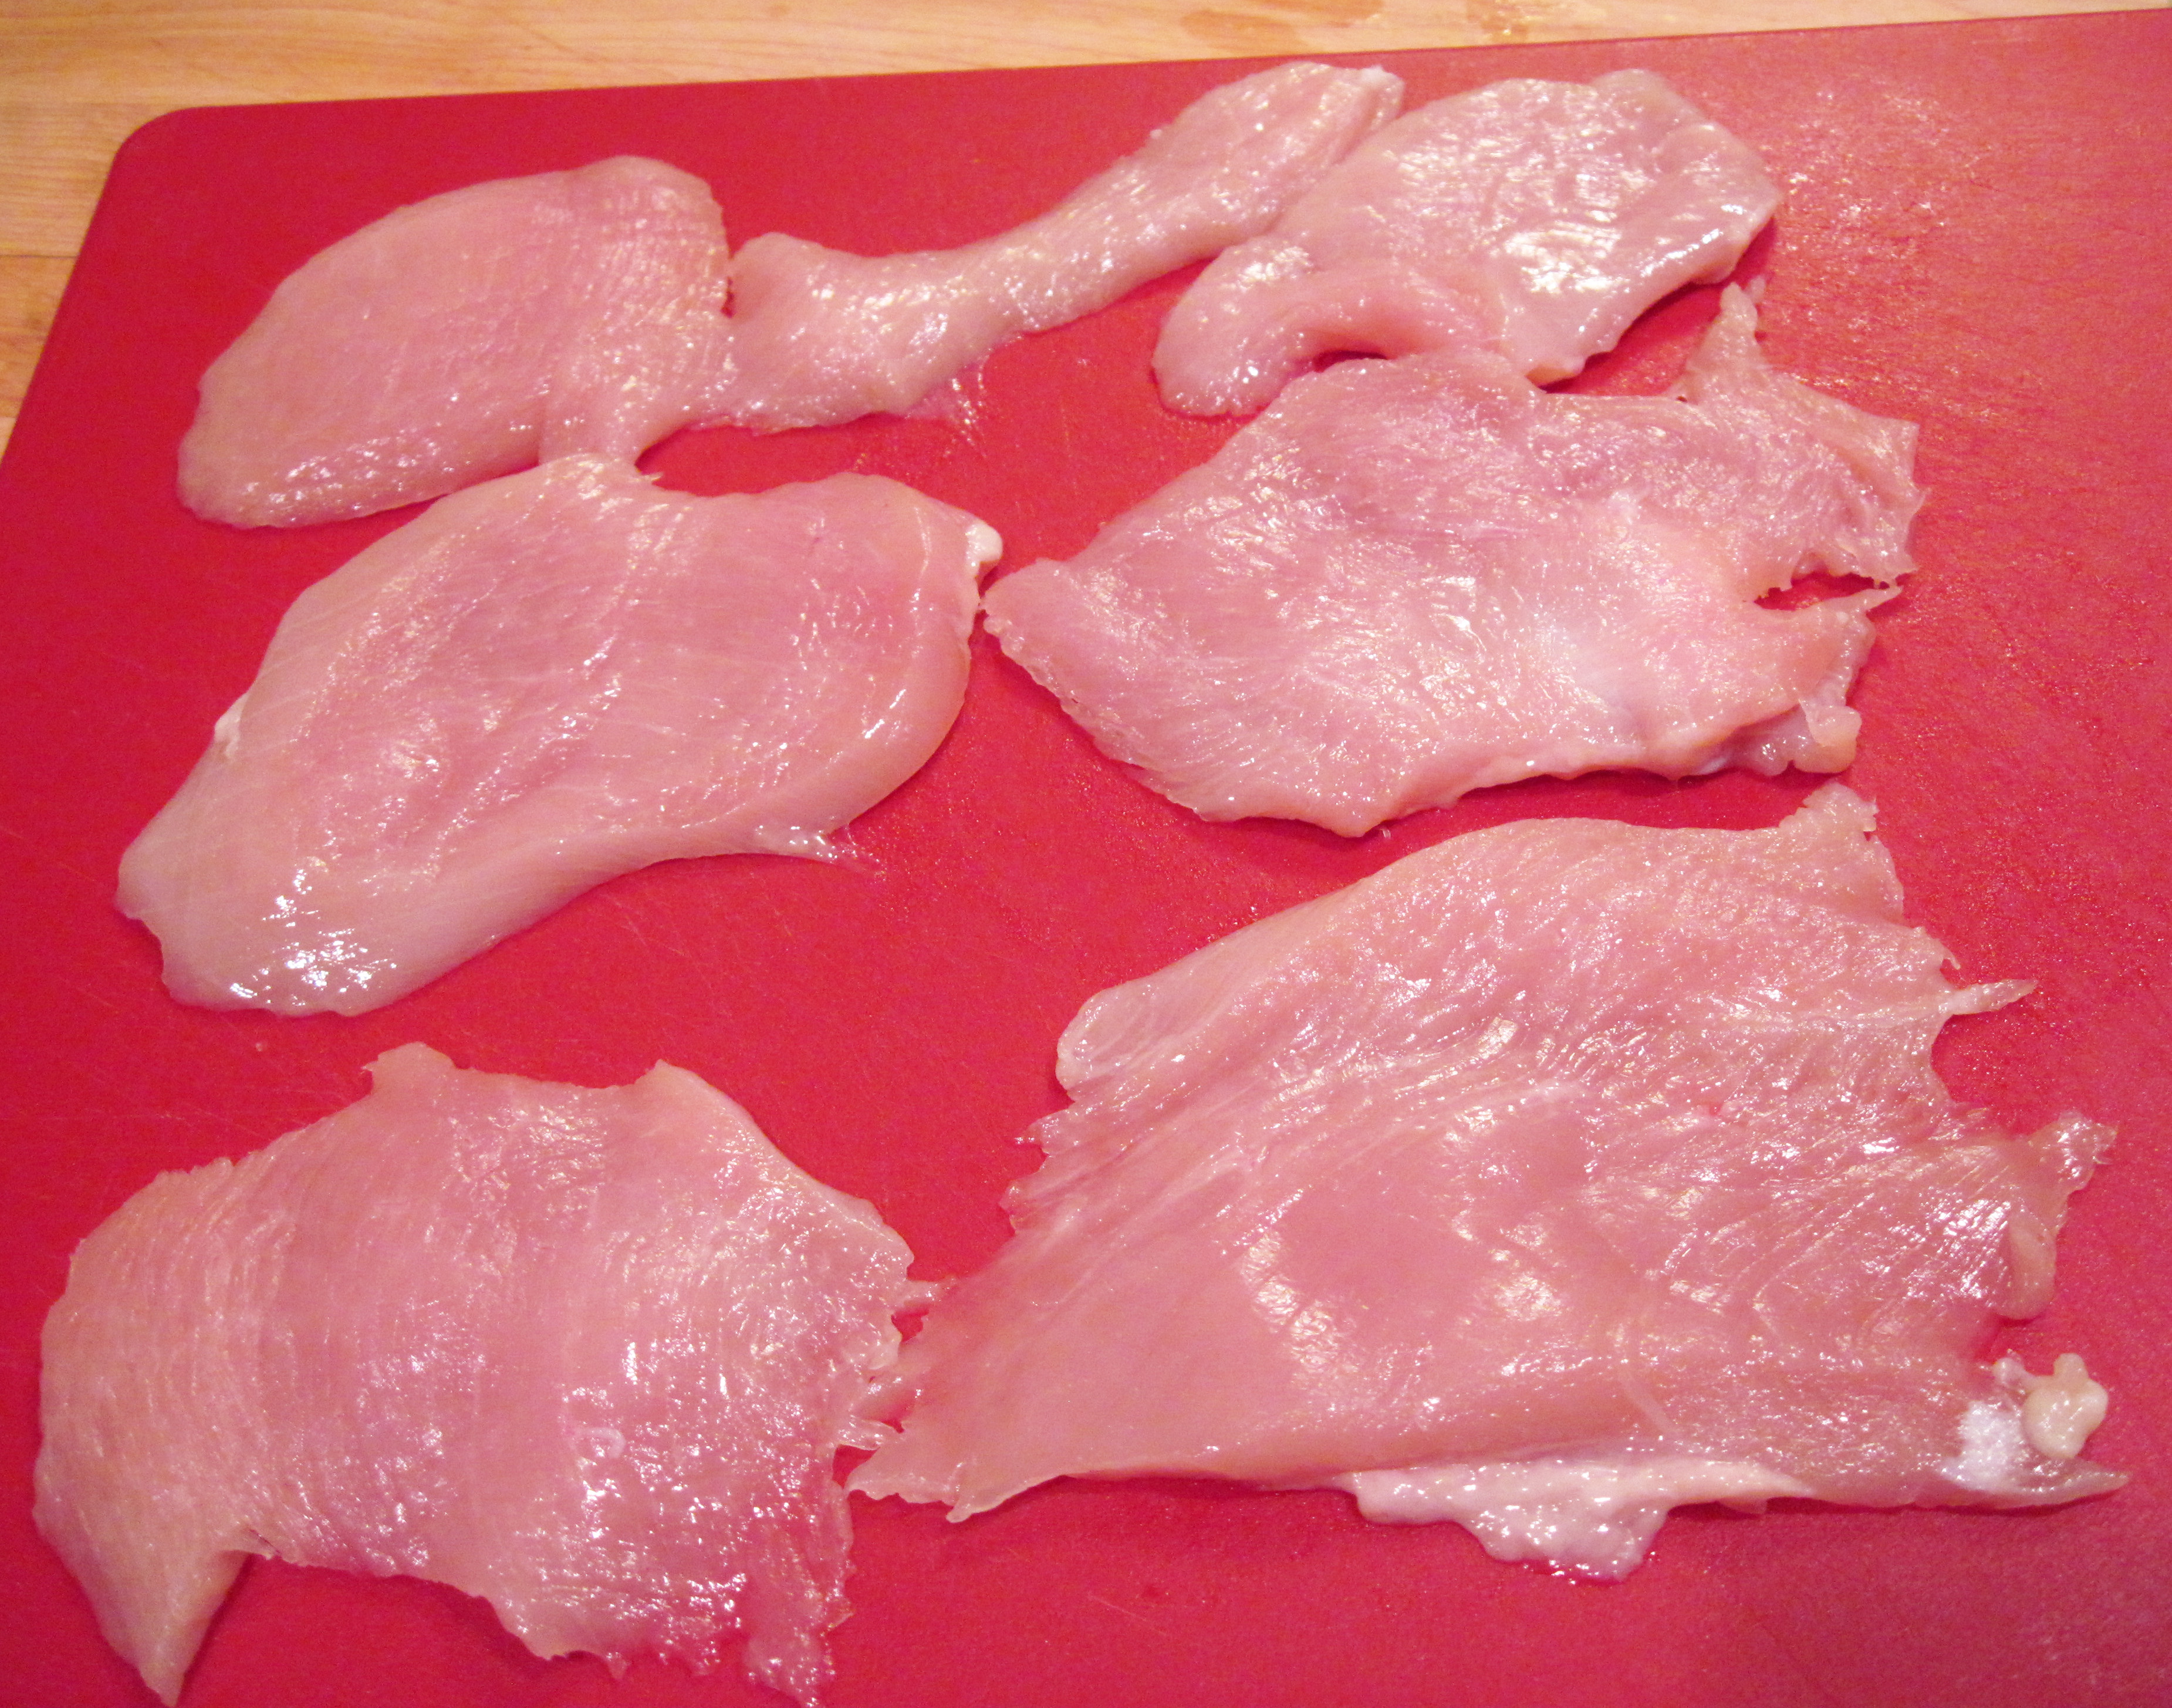
2. Cut the chicken breast horizontally into very thin slices.
This is one large 8-ounce chicken breast cut into thin horizontal slices.
a
3. When the onion is done, remove it from the pan and set aside.
4. Coat the chicken pieces with the flour. (I put the flour and chicken in a gallon Ziploc bag, sealed it, and shook it until the pieces were all well-coated.)
5. Add the extra 1 tablespoon of olive oil to the pan and increase the heat to medium. When the oil is hot, add the chicken pieces and cook until browned a bit. Turn over and continue to cook until done. (The thin pieces of chicken will cook very quickly.) As the chicken is cooking, sprinkle it lightly with salt.

a
6. Add the onions back to the pan. Pour in the Marsala and simmer until it is absorbed.
7. Place the cheese over the chicken pieces, cover the pan, and cook just until the cheese is melted. Enjoy!

a
Share this:

Homemade Noodles
By Kath Dedon
a
I’m just getting over an annoying head cold, so I defrosted some homemade chicken broth in my freezer to make Quick and Easy Chicken Noodle Soup. It would have been very quick and easy, too, except I decided to make Homemade Noodles!
My go-to recipe for Homemade Noodles is in my 1981 edition of Better Homes and Gardens New Cook Book . I decided to use that recipe again, but I was determined to get the noodles as thin as possible. In the past, my noodles have often been quite thick and chewy.
In The Classic Pasta Cookbook, Giuliano Hazan gives directions for rolling pasta by hand, so I knew it could be done. Using a rolling pin, you roll and stretch the dough until it is thin and transparent.
From start to finish, it took about 4 hours to make the noodles, but a lot of that time is for resting/drying. Definitely not quick, but the noodles were delicious and they were pretty thin. I used 4 ounces of the noodles for the soup and cooked the remaining 2 ounces for my lunch today.
a
Chicken Noodle Soup with Homemade Noodles

a
Homemade Noodles
(Adapted from recipes in Better Homes and Gardens New Cookbook and The Classic Pasta Cookbook by Giuliano Hazan)
a
a
Makes about 6 ounces of noodles
a
1 beaten egg
2 tablespoons milk
½ teaspoon salt
1 cup (120g) all-purpose flour
a
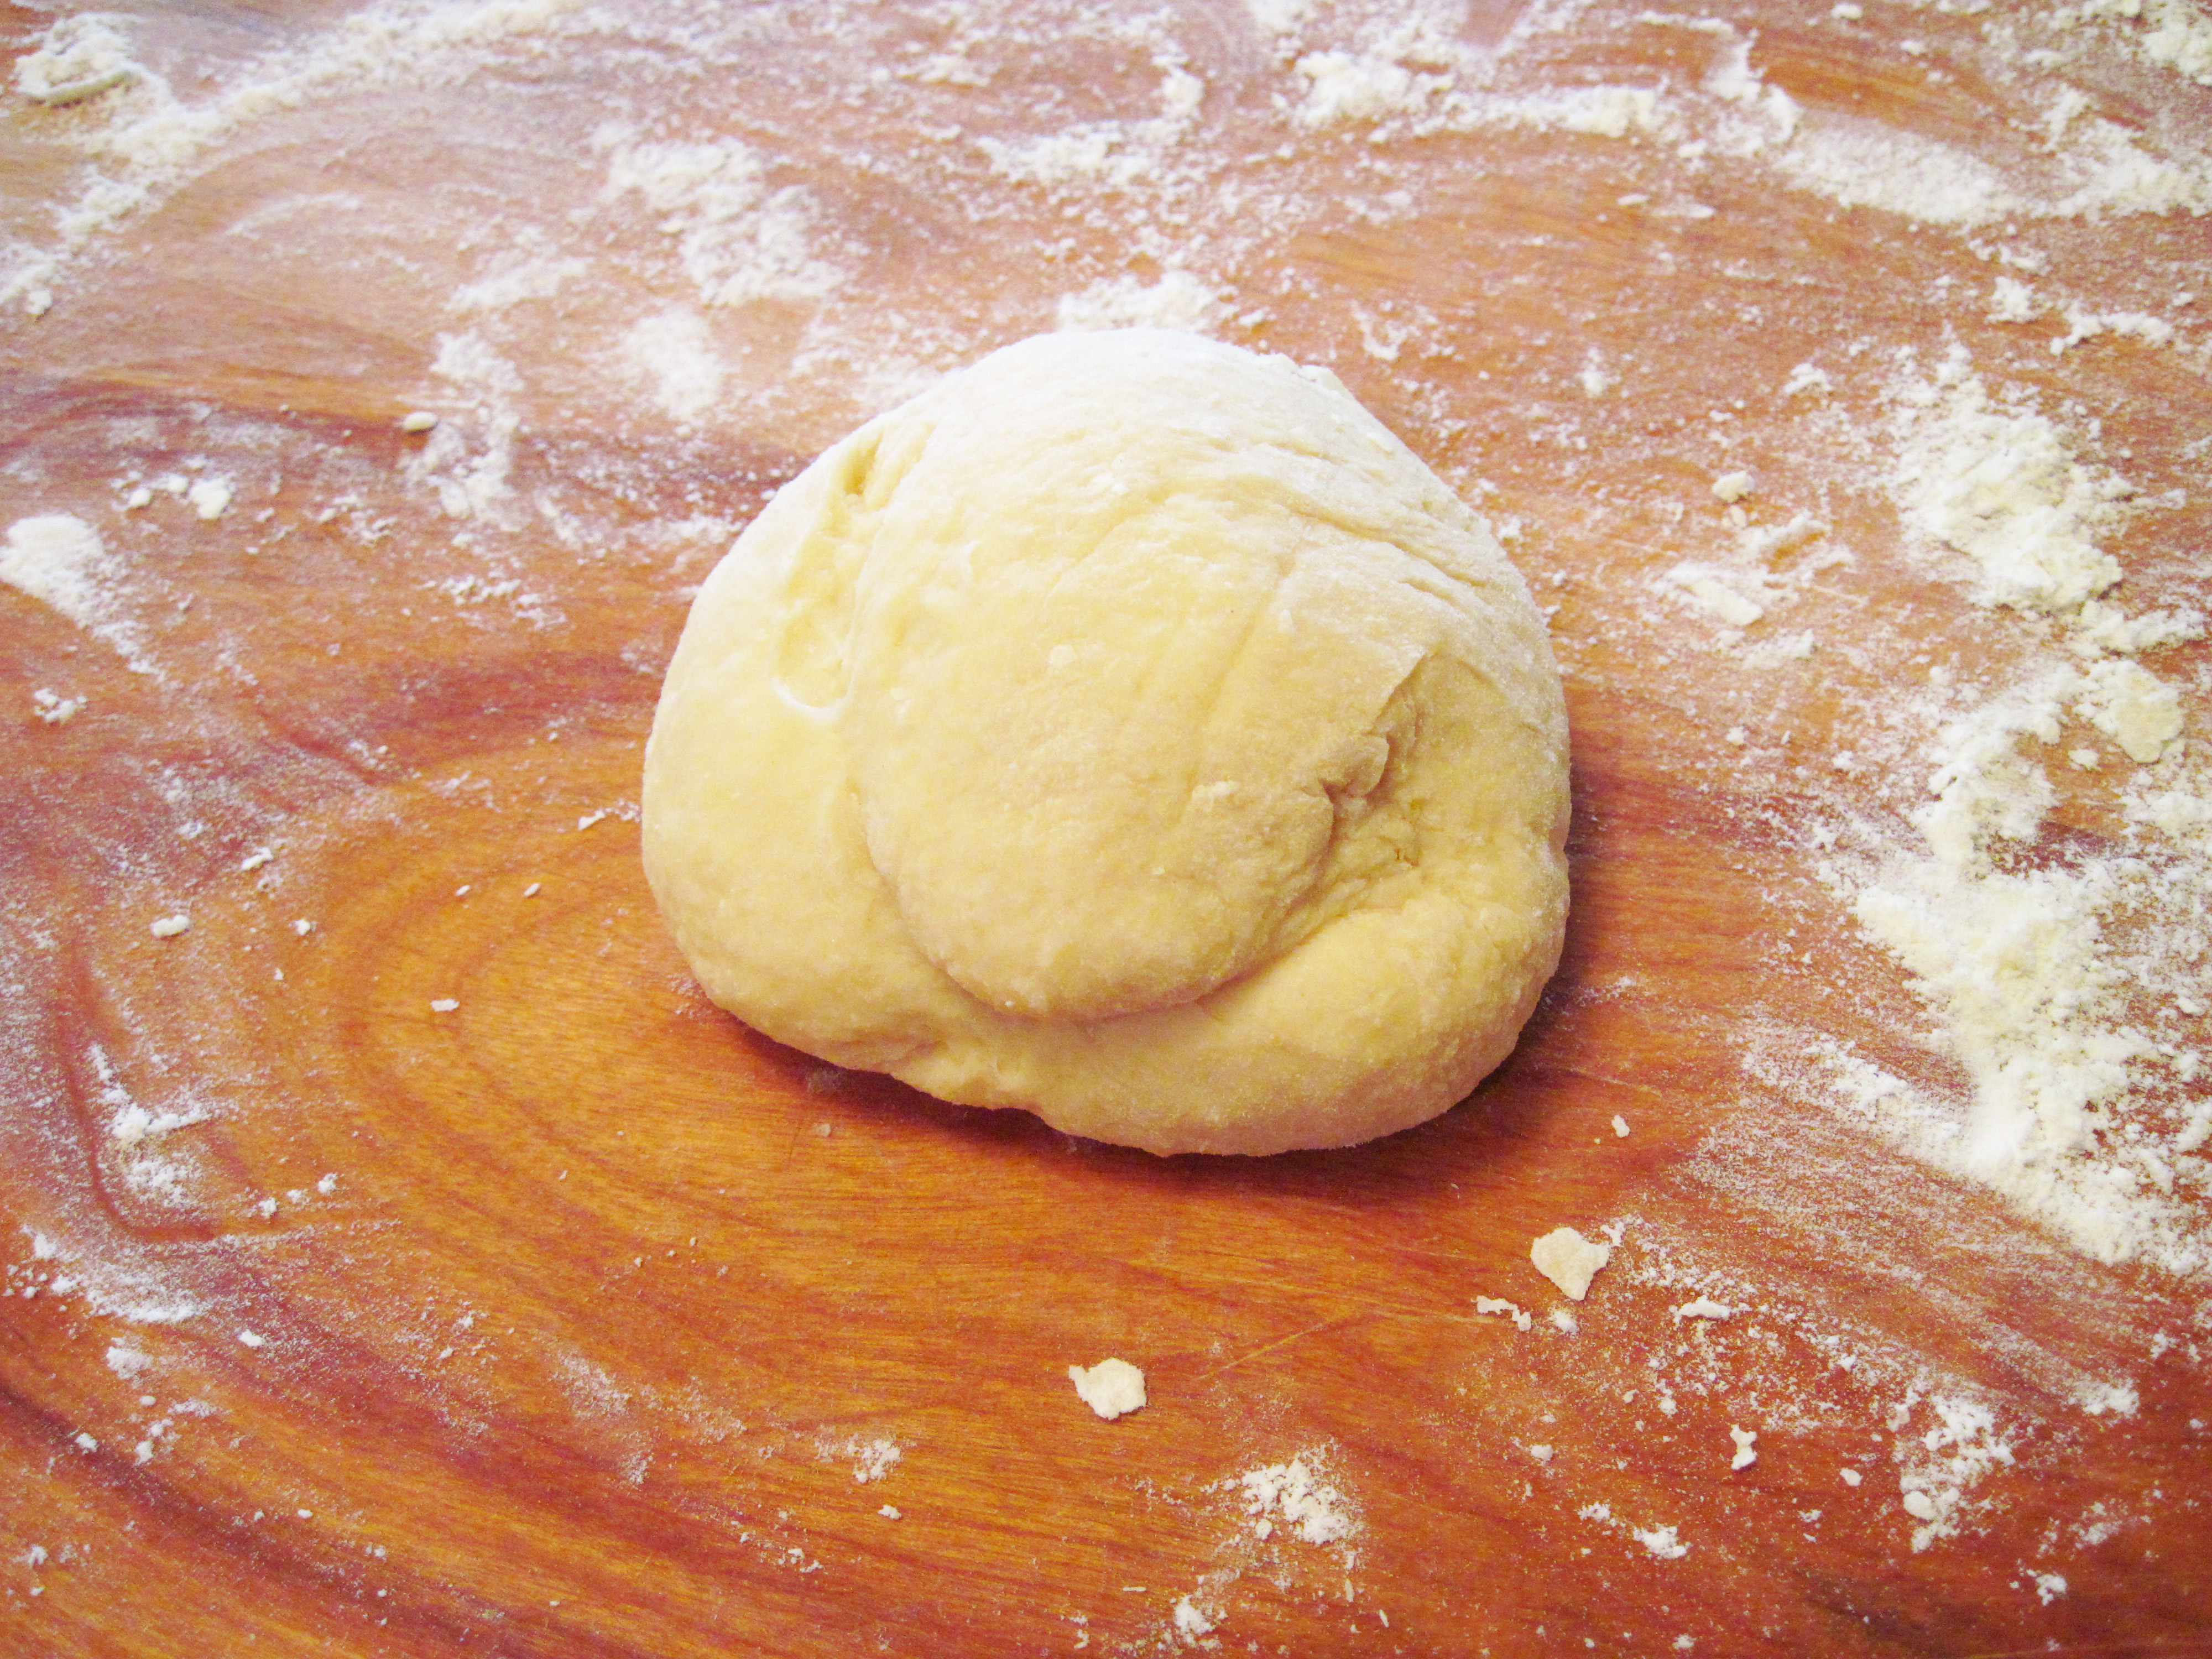
1. Mix the ingredients together to form a stiff dough.
2. Put some flour on a wooden board and knead the dough for about 5 minutes, until the dough is very smooth.
a
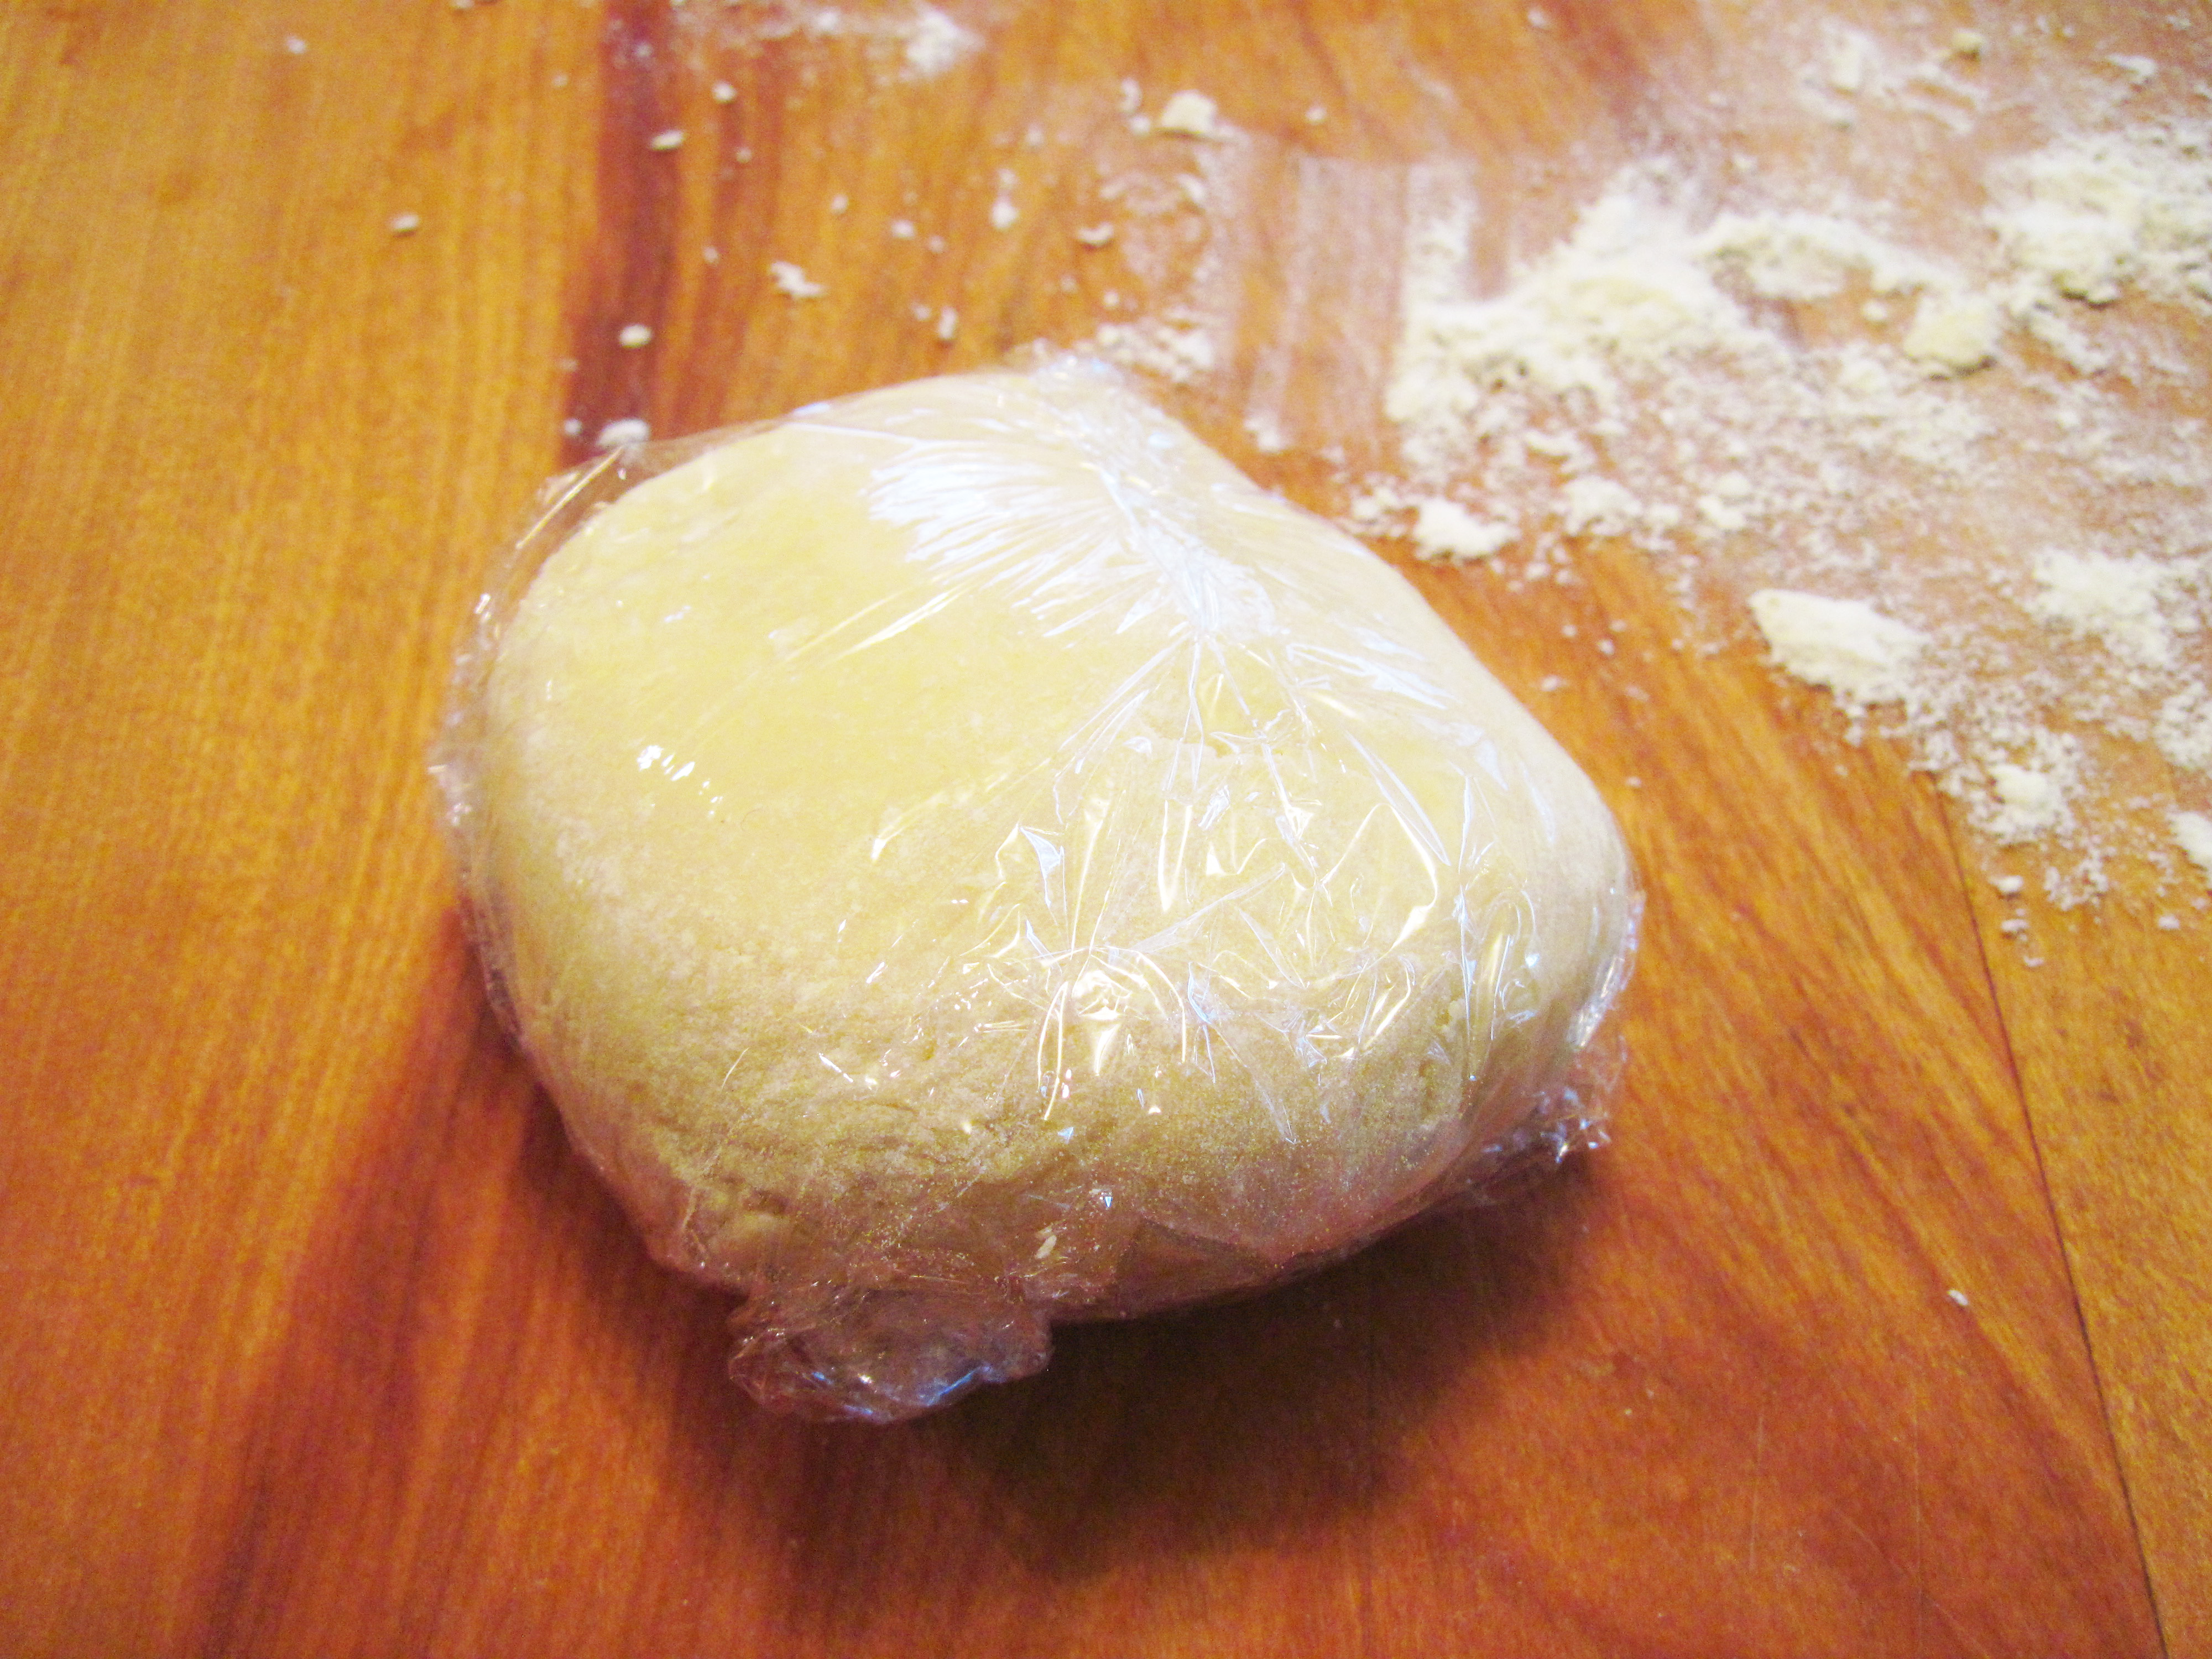
3. Wrap the dough in plastic wrap and let it rest for 20 minutes.
s
4. While the dough is resting, scrape away bits of dough left on the board.

a
5. After the 20 minute rest, unwrap and knead again for about 1 minute.
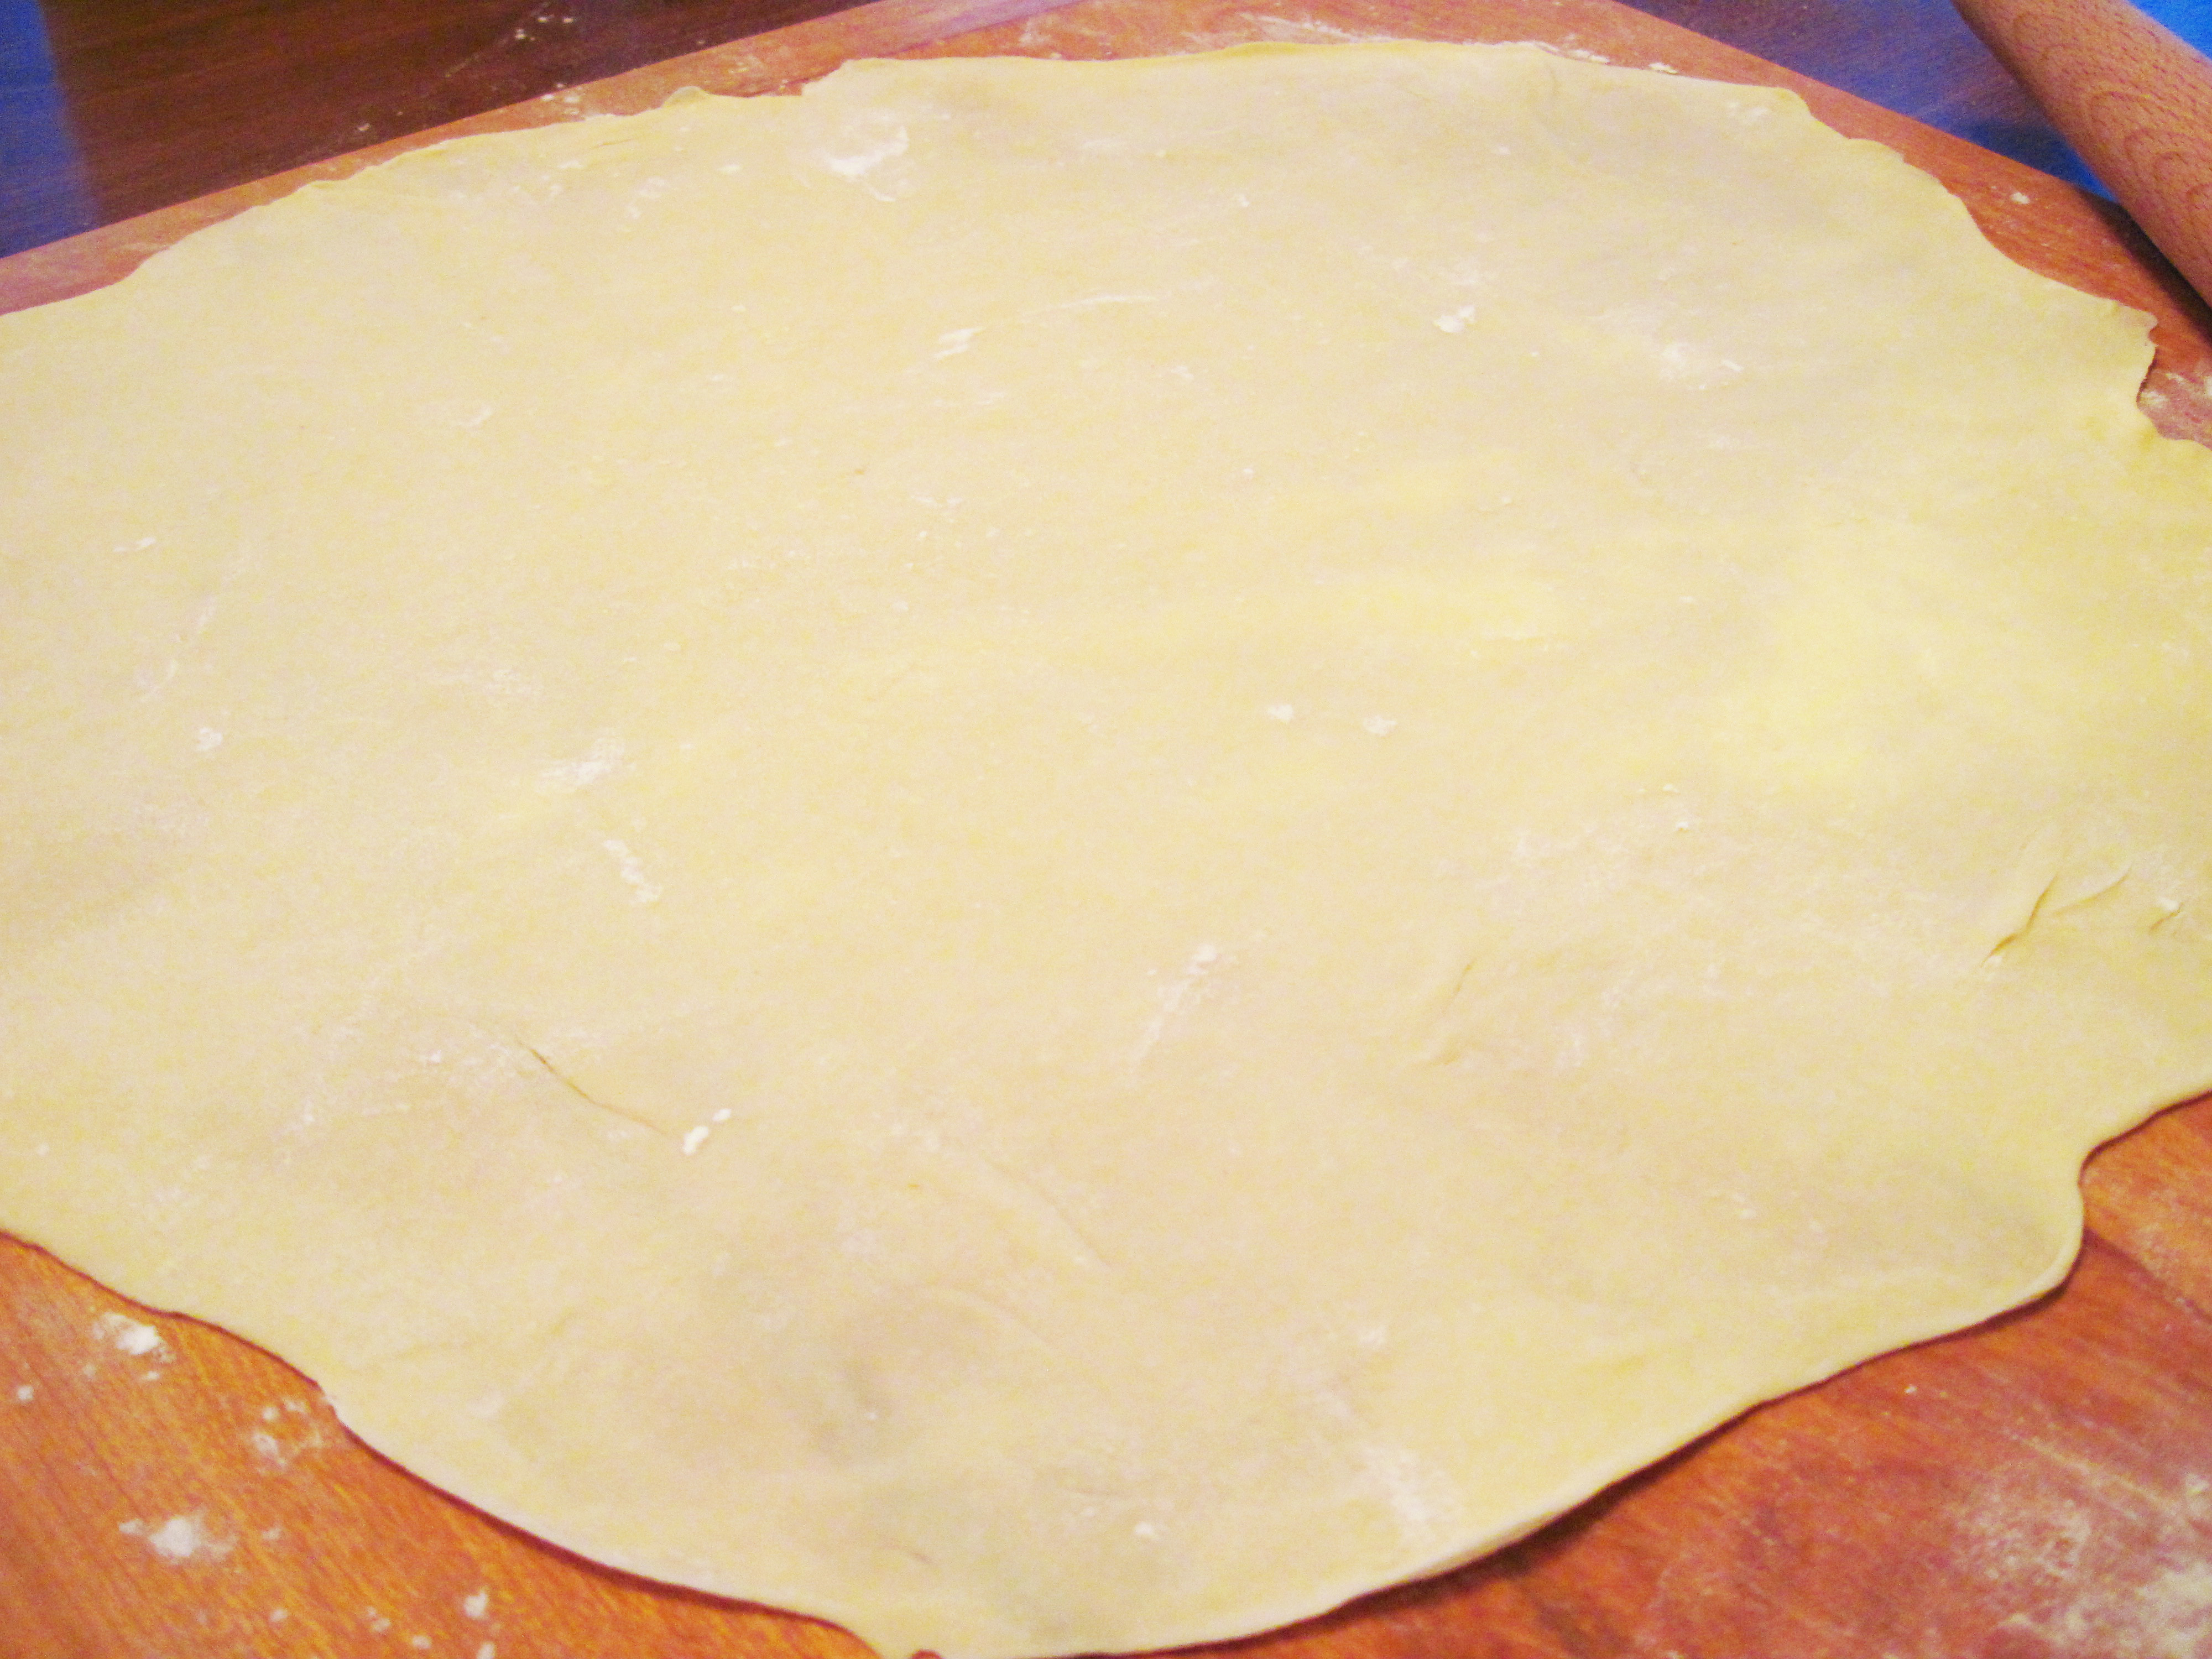
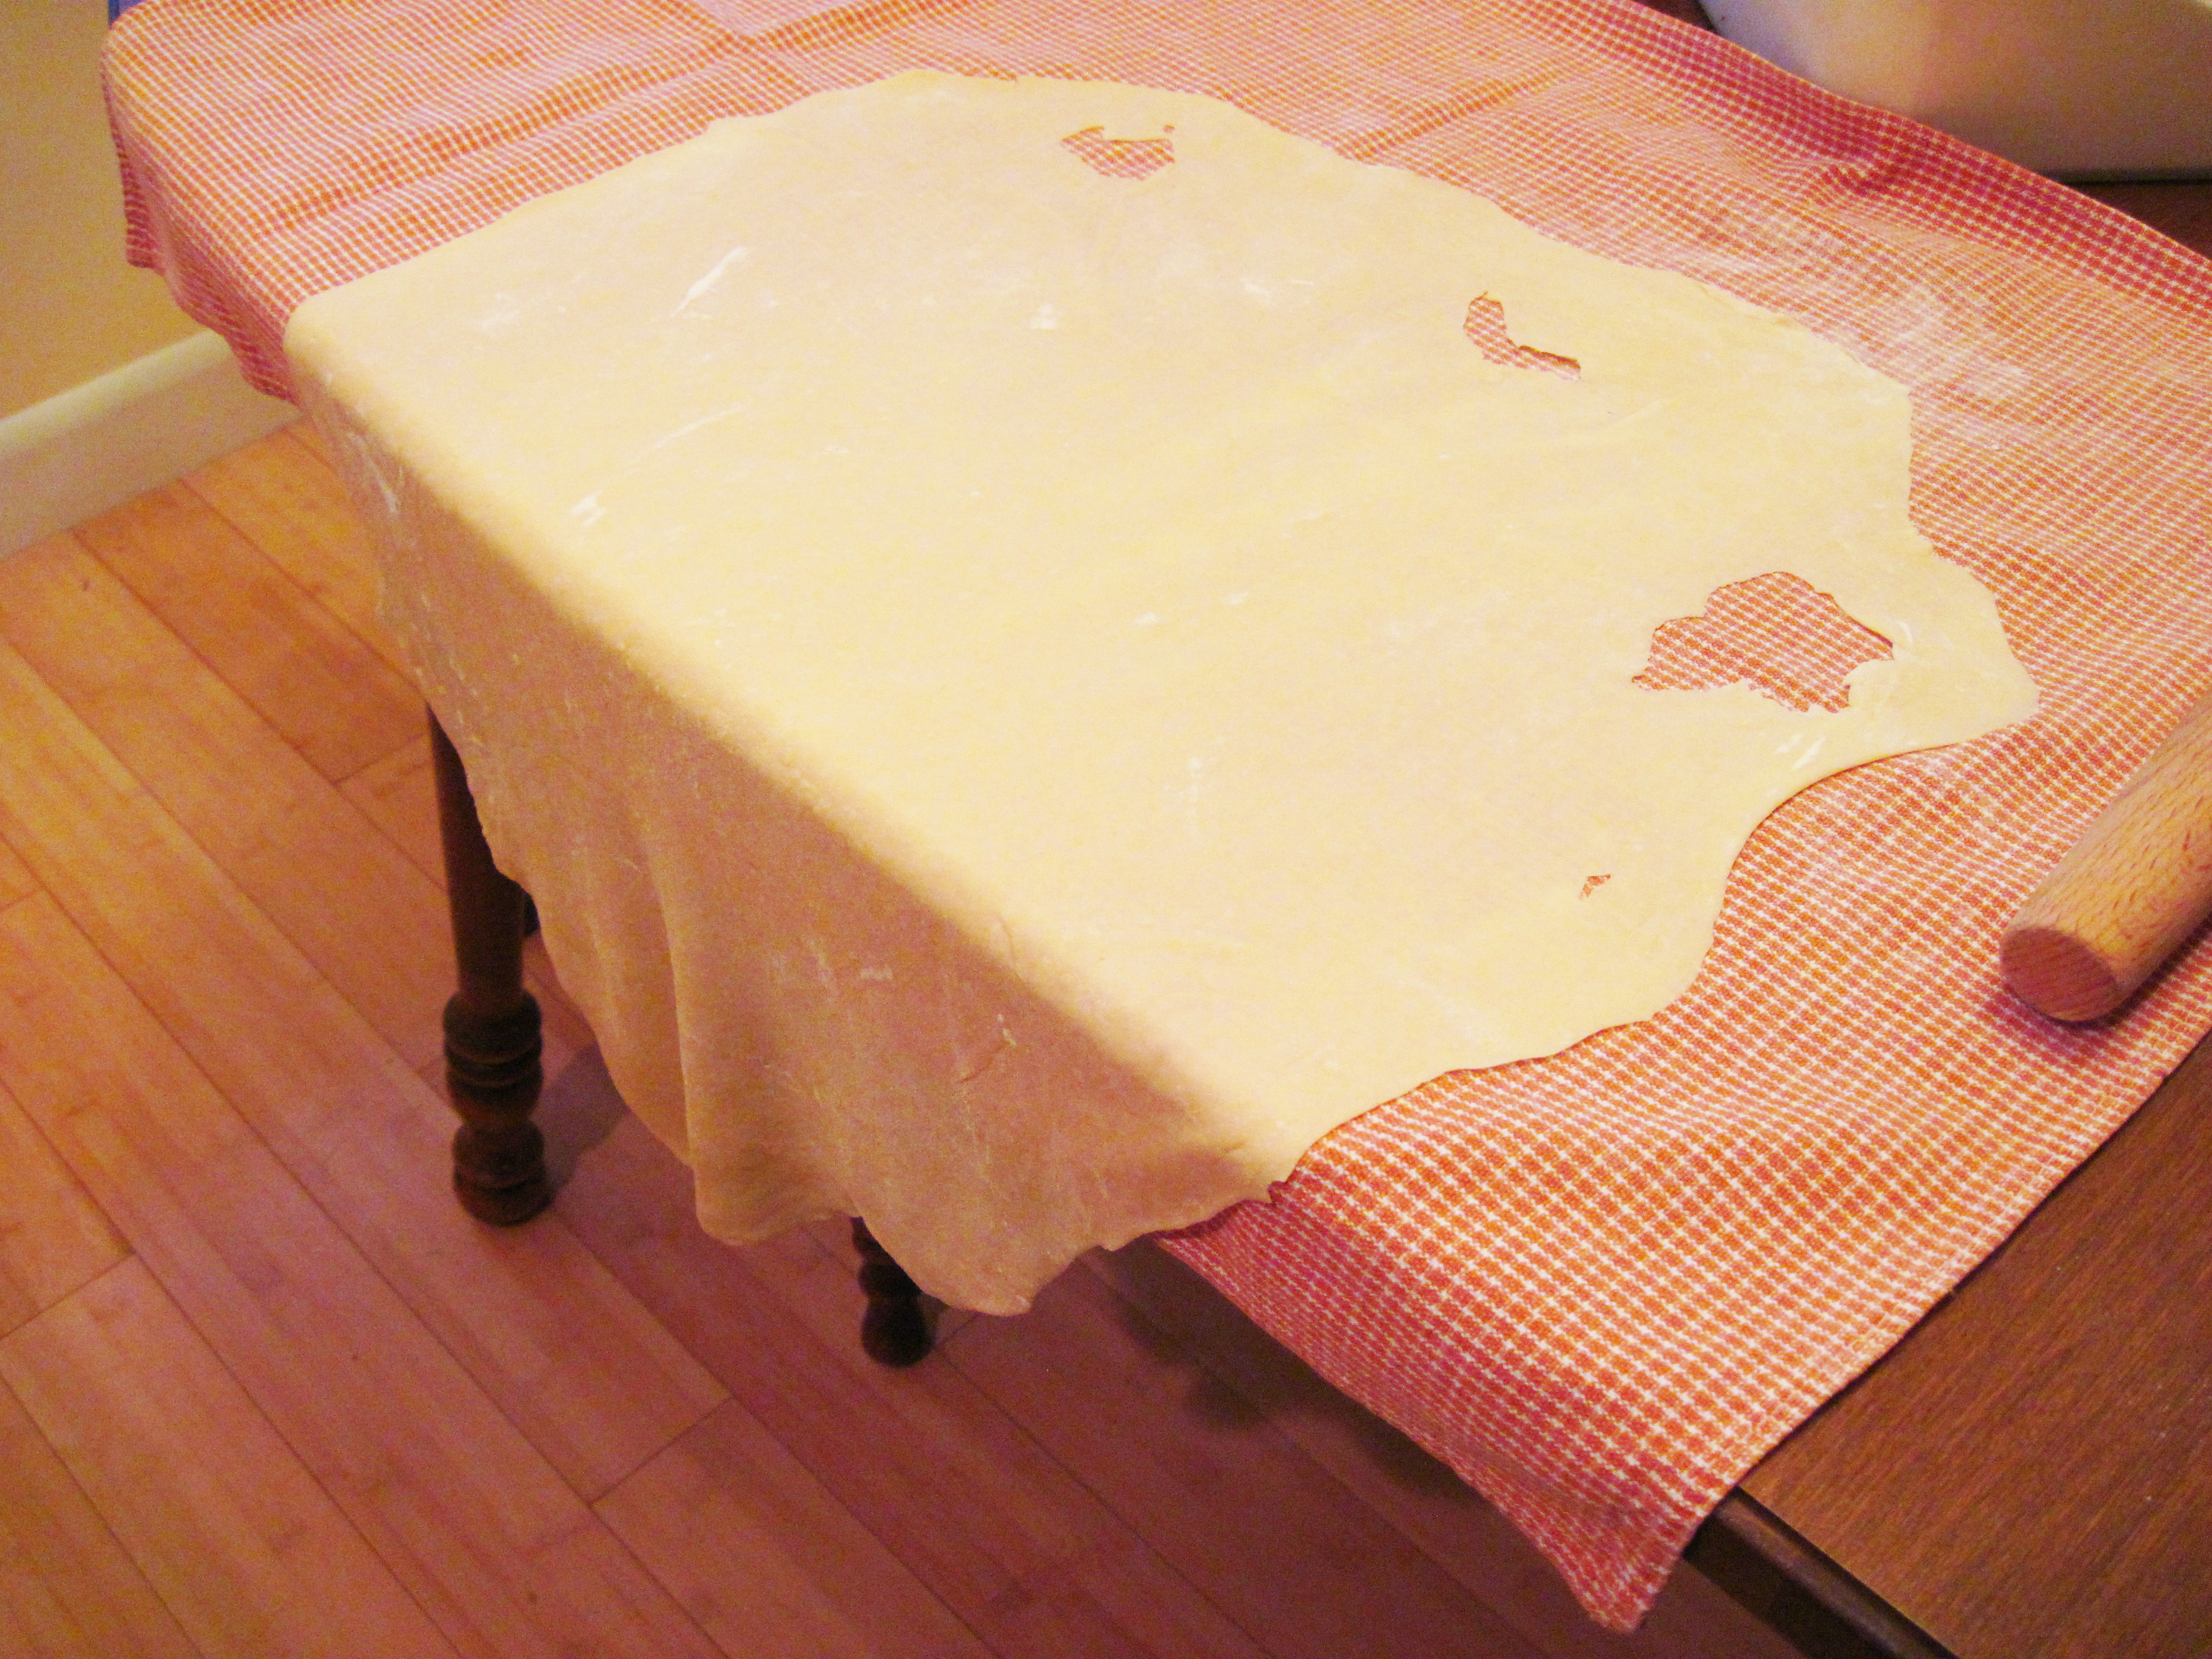
6. Put some flour on the board. Put the dough on the flour and press down into a disk. Start rolling the dough with a rolling pin, turning the dough now and then. When you turn the dough, you can pick it up and let it hang down to help it stretch out. It takes a while, but keep rolling and stretching until the dough is as thin as you can get it.
a
7. Put the dough on a kitchen towel and let it hang over the edge of a table. Let the dough dry for 20 – 25 minutes.
a
Yes, the dough ripped a bit when I moved it to the towel. No worries.
a
8. With a sharp knife, slice the dough into your desired width and lay the noodles over towels on a broom handle to dry.

a
Noodles drying
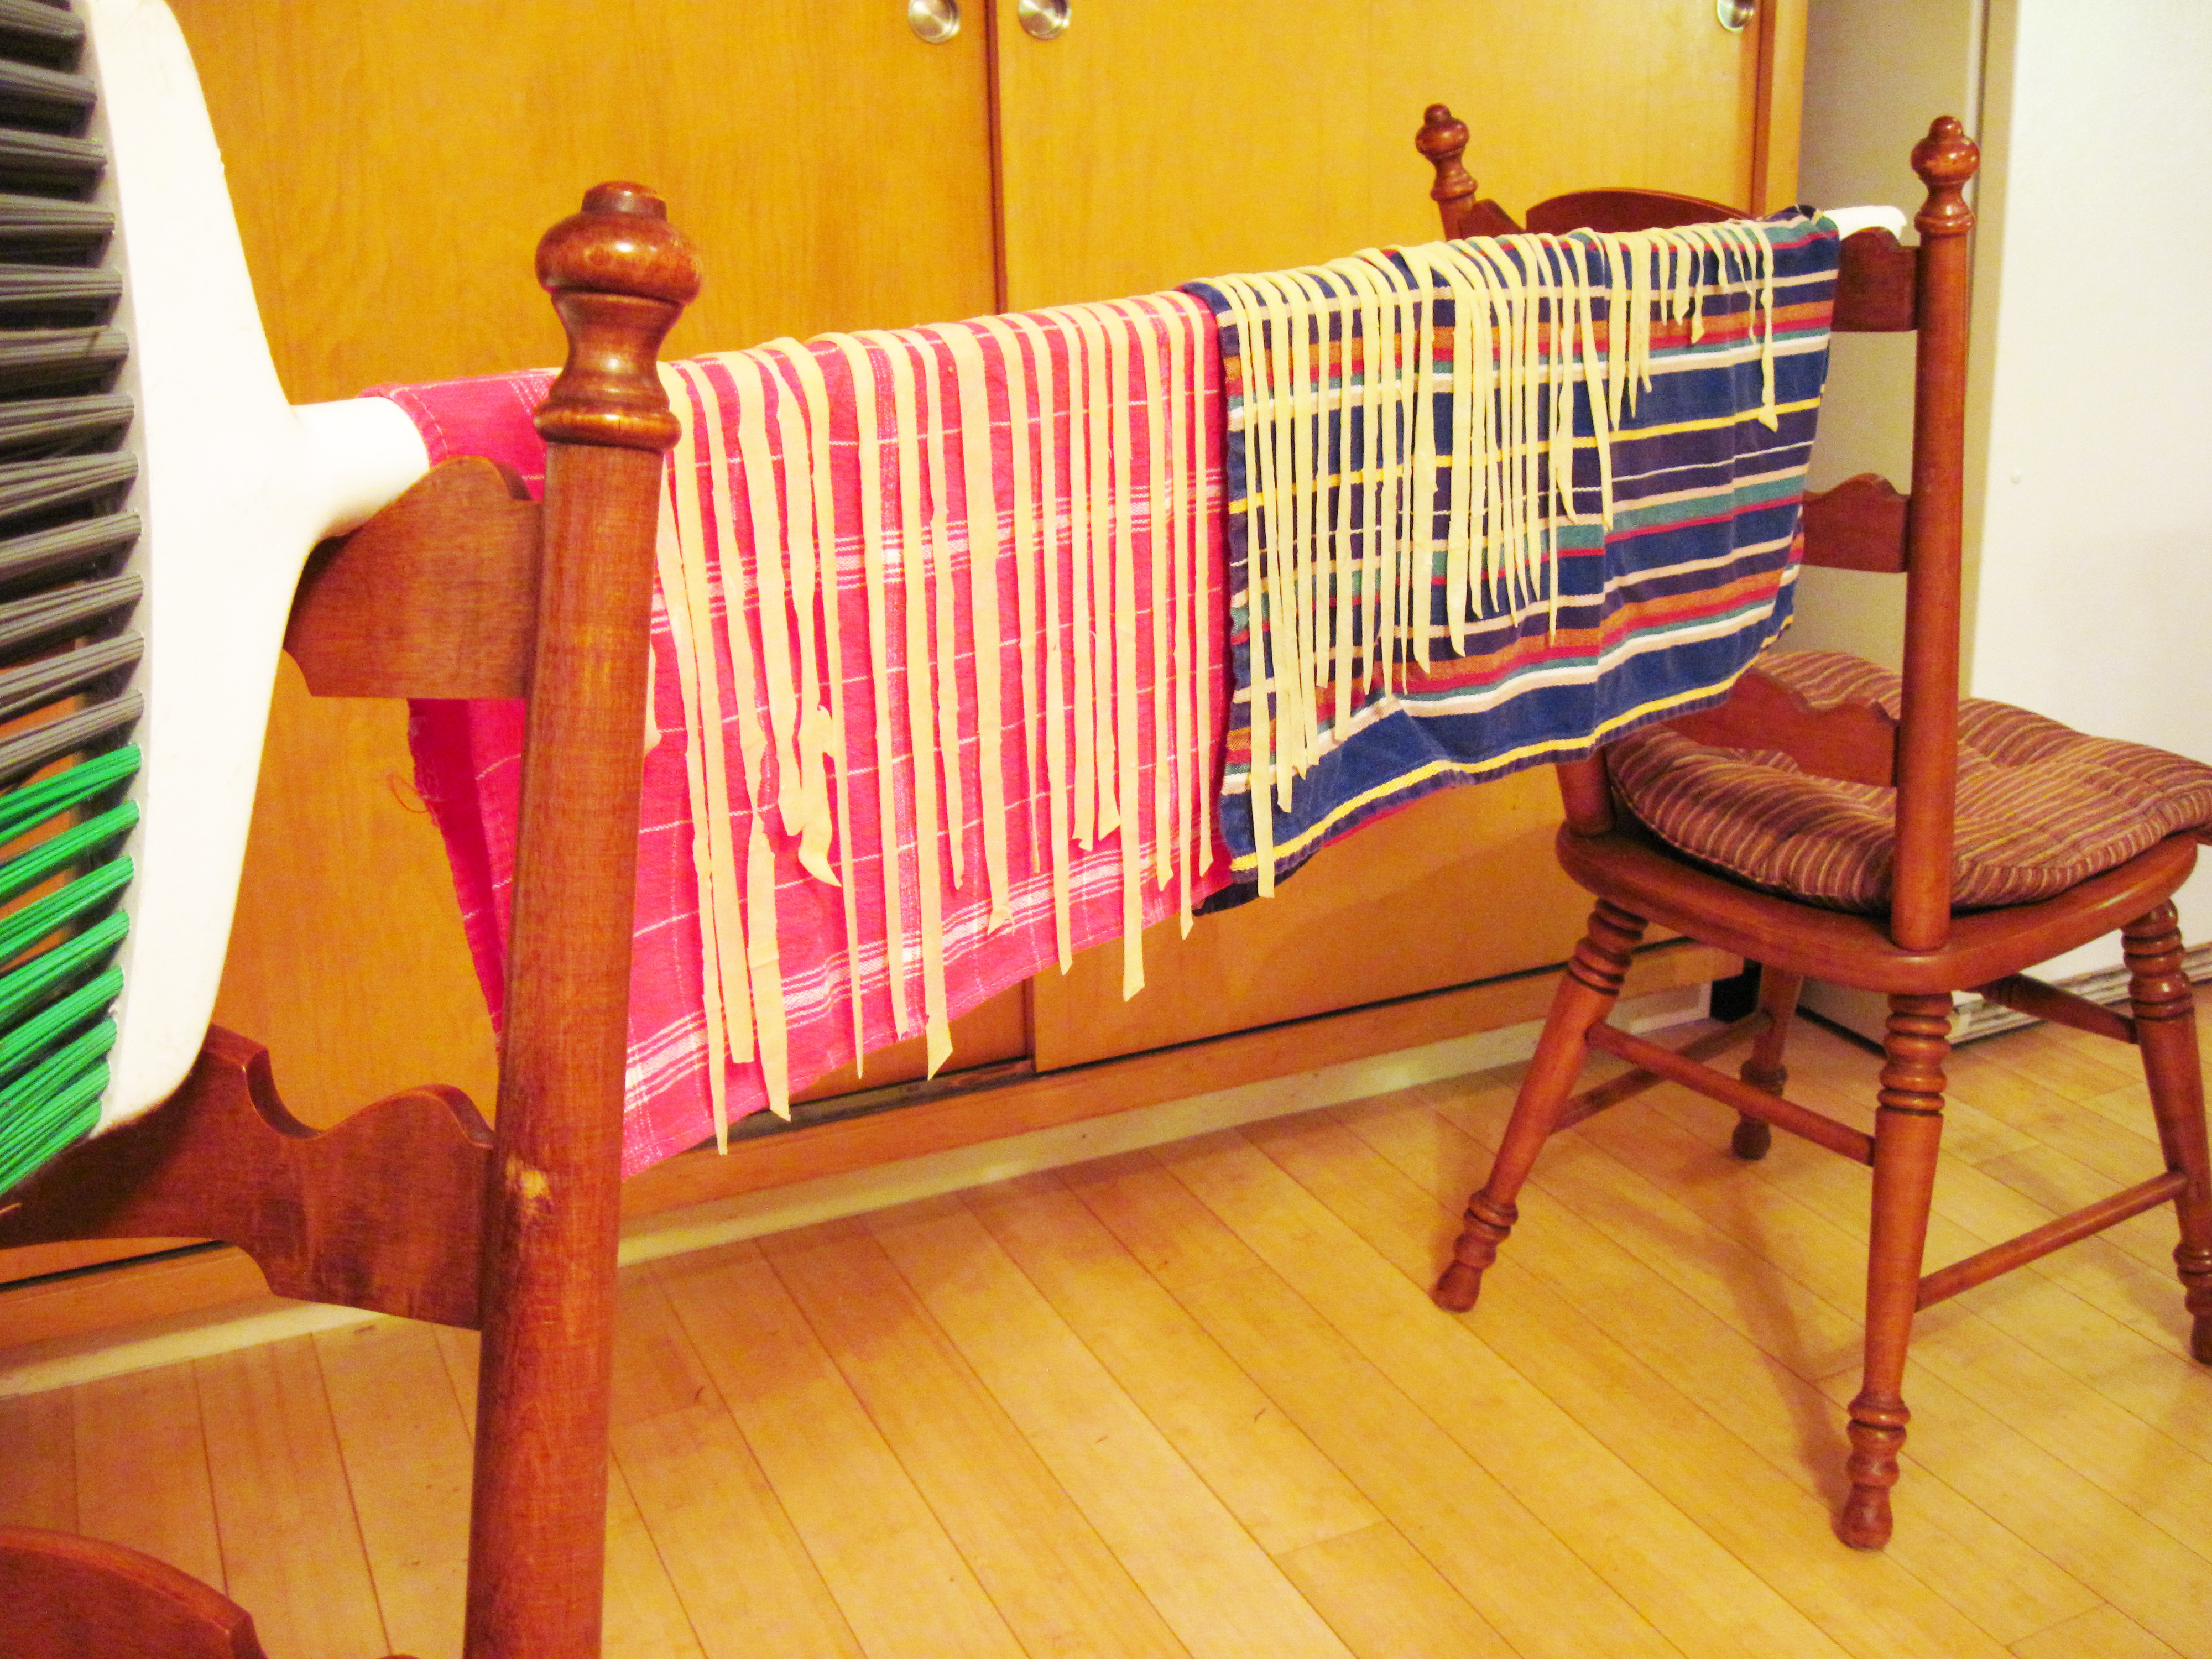
9. Let the noodles dry for 2 hours. They’re then ready to use, or they can be stored in an airtight container.
a
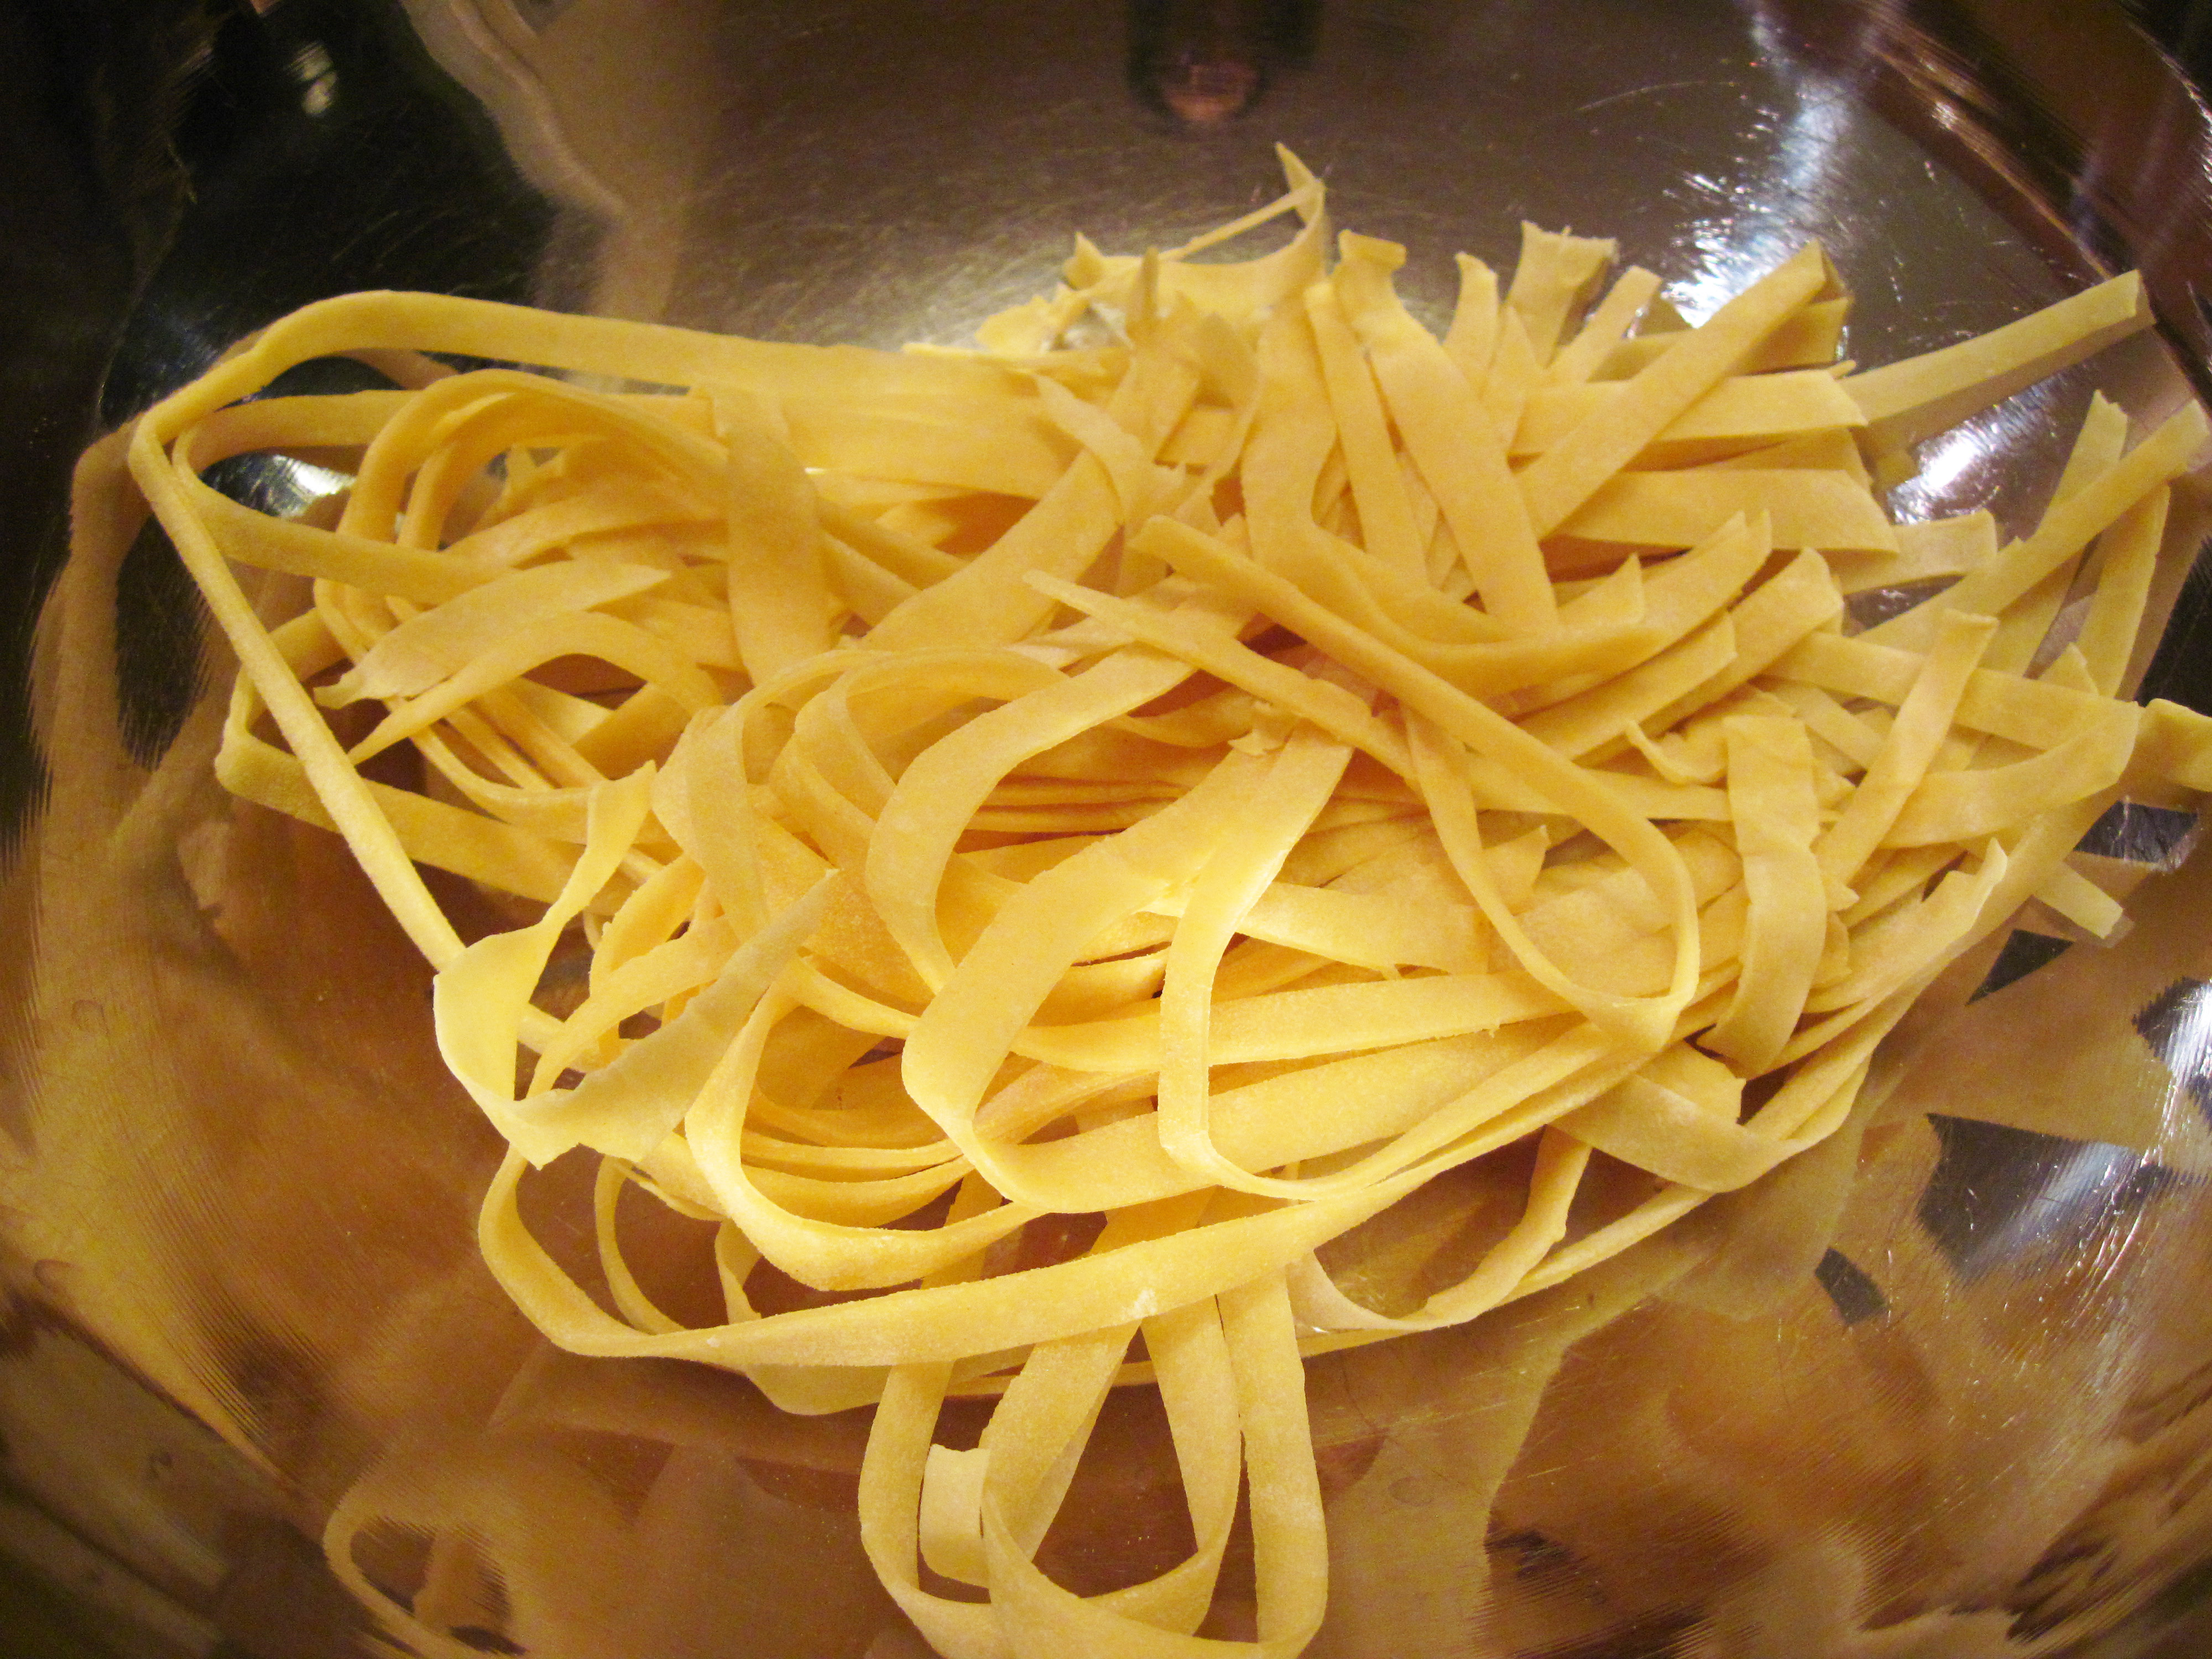
6 ounces of Homemade Noodles
a
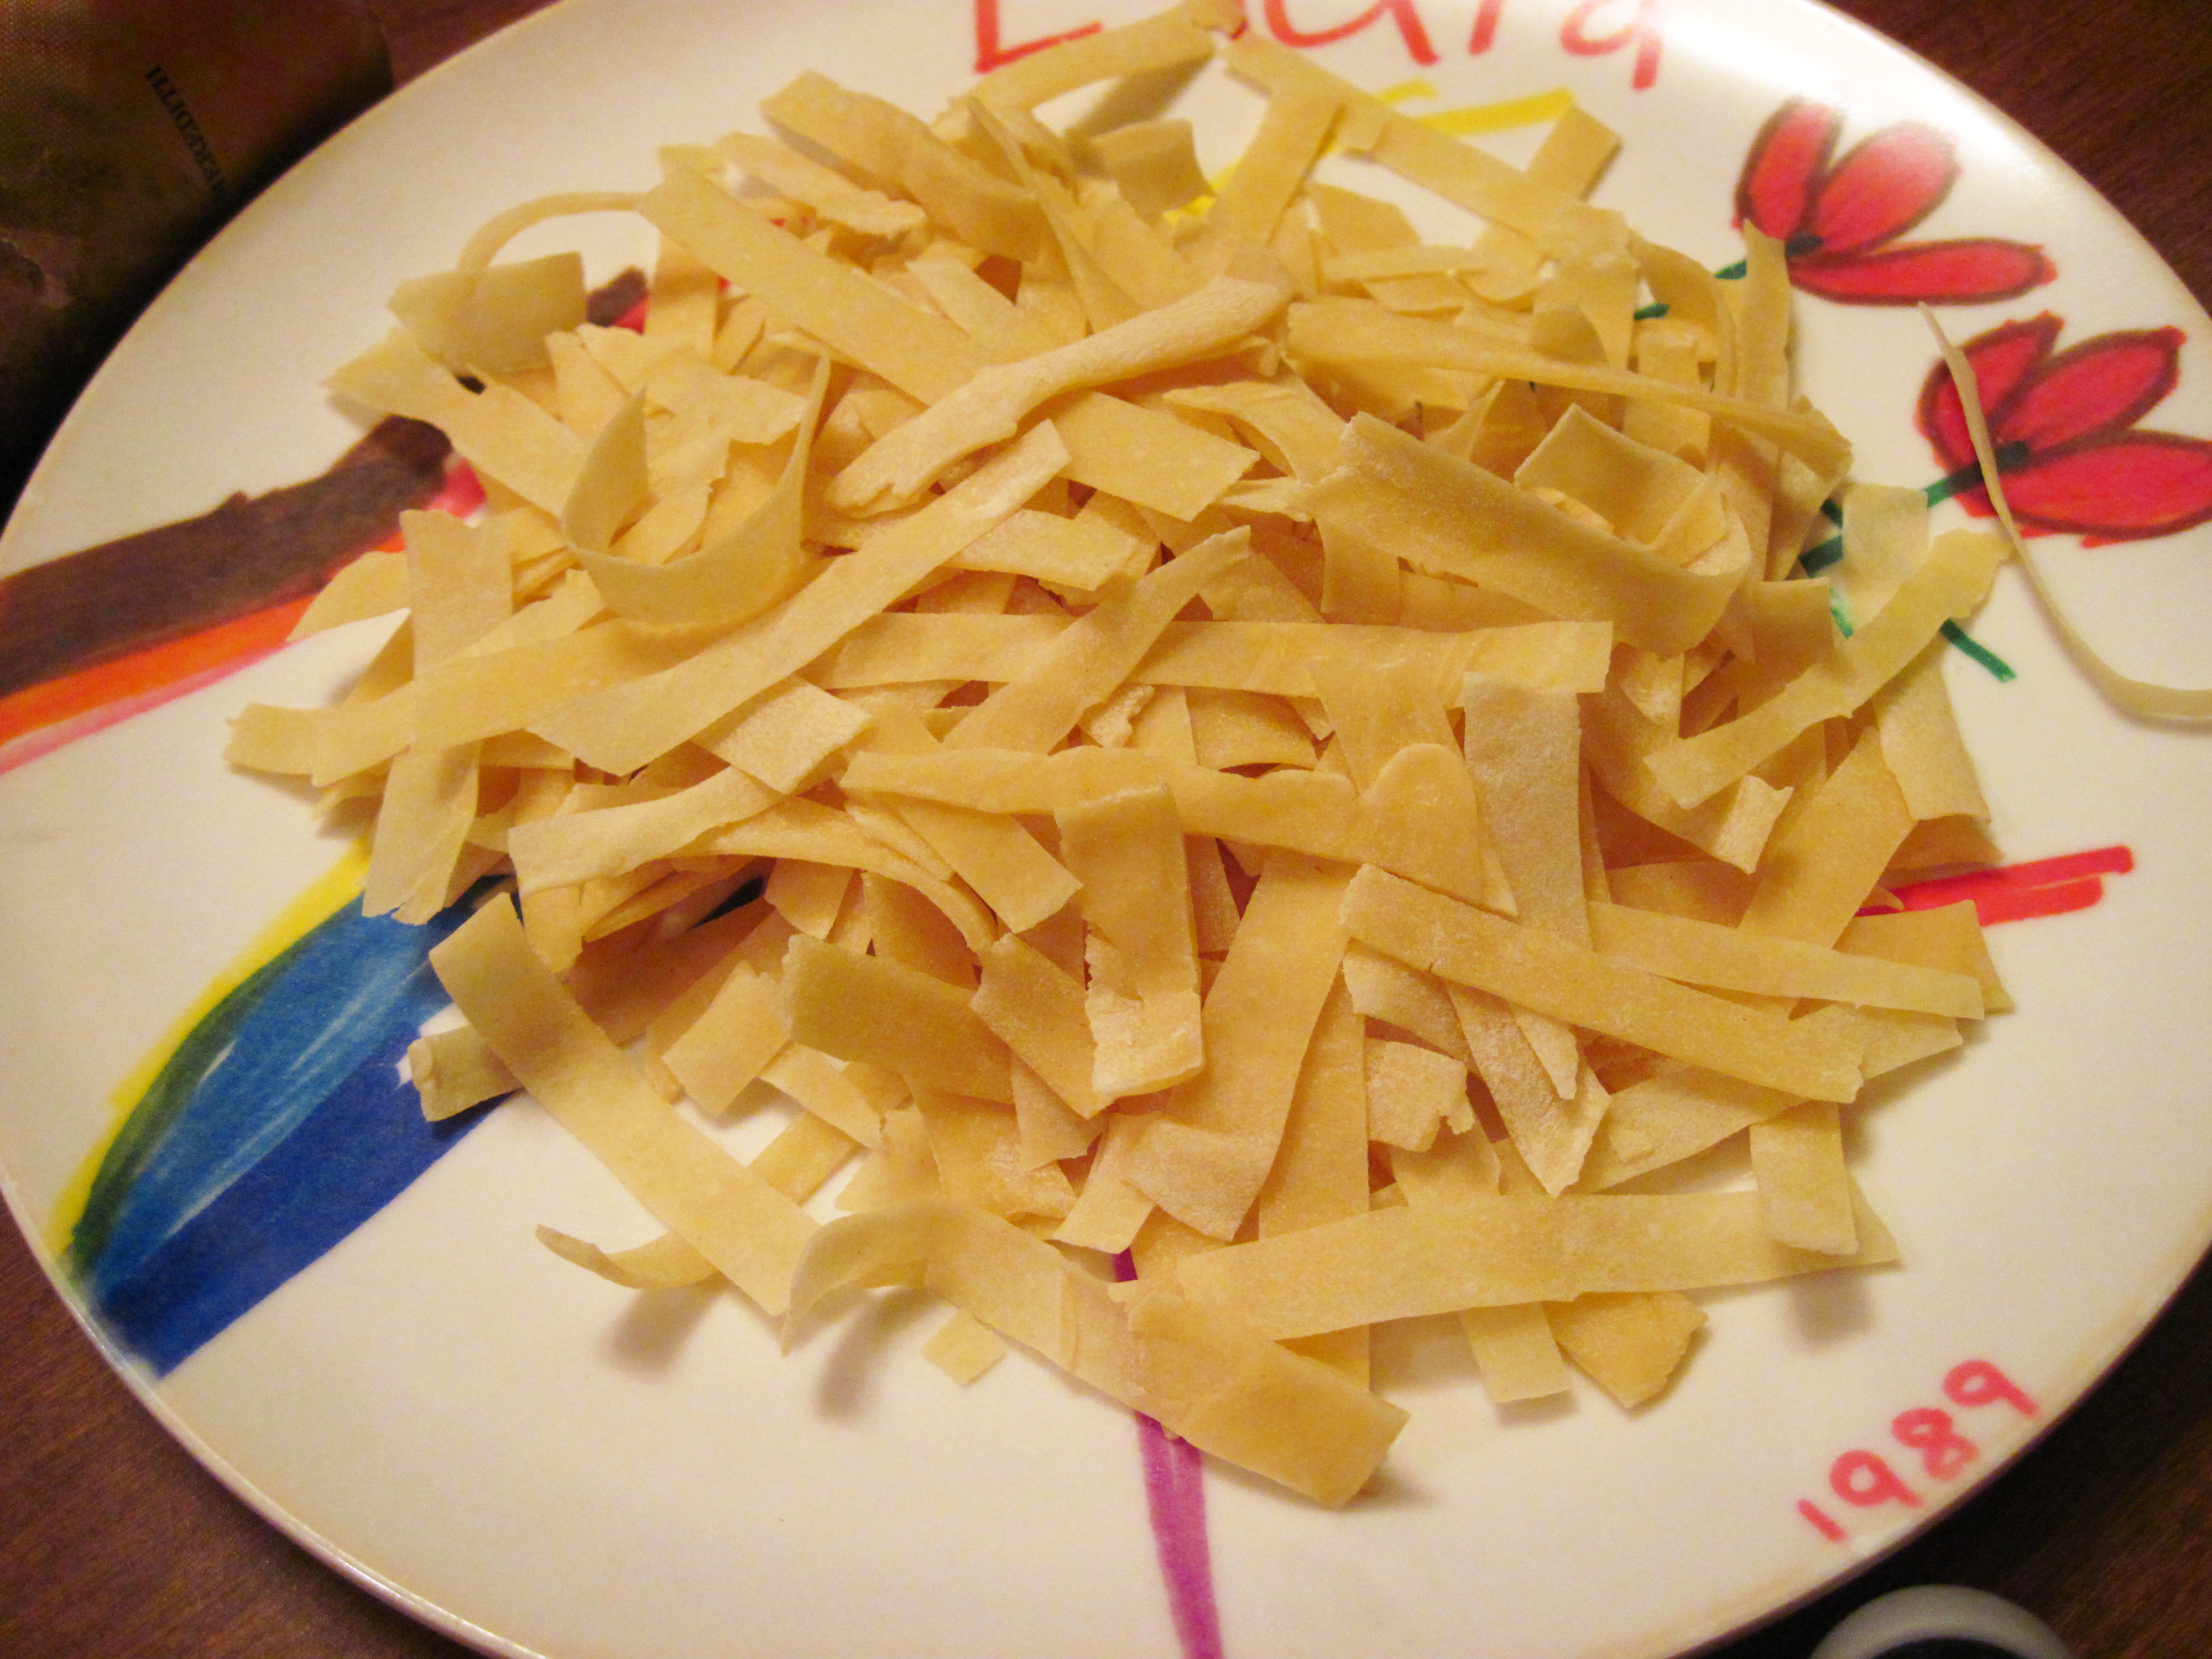
4 ounces of Homemade Noodles broken into smaller pieces for Chicken Noodle Soup
a
10. Cook in soup or in a large amount of salted boiling water for 10 minutes, or until done.
a
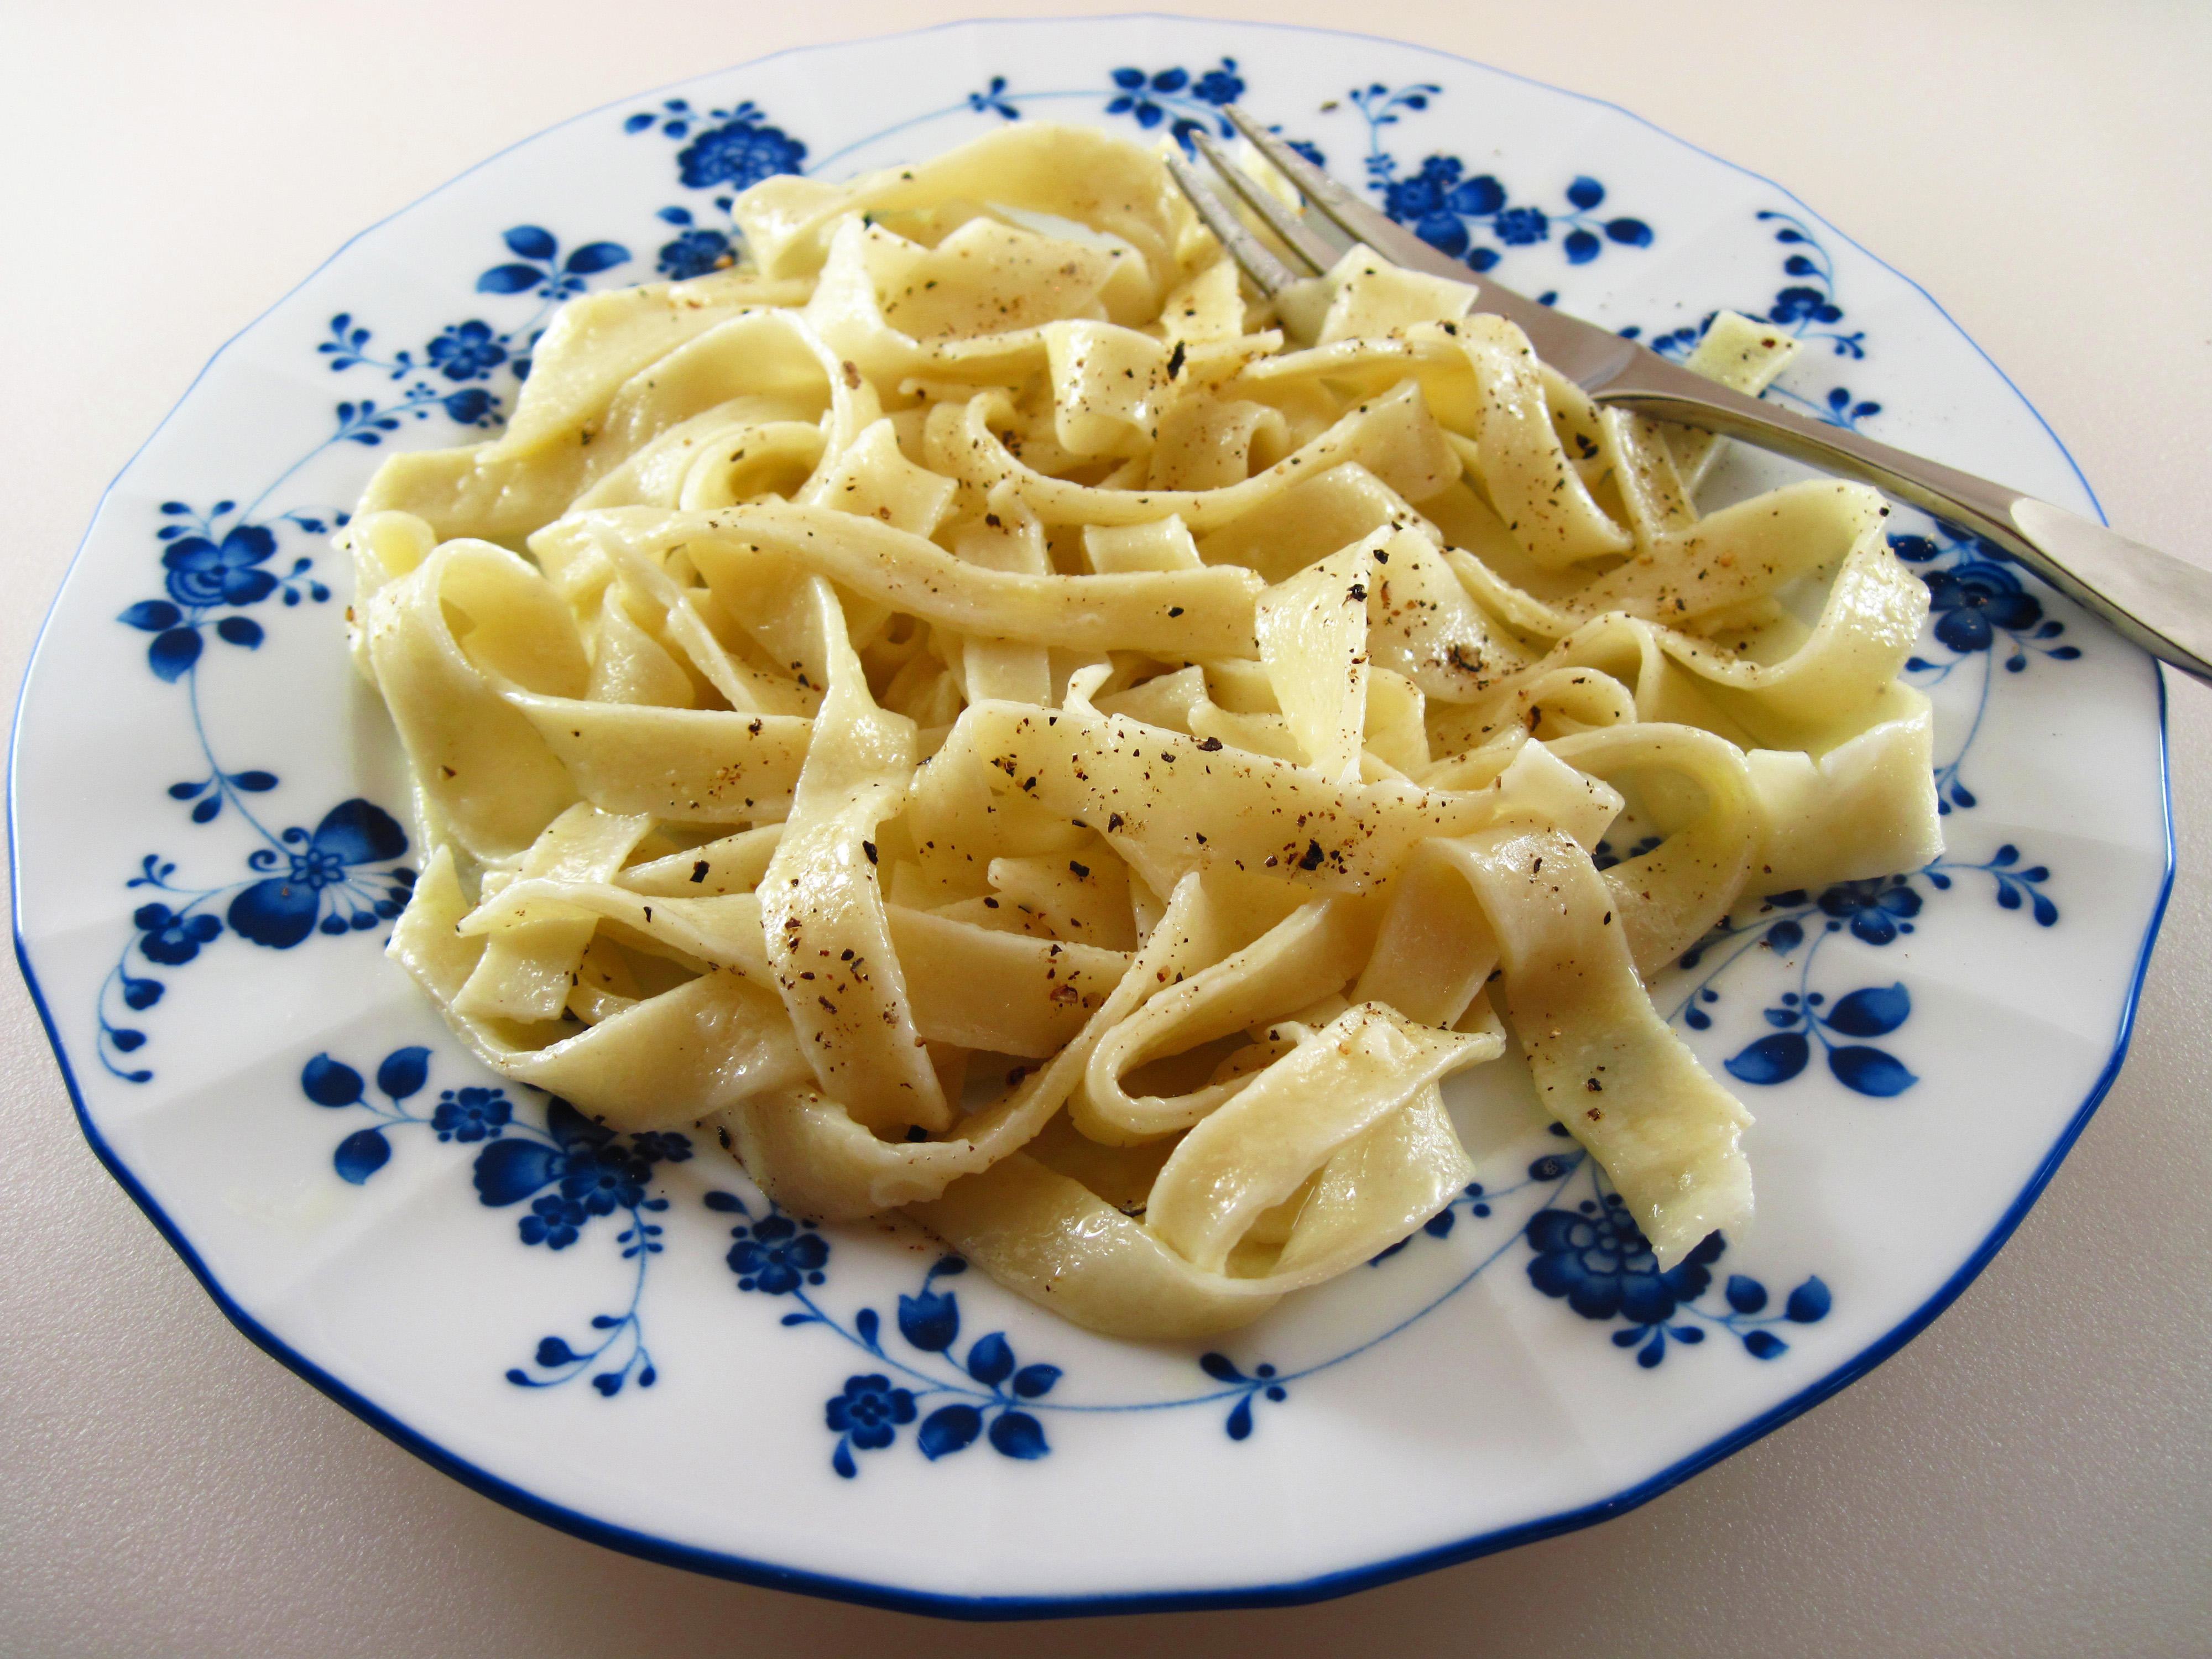
2 ounces of Homemade Noodles cooked, tossed with a bit of butter, and served with a couple of grinds of pepper 🙂
a
Share this:

Roasted Vegetable Curry
By Kath Dedon
a
Roasted Vegetable Curry is one of my favorite vegetarian meals. I have made it several times. Bob’s not so fond of it, but then he doesn’t like sweet potatoes which are a major ingredient.
The original recipe is in Moosewood Restaurant Simple Suppers from The Moosewood Collective. The book is a collection of “fresh ideas for the weeknight table”. Every time I make Roasted Vegetable Curry I remind myself that I really should try a few more recipes from the book.
When I made it this time, I found it to be a bit too mild for our tastes. The heat of the dish will depend on the curry powder that you use and the one I used was quite mild. Had I tasted the sauce before I mixed it with the vegetables (and why didn’t I do that?), I would have added more curry powder or maybe a dash of cayenne. If I had been using a particularly hot curry powder, the two tablespoons may have been too much. So consider the 2 tablespoons of curry powder as a suggested amount and adjust it according to your tastes or your curry powder.
Give Roasted Vegetable Curry a try if you want an easy vegetarian main dish. Especially if you like sweet potatoes!
a

a
Roasted Vegetable Curry
(Adapted from a recipe in Moosewood Restaurant Simple Suppers)
a
a
Serves 3 (or 4 if served with other dishes)
a
1 large or 2 small sweet potatoes (about 1 pound total)
1 cup chopped onions
½ small head of cauliflower
2 tablespoons oil (plus a bit more for the pan)
½ teaspoon salt
a
Curry sauce:
2 teaspoons grated peeled ginger root
2 tablespoons curry powder
½ teaspoon salt
1 cup coconut milk
1 cup diced tomatoes (use canned if you can’t get flavorful fresh tomatoes)
Dash cayenne pepper (optional)
a
For serving:
Steamed rice
Optional toppings: raisins, chopped toasted nuts, cilantro, cooked peas, chutney
a
1. Preheat the oven to 450˚. Spread a small amount of oil on one large or two small rimmed baking sheets.
2. Cut the sweet potatoes into small cubes and cut the cauliflower into small pieces. Put the vegetables in a large bowl with the onions. Toss them all with the oil and ½ teaspoon of salt.
3. Spread the vegetables out in a single layer in the pan(s). Roast for about 20 minutes, stirring once during the roasting time.
a
Cauliflower, sweet potato, and onion ready to roast

a
Roasted!

a
4. While the vegetables roast, combine all of the curry sauce ingredients in a bowl. Taste and adjust for seasoning.
a

a
5. After the vegetables have roasted for about 20 minutes, pour the curry sauce over them. Stir well and roast for an additional 5 minutes or so, until the sauce is hot and the vegetables are tender.
6. Serve over steamed rice with toppings, if desired.
a
Share this:

Super Quick and Easy Olive Oil Biscuits
By Kath Dedon
a
It’s surprising to me that I haven’t shared Super Quick and Easy Olive Oil Biscuits before today. I made these biscuits fairly regularly when I was cooking for my family of four. There’s no reason not to make them now that I’m mostly cooking for two. It’s easy to cut the recipe in half for fewer servings.
My recipe is adapted from the “Biscuits Supreme” recipe in the 1981 version of Better Homes and Gardens New Cook Book. It called for shortening; I can’t remember the last time I used shortening. Maybe I used shortening in this recipe back in the day.
I know I came up with Super Quick and Easy Olive Oil Biscuits after seeing Rozanne Gold’s recipe for Olive Oil Biscuits in her Cooking 1-2-3. I loved the idea of using olive oil in biscuits. It’s certainly a healthier fat than shortening. Rozanne’s recipe uses self-rising flour, milk and olive oil. Since I never have self-rising flour on hand, I decided to tweak the Better Homes and Gardens recipe.
To make 10-12 biscuits, the recipe called for ½ cup shortening. I tried subbing ½ cup olive oil. The biscuits were way too oily. I cut back on the olive oil, and eventually settled on ¼ cup which gave the best results.
Are these the world’s greatest “to die for” biscuits? No. I think you need to search for a recipe with copious amounts of butter and/or cream for that. But Super Quick and Easy Olive Oil Biscuits are very good indeed. My family has always eagerly gobbled them up whenever I have made them.
What do I love about them?
1. They are so quick, especially since I never bother to use a biscuit cutter. Over-handling the dough will produce tough biscuits, so I think it’s best just to cut the biscuits with a sharp knife.
2. I always have the ingredients on hand to make them at a moment’s notice. You don’t have to buy buttermilk. Or cream. You may have to add cream of tartar to your pantry, but once you have that you’re probably set.
3. Since they are made with a small amount of heart-healthy olive oil, I don’t feel so bad about slathering the biscuits with butter!
The next time you’re making a soup or stew that just begs to have a bit of bread for an accompaniment, give these Super Quick and Easy Olive Oil Biscuits a try. I don’t think they’ll disappoint. They were perfect with last night’s Chicken and Rice Soup!
a
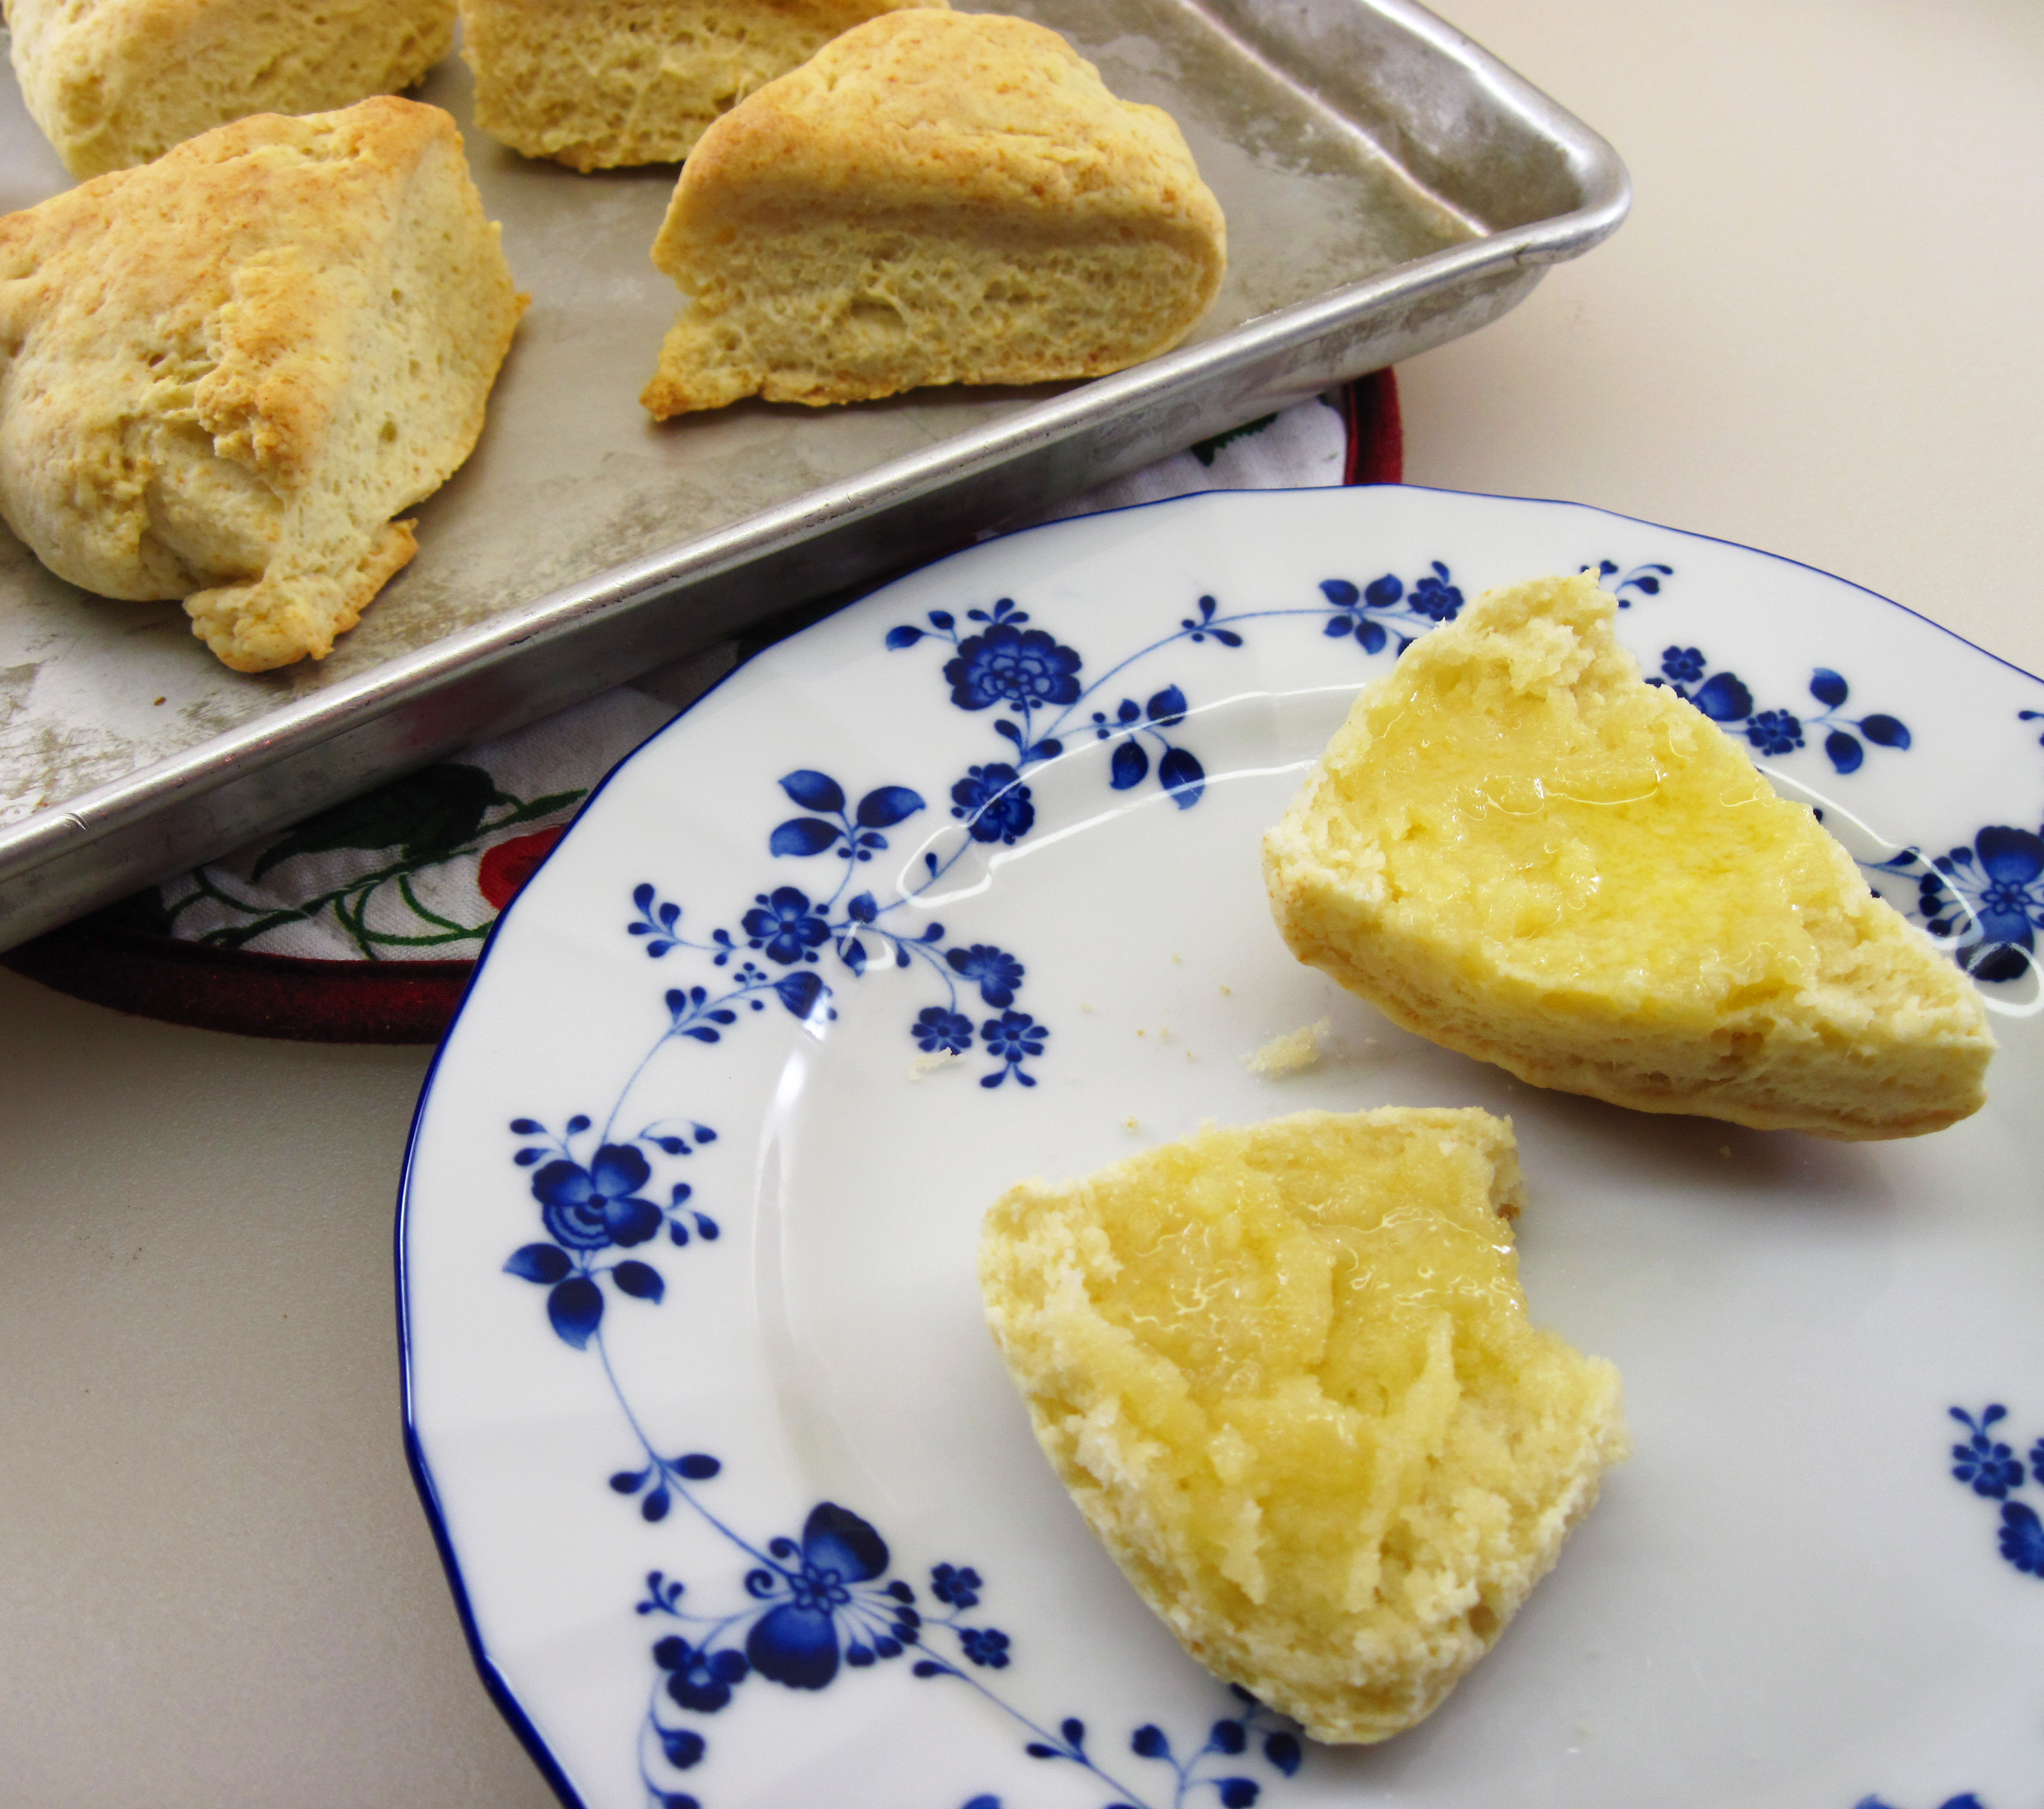
Yes, I couldn’t resist taking a bite out of this biscuit!
a
Super Quick and Easy Olive Oil Biscuits
(Adapted from recipes in Better Homes and Gardens New Cook Book and Rozanne Gold’s Cooking 1-2-3)
a
Note about cream of tartar – It’s in the Better Homes and Gardens recipe and I’ve always used it. Joy of Cooking recipes for biscuits don’t call for it; they just use baking powder. Perhaps it isn’t necessary, which would make this recipe even simpler.
Update, 1/12/13: In the interest of science, I made the biscuits again without the cream of tartar. They were just okay. The ones made with cream of tartar had a much better texture; they were “softer” and more tender.
a
a
Makes 6 small biscuits (Double the ingredients to make 10 – 12 biscuits)
a
1 cup (120g) all-purpose flour
2 teaspoons baking powder
¼ teaspoon cream of tartar (See note about cream of tartar above.)
¼ teaspoon salt
2 tablespoons olive oil
1/3 cup milk (I have always used whole milk. It’s what we have in our refrigerator. I don’t know if it would work as well with reduced fat milk.)
a
1. Preheat the oven to 450˚.
2. Stir the flour, baking powder, cream of tartar, and salt together in a medium bowl.
a
Dry ingredients stirred together, milk, and olive oil

a
3. Pour the olive oil and milk into the dry ingredients and stir just until it comes together.
4. Put the dough on a lightly floured board and knead gently just 10 or 12 times.
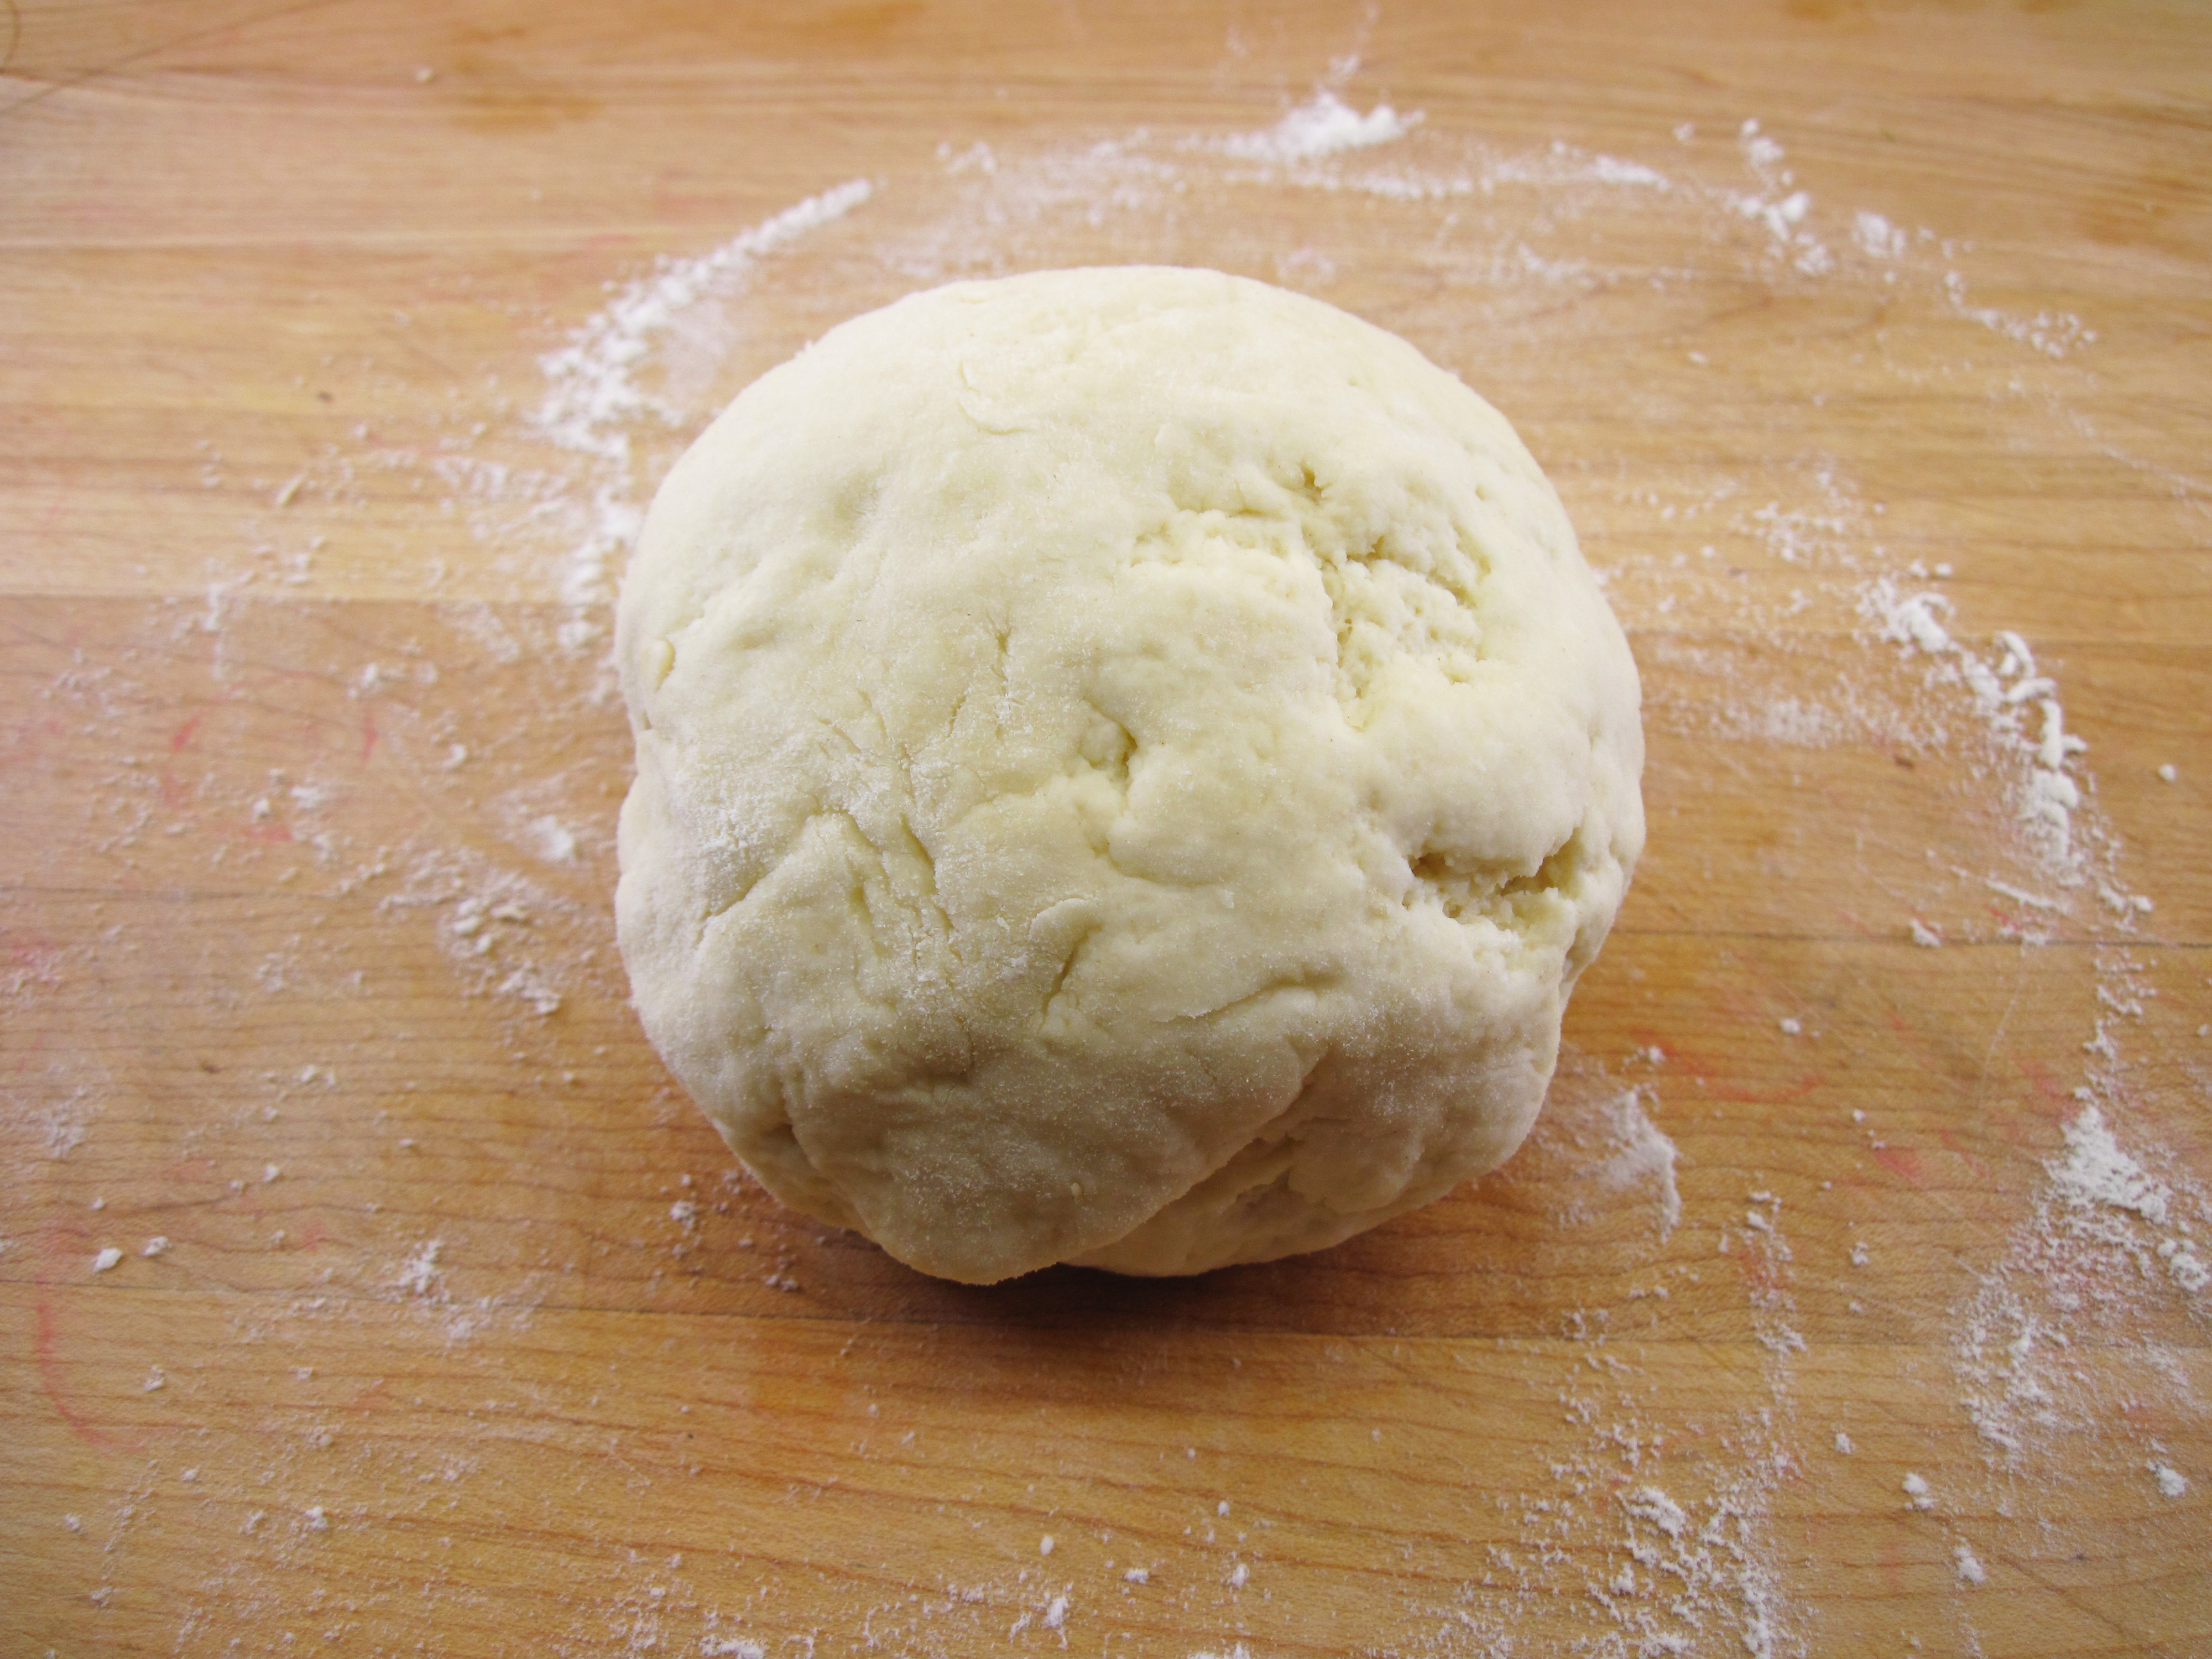
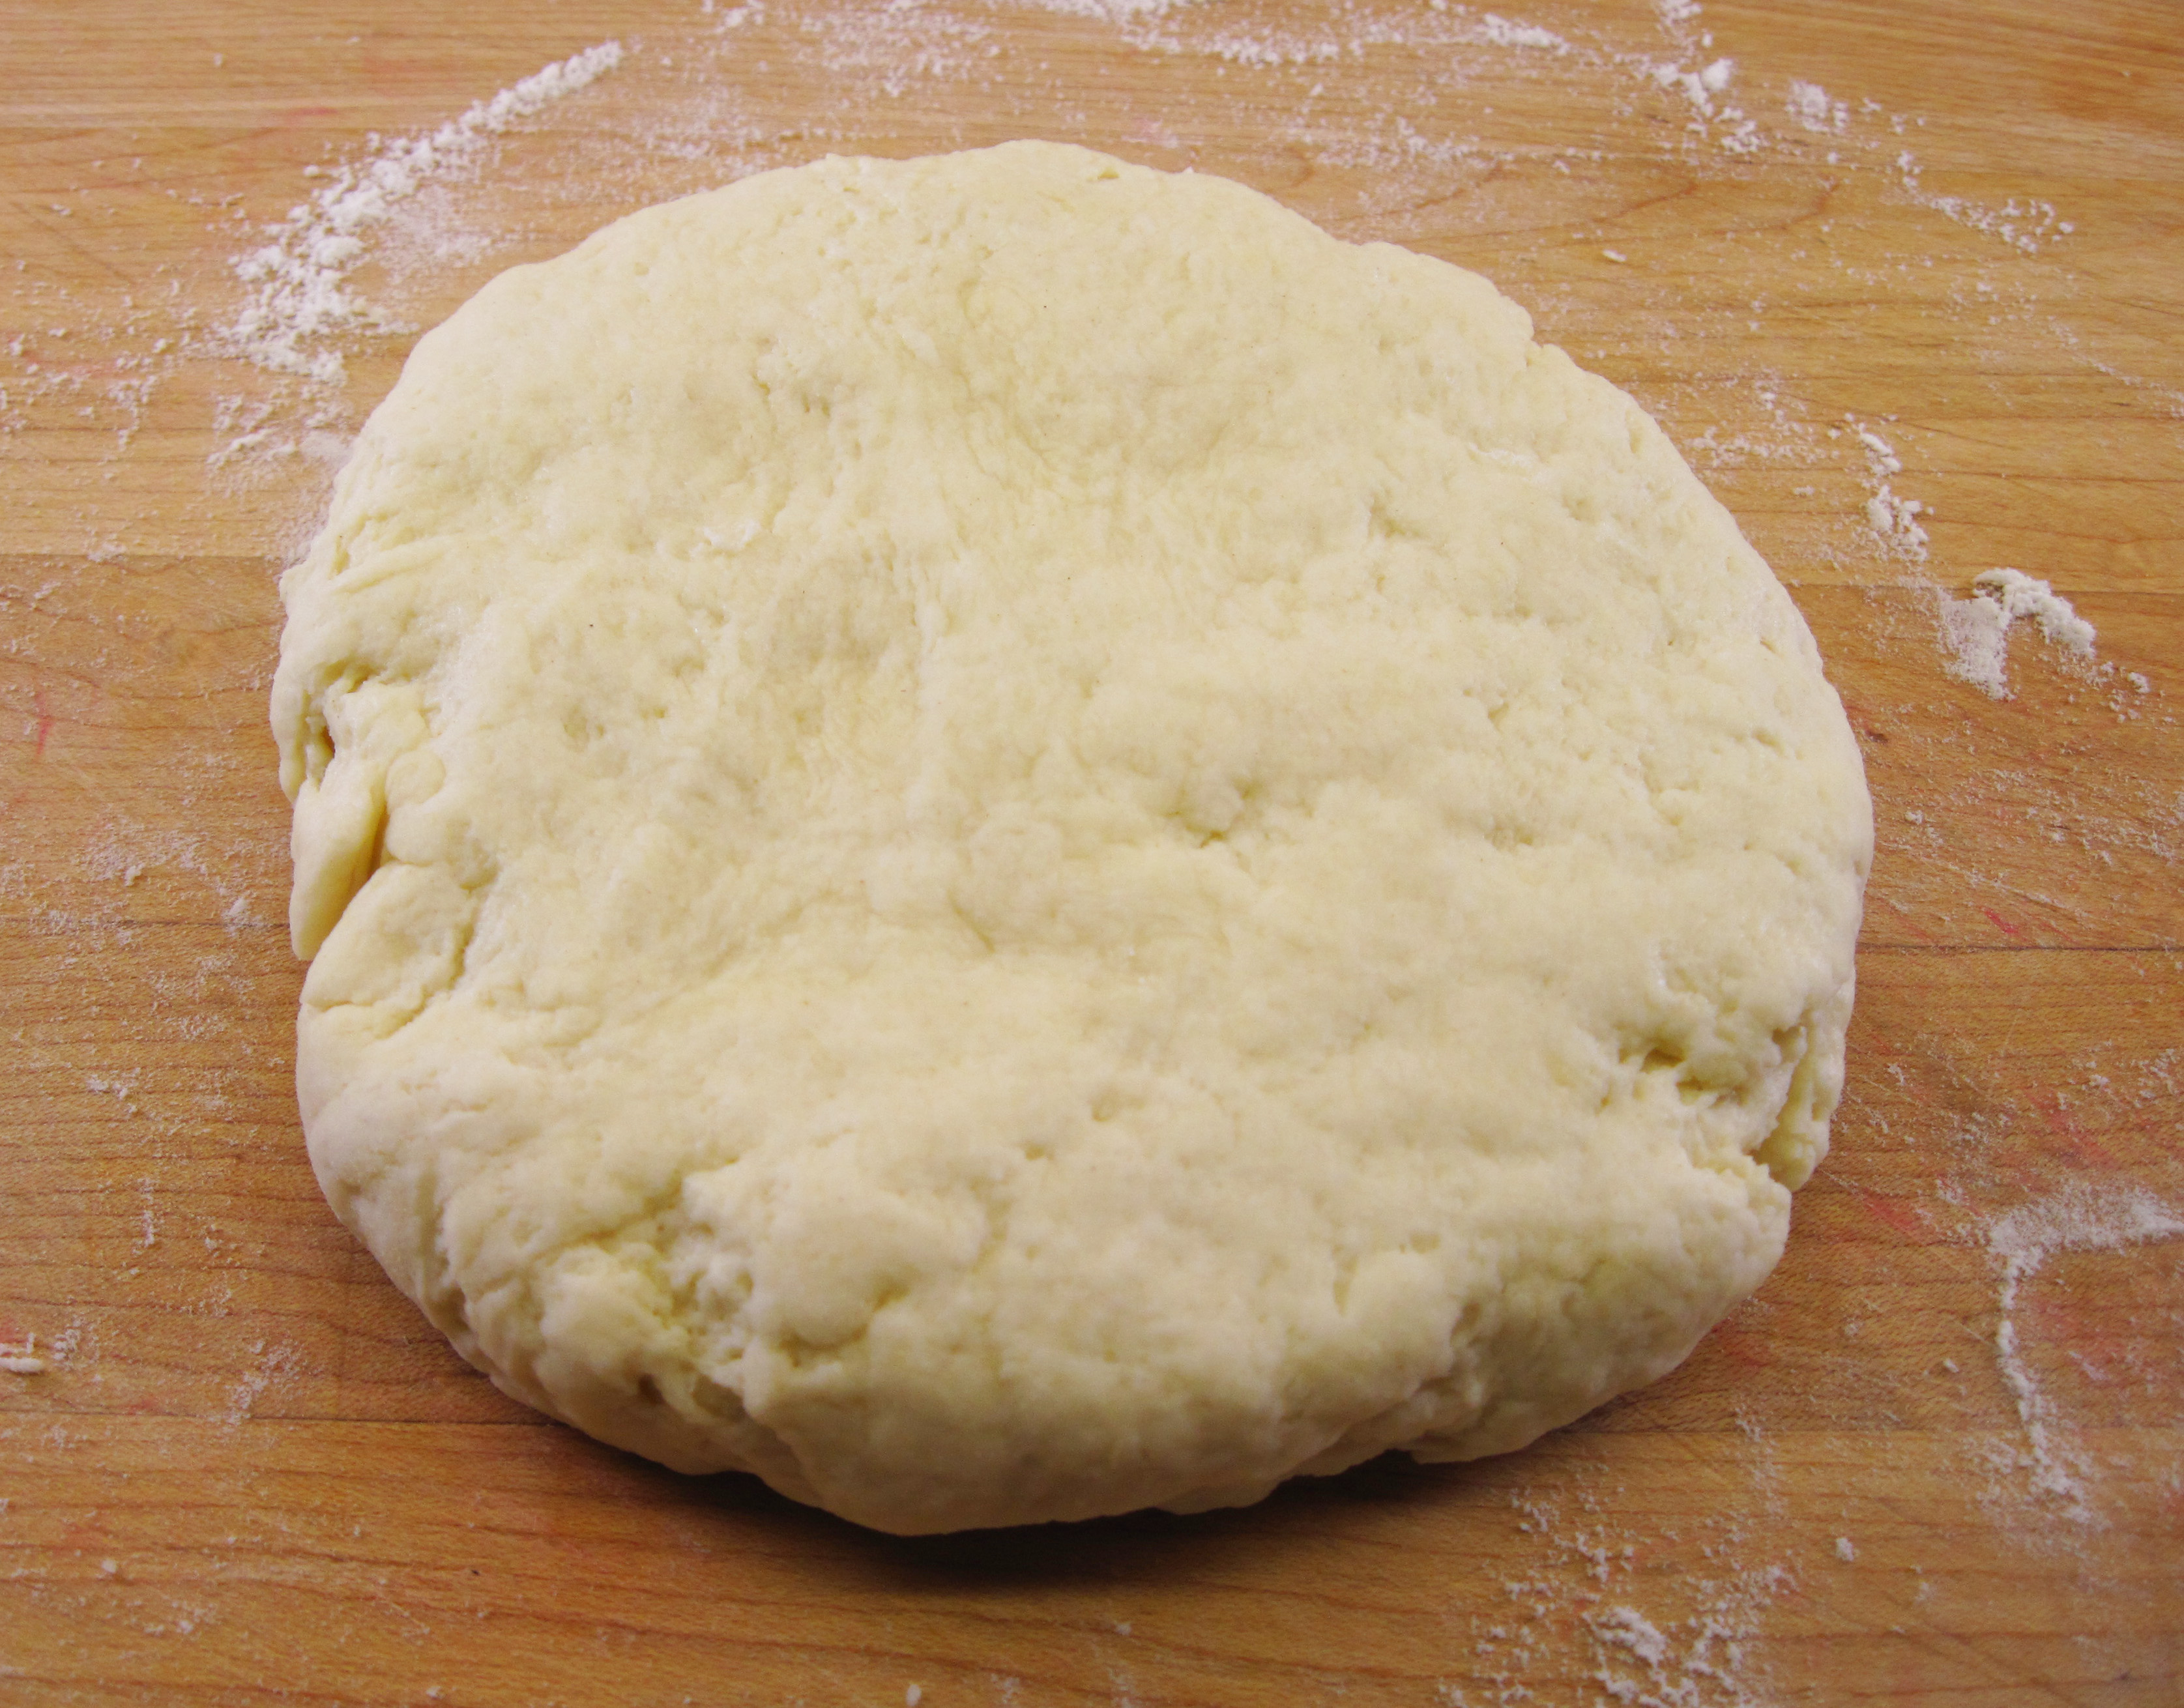
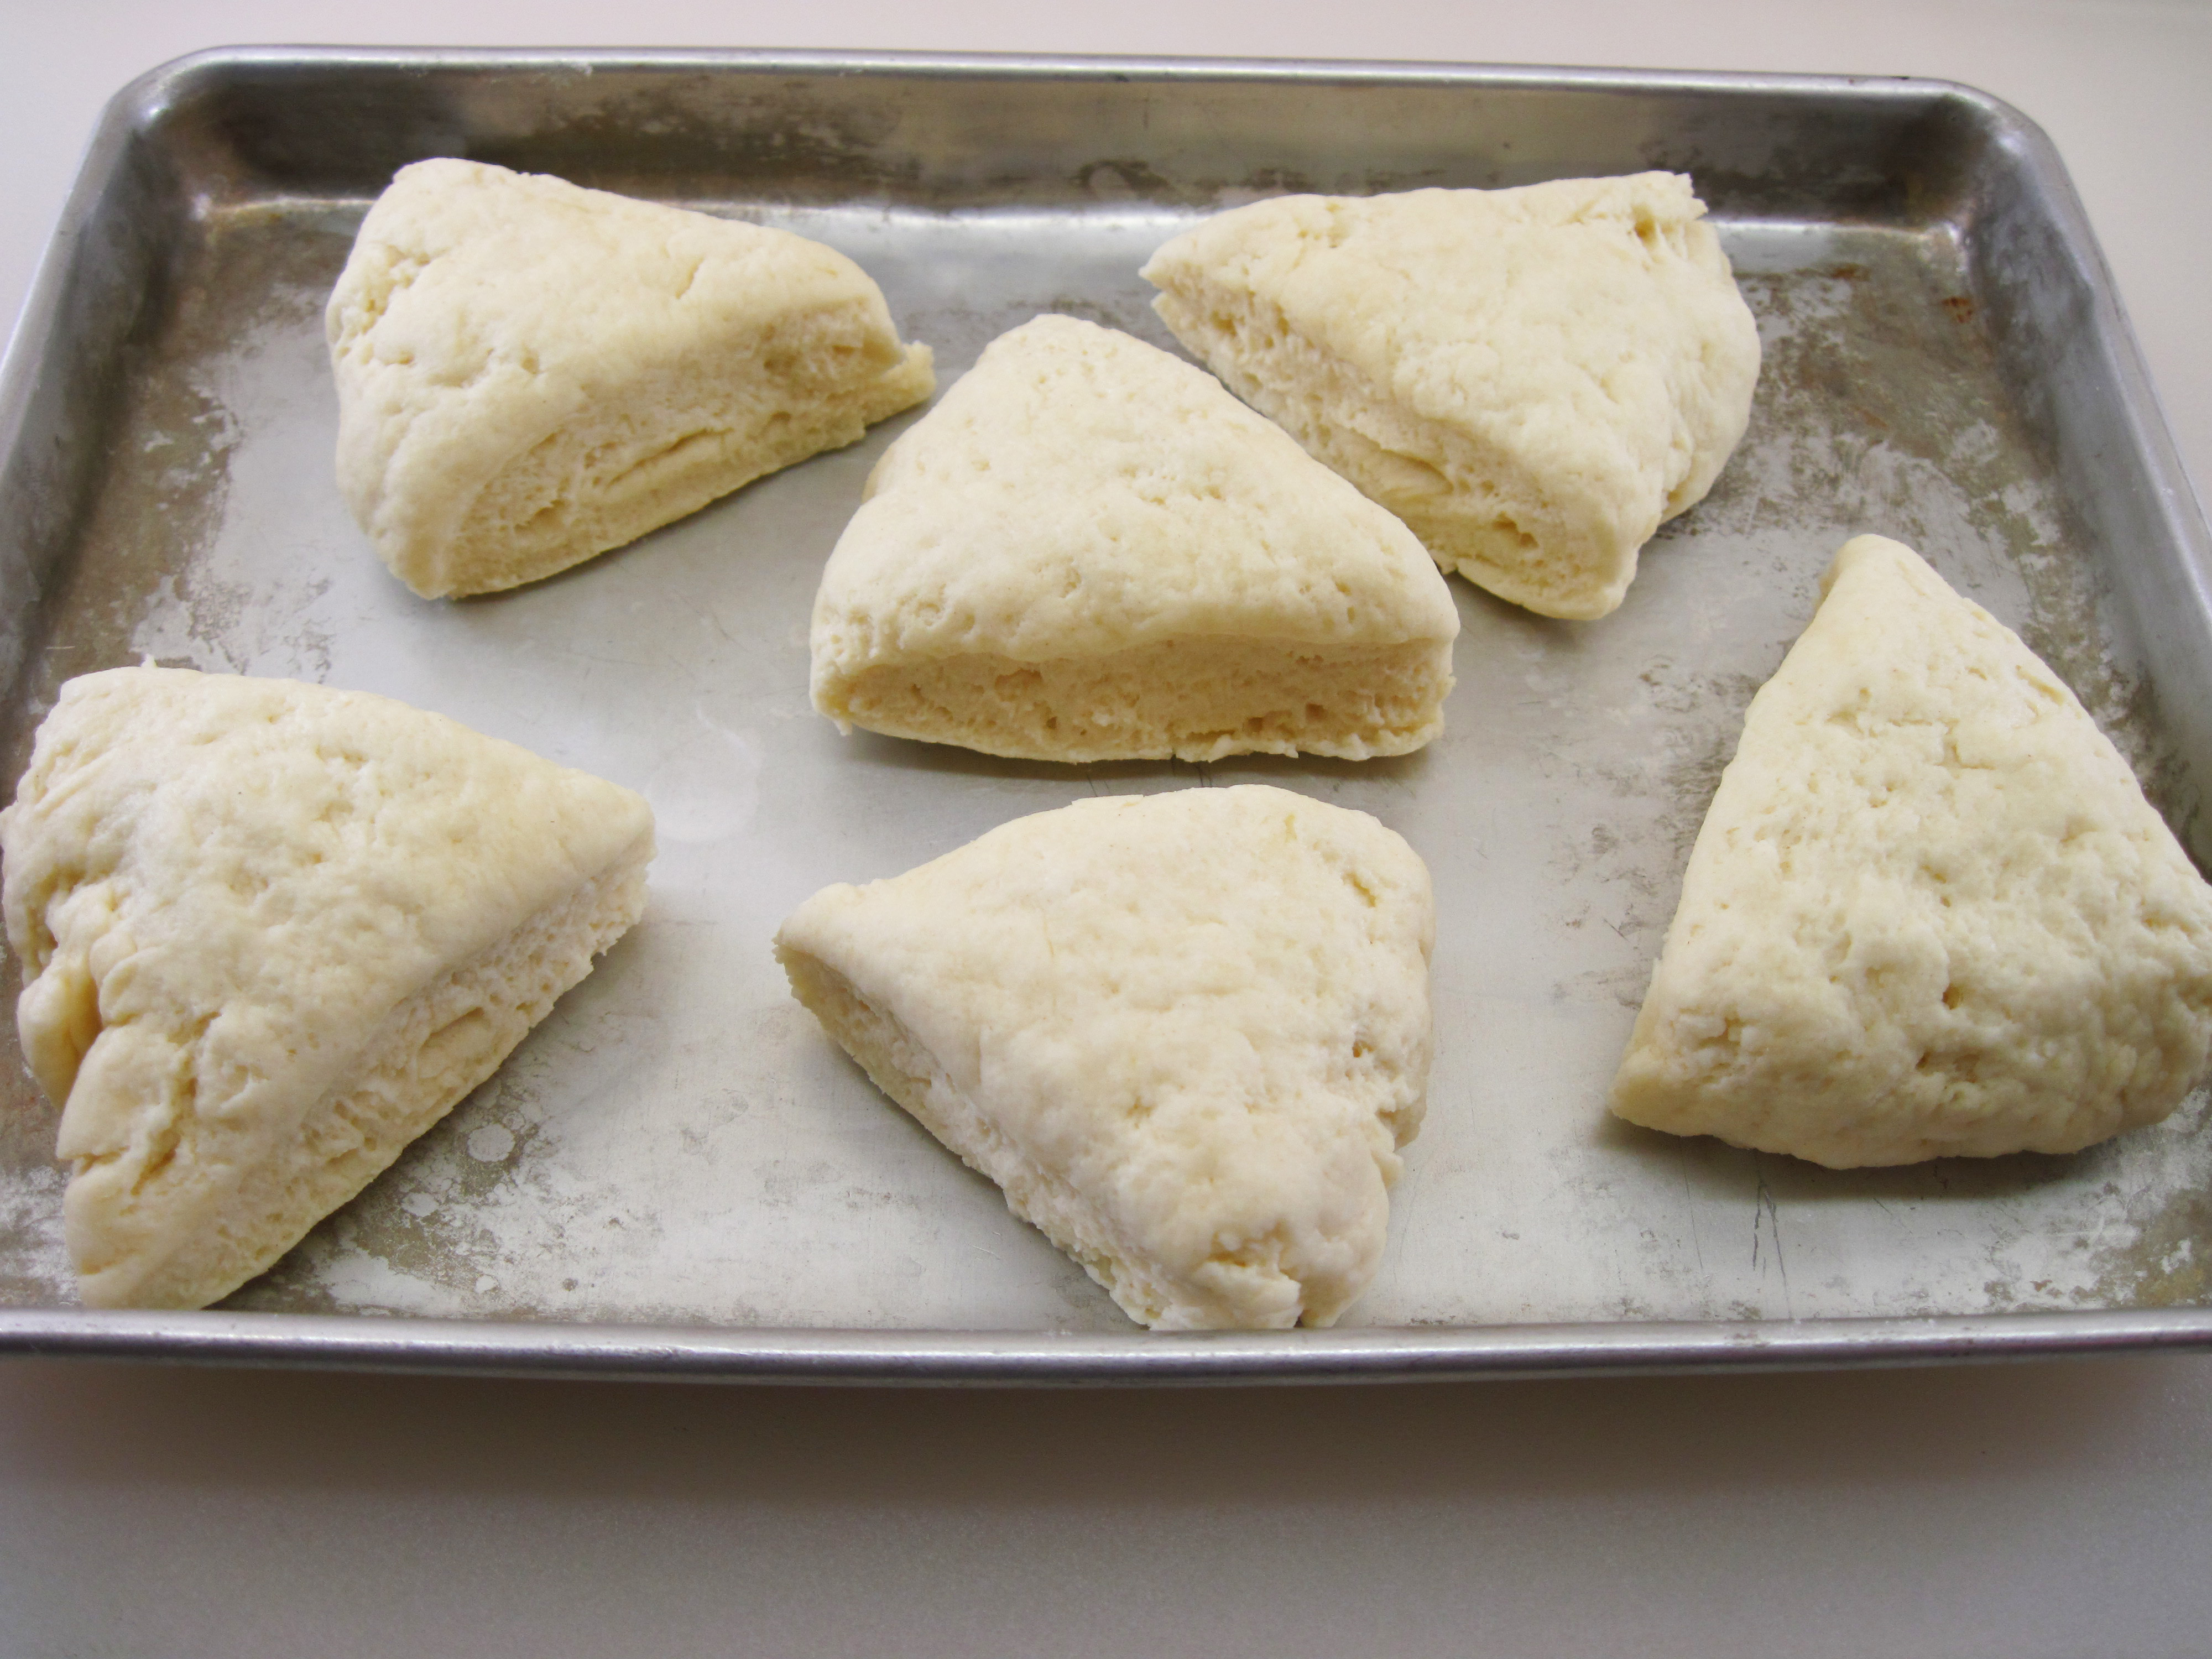
5. Form the dough into a ball, and then flatten it so it’s about ½ inch thick.
a
a
Flattened to 1/2-inch thick
a
6. Using a sharp knife, cut the dough into 6 pieces.

a
7. Transfer the biscuits to a baking sheet. Bake for 10 – 12 minutes, or until golden. (I found it took just a bit longer in my toaster oven – about 14 minutes.)
a

a
8. Serve warm with good butter.
a

Share this:

Cornbread Dressing with Sausage
The Southern Corn Bread recipe in Joy of Cooking is the cornbread that the book recommends for its cornbread stuffing. It’s delicious on its own, so I knew it would probably work well in Cornbread Dressing with Sausage.
In November I saw a recipe for Cornbread, Sausage, and Pecan Dressing from Bon Appétit that looked terrific. I ended up combining ideas from Bon Appétit’s recipe with Joy of Cooking’s Basic Corn Bread Stuffing to create my Cornbread Dressing with Sausage.
This dressing was a great side dish with the turkey that I recently roasted, but it shouldn’t be reserved just for holidays. It would be a welcome side dish at any time during the cold winter months when comfort foods are so appealing. It would be just as good with a roast chicken, pork roast, or ham as it was with the turkey.
I loved the Southern Corn Bread in this dressing. It’s made with 100% cornmeal and no flour, so it’s an excellent choice for those who avoid wheat and gluten. Plus, it was just delicious! If wheat is not an issue, you can use 8 – 9 cups of your favorite cornbread.
Cornbread Dressing with Sausage is most definitely a recipe I’ll be making again!
a
a
Cornbread Dressing with Sausage
(Adapted from a Bon Appétit recipe and one in Joy of Cooking)
a
a
Serves 8 – 10
a
1 recipe of Southern Corn Bread (or 8 – 9 cups of your favorite cornbread)
1 pound bulk chicken sausage (I used Isernio’s Italian Chicken Sausage Roll)
½ cup unsalted butter, plus more for greasing the pan
1½ cups diced celery
2 cups chopped onions
2 cloves garlic, minced
1/3 cup minced Italian parsley
1 tablespoon minced fresh sage (or 1 teaspoon dried sage)
2 teaspoons poultry seasoning
¾ teaspoon salt
½ teaspoon freshly ground black pepper
3 cups chicken (or turkey) broth
a
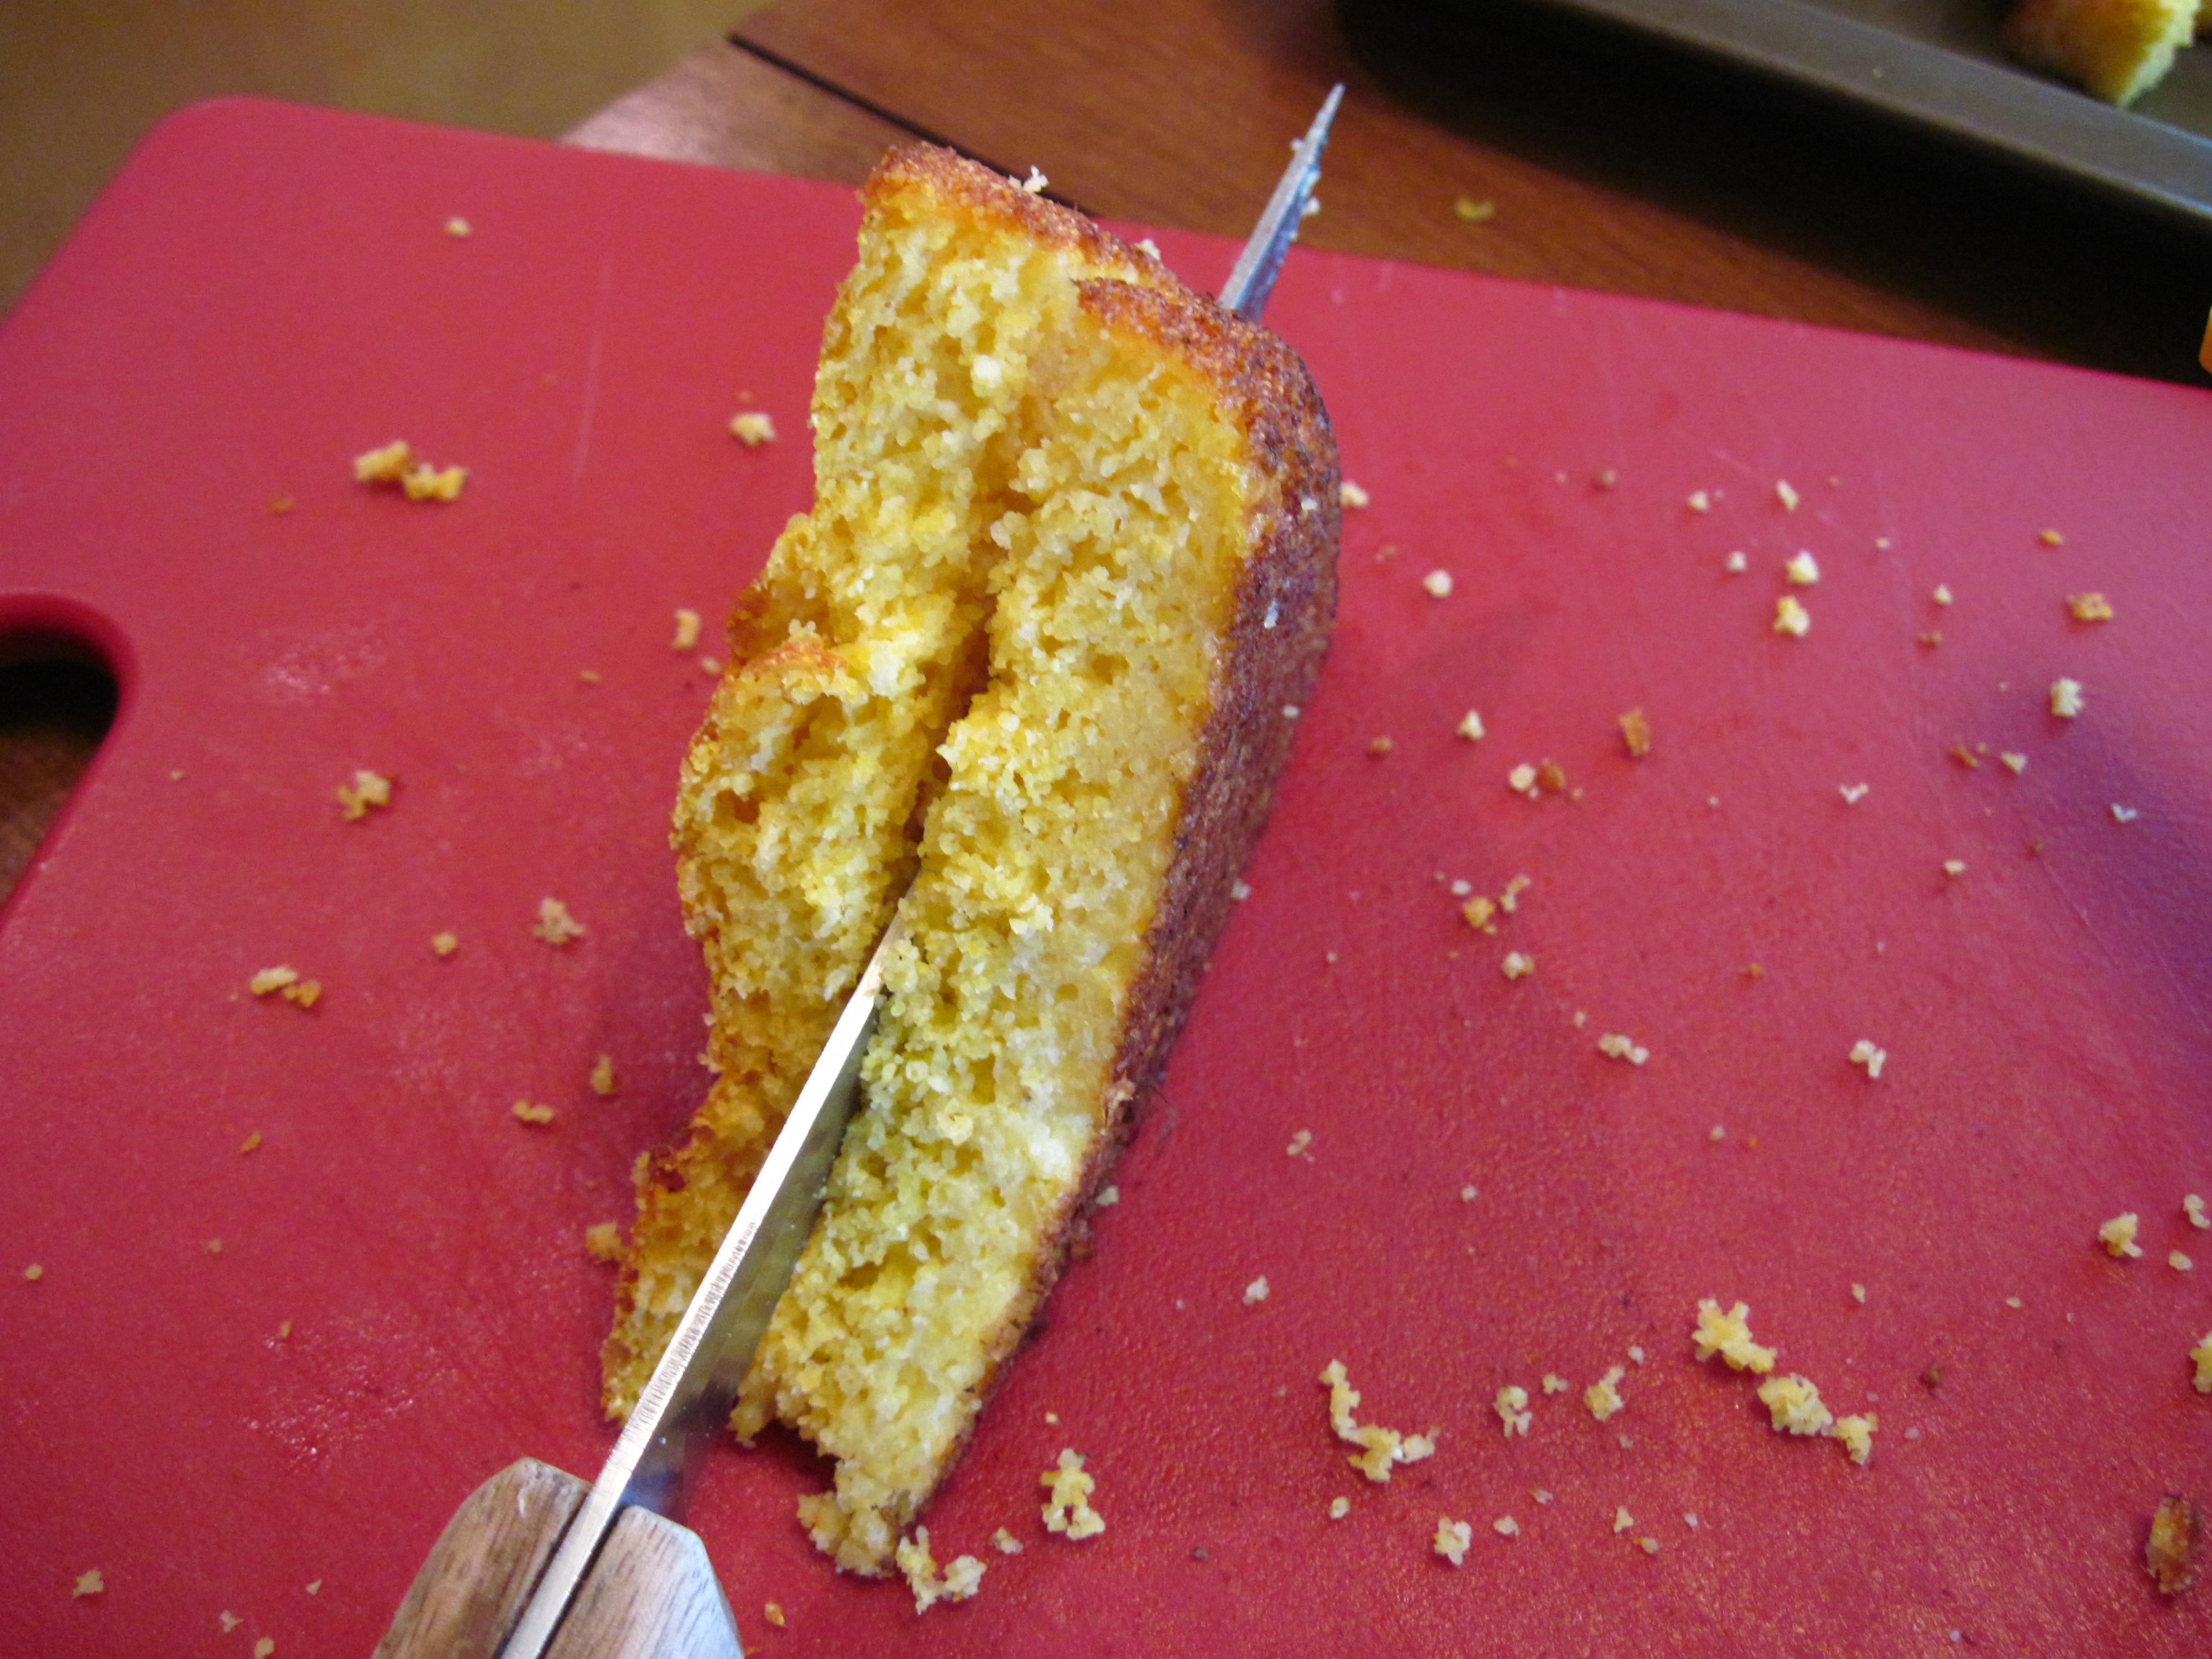
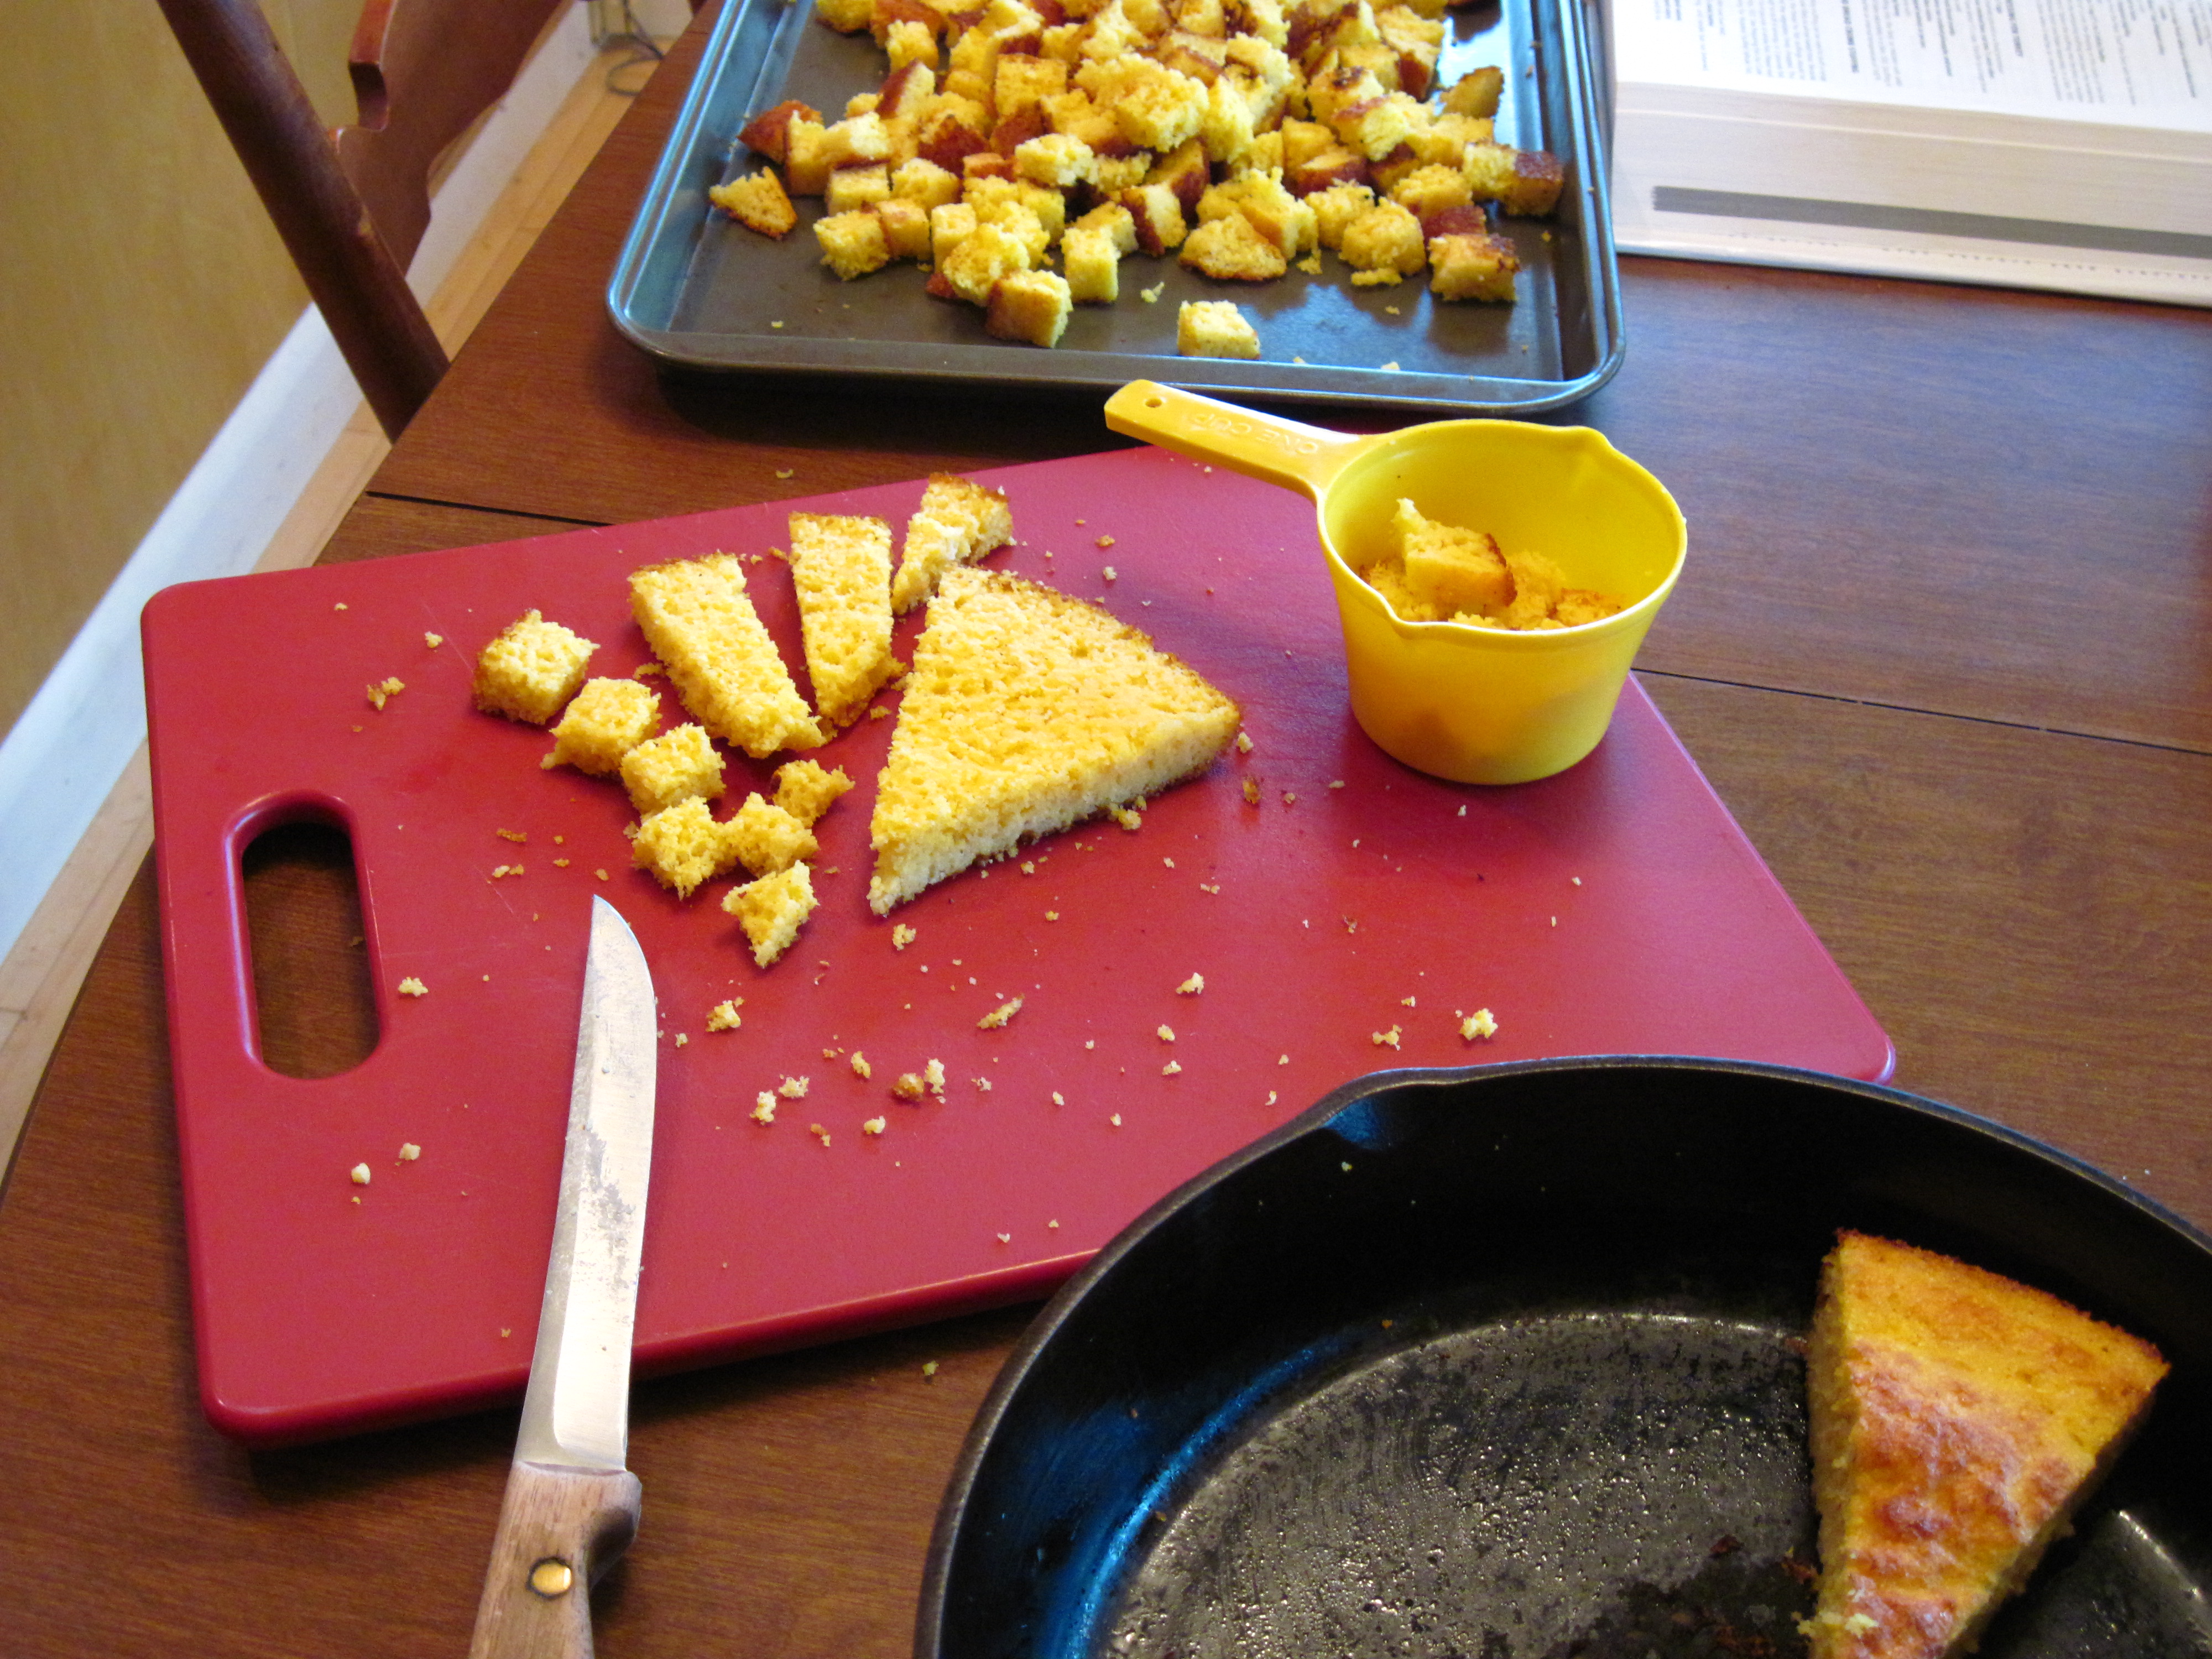
1. To toast the cornbread, preheat the oven to 400˚.
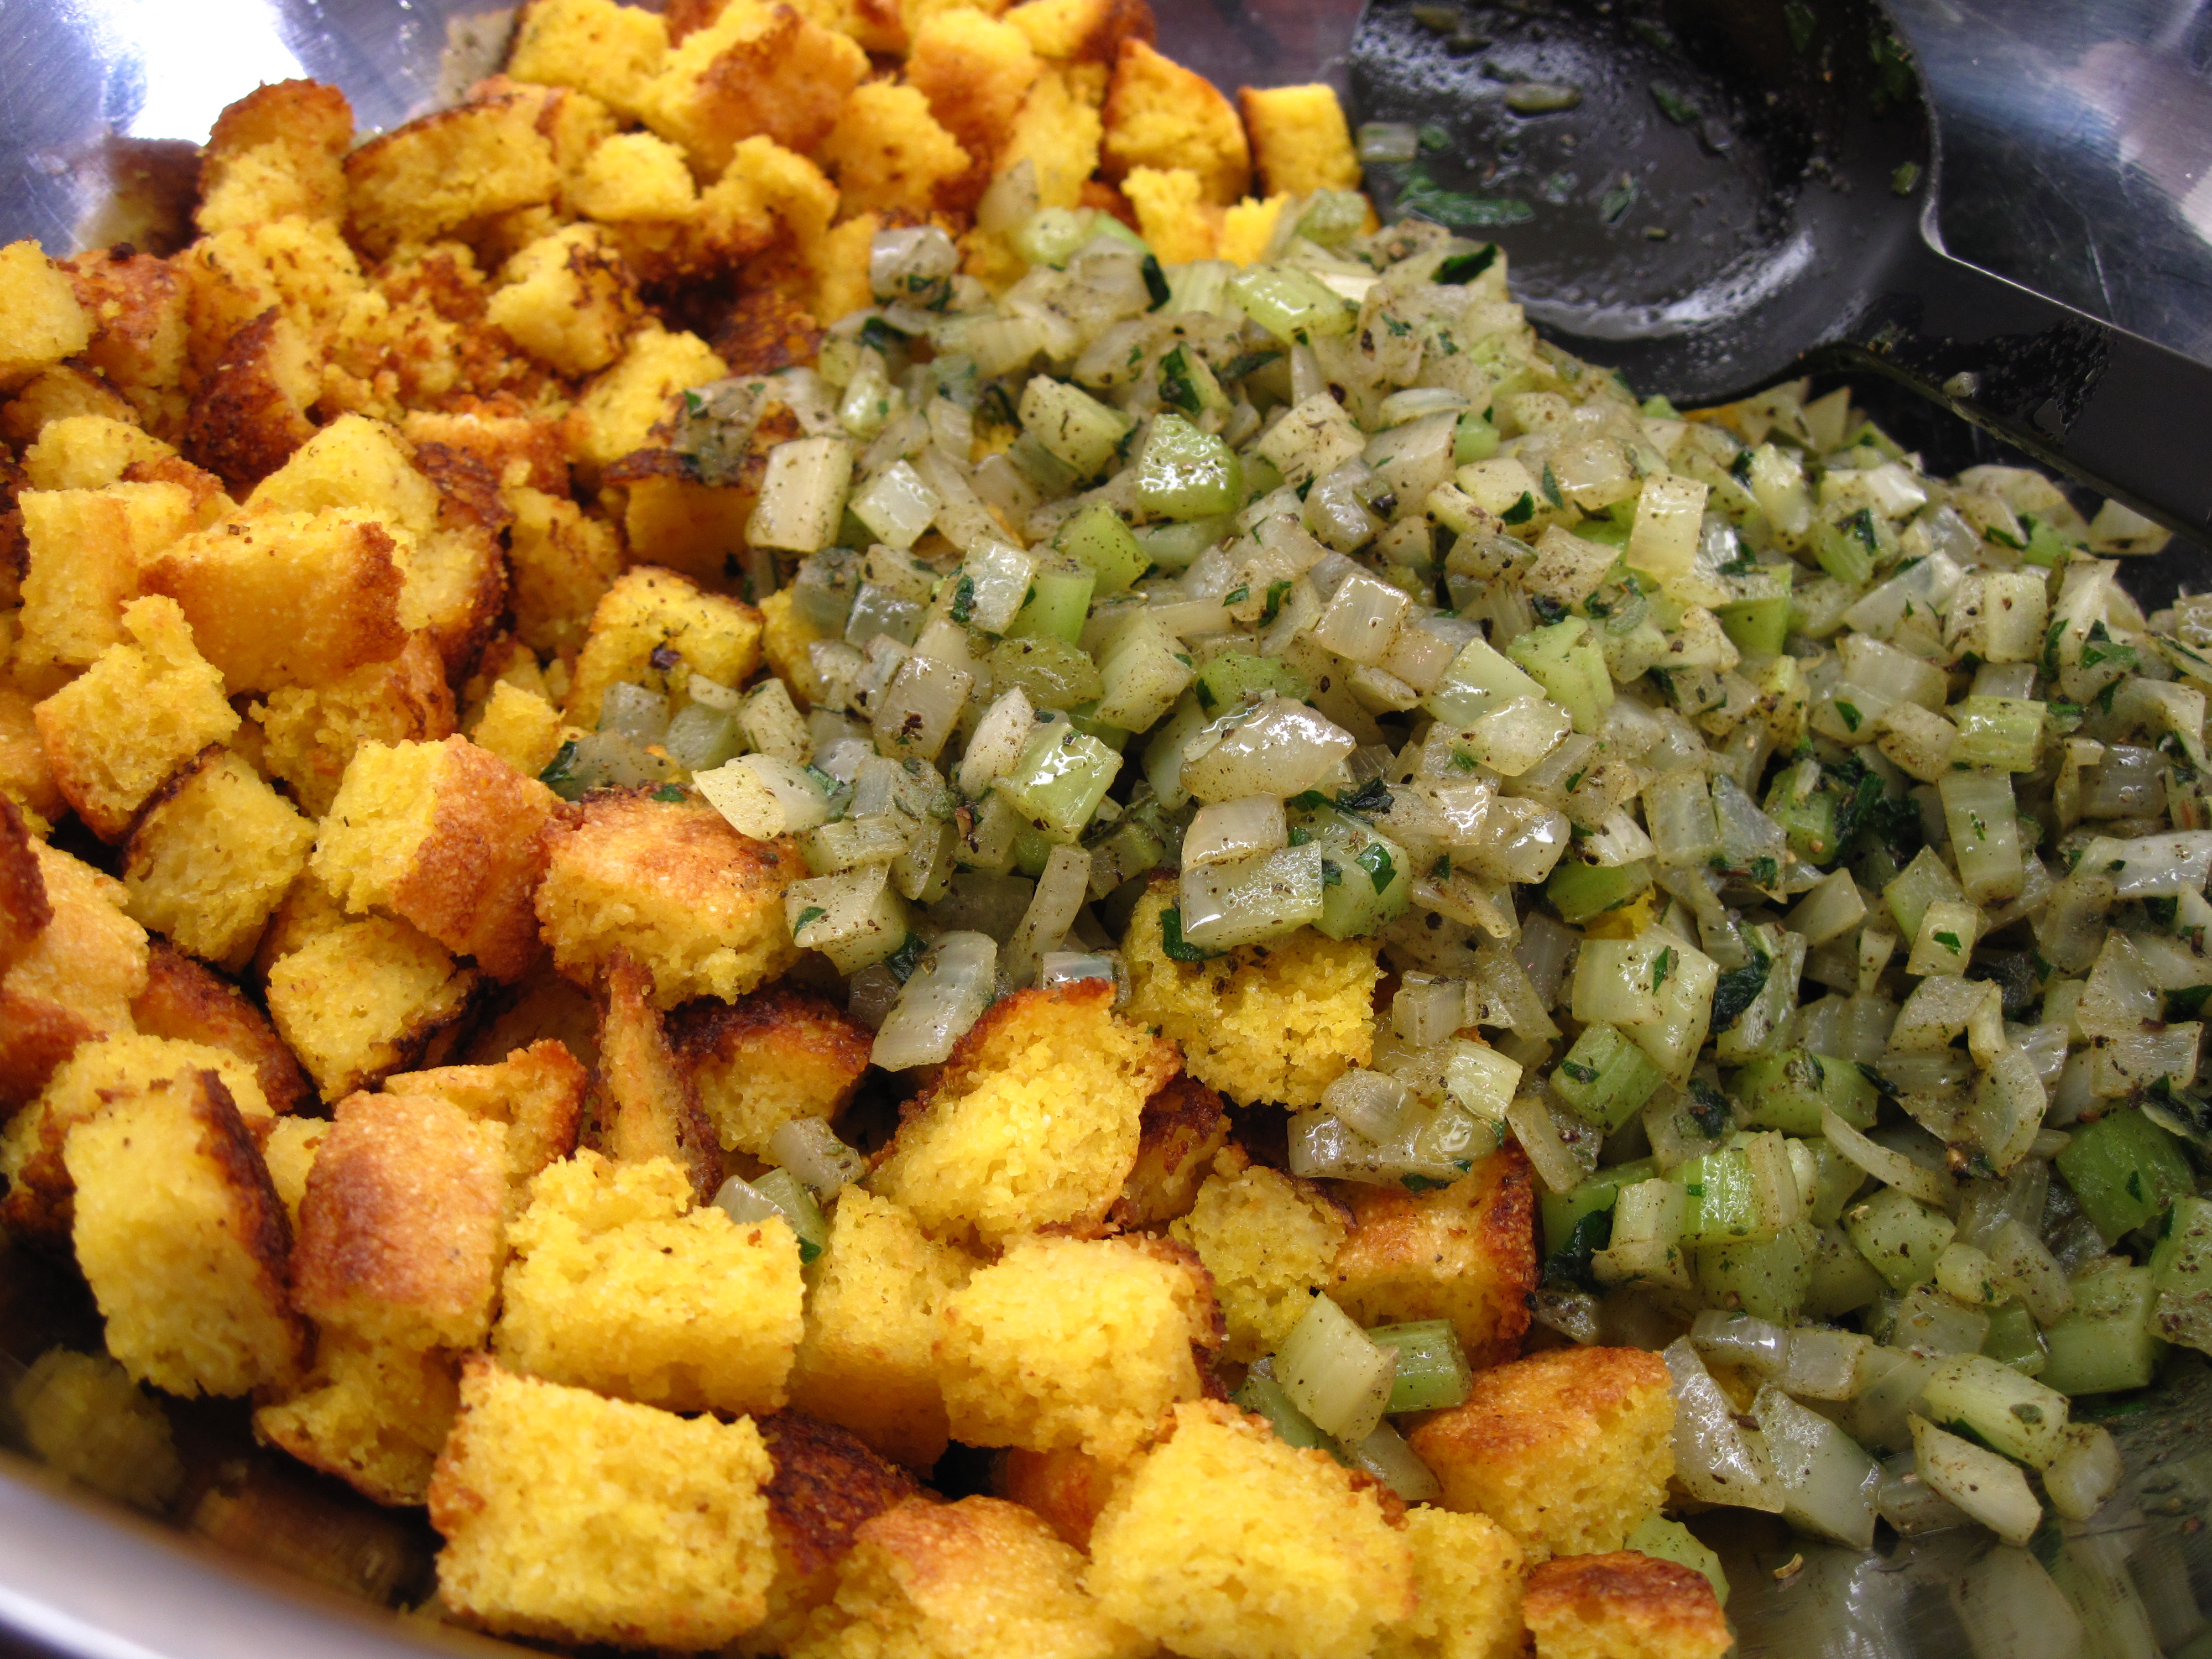
2. Cut the cornbread into cubes. Spread the cubes out on a large rimmed baking sheet and toast in the preheated oven for 10 – 13 minutes, stirring occasionally. Put the toasted cornbread in a large bowl.
a
a
3. Turn the oven down to 350˚.
4. Heat a large skillet over medium heat. Break up the sausage into the hot skillet and cook, stirring occasionally, until done. Remove the sausage from the pan and set aside in a medium bowl.
5. Add the ½ cup of butter to the skillet. When it has melted, add the onions, celery, and garlic. Cook for about 5 minutes, until the vegetables have softened a bit.
6. Remove the pan from the heat and stir in the parsley, sage, poultry seasoning, salt and pepper.
7. Add the mixture in the pan to the bowl with the cornbread. Stir to combine.
a
8. Add the cooked sausage and the chicken broth and stir to combine.
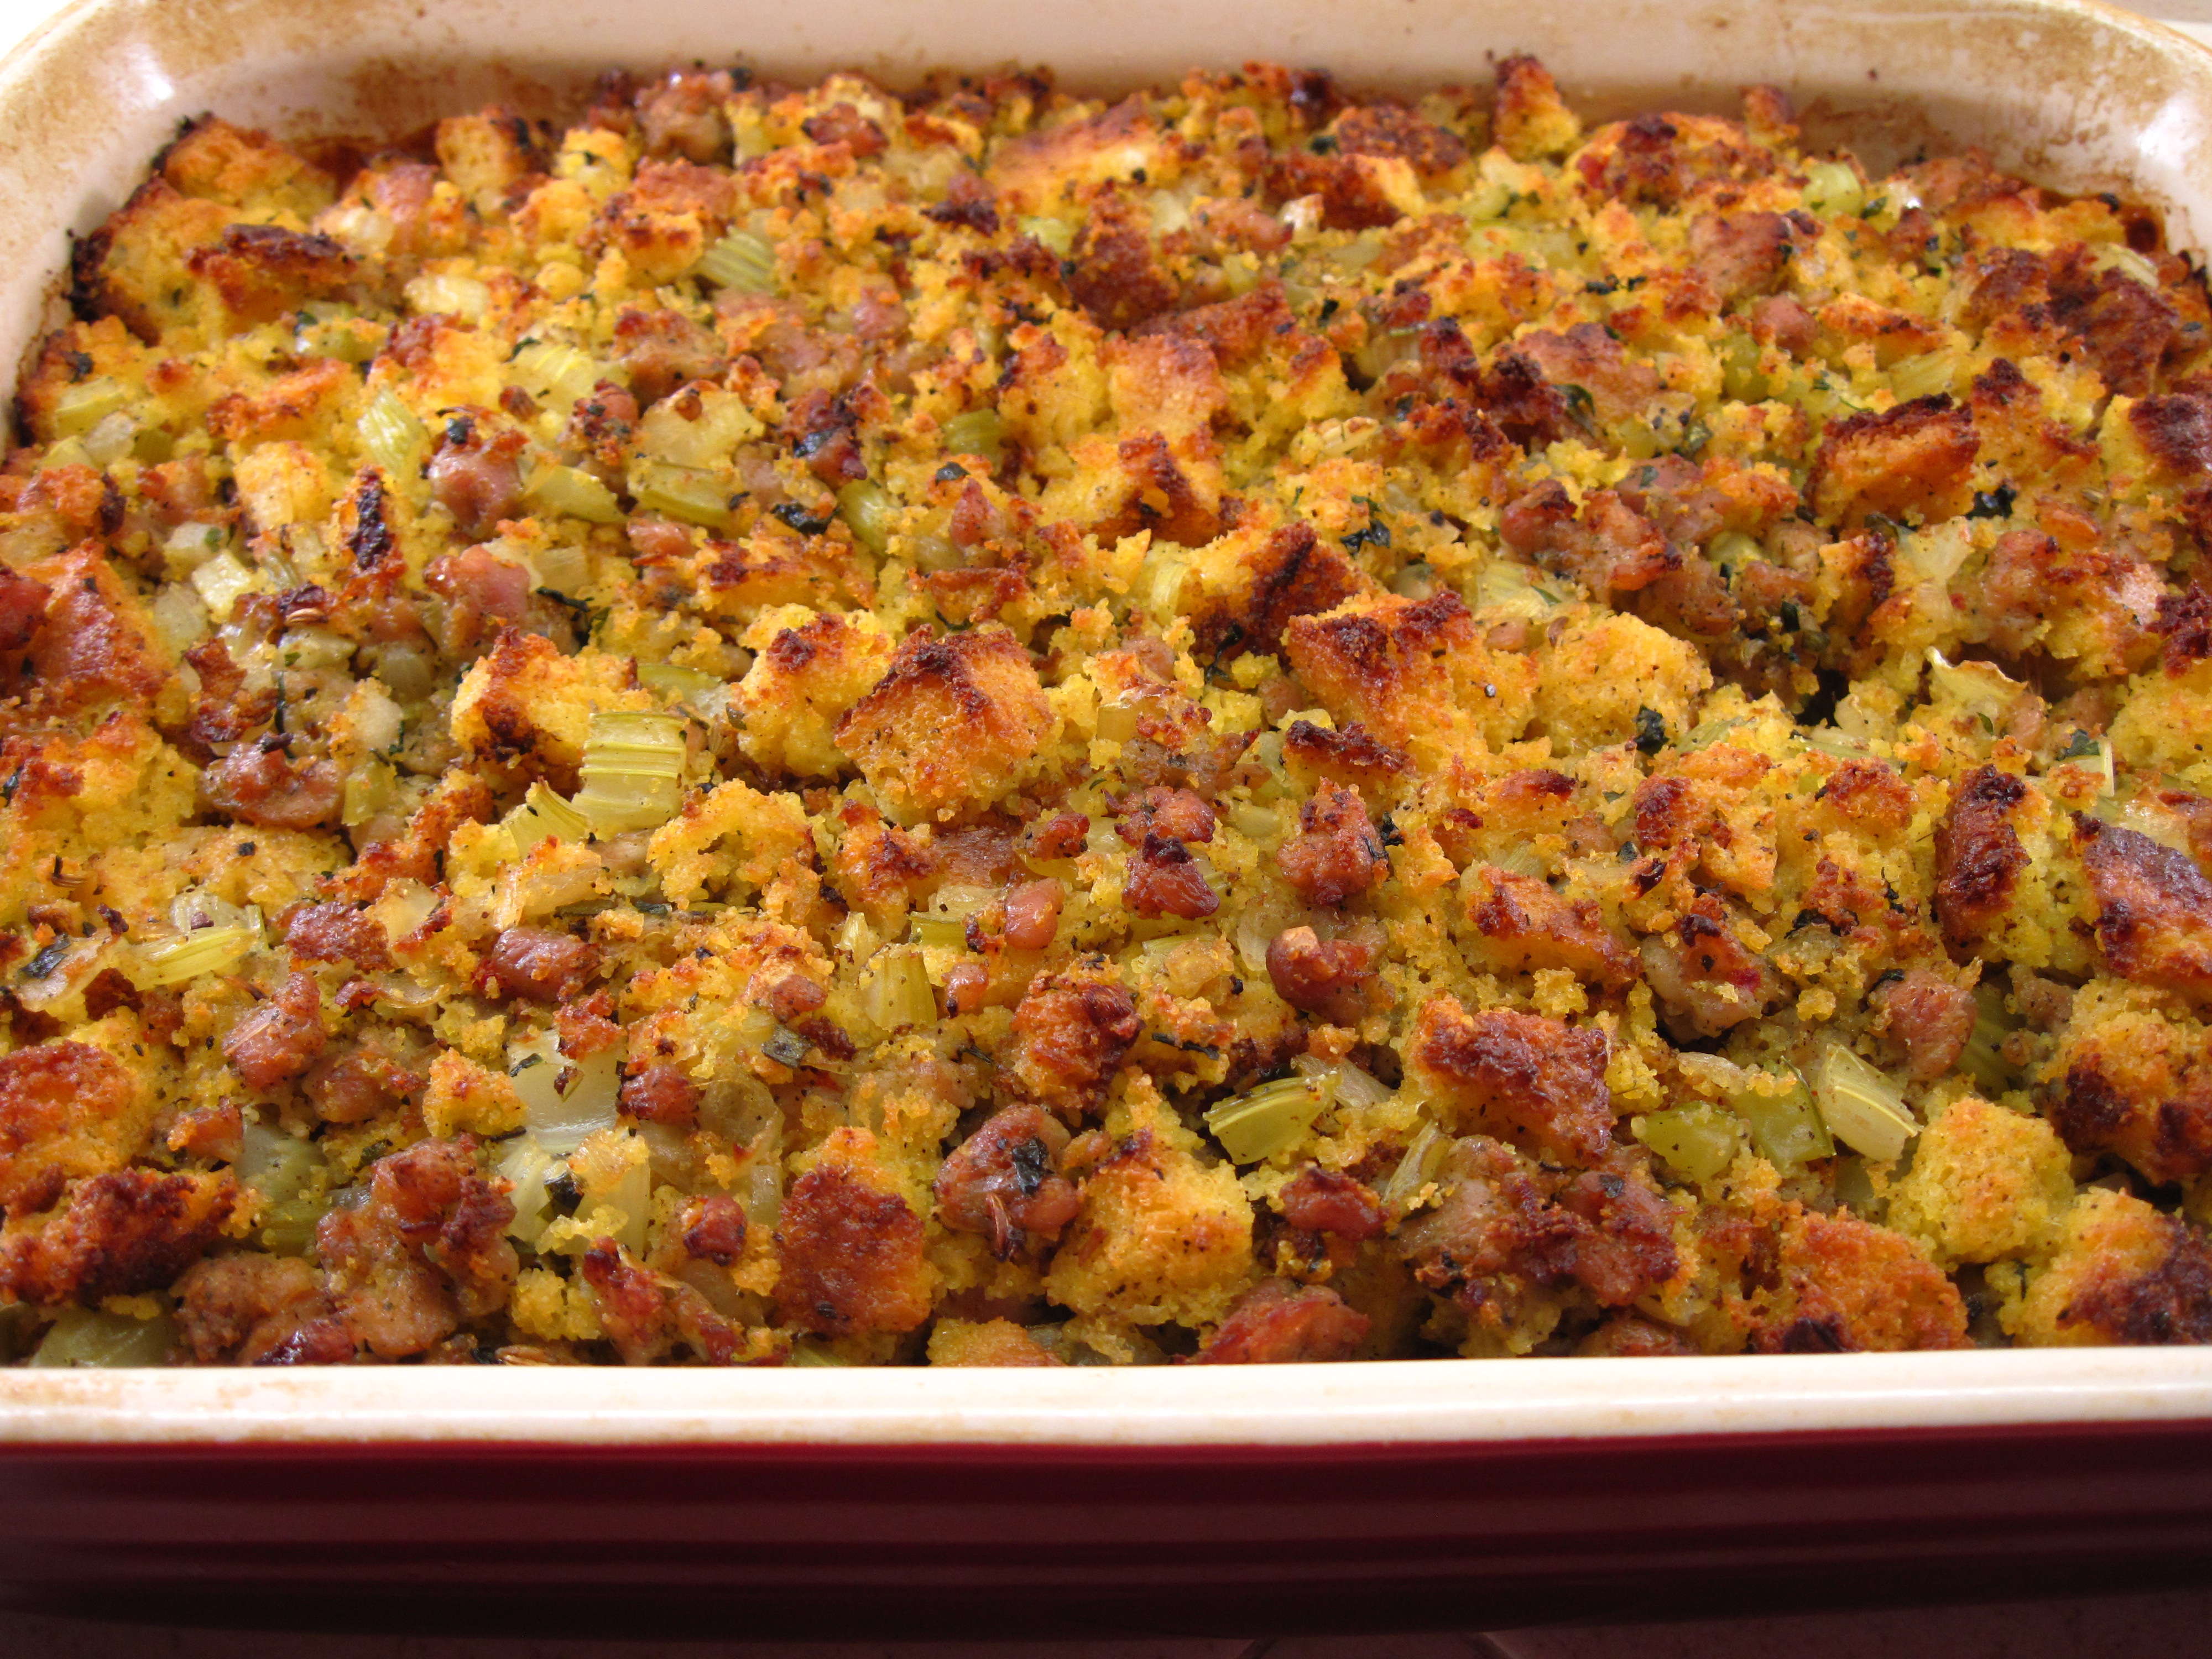
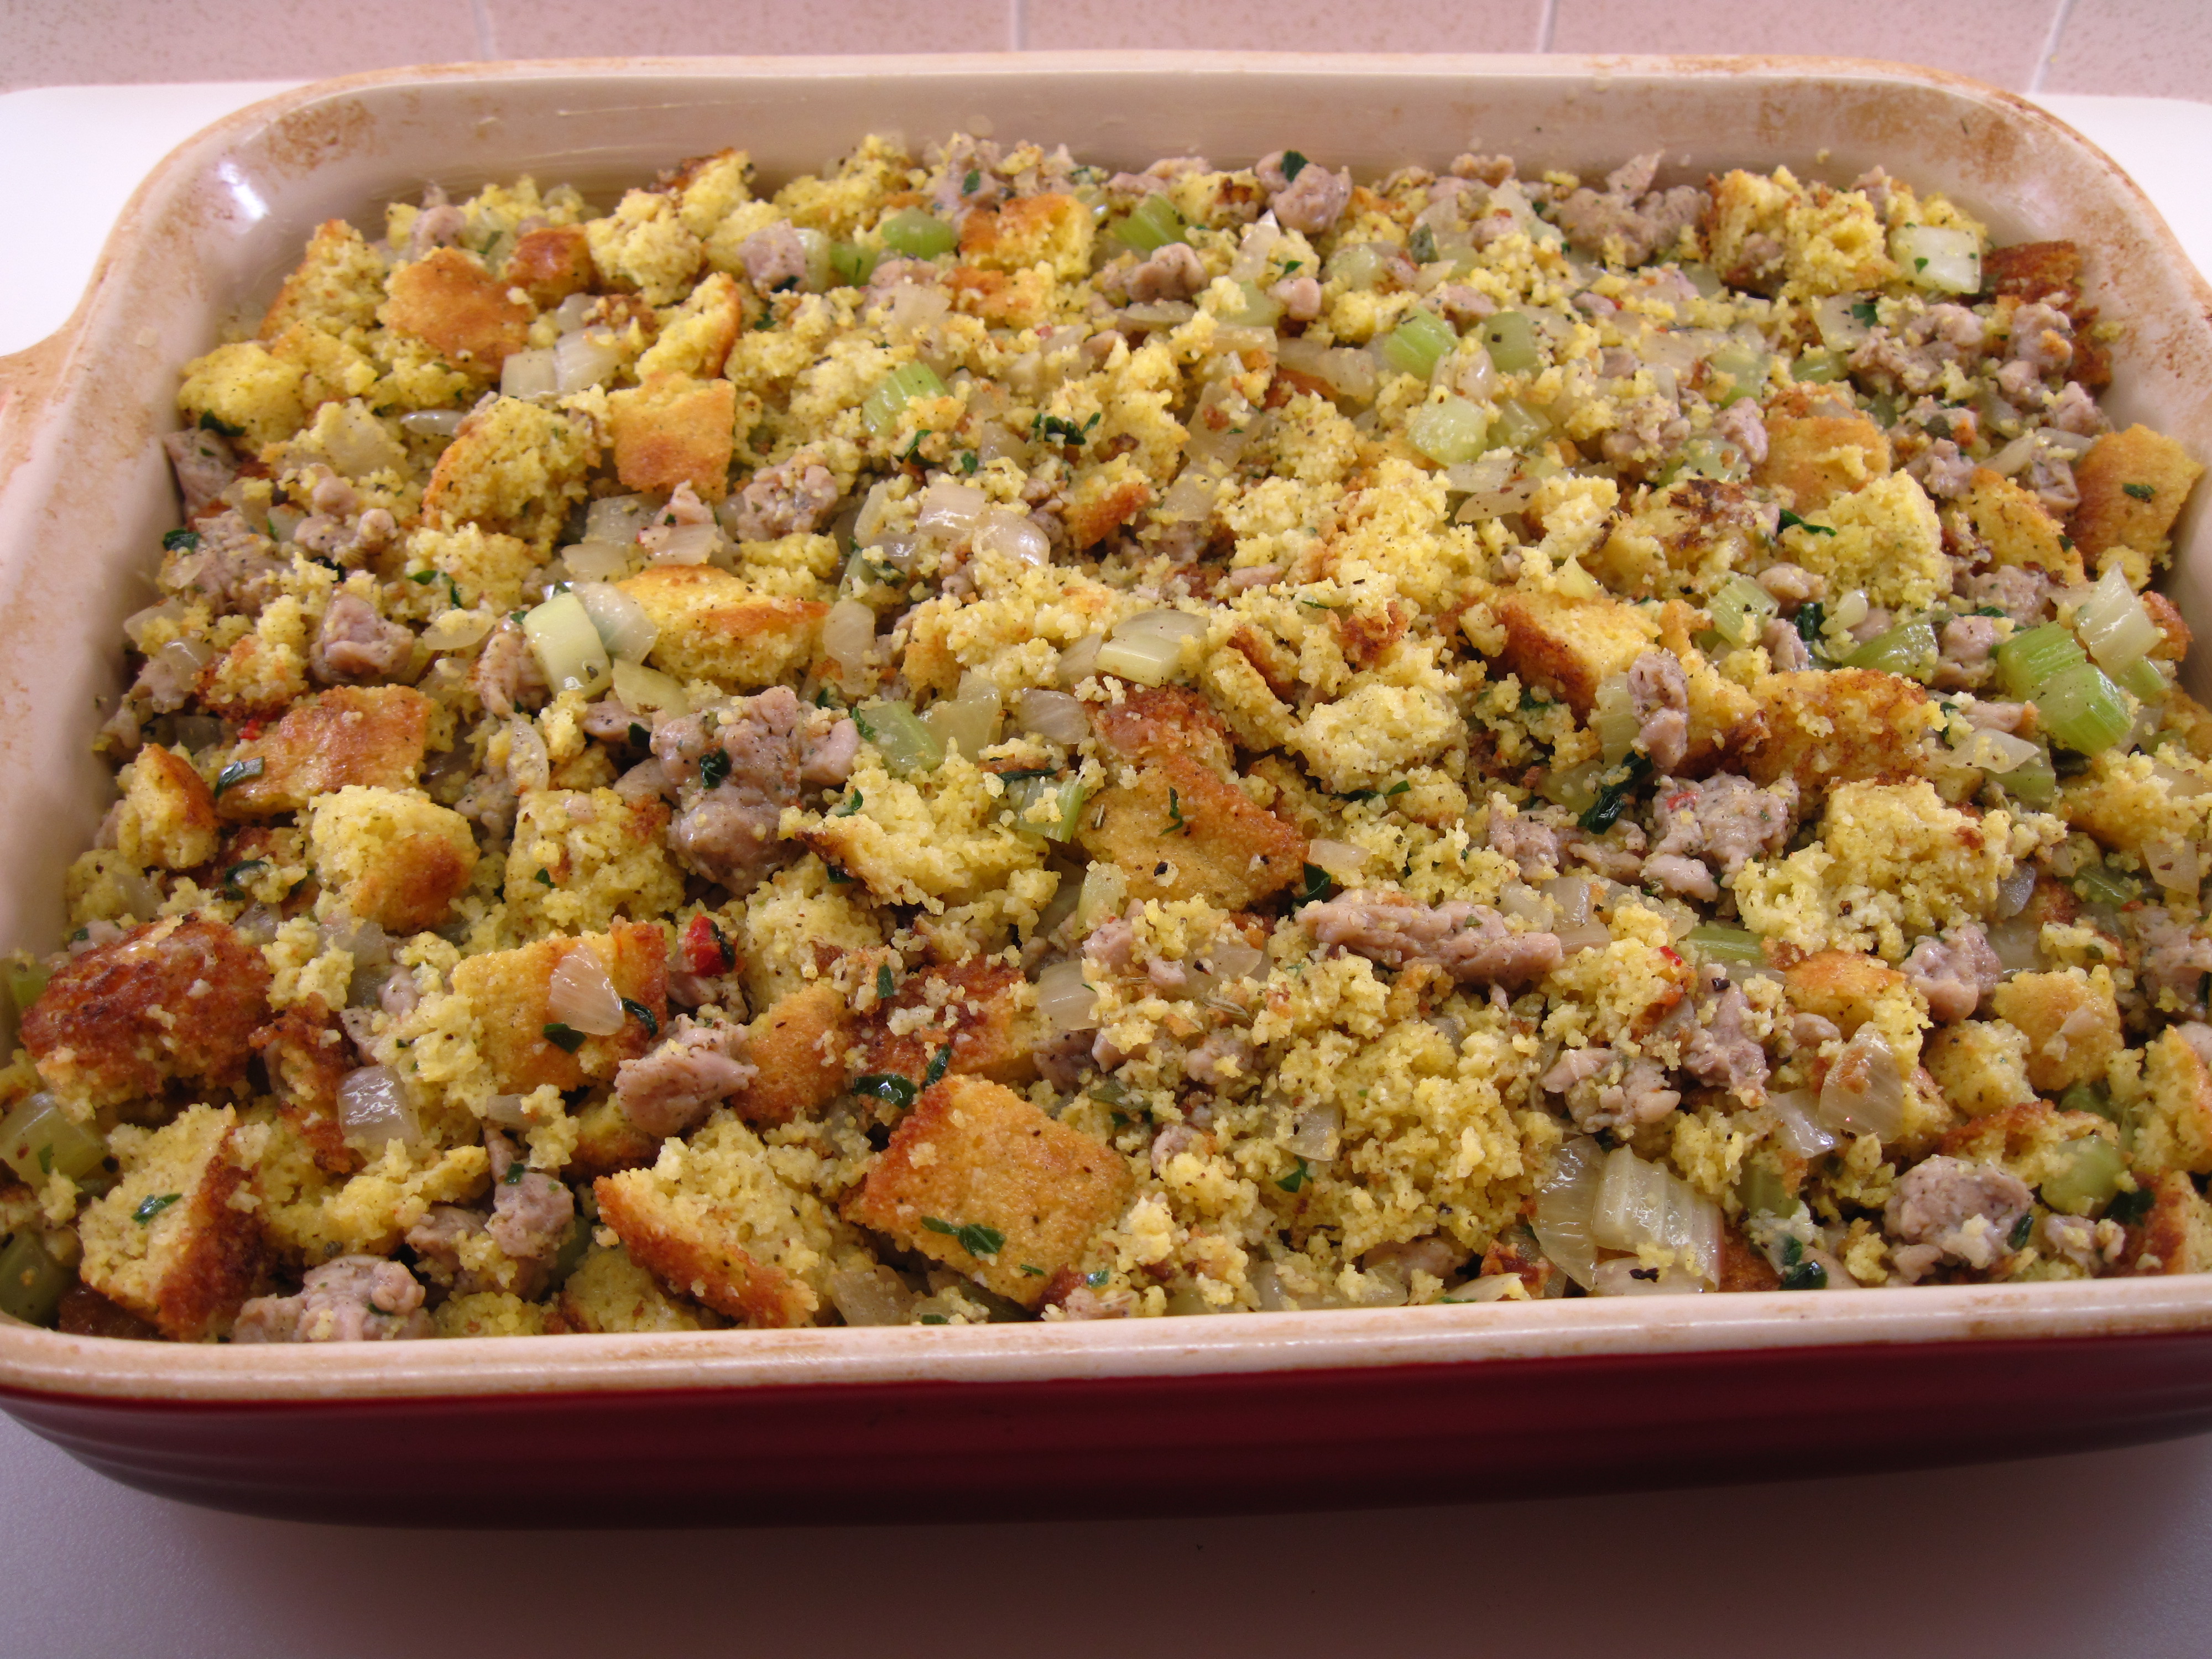
9. Butter a 9 x 13-inch casserole dish. Spoon the dressing into the dish.
a
Cornbread dressing ready to bake
a
10. Cover the dish with foil and bake at 350˚ for 40 minutes. Remove the foil and bake for an additional 40 minutes.
a
Share this:

Steamed and Roasted Turkey
Did you notice Jacques Pepin’s recipe for Steamed and Roasted Turkey in the New York Times on November 12, 2012? It caught my eye, and then I was excited to learn that my nephew was going to try it for our family’s Thanksgiving dinner. The turkey was excellent, with a crispy skin and breast meat that wasn’t too dry. (Here’s an interesting article by Jeff Gardinier about the steam and roast method.)
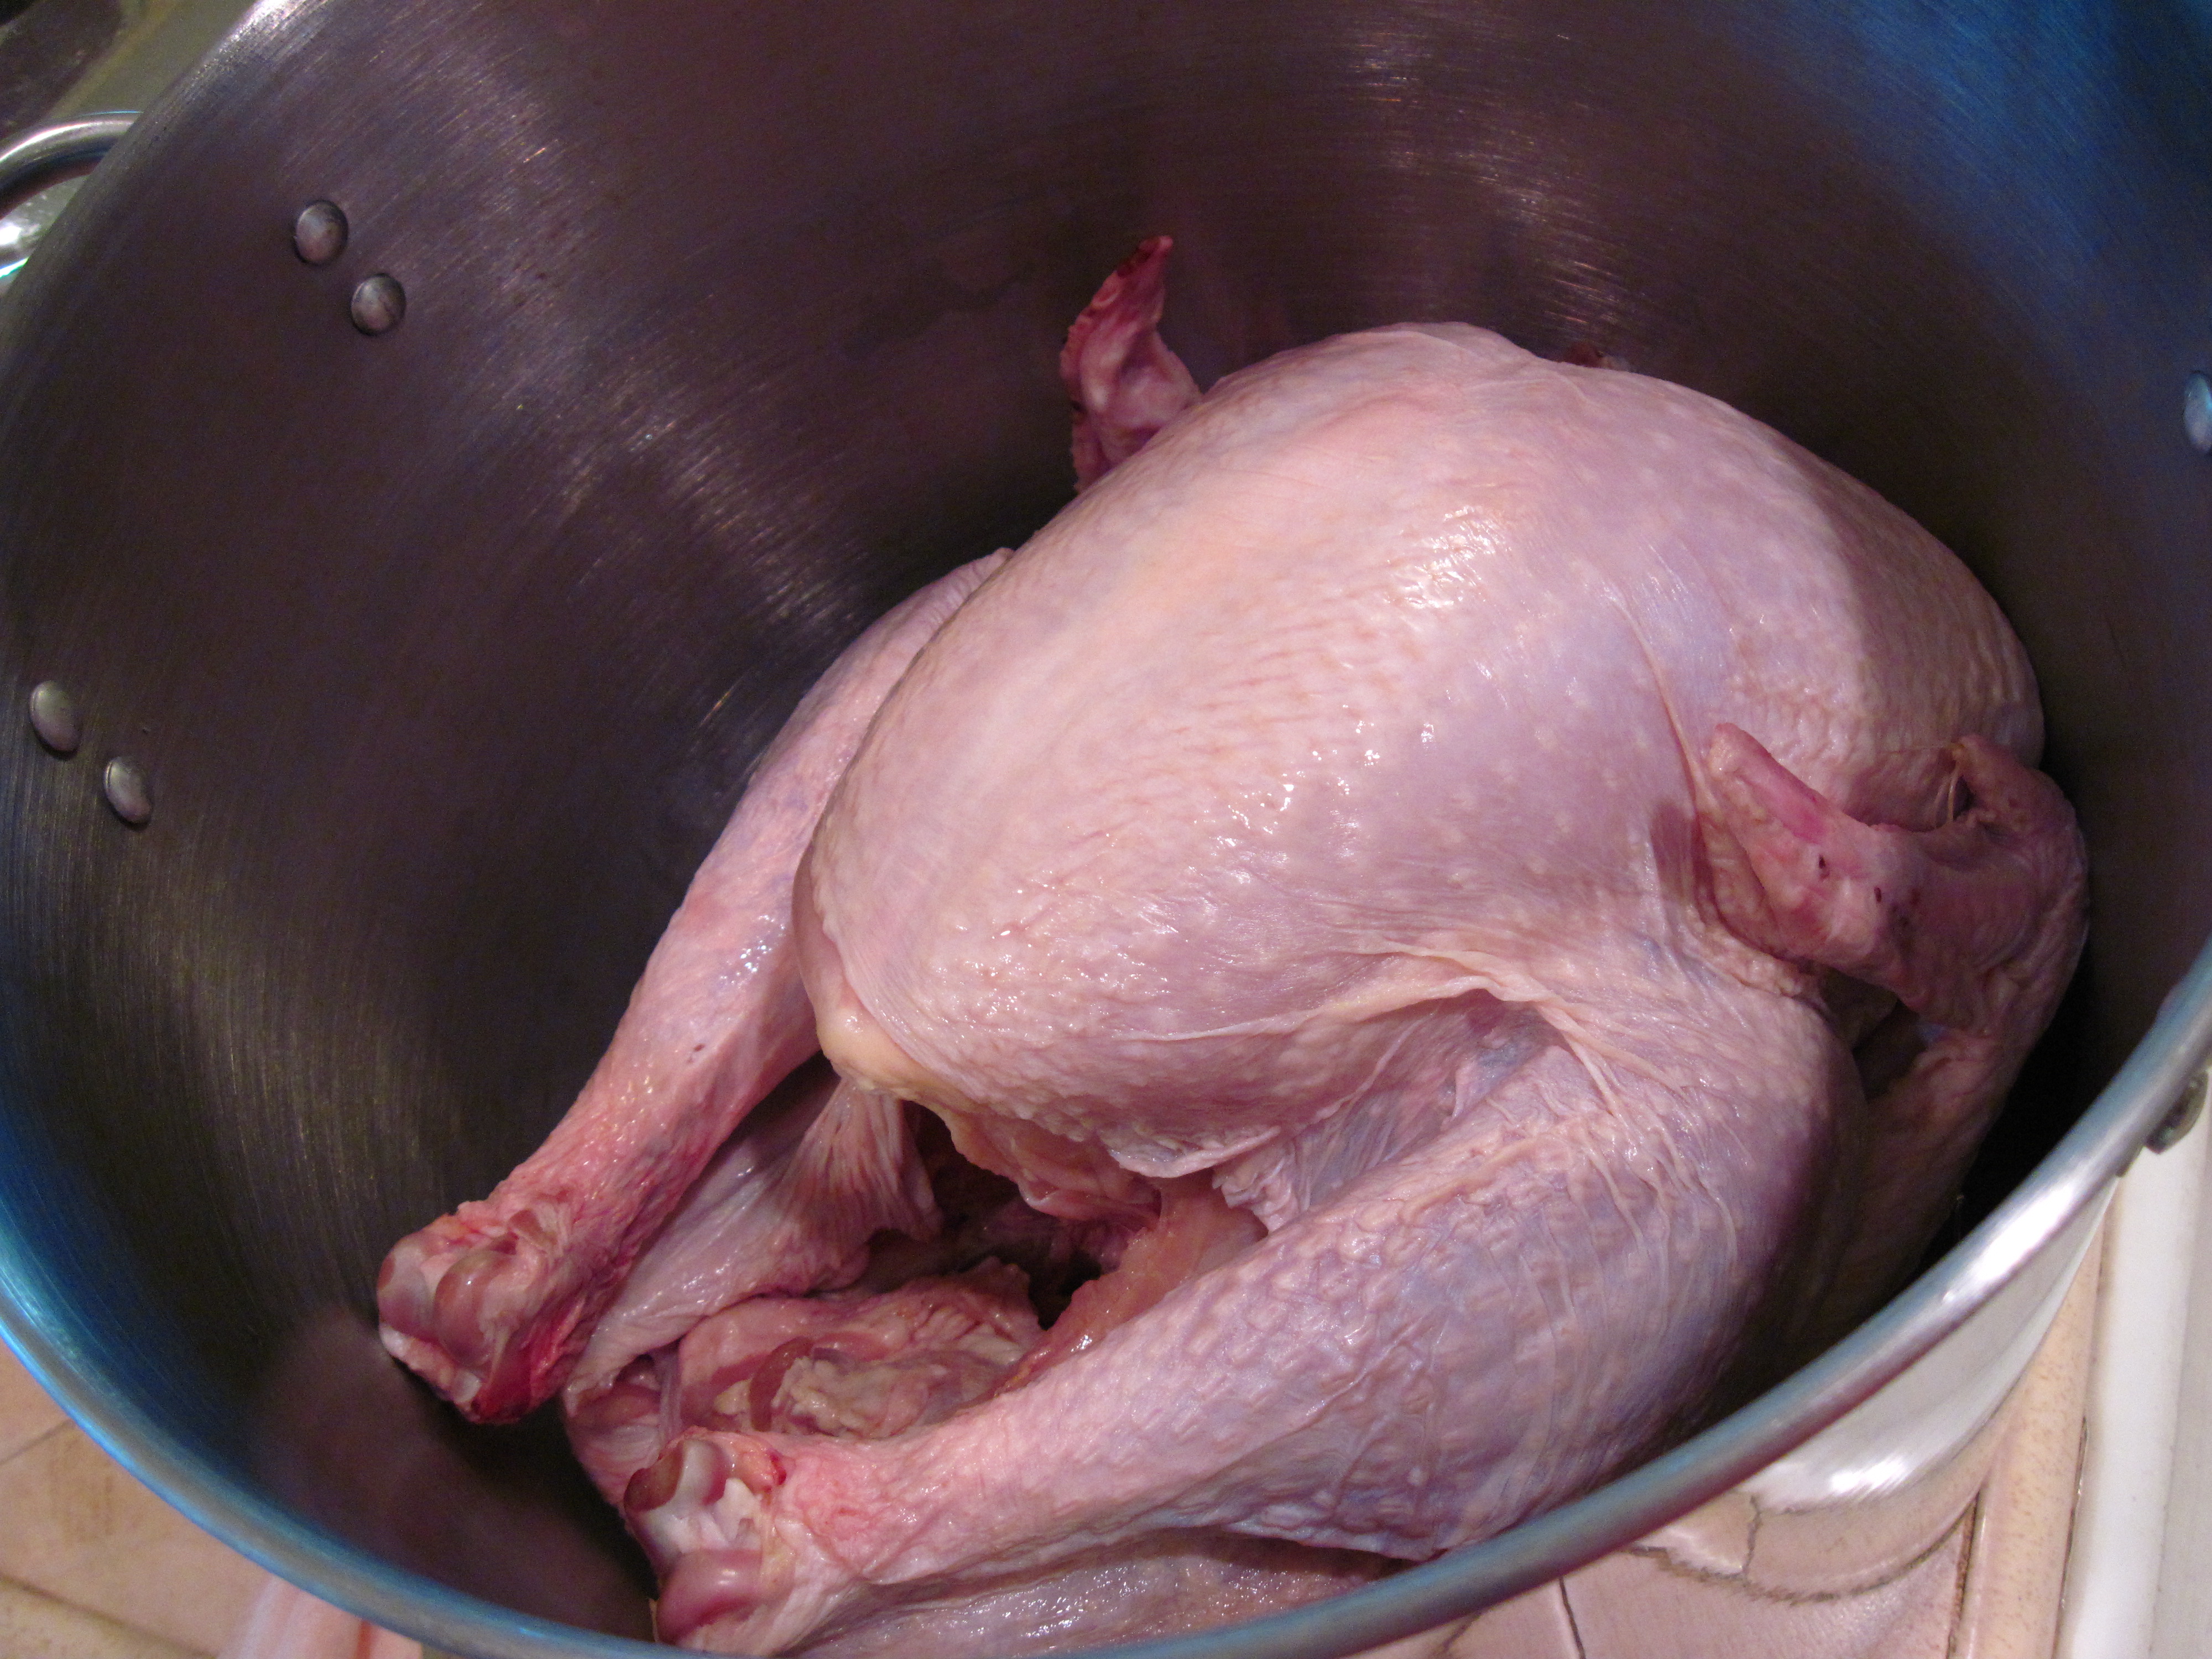
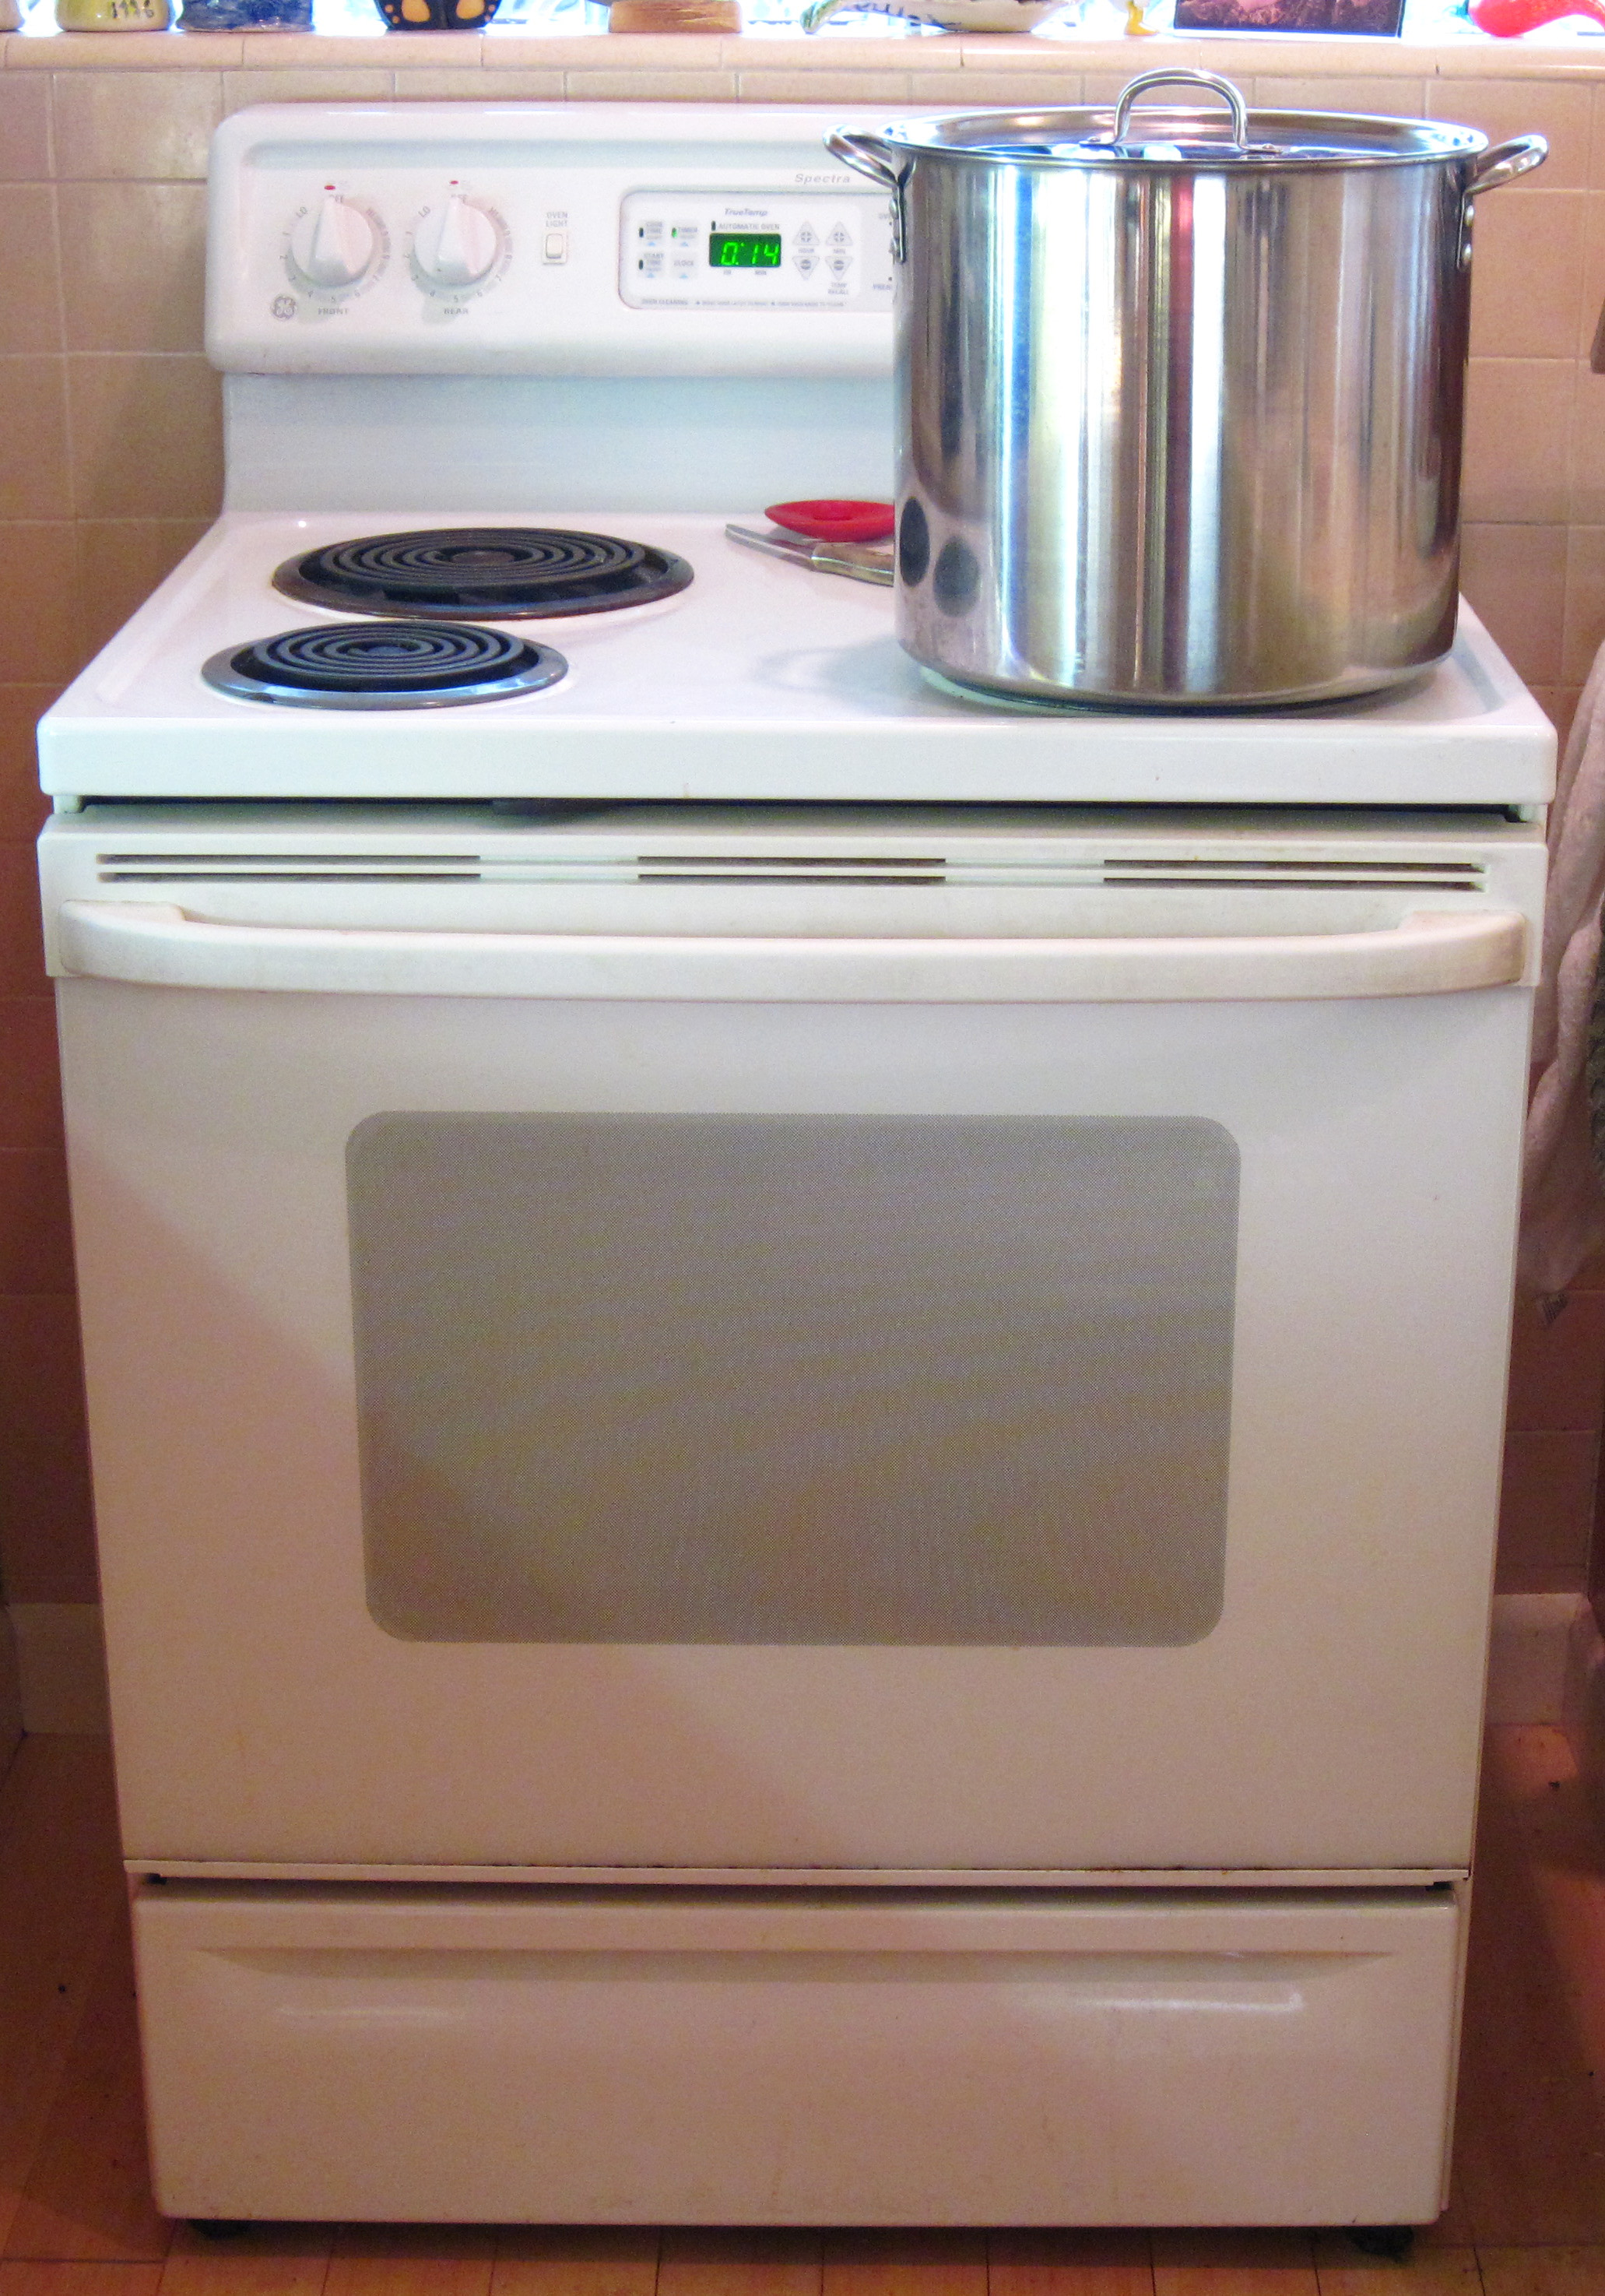
After Christmas I decided to give the Steamed and Roasted Turkey a try myself. I had inherited a huge pot from my mom and it easily held my 12-pound turkey.
We had Jacques’ sauce on Thanksgiving, along with traditional gravy. The sauce was really good, but I decided to use the broth to make the gravy I usually make for my post-holiday turkey dinner.
If you have a pot that’s large enough, I definitely recommend this method. If you don’t have a large pot, my Holiday Roast Turkey is easy and I’ve always had good results with it.
a
a
Steamed and Roasted Turkey
(Adapted from Jacques Pepin’s recipe in The New York Times, which was adapted from his recipe in Jacques Pepin Celebrates)
a
a
For the Turkey:
1 12-pound turkey
2 carrots, each cut into about 4 pieces
1 large onion, cut into large pieces
a
For the Glaze:
½ cup apple cider
2 tablespoons cider vinegar
1 teaspoon Tabasco or other hot pepper sauce
½ teaspoon salt
a
1. Remove the neck, gizzard, heart and liver from the cavity of the turkey. Reserve the neck, gizzard, and heart for broth, if desired. (I toss the liver, but Jacques recommends sautéing it in a bit of butter, seasoning with salt and pepper, and enjoying it as a snack.)
2. Make a cut about 1 ½ inches long and about 1-inch deep where the thighs connect to the body and where the wings connect to the breast.

a
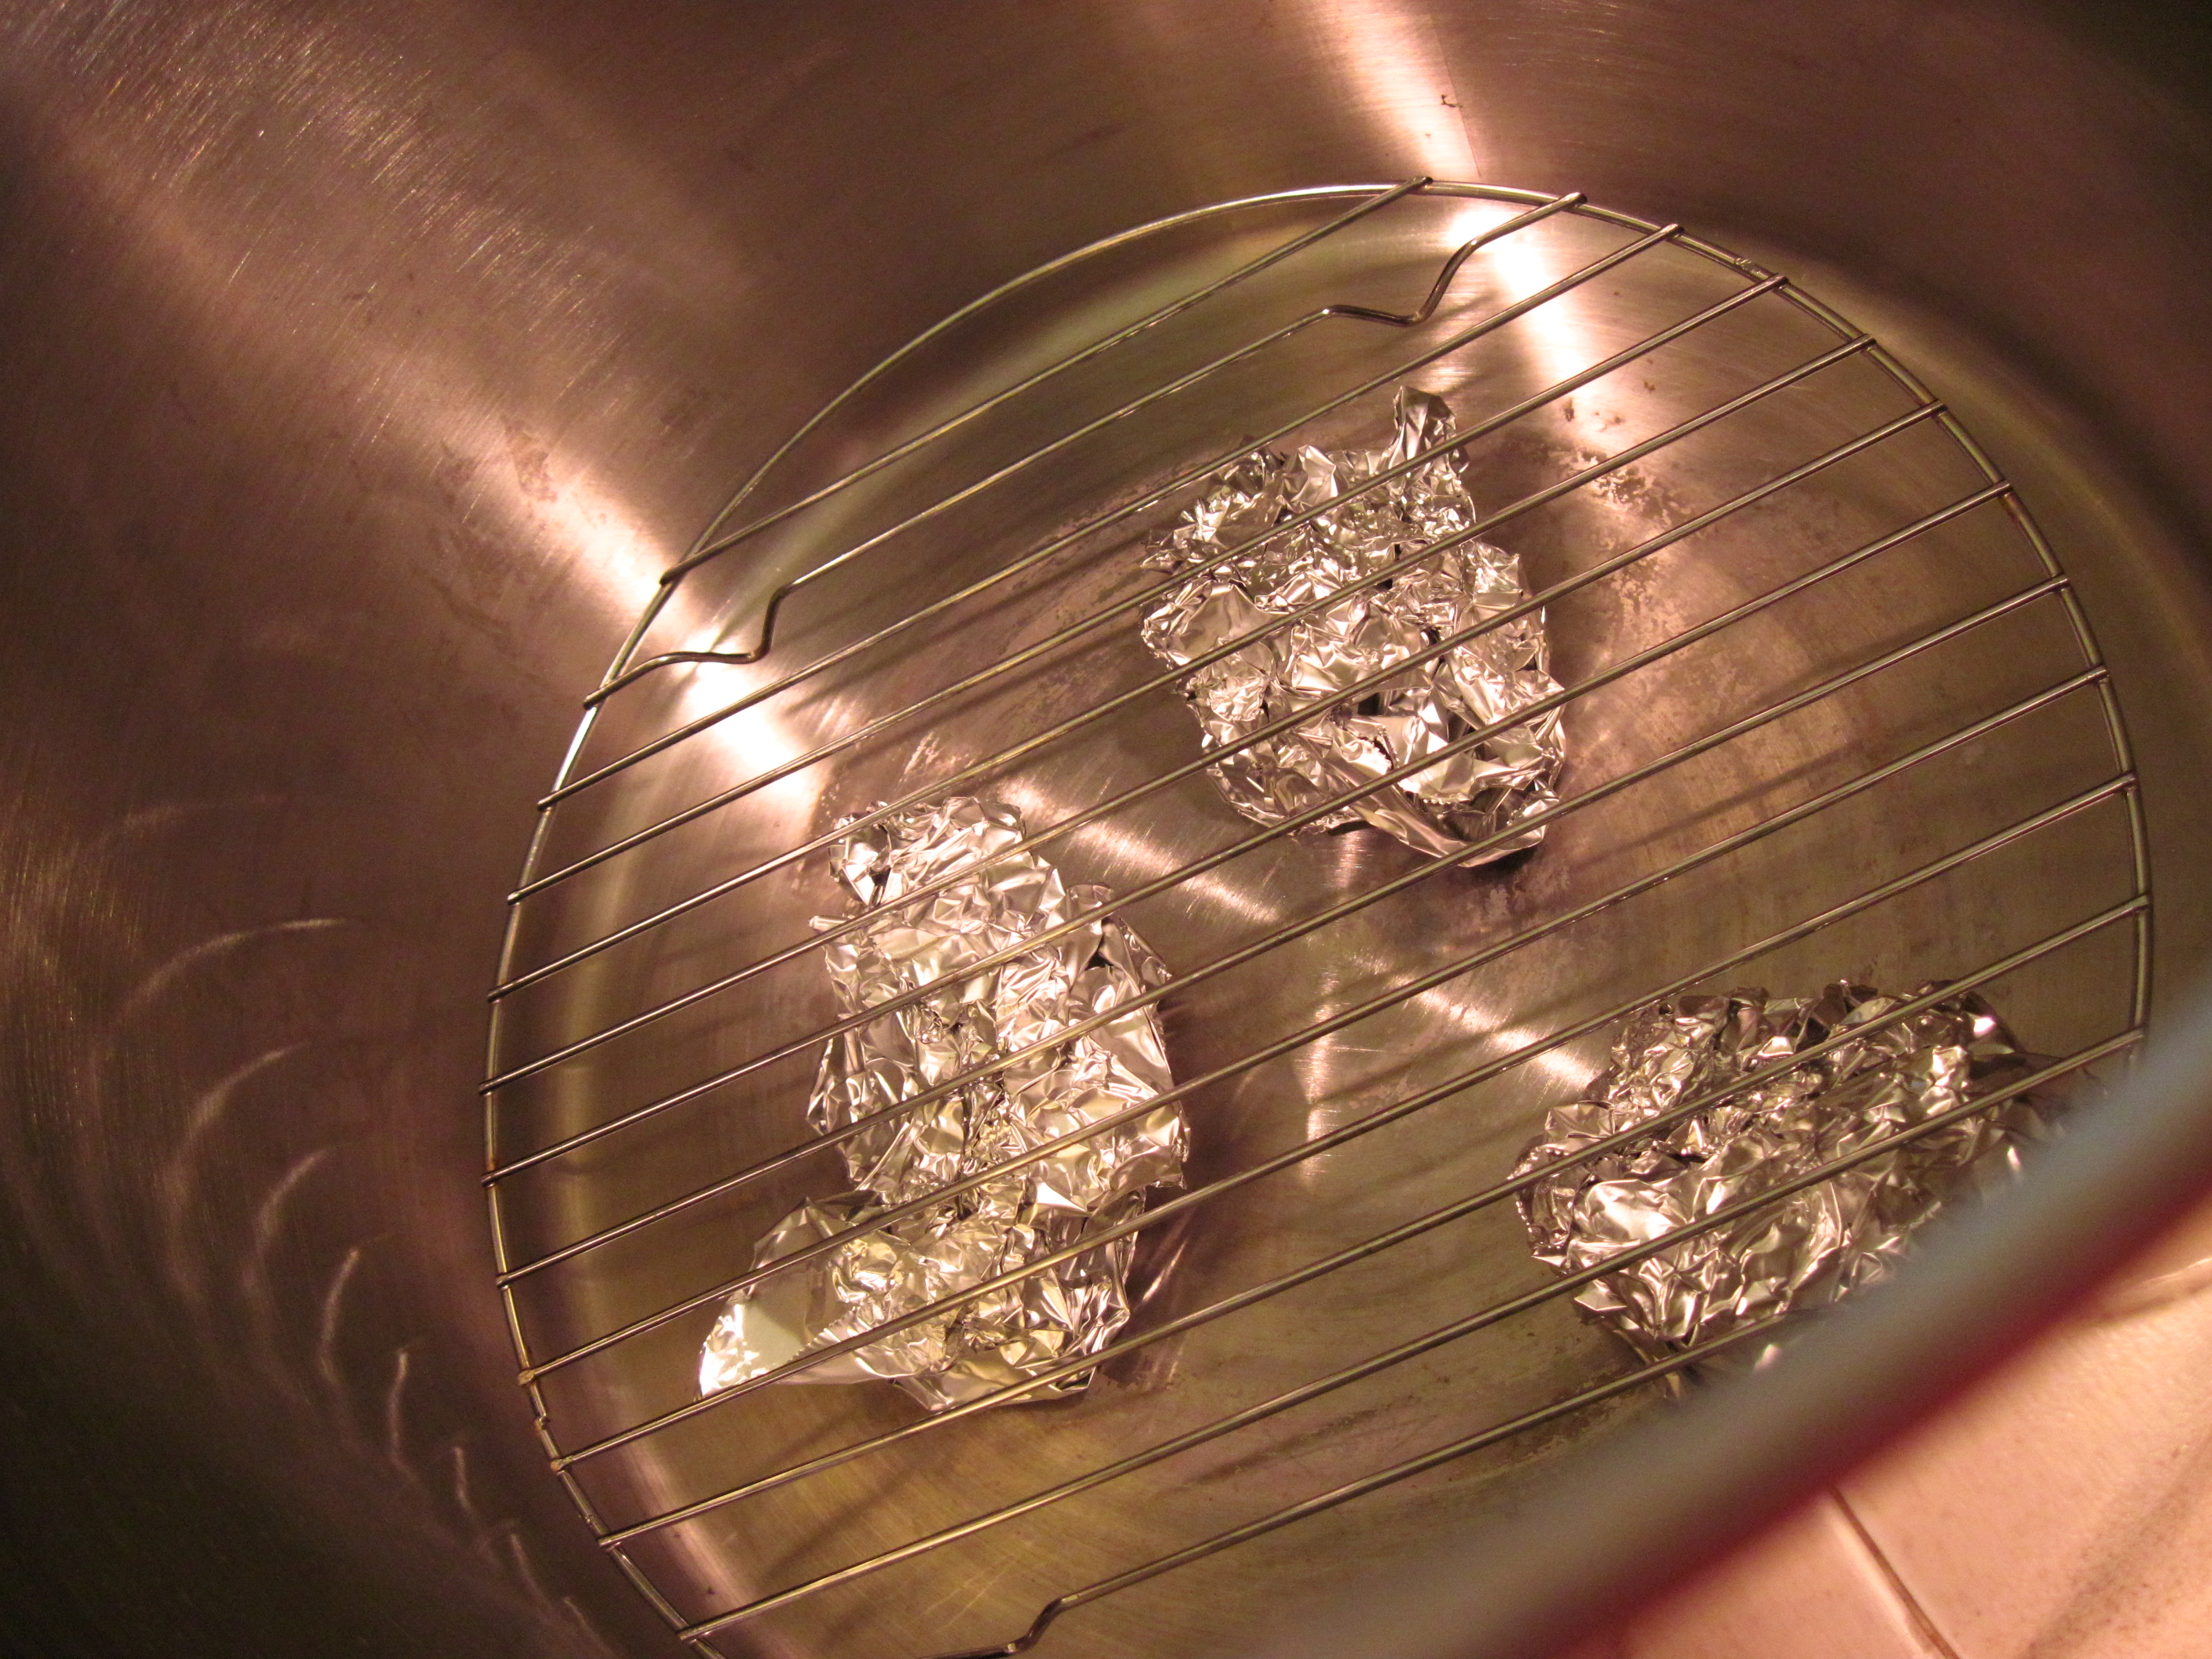
3. Put a small rack in the pot. If you don’t have one, you can improvise. I used 3 balls of heavy-duty foil and put a wire rack on top of that to raise the turkey off bottom of the pot.
a
4. Put the turkey in the pot and add 6 cups of water. Bring to a boil. Cover, reduce the heat so it is simmering, and steam for about 30 minutes.
a
This photo gives you an idea of how large my pot is!
a
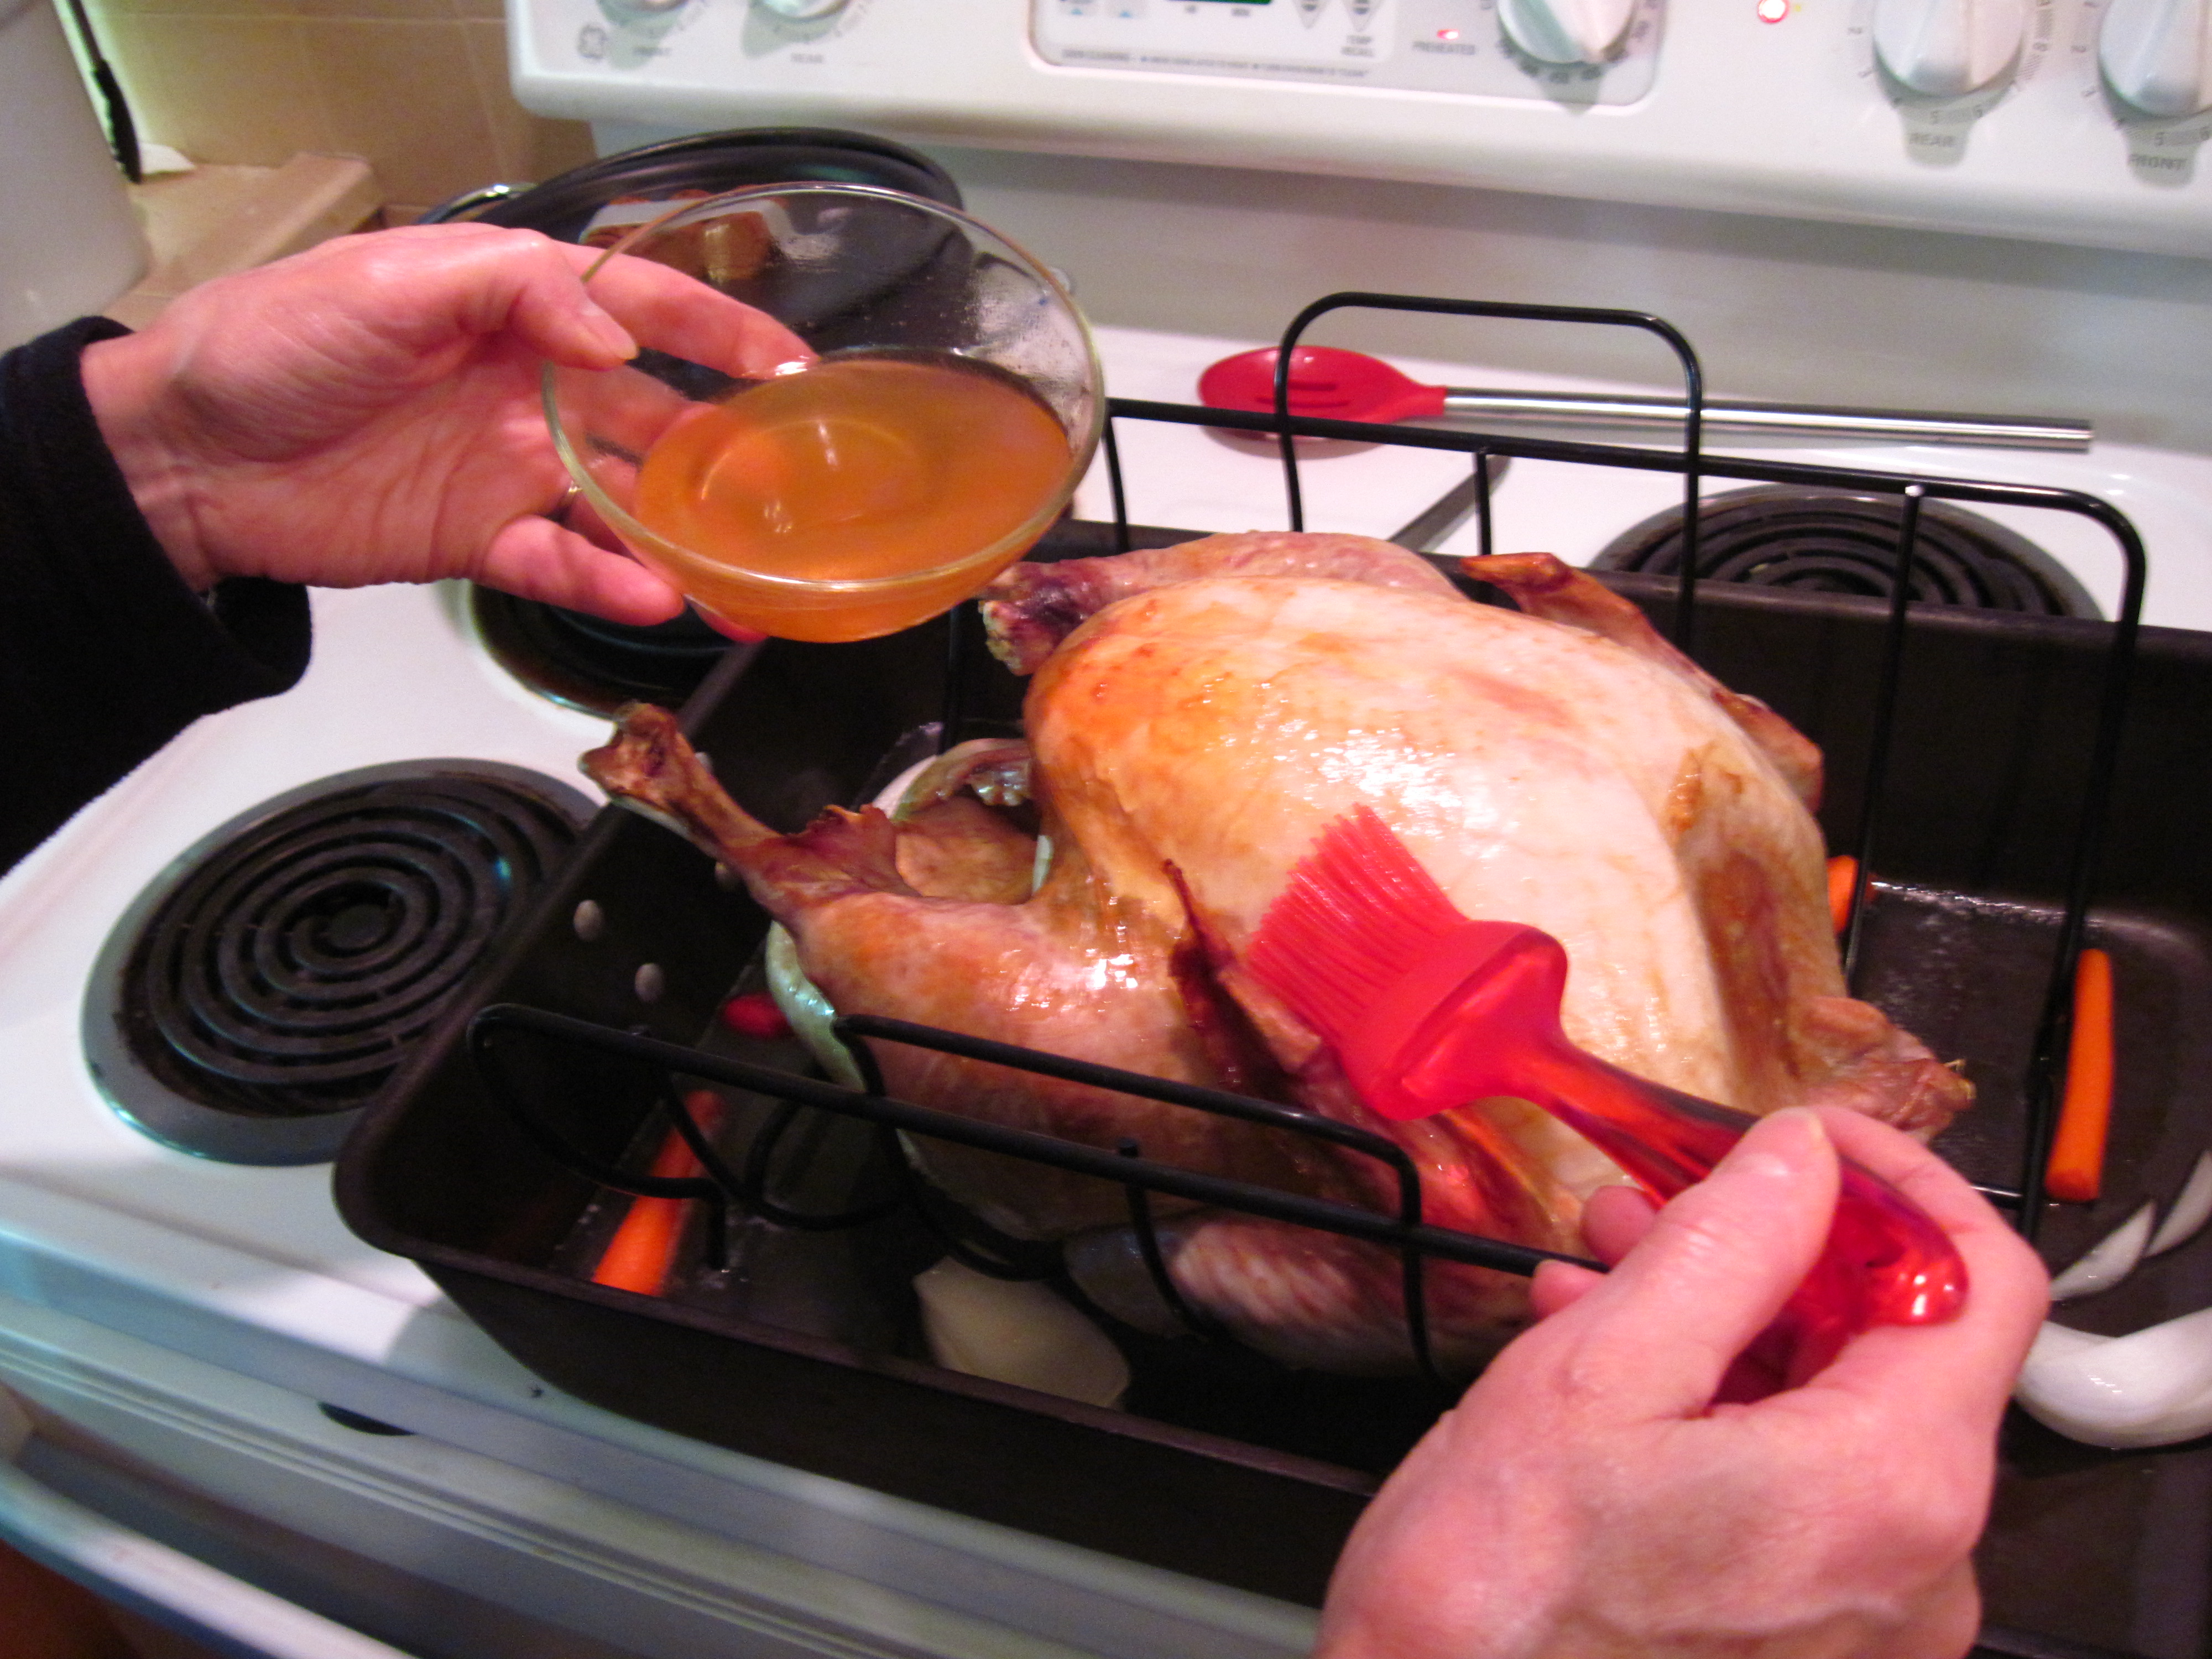
5. Combine the apple cider, cider vinegar, Tabasco, and salt in a small bowl for the glaze.
6. After the turkey has steamed for 30 minutes, remove the pot from the heat and let it cool a bit so the turkey is easier to handle.
7. Preheat the oven to 375˚. When the oven is hot, put the turkey breast-side up on a rack in a roasting pan. (Reserve the broth that is in the pot.) Add 3 cups of water to the roasting pan and scatter the onion pieces and carrots in the water around the turkey.
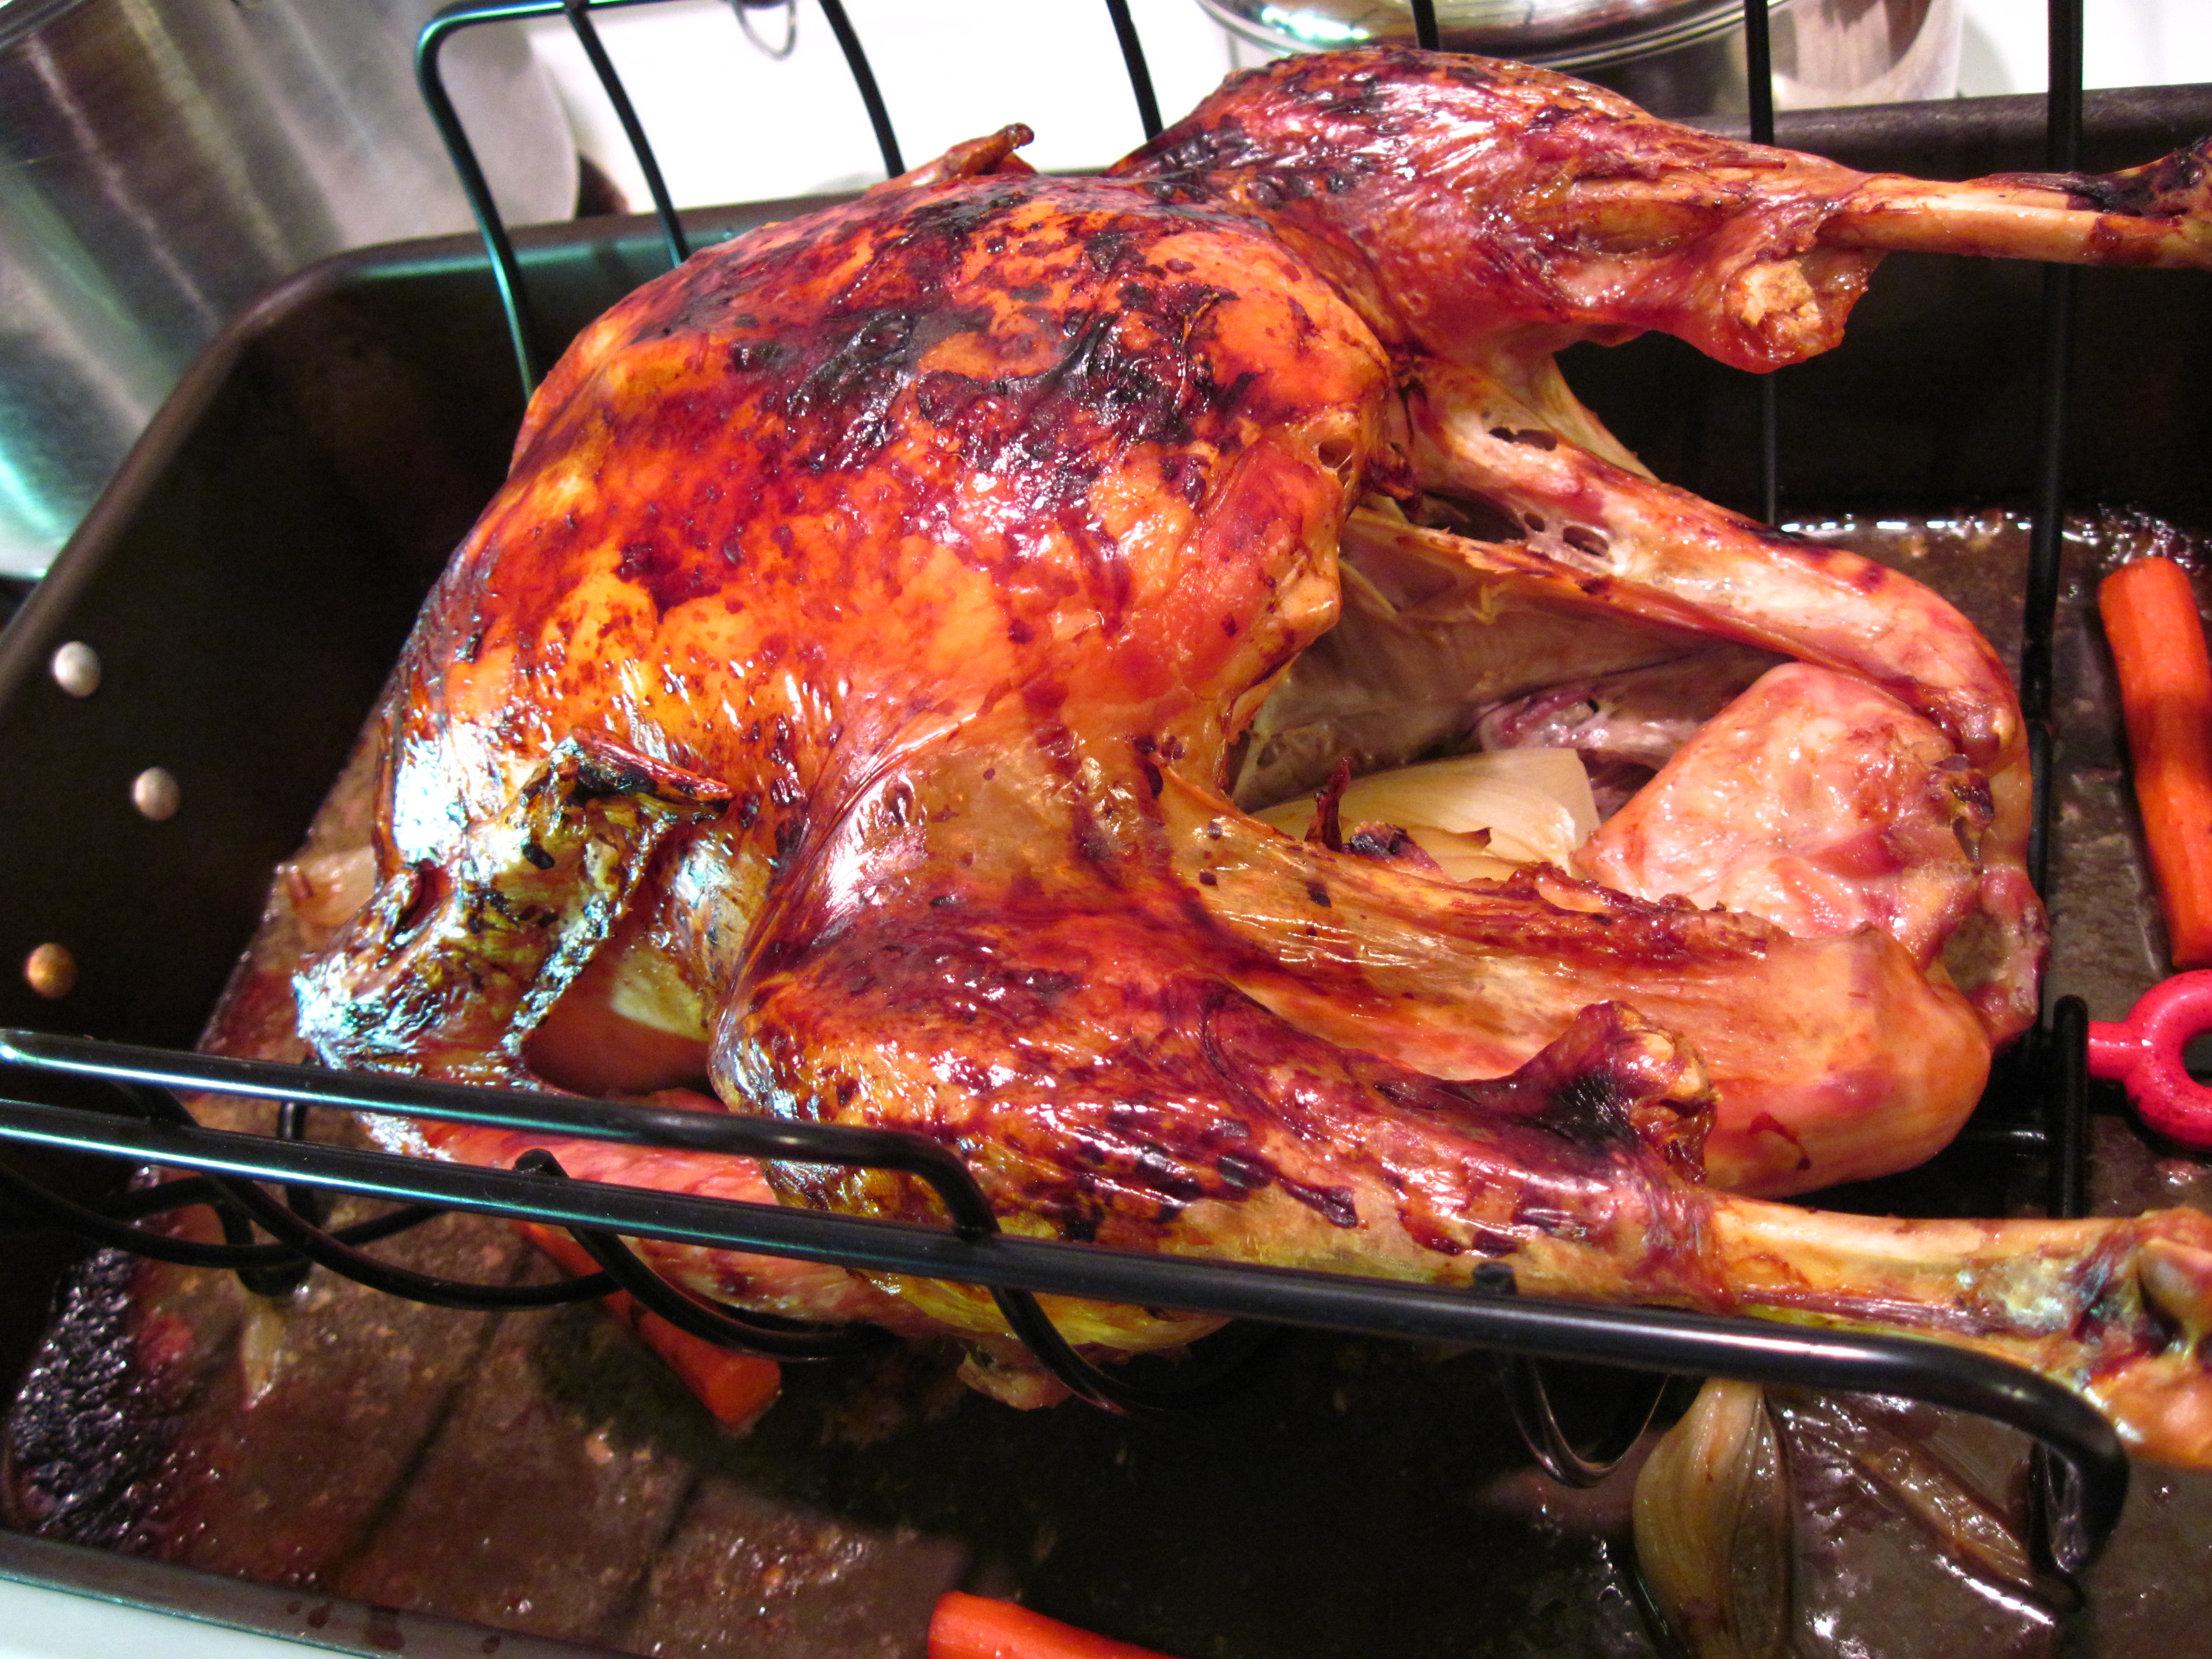
8. Roast the turkey for 30 minutes. Brush the turkey with the glaze and roast for about 1½ hours longer, basting occasionally. Add a bit more water to the pan if it’s starting to evaporate too much. You want to maintain about 2 ½ – 3 cups water in the roasting pan. The turkey is done when an instant read thermometer shows at least 165˚ when it’s inserted in the thickest part of the breast.
Basting the turkey with the cider glaze
a
9. While the turkey is roasting, put the reserved broth from the pot in a saucepan. Add the neck, gizzards, and heart. Bring to a boil, partially cover, and simmer until it is reduced to about 4 cups. It will take about 1 hour. (The neck, gizzards, and heart can be reserved and the meat cut off to make giblet gravy or Jacques’ sauce, if desired. I usually just toss them.)
10. When the turkey is done, put the turkey on a platter and loosely cover with heavy-duty foil. Let it rest for about 30 minutes.
11. Let the broth in the roasting pan rest for about 5 minutes. Then skim off as much fat as you can. Reserve the fat to use for gravy, if desired. Strain the broth and combine it with the broth in the sauce pan. Use 4 cups of the broth to make gravy while the turkey rests. Any extra broth can be frozen.
Gravy
(Adapted from Julia Child’s recipe in The Way to Cook)
(Update 11/22/17: I’ve started adding a bit of fish sauce to the gravy. It adds umami, not a fishy flavor.)
a
Makes about 2½ cups, serving 8.
a
If you don’t have enough turkey broth, use what you have and add chicken broth to make 4 cups.
a
½ cup Turkey fat, skimmed from the top of the broth in the roasting pan
If you don’t have ½ cup turkey fat, add enough unsalted butter to make a total of ½ cup fat
¼ cup flour (or potato flour for gluten-free)
4 cups turkey broth
1/2 teaspoon fish sauce (optional; adds umami, not fishy flavor)
Salt and pepper, to taste
a
1. Melt the butter in the turkey fat over medium heat in a large skillet.
2. When the butter is melted, add the flour to make the roux. Cook, stirring constantly, for a few minutes. The roux will turn brown.
3. Remove the pan from the heat. Pour some of the broth in the pan and whisk vigorously until it is smooth and lump-free.
4. Whisk in the rest of the broth. Whisk in the optional fish sauce if using.
5. Put the pan back on the burner; reduce the heat so it is just simmering. Cook, stirring occasionally, for about 10 minutes.
Share this:

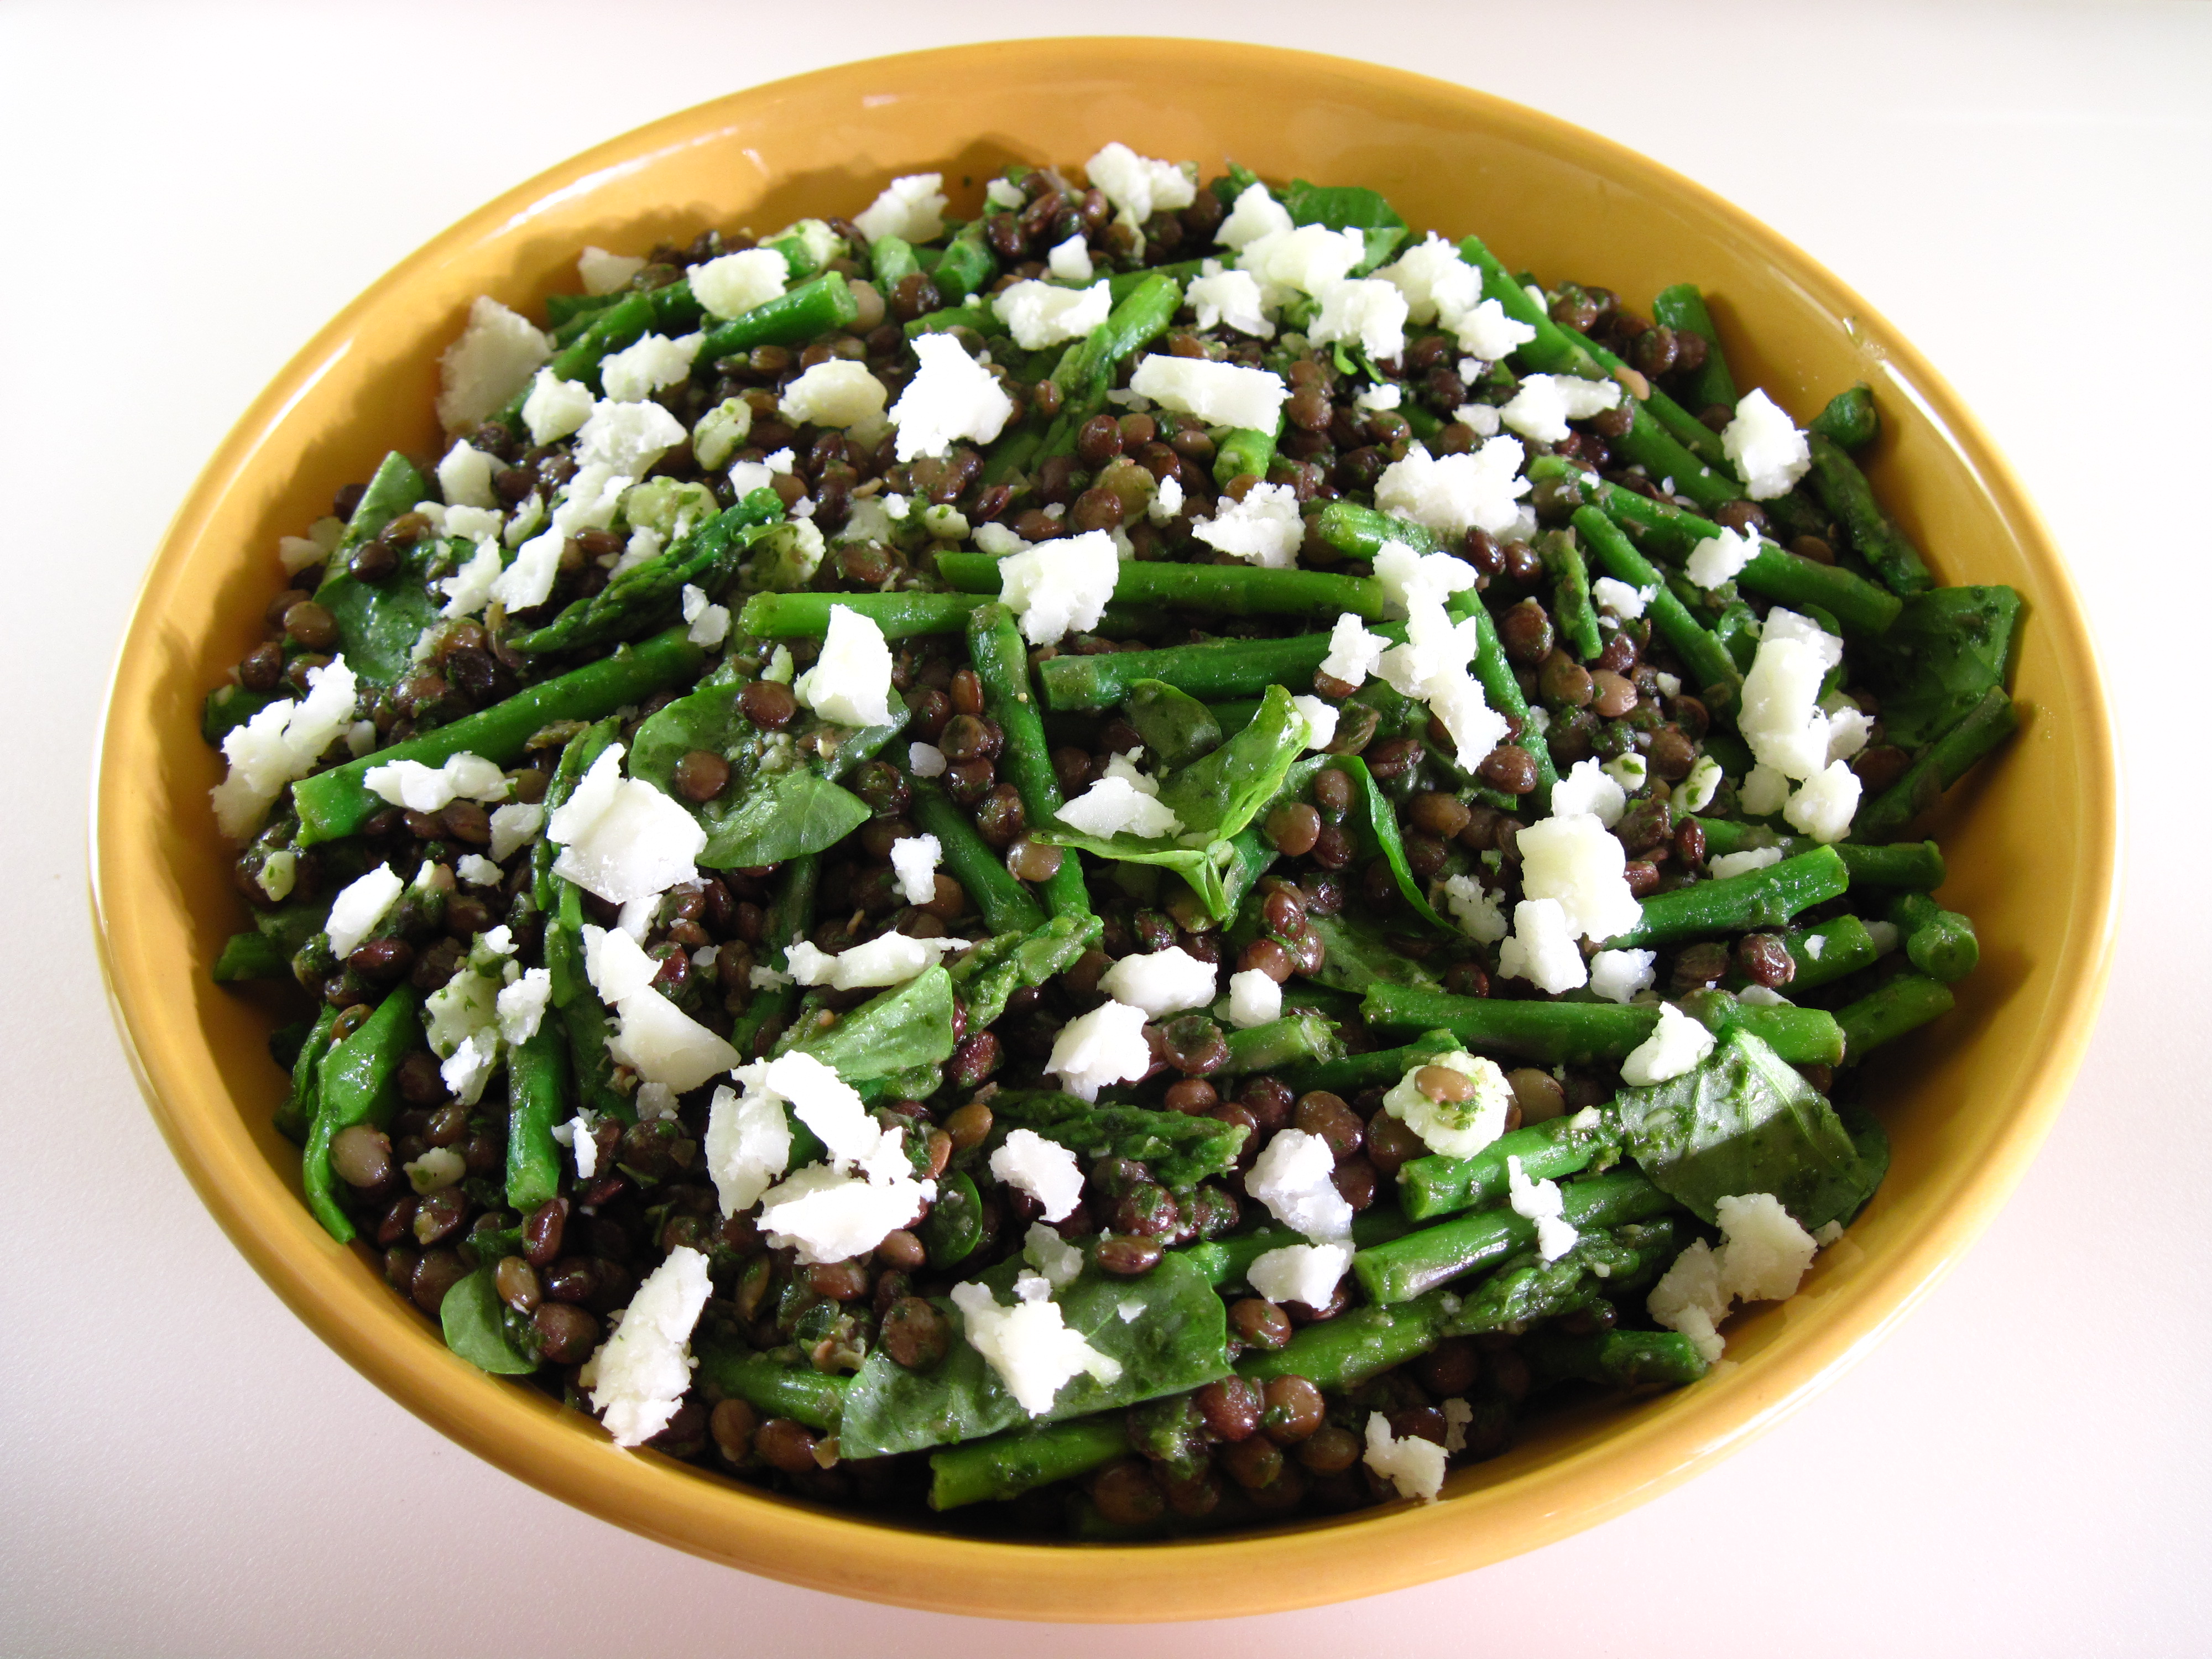
Green Lentils, Asparagus and Watercress
One of my Christmas gifts was a copy of Plenty, by Yotam Ottolenghi. Ottolenghi is a celebrity restaurateur in London and he also writes a weekly column for The Guardian newspaper. I was thrilled to receive his book of innovative vegetable dishes. They are substantial enough to make great vegetarian meals and they also make stunning side dishes when served with simple grilled or roasted meats.
When it came time to choose a recipe to take to a New Year’s Day party, I selected Ottolenghi’s Green Lentils, Asparagus and Watercress salad. I could just tell by reading the list of ingredients that it would be a great recipe.
I pretty much followed the recipe, although I found my green lentils (also known as French or puy lentils) took a lot longer than his 15 minutes to cook. The dressing is almost like a watercress pesto. I wondered if the 1 tablespoon of red wine vinegar would be enough, but everything came together beautifully.
The Green Lentils, Asparagus and Watercress salad was very well-received at the party! It’s definitely one I would make again, especially when we have fresh local asparagus available this spring.
a

a
Green Lentils, Asparagus and Watercress
(Adapted from Yotam Ottolenghi’s recipe in Plenty)
a
a
Can be served warm or at room temperature.
a
Serves 4 generously as a vegetarian main dish, or 6 – 8 as a side dish.
a
1 cup green (French or puy) lentils, rinsed and drained
4 cups watercress, thick stalks removed (about 4 bunches)
2/3 cup Italian parsley
2/3 cup light olive oil
1 tablespoon red wine vinegar
1 garlic clove, peeled
Salt and black pepper
1 large bunch of thin asparagus spears
3½ oz Manchego cheese, broken into chunks (or substitute pecorino)
Walnut oil to finish (optional – I didn’t use it)
Lemon wedges for serving (optional – I didn’t use)
Watercress

a
1. Put the lentils in a pot. Cover with water, bring to a boil, cover and simmer for 25 – 30 minutes, or until the lentils are just cooked.
2. Put 2 cups of the watercress, the parsley, olive oil, vinegar, garlic, and a bit of salt and pepper in a food processor. Process until it is smooth. Pour the dressing into a large bowl.

a
3. When the lentils are cooked, drain them and stir the warm lentils into the dressing. Taste and adjust for seasoning, adding more salt and/or pepper if necessary.
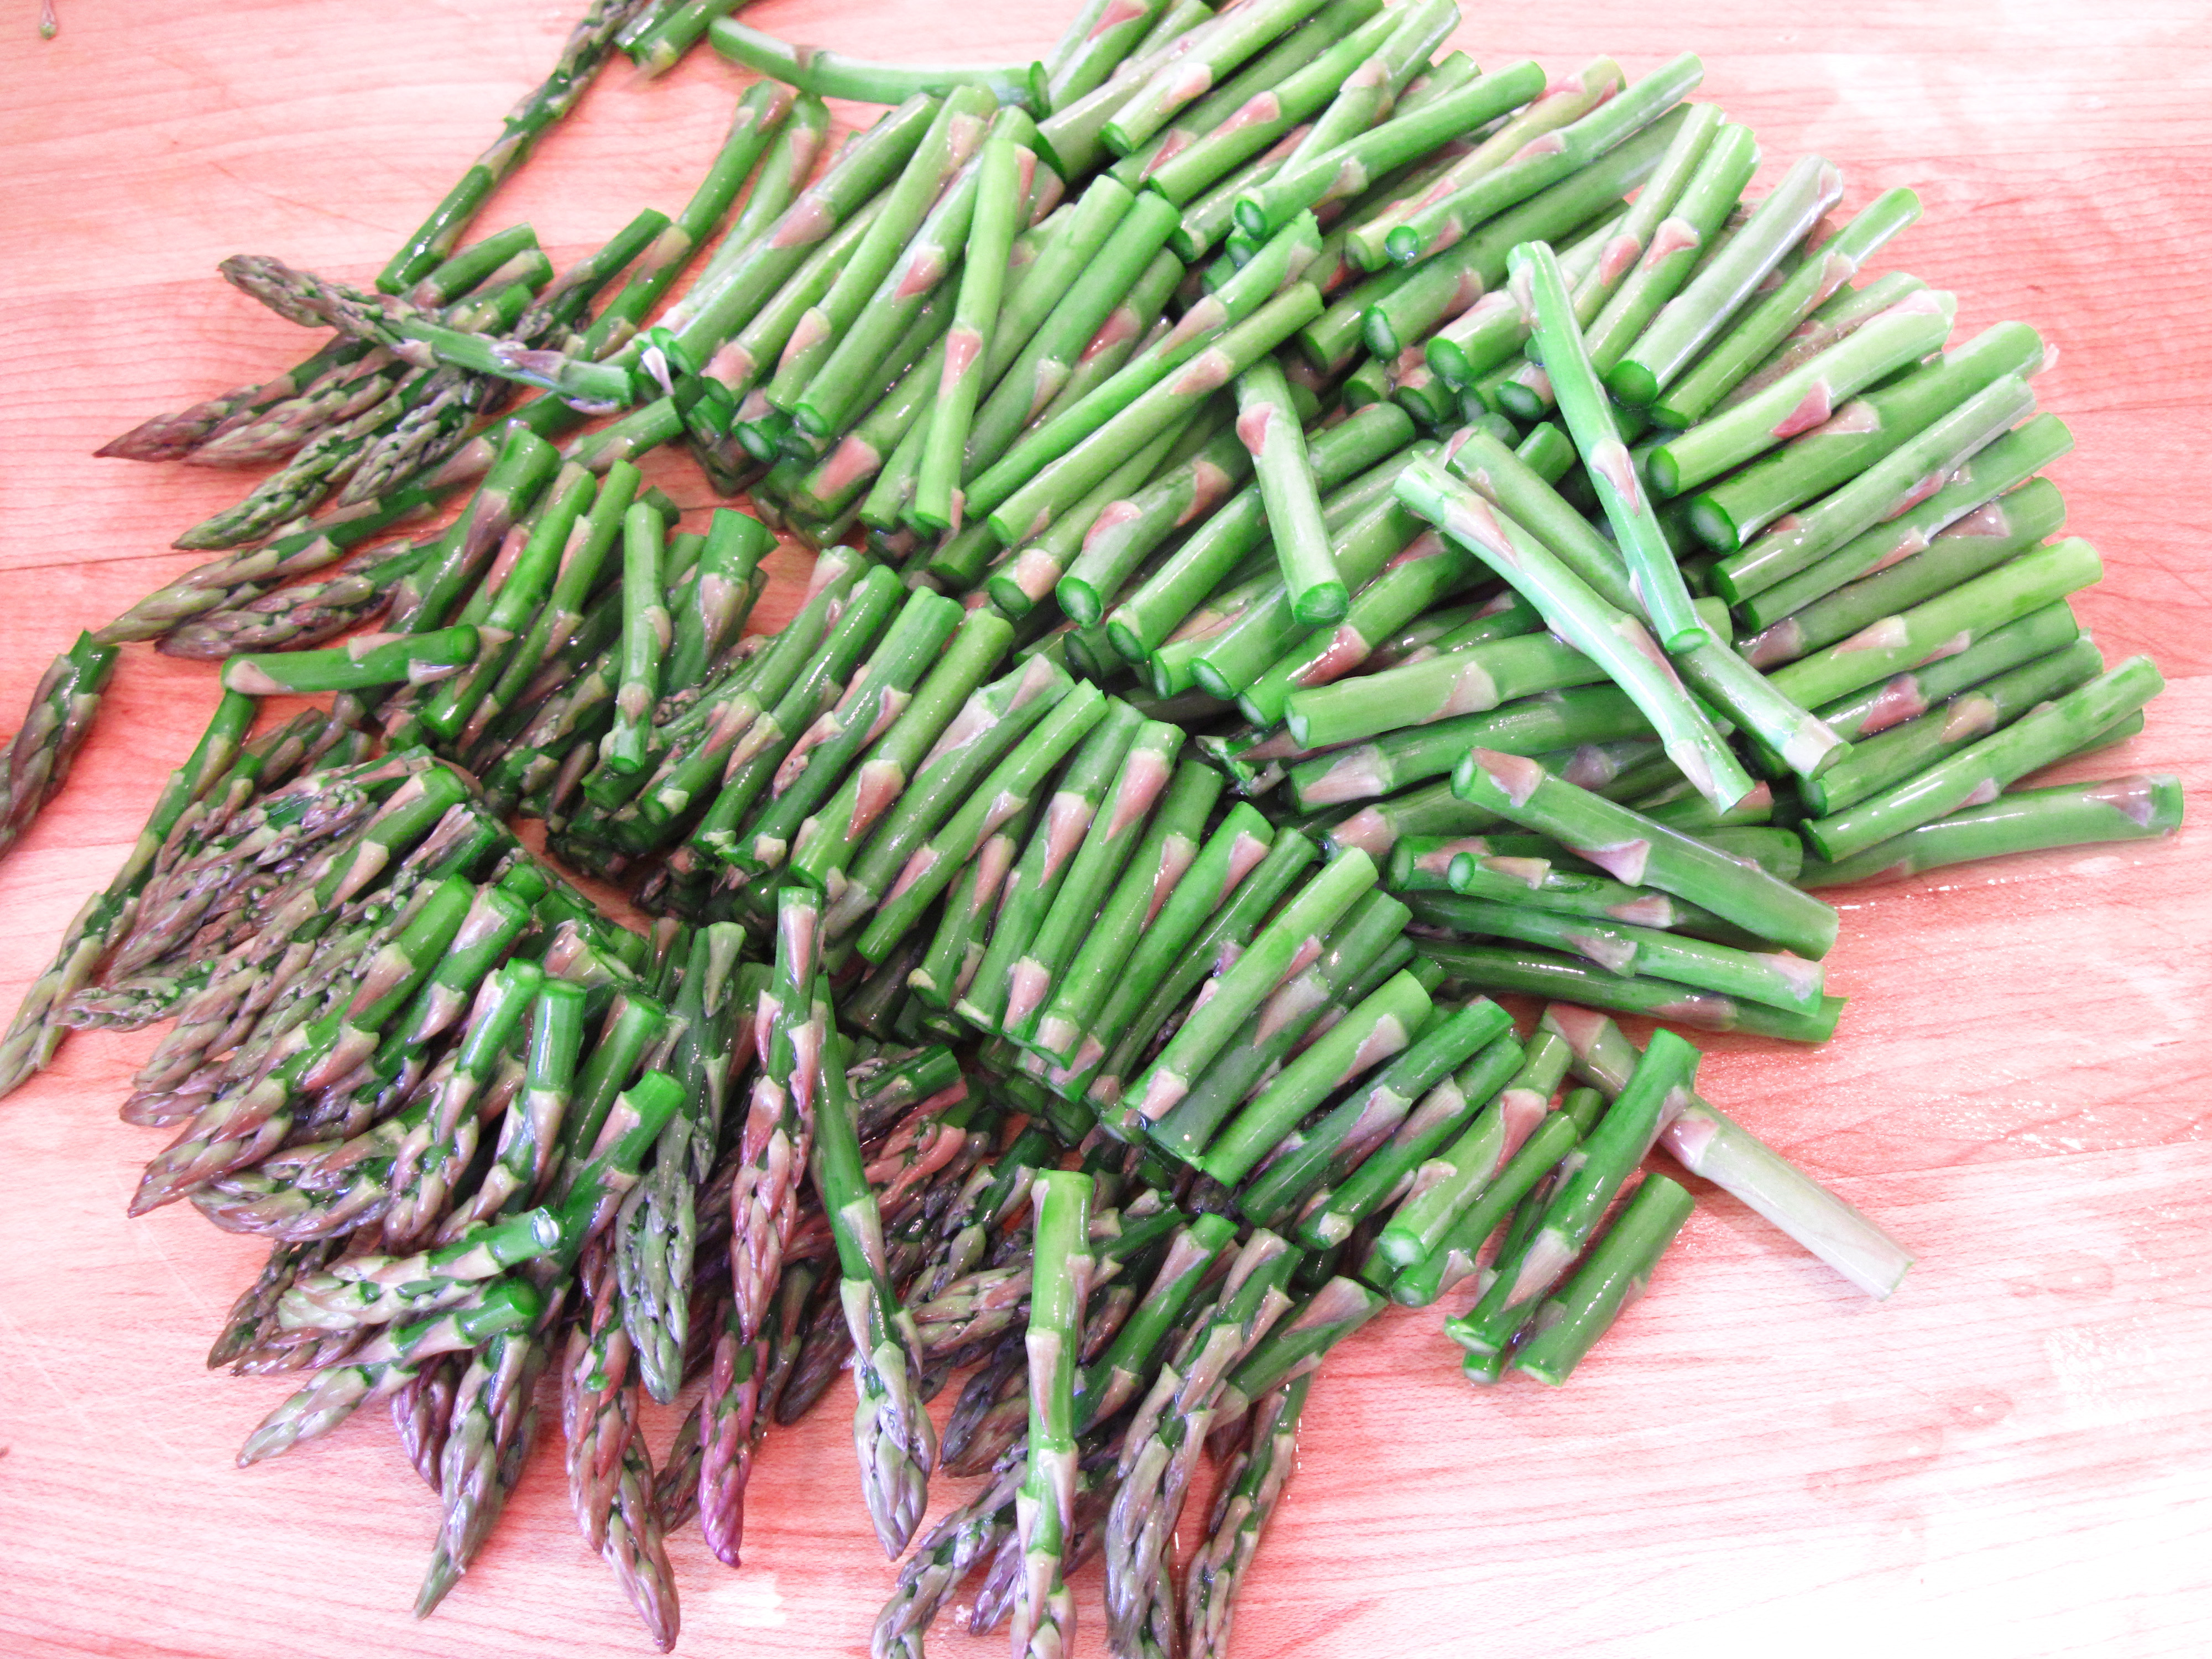
4. Wash the asparagus and trim the tough ends off. Cut the spears into 2 – 2½-inch lengths. Bring a pot of water to boil, add the asparagus and cook for 2 minutes. Drain and add to the bowl of lentils.
 a
a
Manchego Cheese, a Spanish sheep’s milk cheese

a
5. Toss together the lentils, asparagus, the remaining 2 cups of watercress, and some of the crumbled cheese. Garnish with the rest of the cheese.
6. Optional: At serving time drizzle with some walnut oil and serve with lemon wedges.
a
a
Share this:

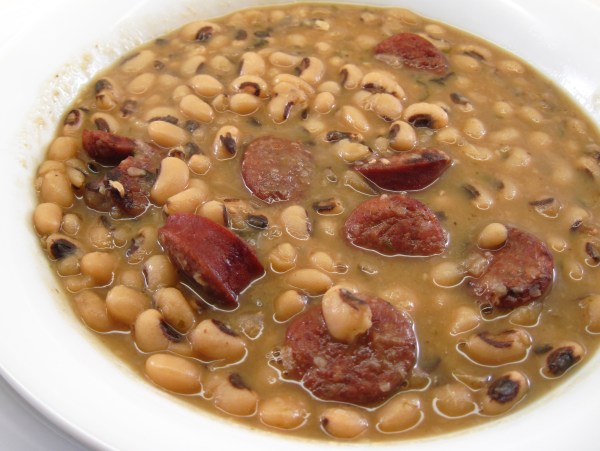
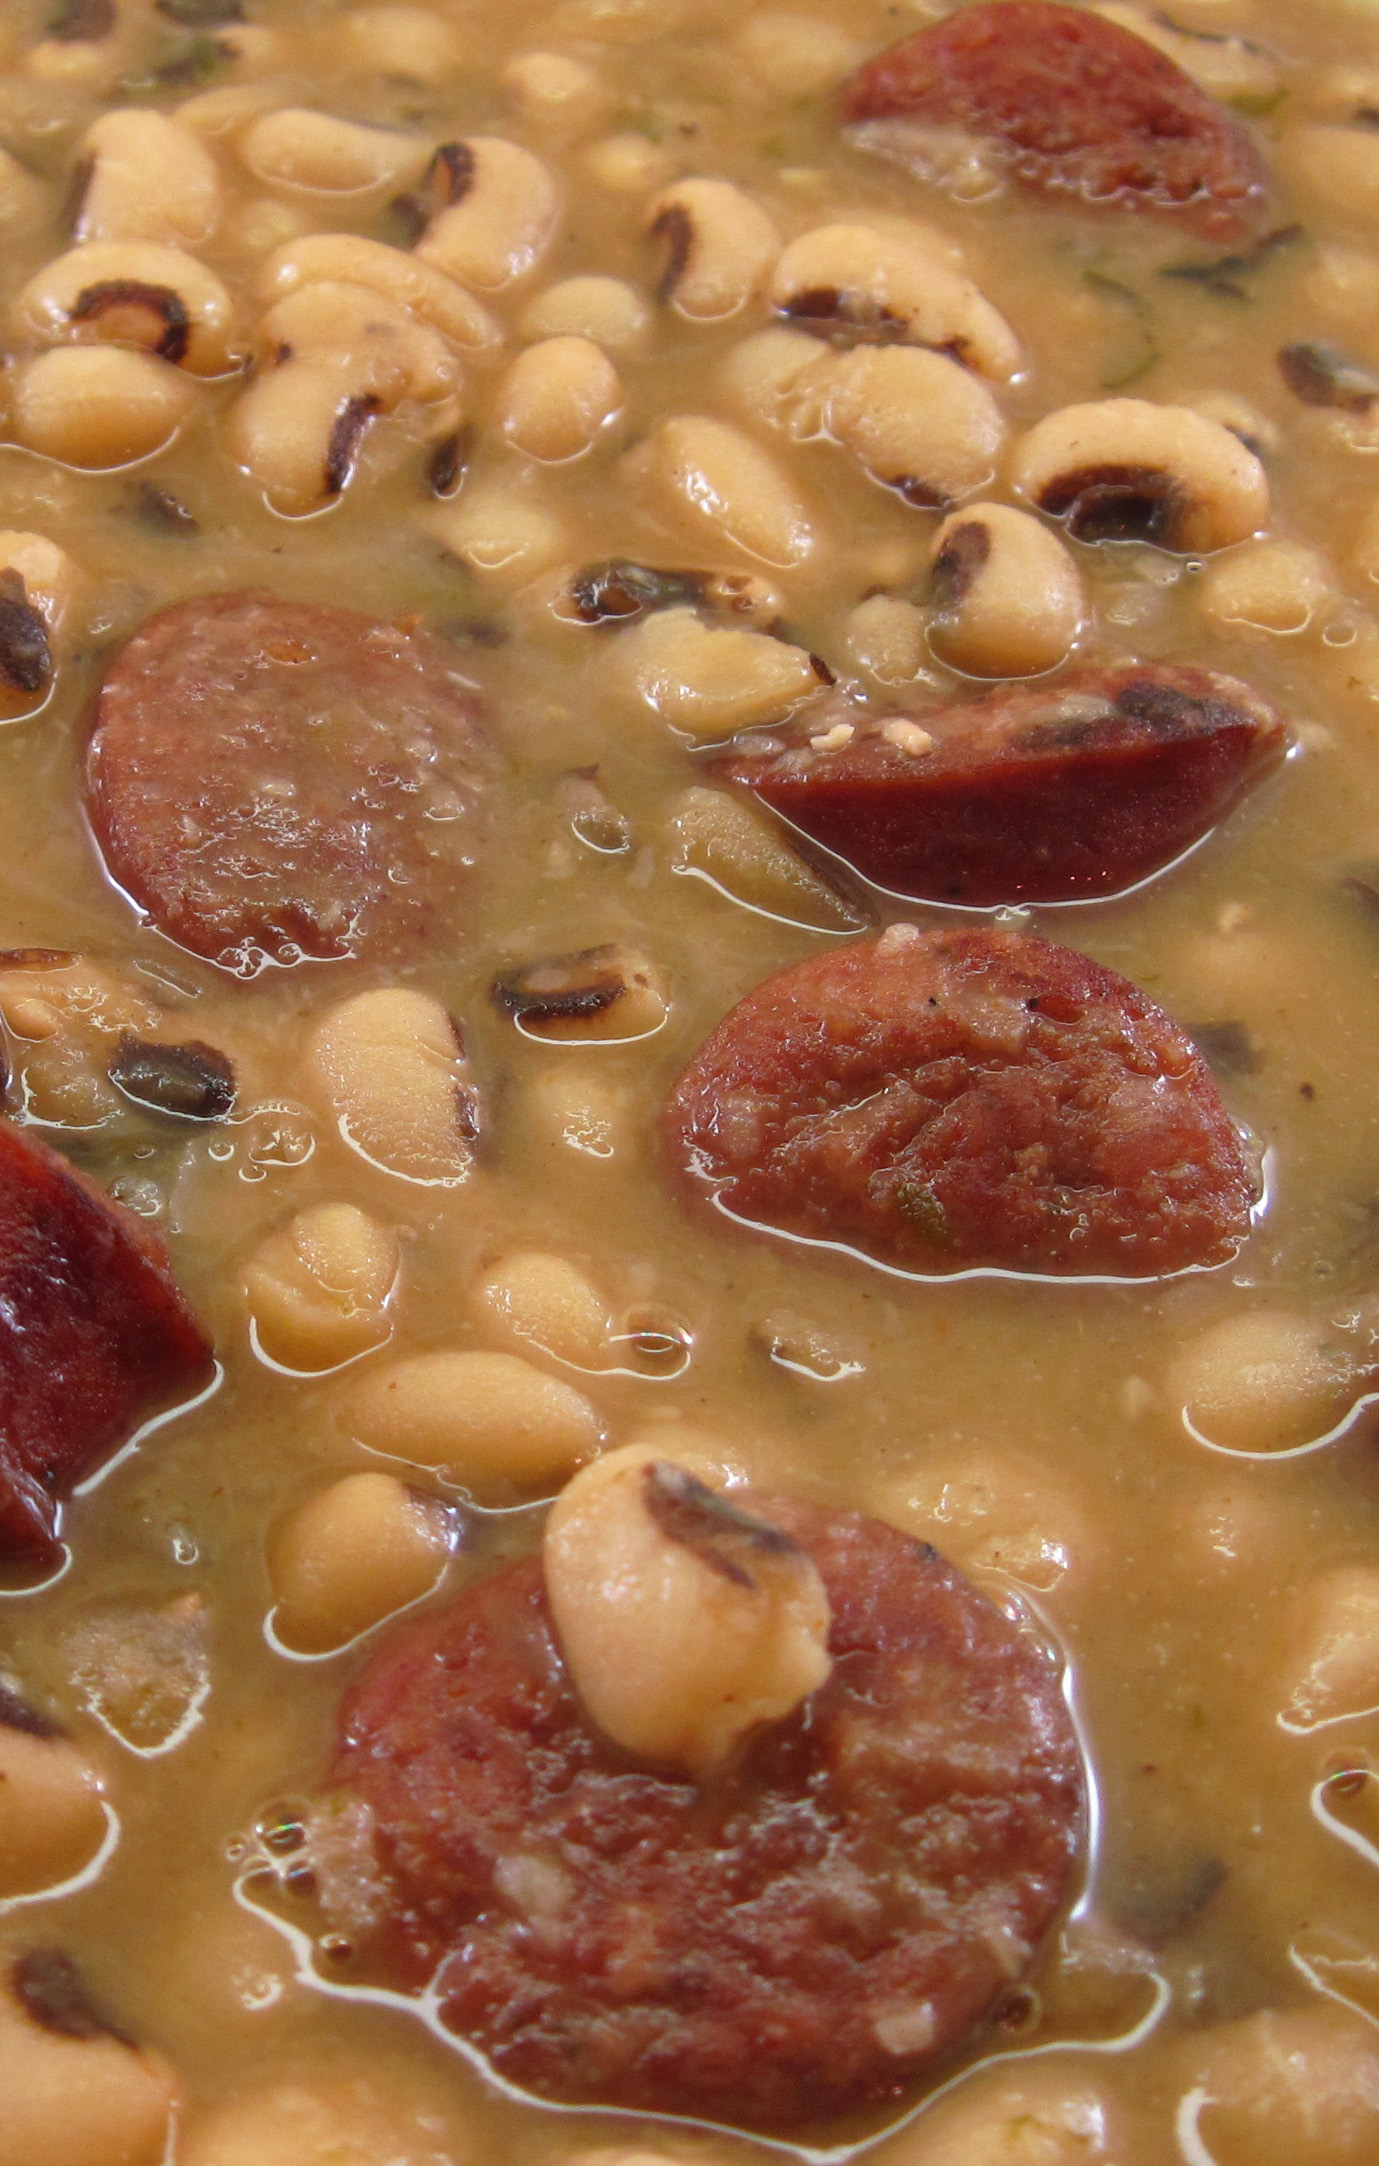
Smoked Sausage and Black-Eyed Peas
By Kath Dedon
.
Update January 1, 2018: This recipe takes about 2 hours, start to finish. You can shave off some time and have excellent results if you make it in an Instant Pot. I made it in my 6-quart Instant Pot yesterday. It took about 1 1/2 hours and was really delicious! Click here for the Instant Pot version.
.
Carrie told me about Emeril Lagasse’s Smoked Sausage and Black-Eyed Peas recipe a couple of years ago. I finally made it. I must say, I think it’s the best recipe for black-eyed peas that I have ever tasted! The seasoning is perfect. As a bonus, it is very easy to make.
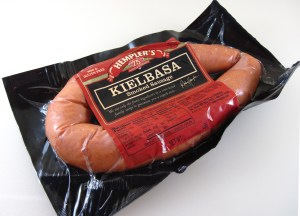
I used a 12-ounce Hempler’s Kielbasa sausage which was great! If you’re making the Smoked Sausage and Black-Eyed Peas for New Year’s, it’s best to use a pork sausage. Pork is said to bring good luck because pigs root moving forward. Thus, if you eat pork, you will move forward in the New Year. Chickens scratch backwards so chicken is not recommended for your New Year’s meal. This is not the time for chicken sausage! 😉
We ate collard greens on the side to cover all the bases. Emeril suggests corn muffins, which also would have been a good accompaniment.
Happy New Year to all!
a
a
Smoked Sausage and Black-Eyed Peas
(Adapted from Emeril Lagasse’s recipe)
a
Serves 4 – 6
a
a
12 – 16 ounces smoked sausage
1 cup chopped yellow onion
½ teaspoon salt
¼ teaspoon cayenne
4 whole cloves garlic, peeled
5 sprigs of fresh thyme
4 bay leaves
3 teaspoons finely chopped Italian parsley
8 cups chicken stock
1 pound dried black-eyed peas, rinsed and drained (They don’t need to be soaked.)
1 tablespoon minced garlic
Minced green onions, to garnish (optional)
a
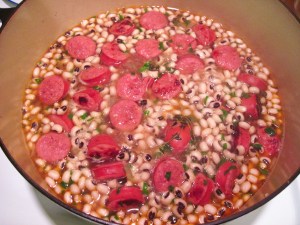
1. Slice the sausage and cook it in a large pot over medium heat to render some of the fat. (Mine didn’t yield much.)
a
a

a
2. Add the onions, salt, cayenne, whole garlic cloves, bay leaves, thyme, and parsley to the pan. Cook, stirring occasionally, for about 5 minutes, until the onion begins to soften.
3. Add the chicken stock, black-eyed peas, and minced garlic.
a
a
4. Bring to a boil, and simmer, covered for about 1 ½ hours, until the peas are tender. Serve garnished with green onions, if desired.
a

a
a
a
Share this:

Sicilian Swordfish Ragu
One of the best things about having a birthday just before Christmas is the fact that everyone in my family has always been home for the holidays. (And, of course, that includes my birthday, right?)
This year I celebrated my birthday in my favorite way – a family dinner at home that is not cooked by me! Carrie made Sicilian Swordfish Ragu, a delicious slow cooker pasta sauce, and Laura made a Mandarin Orange Cake! Everything was delicious! (Thank you, Laura and Carrie! ♥)
On the morning of my birthday I was thumbing through a book I had checked out from the library, The Italian Slow Cooker, by Michele Scicolone. It is full of recipes that I would like to try, and I think it’s a book I may have to add to my collection. Anyway, on my birthday I came across her recipe for Sicilian Swordfish Ragu and immediately thought, “This is what I want for my birthday dinner!”
The recipe makes enough sauce for a pound of pasta, easily serving 8 people, but it only uses one pound of swordfish so it’s an economical way to share a special fish.
The Sicilian Swordfish Ragu was so good! It’s a recipe I would, and probably will, make again. You could substitute any firm white fish for the swordfish. The sauce is so full of flavor; you could even skip the fish to make an excellent vegetarian sauce. This slow cooker recipe is definitely a keeper!
a

a
Sicilian Swordfish Ragu
(Adapted from a recipe in The Italian Slow Cooker, by Michele Scicolone)
a
Serve with a salad and a good crusty bread for a complete meal!
a
a
Makes 8 cups, plenty to sauce 1 pound of pasta
(Cut the recipe in half to make it in a 3½ quart slow cooker.)
a
¼ cup olive oil
3 medium celery ribs, chopped
2 medium carrots, chopped
5 garlic cloves, finely chopped
2 tablespoons finely chopped fresh Italian parsley
2 (28-ounce) cans of Italian peeled tomatoes with their juice
1 pound swordfish, skin removed
½ cup pitted and chopped Sicilian green olives
¼ cup rinsed, and drained capers (chopped if they are large)
½ teaspoon dried oregano
¼ teaspoon crushed red pepper flakes
Salt, to taste
a
For serving: 1 pound pasta (Cavatelli is suggested. Carrie used medium shells which were perfect for capturing bits of the sauce.)
a
1. Heat the olive oil in a large skillet until it is just warm. Add the celery, carrots, garlic, and parsley and cook, stirring occasionally, until the vegetables are soft. Do not let them brown. It will take 5 – 10 minutes.
2. Put the vegetables and oil into the slow cooker. Put the canned tomatoes in a strainer over the slow cooker so the juices drain in. Break the tomatoes with your hands into small pieces and add them to the slow cooker. Add just a bit of salt. Cover, and cook on Low for 3 – 4 hours, until it has thickened up a bit.
a

a
3. Add the olives, capers, dried oregano and the red pepper flakes. Stir, cover and cook on Low for another 30 minutes or so.
4. Cut the swordfish into 1/2 –inch pieces and stir it into the sauce. Cover and cook on Low for another 30 minutes. Taste the sauce for seasoning; add a bit of salt, if needed. (If the canned tomatoes are salted, you may not need any more.)
5. When the sauce is about done, cook the pasta according to the package directions in salted water. When the pasta is done, turn off the slow cooker, drain the pasta and gently stir it into the sauce in the slow cooker. Serve!
Share this:

Slow-Cooker Chicken Broth
I have a perfectly good 3½ quart slow cooker that I have had for a long time. It still works great, and I have some recipes that are perfect for the smaller size. However, I found there were times when I would like to have a larger slow cooker. So, I recently treated myself to a new 6-quart Crock-Pot and I love it!
One of the first things I tried was Slow-Cooker Chicken Broth from Slow Cooker Revolution, published by America’s Test Kitchen. They experimented and found that they got the best results using just chicken wings, onion, garlic, and salt. I loved the simplicity so I decided to give it a try.
All of the recipes in the book were cooked in a Crock-Pot 6½ quart slow cooker. I put all of the ingredients in mine and it was pretty full; I was afraid it might boil over. I decided to pare it down a bit for my 6 quart cooker, but it cooked on Low at such a gentle simmer that I think I could have gotten away with using the original quantities. I’ll probably try the original quantities next time.
a
If you have a large slow cooker, here are the quantities used by America’s Test Kitchen:
– 3 pounds chicken wings
– 3 quarts water
– 1 medium onion, chopped medium
– 3 medium garlic cloves, peeled and crushed
– 1 teaspoon salt
a
I was very pleased with the Slow-Cooker Chicken Broth! I froze it in quart bags, putting 1¾ cups in each bag, which is the equivalent of 1 can of chicken broth. I recently made Quick and Easy Chicken Noodle Soup using two bags of my frozen broth instead of two cans of chicken broth. It was every bit as easy for a weeknight dinner, but it was so much better with the homemade broth!
a
Homemade Slow-Cooker Chicken Broth

a
Slow-Cooker Chicken Broth
(Adapted from a recipe in America’s Test Kitchen’s Slow Cooker Revolution)
a
a
Makes about 2¾ quarts, or the equivalent of about 5 cans.
aa
(These are the quantities I used in my 6 quart slow cooker.)
2½ pounds chicken wings
2½ quarts water
¾ large onion, chopped into medium dice
2 large garlic cloves, peeled and crushed
¾ teaspoon salt
a
1. Put everything in the slow cooker. Cover and cook on Low for 8 – 9 hours. (Or cook on High for 4 – 5 hours.)
a

a

a

a
2. Strain the broth through a fine-mesh strainer into a large pot or container. (I find it easiest to scoop the chicken wings into the strainer first and let them drain a bit. Then I discard them and strain the broth through the strainer.)
3. The broth can be used right away, or refrigerate it until it is cool. At this point it’s easy to skim off and discard the fat, if desired. The broth will keep in the refrigerator for 4 days, or in the freezer for up to 2 months.


