Welcome!
You'll find over 470 of my favorite recipes here, including ideas for Quick meals, Cooking for 2, Feasting on Leftovers, and cooking with 5 Ingredients or Less. I'm adding new posts regularly; you can subscribe by email or RSS feed if you'd like to receive the latest recipes. Bon appétit!
Cabbage Braised with Onions
By Kath Dedon
.
I had a head of cabbage that needed to be used last night. Searching my cookbooks, I discovered Mark Bittman’s Cabbage Braised with Onions from How to Cook Everything.
Cabbage Braised with Onions is easy to make and uses ingredients that you probably already have on hand. The touch of cayenne pepper gives it just enough spiciness to make it interesting. It’s a great fall side dish that I’m sure to make again!
a
Cabbage Braised with Onions was terrific with Pork Chops à la Julia

a
Cabbage Braised with Onions
(Adapted from Mark Bittman’s recipe in How to Cook Everything)
a
a
Bittman uses 3 tablespoons of butter or oil. I used 1½ tablespoons of olive oil and was pleased with the results.
a
Serves 4
a
2 cups sliced onions
1½ – 3 tablespoons butter or olive oil (see note above)
3 tablespoons tomato paste
¼ teaspoon cayenne pepper, or to taste
½ cup water
1½ – 2 pounds cabbage, cored and shredded
Salt and freshly ground pepper to taste
a
1. Put the onions in a large pot over medium-low heat. Cover and cook, stirring occasionally, until the onions have released some water. It will take about 10 minutes.
2. Add the butter or oil to the pan. Raise the heat to medium, and continue to cook the onions with the cover on until they have browned a bit, about 10 more minutes. Stir occasionally during the browning.

a
3. Add the cabbage, tomato paste, cayenne pepper, and water to the pot.

a
4. Stir the cabbage well until all of the ingredients are well distributed.

a
5. Cover and cook, stirring occasionally, for about 30 minutes. Add salt and pepper to taste.
Share this:

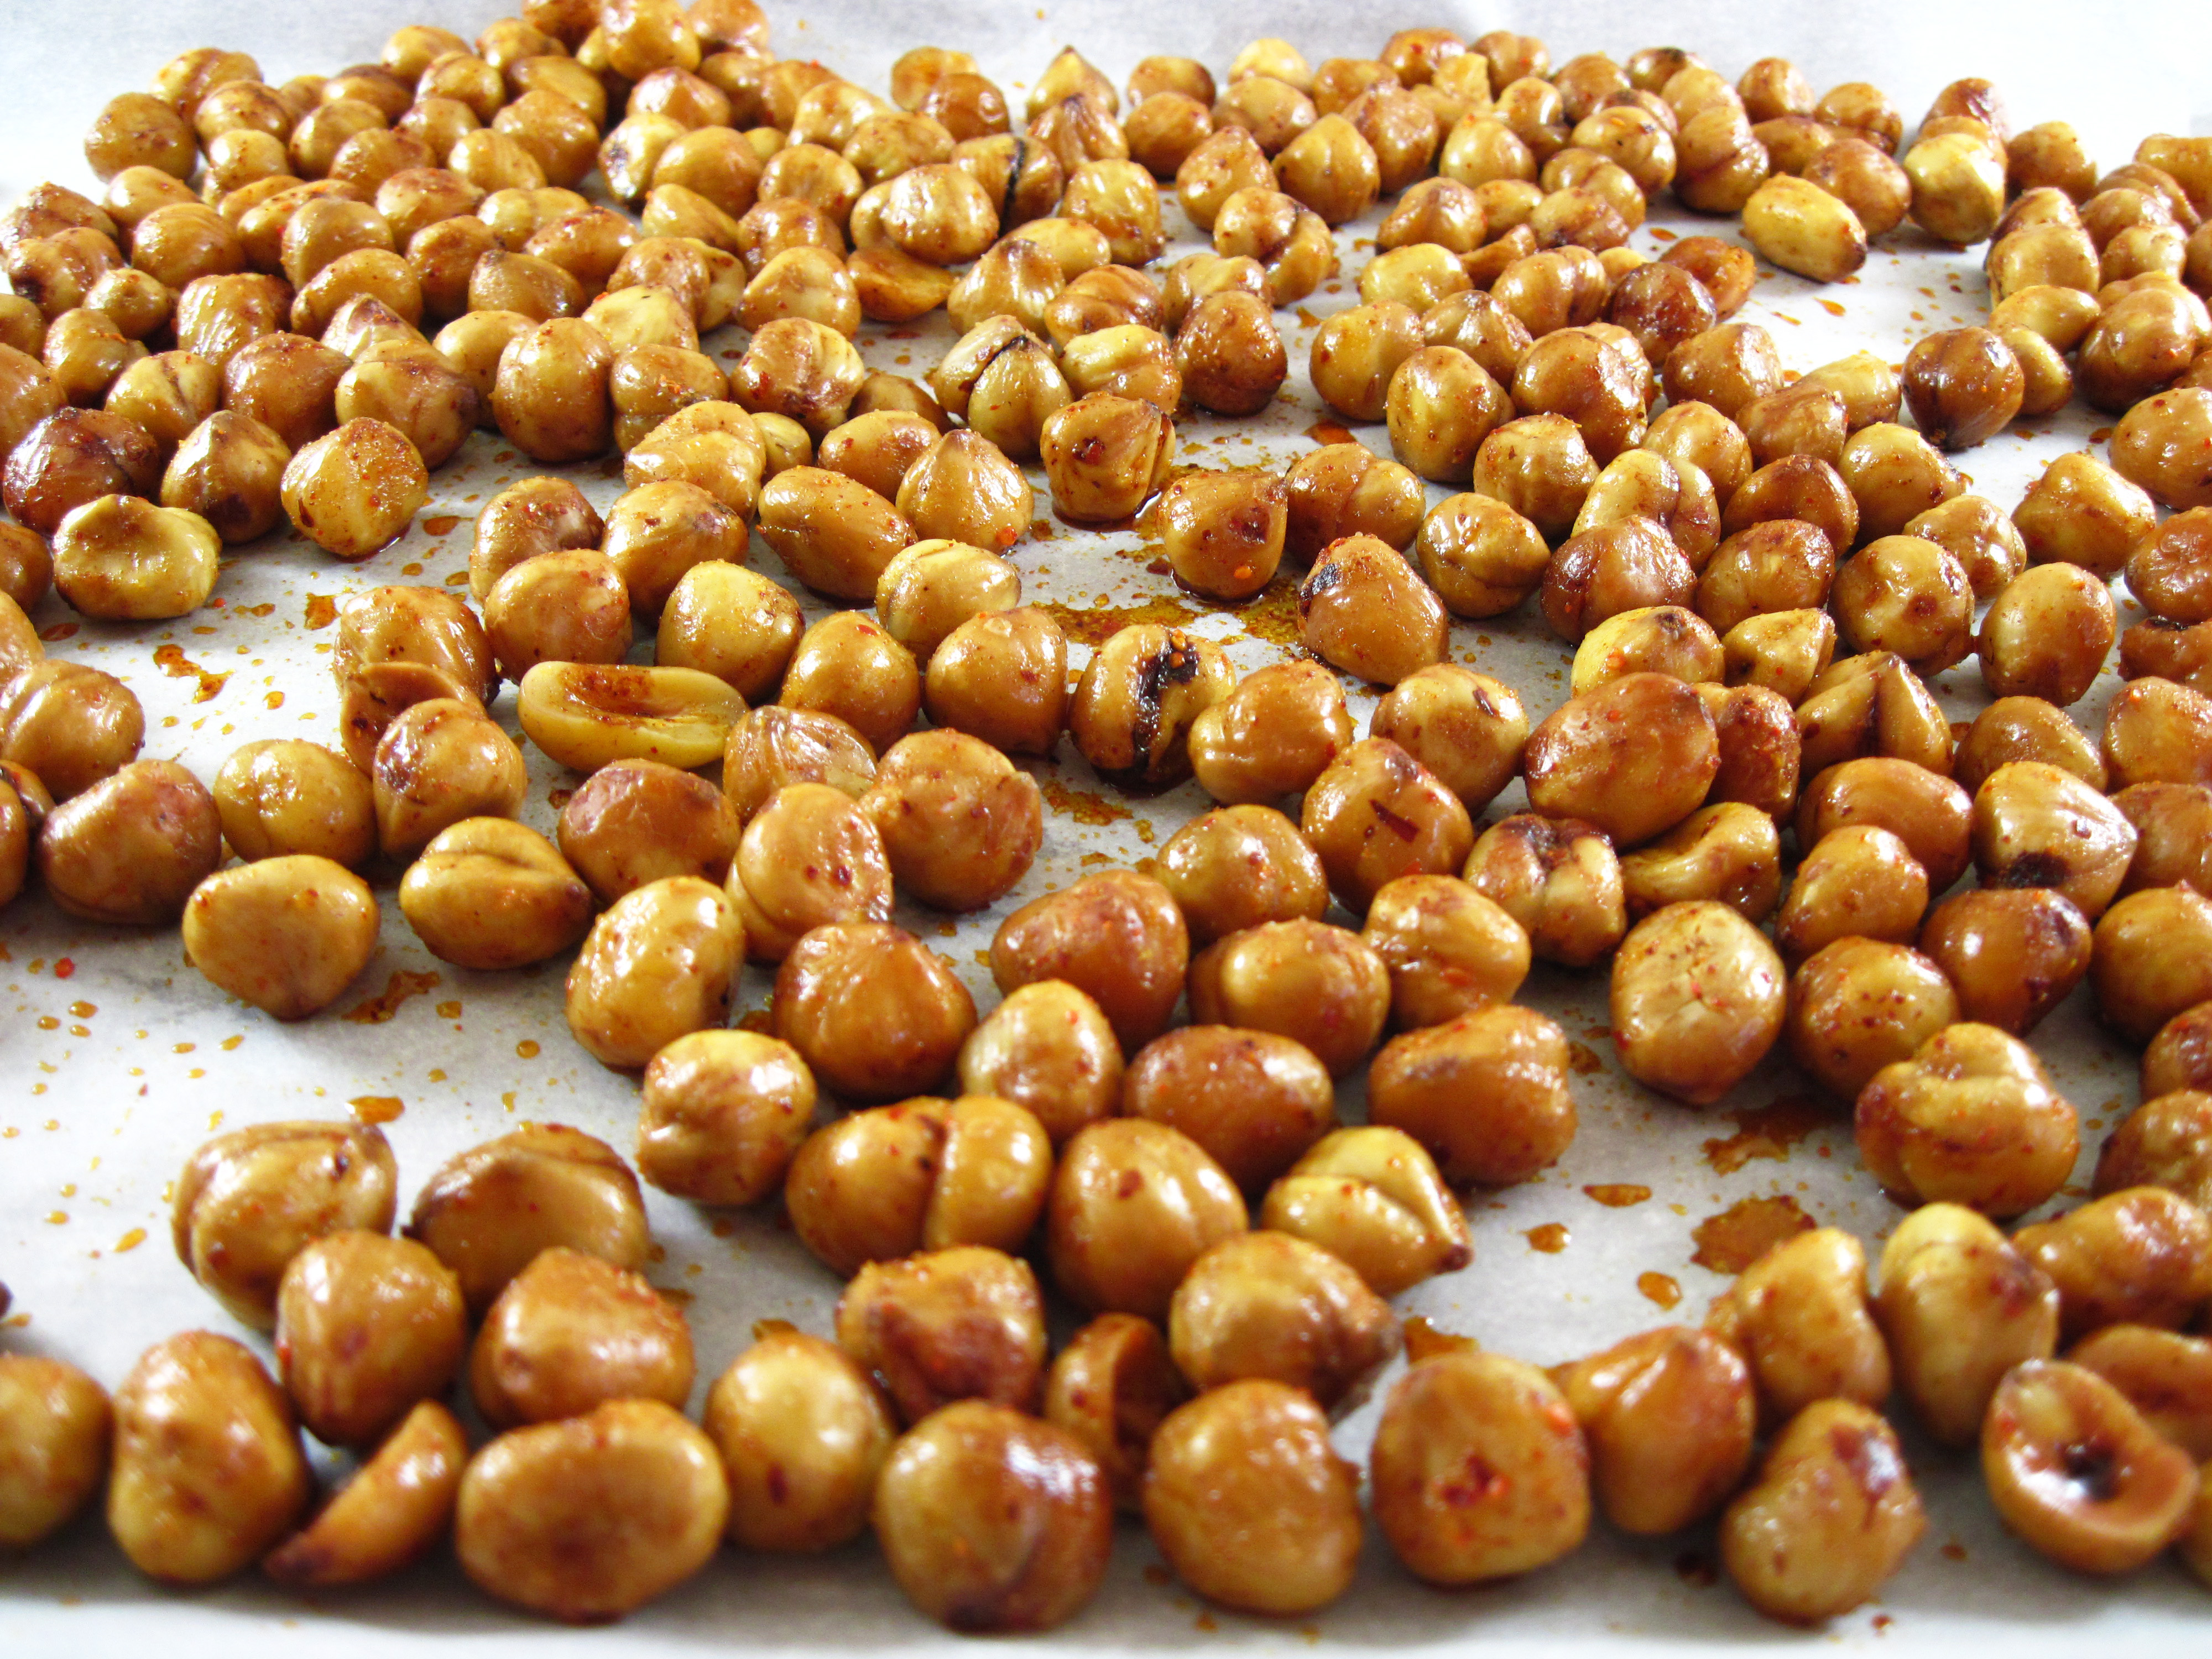
Spiced Roasted Hazelnuts
By Kath Dedon
.
Spiced Roasted Hazelnuts is an adaptation of Thomas Keller’s recipe for Spiced Mixed Nuts in Ad Hoc at Home. Keller uses raw hazelnuts, pecans, and walnuts. I decided to just use hazelnuts.
If you are able to find blanched hazelnuts (nuts that have had the skin removed), this is a quick recipe. The hazelnuts I bought had skins so I had to remove them. That was the most time-consuming part of the recipe.
I found Alice Medrich’s method for peeling hazelnuts online. In this video, she shows Julia Child how to do it. Using her method, I put the 3 cups of hazelnuts and 9 tablespoons of baking soda into 6 cups of boiling water in a tall 8-quart pot. Even in the large pot, I had to stir it often to keep it from boiling over. So if you try this, use a tall pot! After they boiled for 3 minutes, I drained them and put them into a large bowl of ice water. I then had to take the skin off of each nut. The skins came off very easily, but it took a bit of time. As I peeled them, I put them on a kitchen towel to dry them off. When all of the nuts are skinned, roll them in the towel to further dry them. (I was glad I used an old towel, because it did become stained from the skins.)
Once you have the hazelnuts skinned, you’re ready to proceed with the recipe.
Looking at the ingredients, I wondered what made the nuts spicy. It turns out that piment d’Espelette is quite spicy. It’s a type of paprika that is used in the Basque region of southern France. This is a new seasoning for me; I can’t wait to try it in other things!
I tasted the spiced oil before adding the roasted nuts and decided that it needed more salt. Keller uses ¼ teaspoon; I increased it to ½ teaspoon.
These Spiced Roasted Hazelnuts are quite tasty! I’m sure I’ll be making this again. I may try Keller’s combo of hazelnuts, pecans, and walnuts.
a
a
Spiced Roasted Hazelnuts
(Adapted from Thomas Keller’s recipe in Ad Hoc at Home)
a
Makes 3 cups
\ a
3 cups raw blanched hazelnuts (see recipe notes above)
2 tablespoons extra virgin olive oil
½ teaspoon sweet paprika
½ teaspoon piment d’Espelette
½ teaspoon fine sea salt
a
1. Preheat the oven to 350˚.
2. Mix the olive oil, sweet paprika, piment d’Espelette, and salt together in a medium bowl.
3. Add the nuts to the oil mixture and stir well so that all of the nuts are evenly covered with the oil.
4. Spread the nuts out on a large rimmed baking sheet, lined with parchment paper if you wish.
5. Roast the nuts for about 20 minutes. Allow them to cool completely on the baking sheet before using or storing.
Share this:

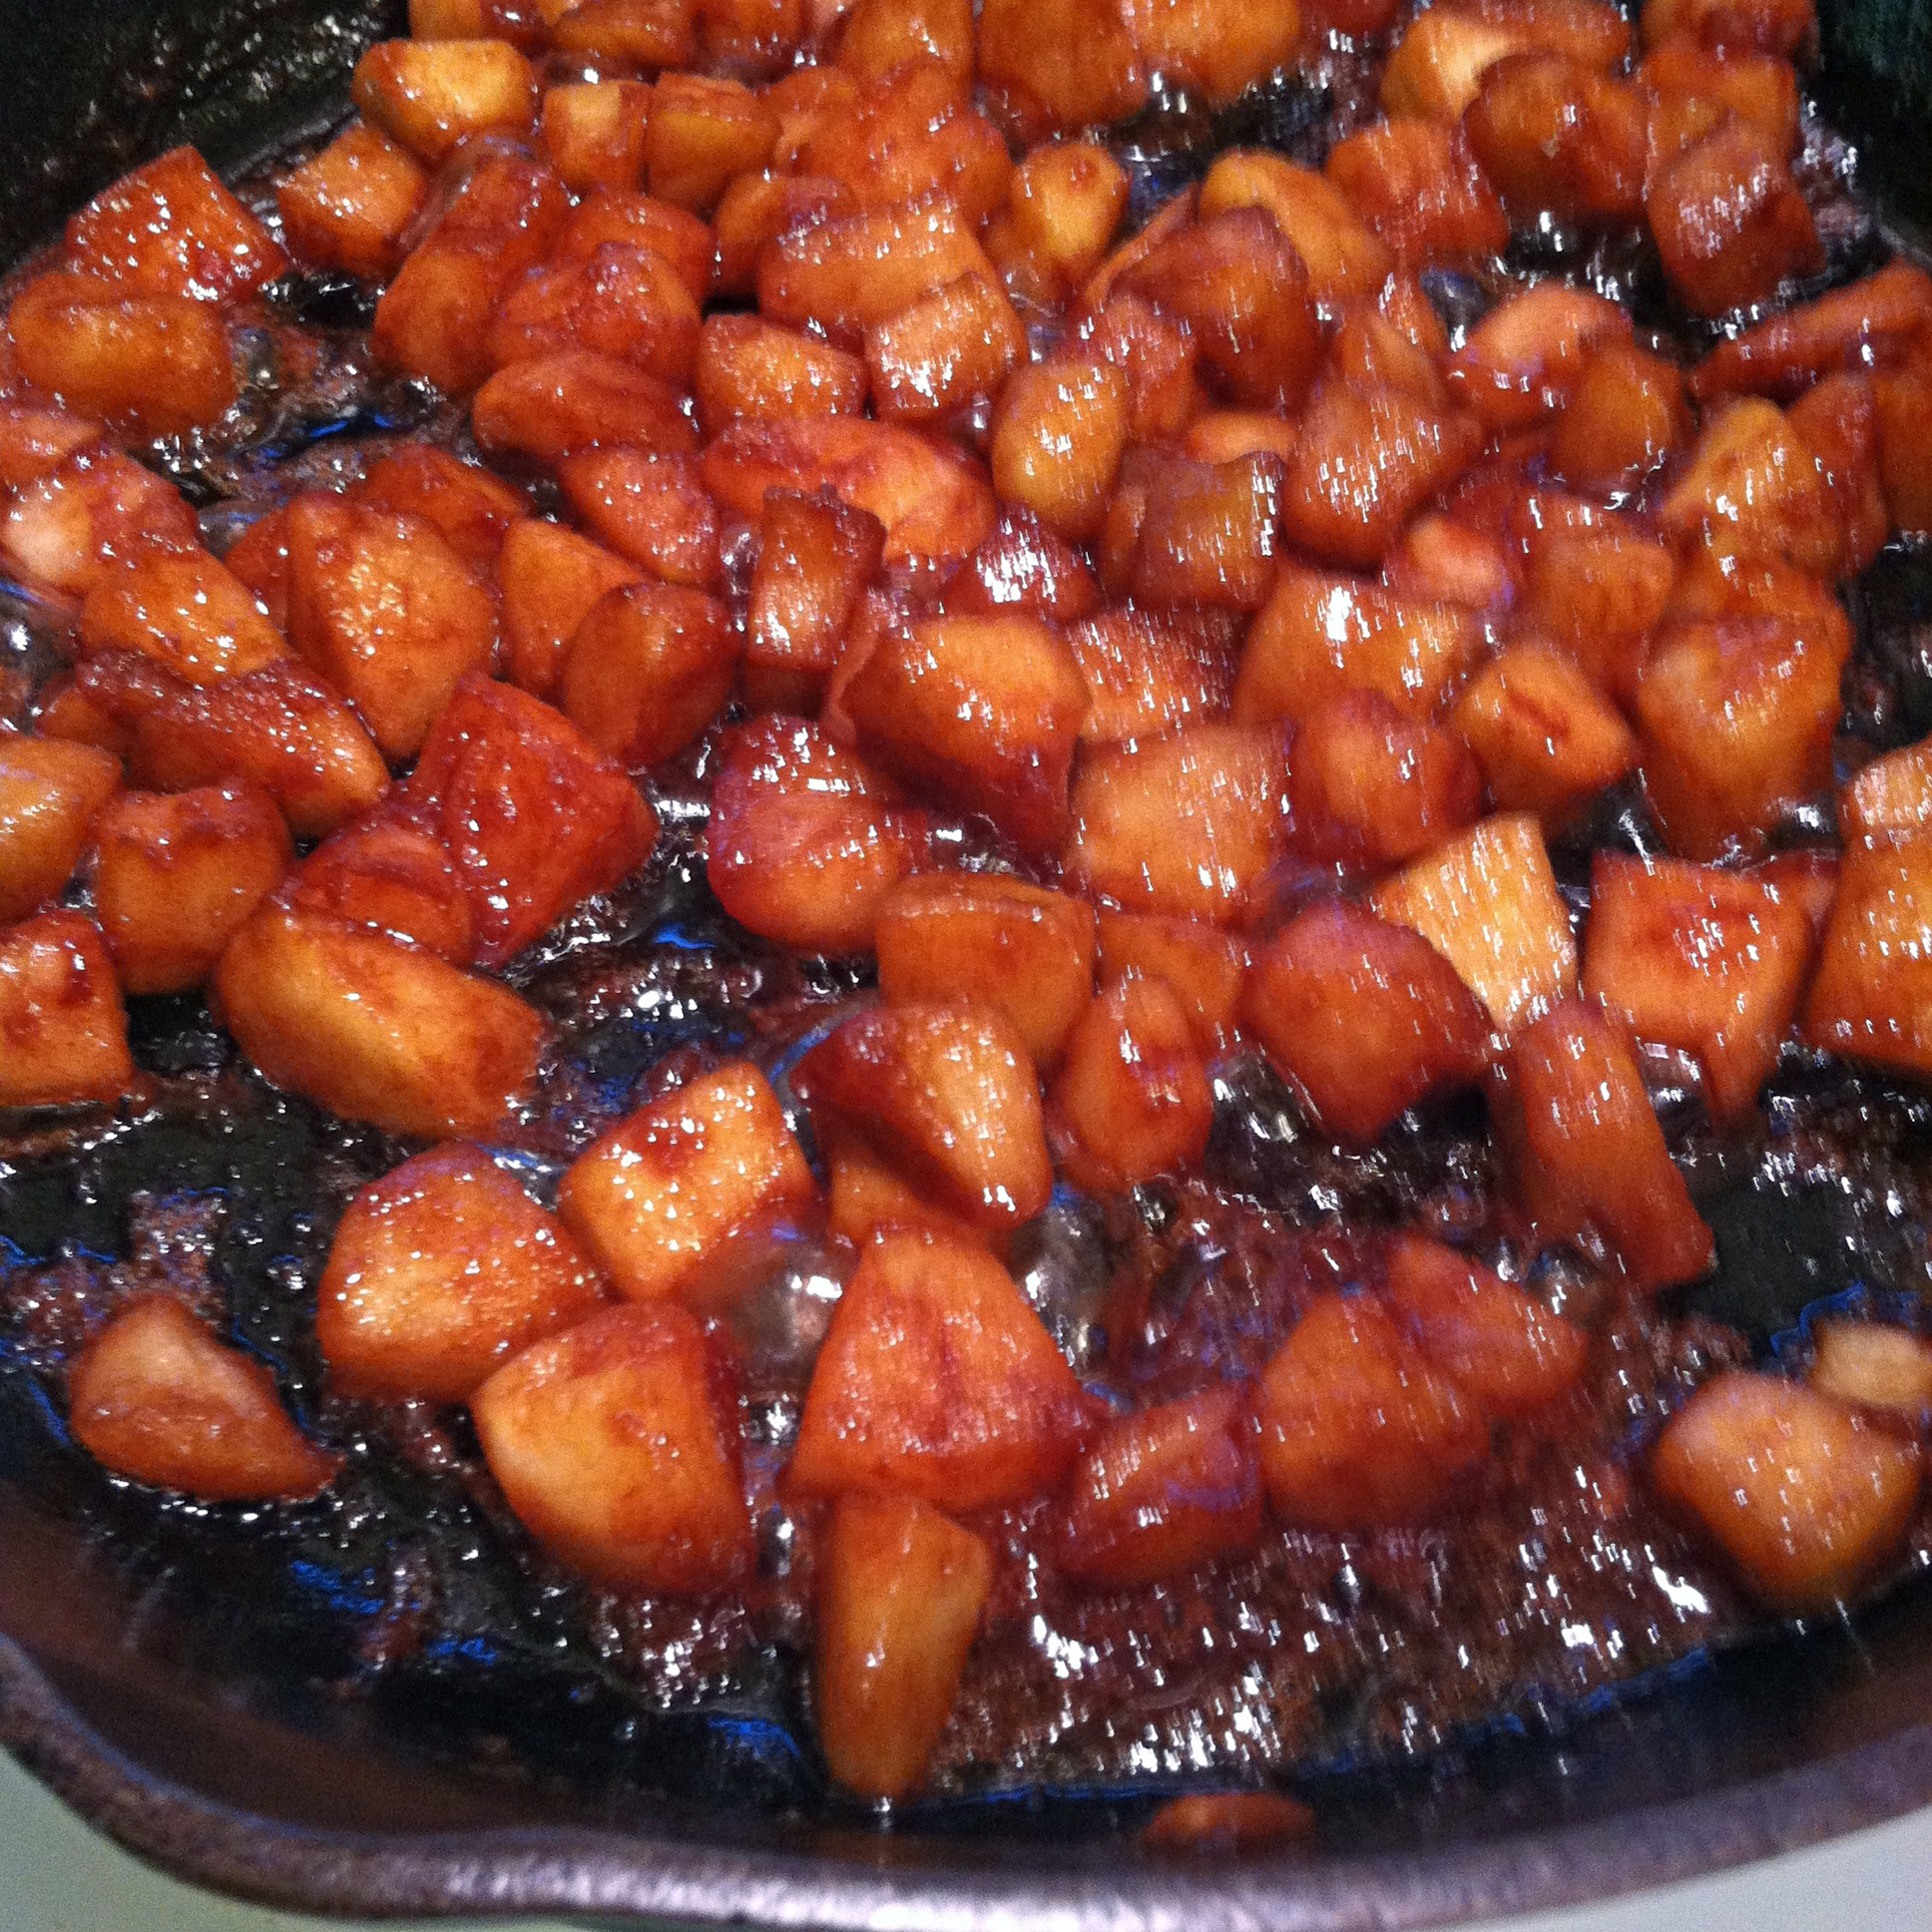
Caramelized Apples
By Kath Dedon
.
Caramelized Apples just taste like fall! The creator of the recipe, Chris of The Café Sucré Farine, used the apples to top her beautiful homemade butterscotch pudding. (That looks like a must-try recipe!) For a quick and easy dessert, I found they were great served warm over vanilla ice cream.
It takes just a few minutes to make Caramelized Apples. I made it ahead of time and reheated it quickly in the microwave when it was time to serve dessert. Delicious!
What other ways would you use the apples?
a
My iPhone photo could be better, but these Caramelized Apples are fantastic!
a
Caramelized Apples
(Adapted from Chris Scheur’s recipe on http://www.thecafesucrefarine.com)
a
a
Serves 4
a
3 large Granny Smith apples (about 1½ pounds), peeled and cut into ½-inch pieces
2 tablespoons butter
3 tablespoons maple sugar (or dark brown sugar)
1 teaspoon cinnamon
Pinch of sea salt
a
1. Melt the butter in a large skillet over medium low heat. (Chris recommends a nonstick skillet. My cast iron skillet worked fine.)
2. Stir in the maple sugar, cinnamon, and sea salt. Cook and stir until it is bubbly, about 2 or 3 minutes.
3. Stir in the apples. Cook, stirring occasionally, for about 8 – 10 minutes. The apples will become tender and the sauce will become smoother.
4. Serve warm, or allow it to cool off and reheat it when you’re ready to use it.
Share this:

Hungarian Beef Stew
By Kath Dedon
.
A little Hungarian Wax Chile Pepper from Laura and Byron’s garden inspired me to try this new recipe – Hungarian Beef Stew.
I first thought I wanted to make Hungarian Goulash but after doing some online searching I realized that Hungarian Goulash is more of a soup. I wanted a stew, so I was actually more interested in Pörkölt. The Cook’s Illustrated Cookbook had just the right recipe.
a
Hungarian Beef Stew served over noodles

a
The main ingredients of an authentic Hungarian Beef Stew are boneless beef, onions, and sweet Hungarian paprika. Cook’s Illustrated advised against using a hot, or a smoky Spanish paprika. And because paprika is such a key ingredient in the recipe, it’s best to get a new container instead of using an old one that has lost its flavor. Knowing nothing about Hungarian paprika, I simply chose the one brand that was available at my store. (I keep all of my varieties of paprika in the refrigerator to help them stay fresh longer.)

Bob and I both really enjoyed this Hungarian Beef Stew. It’s easy to make, but it takes some time for the long braise. This isn’t a recipe I would cut in half because the leftover stew tastes really terrific. I served it over noodles the first night and served leftover stew over smashed Yukon gold potatoes. It was delicious both ways!
a
Hungarian Beef Stew
(Adapted from a recipe in The Cook’s Illustrated Cookbook)
a
A tight-fitting lid on your pot is essential for this success of this recipe. You don’t want the liquid to escape and evaporate. My Le Creuset Dutch oven worked fine. If your lid does not seal your pot well, cover the pot with a sheet of heavy duty aluminum foil before putting the lid on.
a
a
Serves 6
a
1 (3½ – 4-pound) boneless beef chuck eye roast, pulled apart at the seams, trimmed, and cut into 1½-inch pieces
Salt and pepper
1/3 cup Hungarian sweet paprika
1 cup jarred roasted red peppers, rinsed and patted dry
2 tablespoons tomato paste
1 tablespoon white vinegar
2 tablespoons oil (I used light olive oil.)
4 large onions (about 2½ pounds), chopped fine
4 large carrots, peeled and cut into rounds
1 bay leaf
If needed: Up to 1 cup beef broth (I did not need it.)
a
1. Put the oven rack in the lower third of the oven and preheat to 325˚.
2. Toss the beef with 1 teaspoon of salt and let it sit for 15 minutes.

a
3. Process the paprika, roasted peppers, tomato paste, and 2 teaspoons of vinegar in a food processor. (My mini-prep food processor worked fine.)
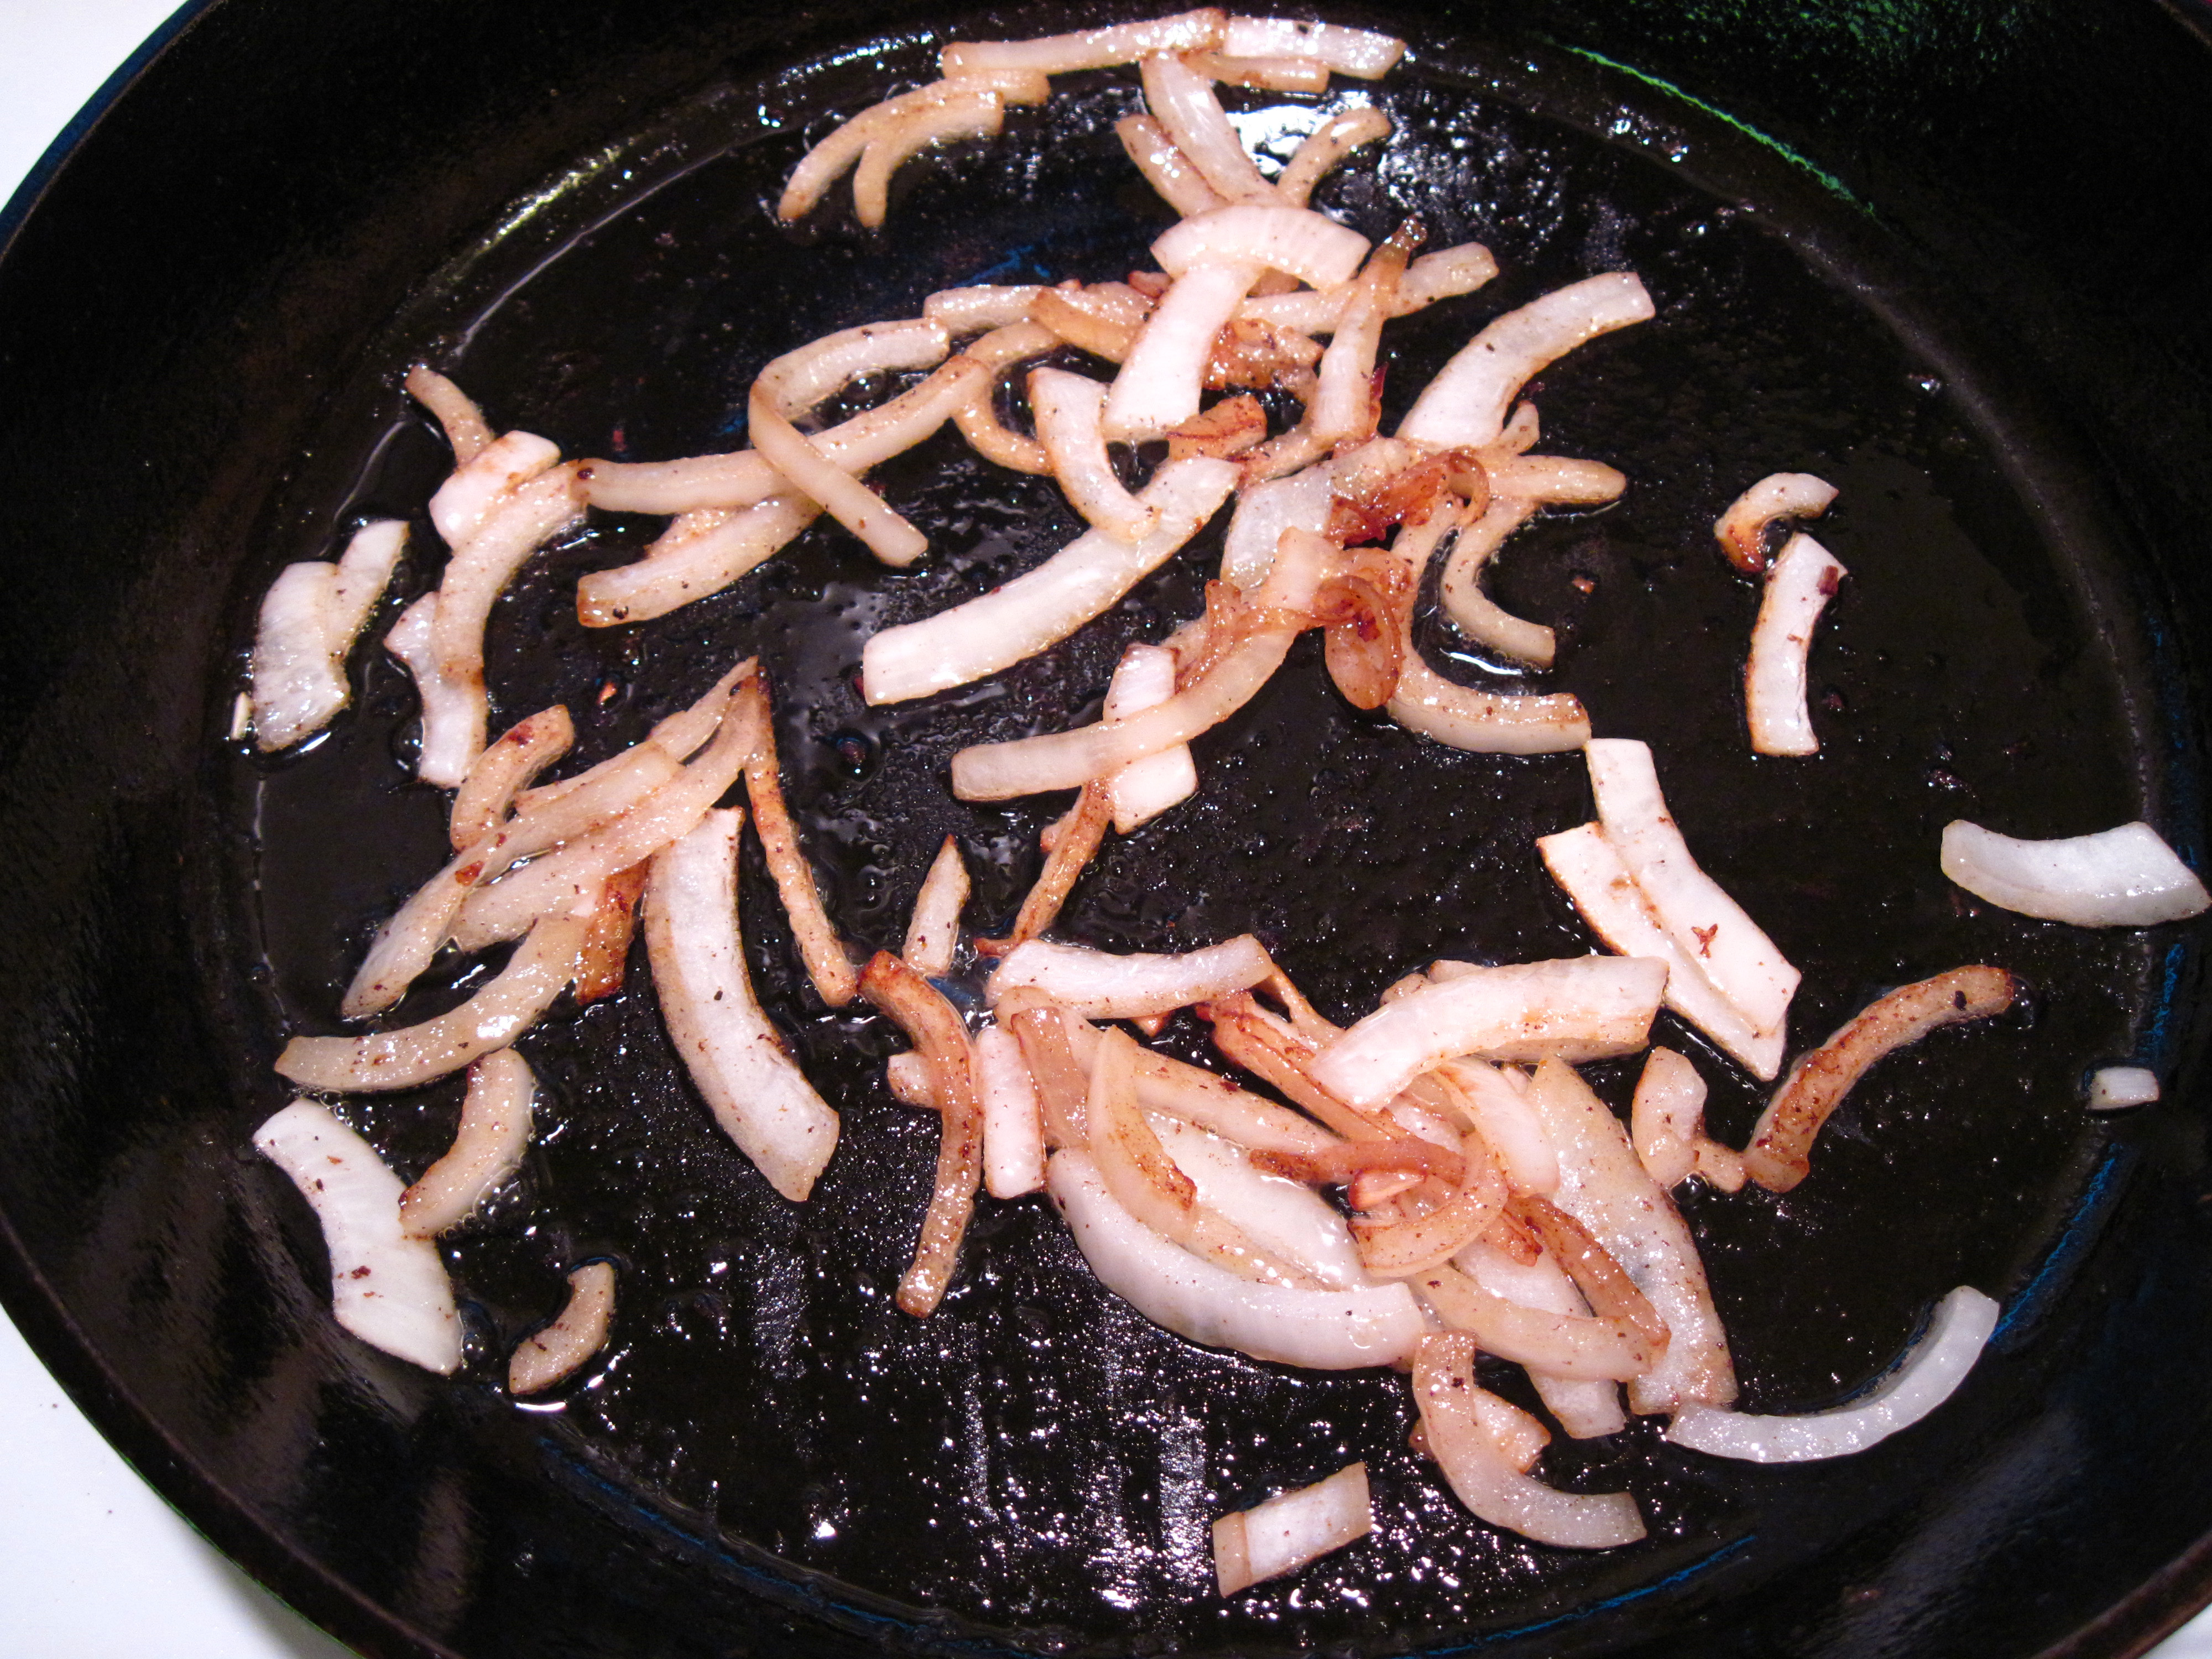
4. Stir the onions, oil, and 1 teaspoon of salt together in a Dutch oven. Cover and cook, stirring occasionally, over medium low heat for about 8 – 10 minutes, or until the onions have softened but have not started to brown.
a
It’s a lot of onions, but they don’t over-power in the final dish.

a
5. Add the paprika mixture to the pot and cook, stirring occasionally, for about 2 minutes.

a
6. Add the beef, carrots, and bay leaf to the pot and stir until the beef is well coated with the onion/paprika mixture.
7. Cover the pot and put it in the oven. Cook for about 2½ hours, stirring the stew every 30 minutes.
8. At this point, stir in just enough beef broth so the liquid is ¼ inch from the top of the meat. (When I made it, the liquid was already about ¼ inch below the top, so the beef broth wasn’t necessary.)
9. Put the pot back in the oven and continue to cook for about 30 more minutes. By this time the beef should be fork-tender.
10. Skim any excess fat from the top of the stew. Remove the bay leaf and stir in the remaining 1 teaspoon of vinegar. Season to taste with salt and pepper.
11. Serve over egg noodles or boiled and smashed potatoes.
a
The lovely little Hungarian wax pepper that inspired me was not used in the stew. We enjoyed it cut up in our salad. 🙂

a
Share this:

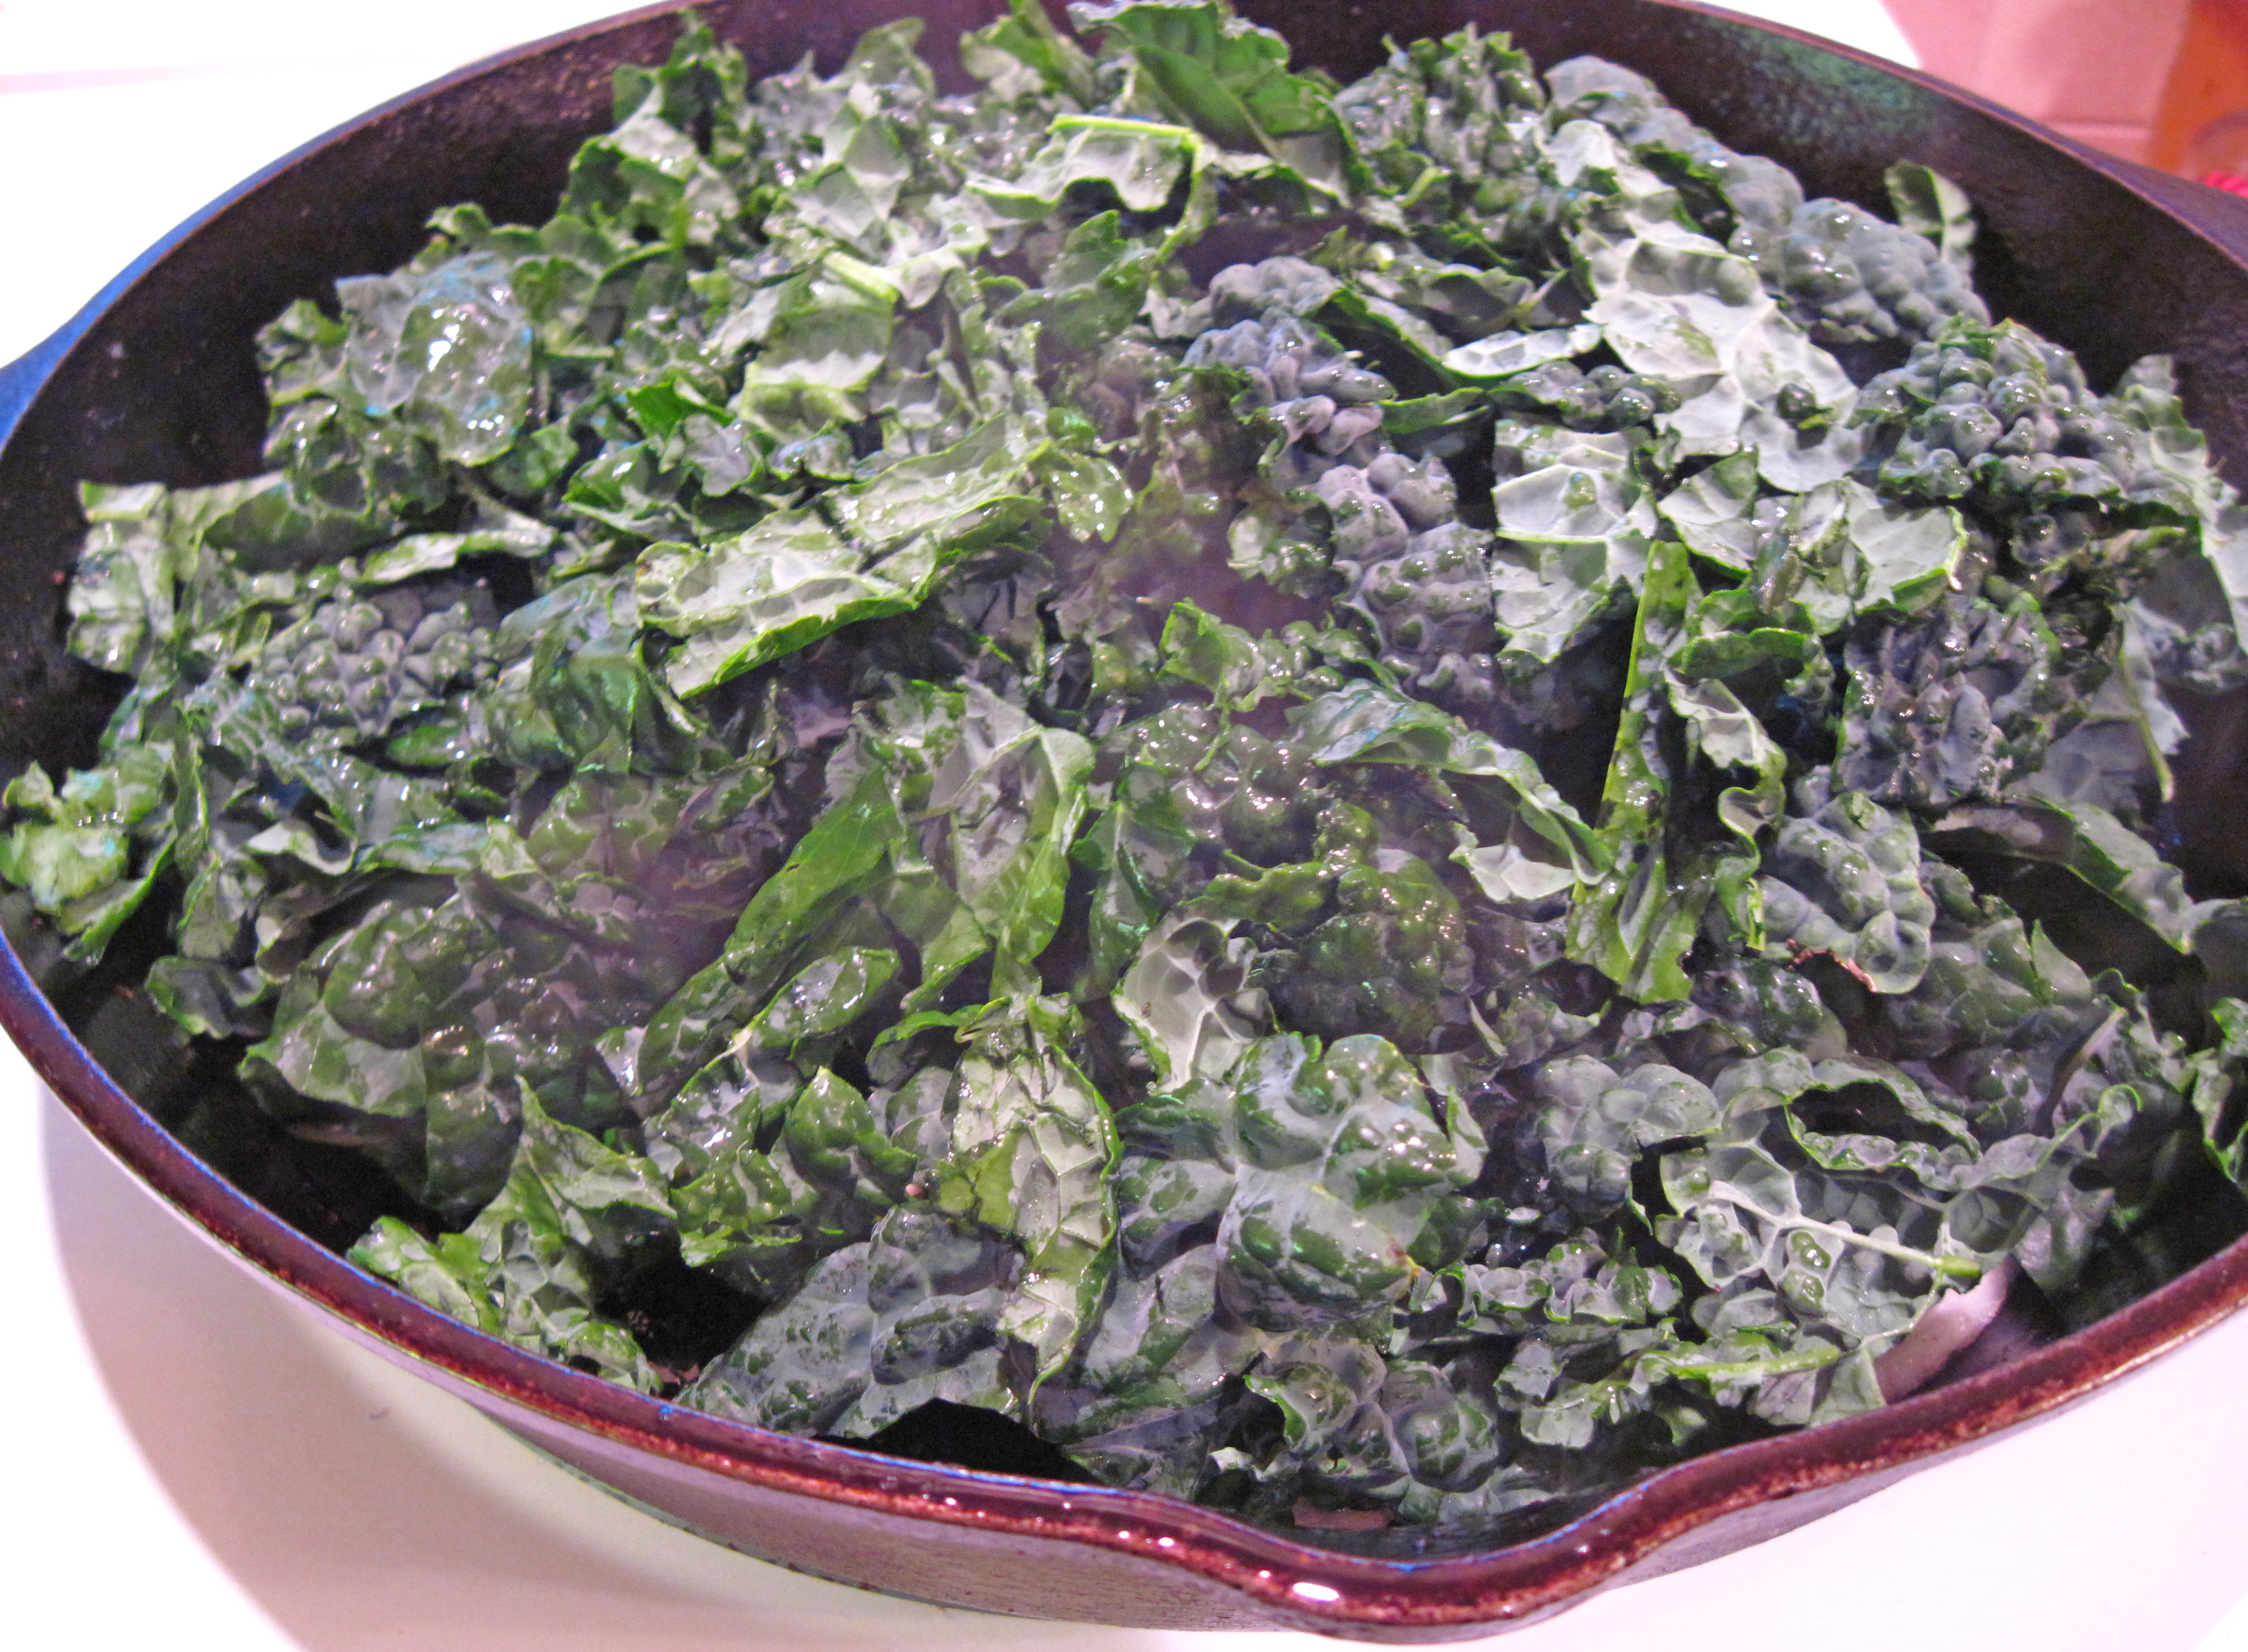
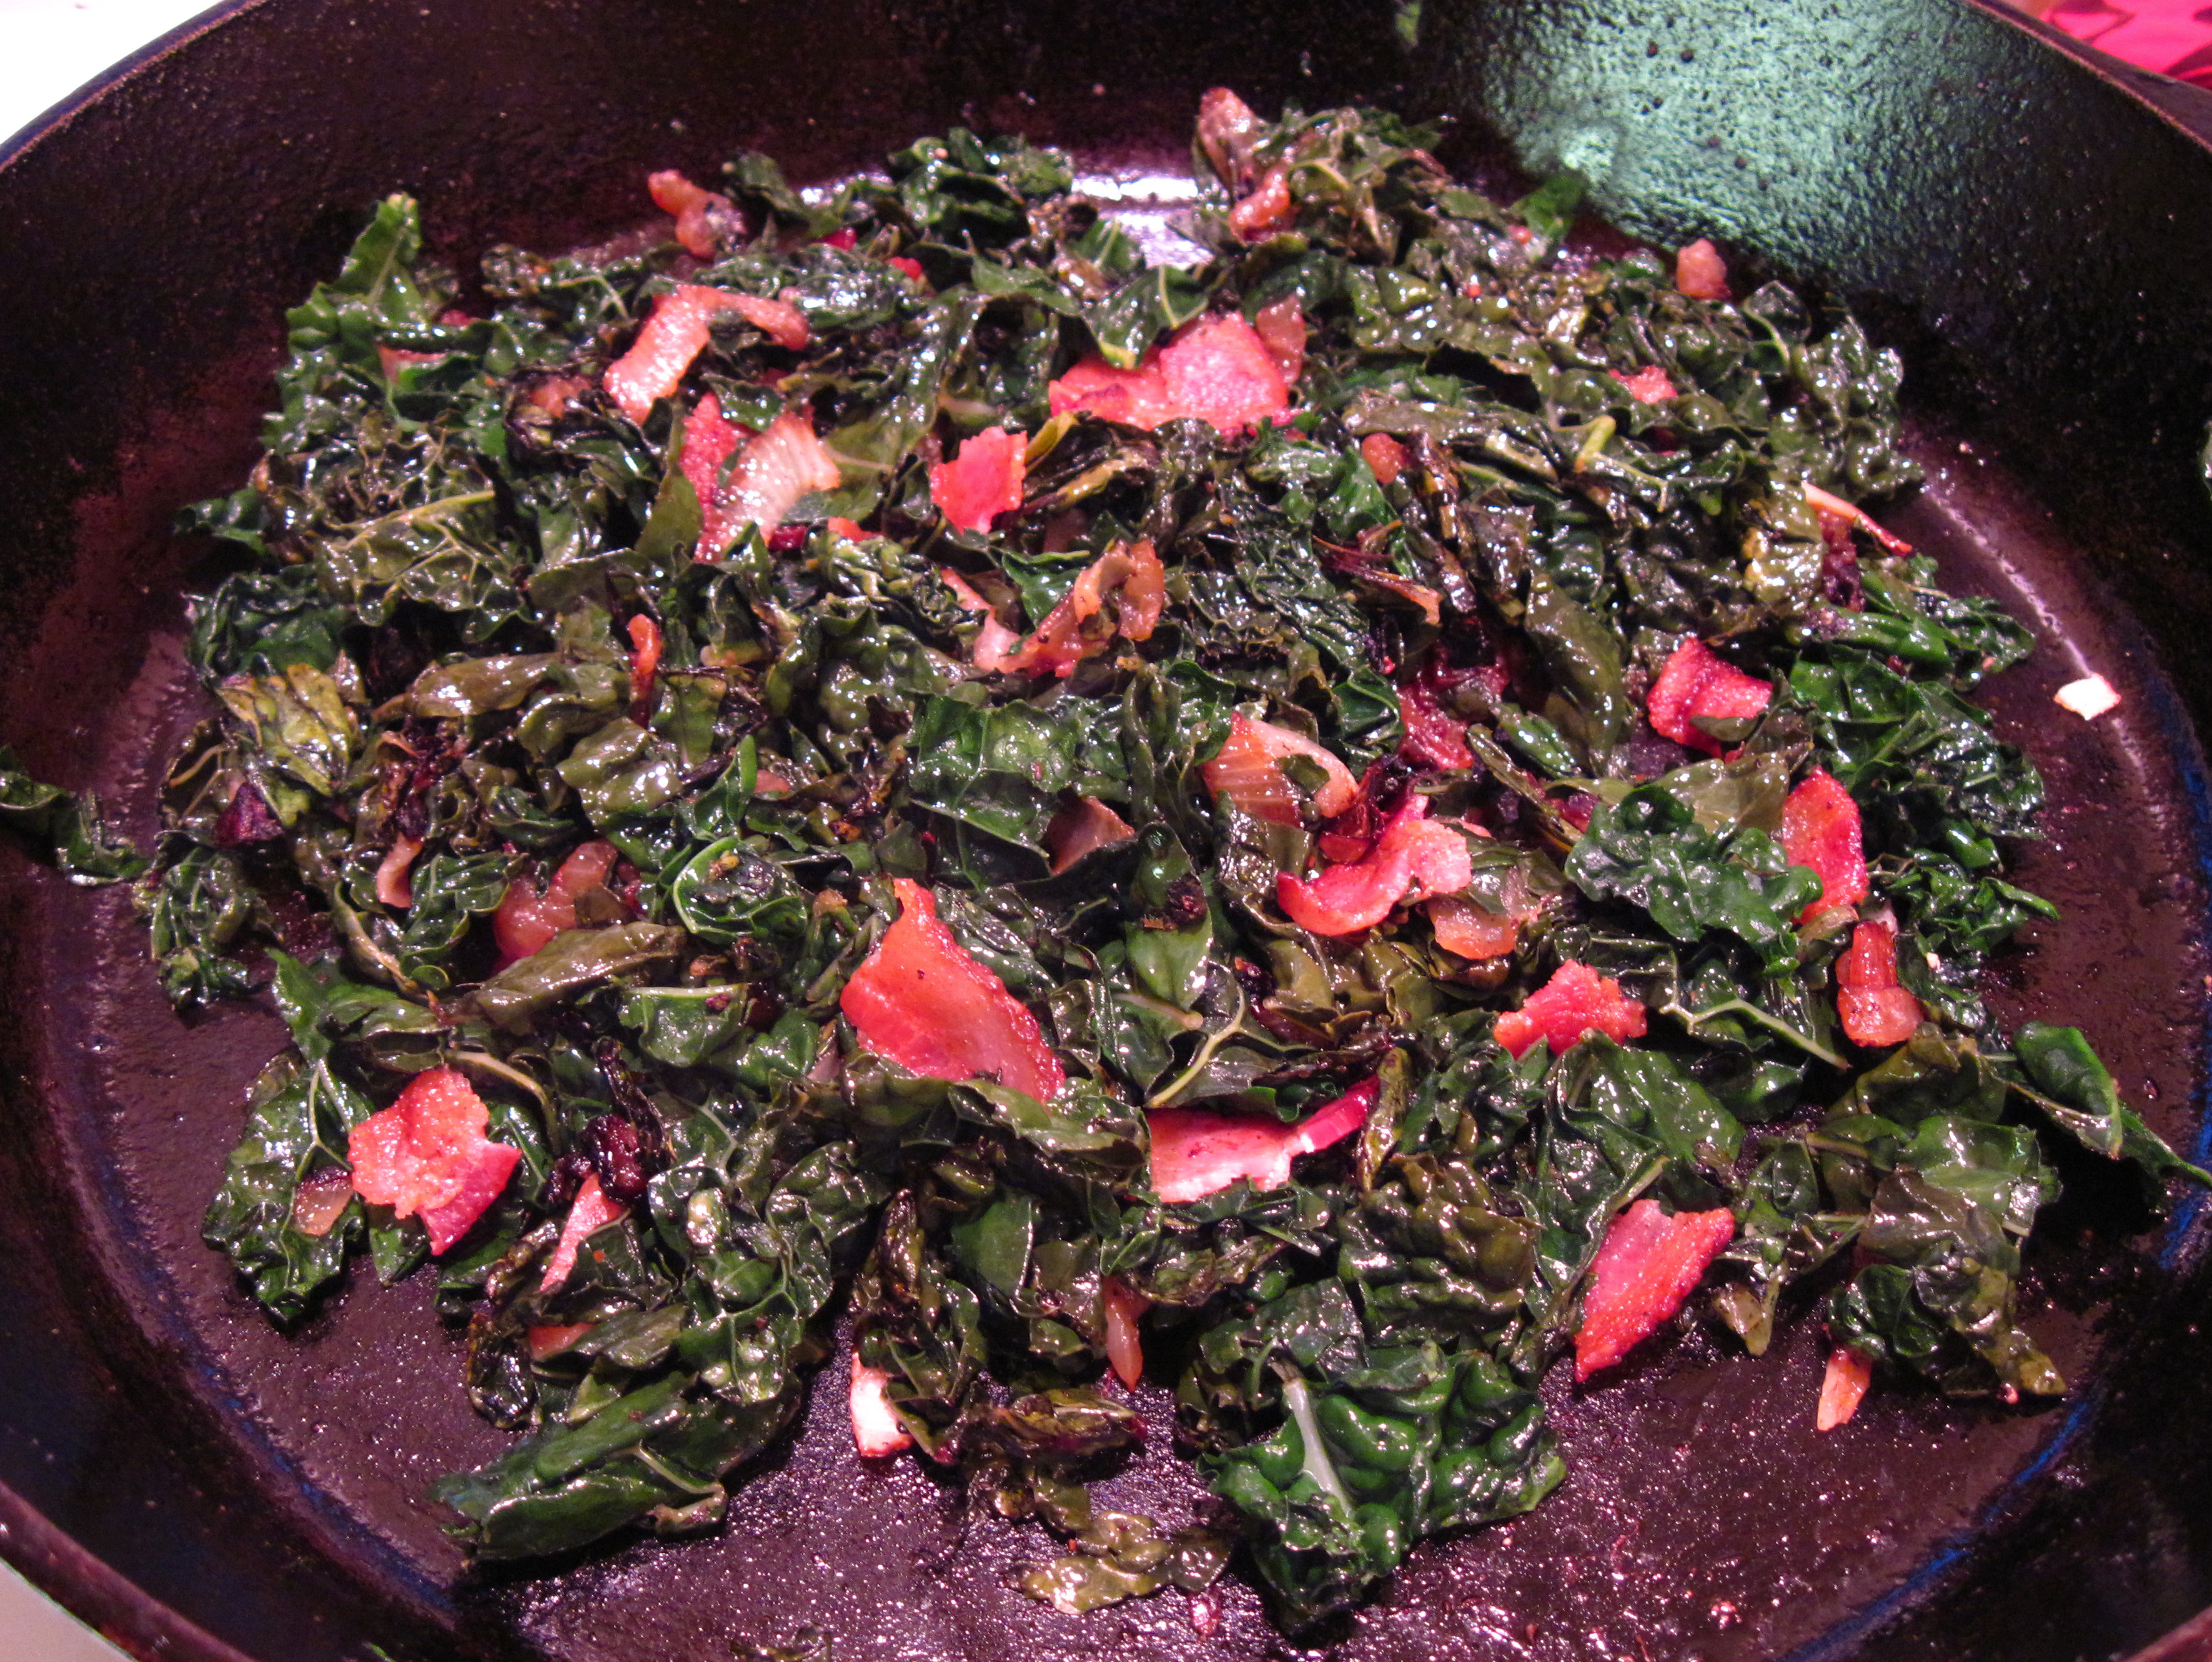
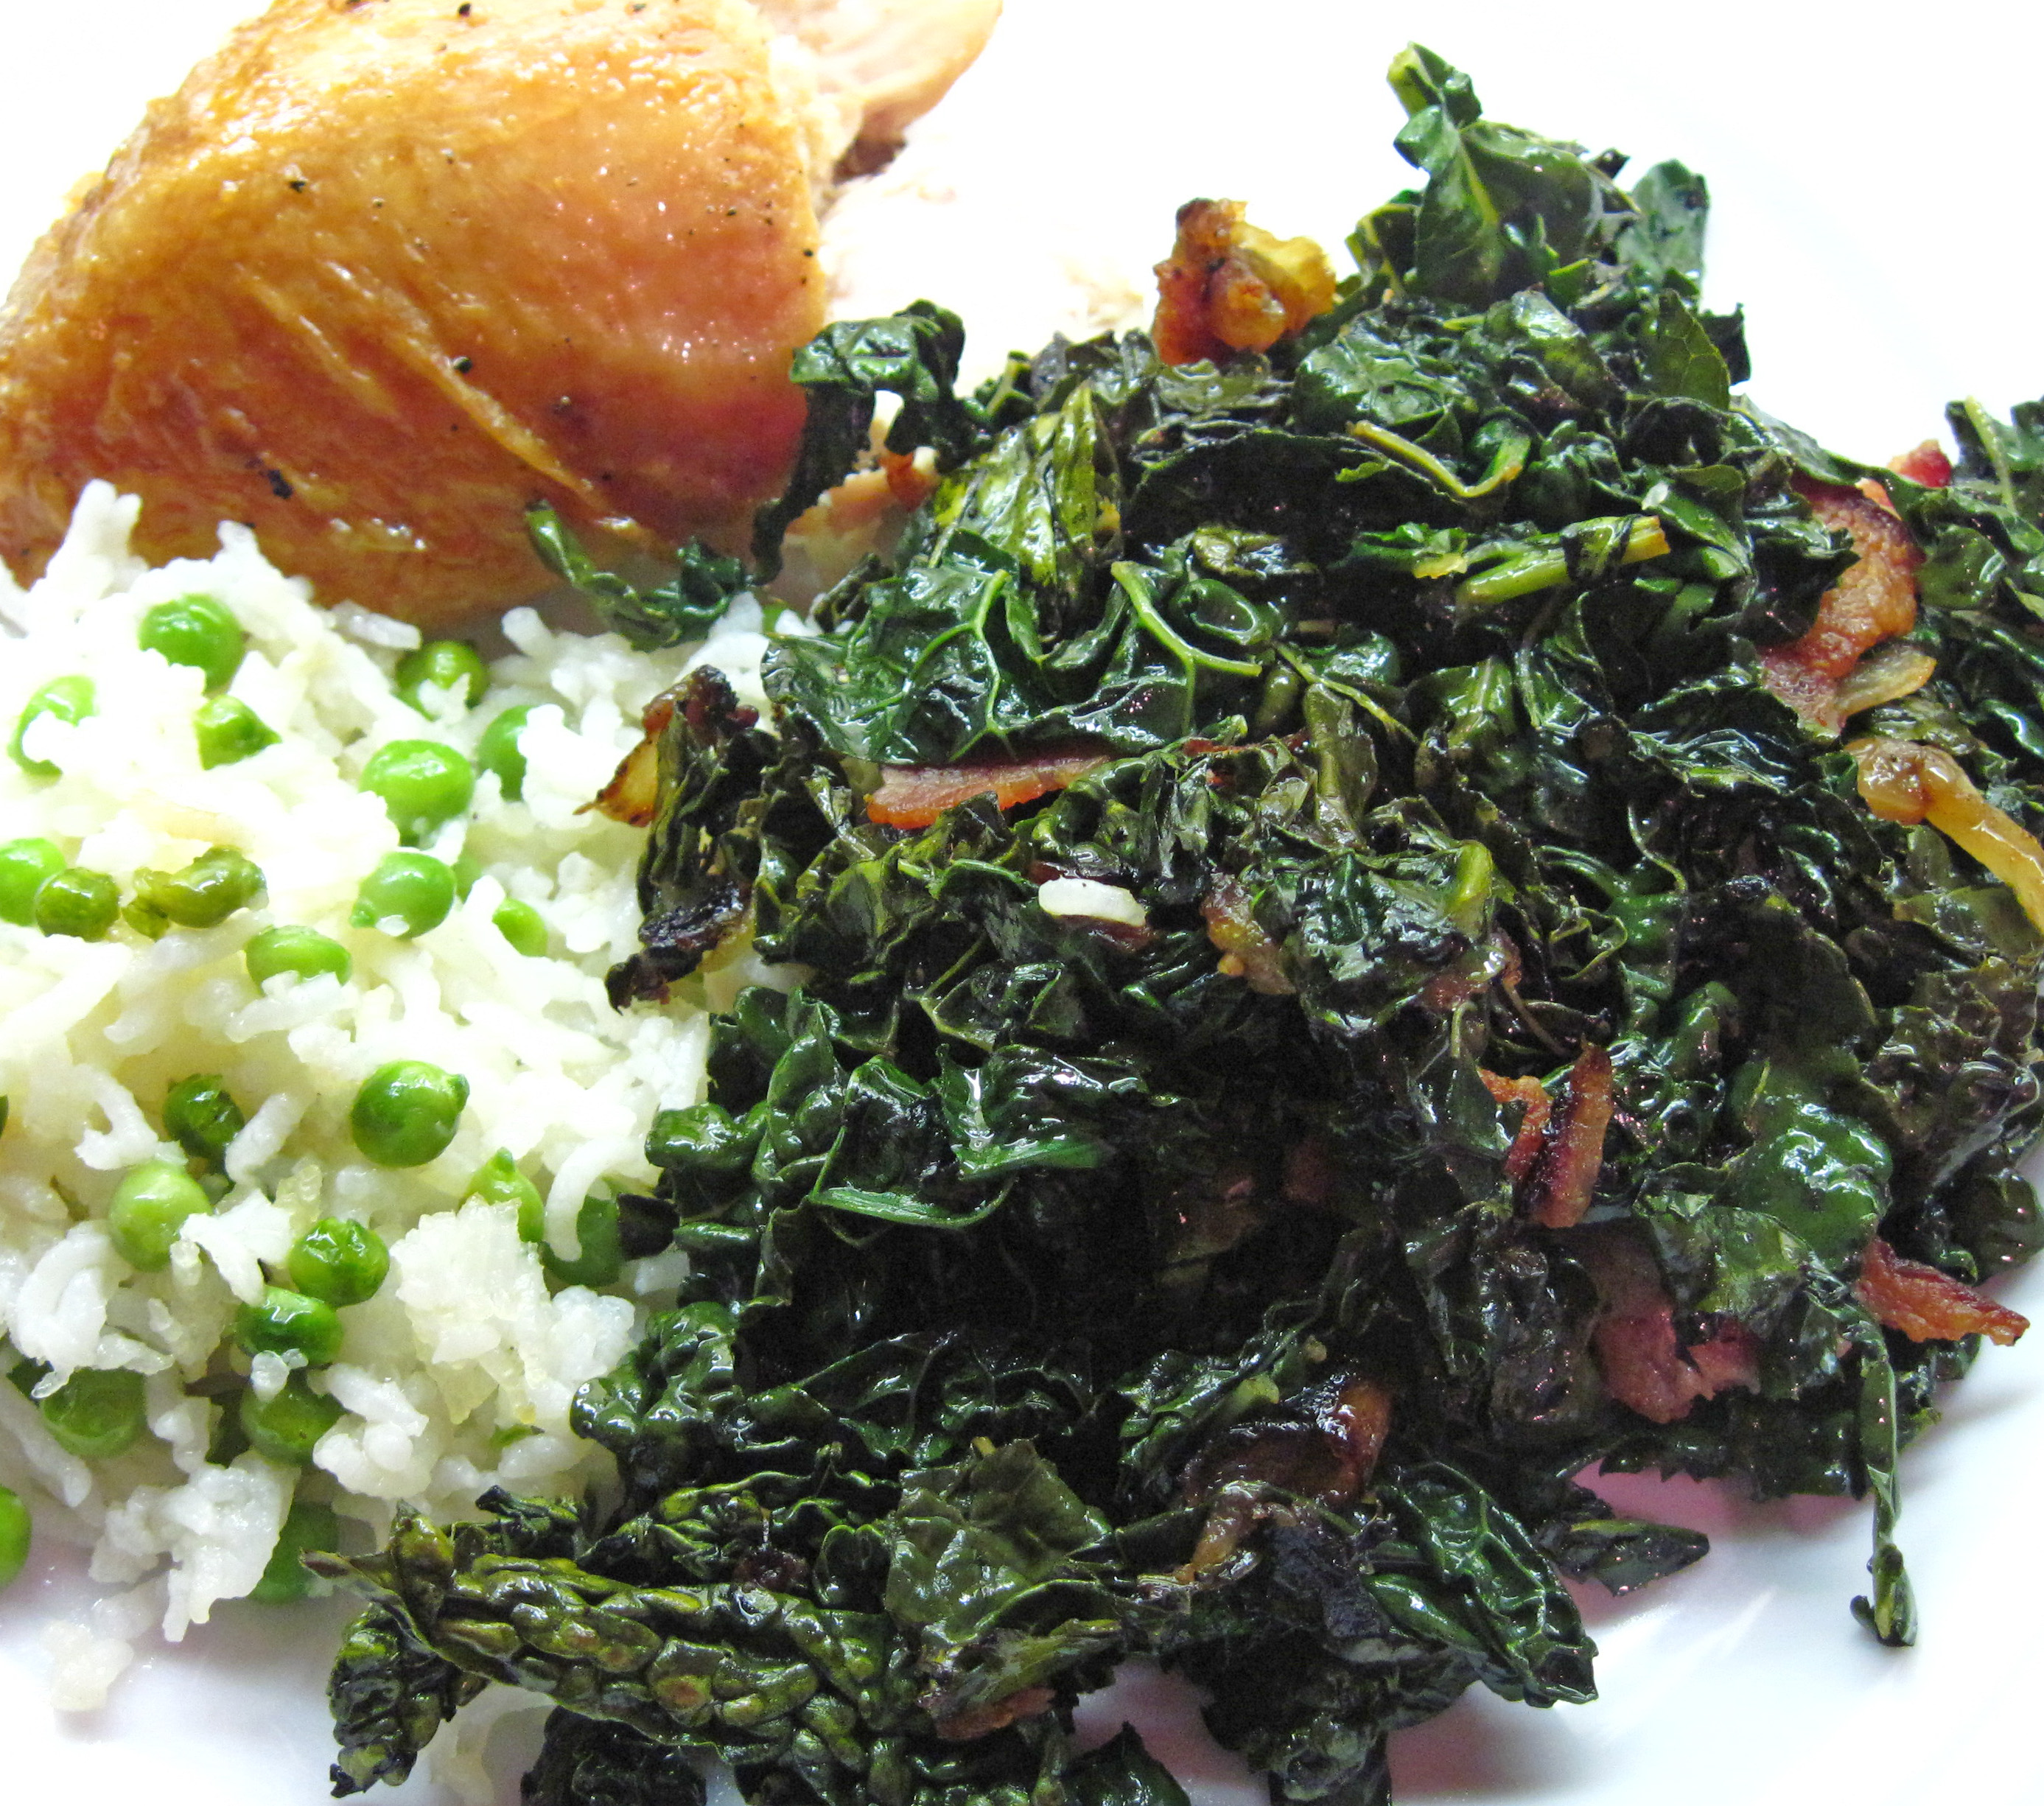
Braised Kale with Bacon
By Kath Dedon
.
You start by cooking bacon in a large skillet. That’s always a good start, but it’s an especially good start when you’re cooking kale! Bacon and kale really are wonderful together. I served this Braised Kale with Bacon with roast chicken, rice with peas, and a salad. The Braised Kale with Bacon was the star of the meal!
The recipe is adapted from a recipe by Grace Parisi on the Food & Wine website. The original recipe makes 4 – 6 servings. I cut it down to serve 2. I used Tuscan kale (aka Lacinato or dinosaur kale) but you could use any type of kale.
I can’t recommend Braised Kale with Bacon enough! You get all of that great nutrition with bacon. Try it, you’ll like it. 🙂
a

a
Braised Kale with Bacon
(Adapted from Grace Parisi’s recipe on the Food & Wine website)
a
a
Serves 2 (If you double it to serve 4 you’ll need a bigger pan than my 12-inch cast iron skillet. I’d probably use a Dutch oven.)
a
2 thick slices of bacon
1 tablespoon extra-virgin olive oil
½ large onion, thinly sliced (about 1 cup)
1 garlic clove, minced
¾ pound kale (about 1 bunch), stems and inner ribs discarded, leaves coarsely chopped, washed and dried
Salt and freshly ground pepper
1 tablespoon cider vinegar
a
1. In a large skillet, cook the bacon in the olive oil over medium low heat, turning occasionally. When the bacon is done the way you like it, remove it leaving the bacon grease in the pan.
This is two slices of bacon cut in half.

a
2. Coarsely chop the bacon and set aside.
3. Raise the heat to medium and add the onion and garlic to the pan. Cook, stirring occasionally, for about 6 minutes, or until the onion and garlic are just starting to brown.
Ready to add the kale!
a
4. Add the kale to the skillet. Season with salt and pepper and stir.
a
5. When the kale has wilted a bit, stir in the cider vinegar. Cover the pan, raise the heat to medium high, and cook for about 5 minutes or until the kale is tender.
6. Stir in the bacon and serve.
It cooks down a lot!
 a
a
a
Share this:

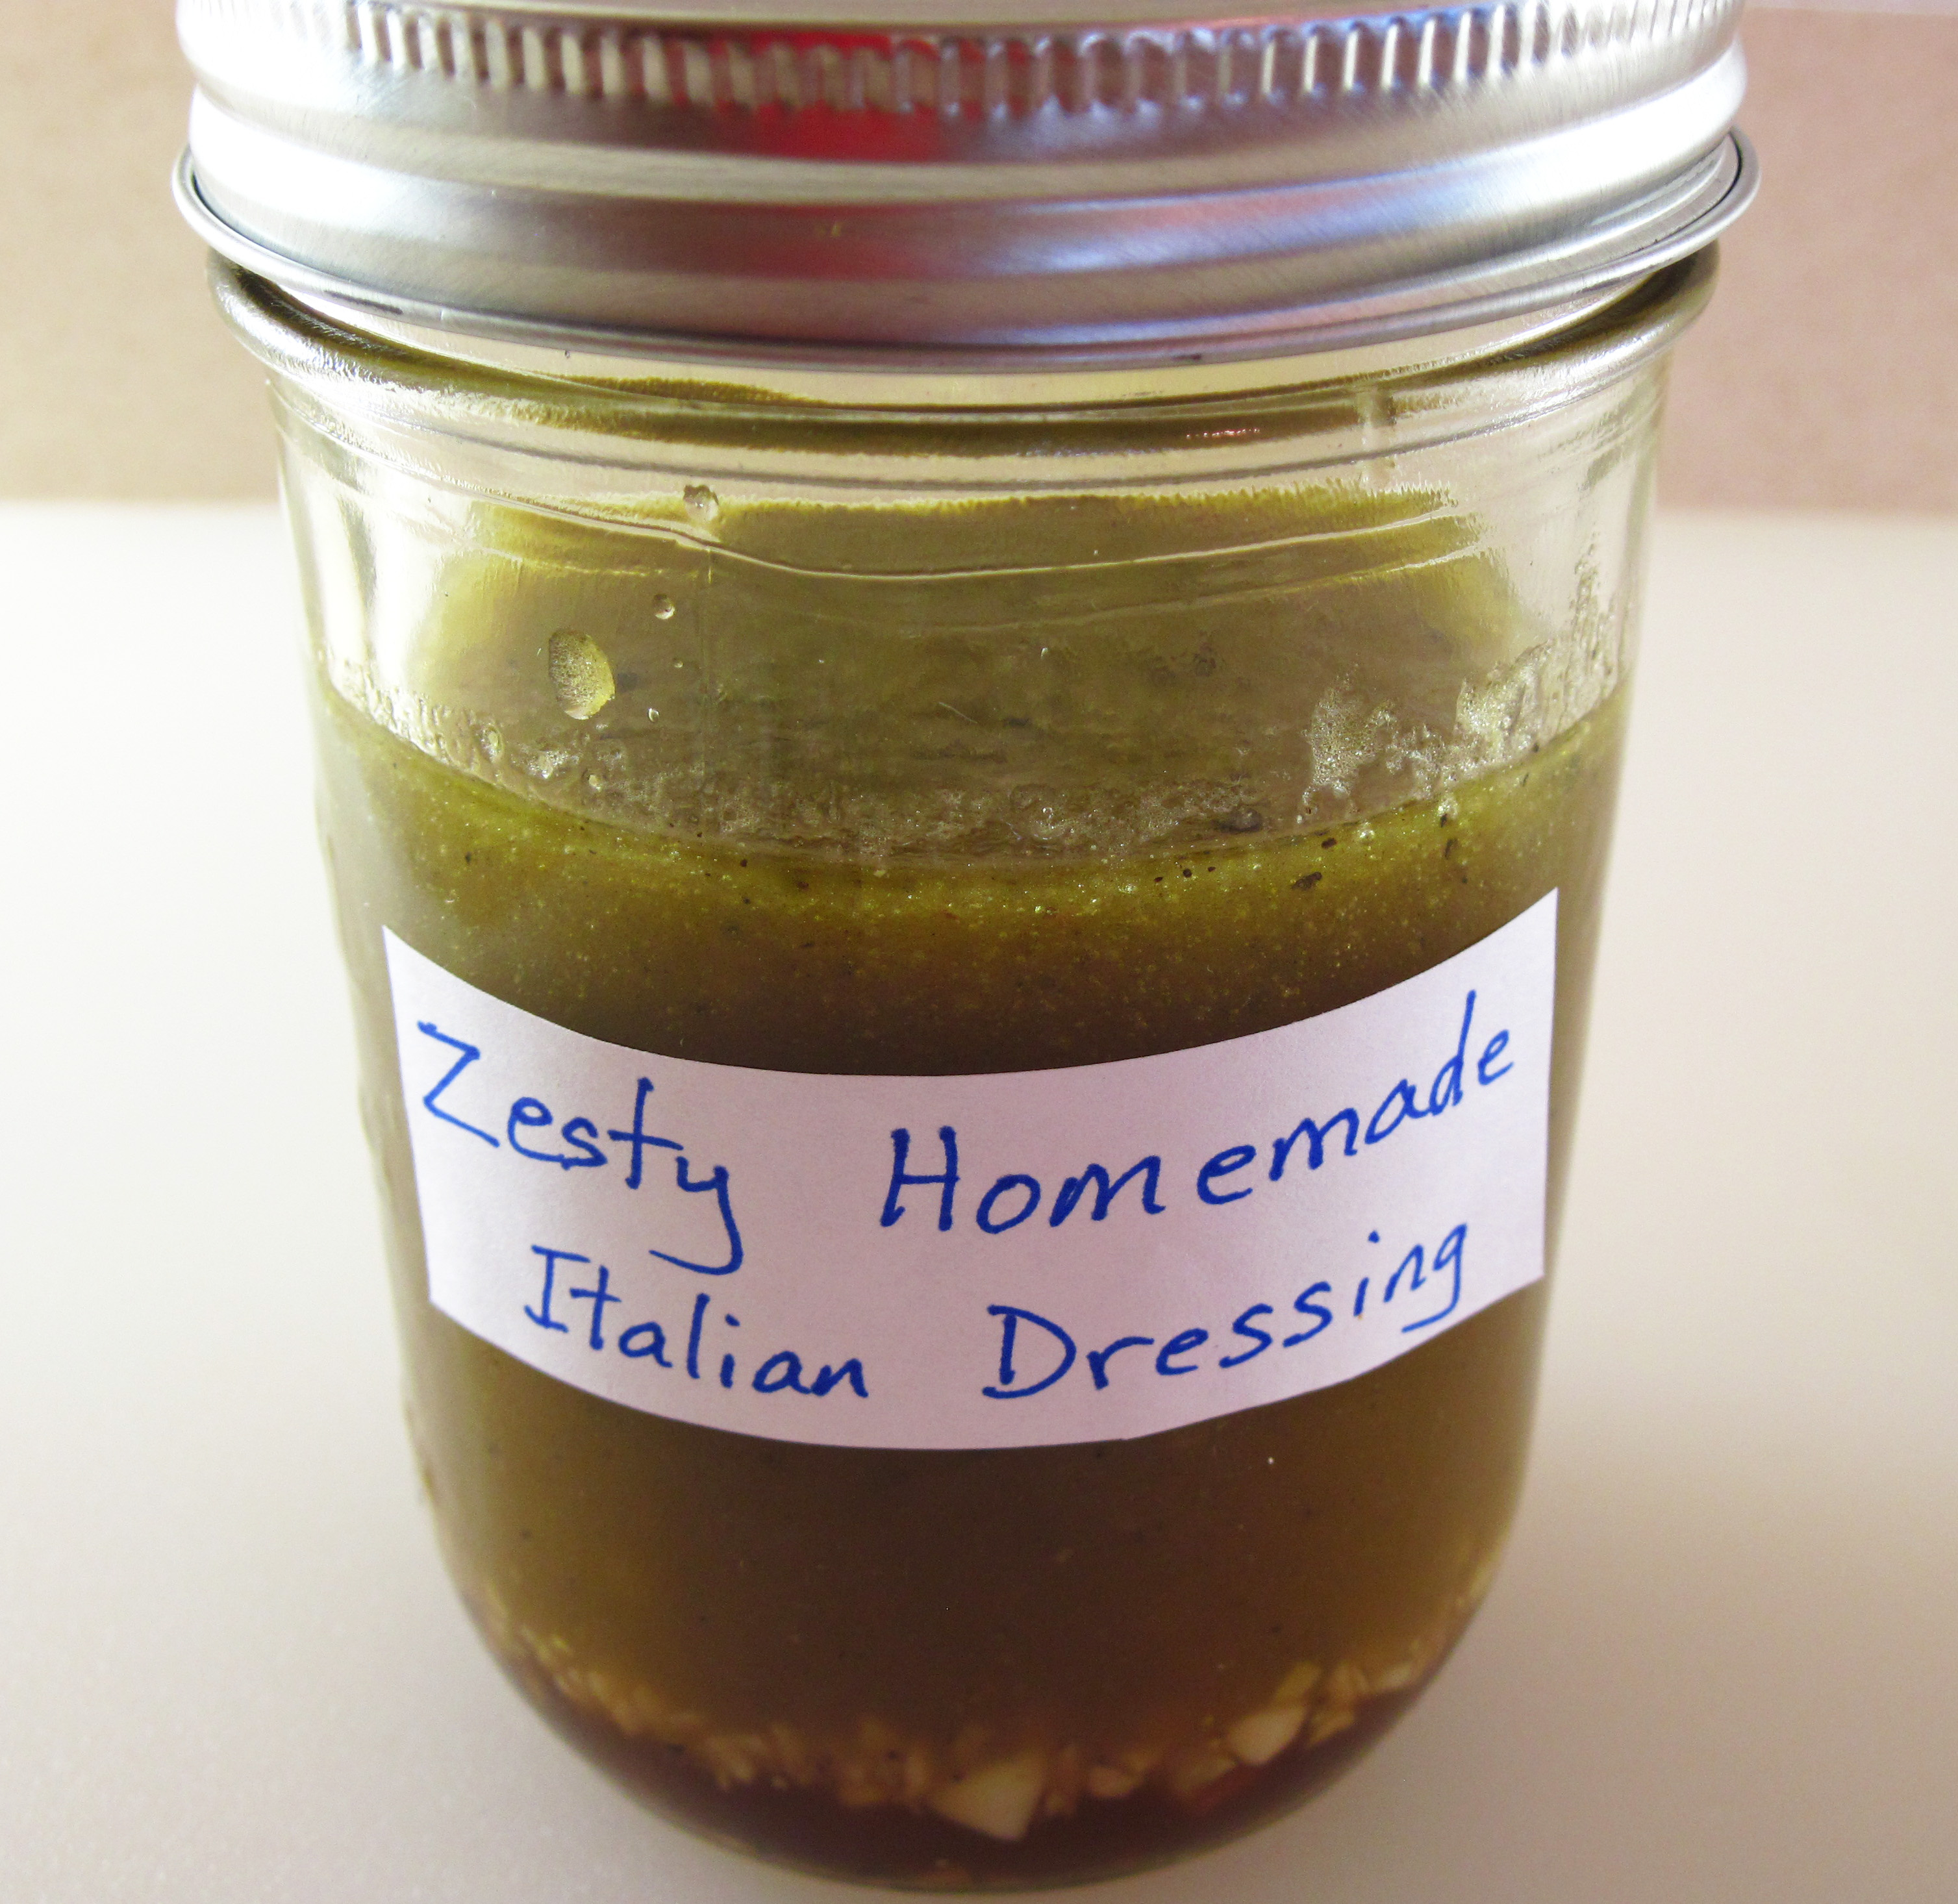
Zesty Homemade Italian Salad Dressing
I have made this Zesty Homemade Italian Salad Dressing several times. I like it so much that I decided it’s about time I shared it.
The recipe is from one of my favorite blogs, Jennifer Segal’s Once Upon a Chef. Her blog features foolproof, family-friendly recipes that are right up my alley.
I usually can’t resist tweaking recipes a bit, adapting them to suit our tastes. But Jennifer’s Zesty Homemade Italian Salad Dressing is perfect just the way it is. And it couldn’t be easier to make. Just put all of the ingredients in a jar, shake it up, and it’s ready to go. Keep any leftover dressing in the refrigerator.
a
a
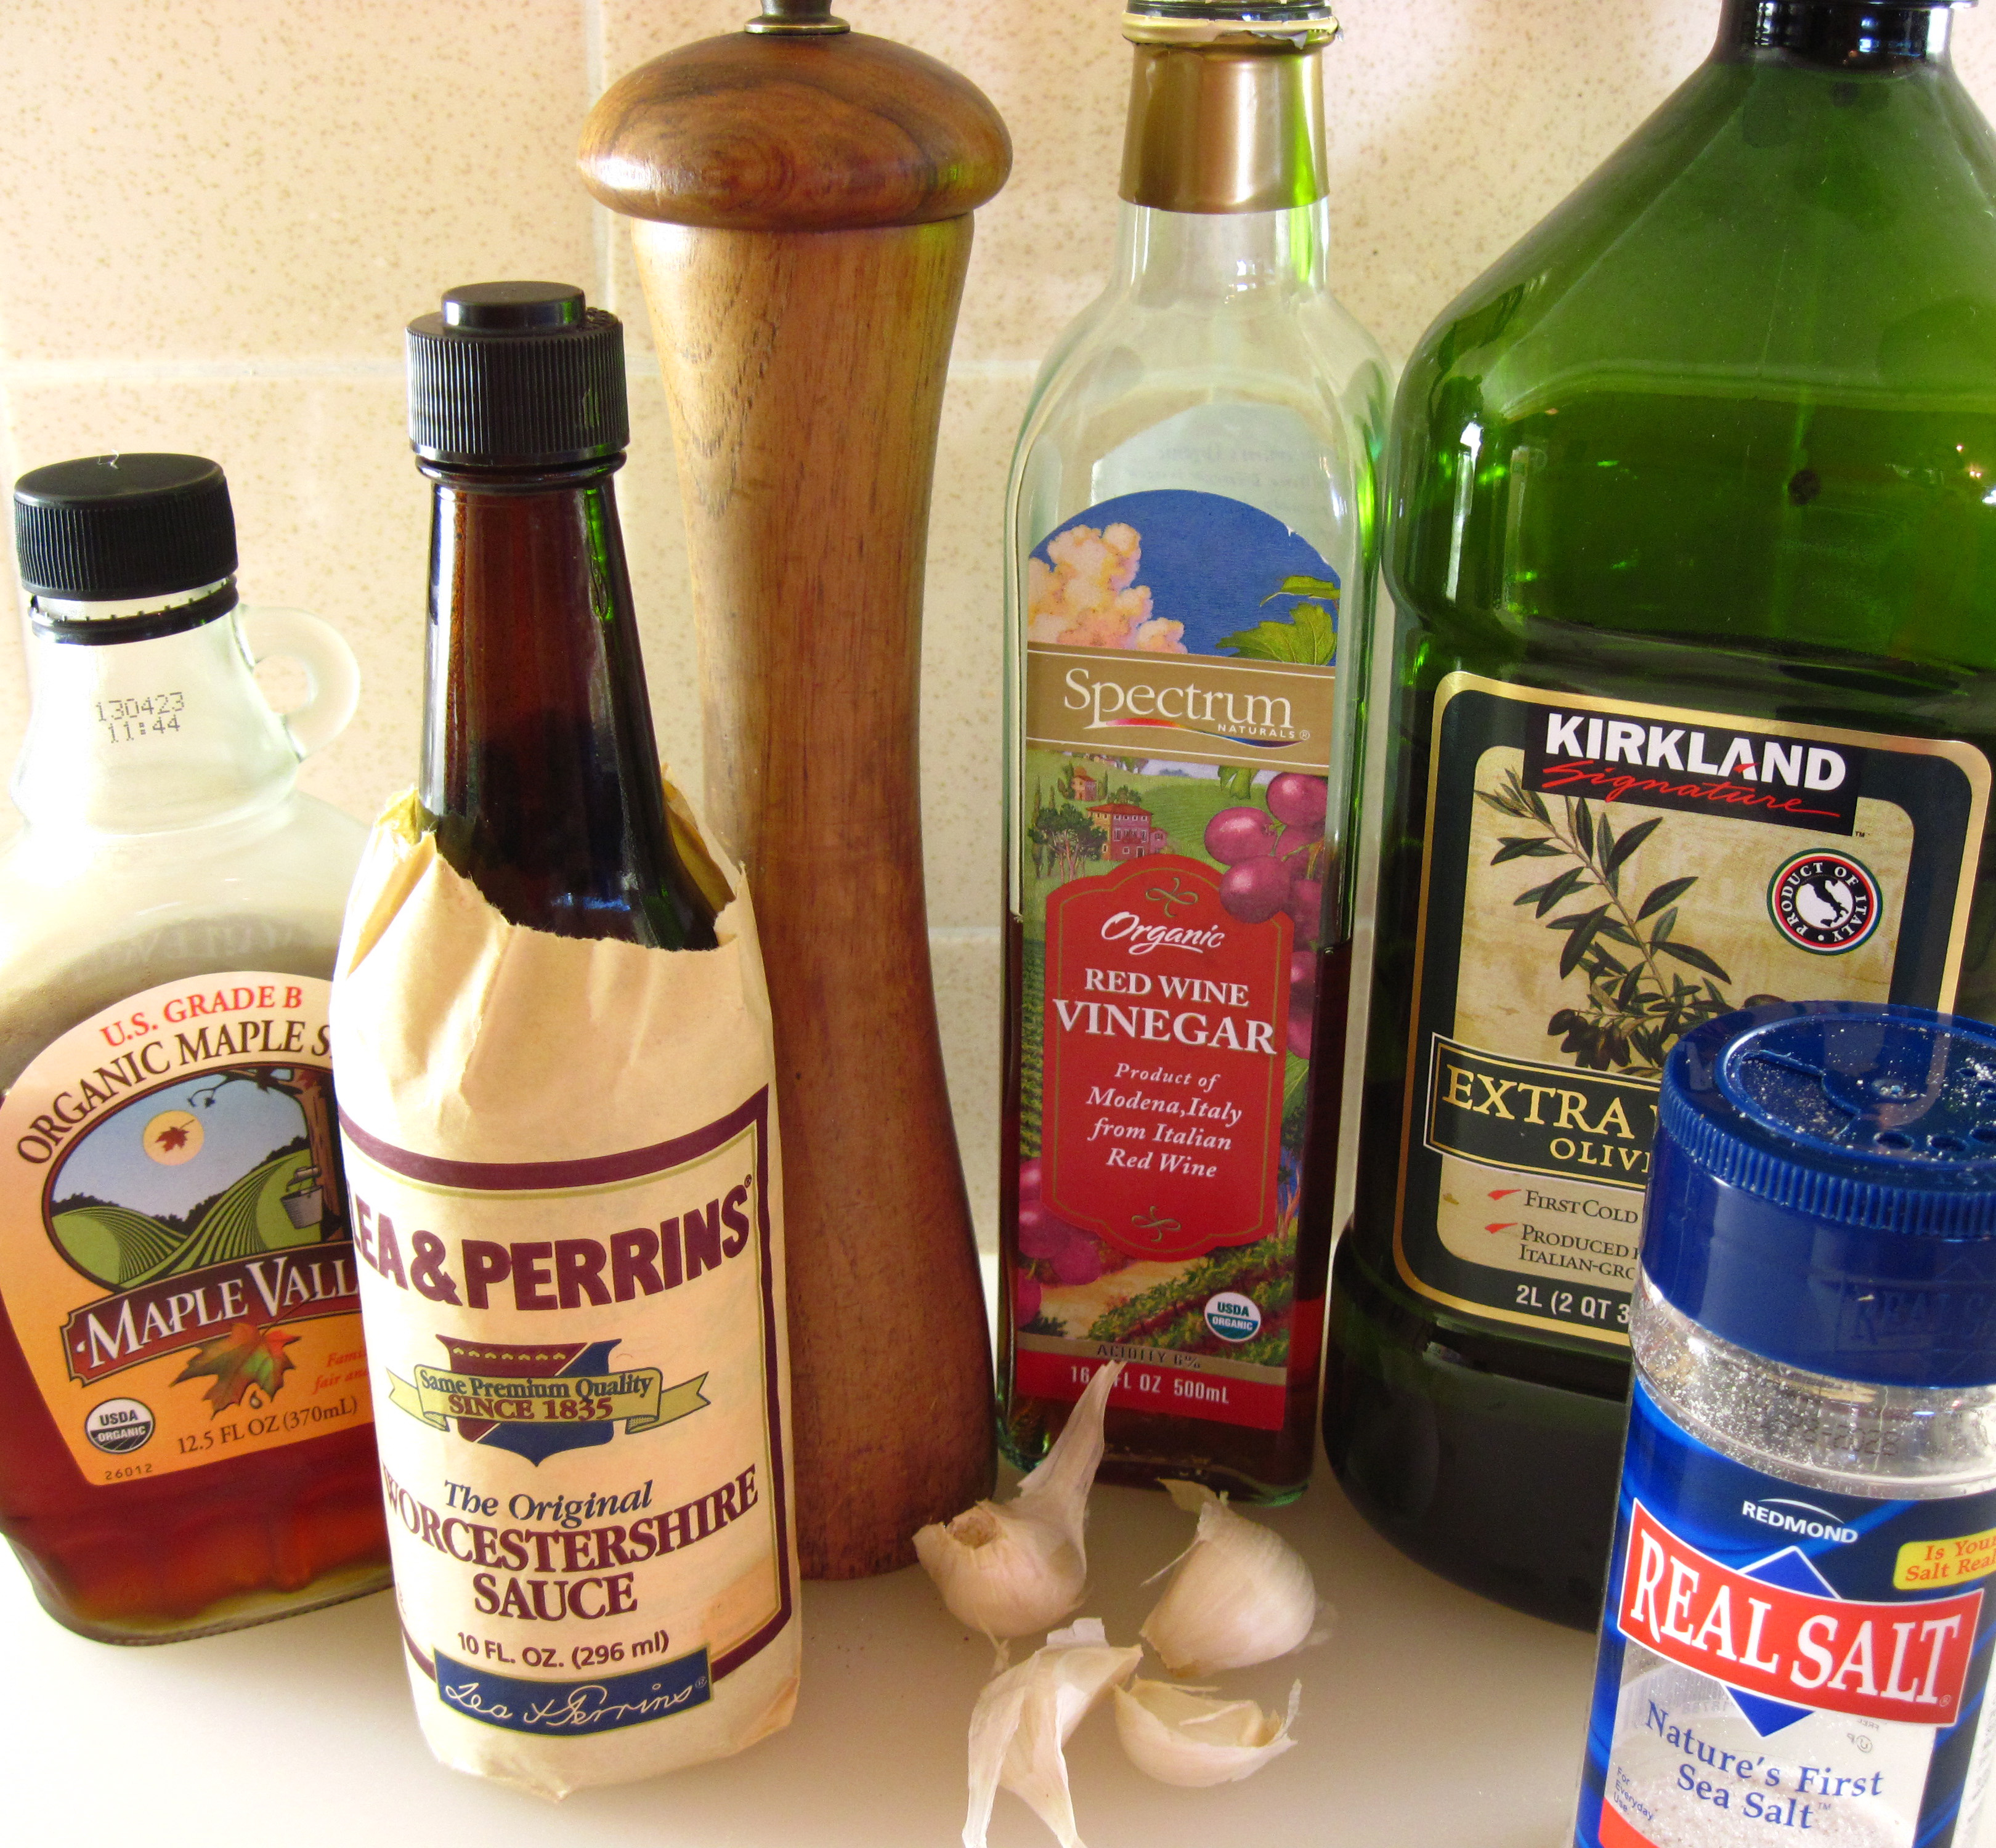
Ingredients for Zesty Homemade Italian Salad Dressing
 a
a
a
Zesty Homemade Italian Salad Dressing
(Thanks to Jennifer Segal of Once Upon a Chef for her permission to share.)
a
a
Makes 1⅓ cups
a
¾ cup extra virgin olive oil
⅓ cup red wine vinegar
1½ tablespoons real maple syrup
1 teaspoon salt
½ teaspoon freshly ground black pepper
2½ teaspoons Worcestershire sauce
4 small garlic cloves, minced
a
1. Put all of the ingredients in a jar and shake it up.
2. Store leftover dressing in the jar in the refrigerator. You will need to shake it before each use to re-emulsify the dressing.
a
I made a simple salad consisting of spinach, tomatoes, radishes, and red onions and tossed it with some of the salad dressing. Splitting the salad between two plates, I then topped them with leftover steak and chicken, a hard boiled egg, and slices of avocado. It was a great meal for a warm summer evening!

Share this:

Winter Cauliflower Salad
By Kath Dedon
Winter Cauliflower Salad is a terrific way to enjoy cauliflower! Ingredients like olives, garlic, red onion, sun-dried tomatoes, a chile pepper, and gorgonzola cheese guarantee that it will be full of flavor.
The recipe is from a newly published book, The Glorious Vegetables of Italy, by Domenica Marchetti. This is not a vegetarian book, although most of the recipes are indeed vegetarian. There are recipes for appetizers, soups, salads, side dishes, and main courses and they all feature the favorite vegetables of Italy. There’s even a short chapter of desserts. (How does Chocolate Zucchini Cake or Pumpkin Gelato sound?)
So far, I have only made this Winter Cauliflower Salad. If it is any indication of the quality of the other recipes, I can’t wait to explore this book some more.
Some of my observations about the recipe:
- I used sun-dried tomatoes, but if I had some garden-fresh plum tomatoes I might have slow-roasted some and used them.
- I used all green olives. Next time I’ll use half green and half black (probably kalamata). I think it will add to the visual appeal.
- Because of all of the salty ingredients (olives, sun-dried tomatoes, gorgonzola), I cut the sea salt in half. We thought it was just right.
- I seeded the serrano chile pepper and its heat was subtle and did not overpower the other ingredients.
You might wonder why it is called Winter Cauliflower Salad. Domenica states that, although it certainly can be made year-round, she especially loves it during the winter months to complement the heartier fare of the season. We would eat it any time!
a

a
Winter Cauliflower Salad
(Adapted from the recipe in The Glorious Vegetables of Italy)
Since I was cooking for two, I cut the recipe in half. I won’t do that again because this is the kind of salad that I would love to have again the next day. Here is the full recipe that serves 6 – 8. You can halve it if you wish.
Serves 6 – 8
1 medium head cauliflower (1 lb/455g), trimmed and cut into florets
1 large celery rib, sliced on the bias
1 cup (115g) coarsely chopped pitted olives, preferably a mixture of green and black
1 tablespoon coarsely chopped fresh flat-leaf parsley
2 garlic cloves, minced
¼ cup (30g) diced red onion
2 tablespoons coarsely chopped bottled sun-dried tomatoes (or slow-roasted tomatoes)
1 fresh chile pepper, very hot or mildly hot, your preference, minced (I used a seeded serrano chile.)
Finely grated zest of 1 lemon, plus 2 tablespoons lemon juice
½ teaspoon fine sea salt
¼ to ½ cup extra virgin olive oil (I found ¼ cup to be sufficient.)
3 – 4 oz (85 – 115g) gorgonzola piccante, crumbled
1. Put a steamer basket with the cauliflower over boiling water. Cover and steam for about 4 minutes. Remove the steamer from the pot.
2. Put the celery, olives, parsley, garlic, red onion, sun-dried tomatoes, and chile pepper in a large bowl. Add the cauliflower and toss the salad well.
3. Add the lemon zest, lemon juice, and salt and toss again so they are well distributed.
4. Add ¼ cup of olive oil and toss the salad. Taste to see if you need more salt or olive oil.
5. Cover and let it marinate for at least 30 minutes.
6. Just before serving, toss in the gorgonzola crumbles.
Share this:

Mika Garnett’s Southwest Chicken and Green Chile Stew
By Kath Dedon
.
We tried Hatch chiles for the first time last week. These New Mexican chiles have a short season and are not available at every store in Seattle. Last week I picked some up at one of my favorite supermarkets to give them a try.
I used the broiler to “roast” them until they were charred. Then I put them in a sealed Ziploc bag to let them cool off. After they were cool, the skin slipped right off. I slit them lengthwise and scraped the seeds out. The Hatch chiles were ready to go.
We first tried them sautéed with some red pepper and onion as a side dish with grilled skirt steak. They are quite good, although I wouldn’t call them amazing. I suspect that they are probably better if you buy them fresh from the fields in Hatch, New Mexico. They may lose some of their punch on the journey to Seattle.
Apparently, they can range from mild to medium-hot. Overall, our batch was mild, but every once in a while we had a bite that was noticeably hotter.
So after that dinner, I had 4 large chiles left. I searched eatyourbooks.com and found that I had an interesting recipe in One Big Table by Molly O’Neill.
(I love eatyourbooks.com! It makes it possible to search your own cookbook collection for recipes or ingredients. If you own a lot of cookbooks, check it out.)
Mika Garnett’s Southwest Chicken and Green Chile Stew proved to be a great use for the chiles. The introduction says that she uses a 4-ounce can of chopped green chiles when she doesn’t have time to roast and peel her own. I just substituted my Hatch chiles.
The recipe is very easy and we really enjoyed it, but it did take a bit longer to make than I thought it would. The thing that took the most time was prepping all of the vegetables, including cutting fresh corn kernels from the cobs. But the result was well worth it. With all of the fresh vegetables, Mika Garnett’s Southwest Chicken and Green Chile Stew is a perfect late summer meal!
Update 8/22/2016: Important warning about hatch chile peppers!
This is a really great recipe, so I made it again yesterday with 4 hatch chile peppers that I had bought at Thriftway. They had two side-by-side boxes of hatch chile peppers that looked identical. One was labeled “Hot” and the other “Mild”. I chose the mild.
When I researched hatch chiles before making this 3 years ago, I found this information someplace: “Apparently, they can range from mild to medium-hot.” Wrong! I now know they can range from mild to insanely hot!
Thinking I had identical peppers to the ones I had used before, I just added them to the chile. Just before serving I used a spoon to taste the broth for seasoning. I’m talking about 1/2 teaspoon of broth with NO visible signs of pepper pieces in it. WHOA! I don’t think I’ve ever eaten anything so hot before. I thought the top of my head was going to blow off.
Now, I’ll admit I am a bit of a sissy when it comes to hot stuff. I order 2* at Thai restaurants and it’s plenty hot for me. I knew there was no way I could eat this stew tonight. I quickly popped an emergency freezer meal into the microwave for my dinner.
Bob, Mr. 5*-Thai-food-guy who usually asks for extra hot sauce to add, said he’d eat the stew. Well, he did finish his bowl, but I have never seen him sweat so much when he eats hot stuff! After he was finished, he admitted that it was even too hot for him!
So we threw the leftovers out. 😦
I’m passing on the lesson I learned from all of this. Never assume your chile peppers are mild or medium. Taste a bite before adding them to your recipe. Had I done that, I would have used 1/2 – 1 of these crazy-hot chiles and it probably would have been fantastic. Lesson learned!
a

a
Mika Garnett’s Southwest Chicken and Green Chile Stew
(Adapted from Mika Garnett’s recipe in One Big Table by Molly O’Neill)
a
a
I used potato starch flour to make the recipe gluten free and it worked great, but you can use all-purpose flour as Mika does.
a
Serves 4
a
1 tablespoon oil
1 medium onion, finely chopped
1 red bell pepper, stemmed, seeded, and coarsely chopped
1 carrot, coarsely chopped
1 jalapeno chile, stemmed, seeded, and coarsely chopped
One 4-ounce can chopped green chiles, drained (or 4 – 5 fresh Hatch chiles, roasted, peeled, seeded, and diced) (Update: Use 1 – 5 fresh Hatch chiles. Read my update to the text for details.)
4 garlic cloves, minced
½ teaspoon ground cumin
½ teaspoon Kosher salt
A few grinds of black pepper
2 tablespoons potato starch flour (Substitute 2 tablespoons all-purpose flour if you prefer.)
2¼ cups chicken broth
1½ pounds boneless, skinless chicken breasts, trimmed and cut into 1-inch chunks
1 cup corn kernels (You’ll probably need 2 ears if using fresh.)
2 tablespoons fresh lime juice
2 tablespoons chopped fresh cilantro
Optional garnishes:
We enjoyed the stew just as it is, but Mika suggests the following garnishes:
Sour cream
Cheese
Corn chips or heated tortillas
1. Heat the oil in a large pot over medium heat. Add the onion, red pepper, carrot, and jalapeno and cook, stirring occasionally, for about 5 minutes.
1b. (Update) If using fresh Hatch chiles, taste a bit to determine how hot they are and then decide how many to add in step #2.
2. Add the green chiles, garlic, cumin, and salt and pepper. Stir and cook for about 1 minute.
3. Stir the potato starch flour (or all-purpose flour) into the pot until it is well blended.
4. Add the chicken broth and the chicken. Bring to a simmer and cook for 5 minutes.
5. Add the corn and cook for about 5 more minutes, or until the chicken is done.
6. Stir in the lime juice and the cilantro. Serve with optional garnishes if desired.
a
Hatch chiles that I broiled on a foil-lined baking sheet.

a
Share this:

Mexican Three Bean Salad
By Kath Dedon
.
This Mexican Three Bean Salad was the perfect side dish with Mexican Pulled Pork Tacos. Both recipes are adapted from recipes on Simply Recipes, one of my favorite food blogs.
The major change I made was to make the salad less sweet. I have never been a huge fan of the sweet dressings that are typically used with three bean salads. I used just a teaspoon of honey to take the edge off the lime juice. By all means, add more sweetener if you like. Elise uses ¼ cup of sugar.
We loved this Mexican Three Bean Salad! It keeps quite well, so if you have leftovers you can enjoy it the next day.
a
I threw a few sugar snap peas from our garden into the salad, too.

a
Mexican Three Bean Salad
(Adapted from a recipe by Elise Bauer on simplyrecipes.com)
a
Best made at least an hour ahead of time to give it time to marinate.
a
a
Serves 6
a
½ pound green beans
1 (15-ounce) can black beans, drained and rinsed
1 (15-ounce) can pinto beans, drained and rinsed
3 tablespoons olive oil
3 green onions, sliced
1 jalapeno pepper, seeded and minced
1 large clove garlic, cut into thin slivers
¾ cup (about 3 ounces) Cotija cheese
1/3 cup lime juice
1 teaspoon honey (or sugar)
¼ cup chopped cilantro
a
1. Trim the green beans and cut them into 1-inch pieces. Boil in salted water for 5 minutes. Drain and put them in a large bowl.
2. Add the black beans and pinto beans to the bowl. Pour the olive oil over the beans and stir to distribute it.
3. Stir in the green onions, jalapeno pepper, and garlic.
4. Crumble the Cotija cheese into the salad.
5. Whisk the lime juice and honey together and stir into the salad. Let it marinate at least an hour before serving.
6. Just before serving, stir in the cilantro.
Share this:

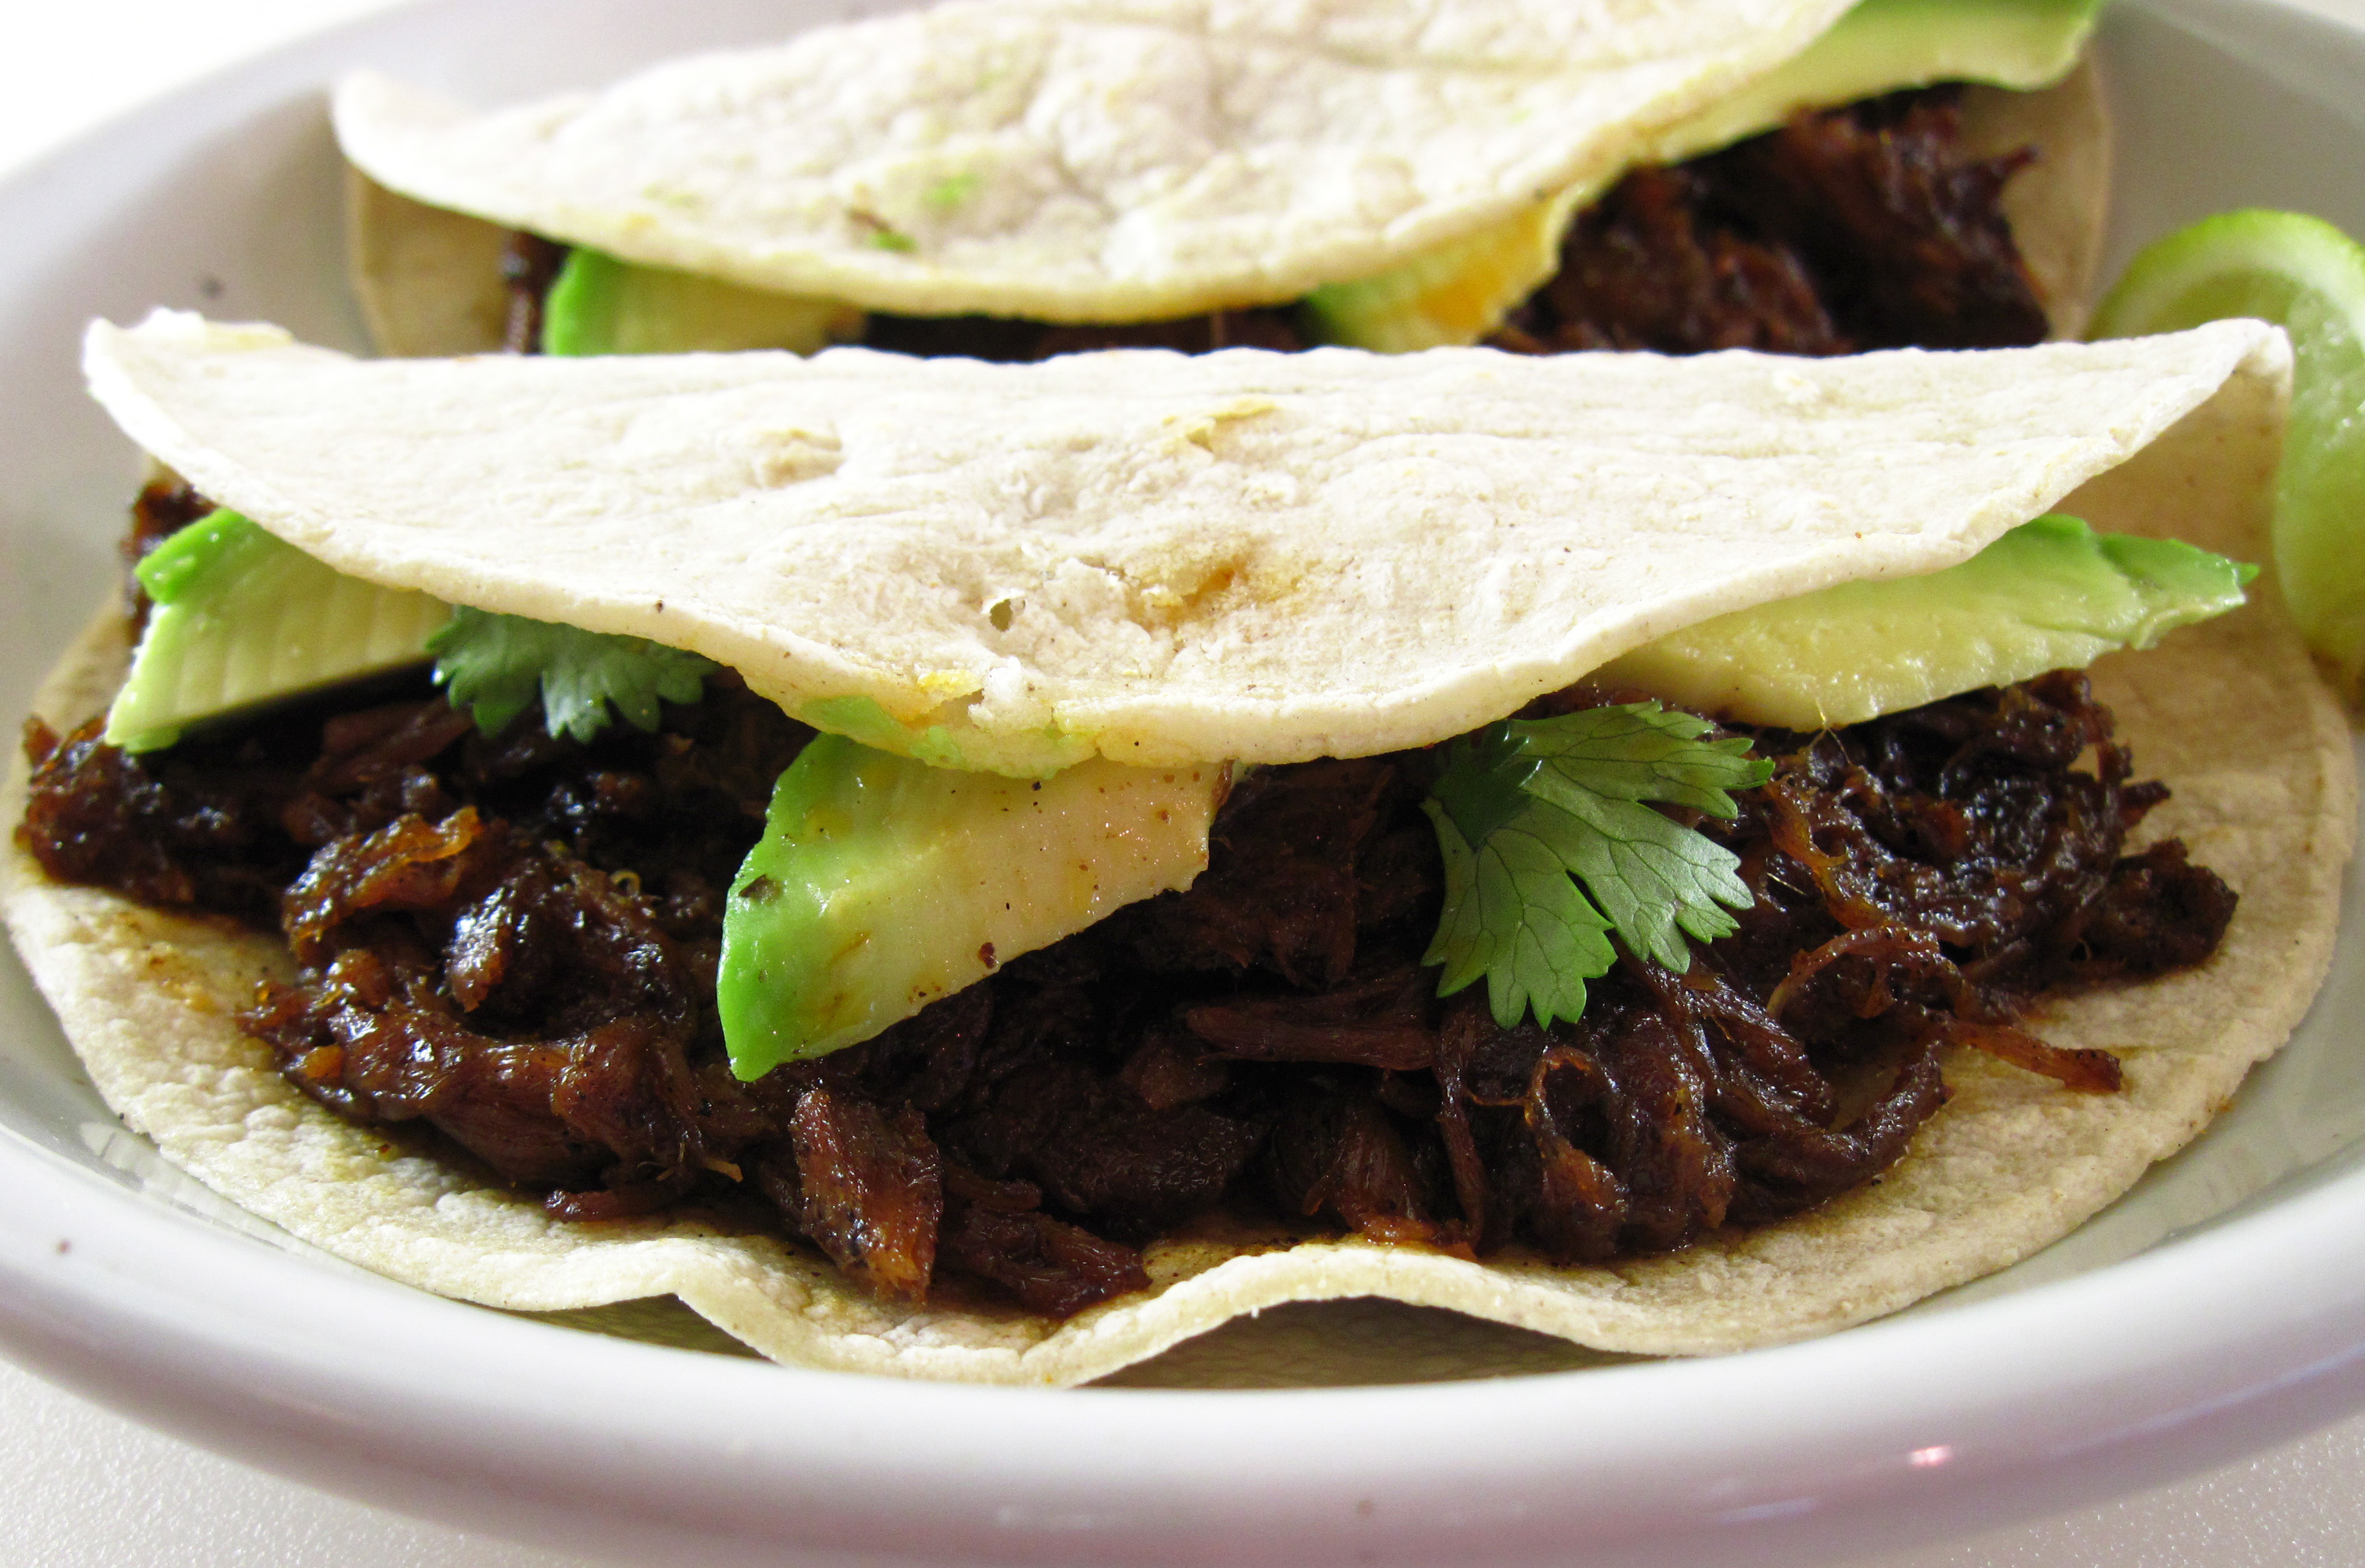
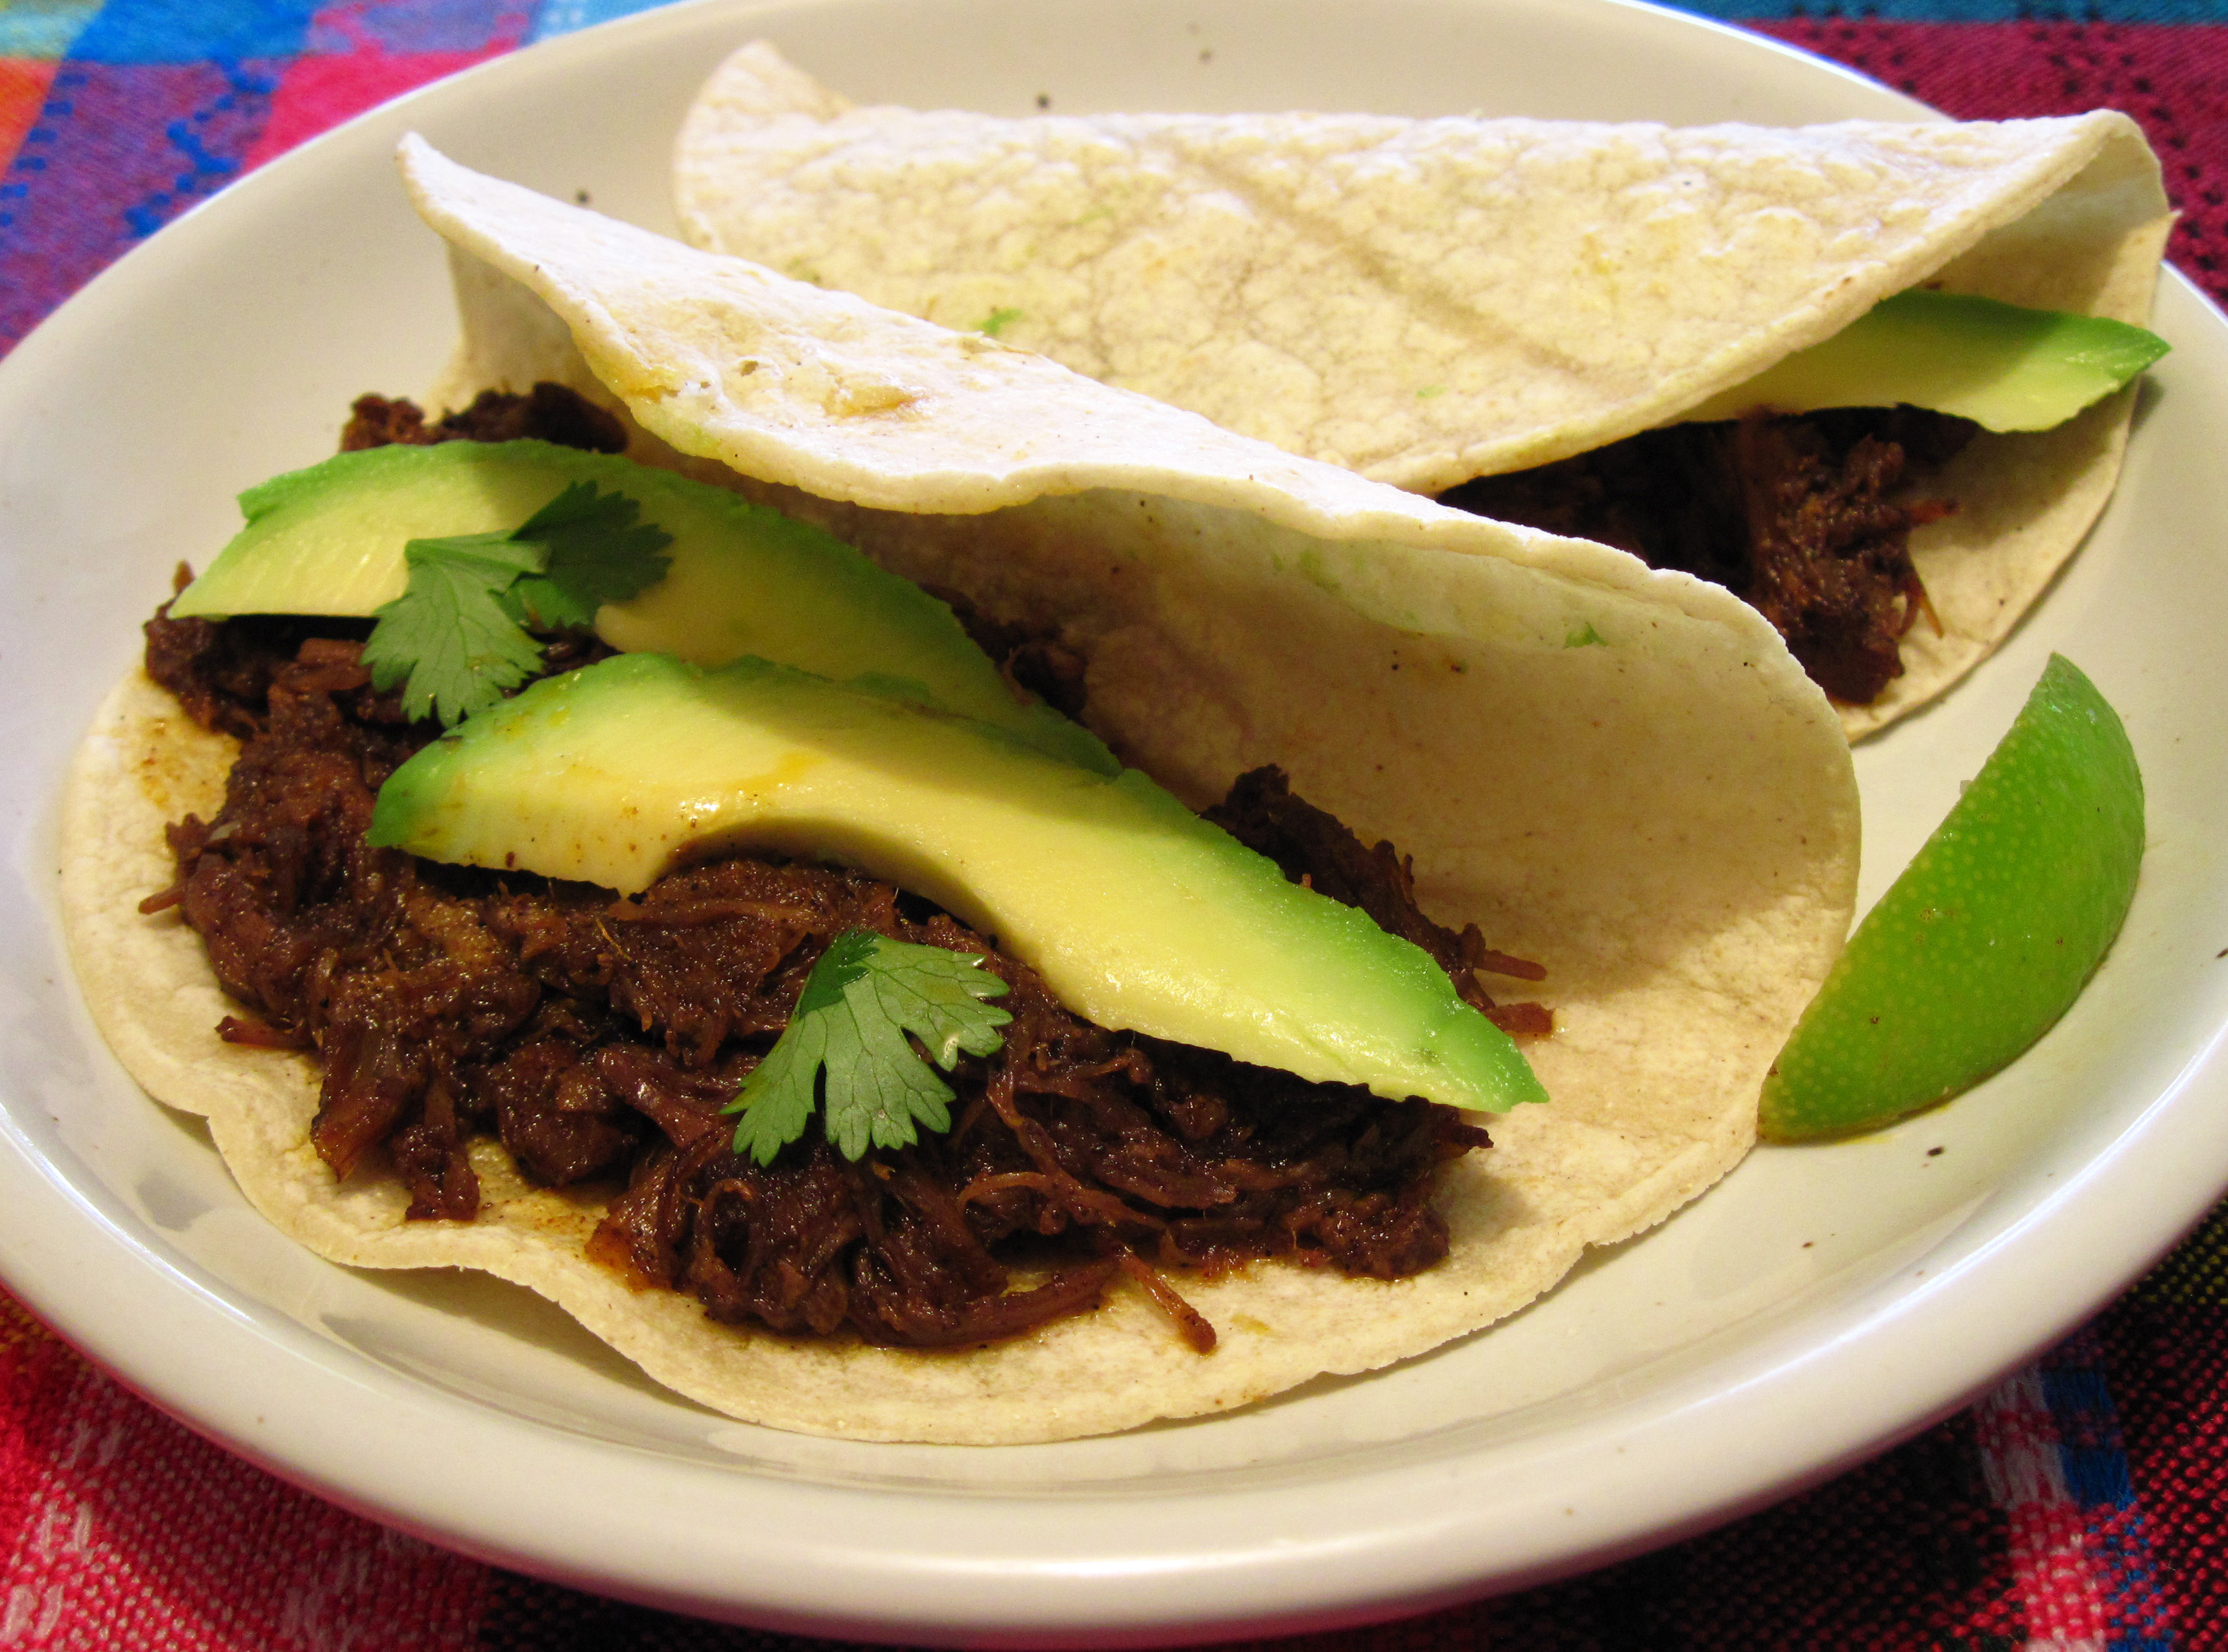
Slow Cooker Mexican Pulled Pork Tacos
By Kath Dedon
.
The Slow Cooker Mexican Pulled Pork on Simply Recipes has been on my “to-do” list ever since I first saw it. The mouth-watering photo that Elise posted and her description about how her friends swooned over it made me want to try it ASAP. With 6 people for dinner last night, I decided the group was big enough to give it a try.
….. Oh. MY! …This recipe for Slow Cooker Mexican Pulled Pork Tacos is even better than it sounds! My photos and words don’t do it justice. We all loved it, and everyone proclaimed that it is one of the best things I’ve ever made! (I think Bob still puts my Baklava at the top of the list.)
The recipe takes time, but it’s mostly unattended time, and it couldn’t be easier. I think if you just try Slow Cooker Mexican Pulled Pork Tacos it will be one of your favorites, too!
(Be sure to head over to Simply Recipes to see the beautiful step-by-step photos. I found all of the comments helpful, too.)
a
a
Slow Cooker Mexican Pulled Pork Tacos
(Adapted from a recipe by Elise Bauer on simplyrecipes.com)
a
If you don’t have a slow cooker you could try a method similar to the one I used for Pulled Pork in the Oven. After the roast has been refrigerated with the spices, brown it in a large pot. (A Dutch oven would be ideal.) When it’s browned all over, add about 1/2 cup water to the pot, stirring up all of the tasty bits on the bottom. Sprinkle the reserved spice mix over the roast. Cover it with a lid or as tightly as you can with aluminum foil and roast at 300˚ for 1½ hours. Turn the roast over, cover it again and continue to roast for another 2½ to 3 hours or until it is fork tender. Because this recipe doesn’t have any added sauce I would leave it covered the whole time so it doesn’t dry out.
a
a
Serves 6 – 8 (or more with a larger roast)
a
4 tablespoons chili powder(I use a salt-free blend.)
1 tablespoon kosher salt
1 tablespoon sugar (I used maple sugar.)
2 teaspoons ground cumin
1 teaspoon cayenne
1 teaspoon dried oregano crumbled with your fingers into smaller bits
1 teaspoon onion powder
1 teaspoon garlic powder
¼ teaspoon cinnamon
Scant pinch of ground cloves
a
3¼ pound boneless pork shoulder roast
2 tablespoons vegetable oil
a
Corn tortillas(at least 2 – 3 per serving, depending on whether you want single or double tortillas for each taco)
a
Optional toppings
Avocado, sliced
Cilantro
Radishes, sliced
Quick Pickled Onions(recipe follows at the end of the taco recipe)
Salsa or Pico de Gallo (We had delicious homemade salsa that Laura and Byron made using peppers from their garden! Yum!)
a
1. The day before you want to serve the tacos, mix all of the spices together and rub them generously all over the pork roast. (If the roast has been tied, cut the string off first.) Reserve any leftover spice for the next day.
a
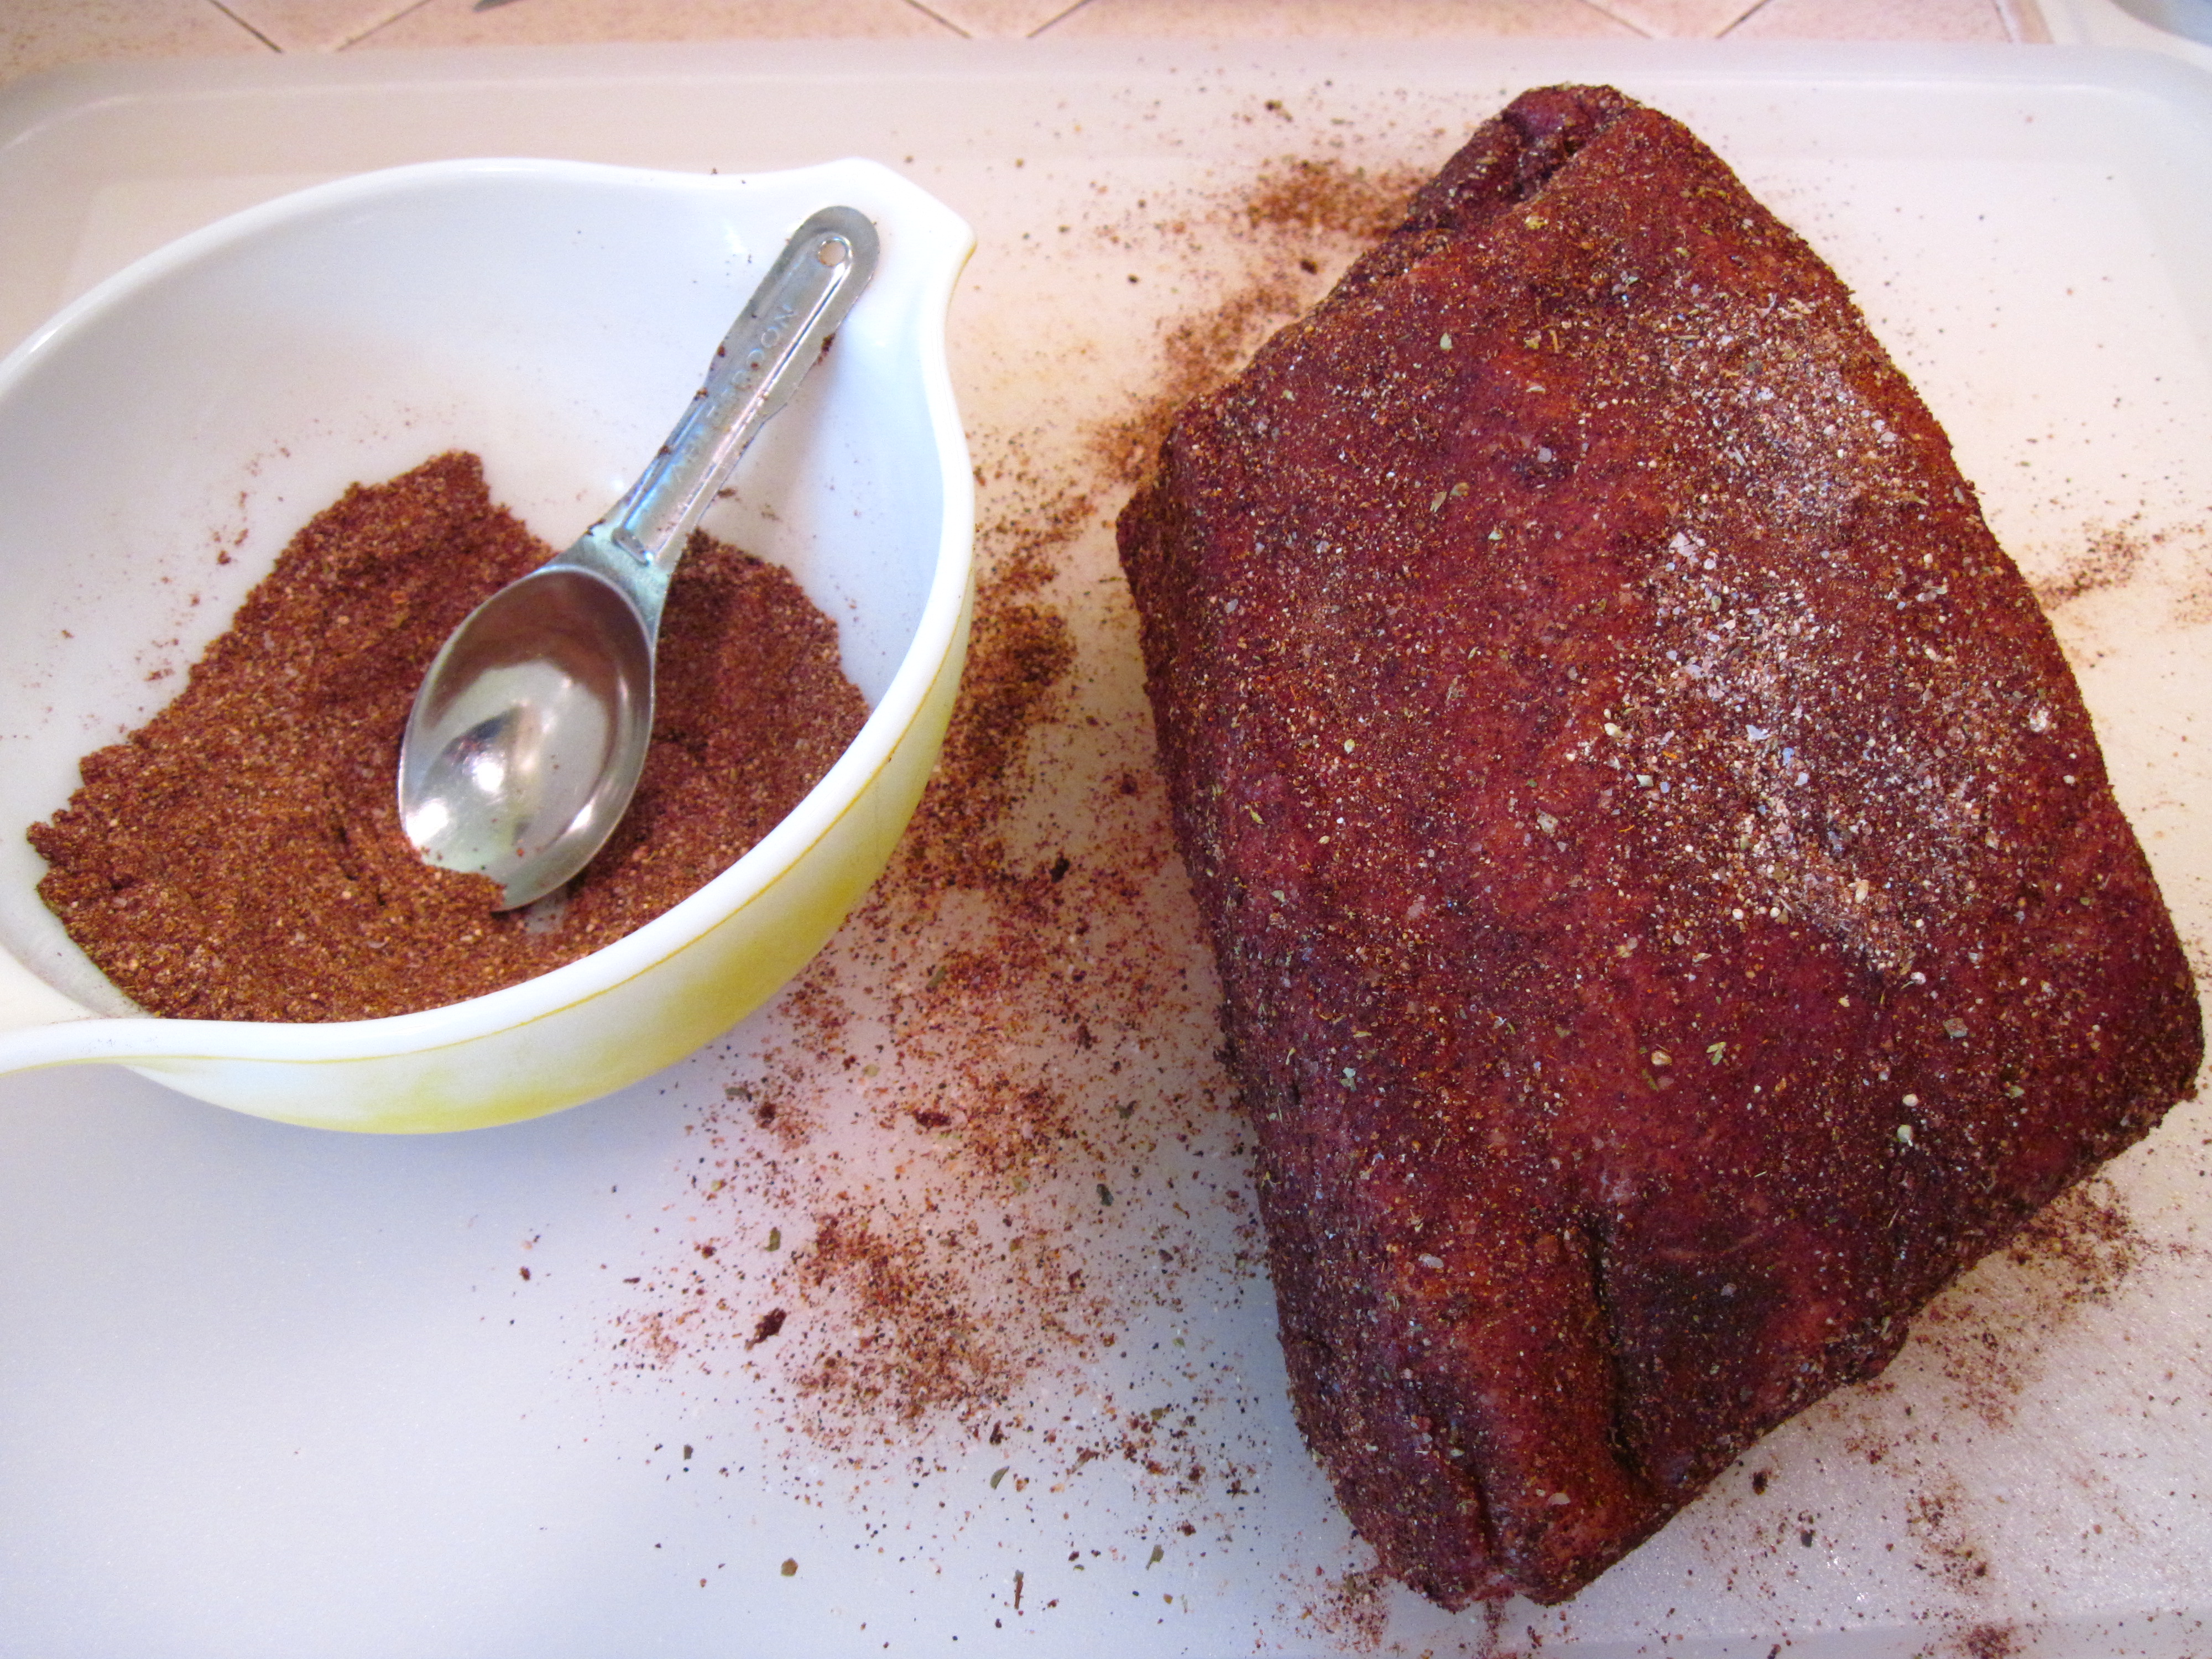
a
2. Cover the roast and refrigerate overnight.
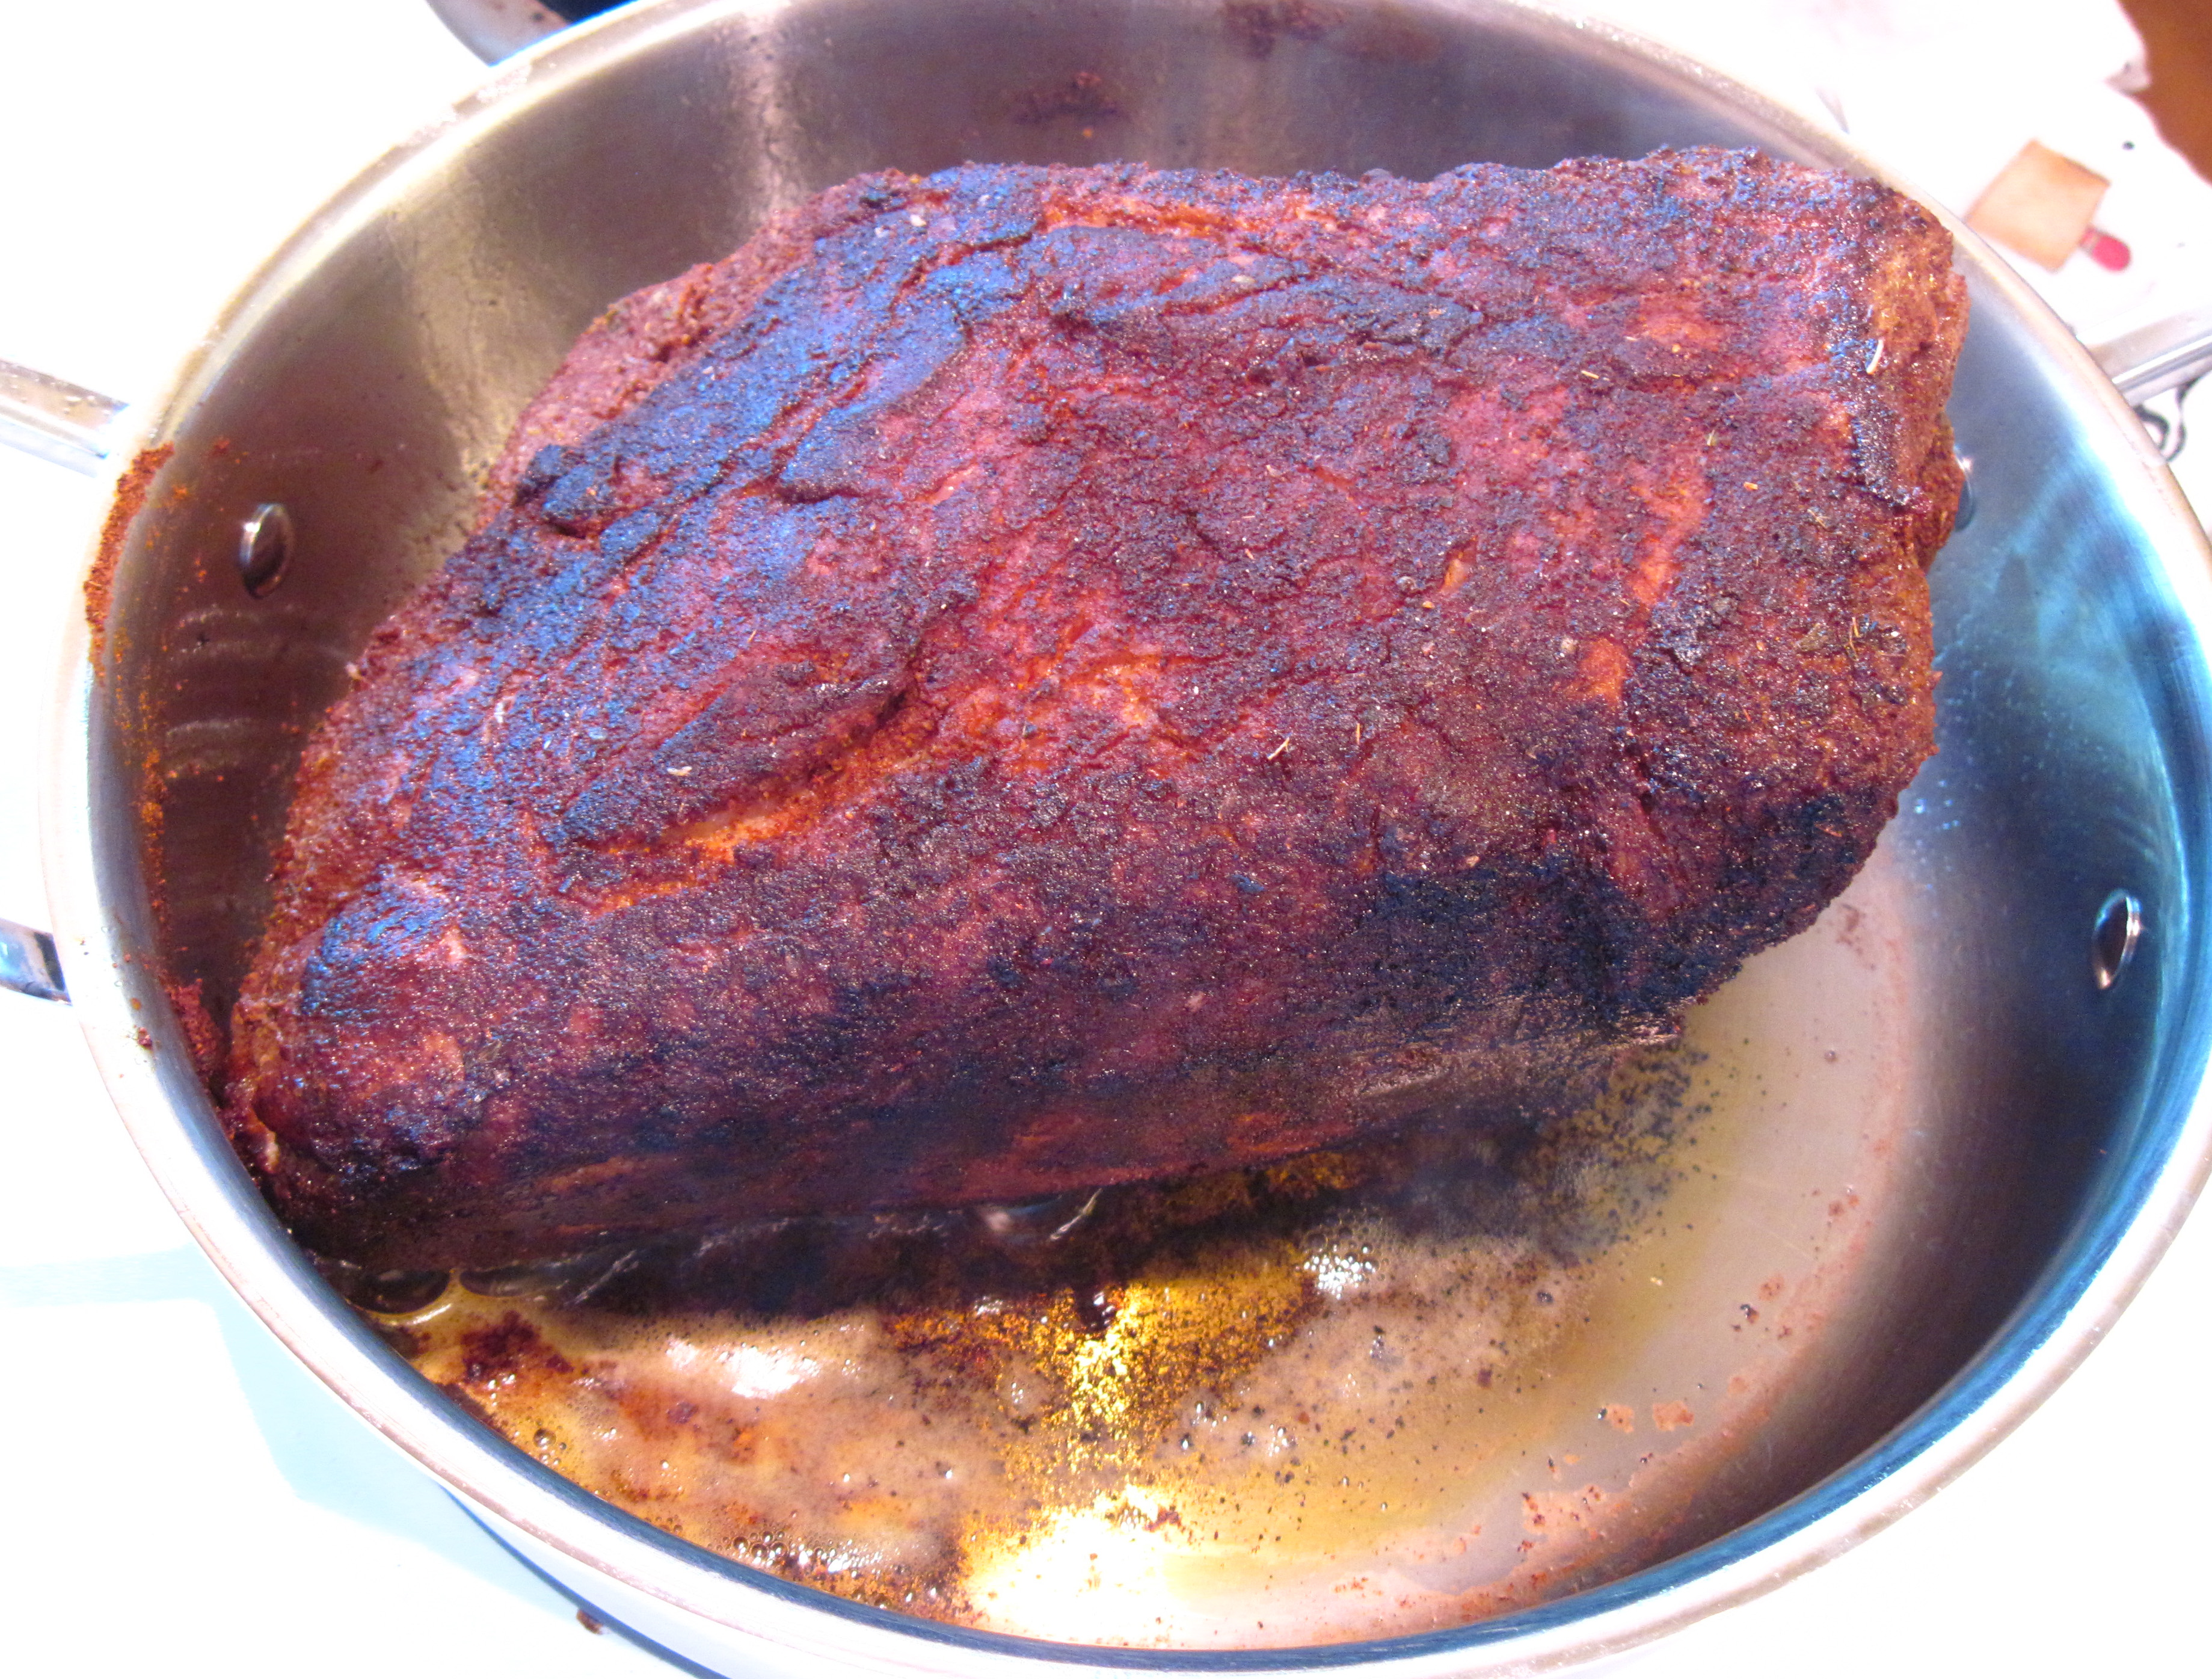
3. Heat the oil in a pan and brown the pork roast on all sides. This will take 15 – 20 minutes.
a
a
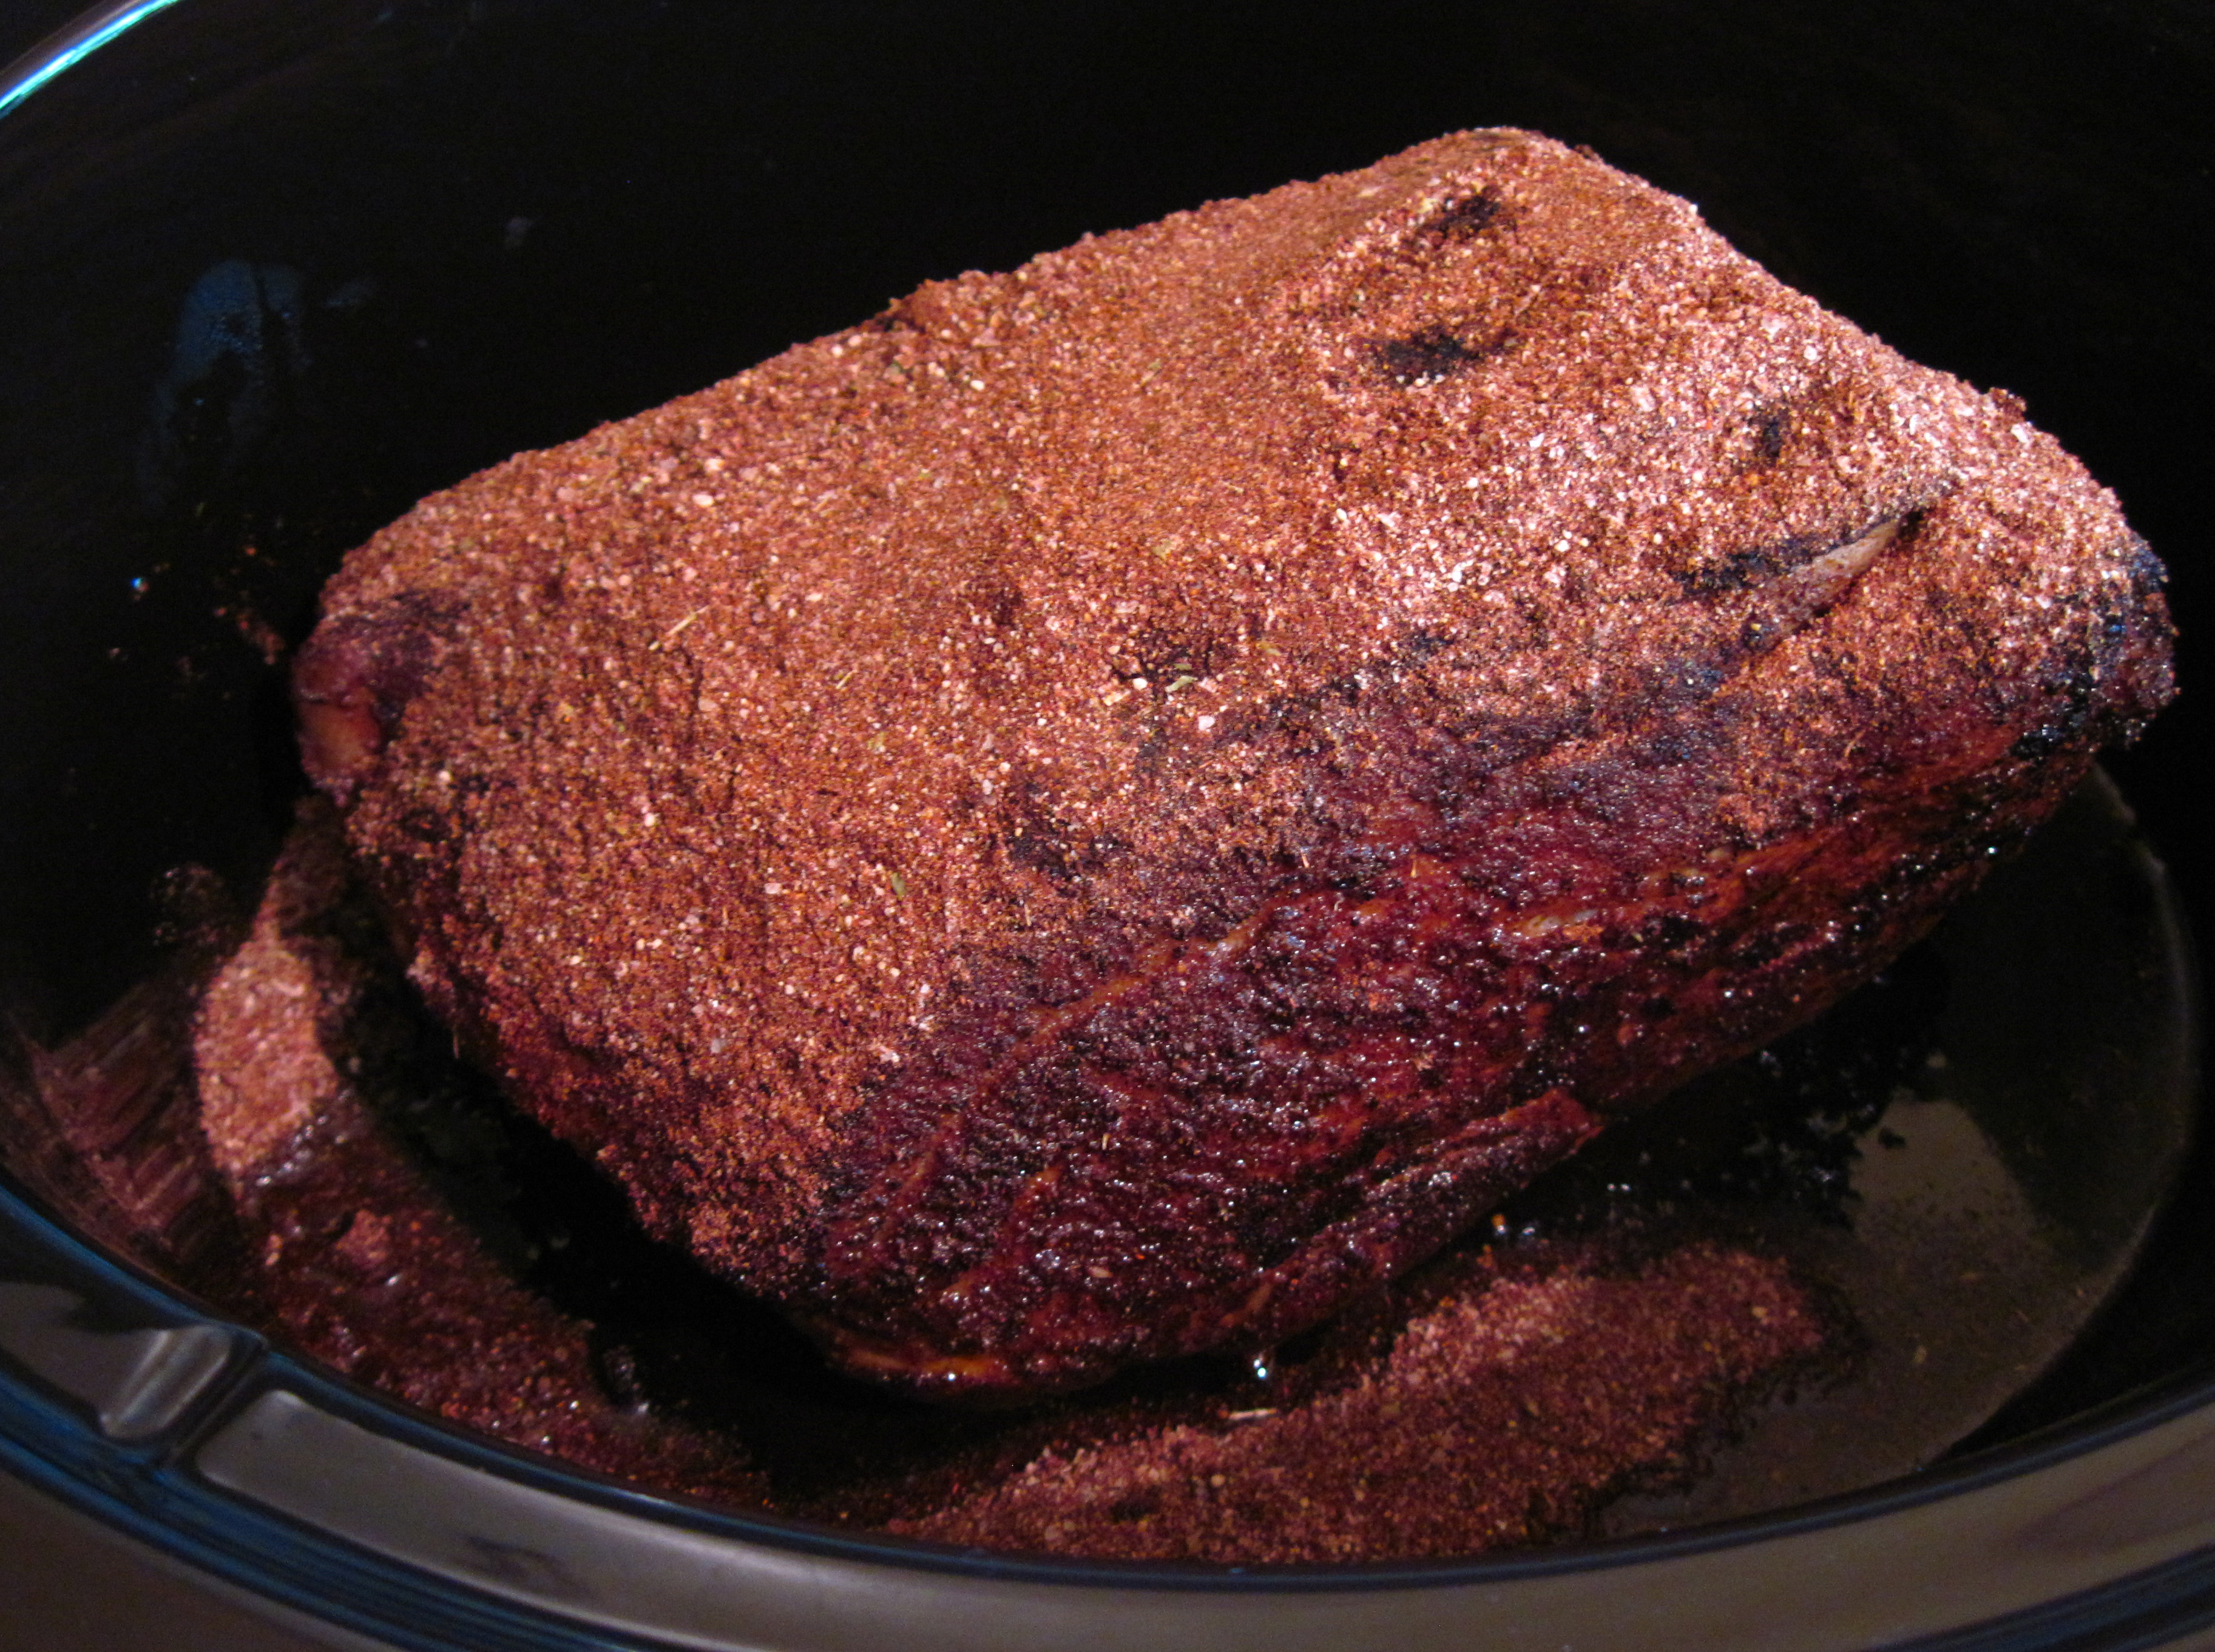
4. Put the browned roast in the slow cooker and add in as much of the remaining oil and spices in the pan as you can.
5. Sprinkle the rest of the reserved spices over the roast. Put the slow cooker cover on and cook on Low for 6 – 10 hours, until it is fork tender. It should be falling-apart done. (It took 6 ½ hours in my 6 quart slow cooker. It would have needed 10 hours in my older 4 quart cooker which cooks at a lower temperature.)
a
Extra spices are sprinkled all over the browned roast and it’s ready to go in the slow cooker.
a
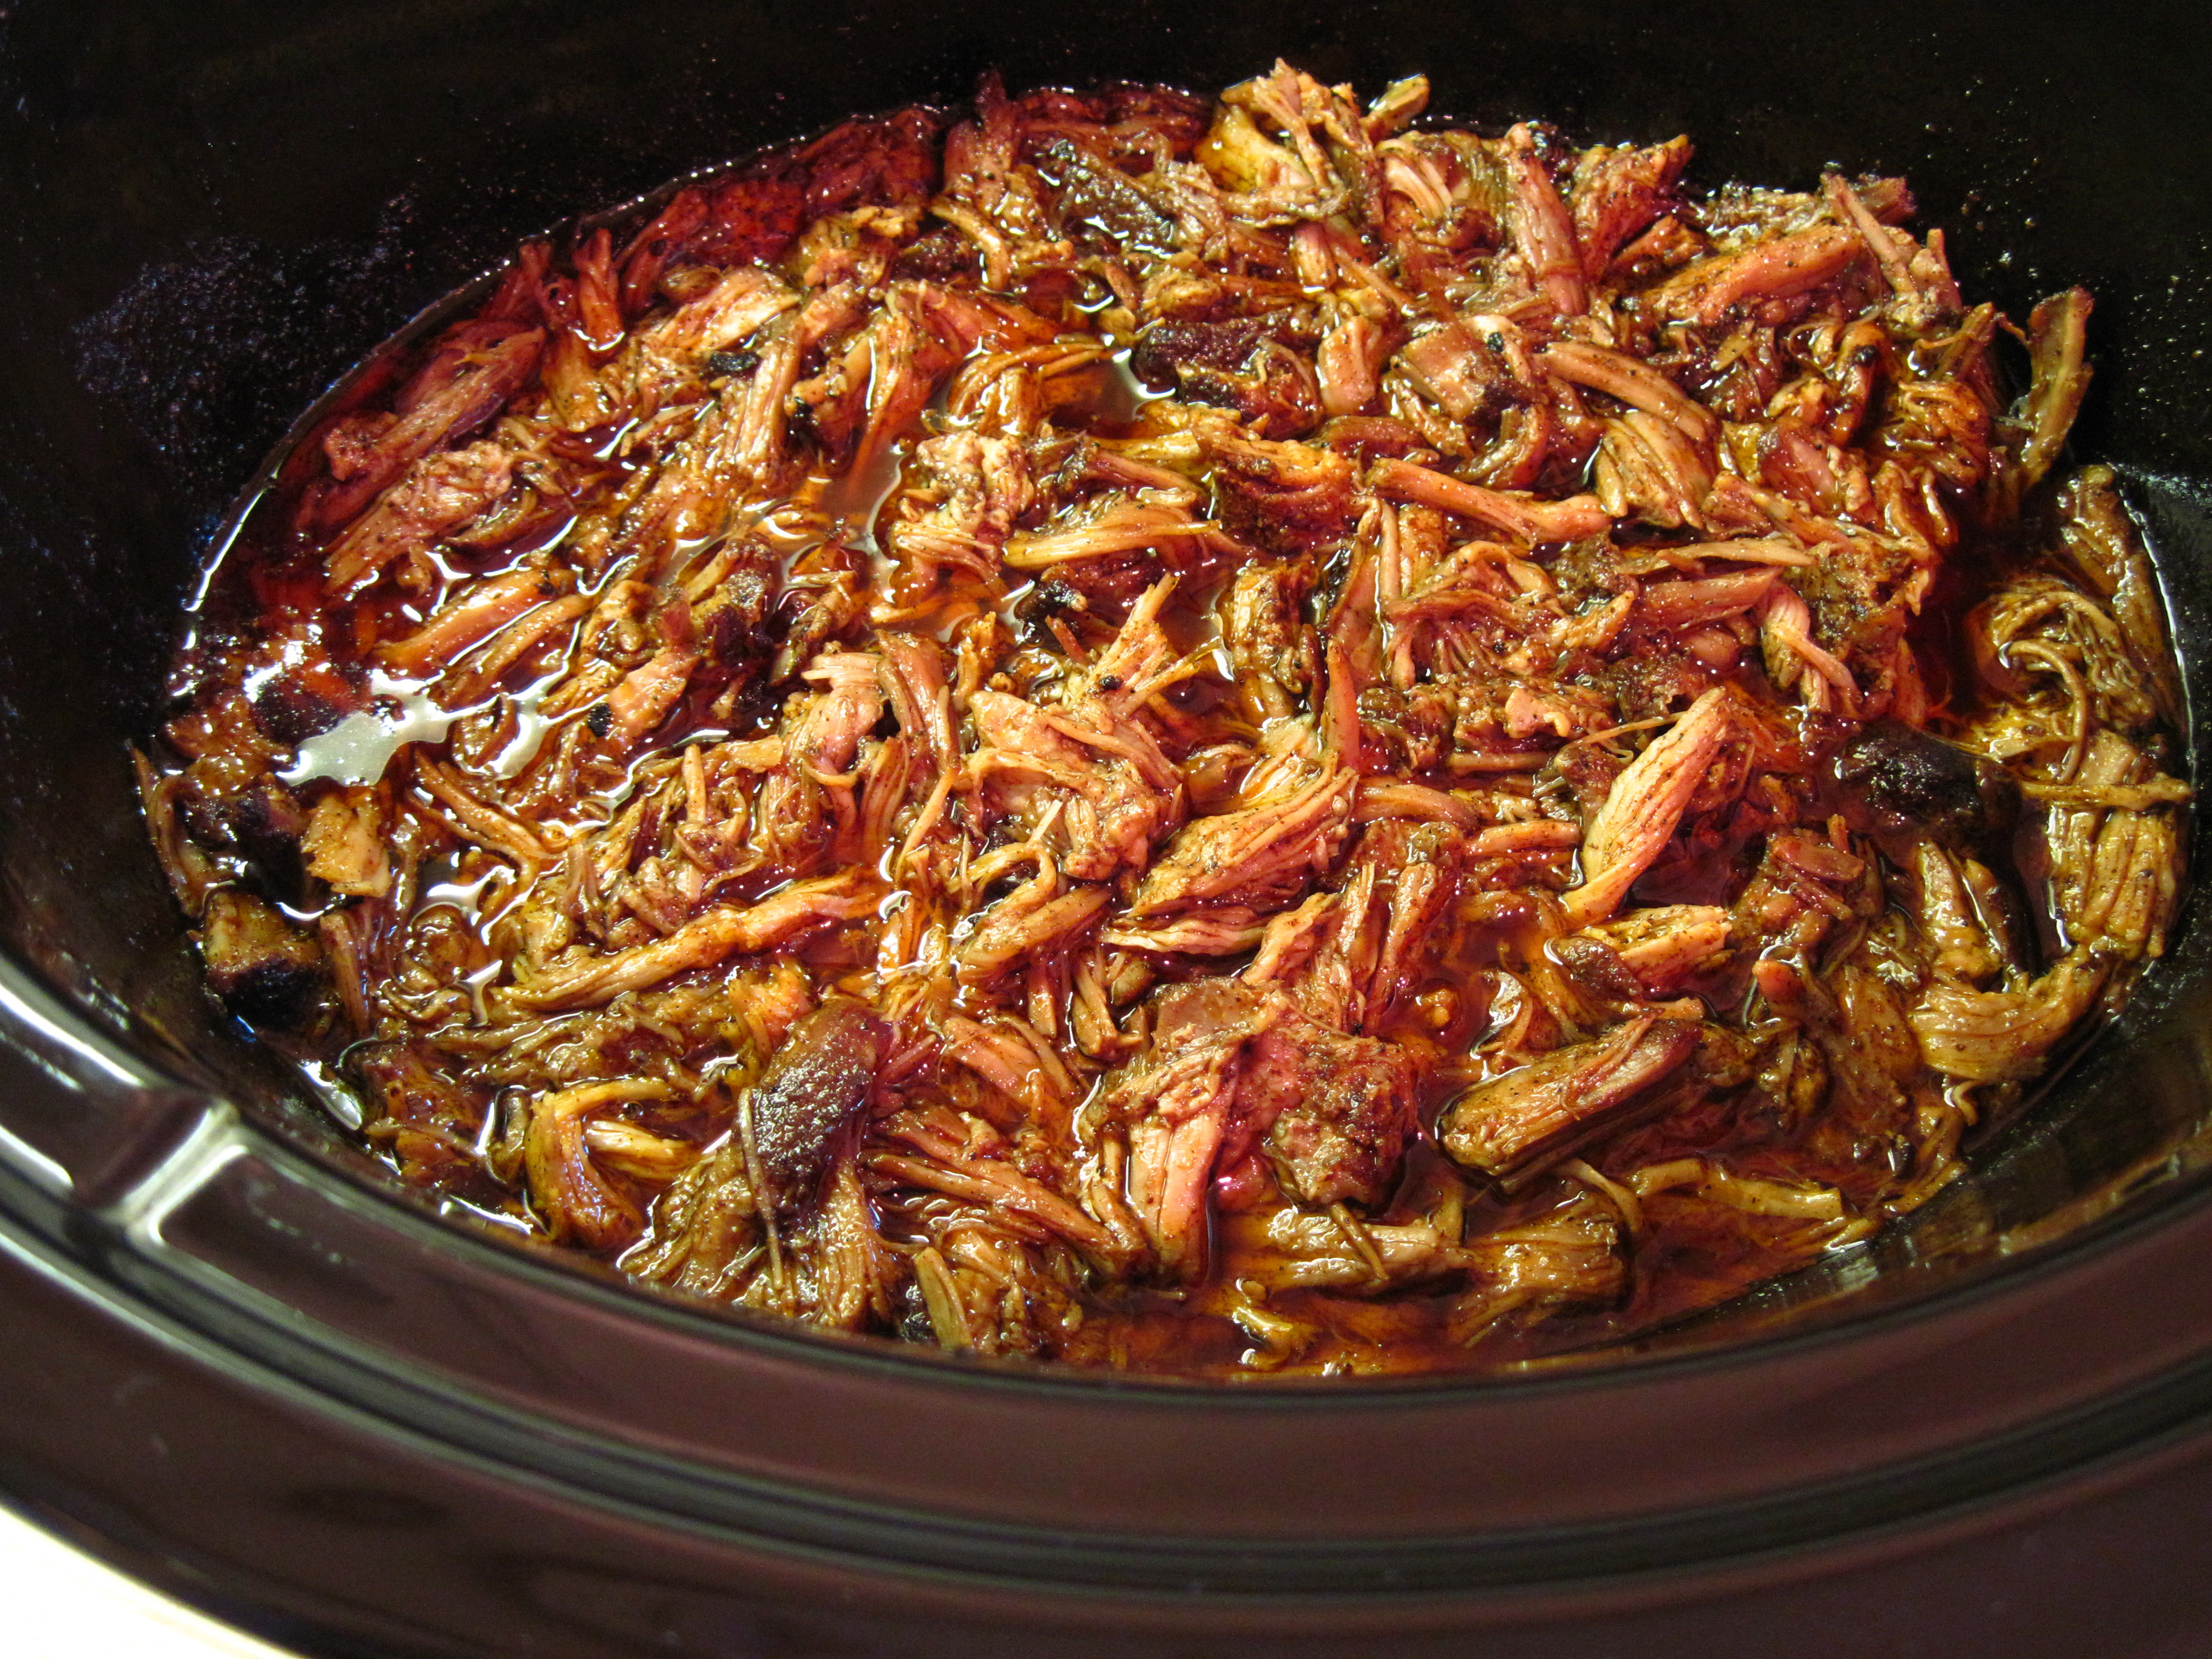
6. Remove the pork from the slow cooker and put it on a cutting board. Using two forks, shred it into bite-sized pieces.
7. Stir the pork back into the spicy juices in the slow cooker. It can be kept on Warm until it’s time to serve.
a
a
8. Heat the tortillas using your favorite method. I like to heat them for about 30 seconds on each side in a hot cast iron skillet. I put them in foil as I go to keep them warm.
9. Assemble the tacos using your favorite toppings and enjoy the feast!
a
Quick Pickled Onions
This is adapted from an easy Bon Appétit recipe.
½ cup apple cider vinegar
1 tablespoon honey
1 ½ teaspoons kosher salt
1 red onion, sliced in half vertically and then sliced in thin horizontal slices
a
1. Whisk the vinegar, honey, and salt together in a large bowl until the honey and salt are dissolved.
2. Add the onion slices. Cover and leave at room temperature for 1 – 2 hours, stirring occasionally.
3. Drain for immediate use, or refrigerate for up to 2 weeks. Drain before using.
a
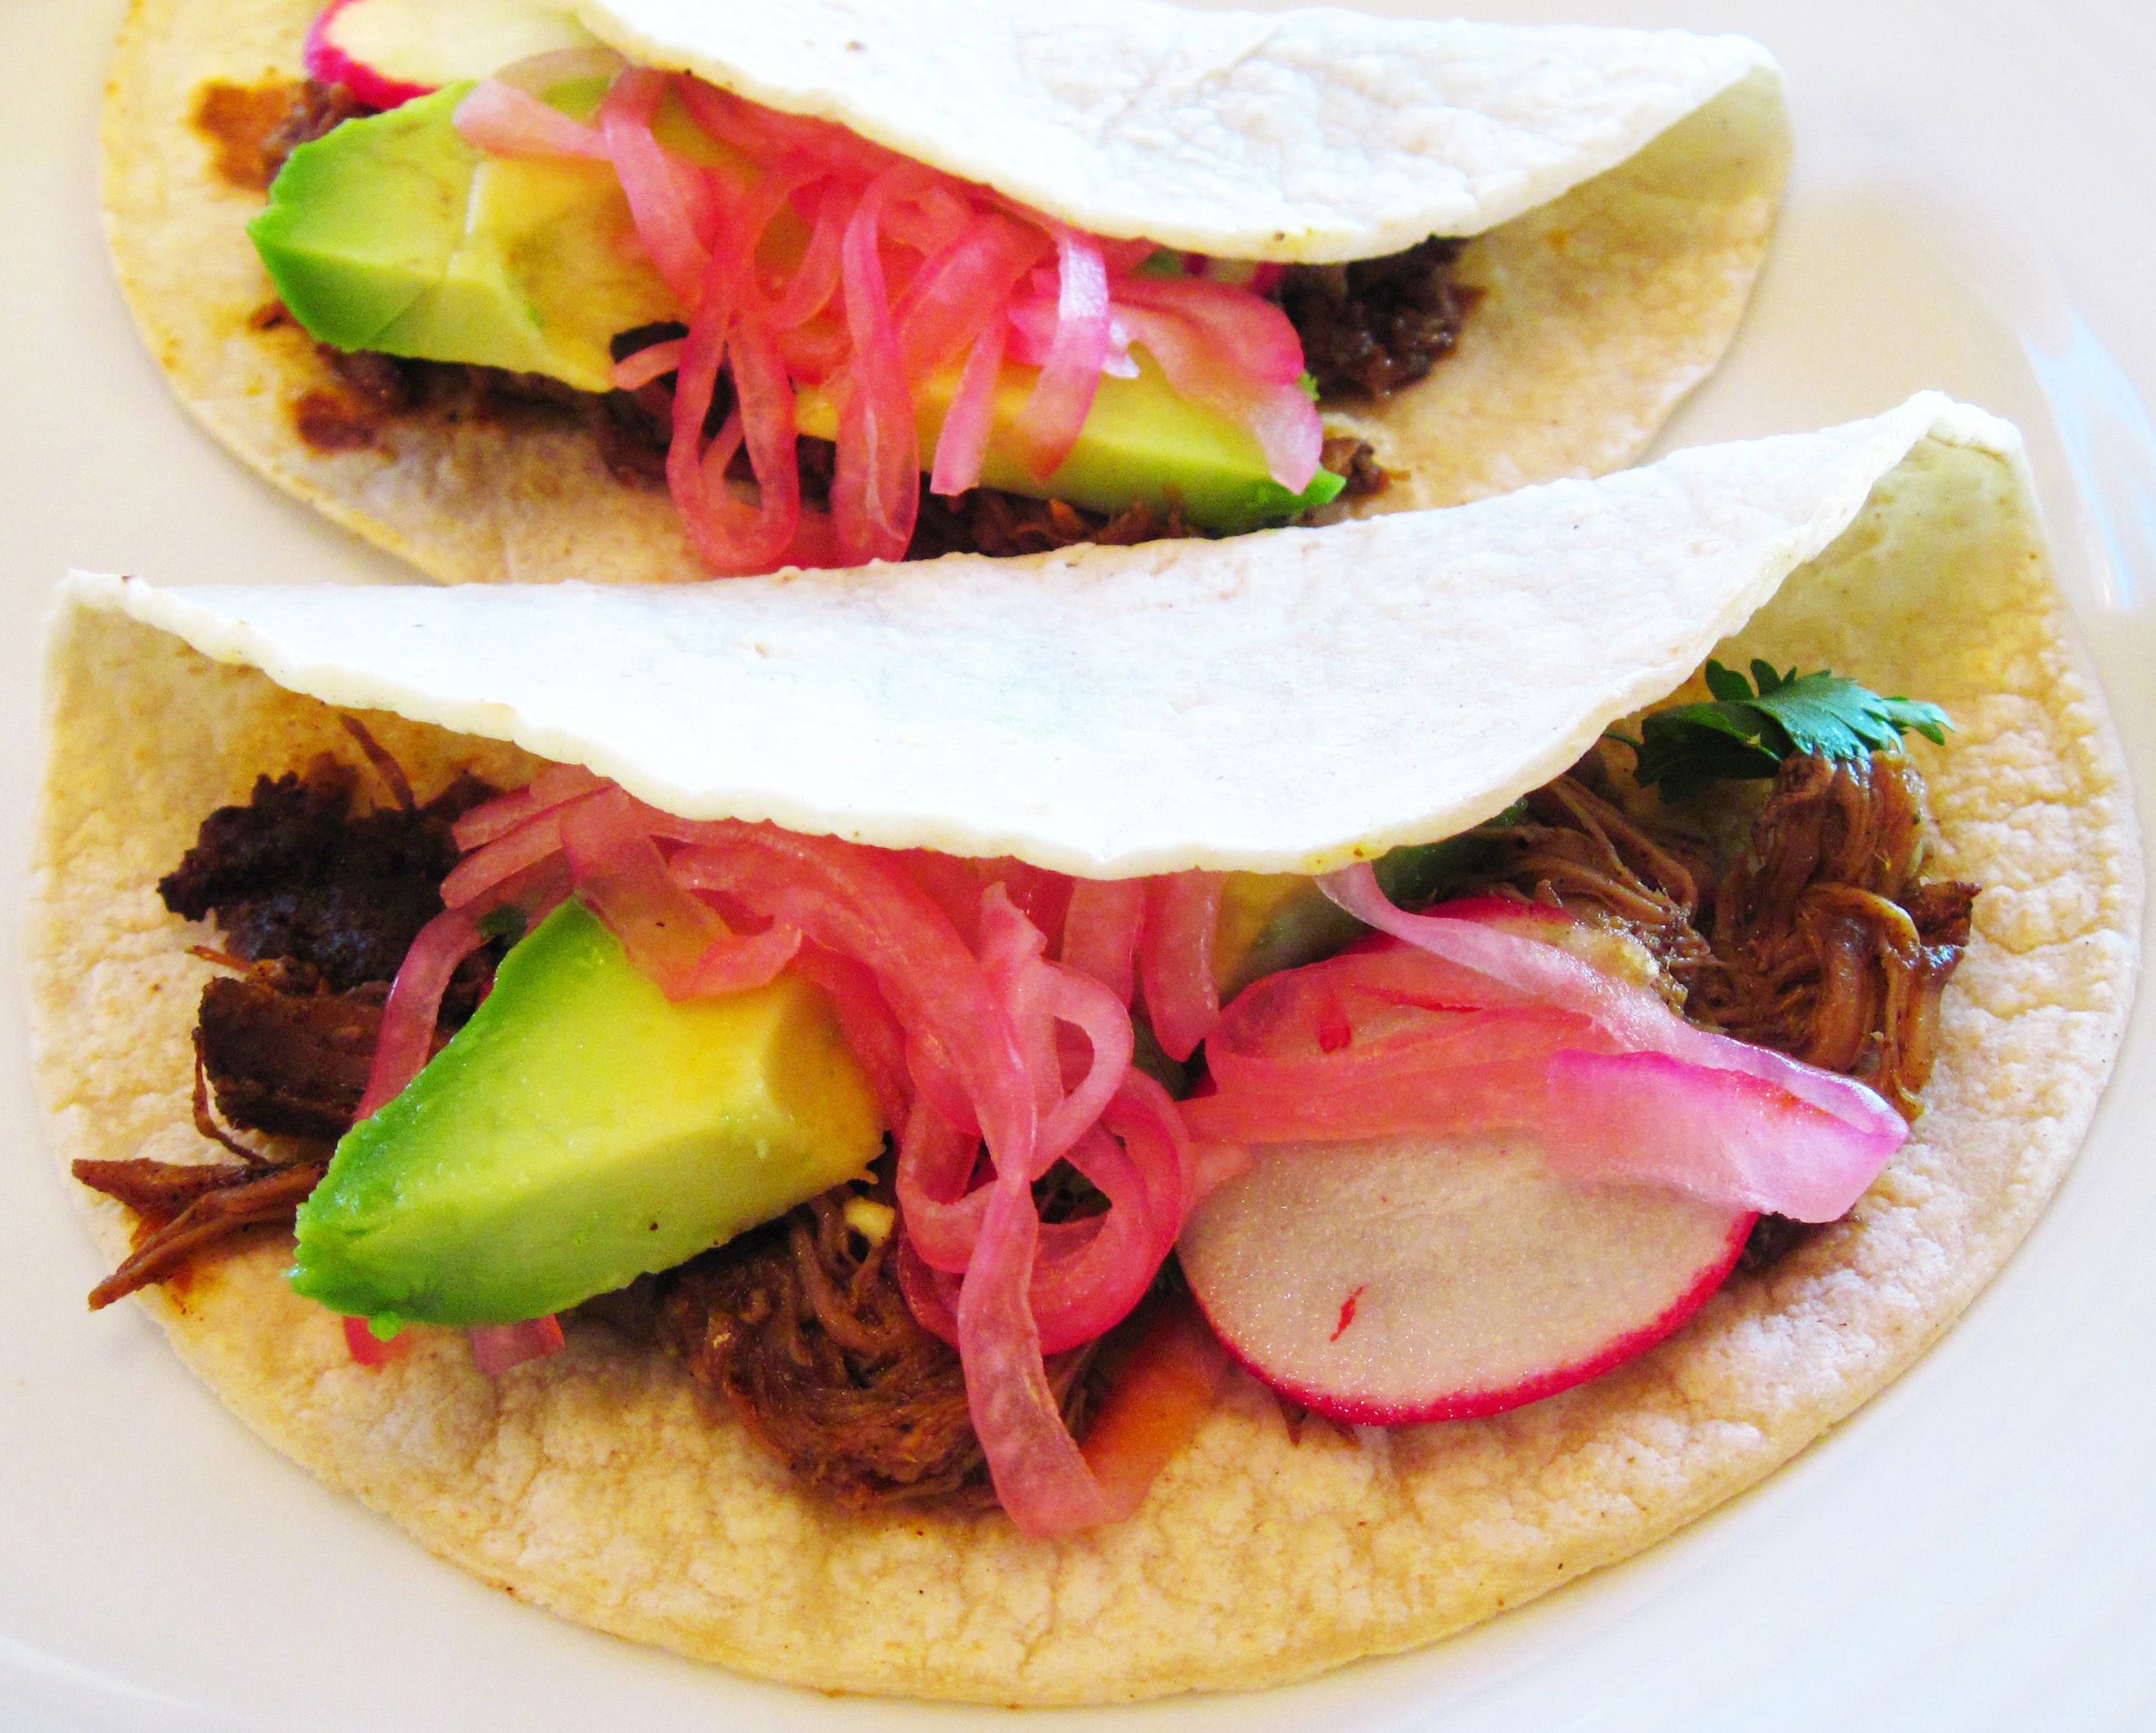
Mexican Pulled Pork Tacos with cilantro, avocado slices, Quick Pickled Onions, radish slices, and a bit of salsa.
a


