Welcome!
You'll find over 470 of my favorite recipes here, including ideas for Quick meals, Cooking for 2, Feasting on Leftovers, and cooking with 5 Ingredients or Less. I'm adding new posts regularly; you can subscribe by email or RSS feed if you'd like to receive the latest recipes. Bon appétit!
Corned Beef Hash with Yukon Gold Potatoes
This Corned Beef Hash with Yukon Gold Potatoes is from Tom Douglas’ Seattle Kitchen, the first of Tom’s three cookbooks. Tom is a popular restaurateur in Seattle; this hash is served on the brunch menu at one of his restaurants, Etta’s.
I already have a good, but pretty basic, corned beef hash recipe on the blog. But I had been eager to try Tom’s recipe to see how his version compares. Bob and I both loved his version! Most hash recipes have equal proportions of corned beef and potatoes. Tom’s recipe goes heavy on the beef. He adds a bit of spice with a poblano chile and just a touch of chili sauce. Along with the green chile, he uses some diced carrot. I love the flecks of color in the hash. The only thing that would have made it better would have been if the poblano chile had been hotter. The one I used was pretty mild.
I did not make the Habanero Ketchup that Tom makes to serve with the hash. Bob doesn’t like anything that is ketchup-like, and I thought the habanero would be too spicy for me. Maybe I’ll try it next time.
a

a
Corned Beef Hash with Yukon Gold Potatoes
(Adapted from a recipe in Tom Douglas’ Seattle Kitchen)
a
a
Serves 4
If you don’t have leftover corned beef, buy a 2 pound corned beef. Put it and the pickling spices it comes with in a large pot and cover with water. Cover; bring to a boil and simmer for 3 hours until it is tender. Add more water, if needed, as it cooks to keep it covered. This method makes the meat easier to shred for the hash. Let it cool. Remove the fat and shred it with your fingers. Chop the shredded meat into smaller pieces.
a
About 3 cups cooked, shredded, and chopped corned beef (see above)
½ pound Yukon Gold potatoes, peeled and cut into ½-inch dice
5 tablespoons unsalted butter
2/3 cup diced onions
1 poblano chile, seeded and minced (about 2/3 cup)
1 carrot, diced (about 1/3 cup)
2 tablespoons plus 1 teaspoon chili sauce (like Heinz)
Kosher salt
8 large eggs
a
1. Preheat the oven to 200˚
At 8.15 ounces, this one Yukon Gold potato was just the right size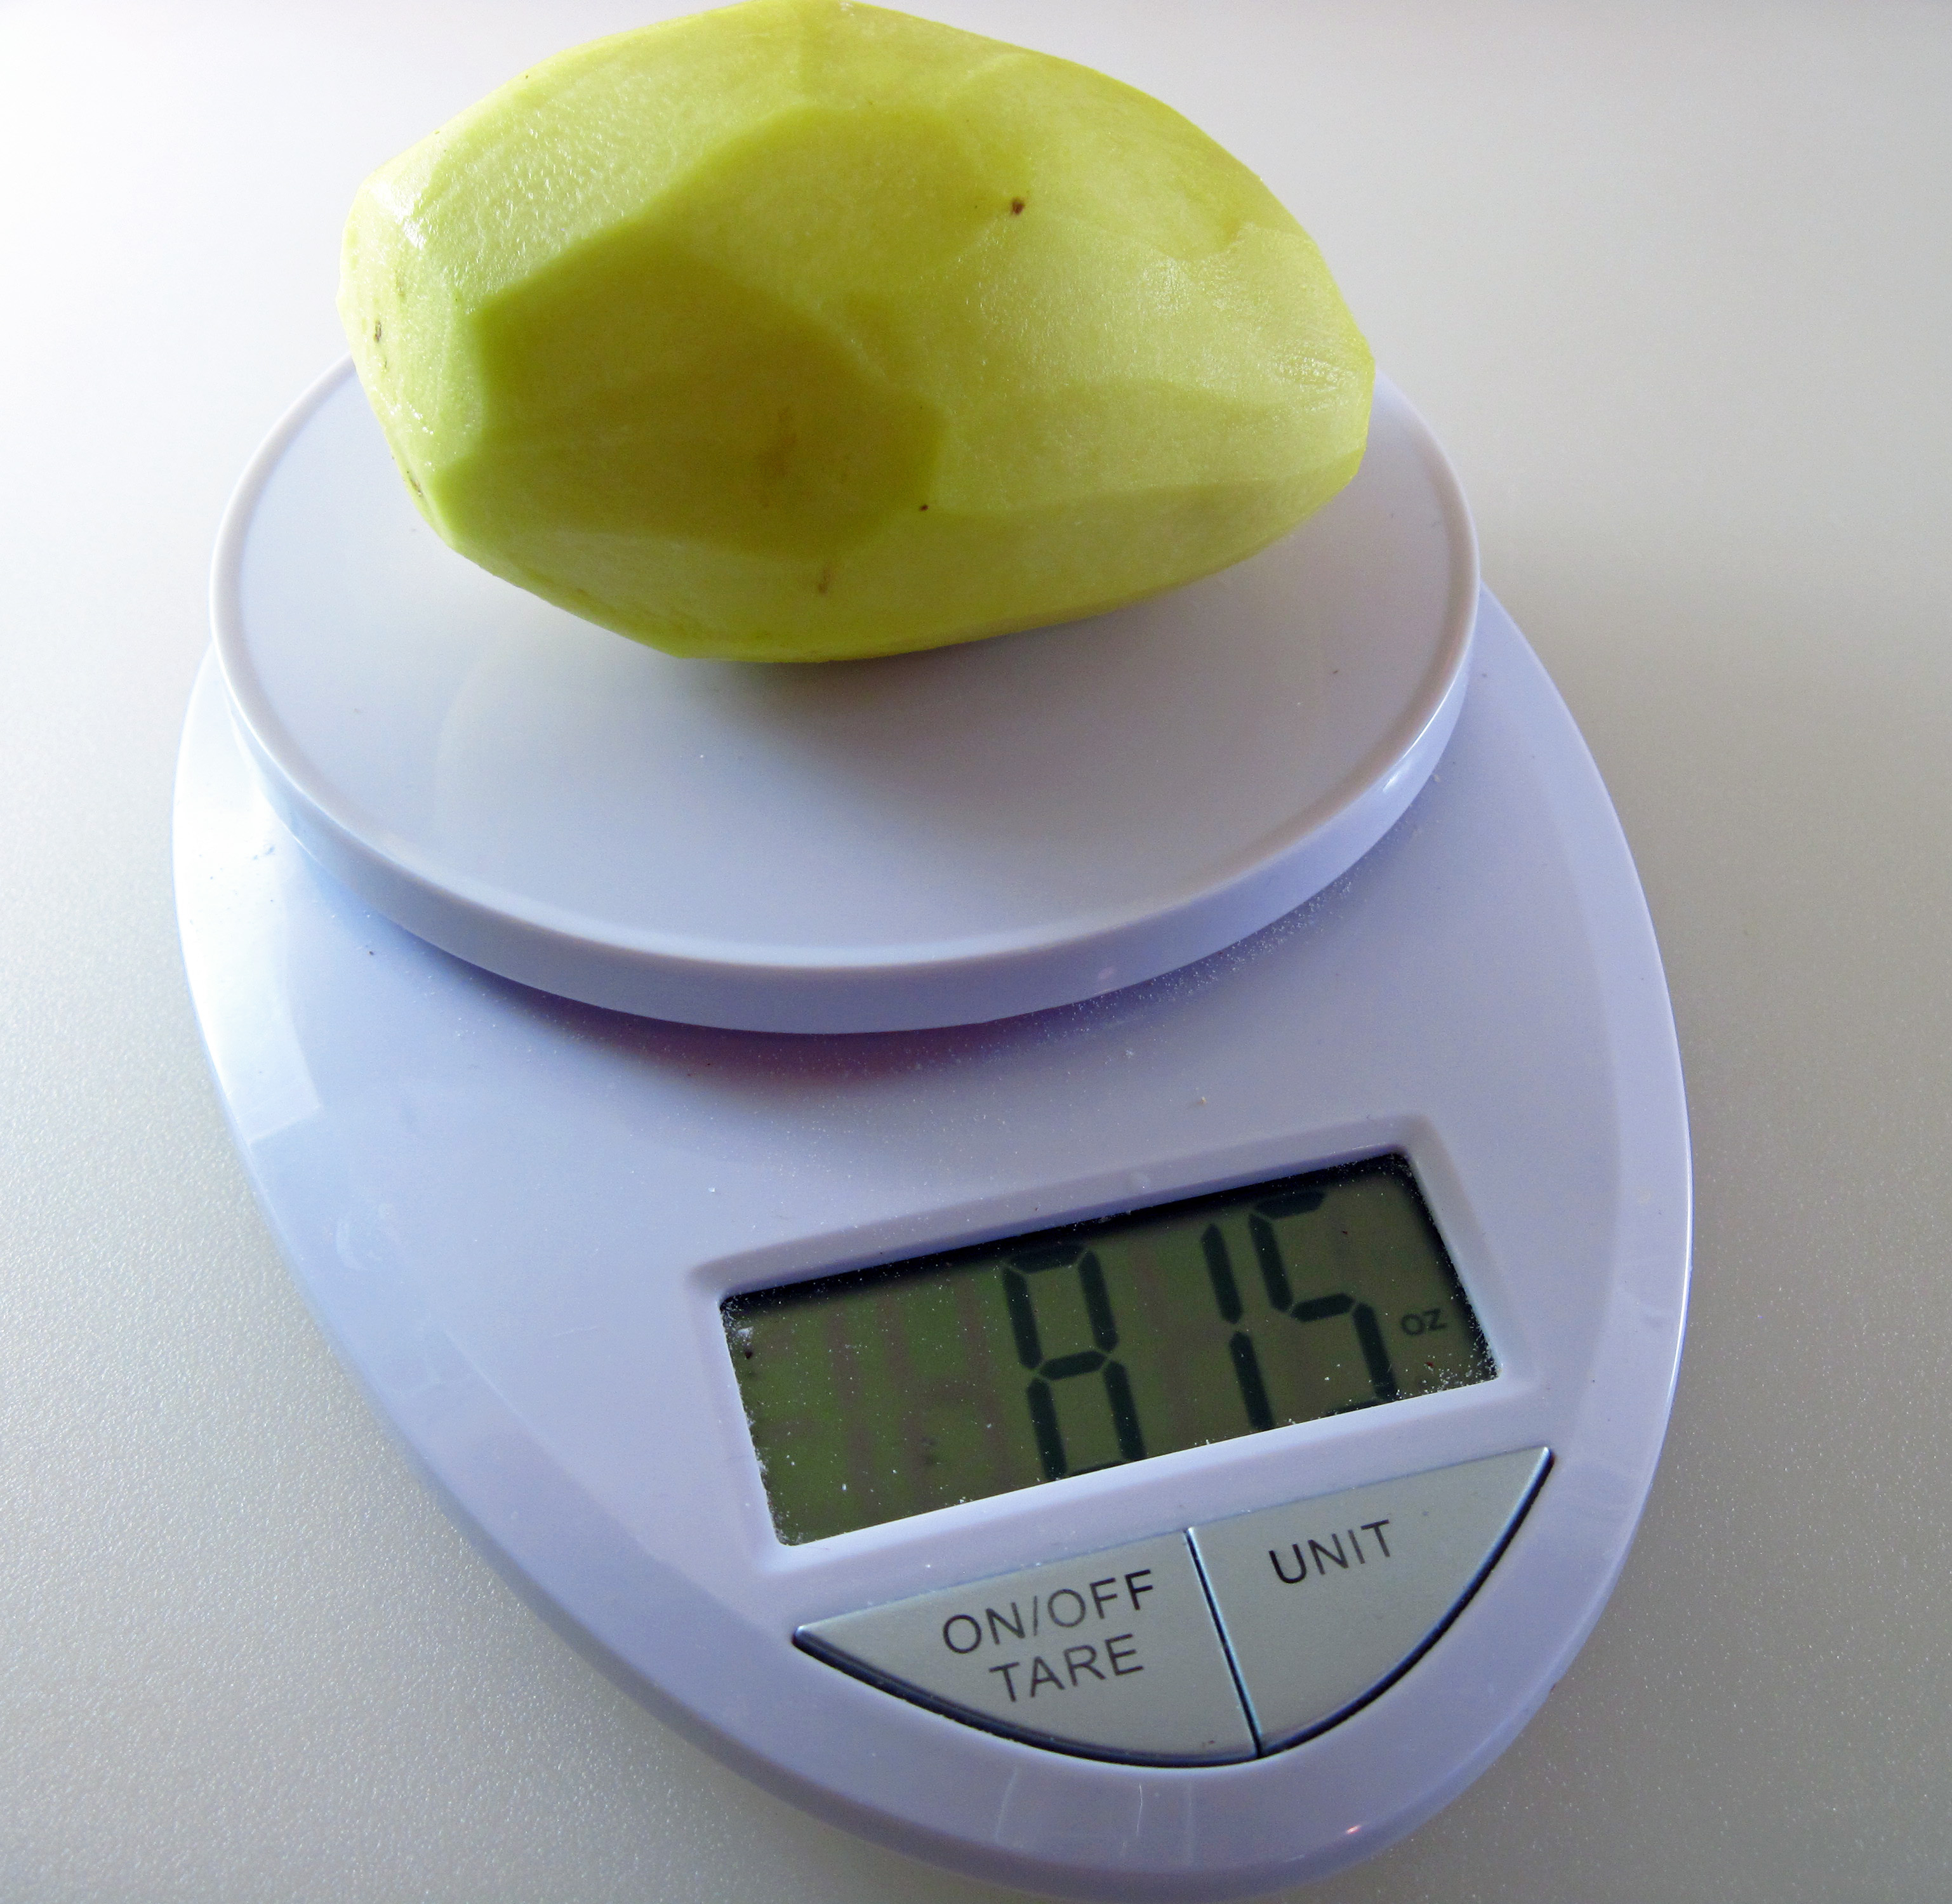
a
2. Put the potatoes in a pot. Cover with water and stir in about 1 tablespoon salt. Bring to a boil, then cover and reduce heat to a simmer. Cook for about 15 minutes or until just tender. Drain and set aside.
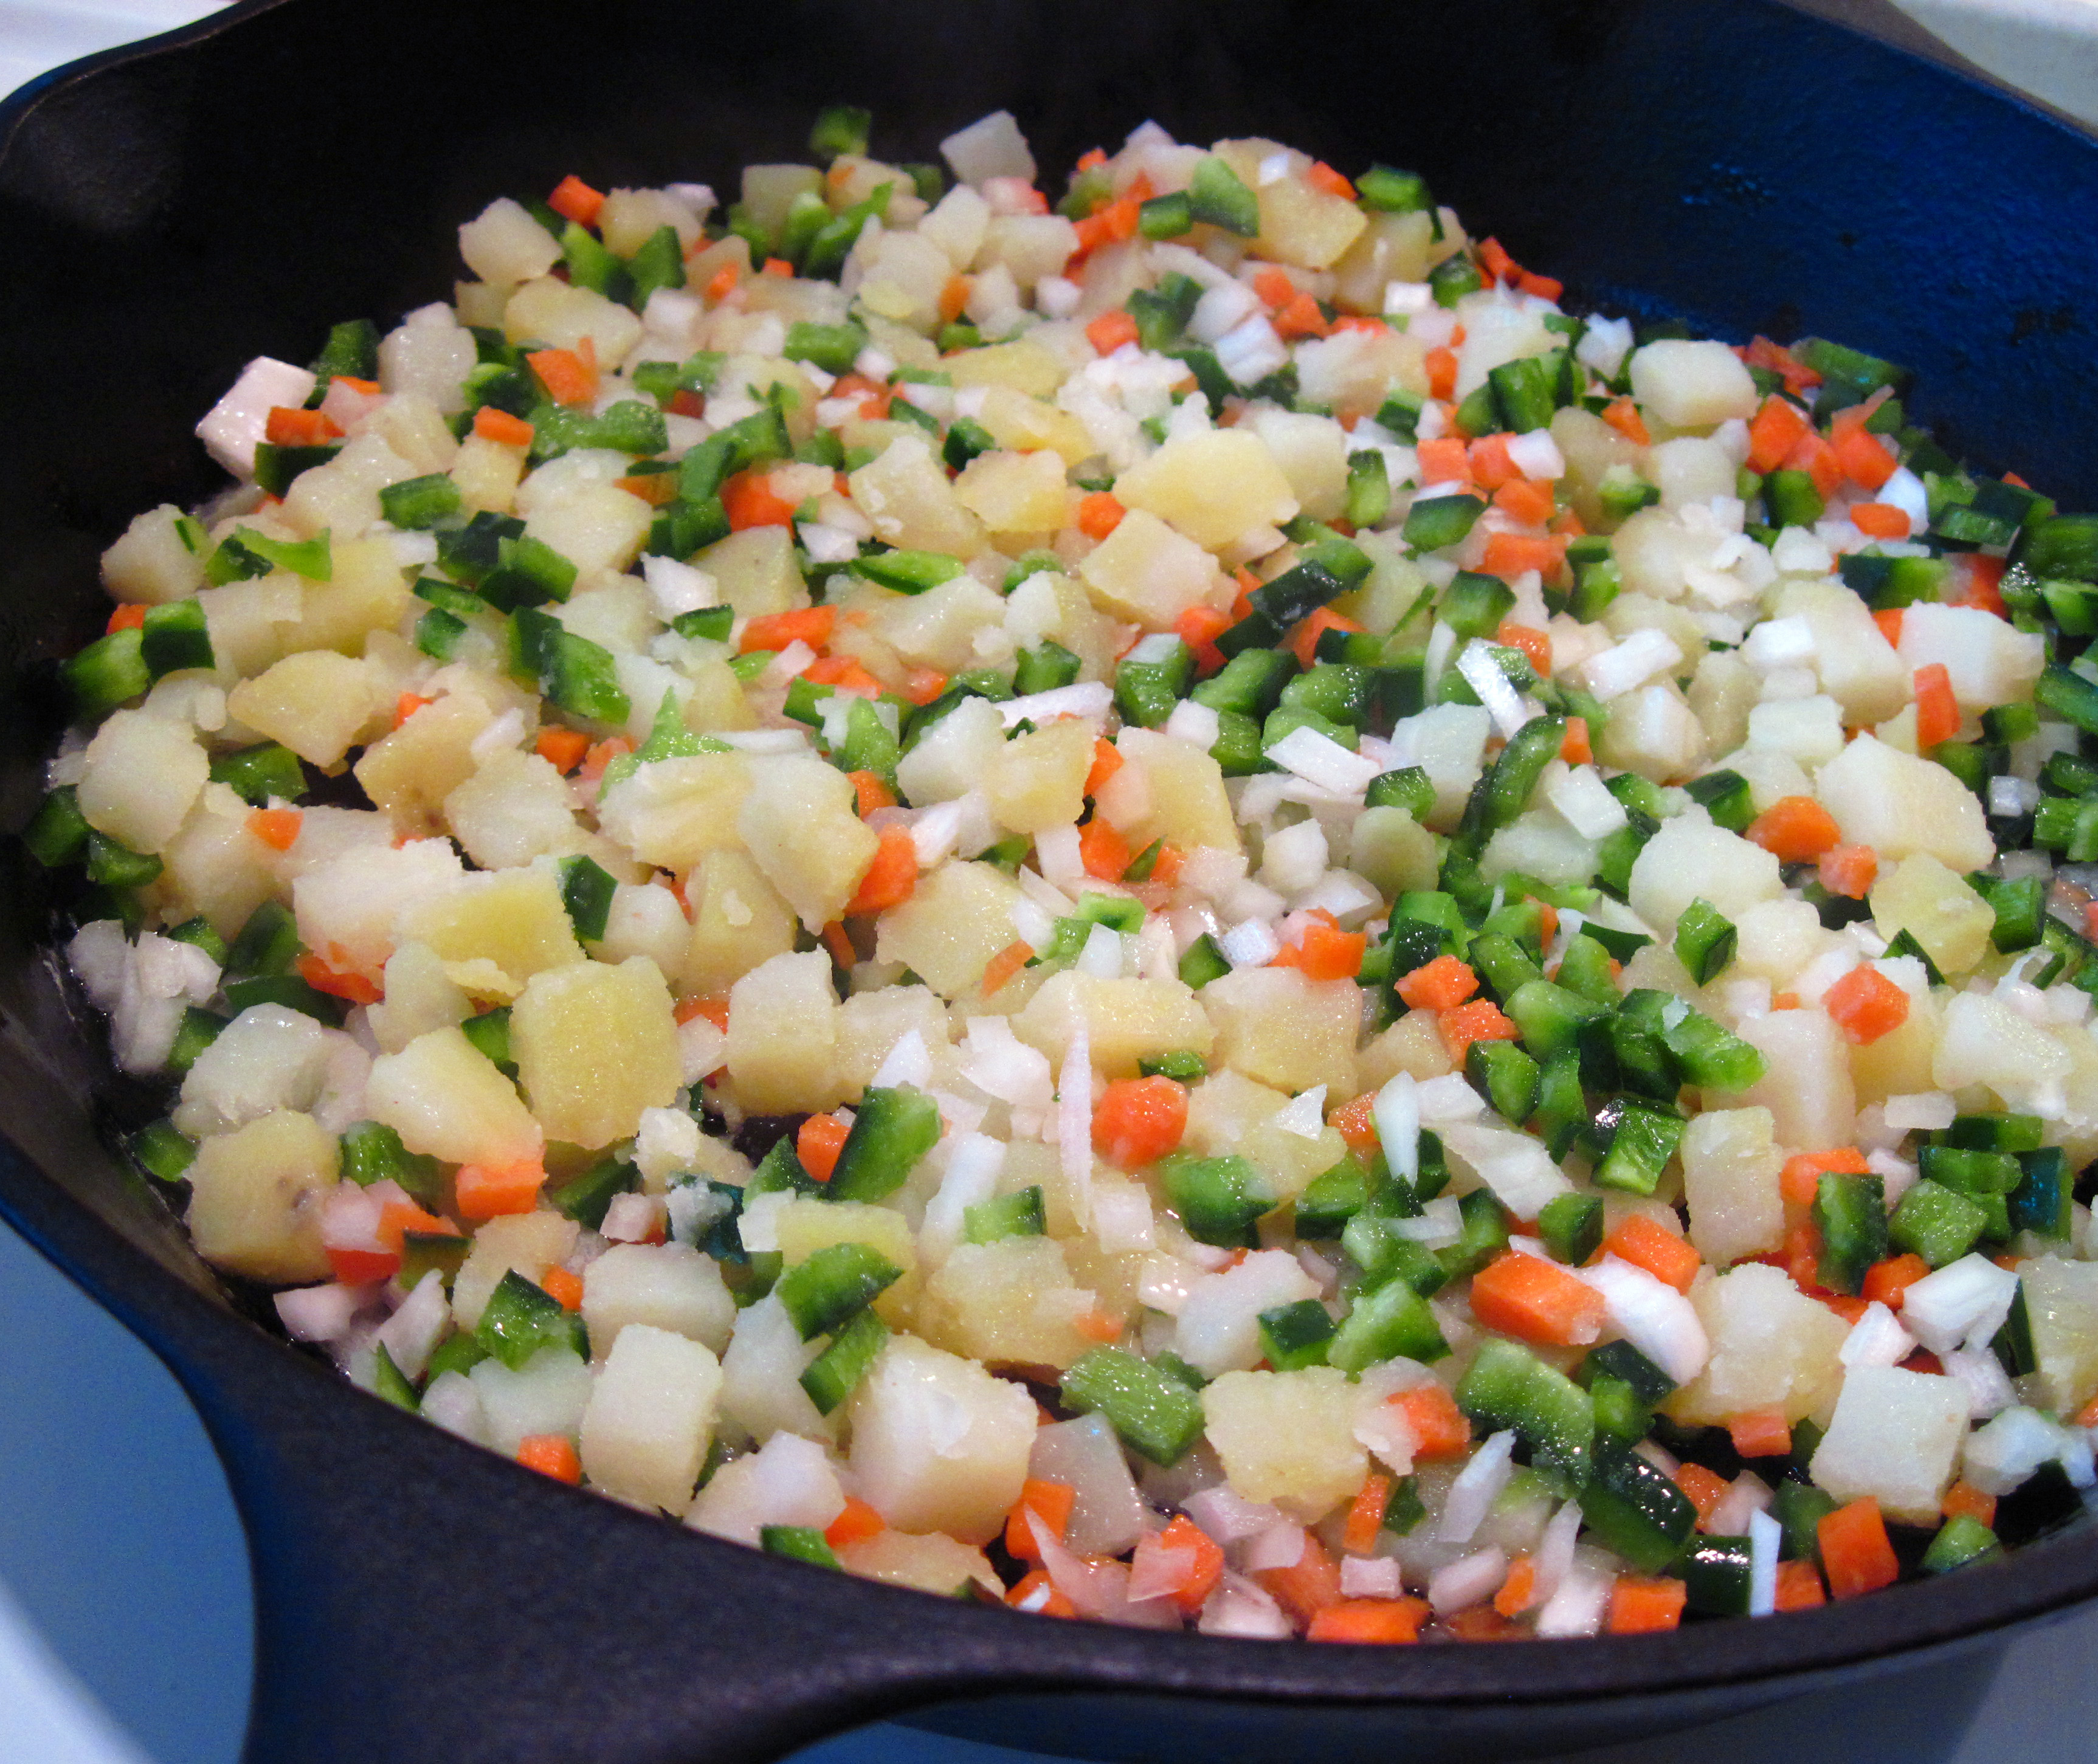
3. Put 3 of the tablespoons of butter in a large oven-proof skillet and heat over medium high heat. When the butter stops bubbling, add the potatoes, onions, poblano chile and the carrot. Toss them with the butter and cook, stirring occasionally, until the potatoes are just starting to brown.
a
4. Add the corned beef and the chili sauce. Stir and taste for seasoning. Add a bit of salt, if it needs it. Add the remaining 2 tablespoons of butter. Continue to cook, stirring occasionally, until it’s starting to get crispy. Put the pan in the oven to keep warm while you cook the eggs.
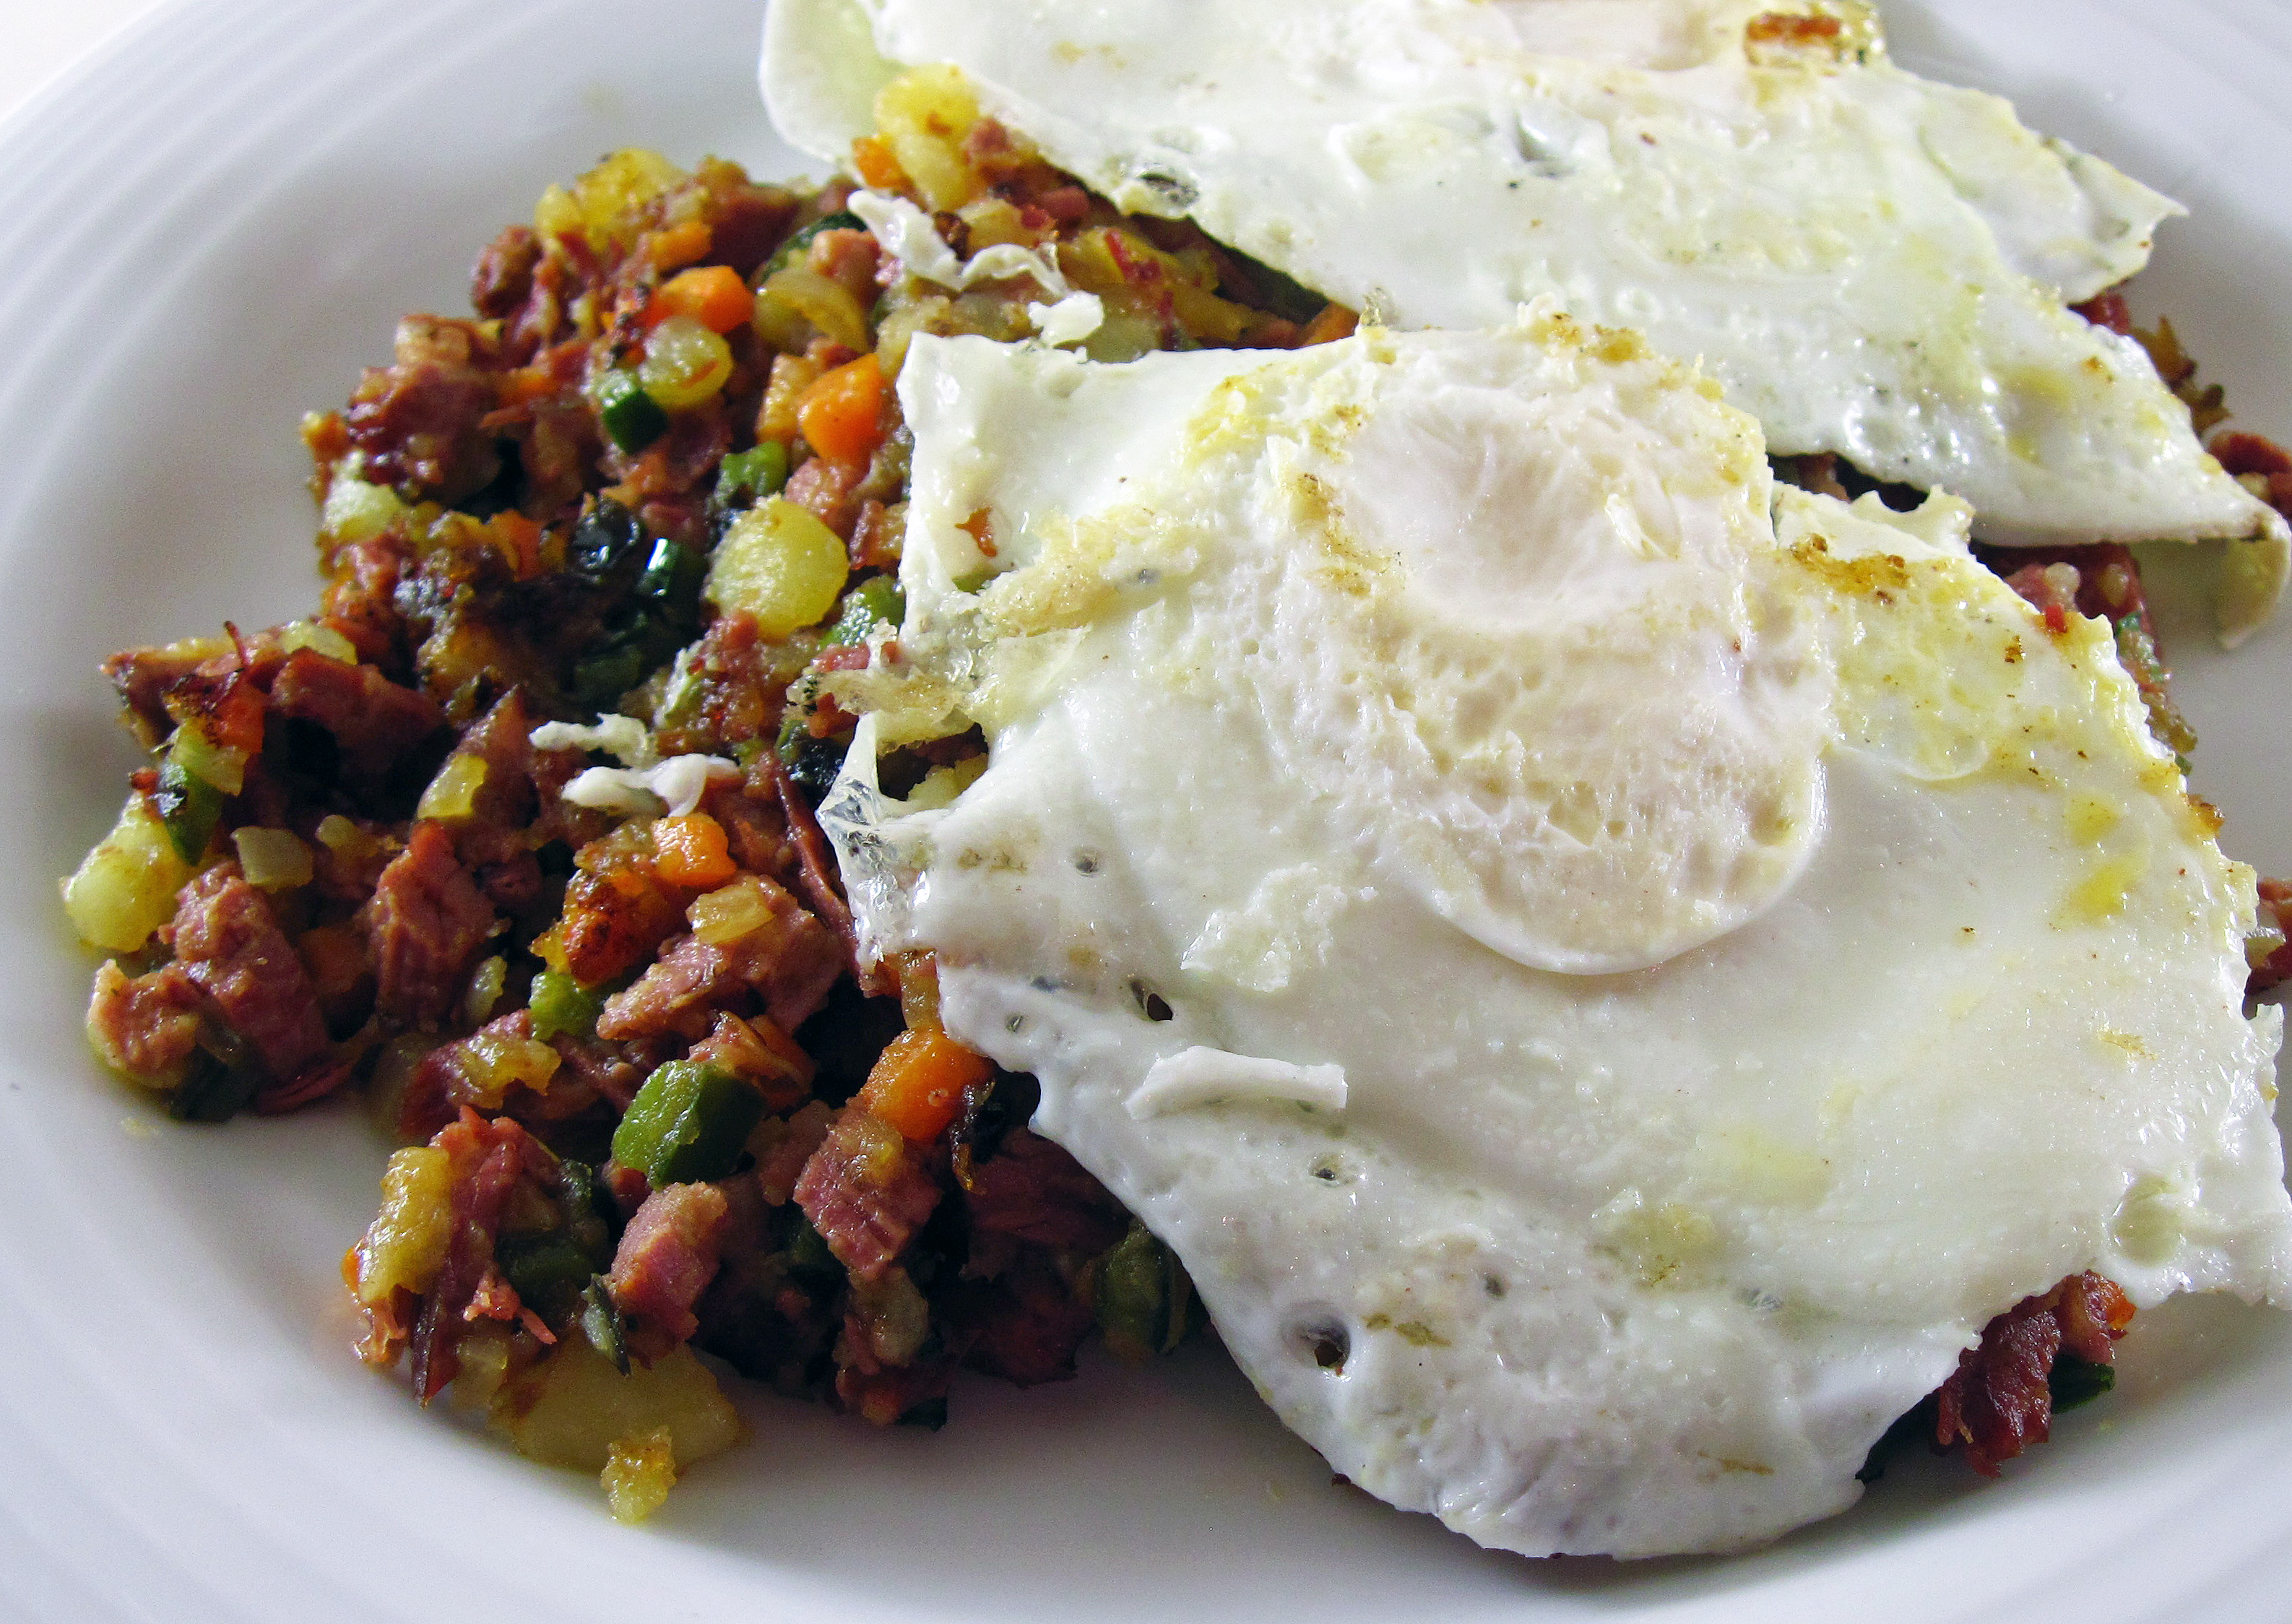
5. Cook the eggs the way you like them (poached, fried, scrambled). Serve the hash topping each serving with two eggs.
a
These are not my best looking fried eggs, but they tasted good! 😉
a
Optional Habanero Ketchup
½ cup ketchup
1/3 cup orange juice
1 dried habanero chile (or 1 fresh one cut in half)
1 tablespoon molasses
½ teaspoon Worcestershire sauce
2 cloves
a
Put all of the ingredients in a saucepan. Simmer for 5 minutes. Strain and discard the chile and the cloves. Let it cool and serve.
a

Share this:

Curry House Cauliflower (Aloo Gobhi)
The Curry House Cauliflower (Aloo Gobhi) in Raghavan Iyer’s Indian Cooking Unfolded is, he says, a simplified version of the dish that is served in most Indian restaurants. Many restaurants include tomatoes and “a host of spices”. Raghavan took the recipe back to the basics to put the focus on the cauliflower and potatoes.
I actually first made Curry House Cauliflower as a vegetarian main dish which I served over rice. That time, I did add a 14.5-ounce can of undrained diced tomatoes. It was very good, but I felt it wasn’t quite substantial enough to serve as a main course.
I recently made it again and I stuck to the suggested ingredients. I omitted the tomatoes, and served it as a side dish. It was excellent with a grilled steak. I guess there’s a reason Raghavan put the recipe in his chapter called “Side Dishes Unfolded”.
I will happily make Curry House Cauliflower again as a side dish to enliven dinners with grilled or roasted meats or seafood.
A bit of chopped cilantro would have made a tasty garnish, but I didn’t have any.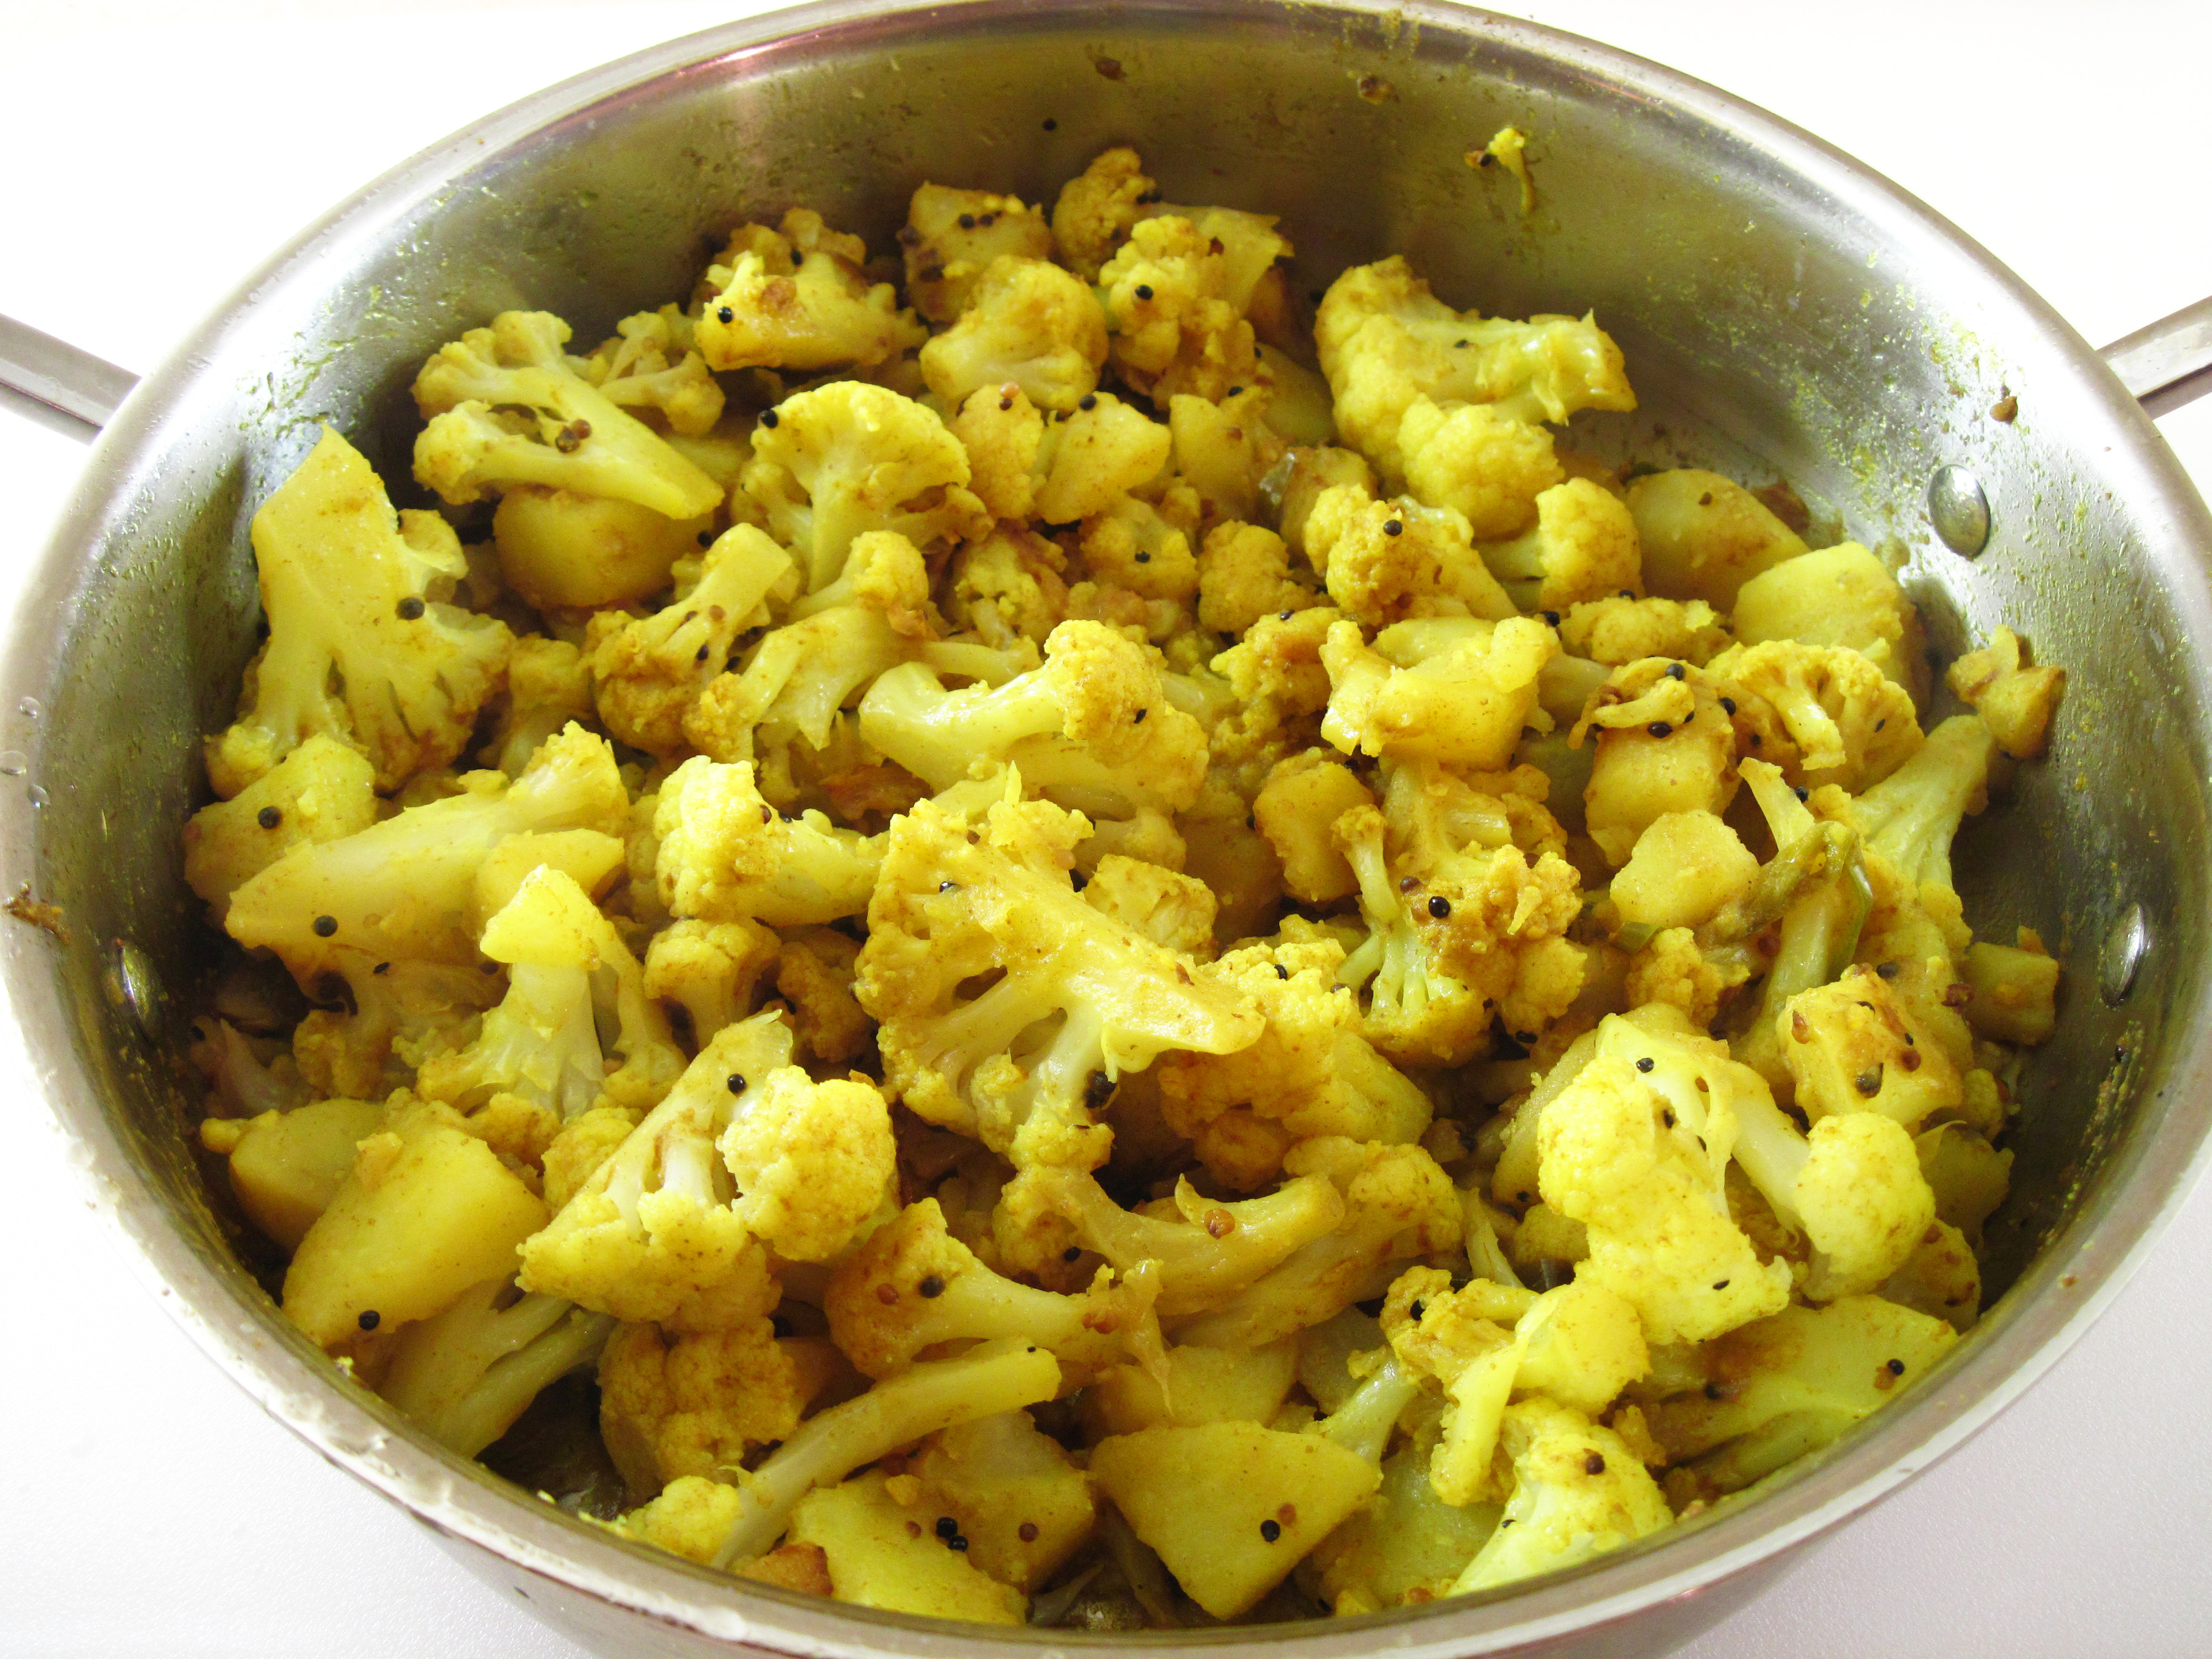
a
Curry House Cauliflower (Aloo Gobhi)
(Adapted from Raghavan Iyer’s recipe in Indian Cooking Unfolded)
Using the chiles’ seeds gives the dish its heat, which we enjoy. You could discard the seeds if you want a mild curry.
Serves 4
1 small head of cauliflower (about 1 pound)
2 slices fresh ginger (each about the size of a quarter; no need to peel)
2 fresh green serrano chiles
2 teaspoons ground cumin
1 teaspoon Kosher or sea salt
½ teaspoon ground turmeric
2 medium Yukon Gold potatoes (10 – 12 ounces total weight)
2 tablespoons oil
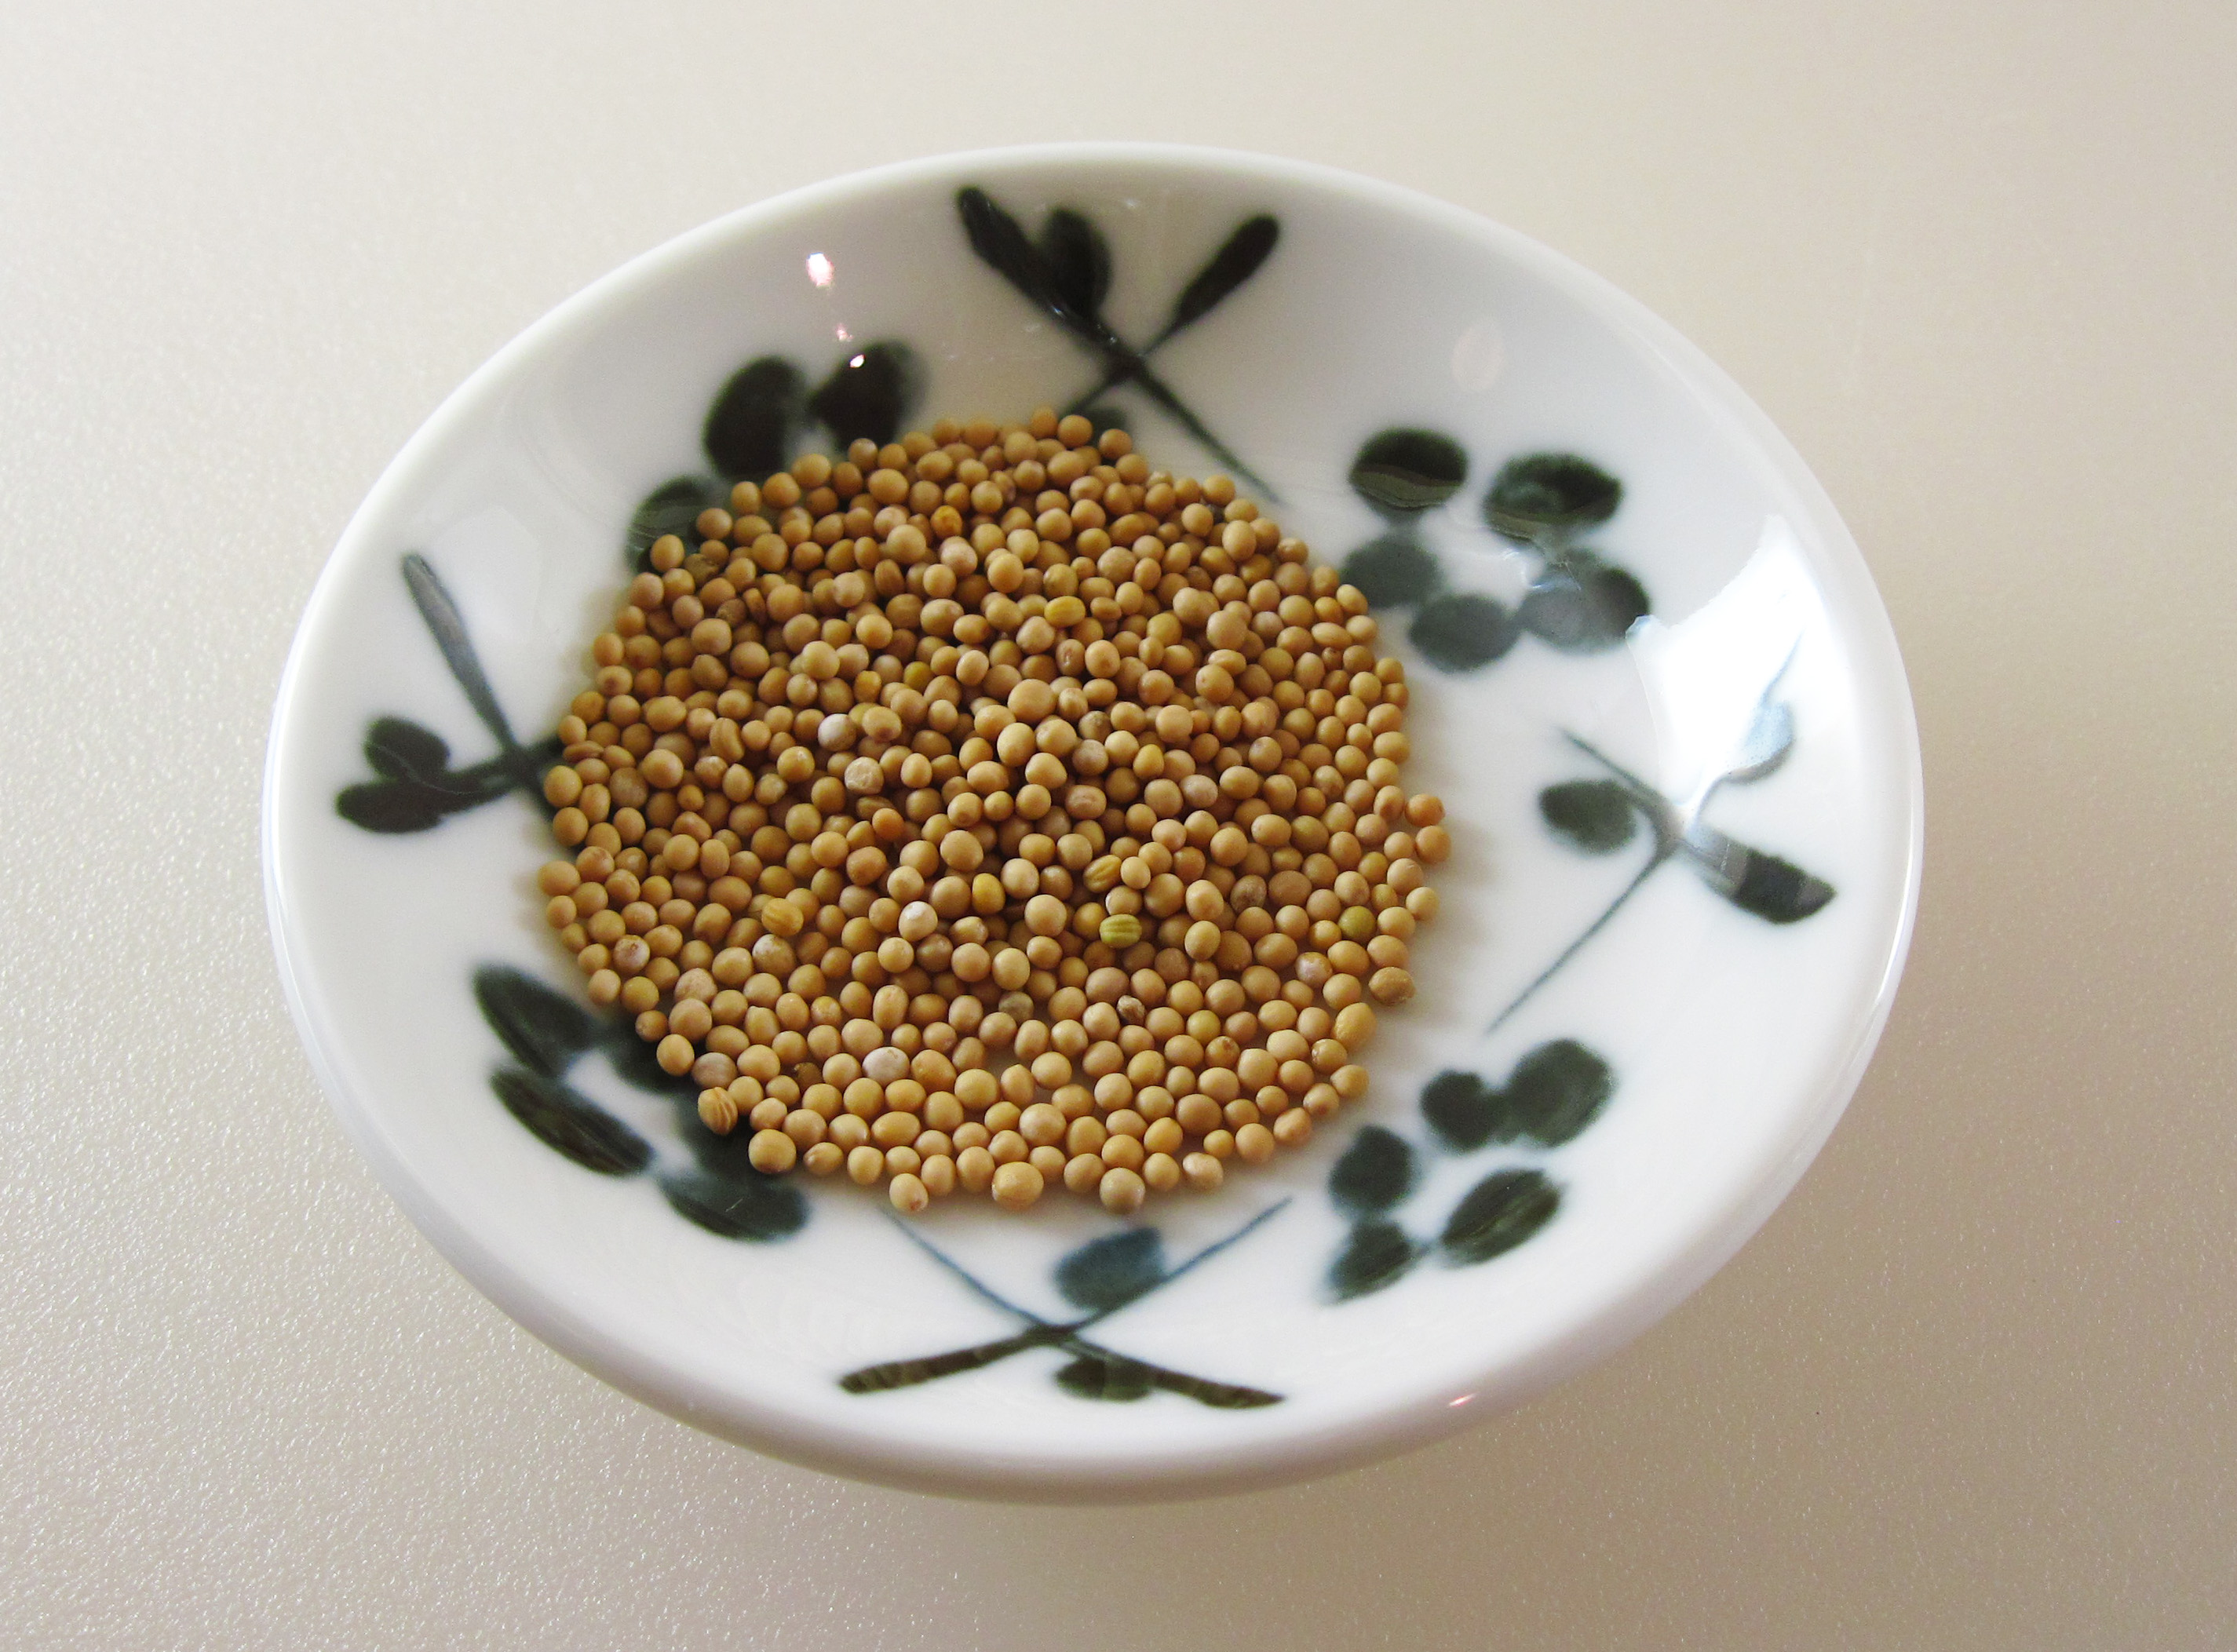
1 teaspoon black or yellow mustard seeds
½ cup water
2 tablespoons finely chopped fresh cilantro leaves and tender stems (optional)
Yellow mustard seeds
1. Separate the cauliflower into florets. Put the florets in a large bowl. Cut the core and ribs into thin slices and set aside.
2. Slice the ginger into thin slices.
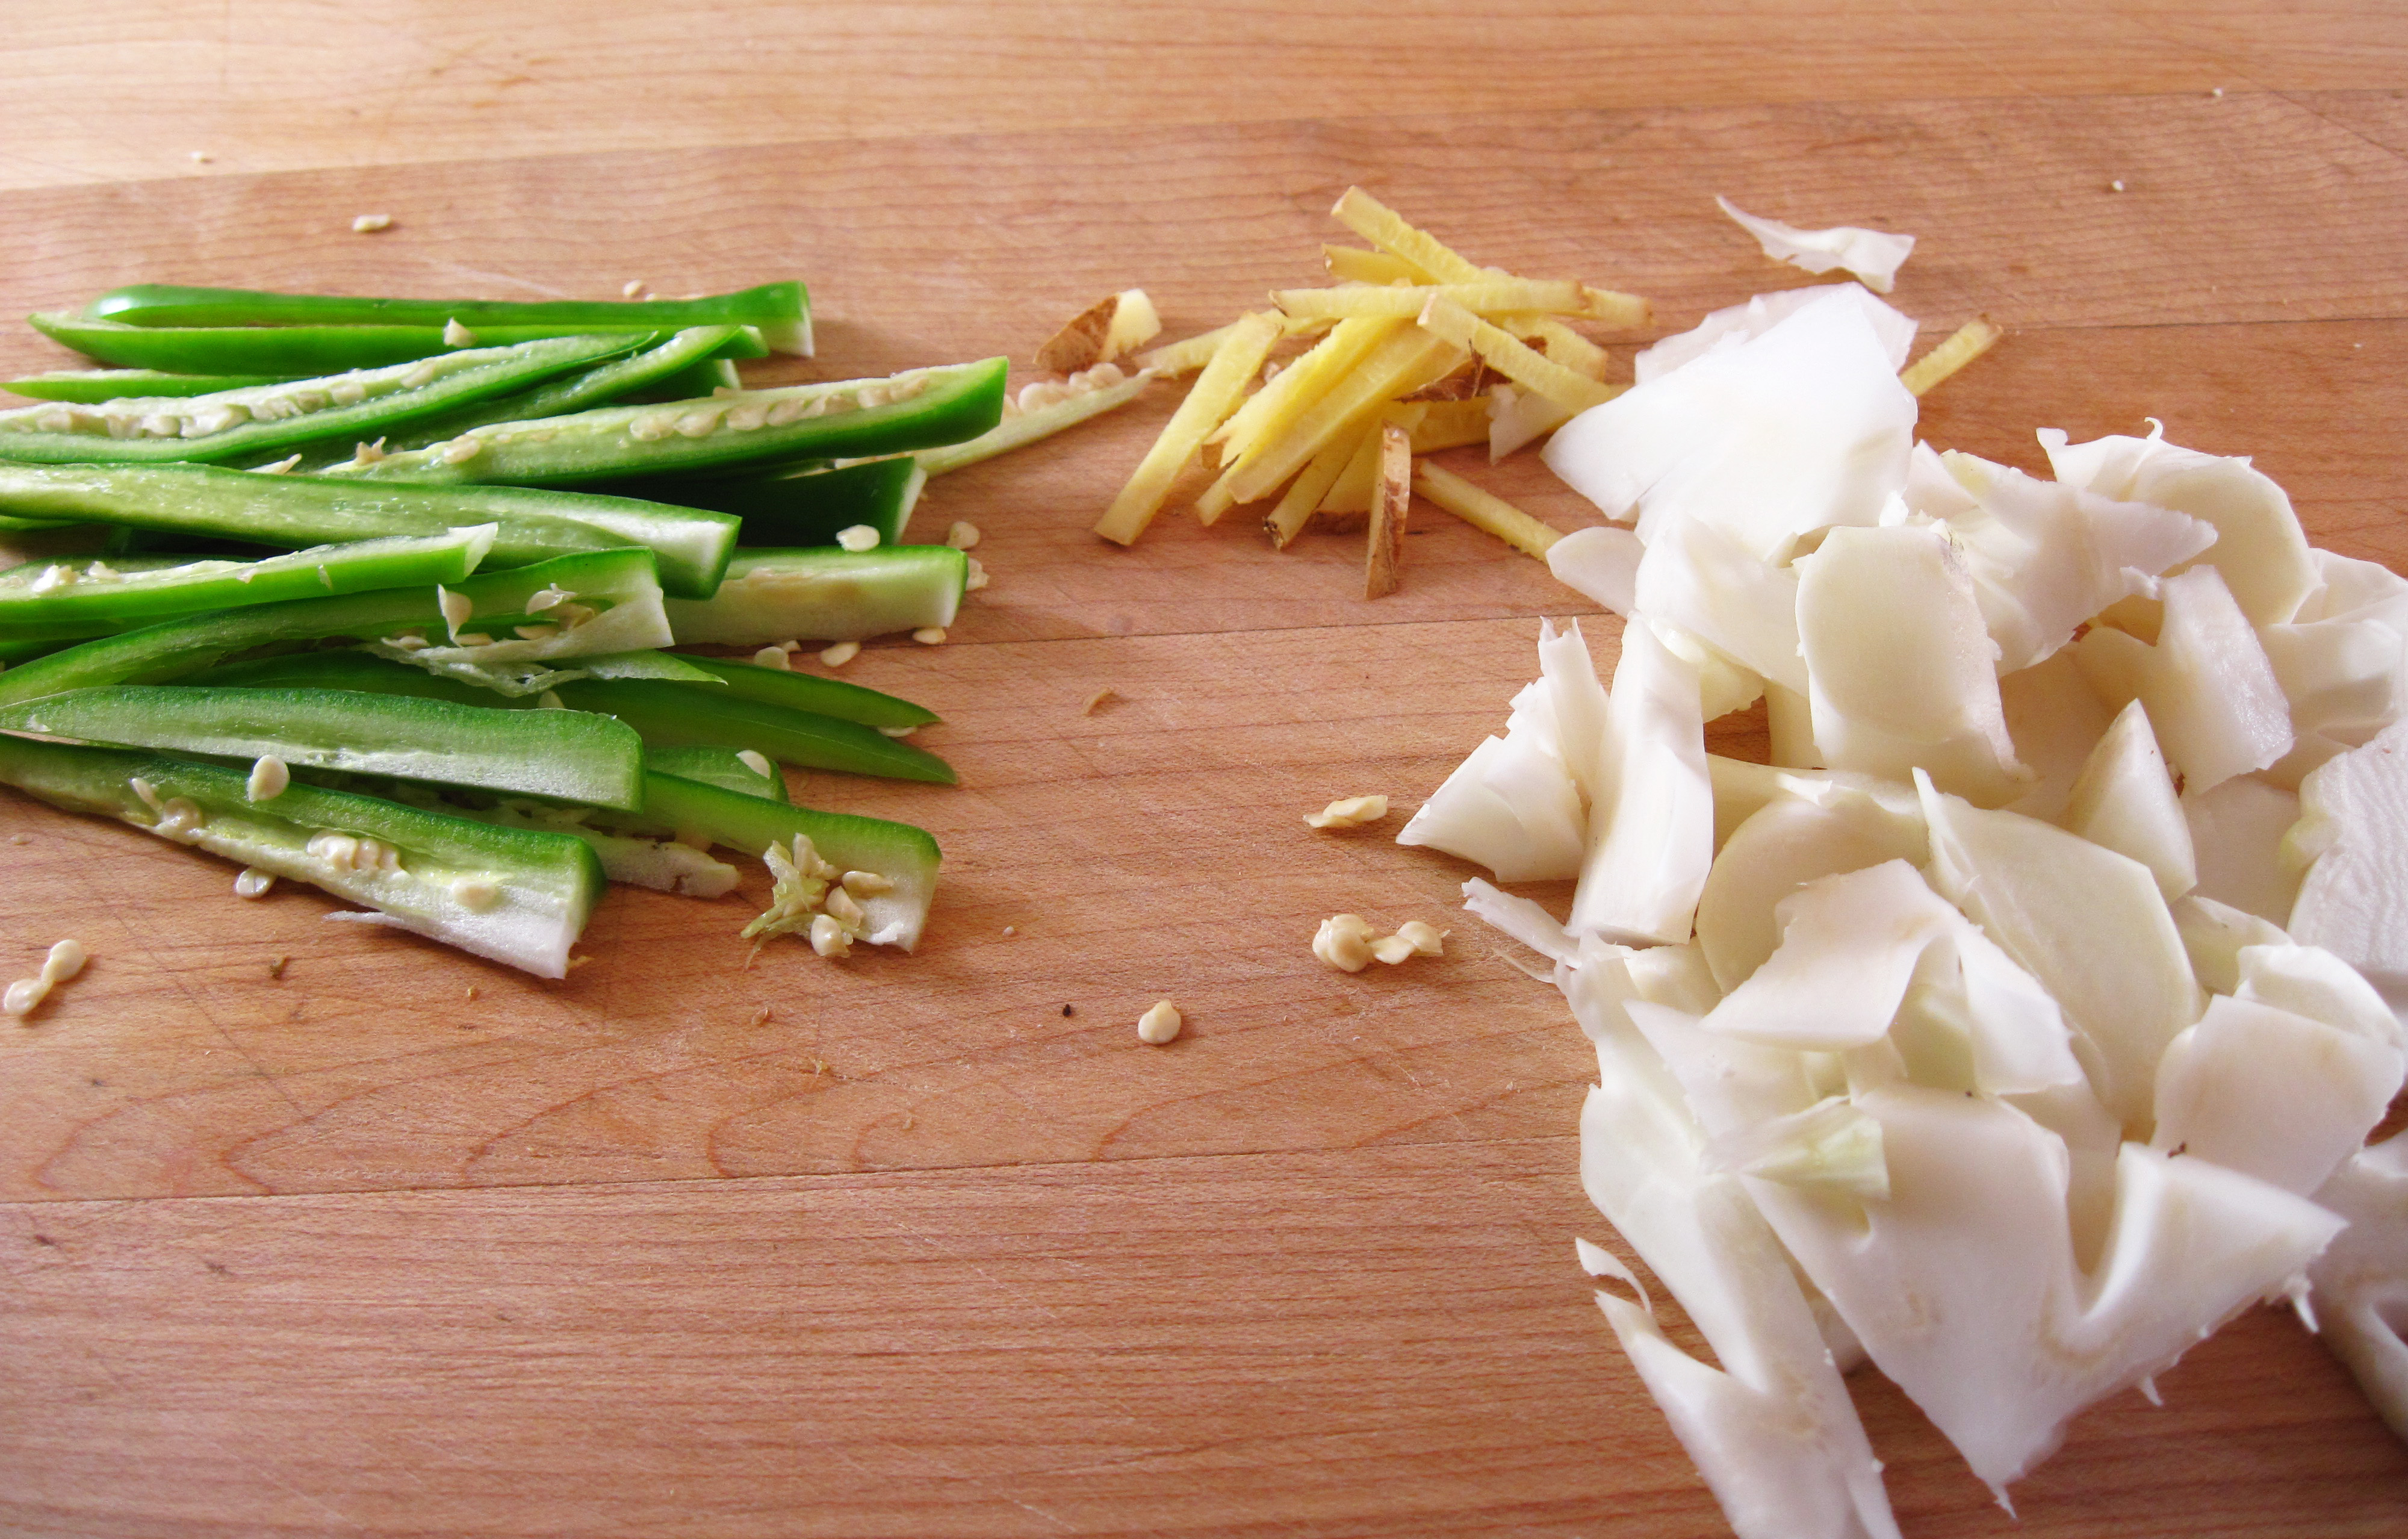
3. Cut the stems off of the chiles and slice them into thin strips. Do not discard the seeds.
Chile strips, ginger, and sliced cauliflower core ready to go
4. Measure the cumin, salt, and turmeric into a small bowl so they’re all set to go when you need them.
5. Peel the potatoes and cut them into 1-inch cubes. Add the potatoes to the cauliflower florets in the bowl.
6. Using a large skillet that has a lid, heat the oil over medium-high heat. When the oil is hot and shimmering, add the mustard seeds and put the lid on the skillet. The seeds will start popping like popcorn.
7. After the mustard seeds stop popping (in about 30 seconds), add the reserved cauliflower slices, the ginger and the chiles. Reduce heat to medium and cook, stirring, for 3 – 4 minutes.
8. Add the potatoes, cauliflower florets, cumin, salt, and turmeric to the skillet. Cook, stirring, for 2 – 3 minutes.
9. Stir in the half cup of water. Reduce heat to medium-low, cover and cook for another 10 – 12 minutes, or until the potatoes and cauliflower is tender.
10. Serve, garnished with the cilantro, if desired.
Share this:

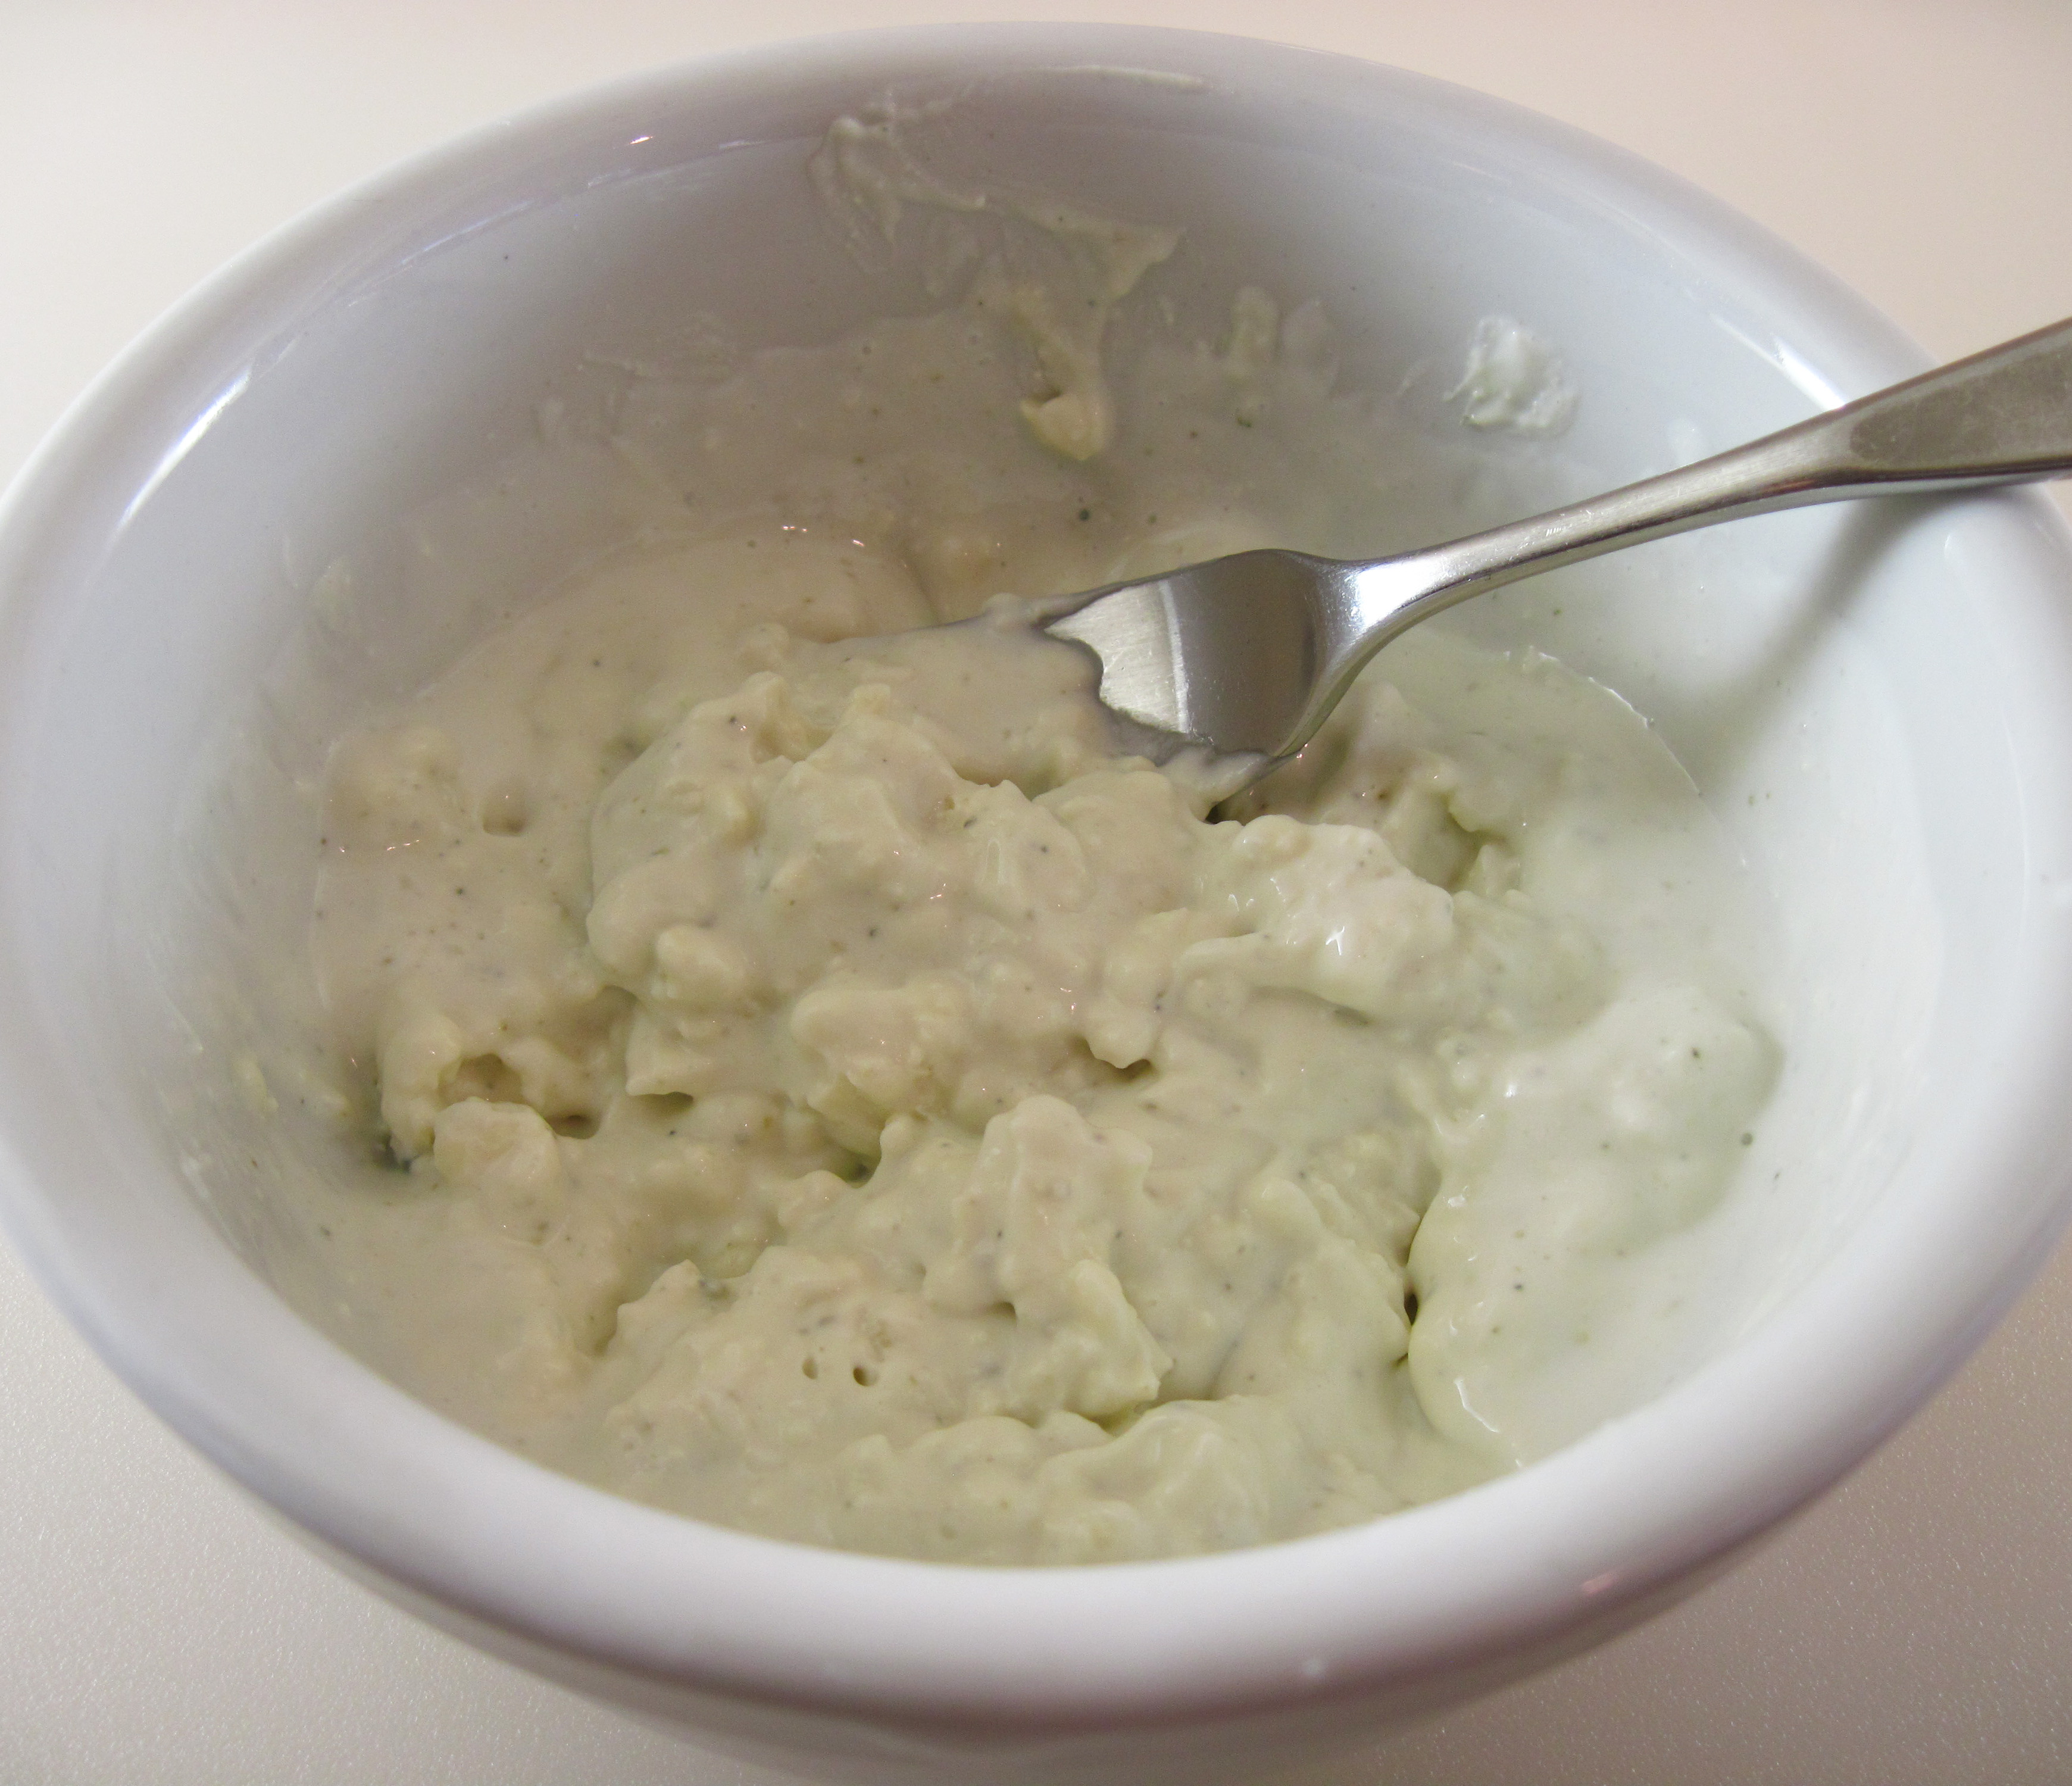
Homemade Blue Cheese Dressing
By Kath Dedon
a
There’s no reason to buy commercial blue cheese dressing when you can make a vastly superior Homemade Blue Cheese Dressing in just a few minutes.
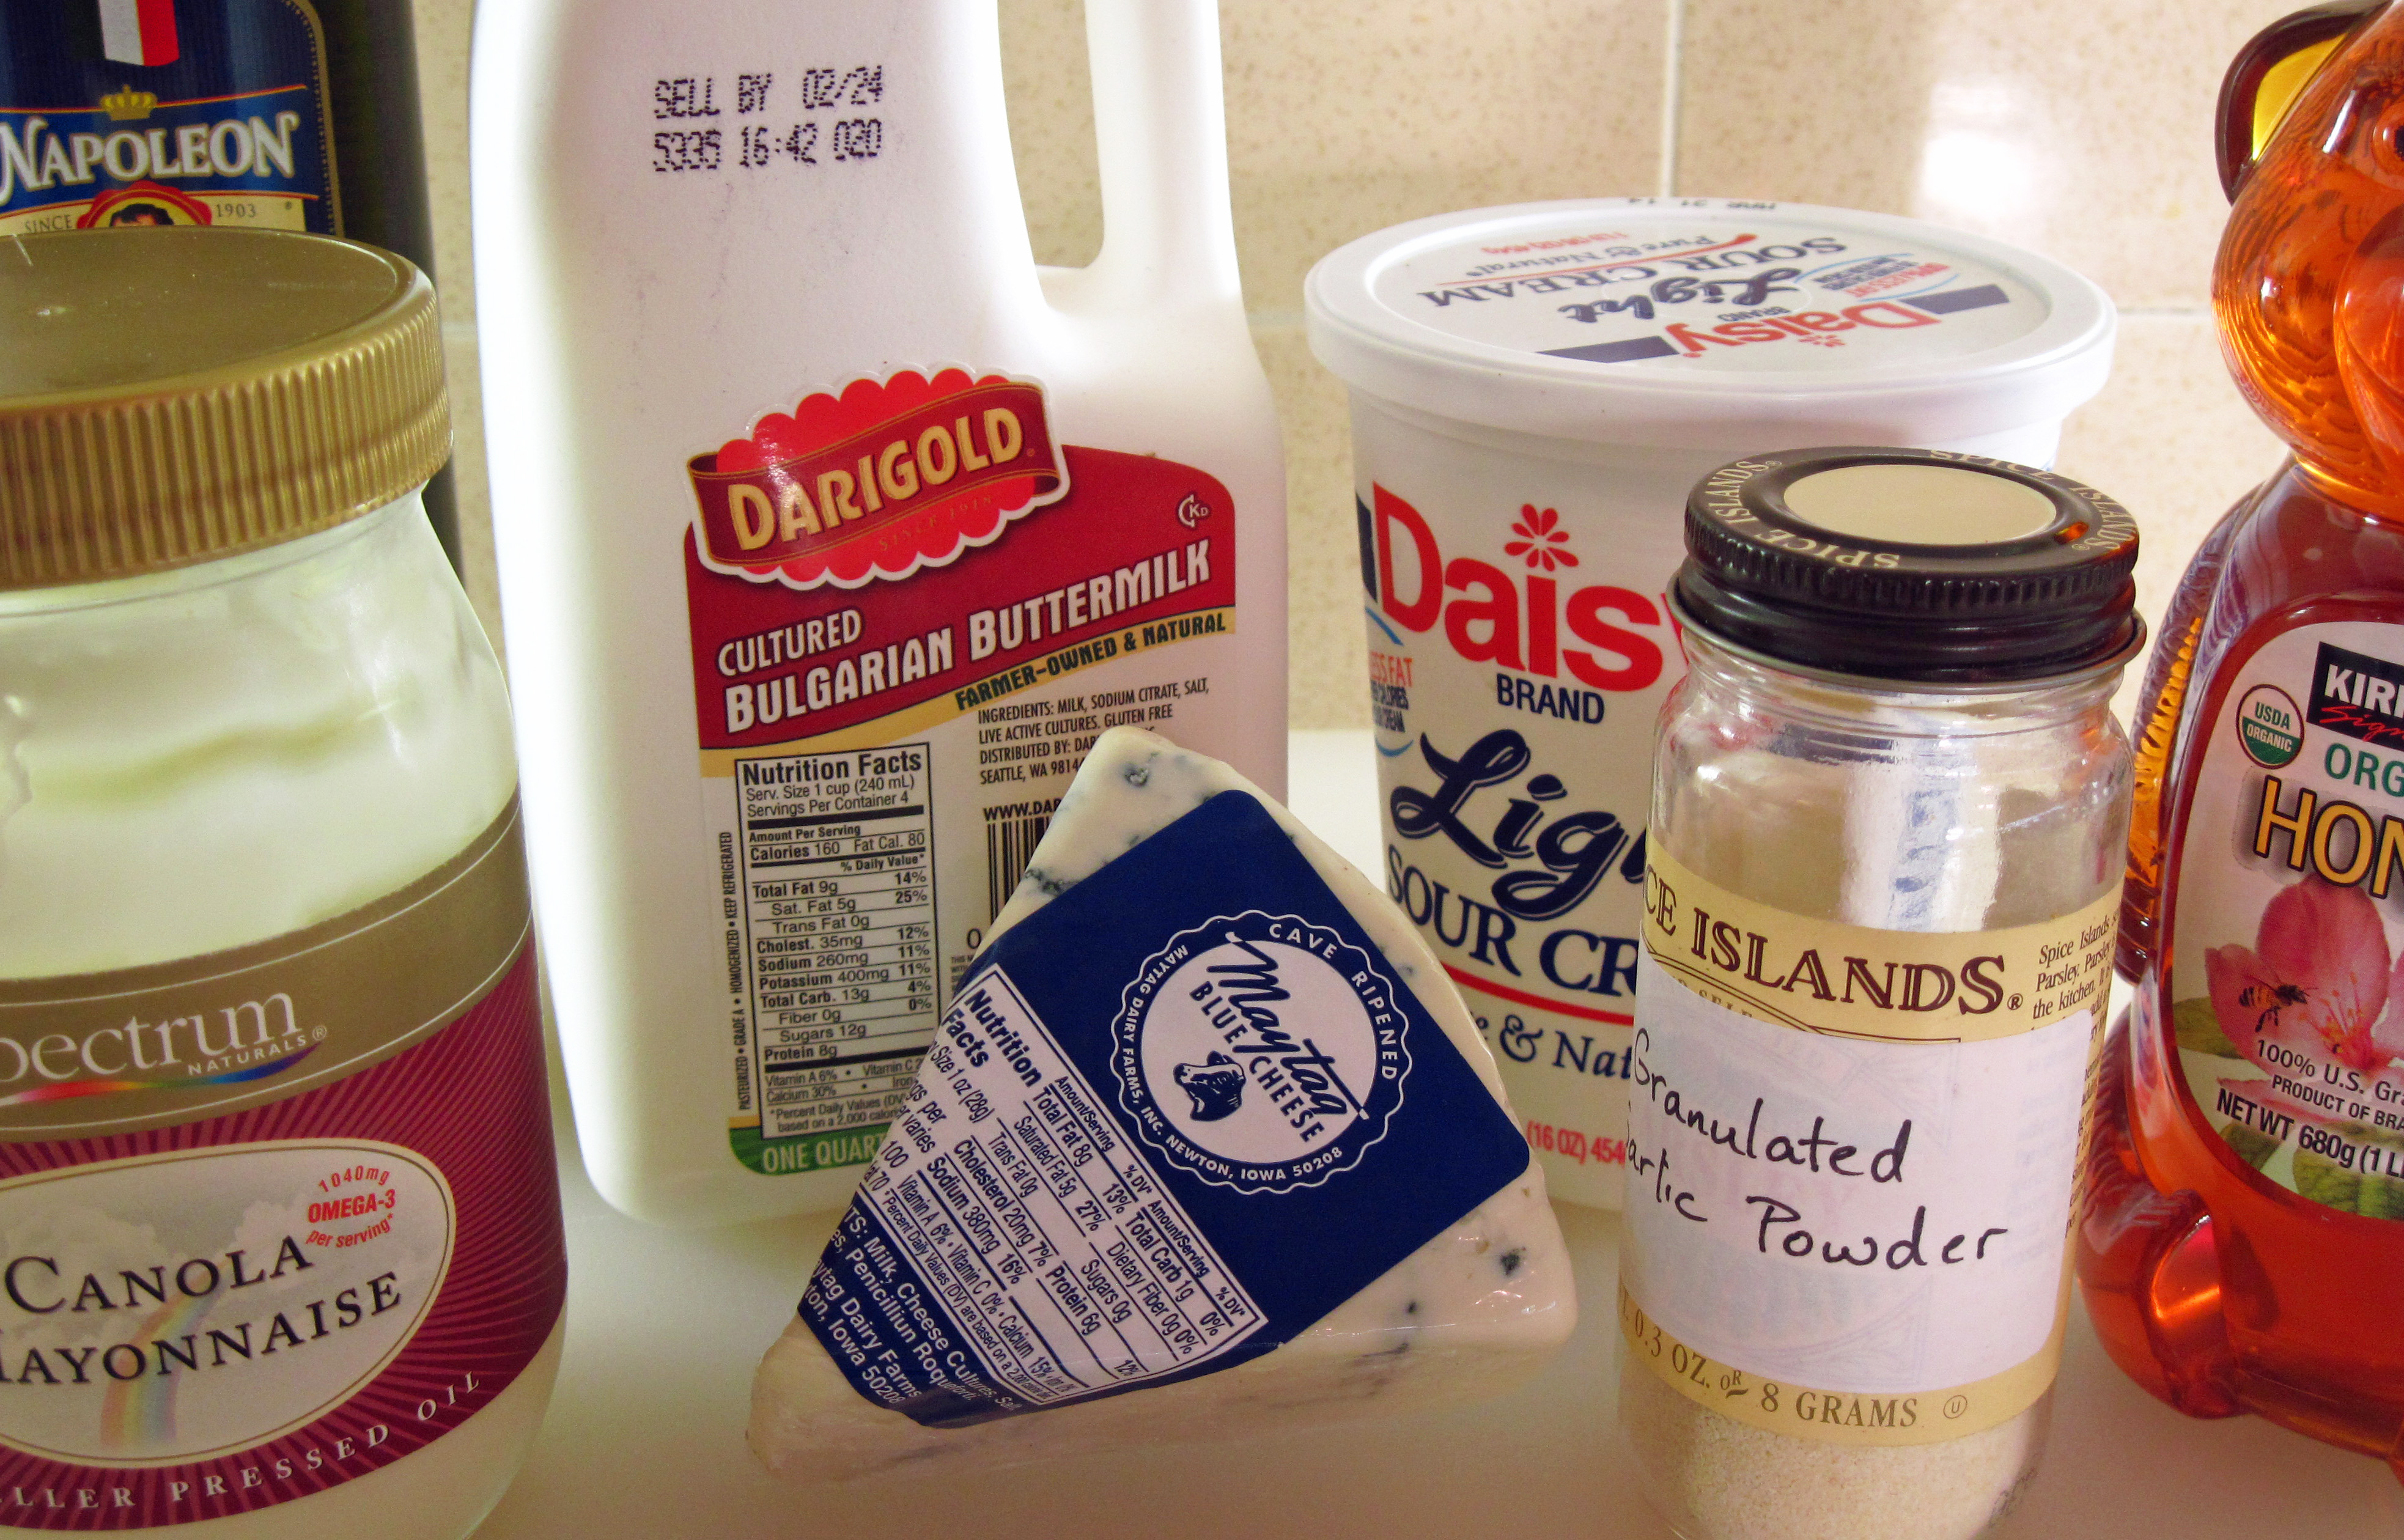
As with any recipe, use high quality ingredients for best results. I prefer Maytag Blue Cheese. Whichever blue cheese you choose, buy a small piece and crumble it yourself. The packages of already crumbled cheese do not have nearly as much flavor.
I chose Darigold 3.5% Bulgarian Buttermilk. I’m sure I have used this buttermilk before, but I had forgotten that it is much thicker than the Lowfat Buttermilk that I usually buy. The finished dressing, while absolutely delicious, was a bit thick. It worked well on the lettuce, but it was thick enough to be a dip.
We loved this Homemade Blue Cheese Dressing! I love the fact that the recipe makes just ¾ cup, the perfect amount for a small family.
Next time I’ll try it with Lowfat Buttermilk to make salad dressing. If I were to make a blue cheese dip, however, I’d definitely reach for the Cultured Bulgarian Buttermilk. It would be a perfect blue cheese dip to serve with Buffalo chicken wings and celery sticks!
Update 3/6/14: I have made the dressing with lowfat buttermilk and it is equally delicious. You can use whatever buttermilk you find. 🙂
a
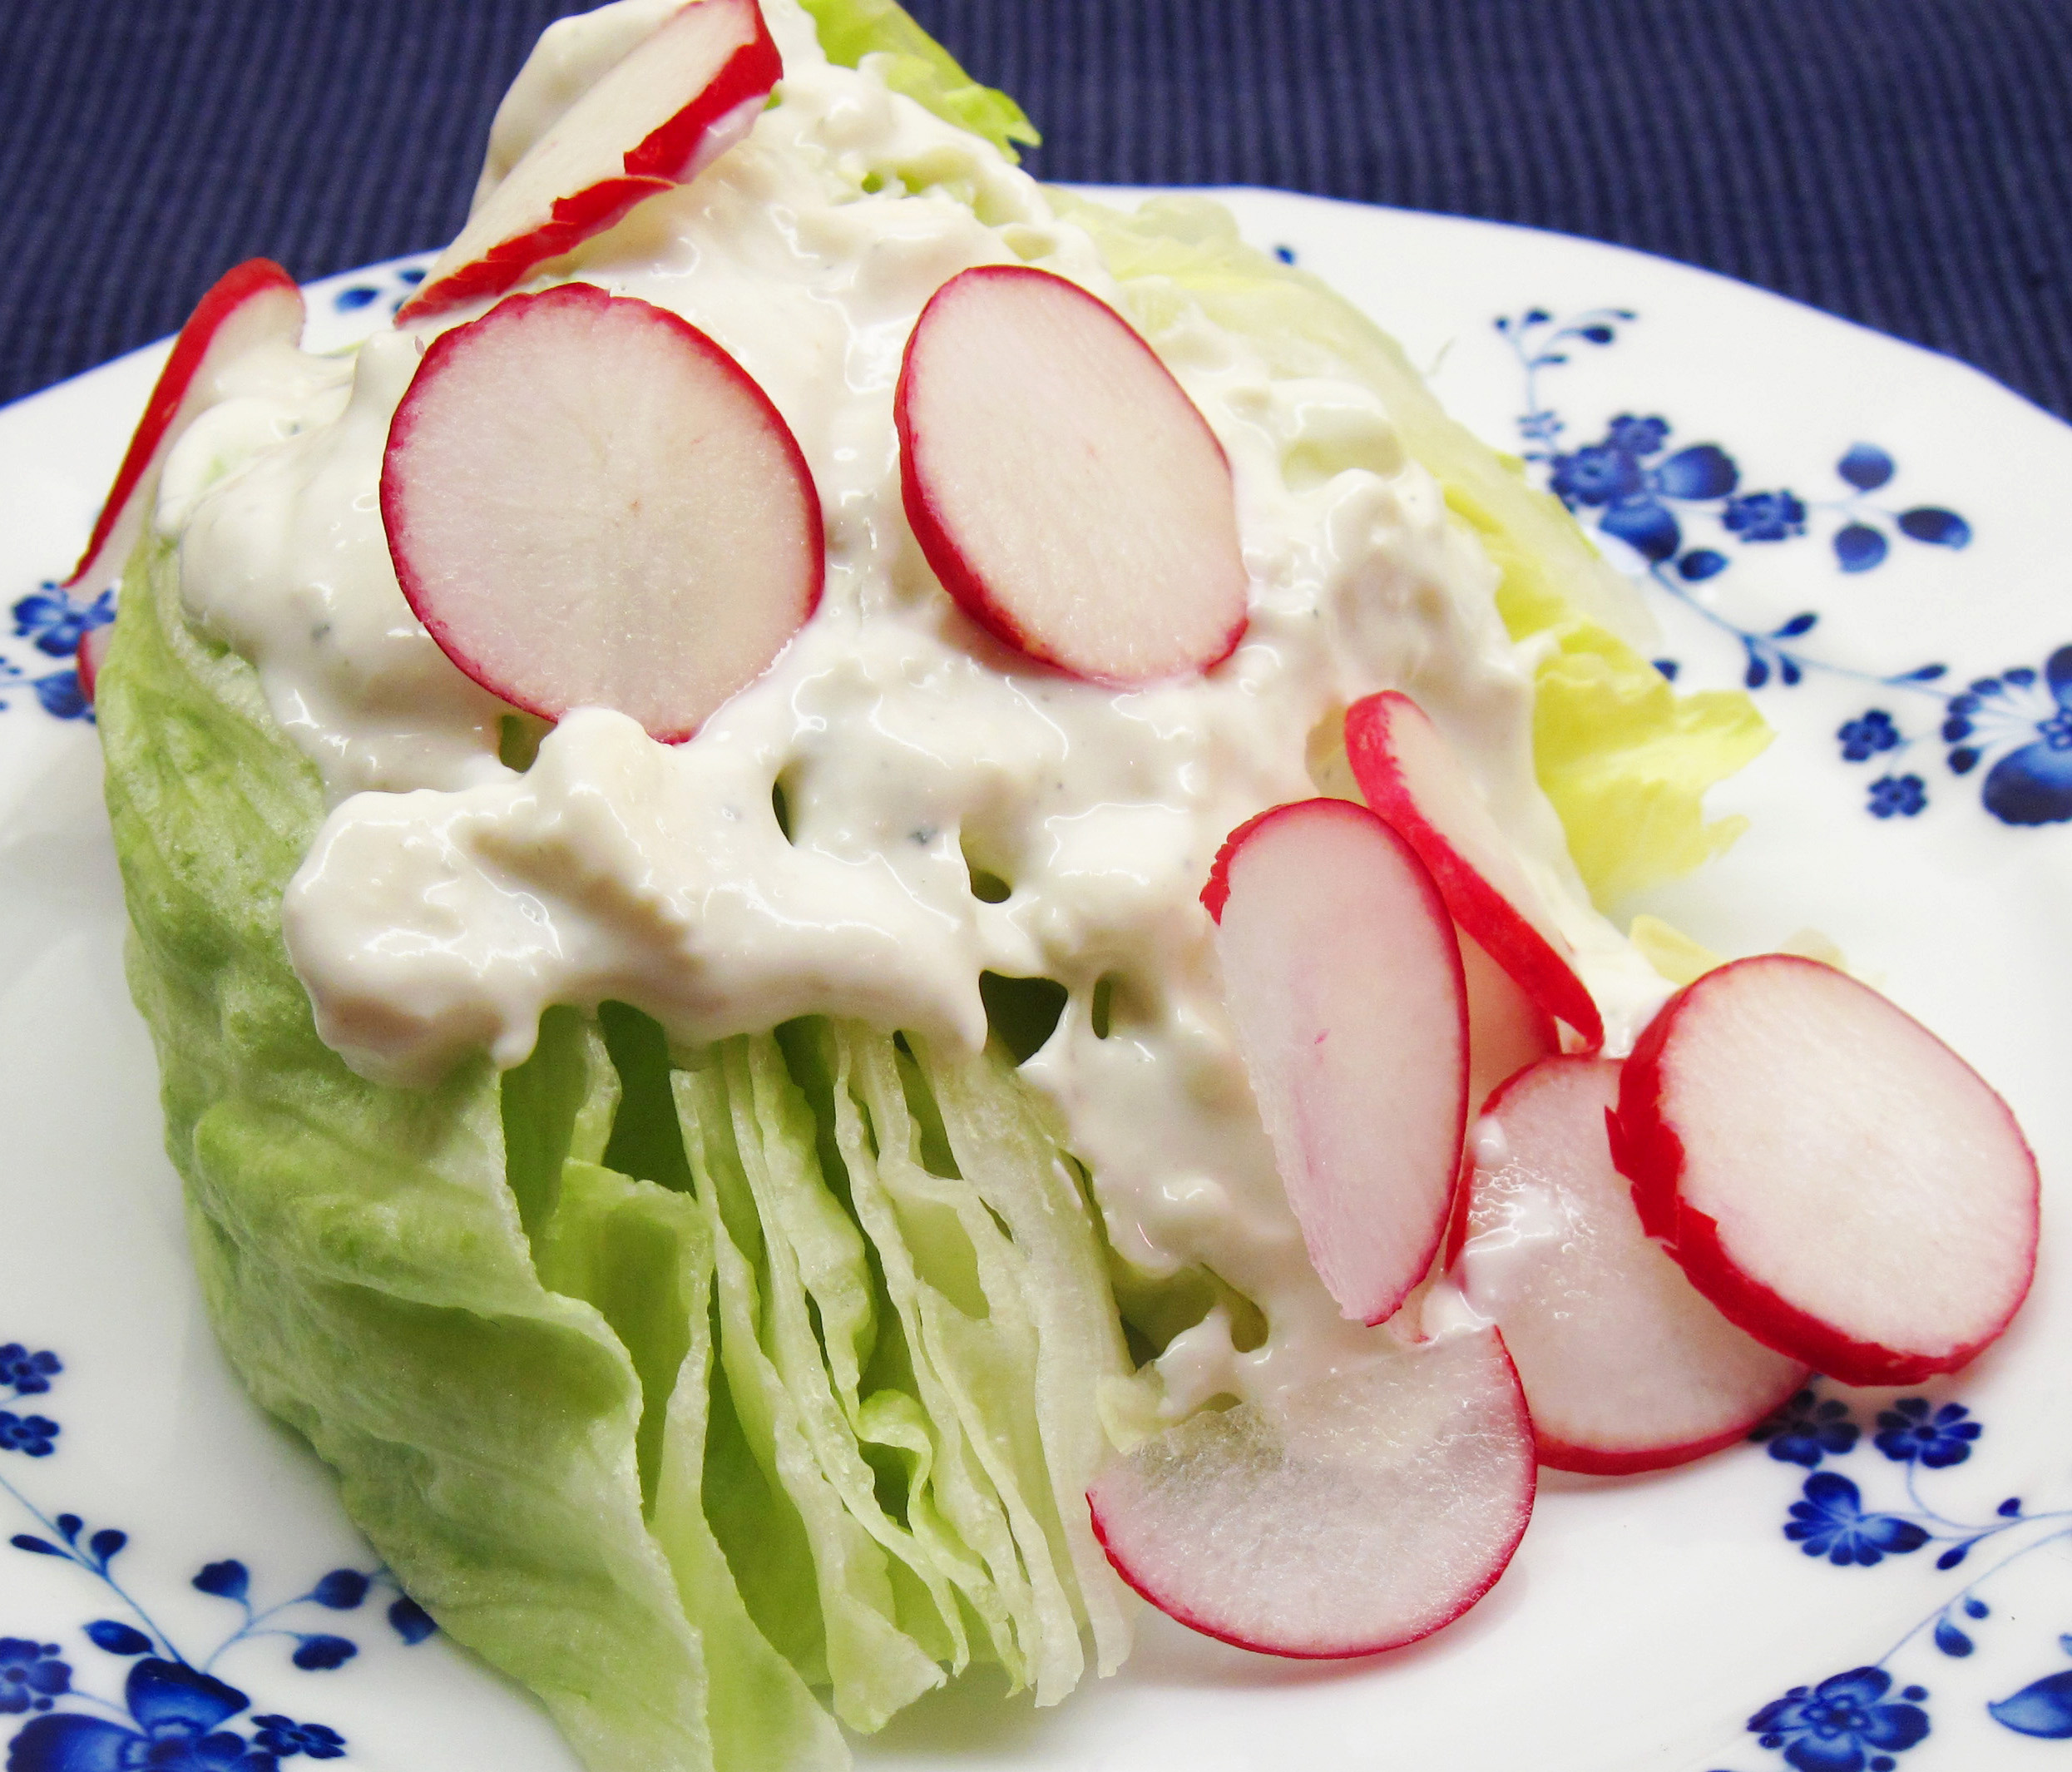
Homemade Blue Cheese Dressing served over a wedge of iceberg lettuce
a
Homemade Blue Cheese Dressing
(Adapted from a recipe in The Cook’s Illustrated Cookbook: 2,000 Recipes from 20 Years of America’s Most Trusted Food Magazine, by The Editors at America’s Test Kitchen)
a
a
Makes about ¾ cup
a
2½ ounces blue cheese, crumbled (about ½ cup)
3 tablespoons buttermilk (Lowfat and Bulgarian both work)
3 tablespoons sour cream
2 tablespoons mayonnaise
2 teaspoons white wine vinegar (I used white balsamic vinegar.)
¼ teaspoon honey
1/8 teaspoon garlic powder
2-3 drops Tabasco
1/8 teaspoon sea salt
a
a
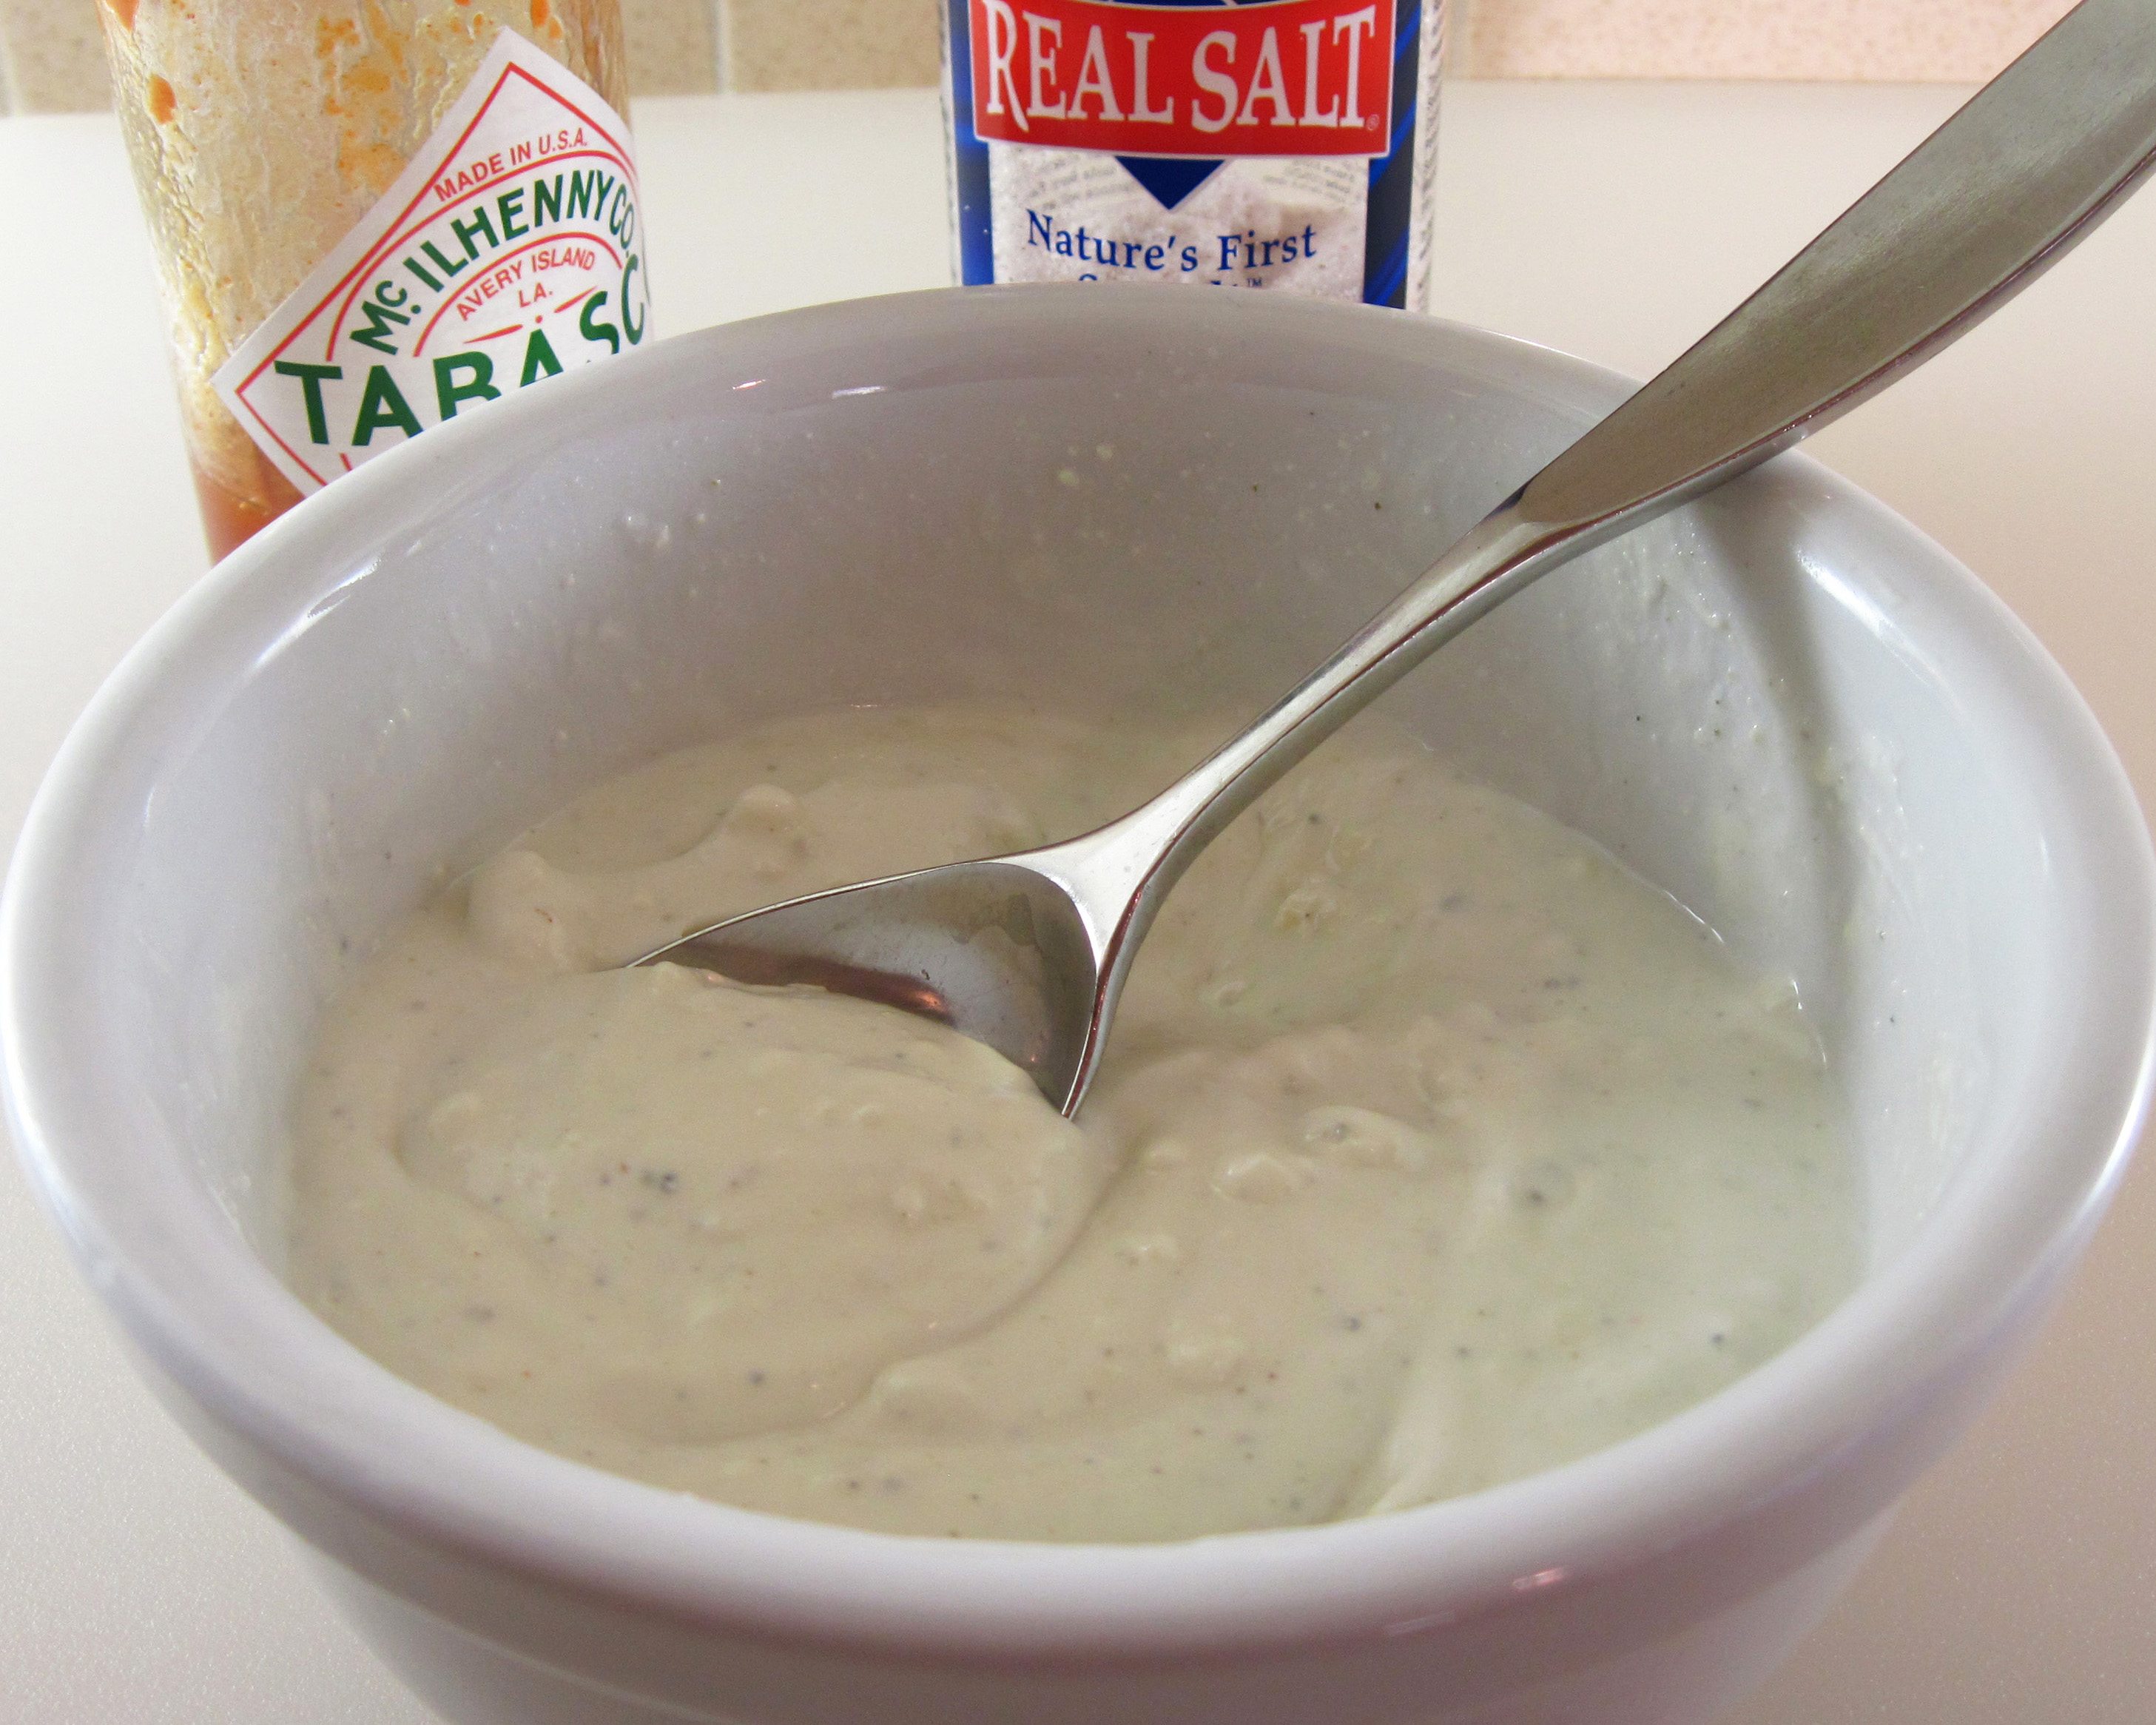
1. Mash the blue cheese and the buttermilk together with a fork in a small bowl.
a
2. Stir in the remaining ingredients. Taste and adjust seasonings, if necessary.
3. Cover and refrigerate for up to 14 days.
a

a
Share this:

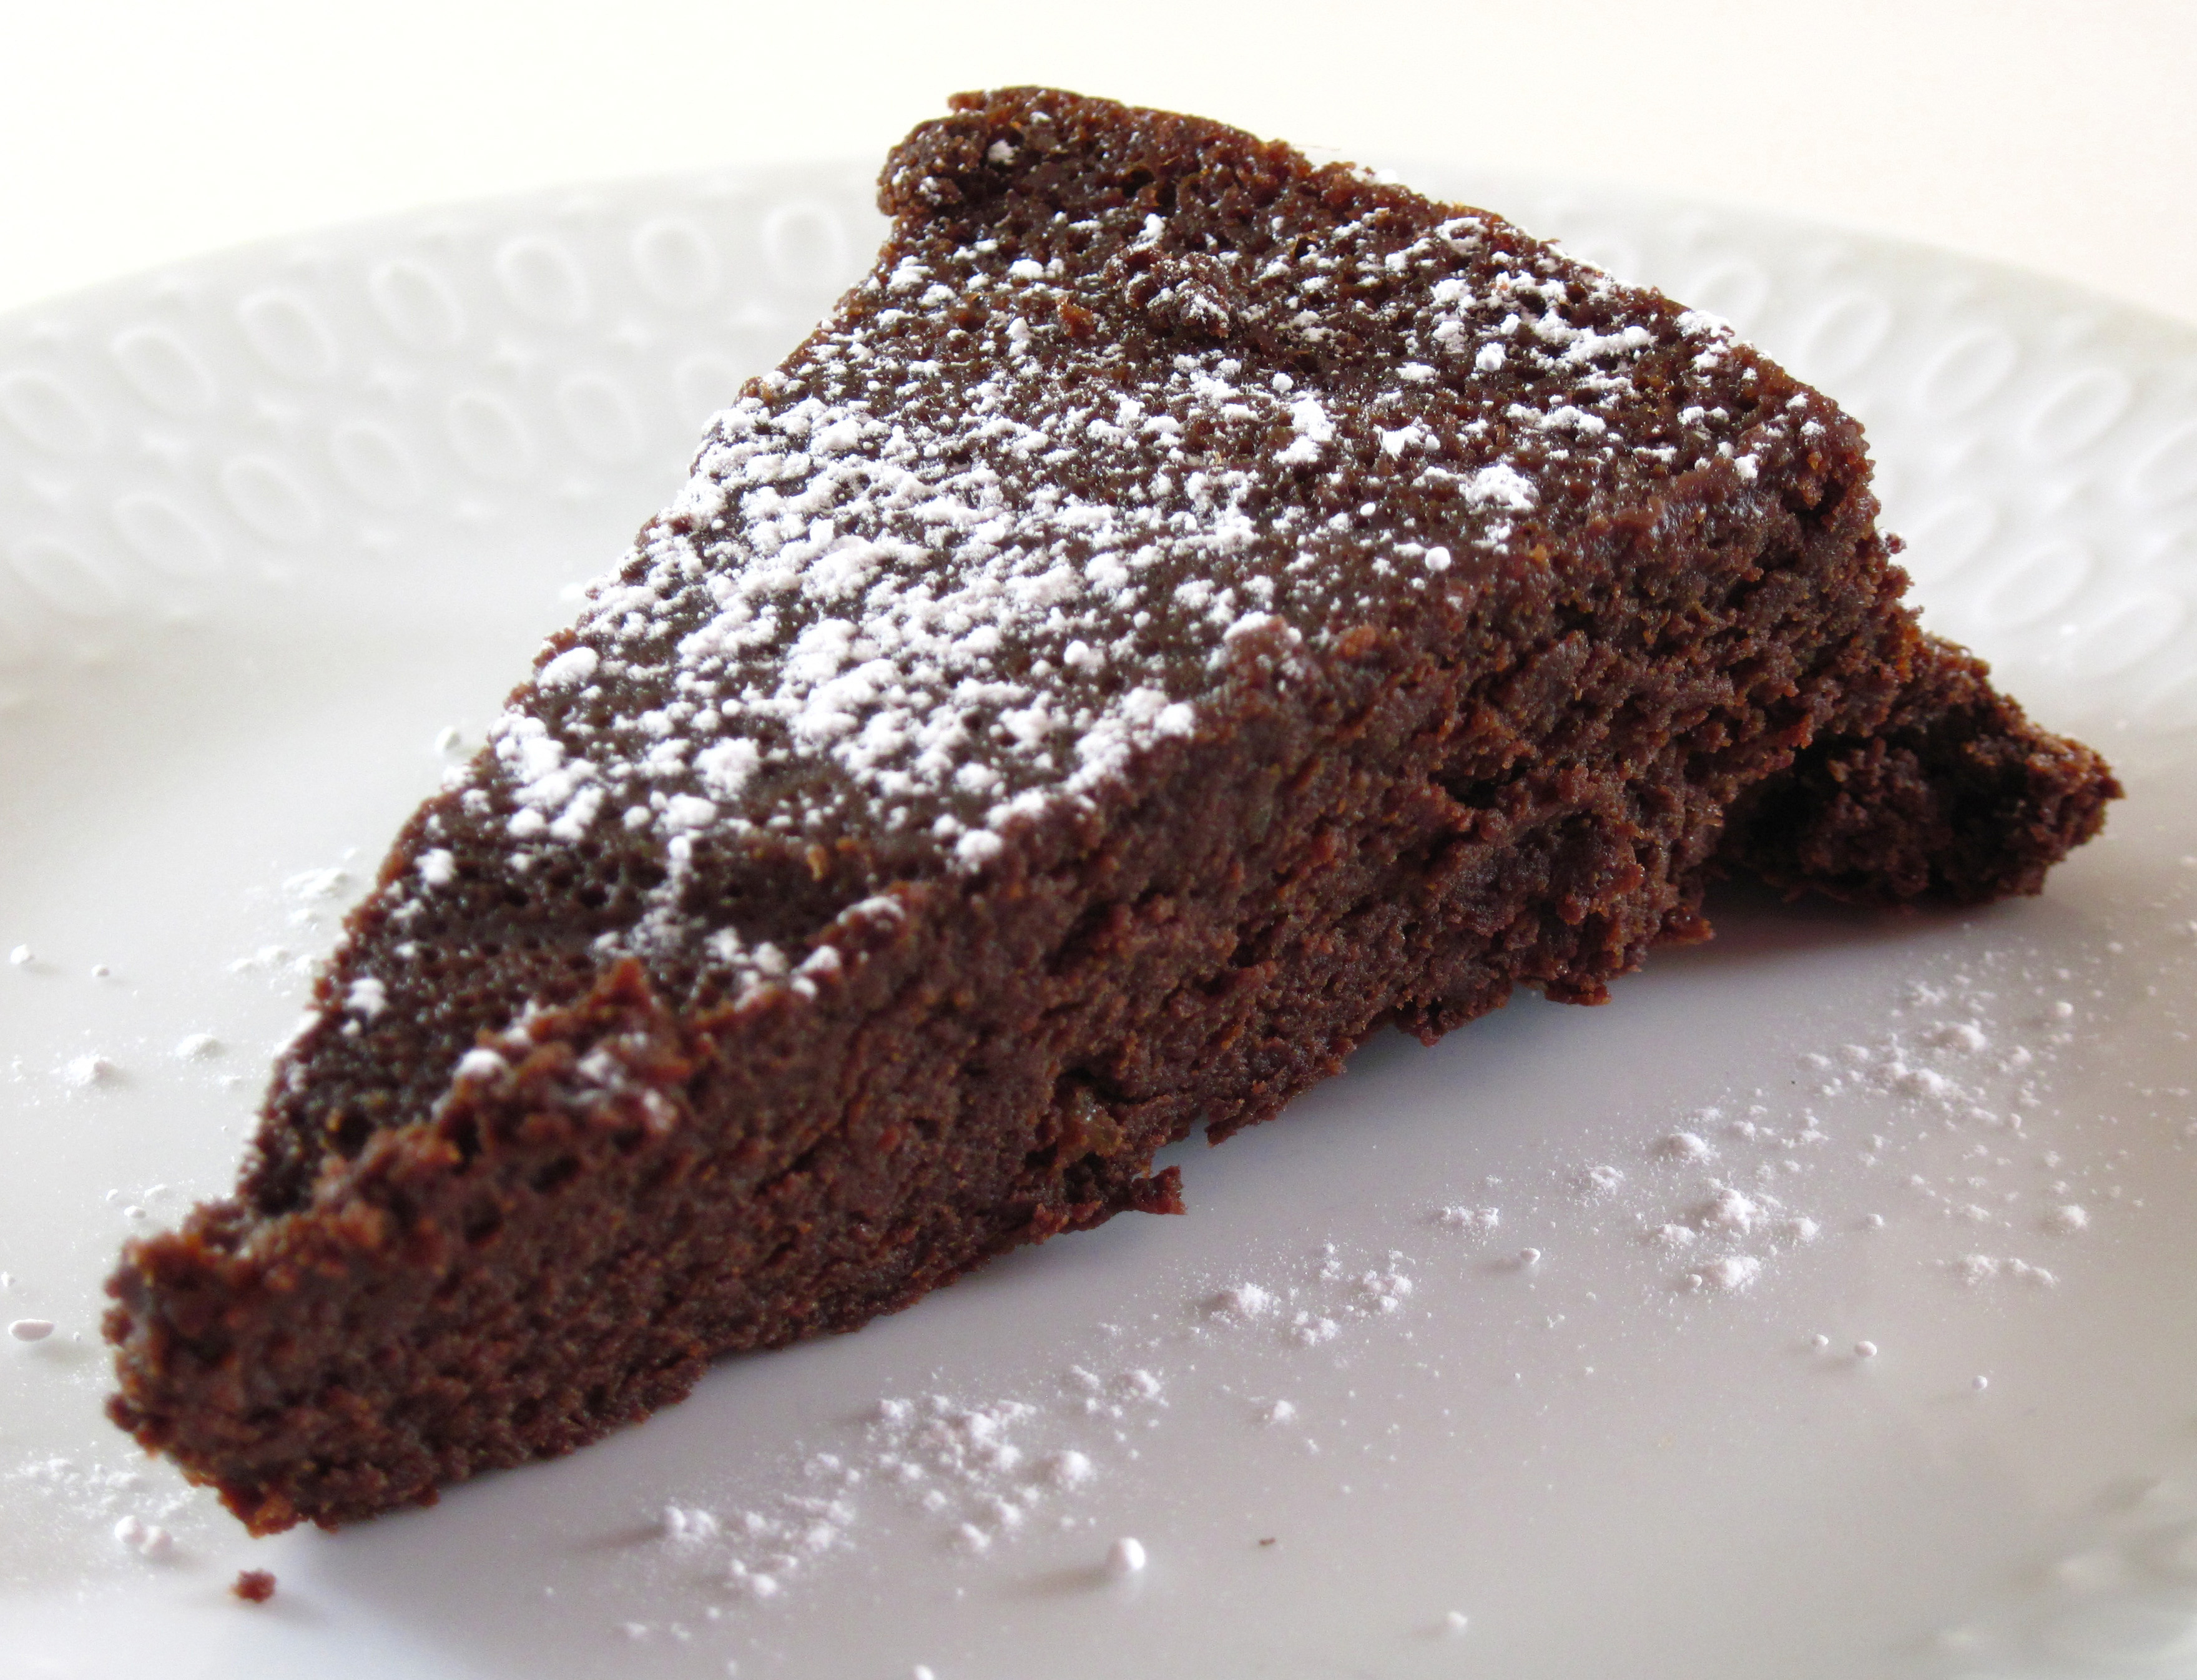
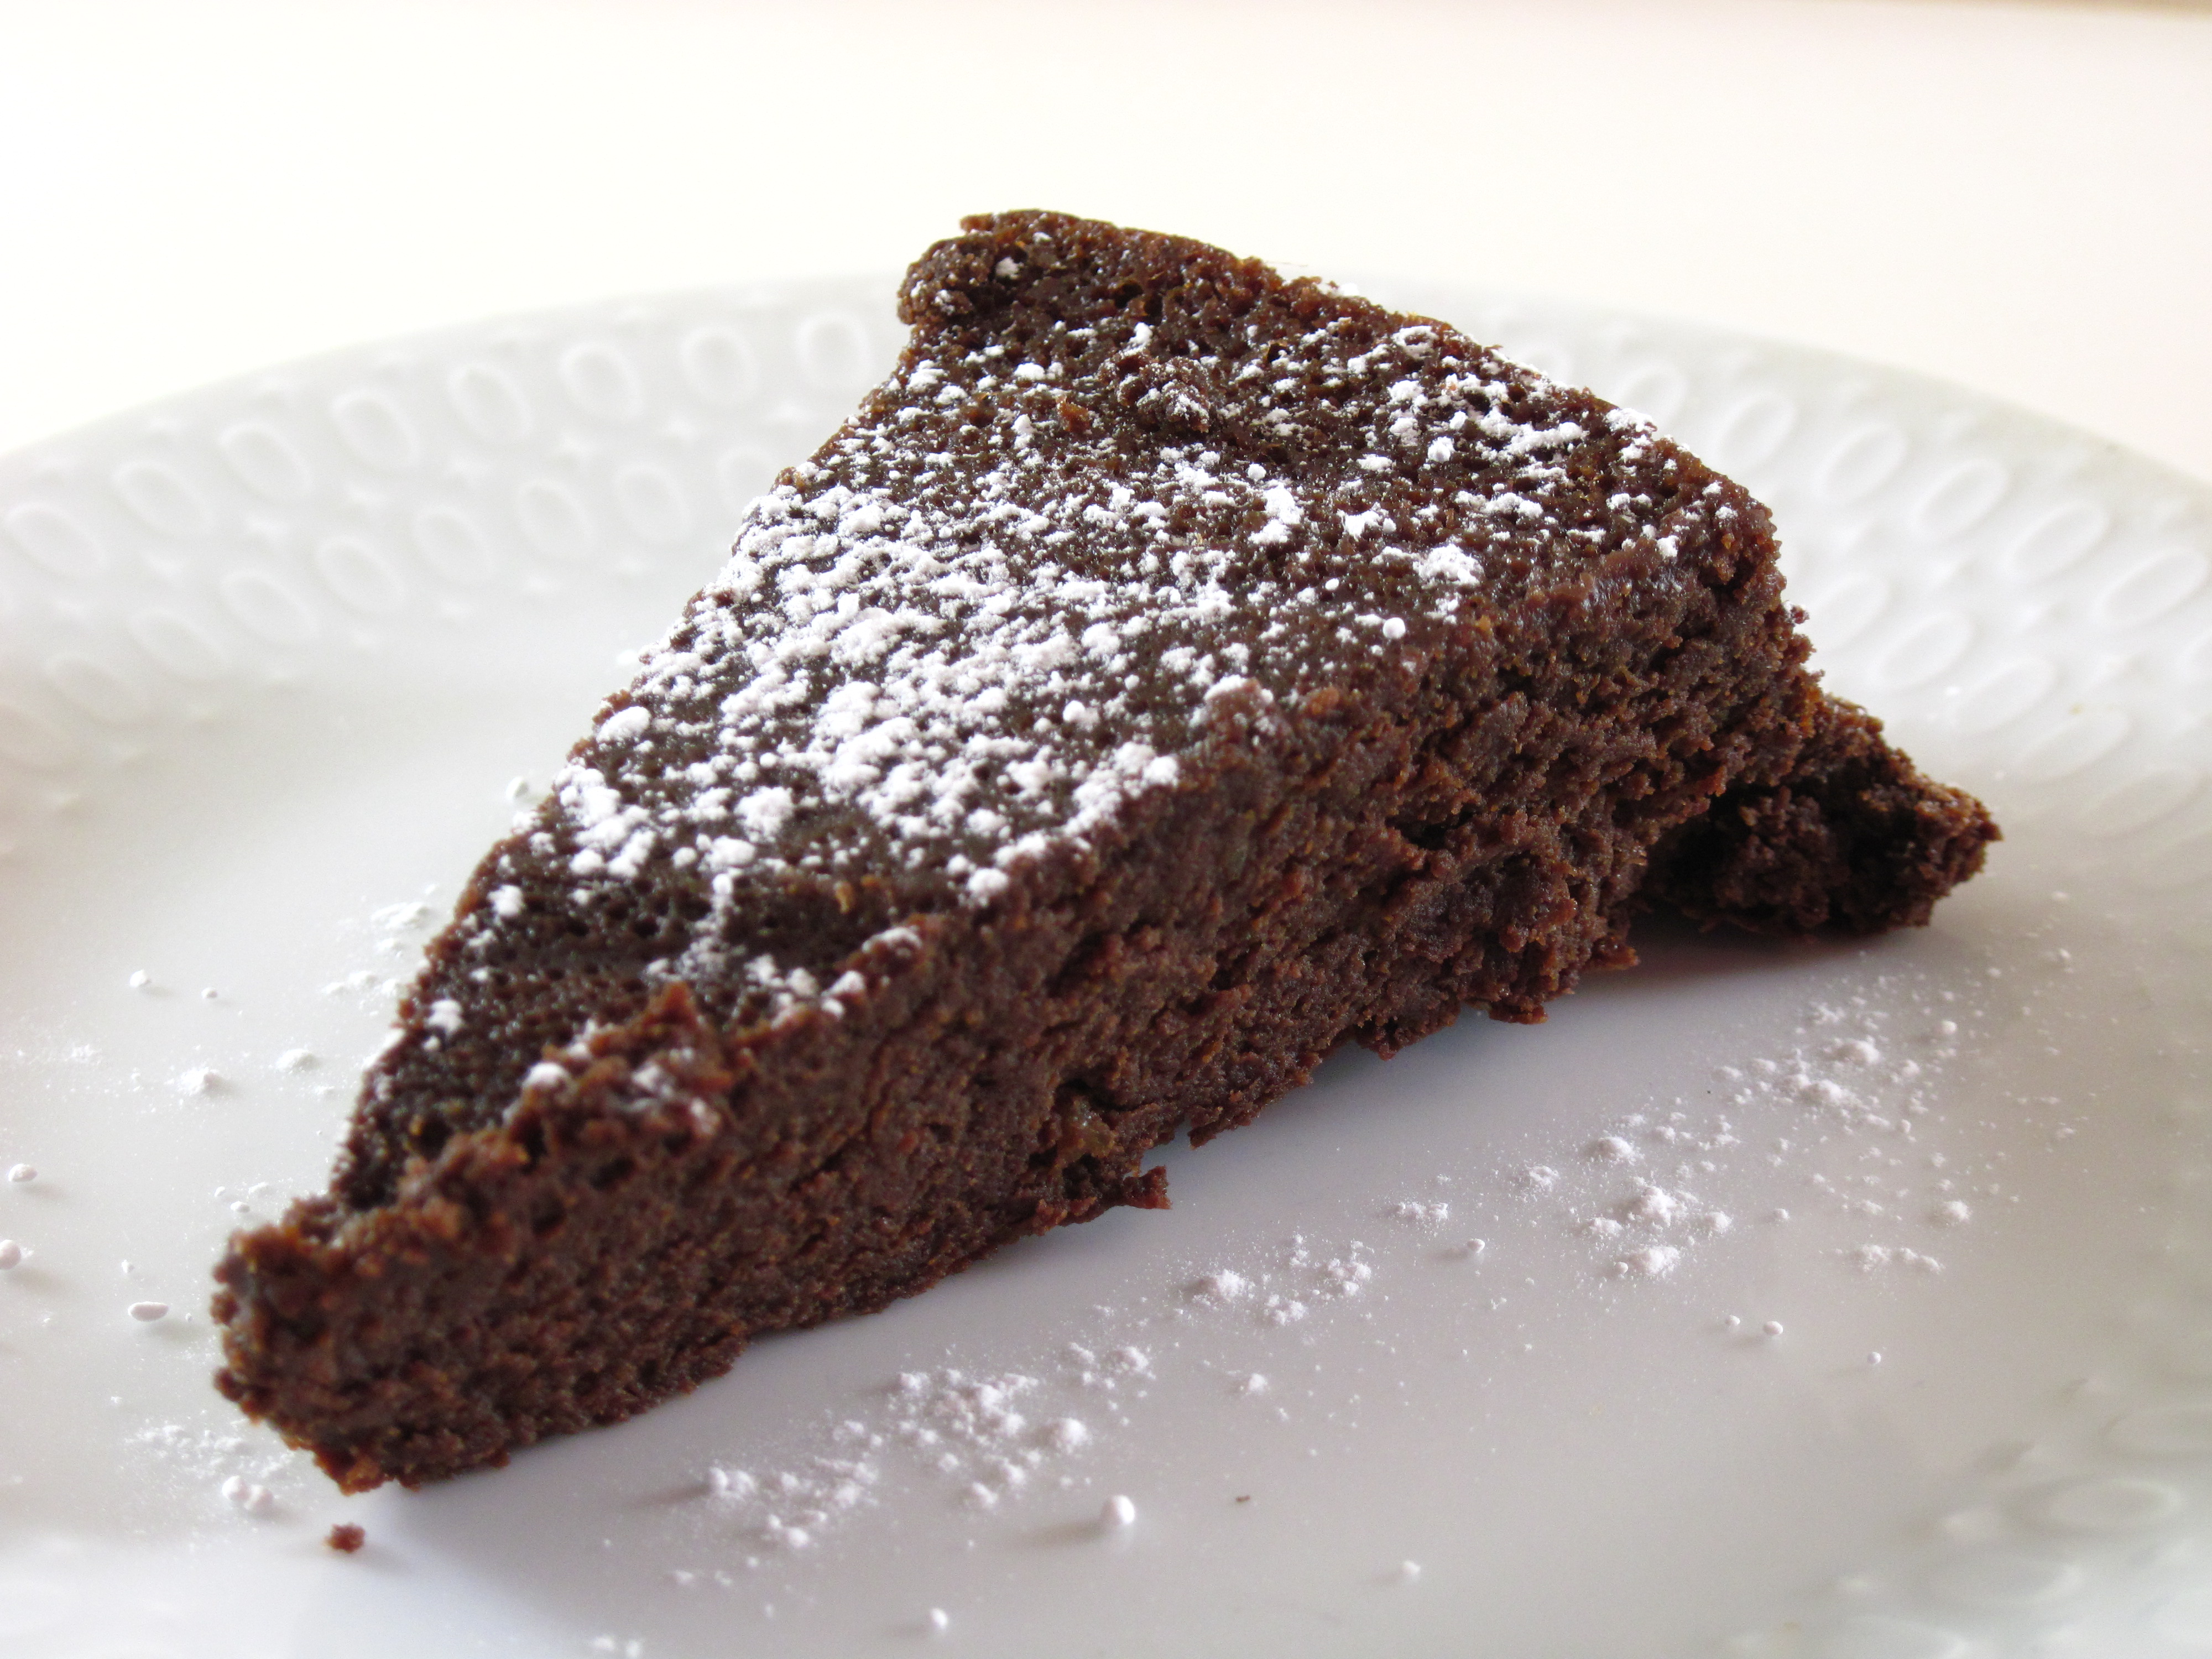
Easy Flourless Chocolate Cake
By Kath Dedon
I made an Easy Flourless Chocolate Cake for Carrie’s birthday this week. I had searched my cookbooks and the Internet for a Flourless Chocolate Cake. I settled on Jesse Rosenberg’s Flourless Chocolate Cake in Molly O’Neill’s One Big Table. Jesse grew up in Paris and she learned how to bake this cake from a Parisian woman.
Many of the other recipes I found involved separating eggs and/or baking the cake in a water bath. I loved the simplicity of Jesse’s cake. It has just four ingredients and is, indeed, very easy to make.
This Easy Flourless Chocolate Cake is very rich without being too heavy. We all loved it! It’s a great cake for any special occasion. It would be a wonderful dessert for Valentine’s Day!
a
Easy Flourless Chocolate Cake
(Adapted from a recipe in One Big Table)
a
a
The original recipe says it serves 8, but this cake is so rich that I found it easily makes 14 – 16 servings.
a
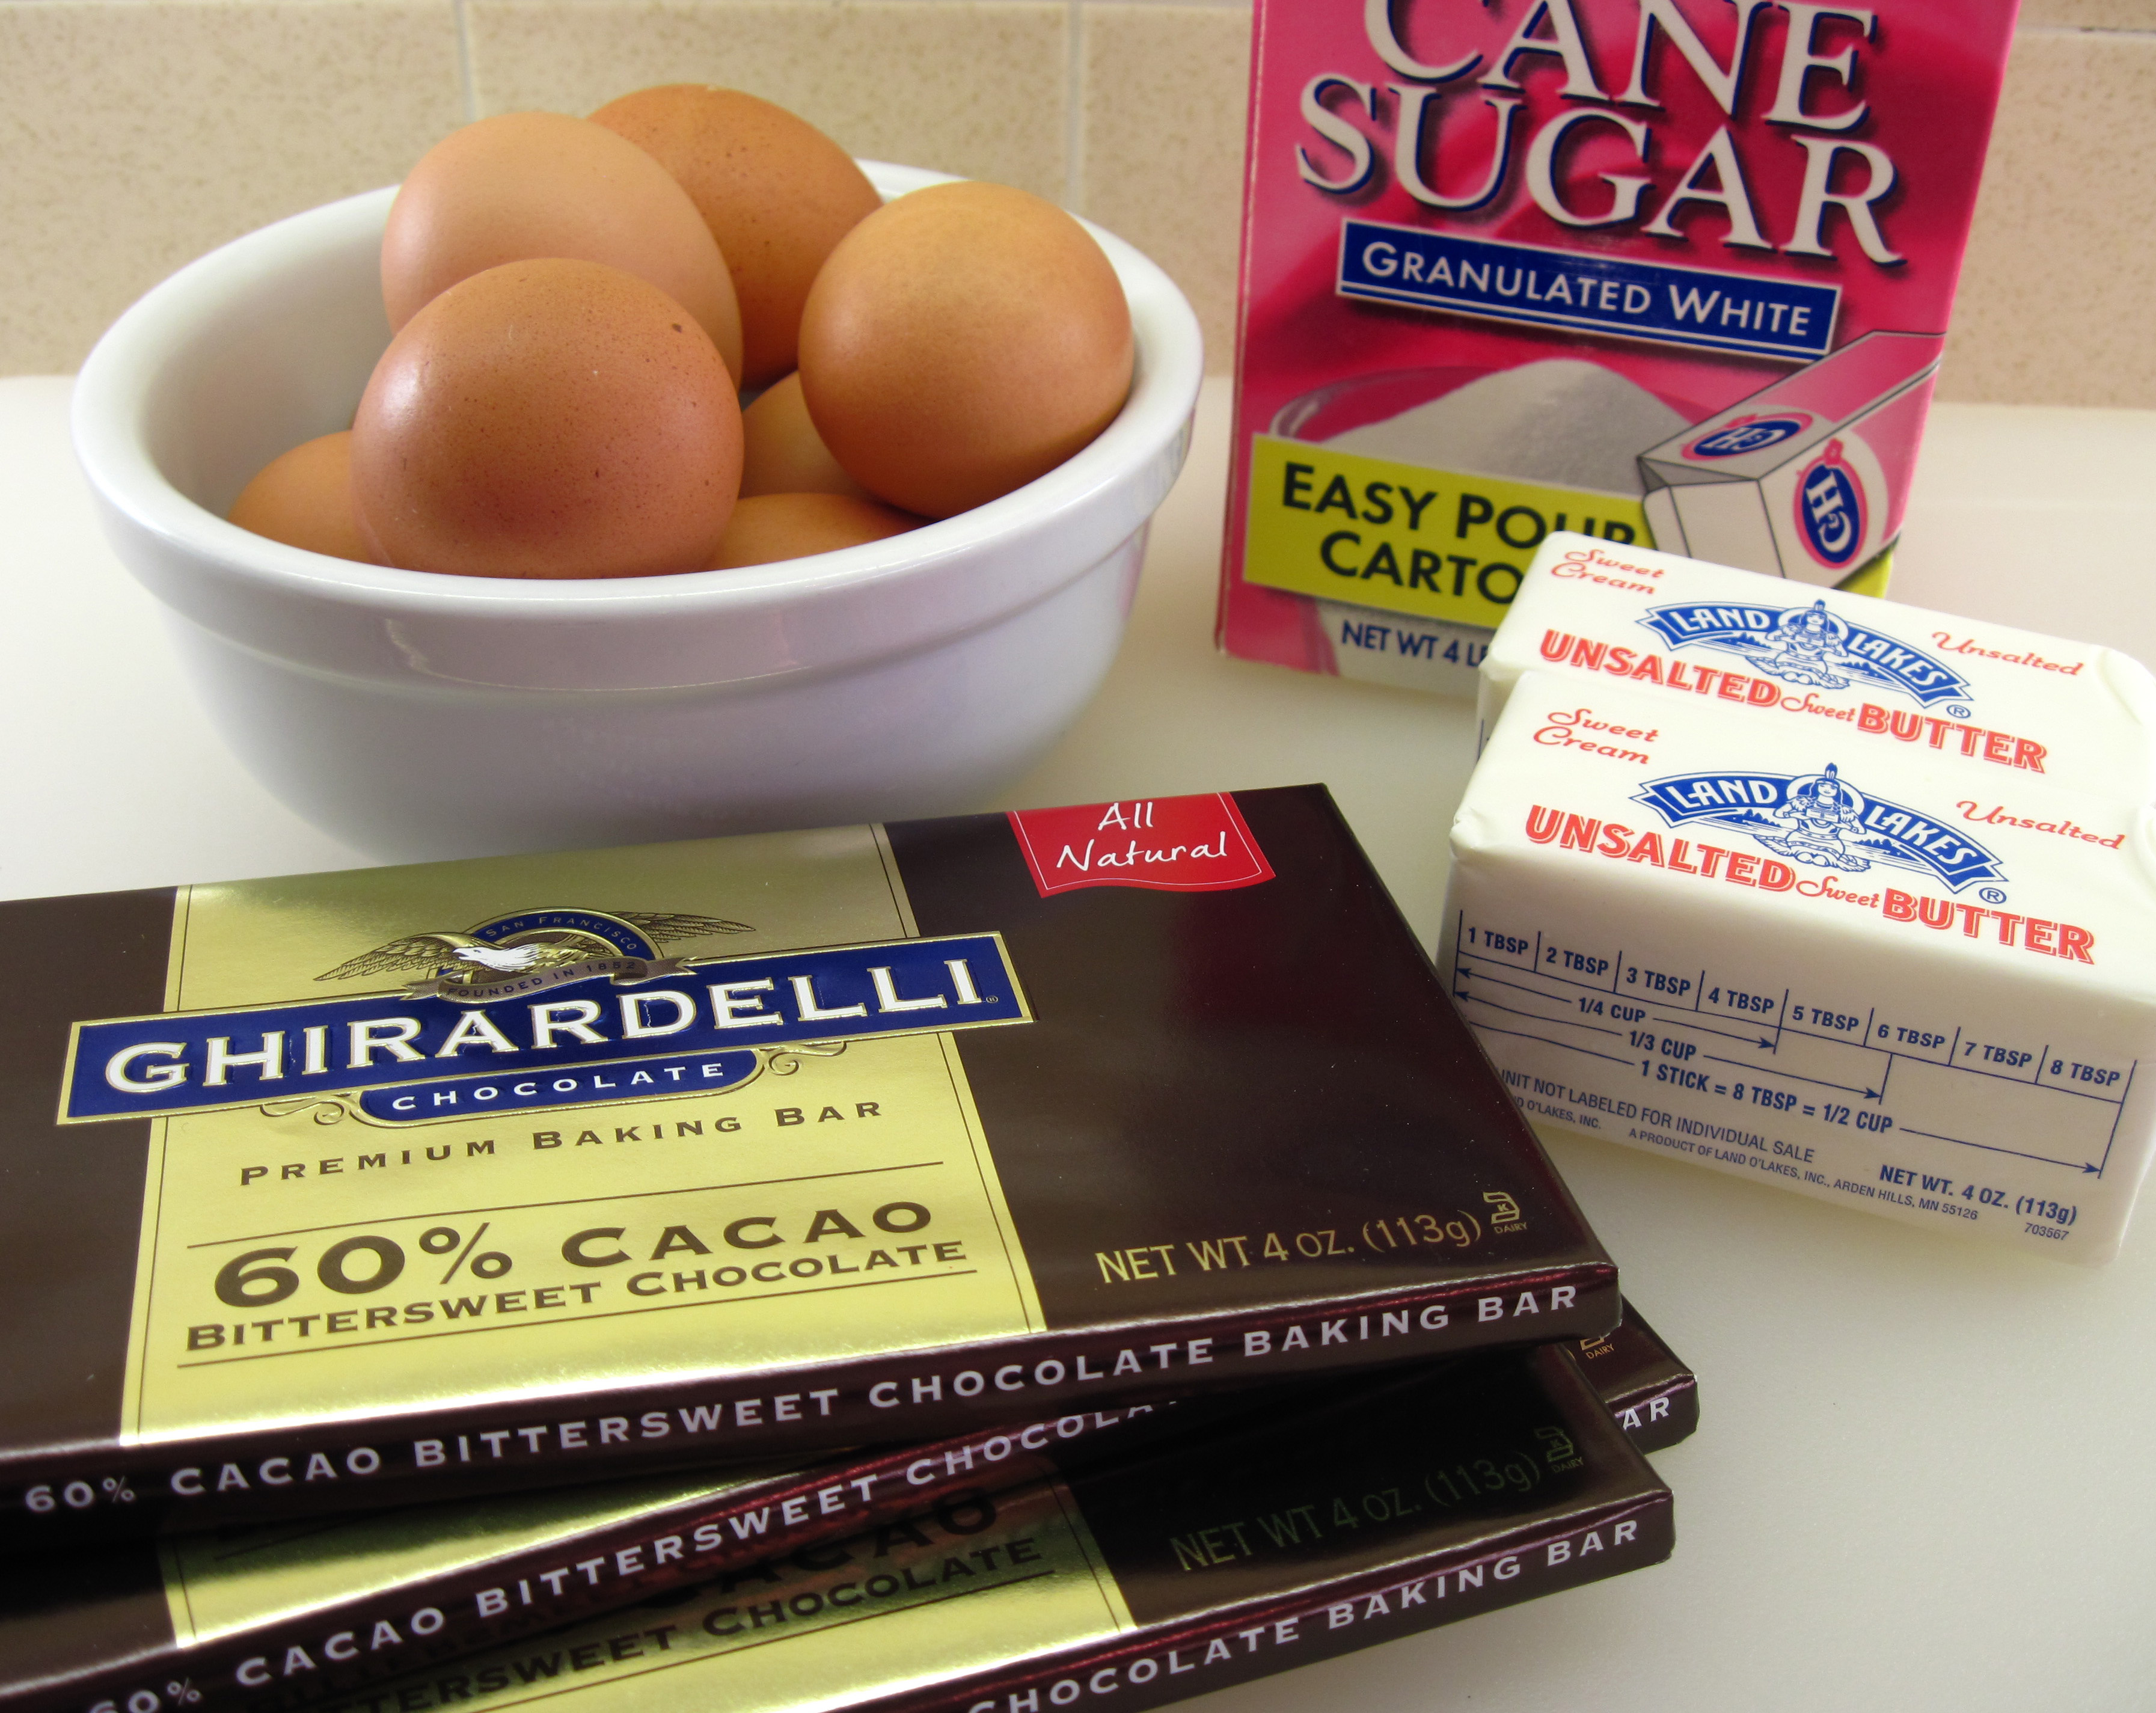
½ pound (2 sticks) unsalted butter, plus a tablespoon more for buttering the pan
1 cup sugar (200g), plus a little extra for the pan
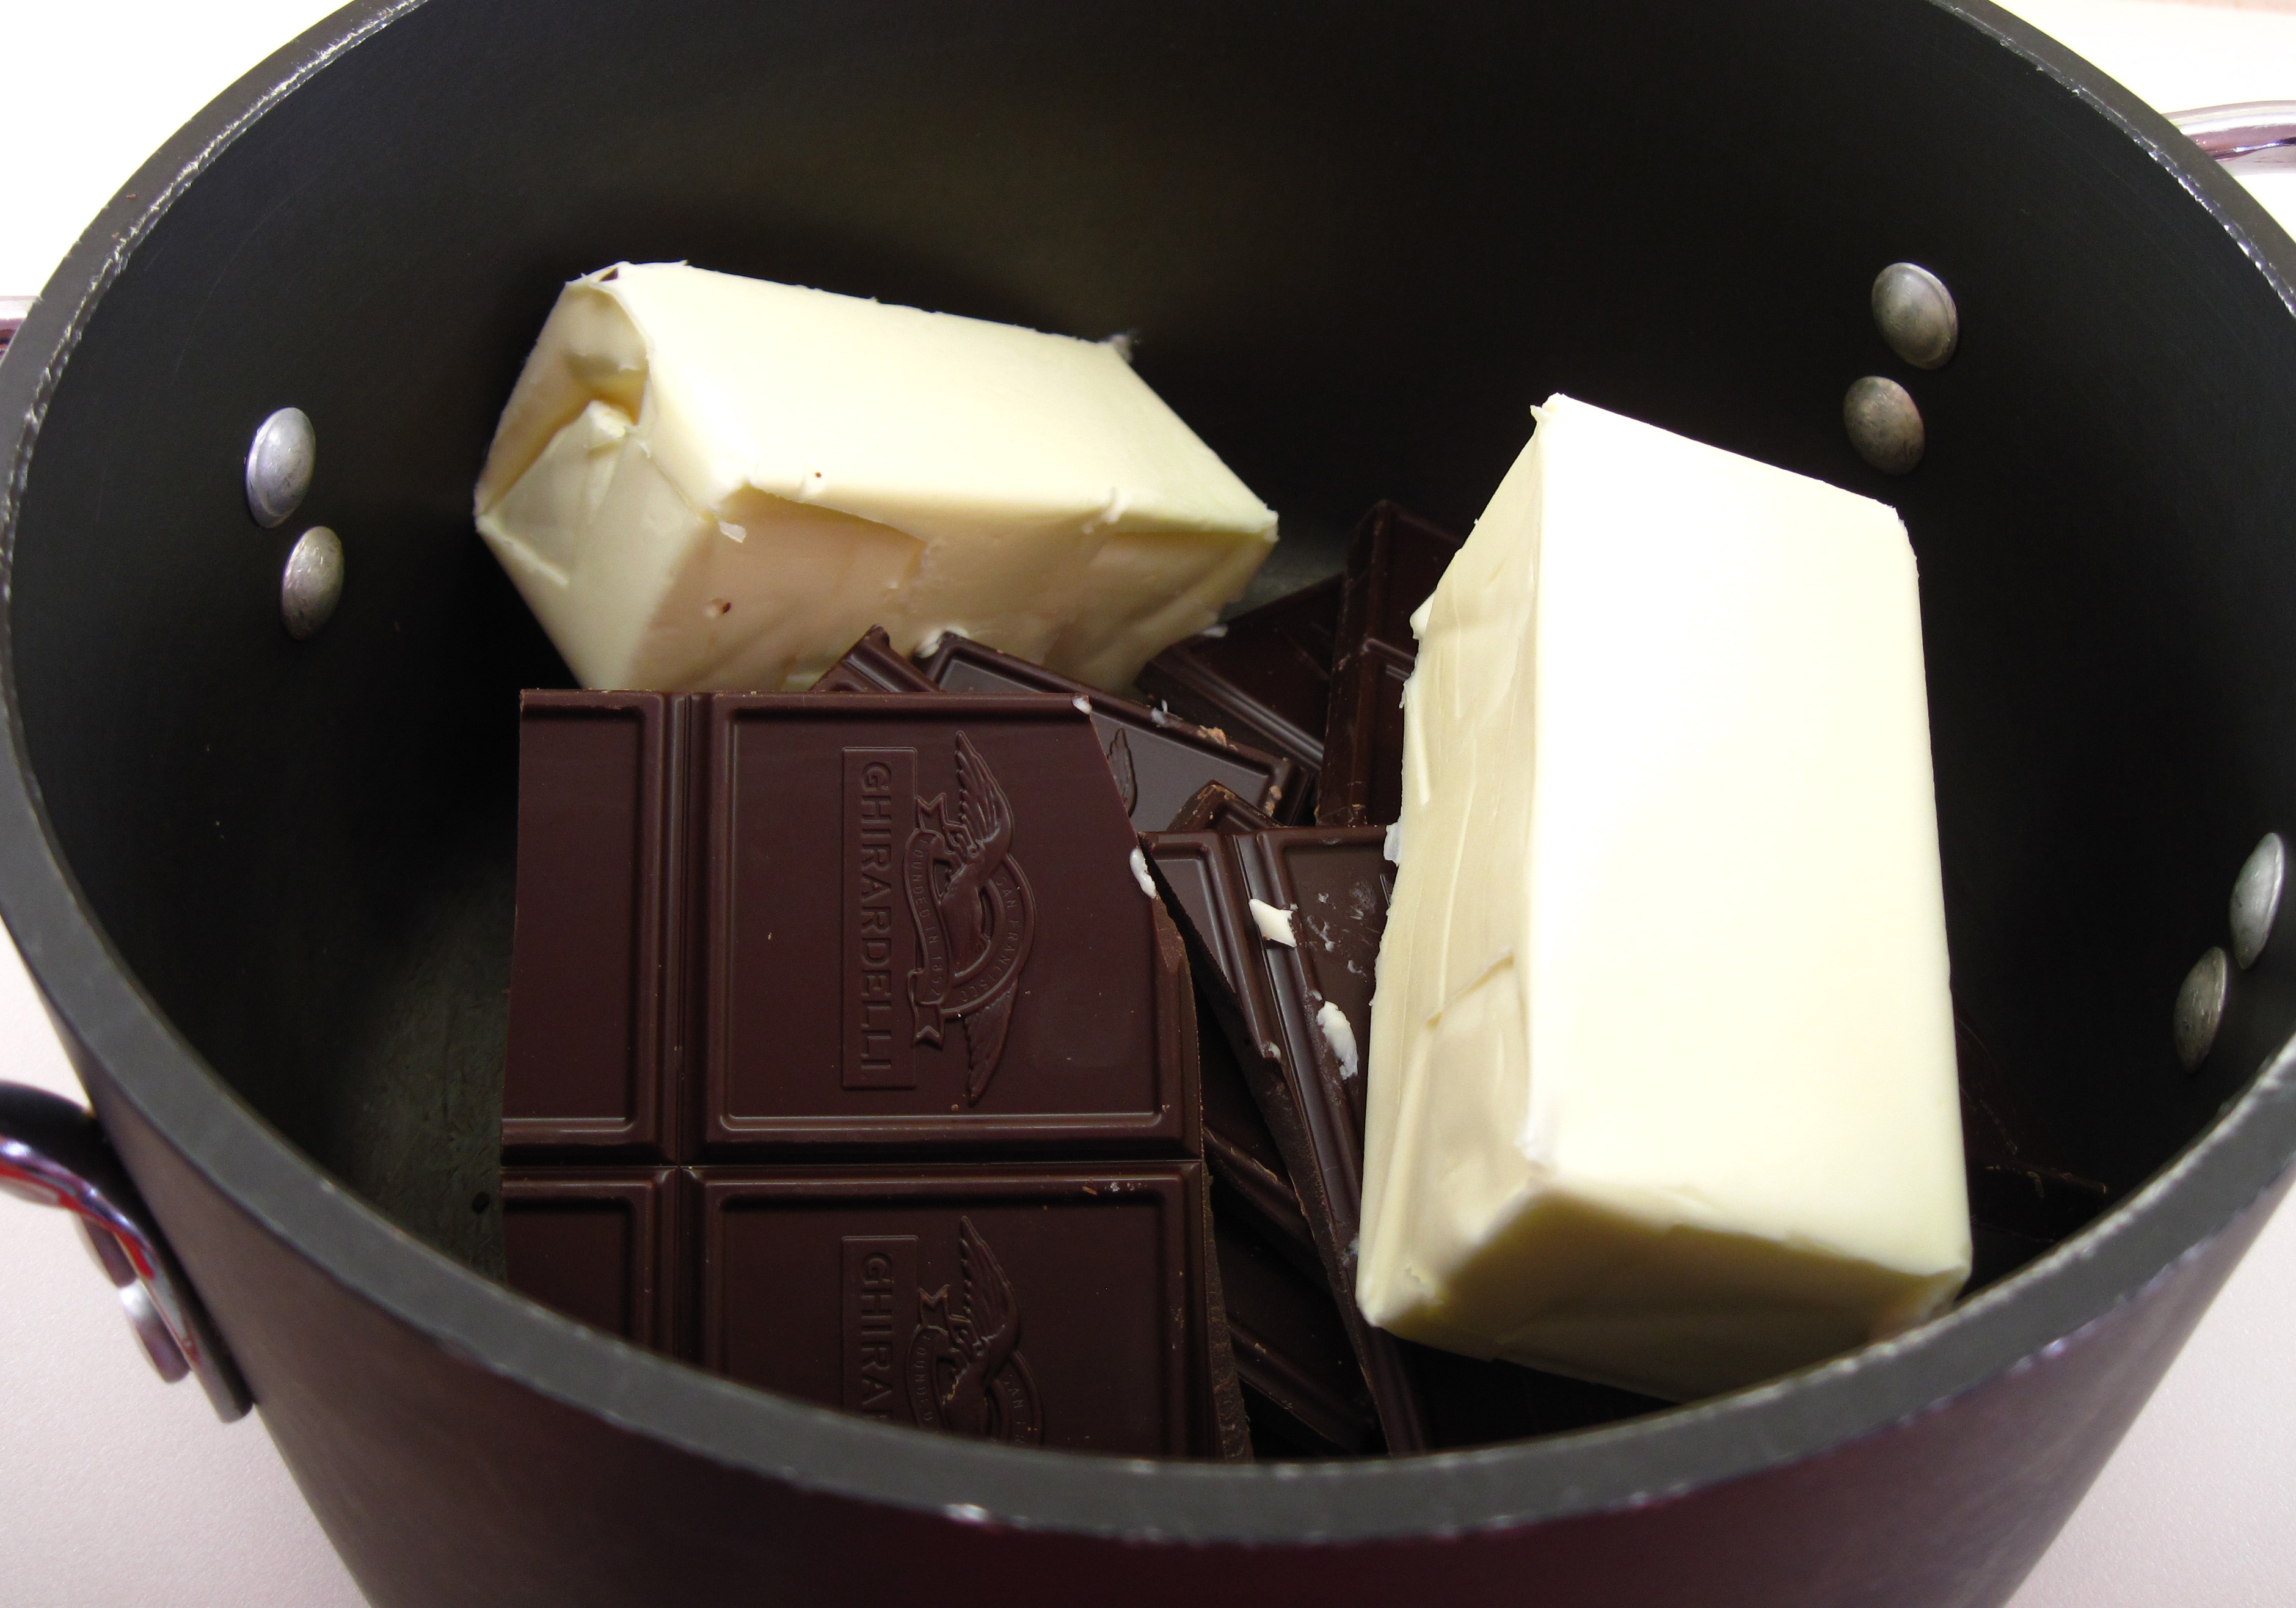
14 ounces dark chocolate (60% cacao bittersweet), broken into pieces
8 large eggs
Parchment paper for the pan
a
Start with great ingredients. Cook’s Illustrated prefers Ghirardelli 60% Cacao Bittersweet Baking Bars and that’s what I used.
a
1. Preheat the oven to 300˚.
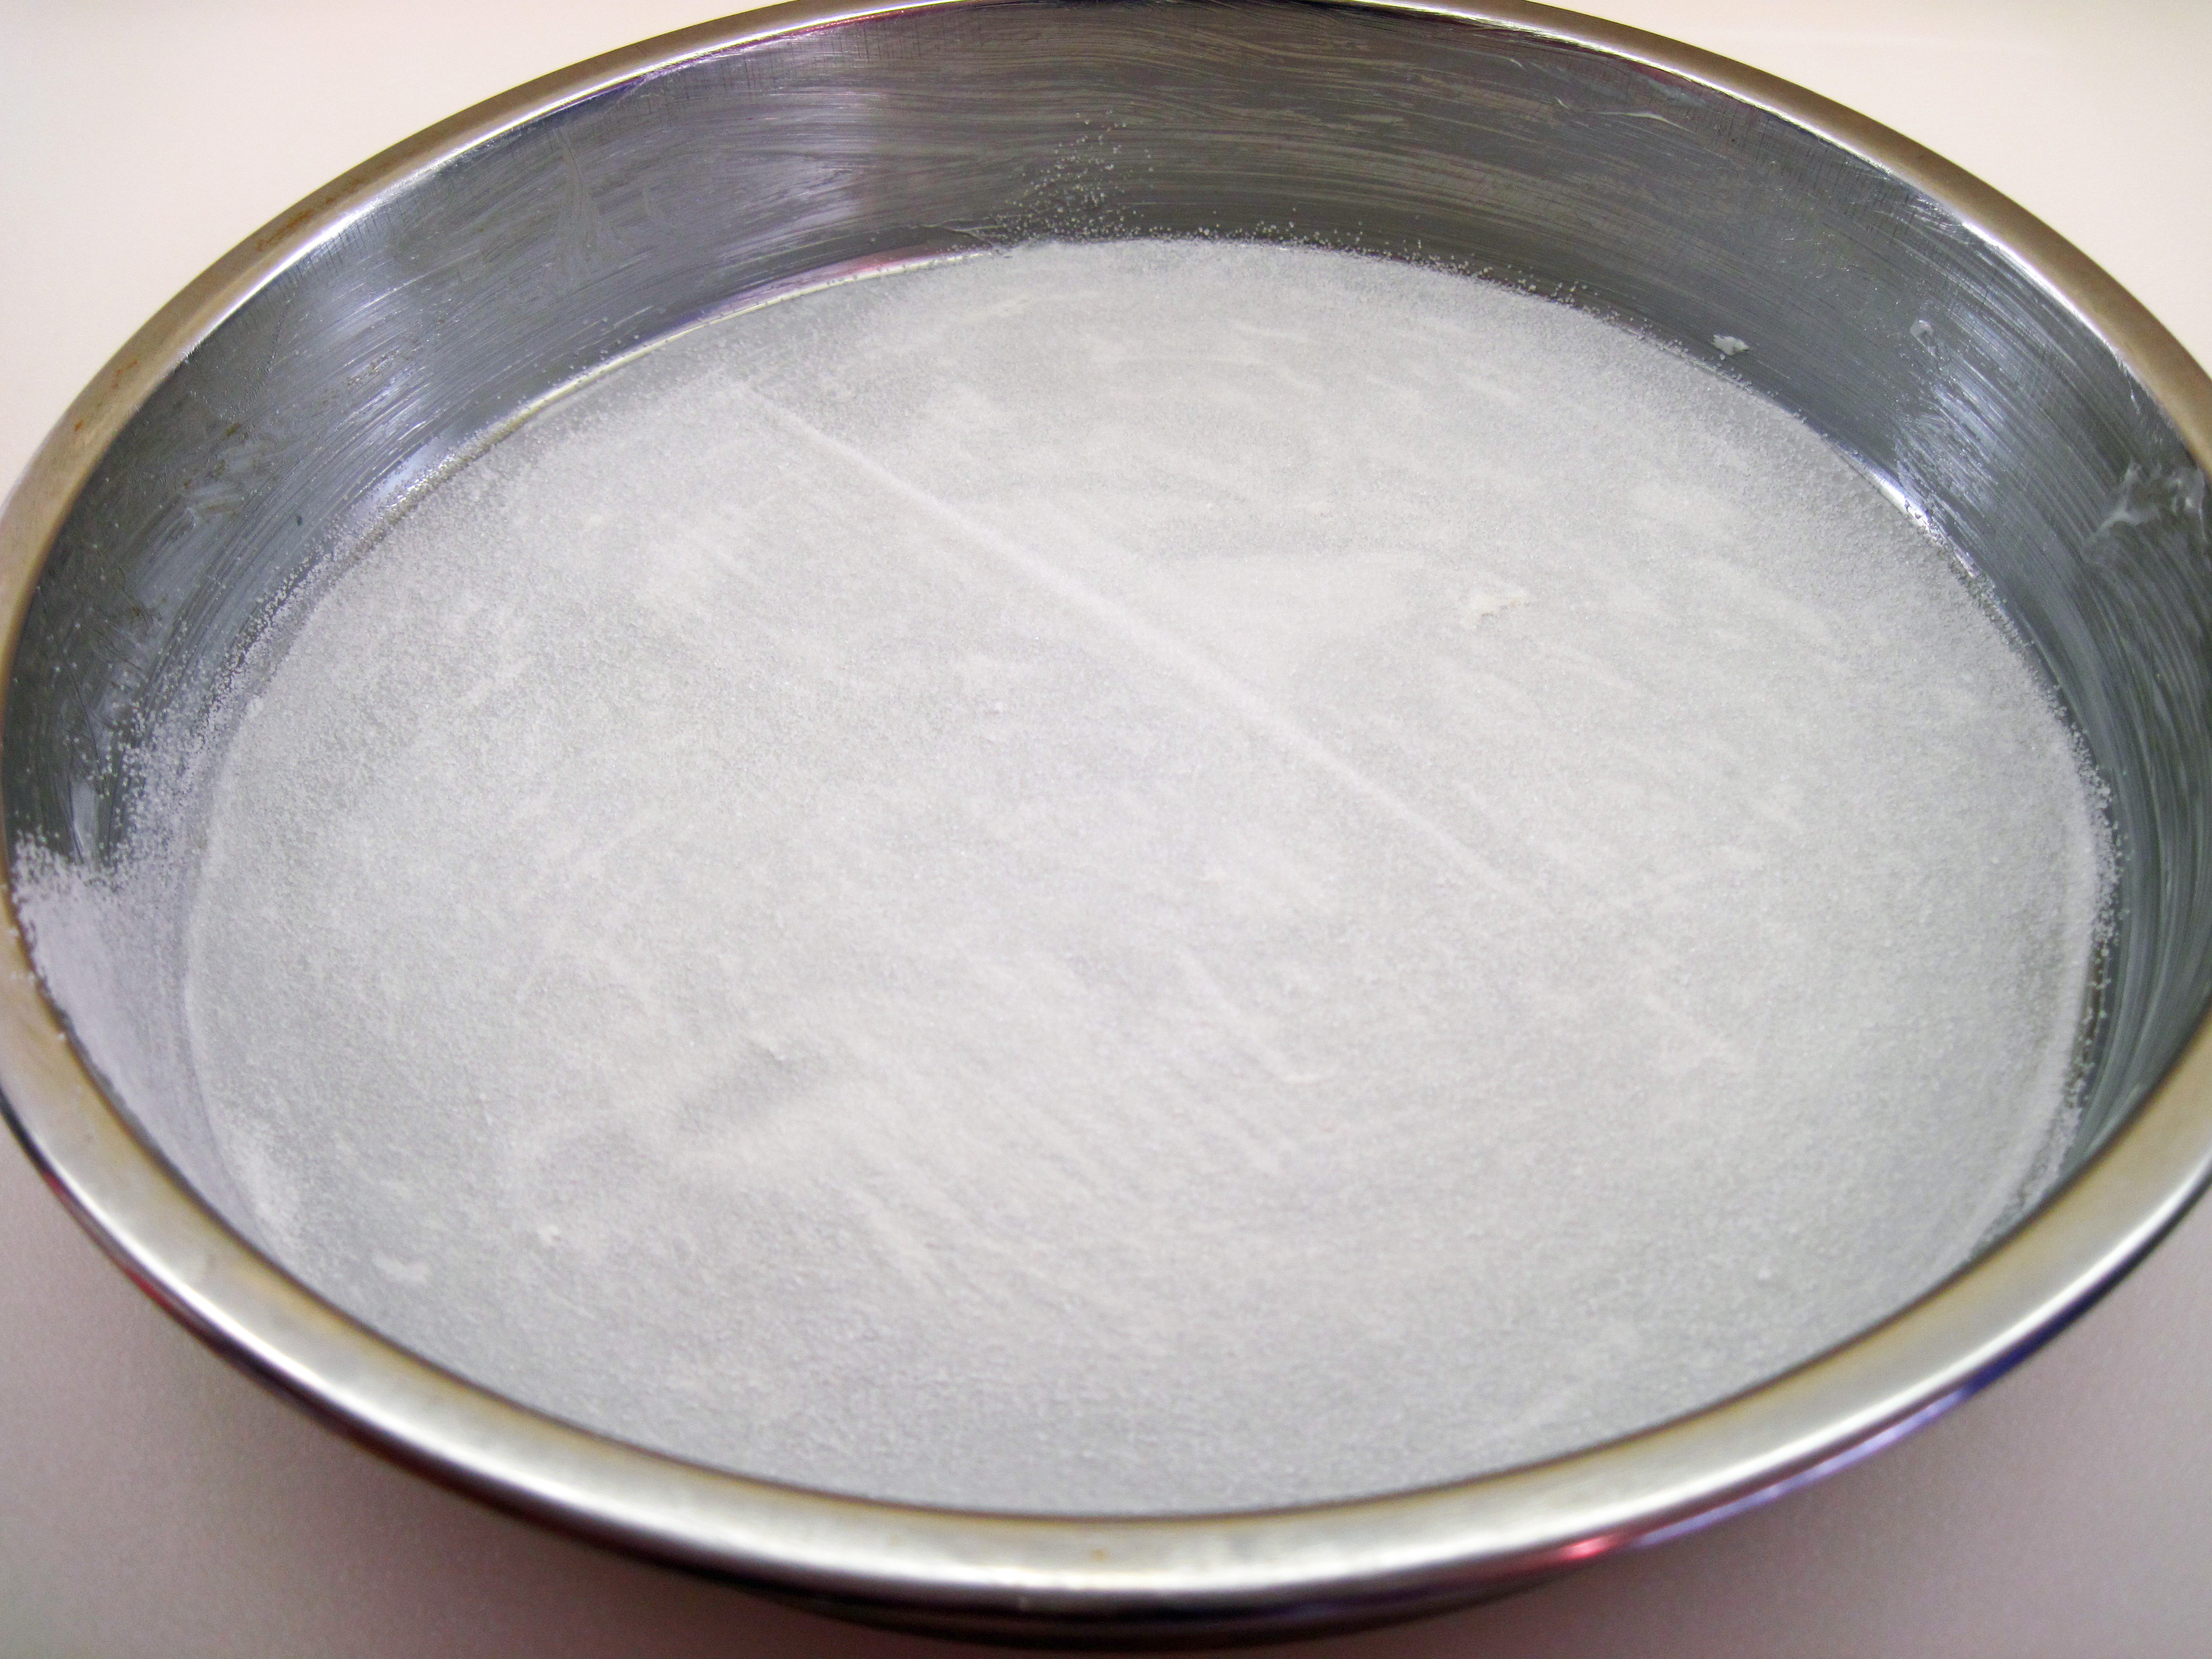
2. Use the extra tablespoon of butter to grease a 9-inch round cake pan. Use about 2 teaspoons of it to grease the pan. Then cut a piece of parchment paper to fit the bottom of the pan. Put the paper in the pan and use the remaining teaspoon of butter to grease the paper. Sprinkle the extra sugar (about 1 tablespoon or so) in the pan and shake it back and forth to cover the bottom. Pour out any excess.
a
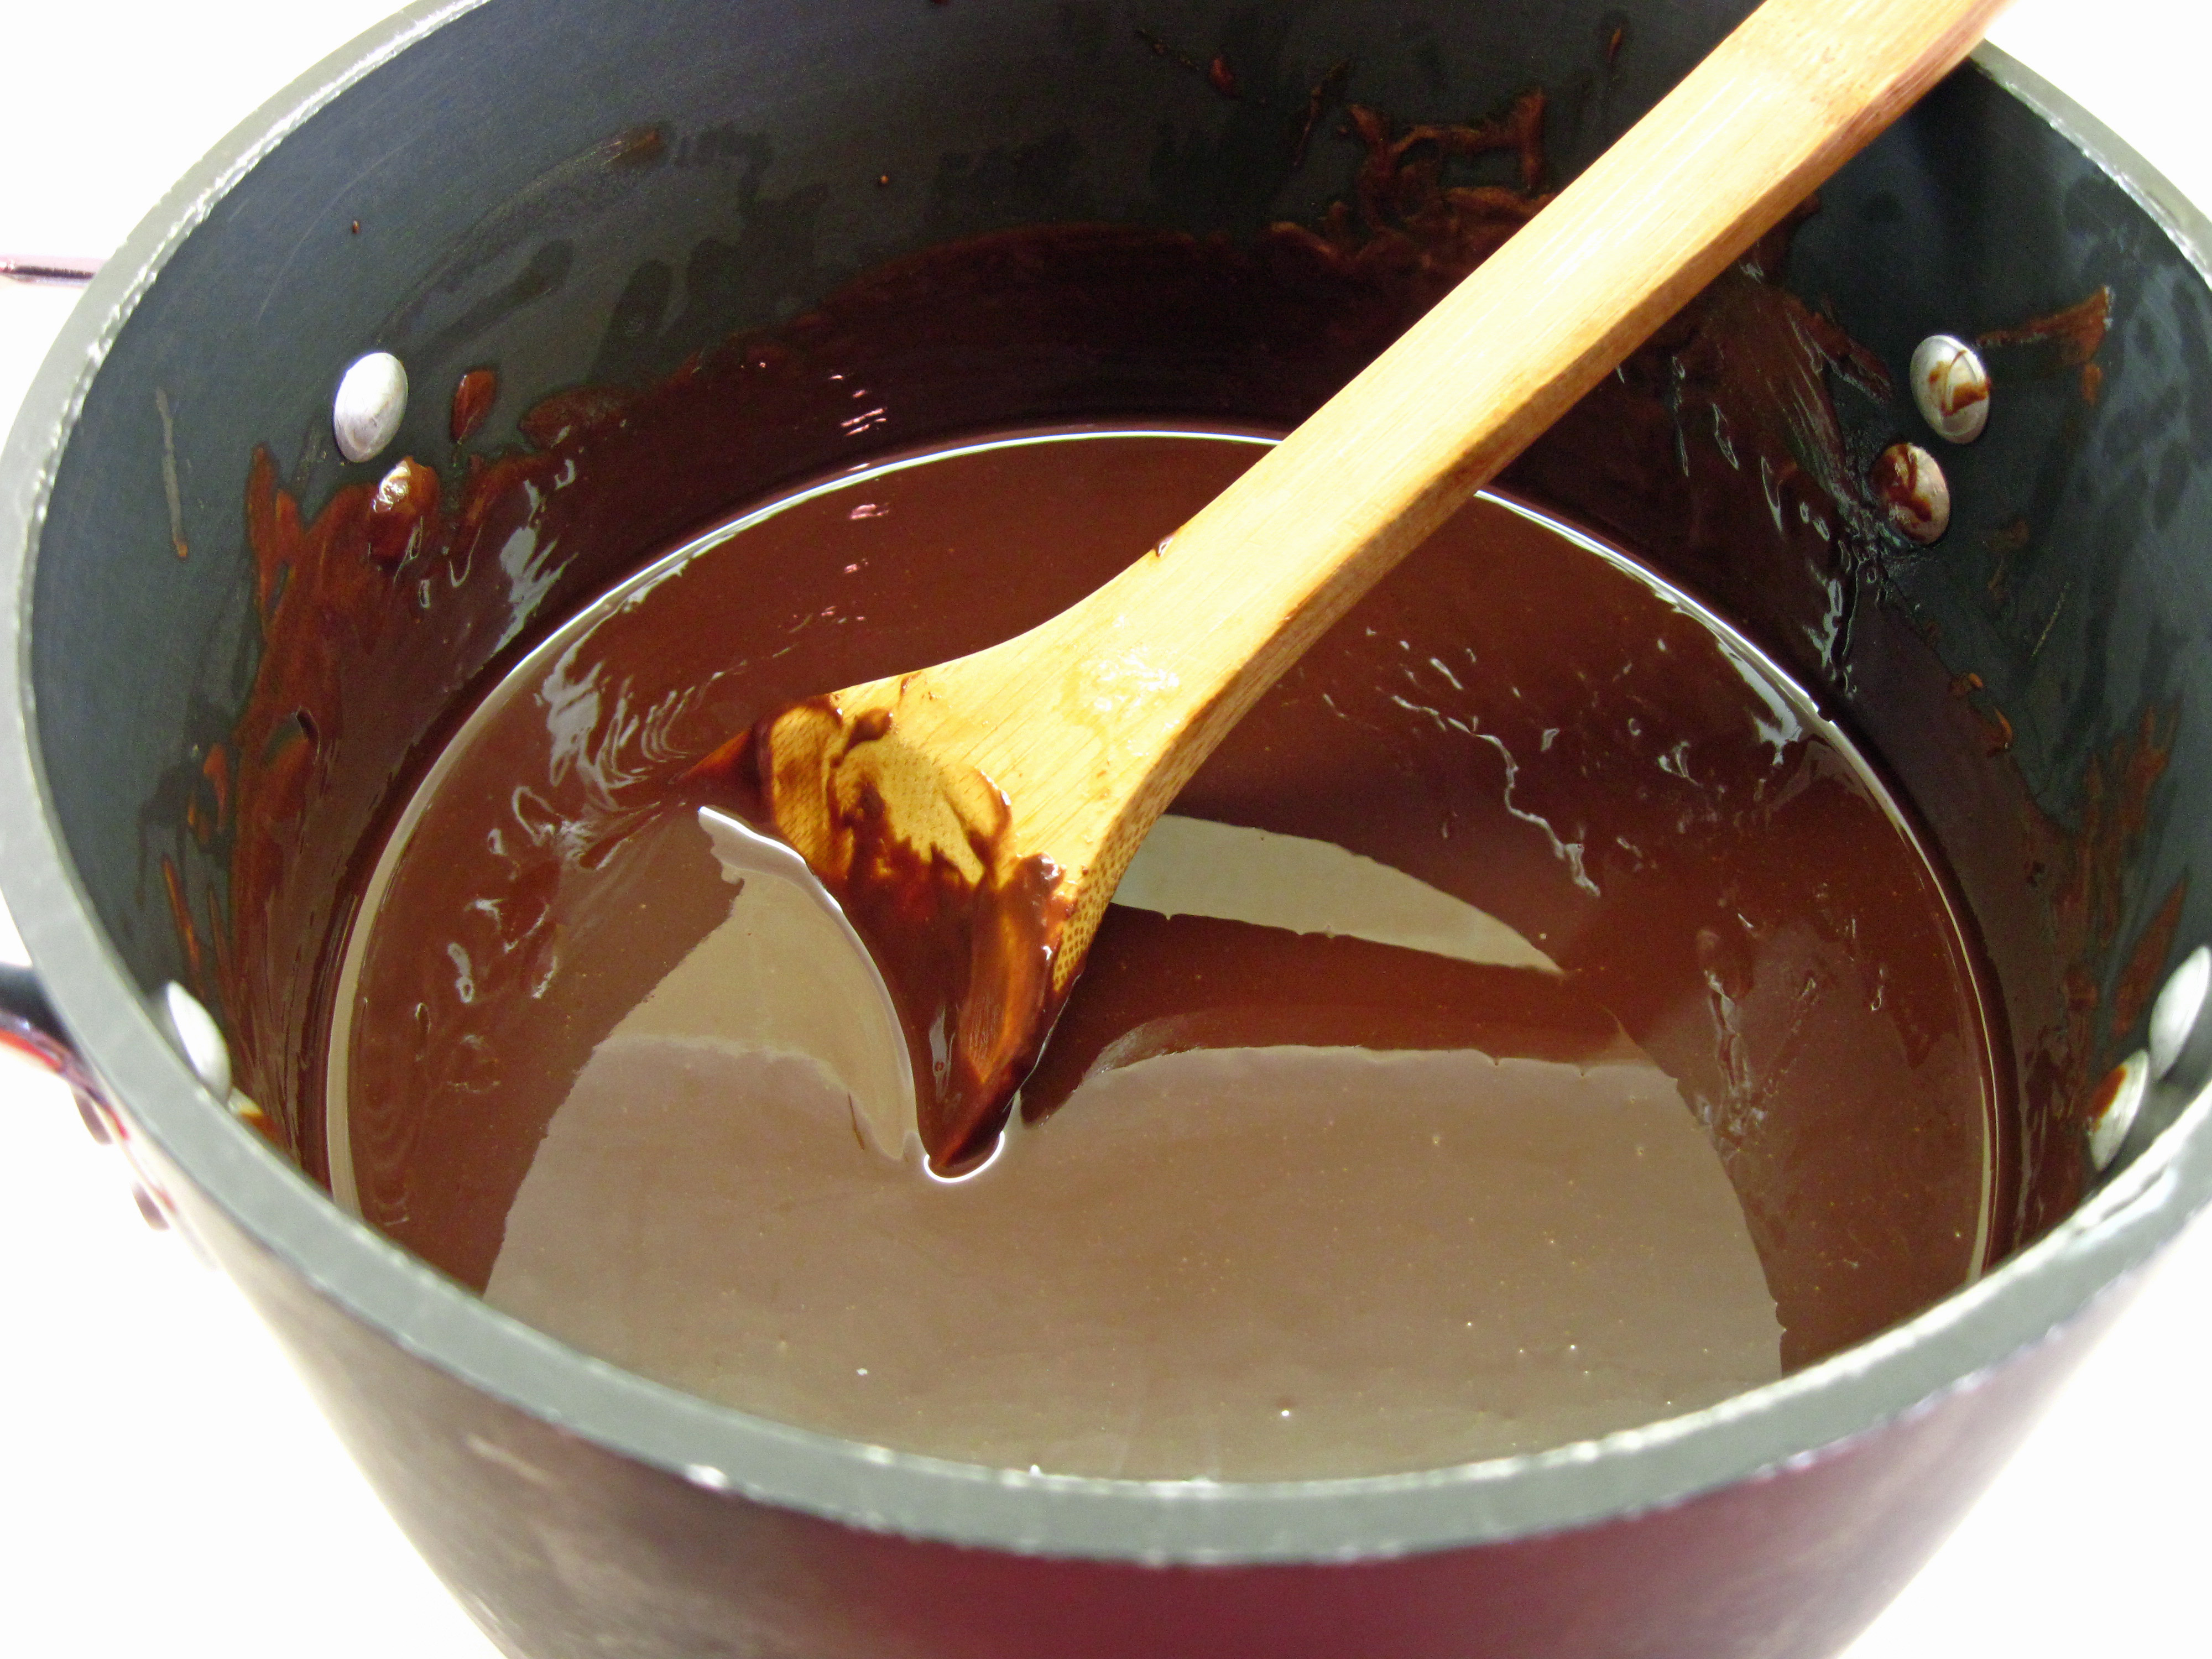
3. Melt the 2 sticks of butter and the chocolate together in a heavy medium saucepan over low heat. Stir it constantly once it starts to melt. When it has all melted and blended together, remove from the heat and allow to cool a bit.
a
a
4. Beat the eggs with a mixer until light. Add the sugar a bit at a time, mixing at medium speed for about 6 – 8 minutes. The mixture should be pale and fluffy.
5. Fold the egg mixture into the chocolate and gently stir until well blended.
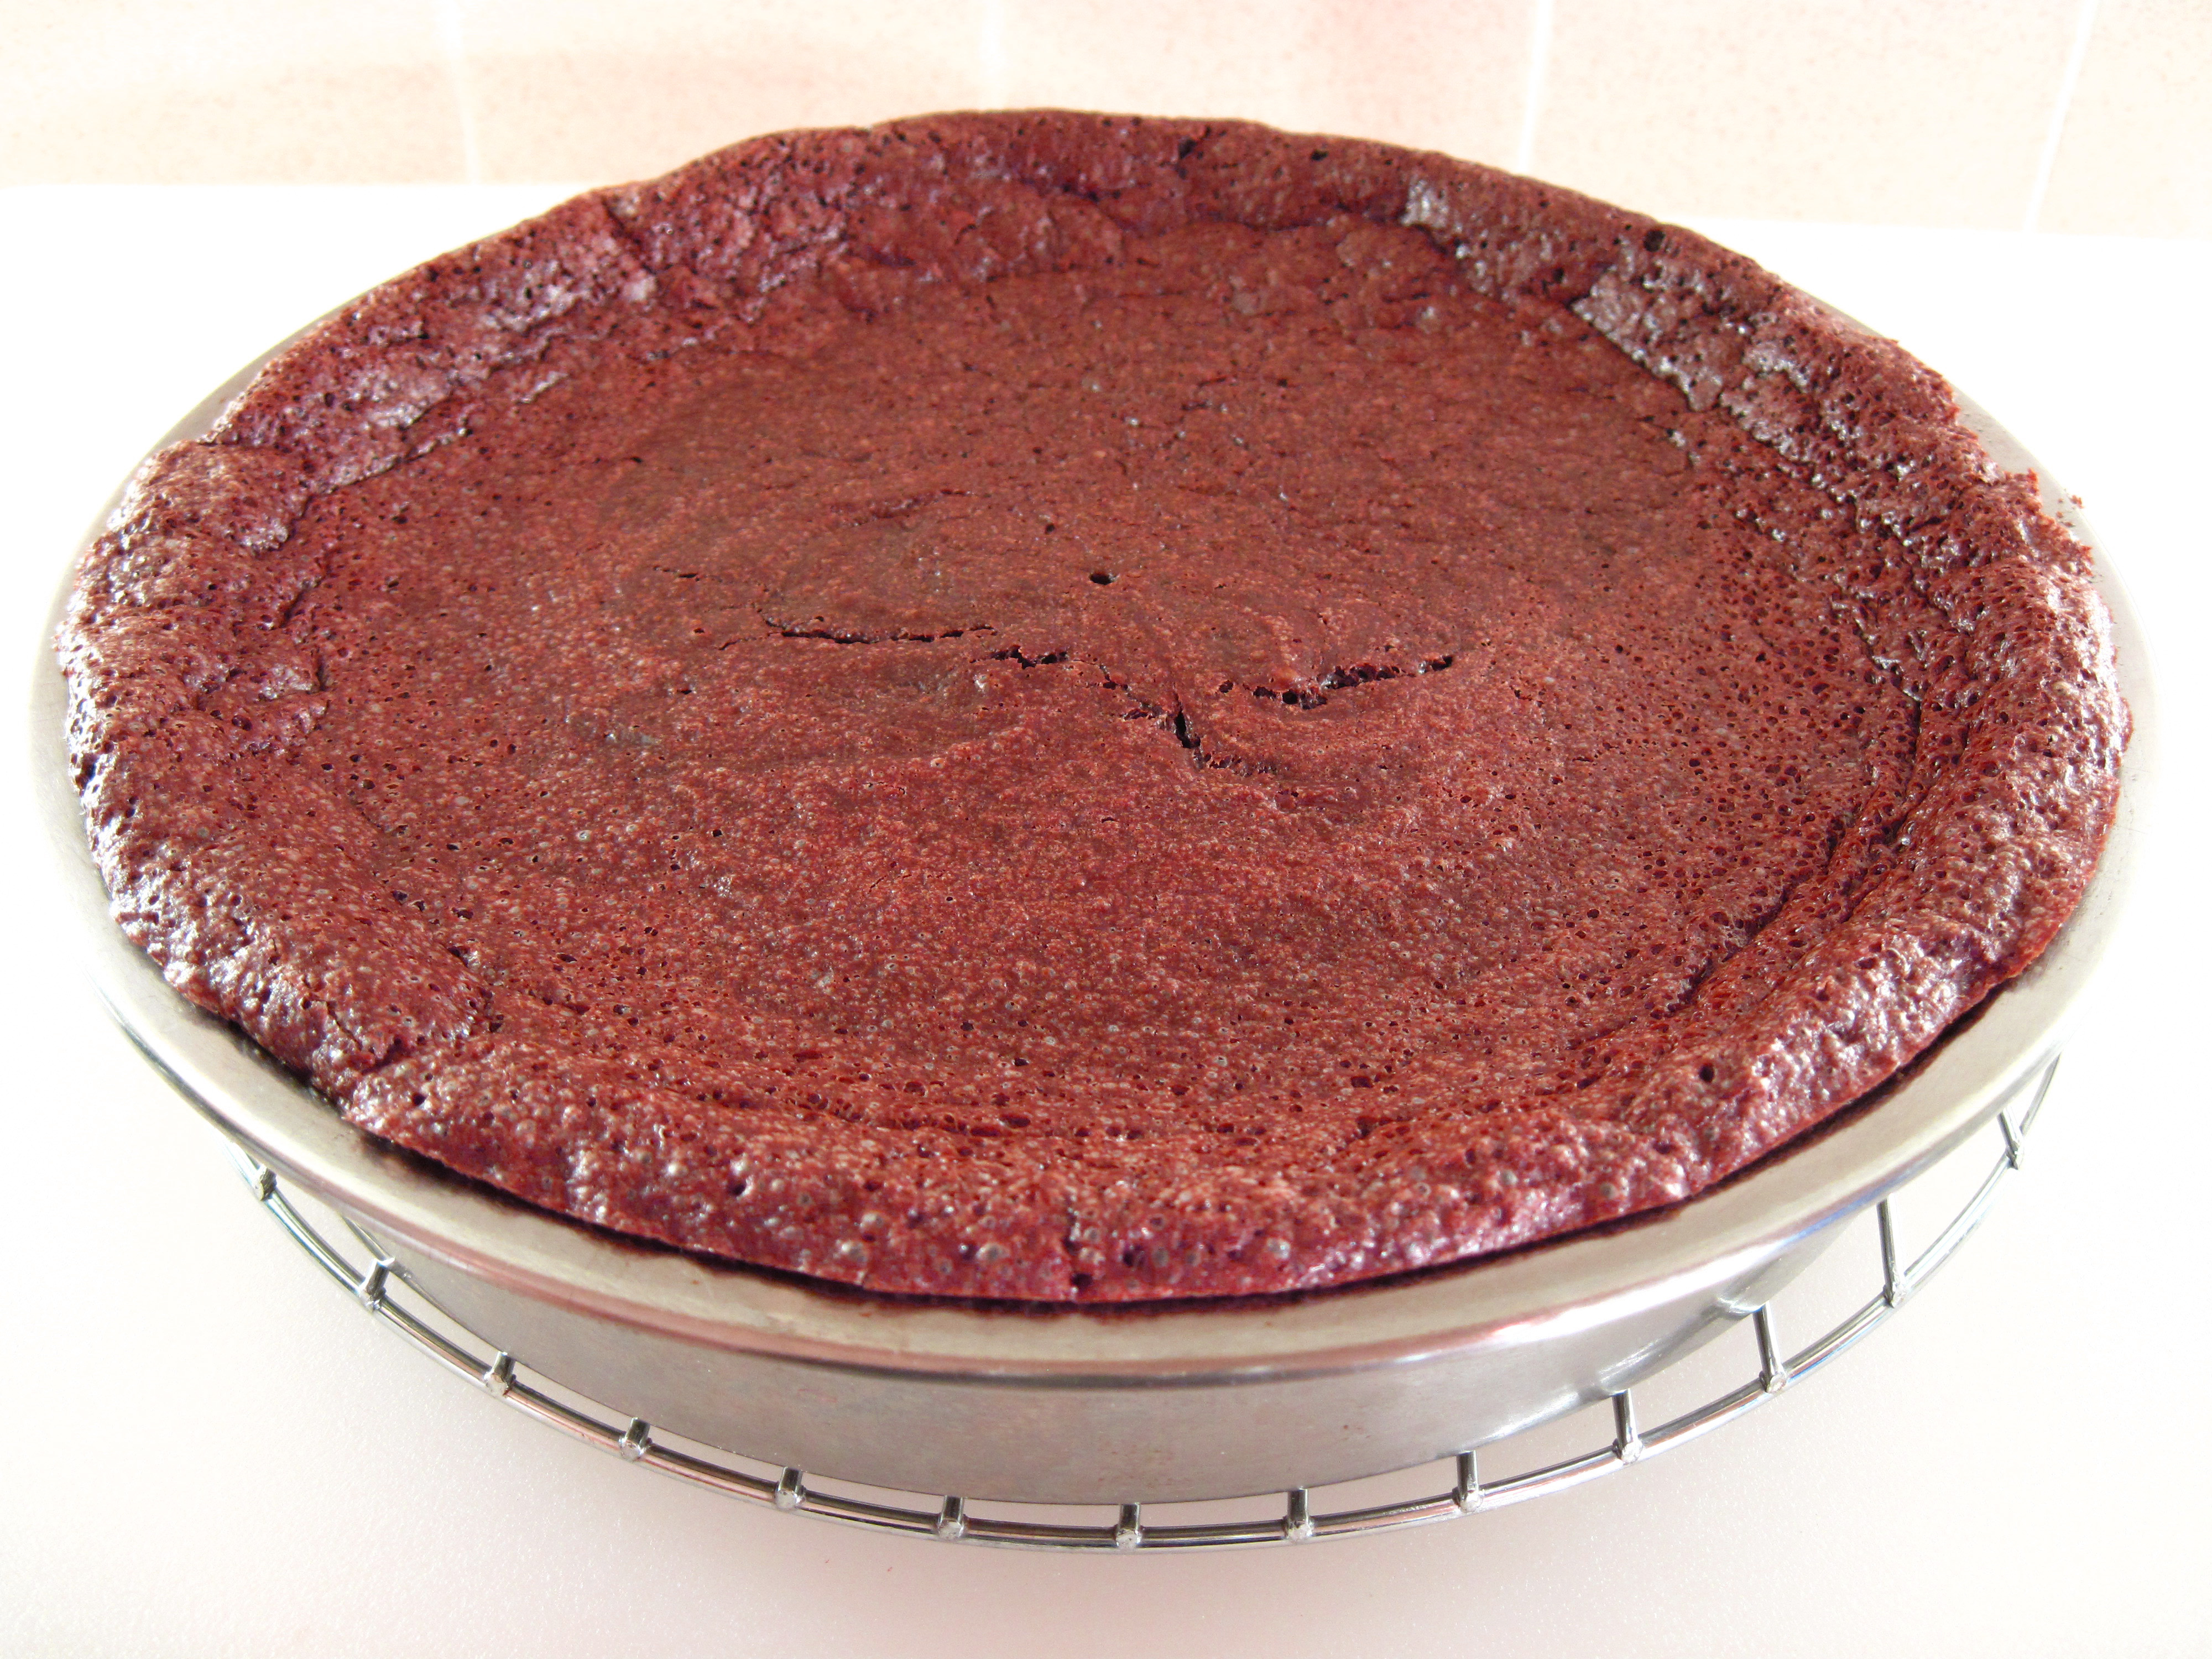
6. Pour into the prepared 9-inch cake pan.
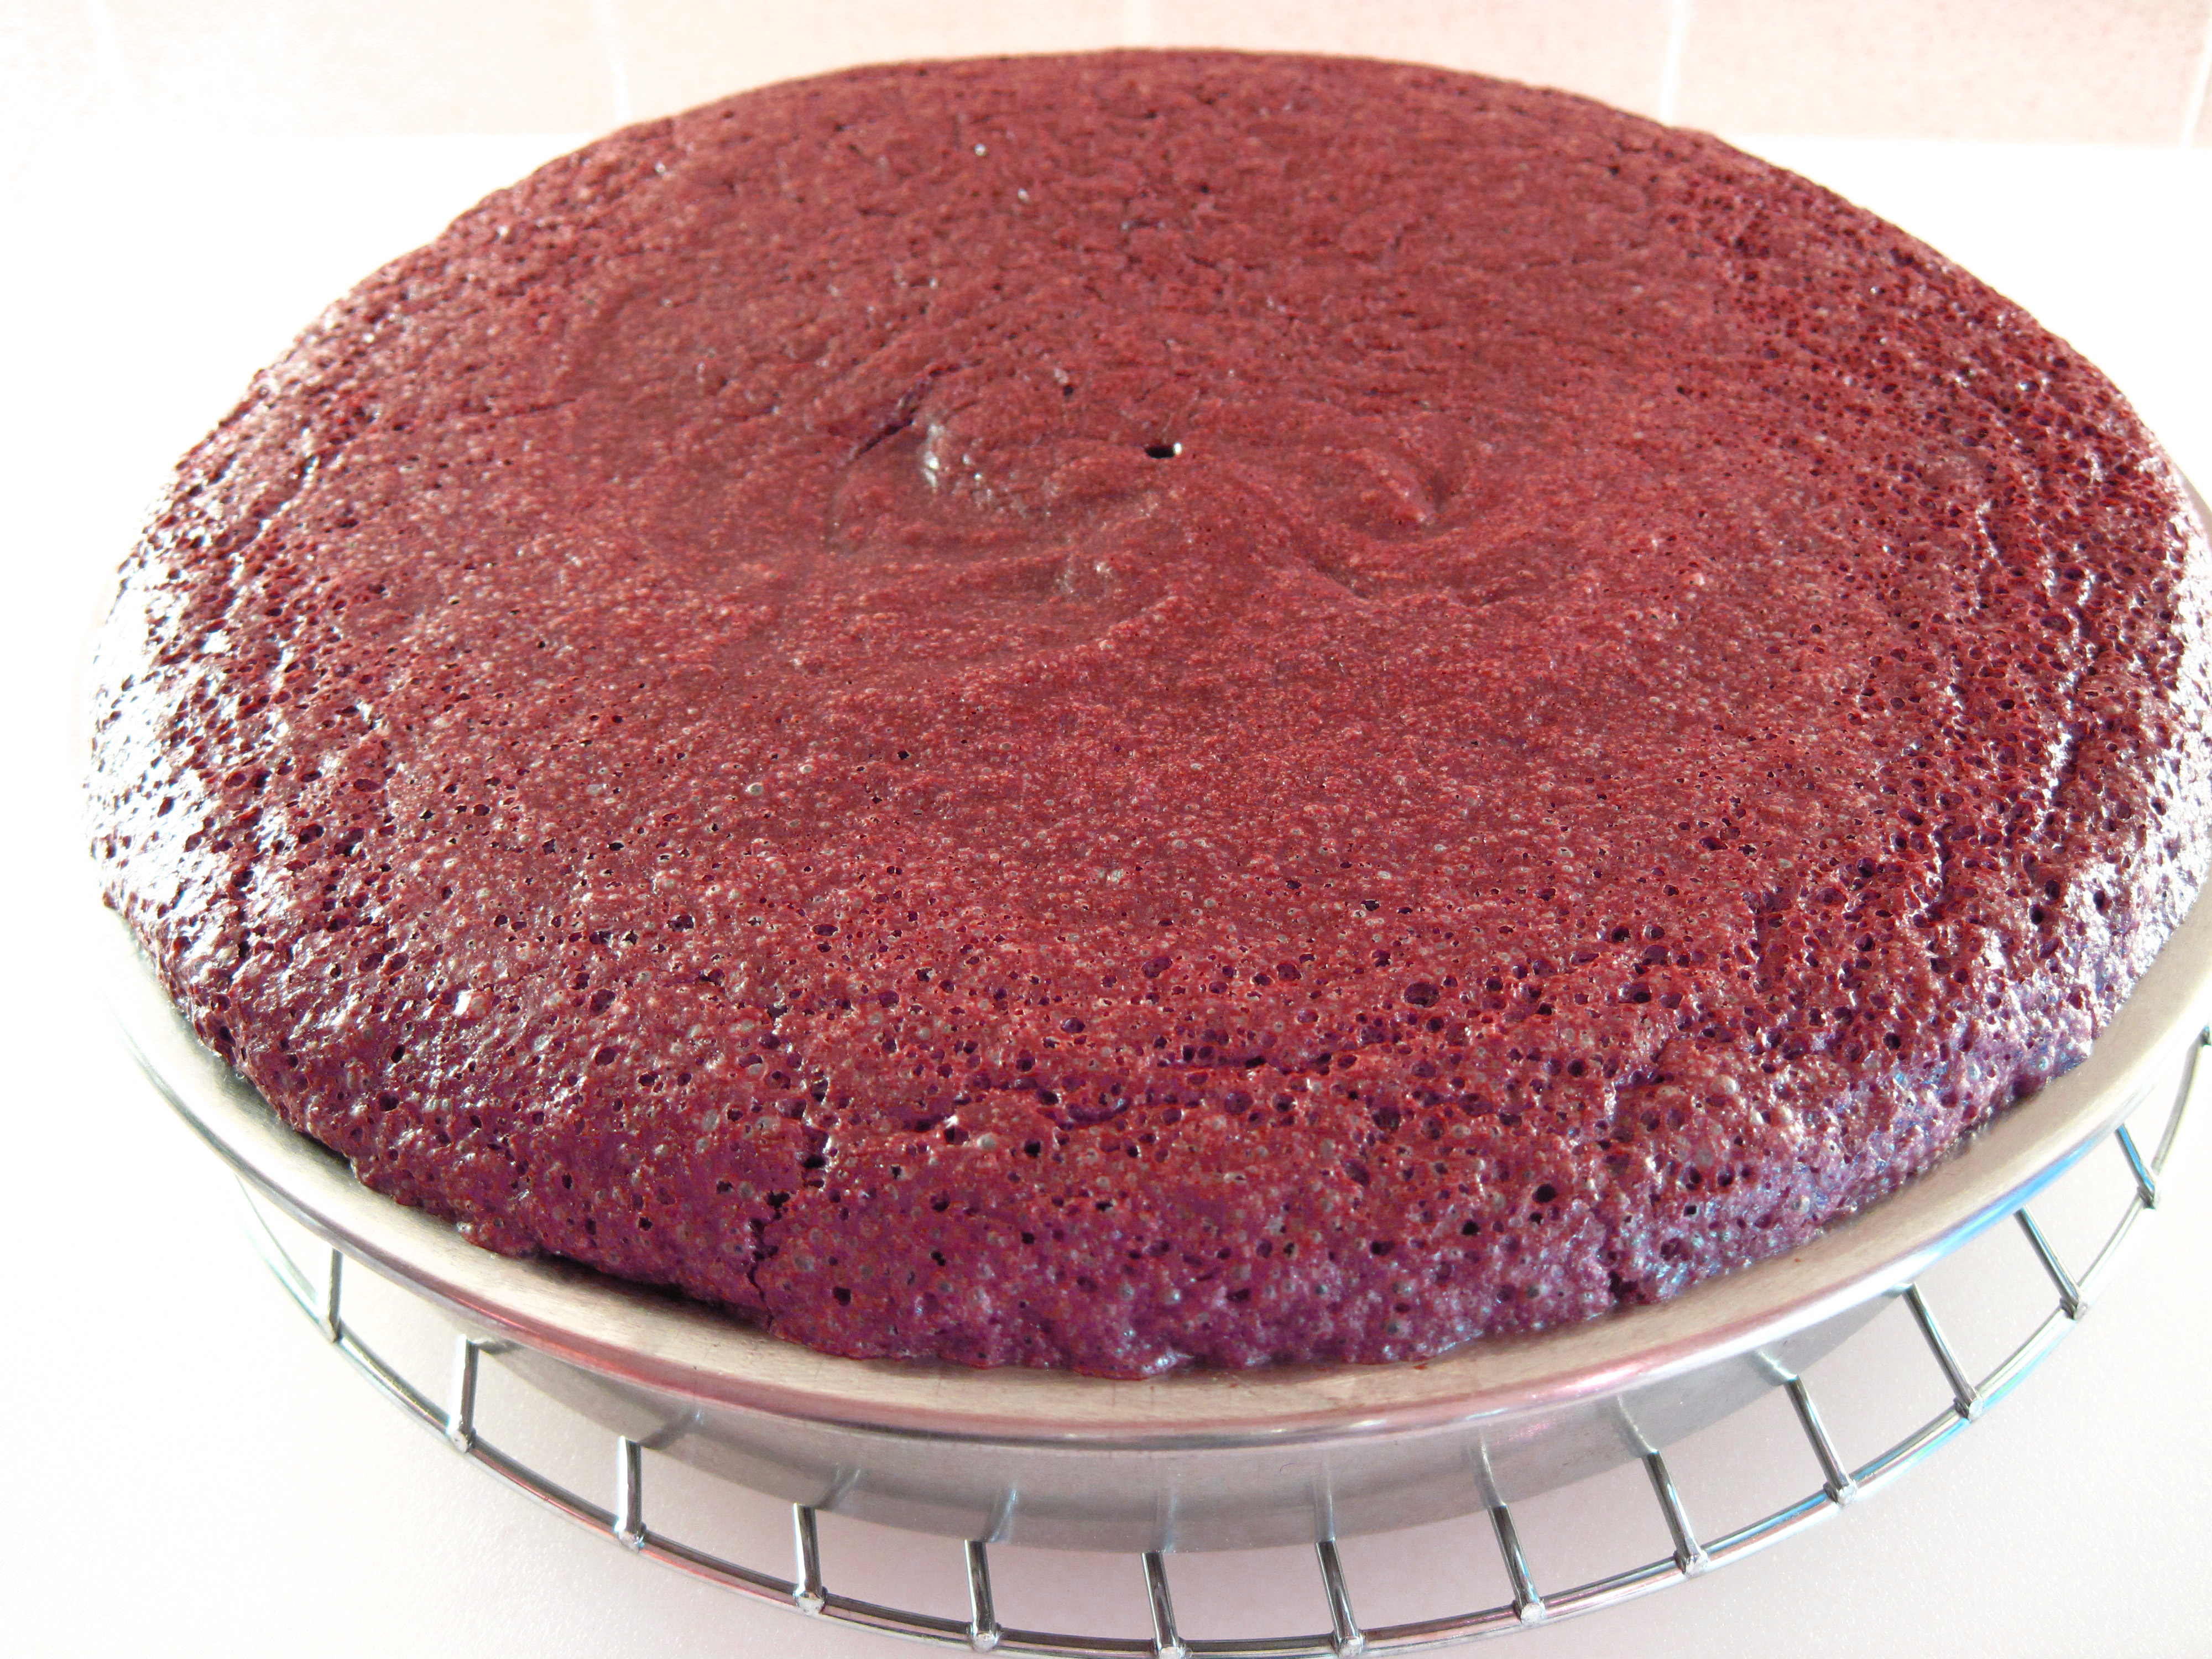
You can see that my 9-inch pan was nearly full.

a
7. Bake for 45 minutes to 1 hour. Check the cake after 45 minutes. The top should be a bit crusty (kind of like brownie tops) and the cake should feel firm. You can test with an instant read thermometer. Put it in the center of the cake without touching the bottom of the pan. If the temperature is at least 140˚ the cake is done.
The cake will be puffed up when it’s done.
a
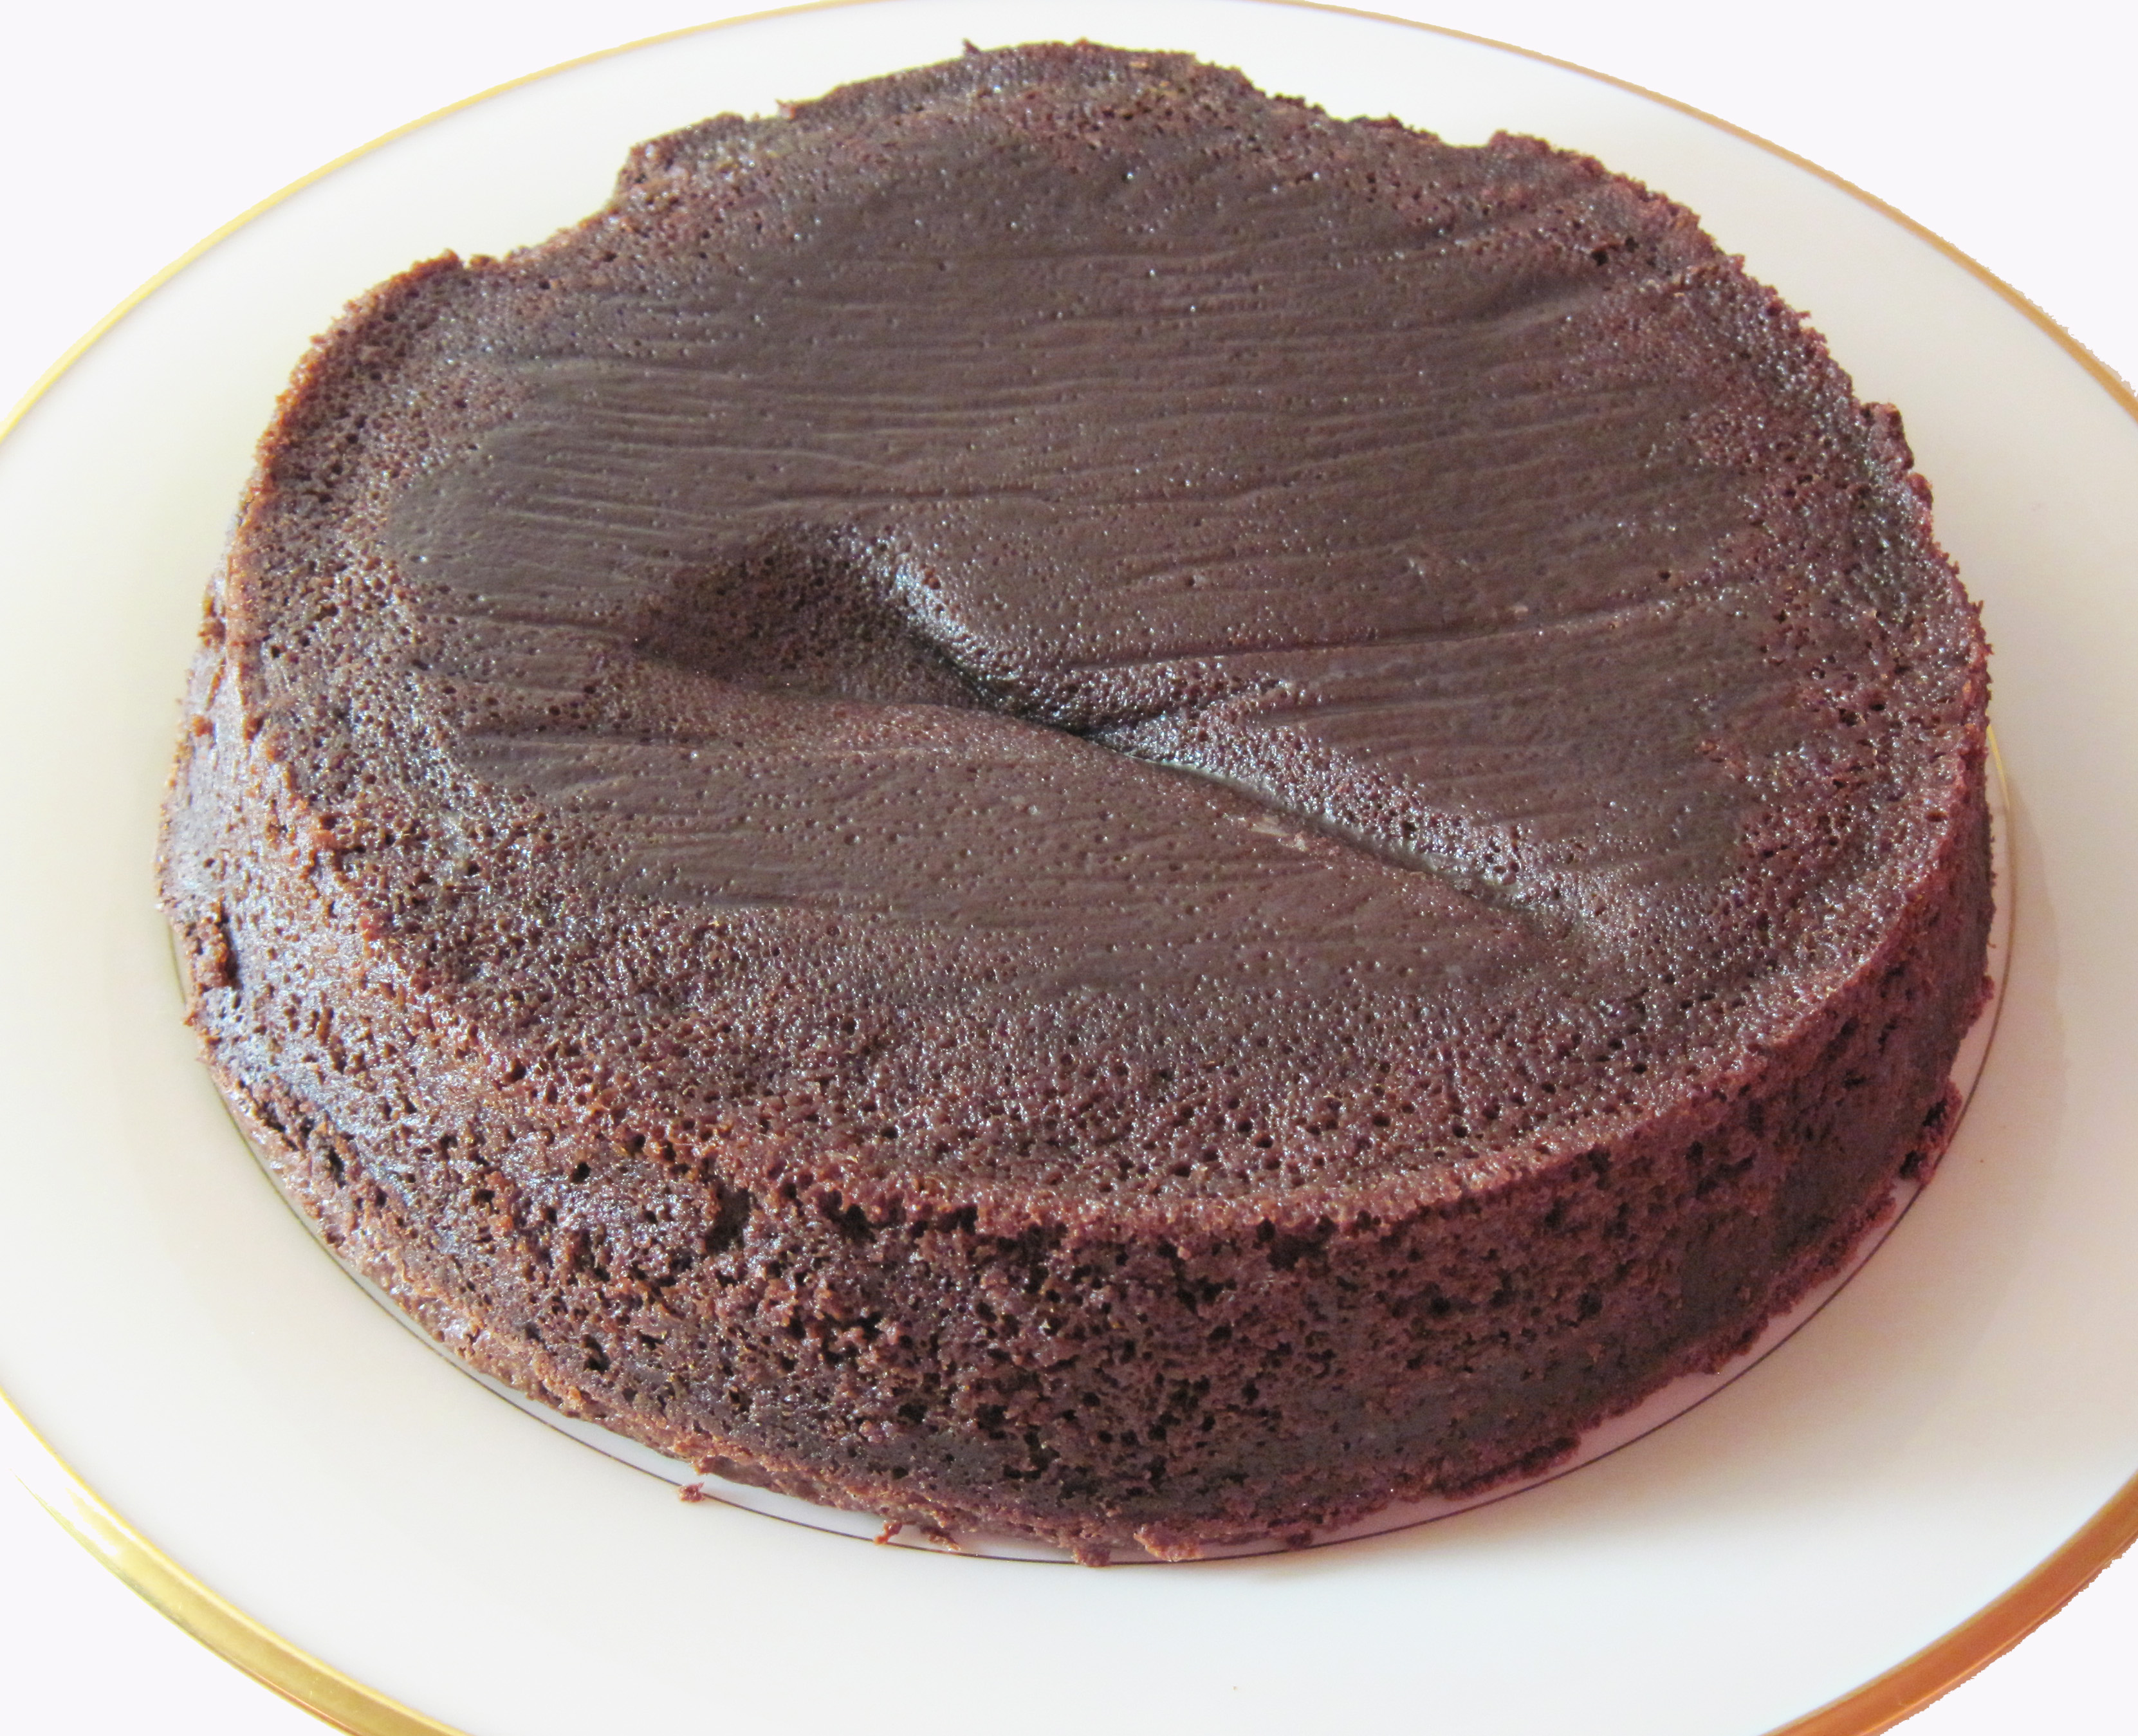
8. Cool the cake on a cake rack.
The cake will deflate as it cools.
a
9. When cool, run a knife along the side of the pan and turn the cake out on a serving plate.Serve with ice cream or whipped cream, or simply dust with a bit of powdered sugar.
a
Share this:

Slow Cooker Marinara Sauce
By Kath Dedon
.
Carrie found a Slow Cooker Marinara Sauce recipe on Budgetbytes.com. It’s an appealing recipe because it uses mostly pantry items and it’s easy to put together. Beth, from Budget Bytes, just puts everything into the slow cooker and cooks it on low for 8 hours.
Carrie used Beth’s method and reported that the onions were a “just a little bit crunchy”. She thought it was fine, but I opted to sauté the onions over medium-low heat in a bit of olive oil until they were soft before adding them to the slow cooker. I think sautéing them enhances their sweetness and adding a bit of olive oil to the marinara certainly can’t hurt.
Besides sautéing the onions, I increased the garlic and added a bit of red pepper flakes. The garlic and red pepper did not overwhelm the sauce. I think they just added a little more depth of flavor.
Using a tip from the America’s Test Kitchen, I used soy sauce (actually gluten free tamari) instead of salt to season the sauce. They claim it helps to add a “meaty” flavor to the sauce. I didn’t use as much as they did because I did not want the sauce to be too salty. I can always add salt if it seems that it’s needed when I use it in recipes.
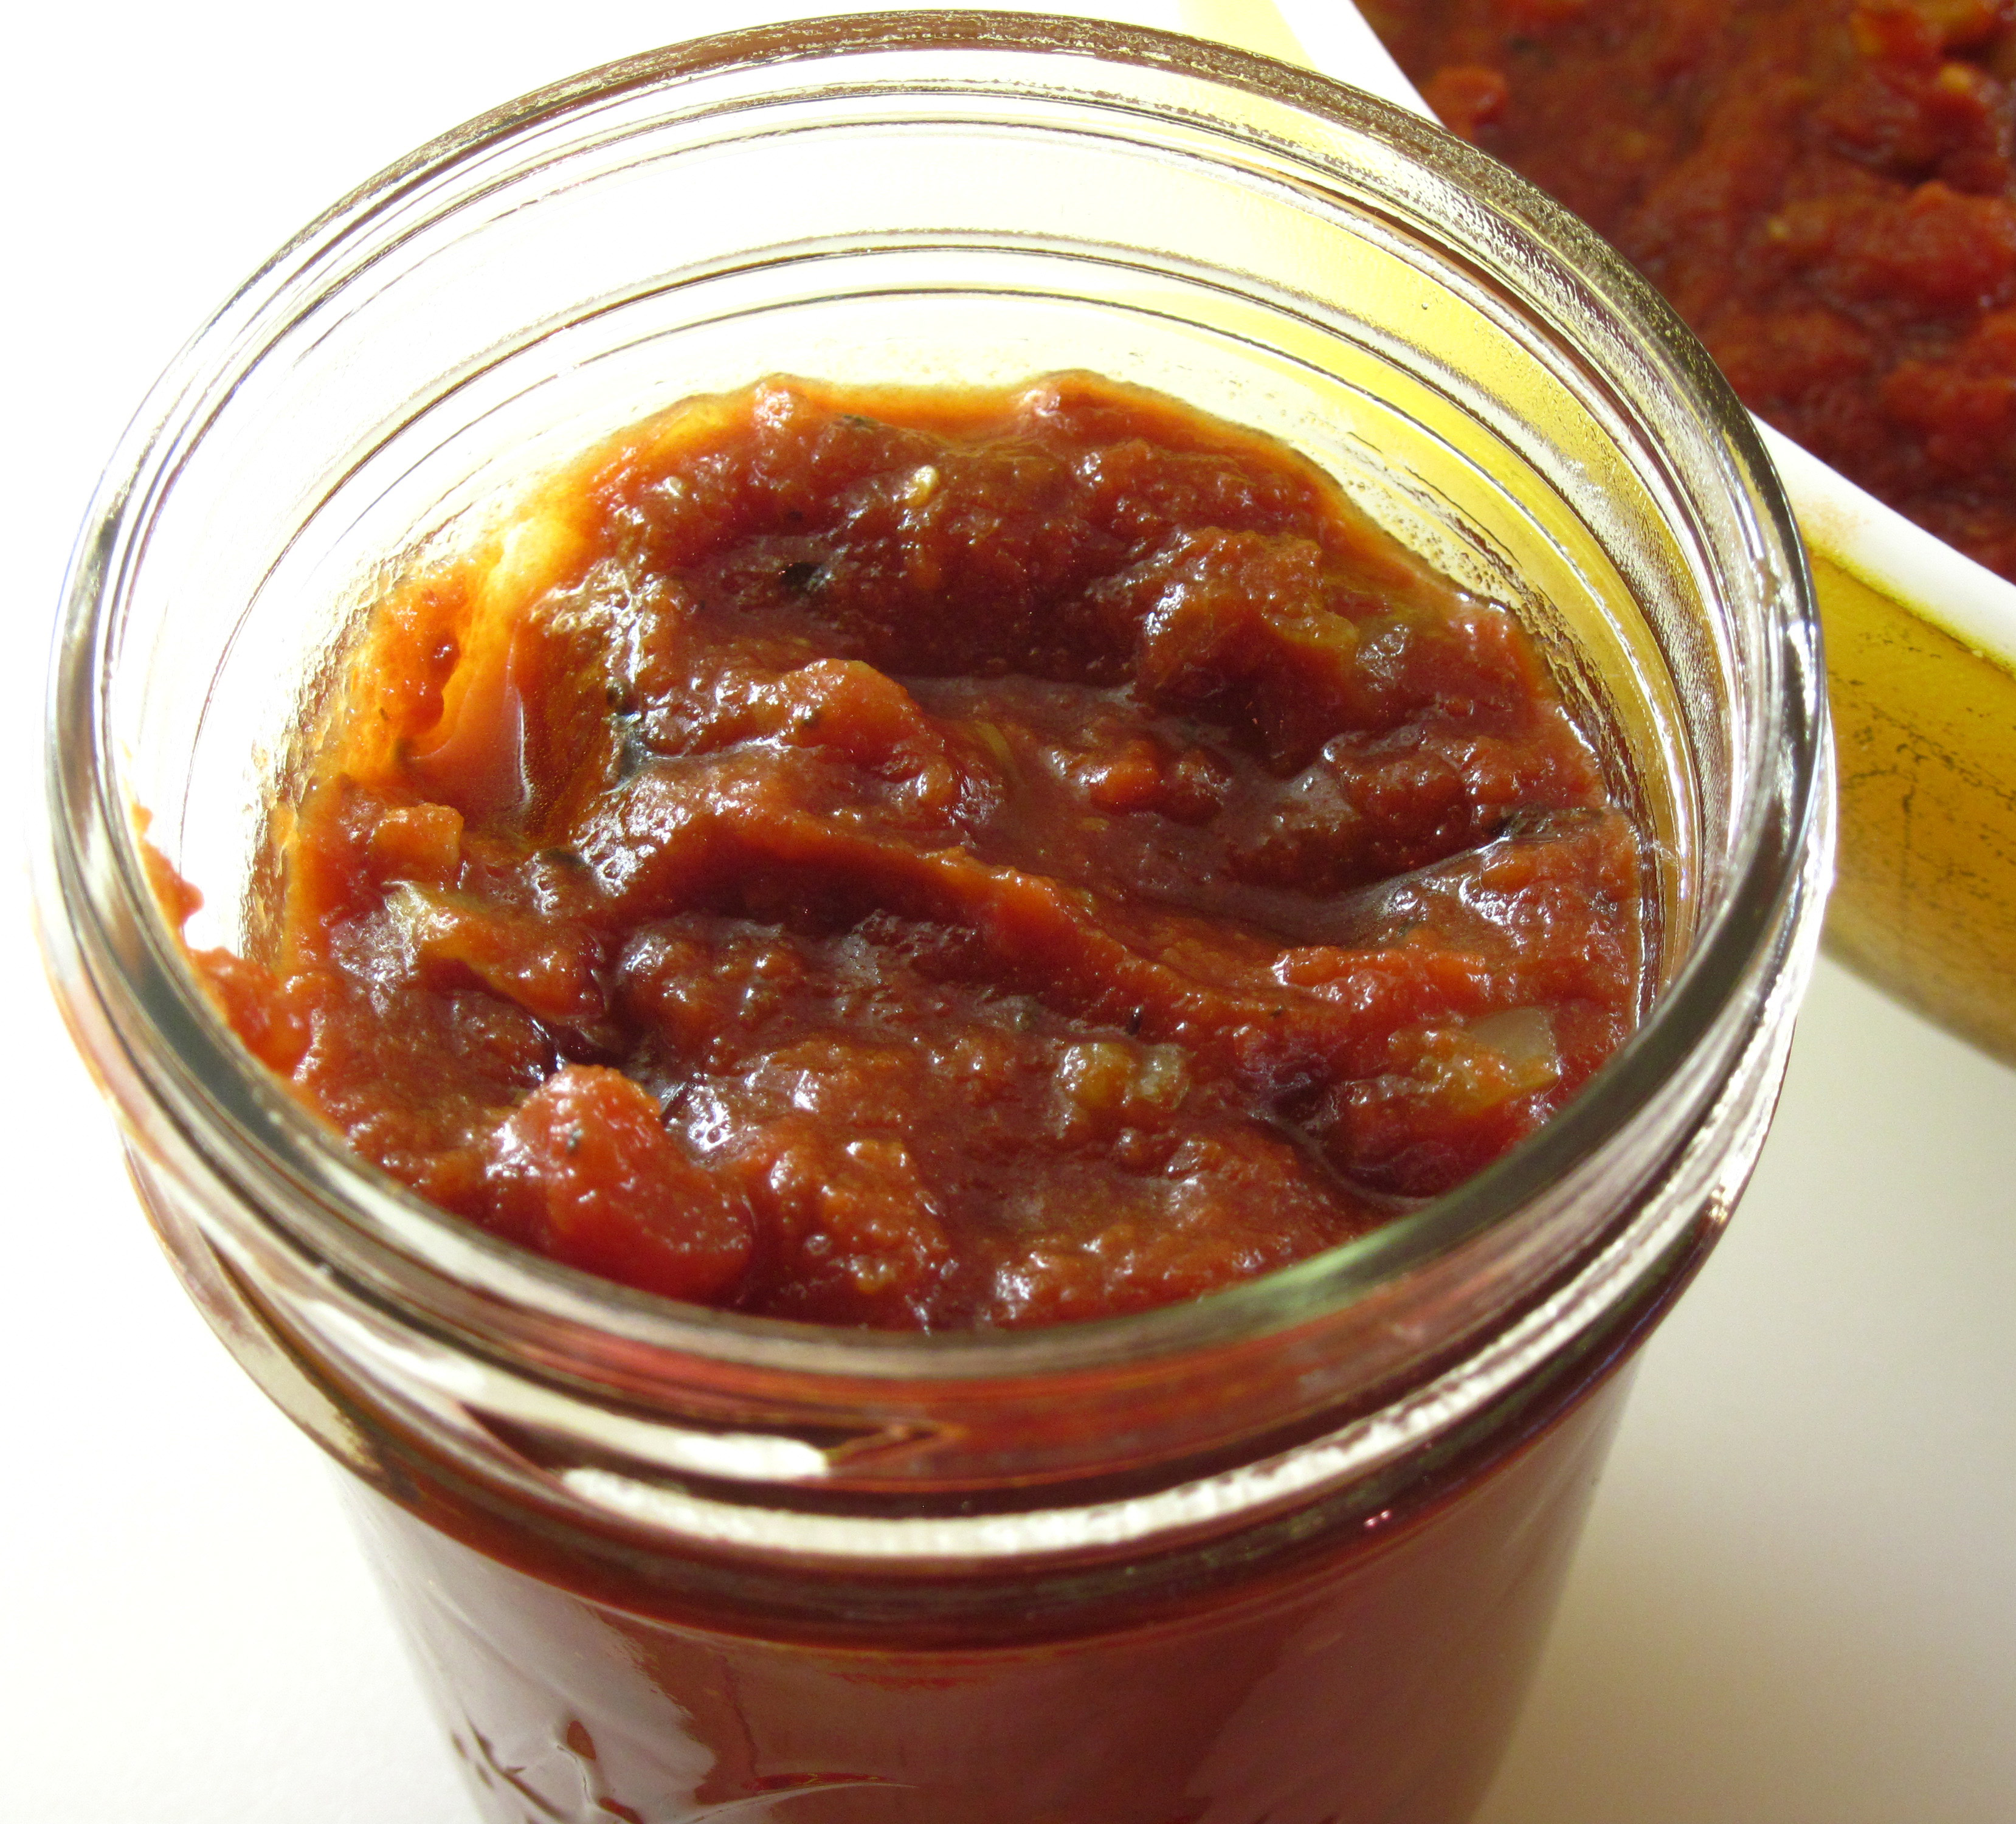
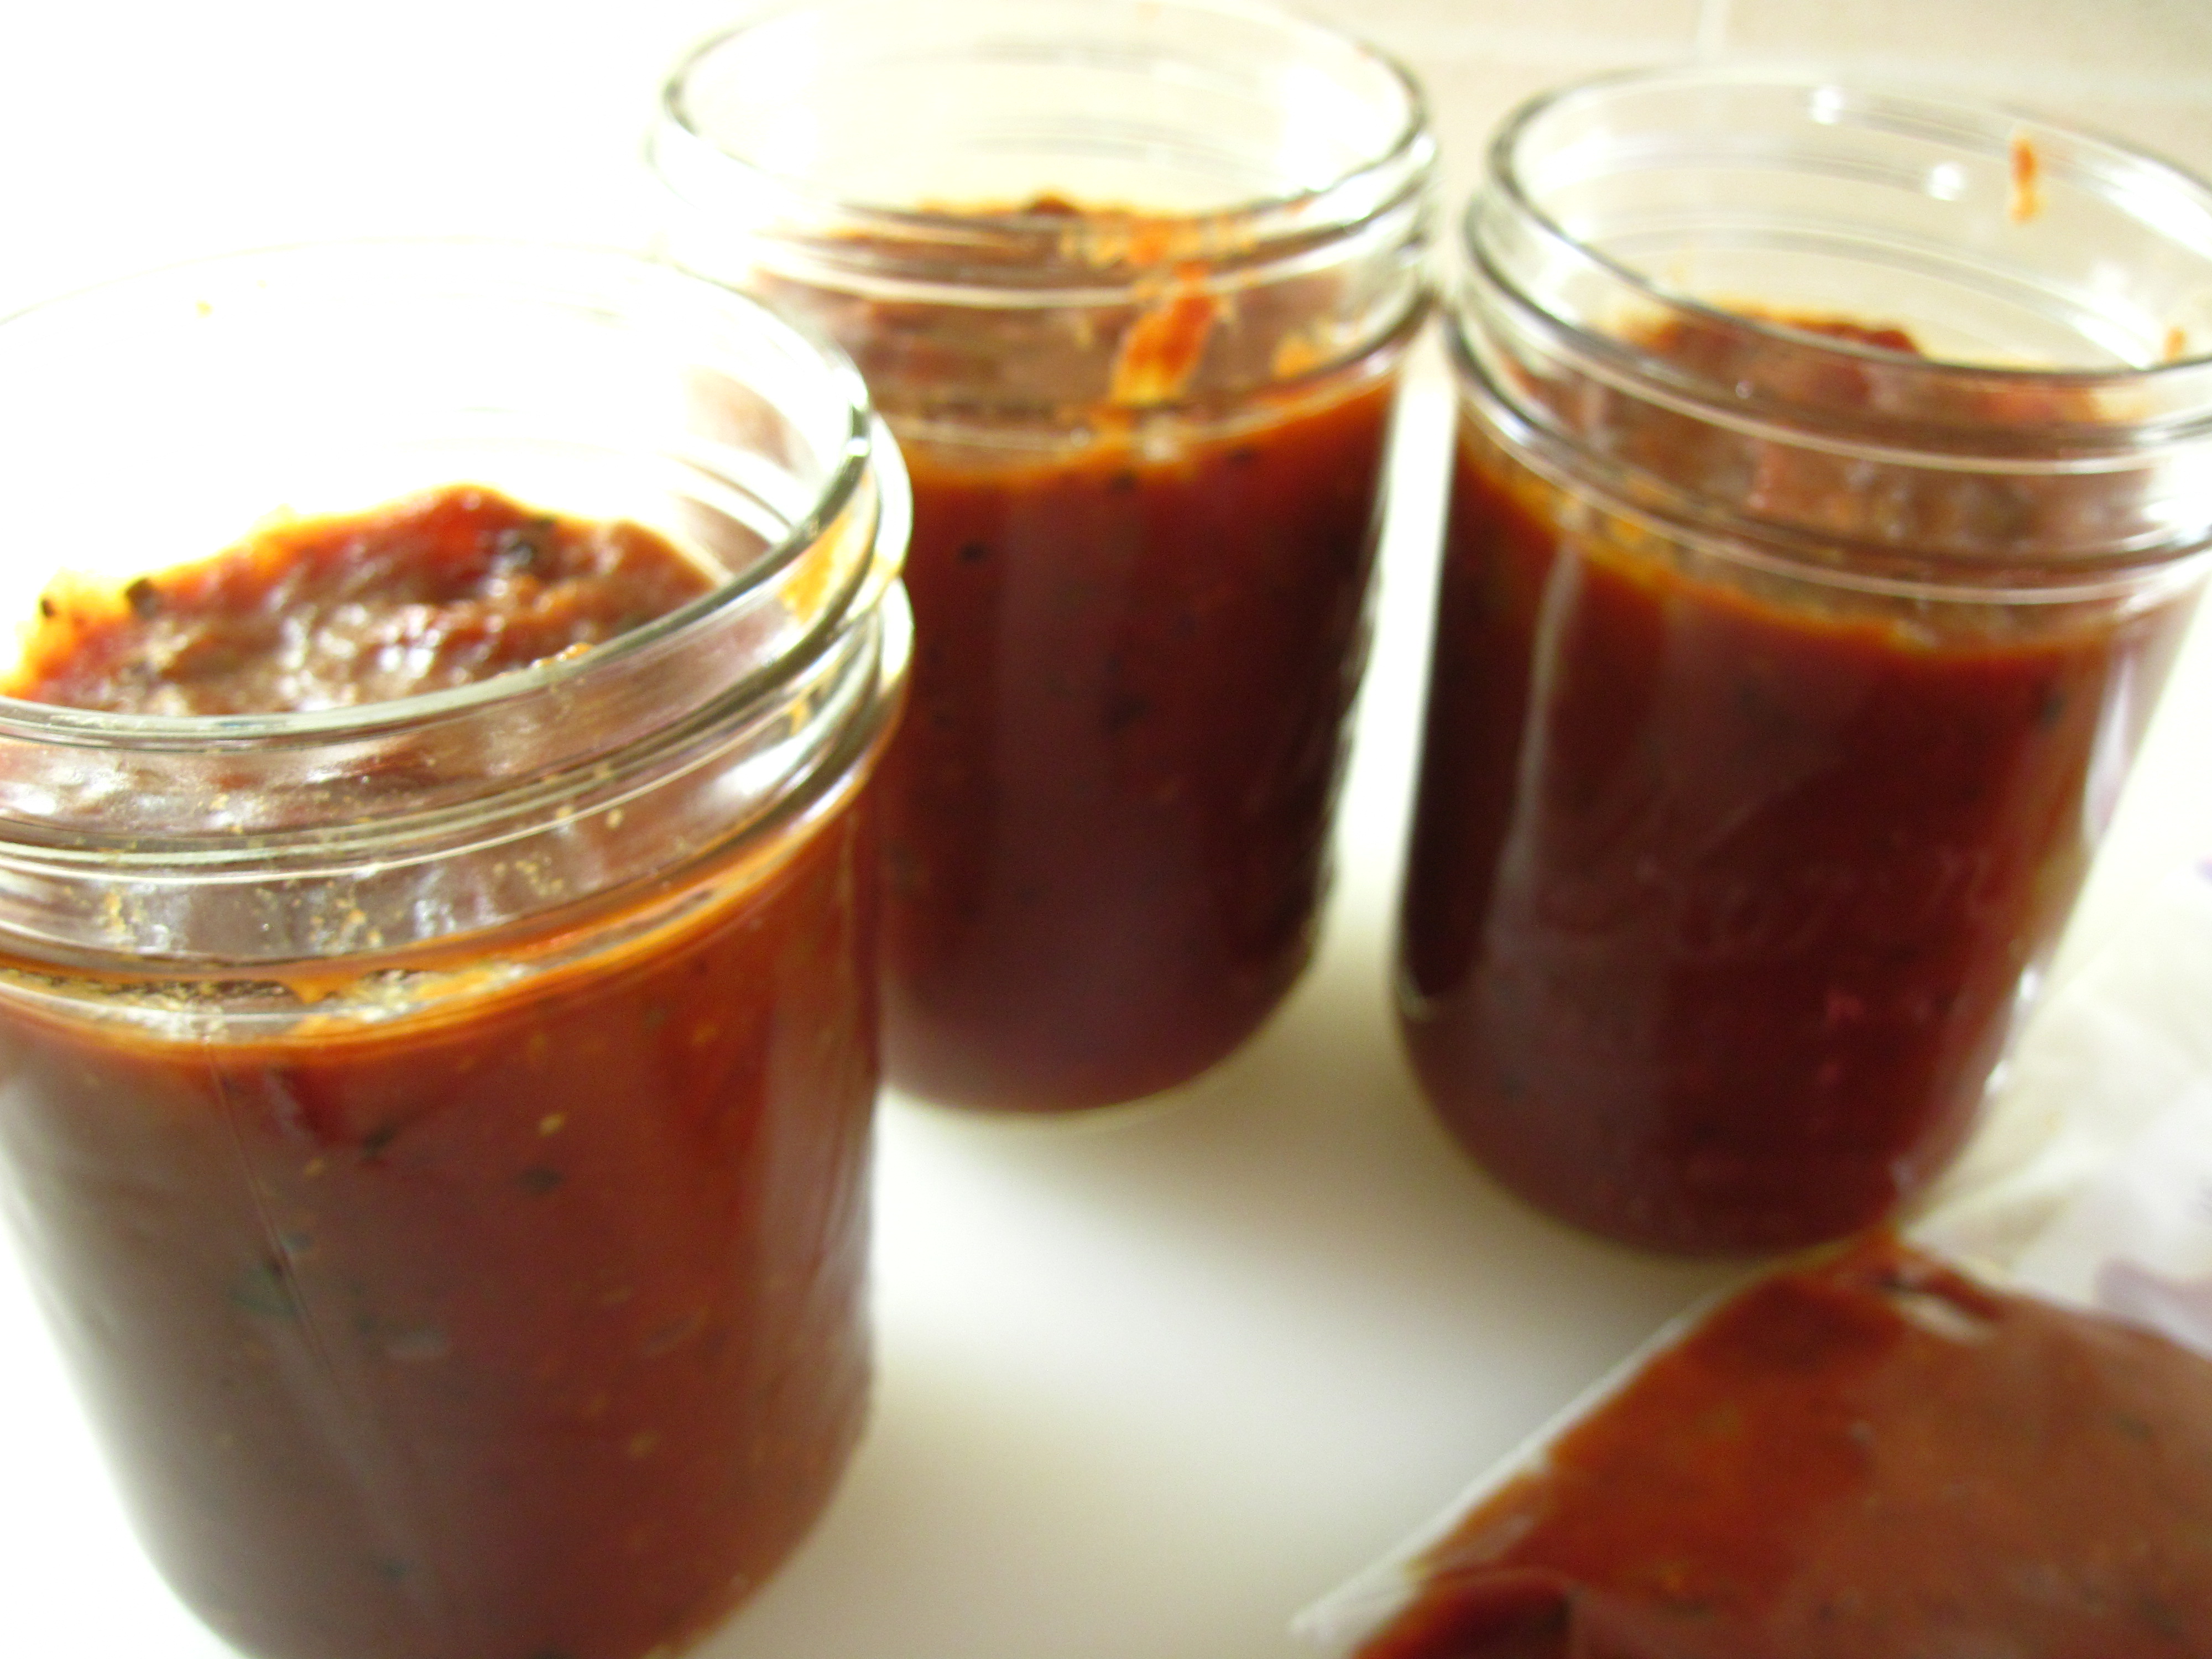
The Slow Cooker Marinara Sauce recipe yielded about 7 cups of sauce. I used some the first night, refrigerated the rest of the sauce, and then put it in pint canning jars to freeze the rest. Each jar holds about 1½ cups (or 13.3 oz).
I learned from an online search that you should not use large jars with “shoulders” for freezing because they will crack. Wide mouth pint size jars are best. Chiot’s Run has a good post about freezing in glass jars.
I do think Slow Cooker Marinara Sauce is a worthwhile slow cooker recipe. Even with the extra step of sautéing the onions, it goes together quickly and makes a marinara that is much better than the ones you can buy. It is thick and has a rich tomato flavor. I’m going to love pulling it from my freezer for quick meals!
.
Slow Cooker Marinara Sauce
(Adapted from a recipe on the Budgetbytes.com blog)
You can certainly omit the extra step of sautéing the onion, if you prefer. Simply put all of the ingredients except the salt or soy sauce in your slow cooker and cook on low for 8 hours. Then taste and add salt or soy sauce to taste.
Makes about 7 cups
2 tablespoons olive oil
1 medium yellow onion, diced
2 (28 oz) cans crushed tomatoes
1 (6 oz) can tomato paste
6 cloves garlic, minced or pressed into the sauce in the slow cooker
2 whole bay leaves
1 tablespoon dried basil
½ tablespoon dried oregano
1 tablespoon brown sugar (or maple sugar or mild honey)
1 tablespoon balsamic vinegar
½ teaspoon red pepper flakes
½ cup water
A few grinds of black pepper
1 tablespoon tamari sauce (or 1 teaspoon kosher salt)
1. Heat the oil over low heat in a skillet. Add the onion. Cook, stirring occasionally, until the onion has softened but has not yet started to brown. This will take about 10 minutes.
Onion just starting to cook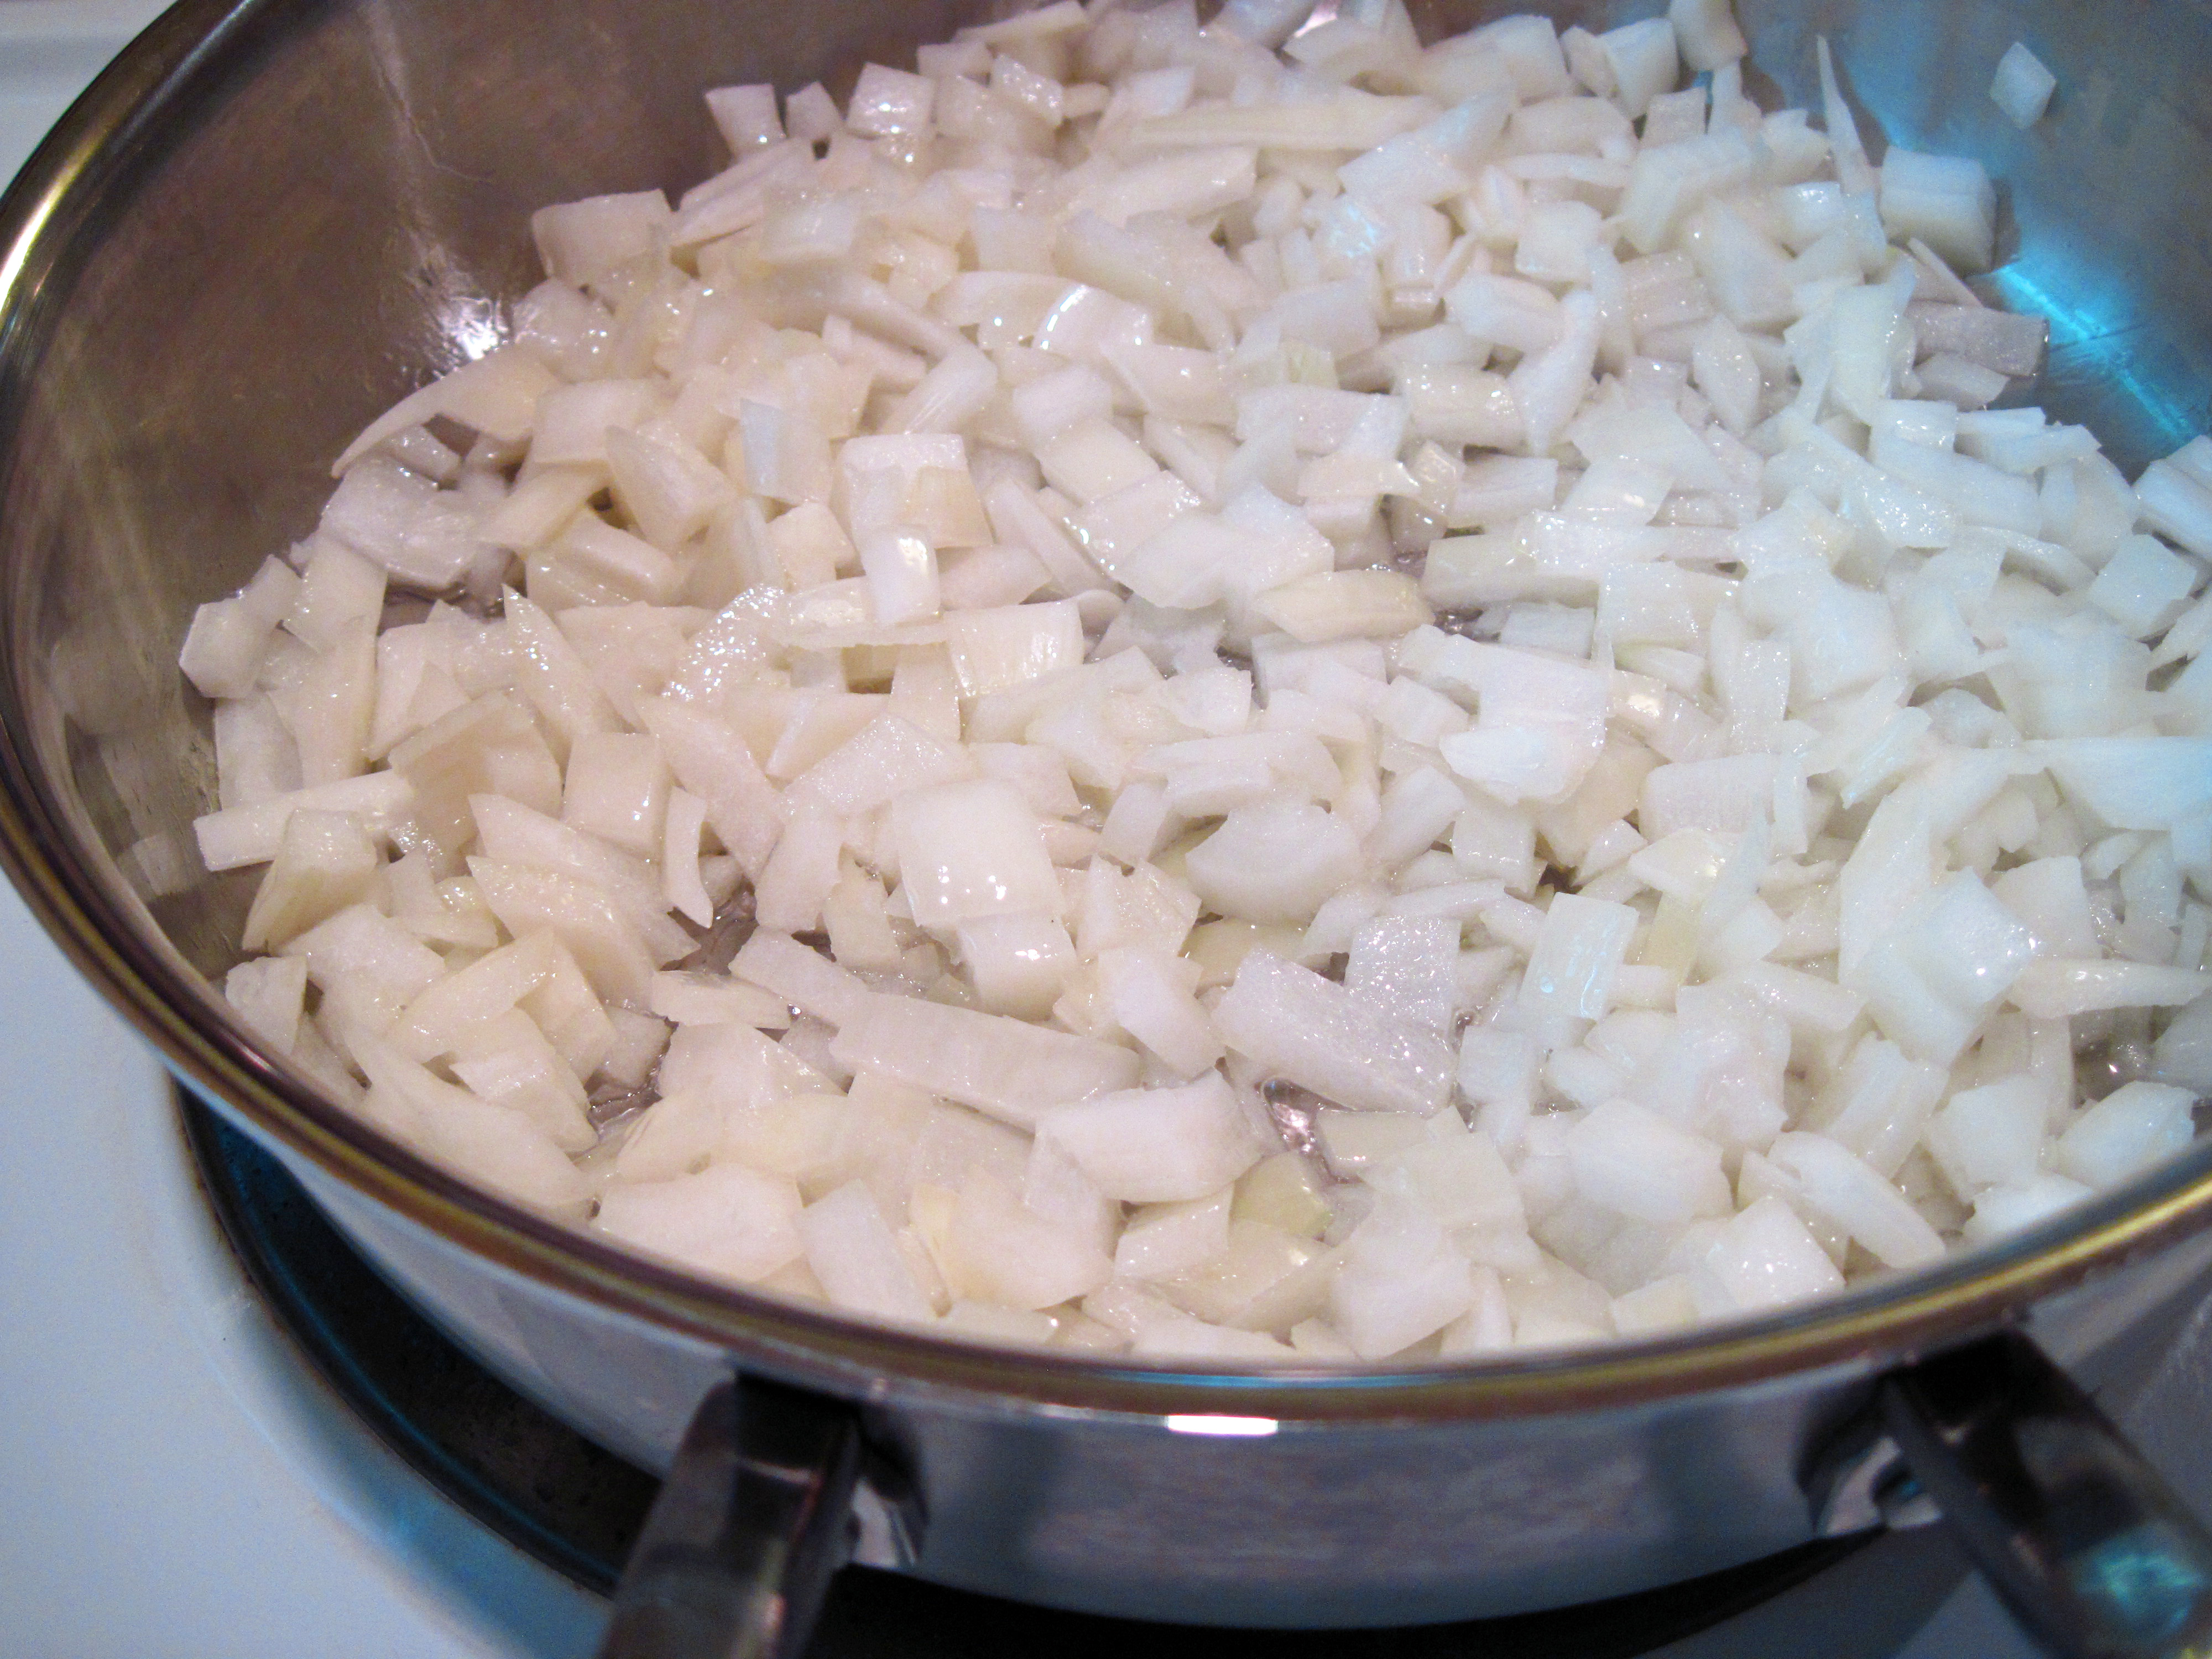
a
Onion softened and ready to go into the slow cooker

2. Put the onion with the oil into the slow cooker. Add all of the other ingredients except the tamari sauce.

a
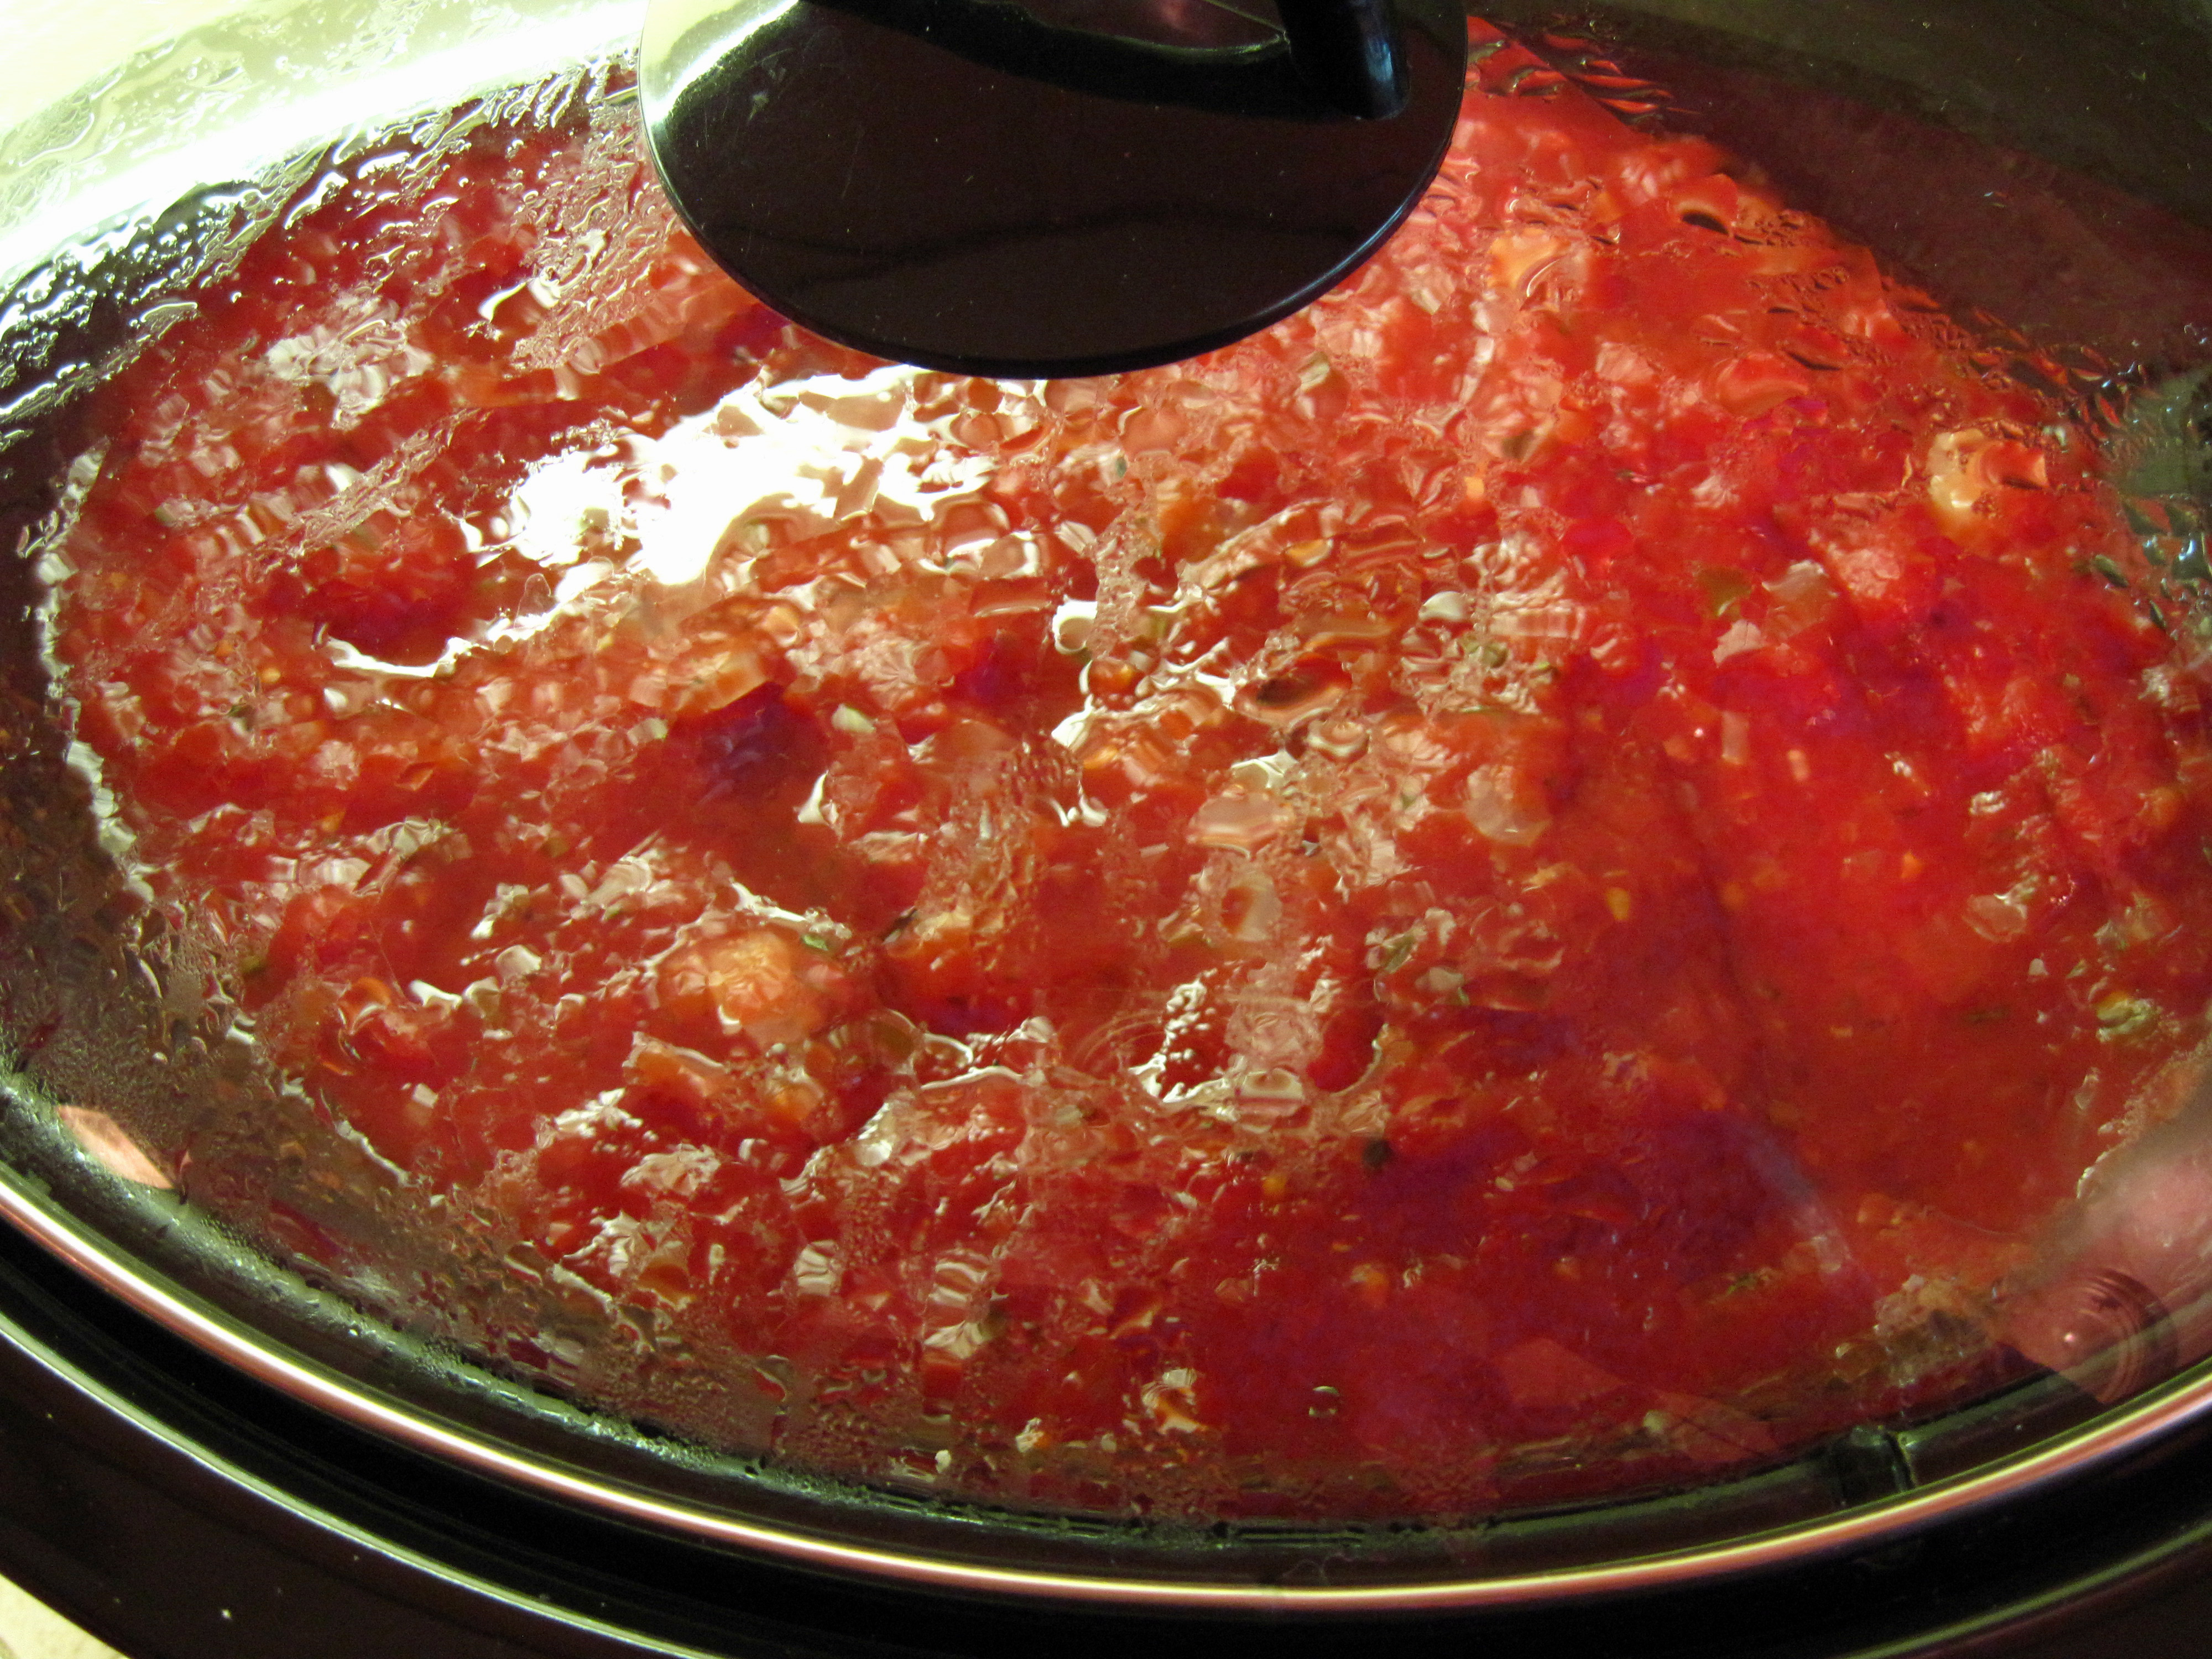
3. Stir all of the ingredients together; cover and cook on low for 8 hours.
Cooking away
a
4. Stir, remove the bay leaves and taste for seasoning. Add the tamari sauce (or Kosher salt) if desired.
a
After using some of the sauce on the first night, I refrigerated the leftover sauce. The next day I put it in wide-mouth pint size jars to freeze it.
The jars I used have lines that shows how much to fill them for freezing. Below, you can see where I marked the line with black so it would be more visible in the photo.
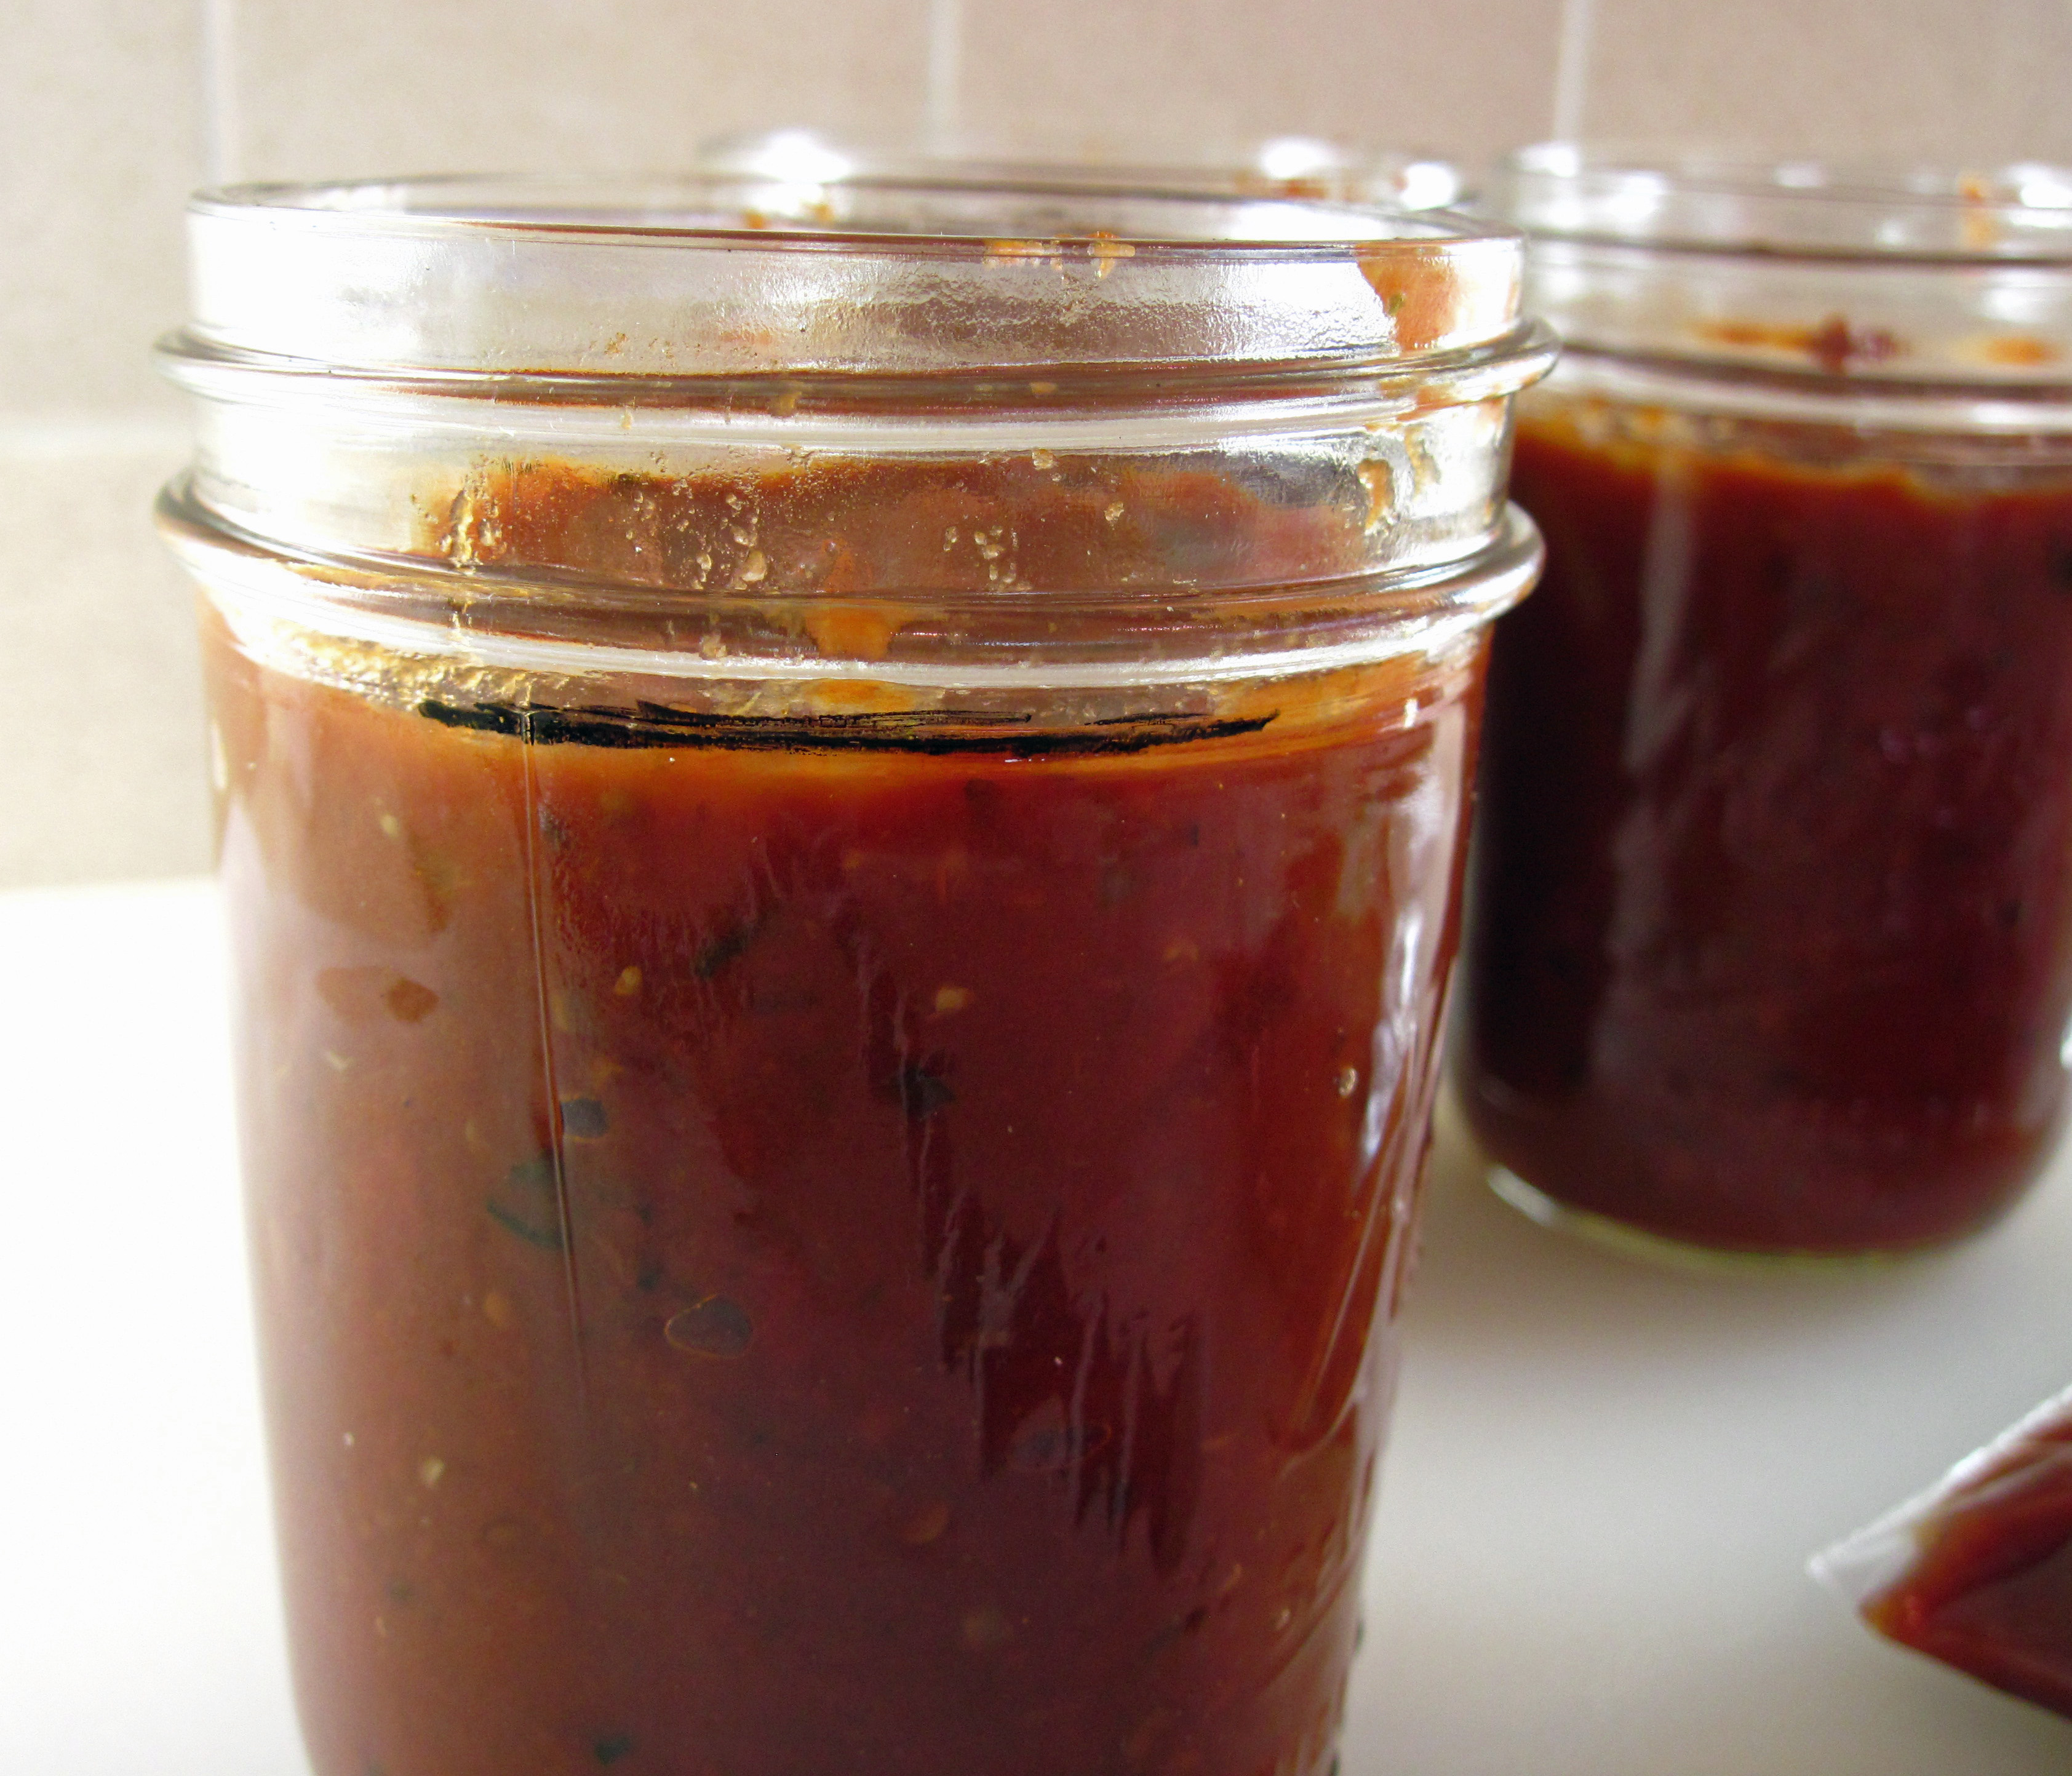
a
Each pint jar holds about 1 1/2 cups, about 13.3 ounces. I put the 3/4 cup of sauce that was leftover in a Ziploc bag.
 a
a
a
Share this:

Maple Molasses Pecans
By Kath Dedon
.
It was 4 years ago today that I started this little blog. Time does fly….
I’m closing 2013 with this little recipe from Tom Douglas in Tom’s Big Dinners. Tom uses the Maple Molasses Pecans to garnish a salad made with arugula, radicchio, Belgian endive, and apple slices. Fantastic, I’m sure, but they also make a tasty little snack on their own.
Be sure to use parchment paper to line your baking pan. I hate to think of what it would have taken to clean my baking pan if I hadn’t used parchment paper.
Happy New Year to all! May you have good eats with family and friends in 2014!
a
Tom’s Maple Molasses Pecans

Maple Molasses Pecans
a
(Adapted from a Tom Douglas recipe in Tom’s Big Dinners)
a
a
Makes about 2 cups of nuts
a
2 tablespoons honey
2 tablespoons maple syrup
1 teaspoon molasses
1 teaspoon pure vanilla extract
Pinch of kosher salt
½ pound pecan halves
1 tablespoon unsalted butter, melted
Finely ground sea salt, to taste
a
1. Preheat the oven to 375˚. Line a rimmed baking sheet with parchment paper.
2. Combine the honey, maple syrup, molasses, vanilla, and kosher salt in a large bowl.
3. Stir the pecans into the syrup mixture and stir well so the pecans are well covered.
4. Spread the pecans in a single layer on the parchment-lined baking sheet.
5. Bake for 8 minutes. Stir the pecans and bake for an additional 7 minutes.
6. While the pecans are baking wash and dry the bowl. Put the melted butter in the bowl.
7. When the pecans are done, put them in the bowl with the butter and stir well to distribute the butter.
8. Line a clean baking sheet with a new piece of parchment paper. Spread the pecans out on the paper to cool. Sprinkle with a bit of finely ground sea salt, if desired.
Share this:

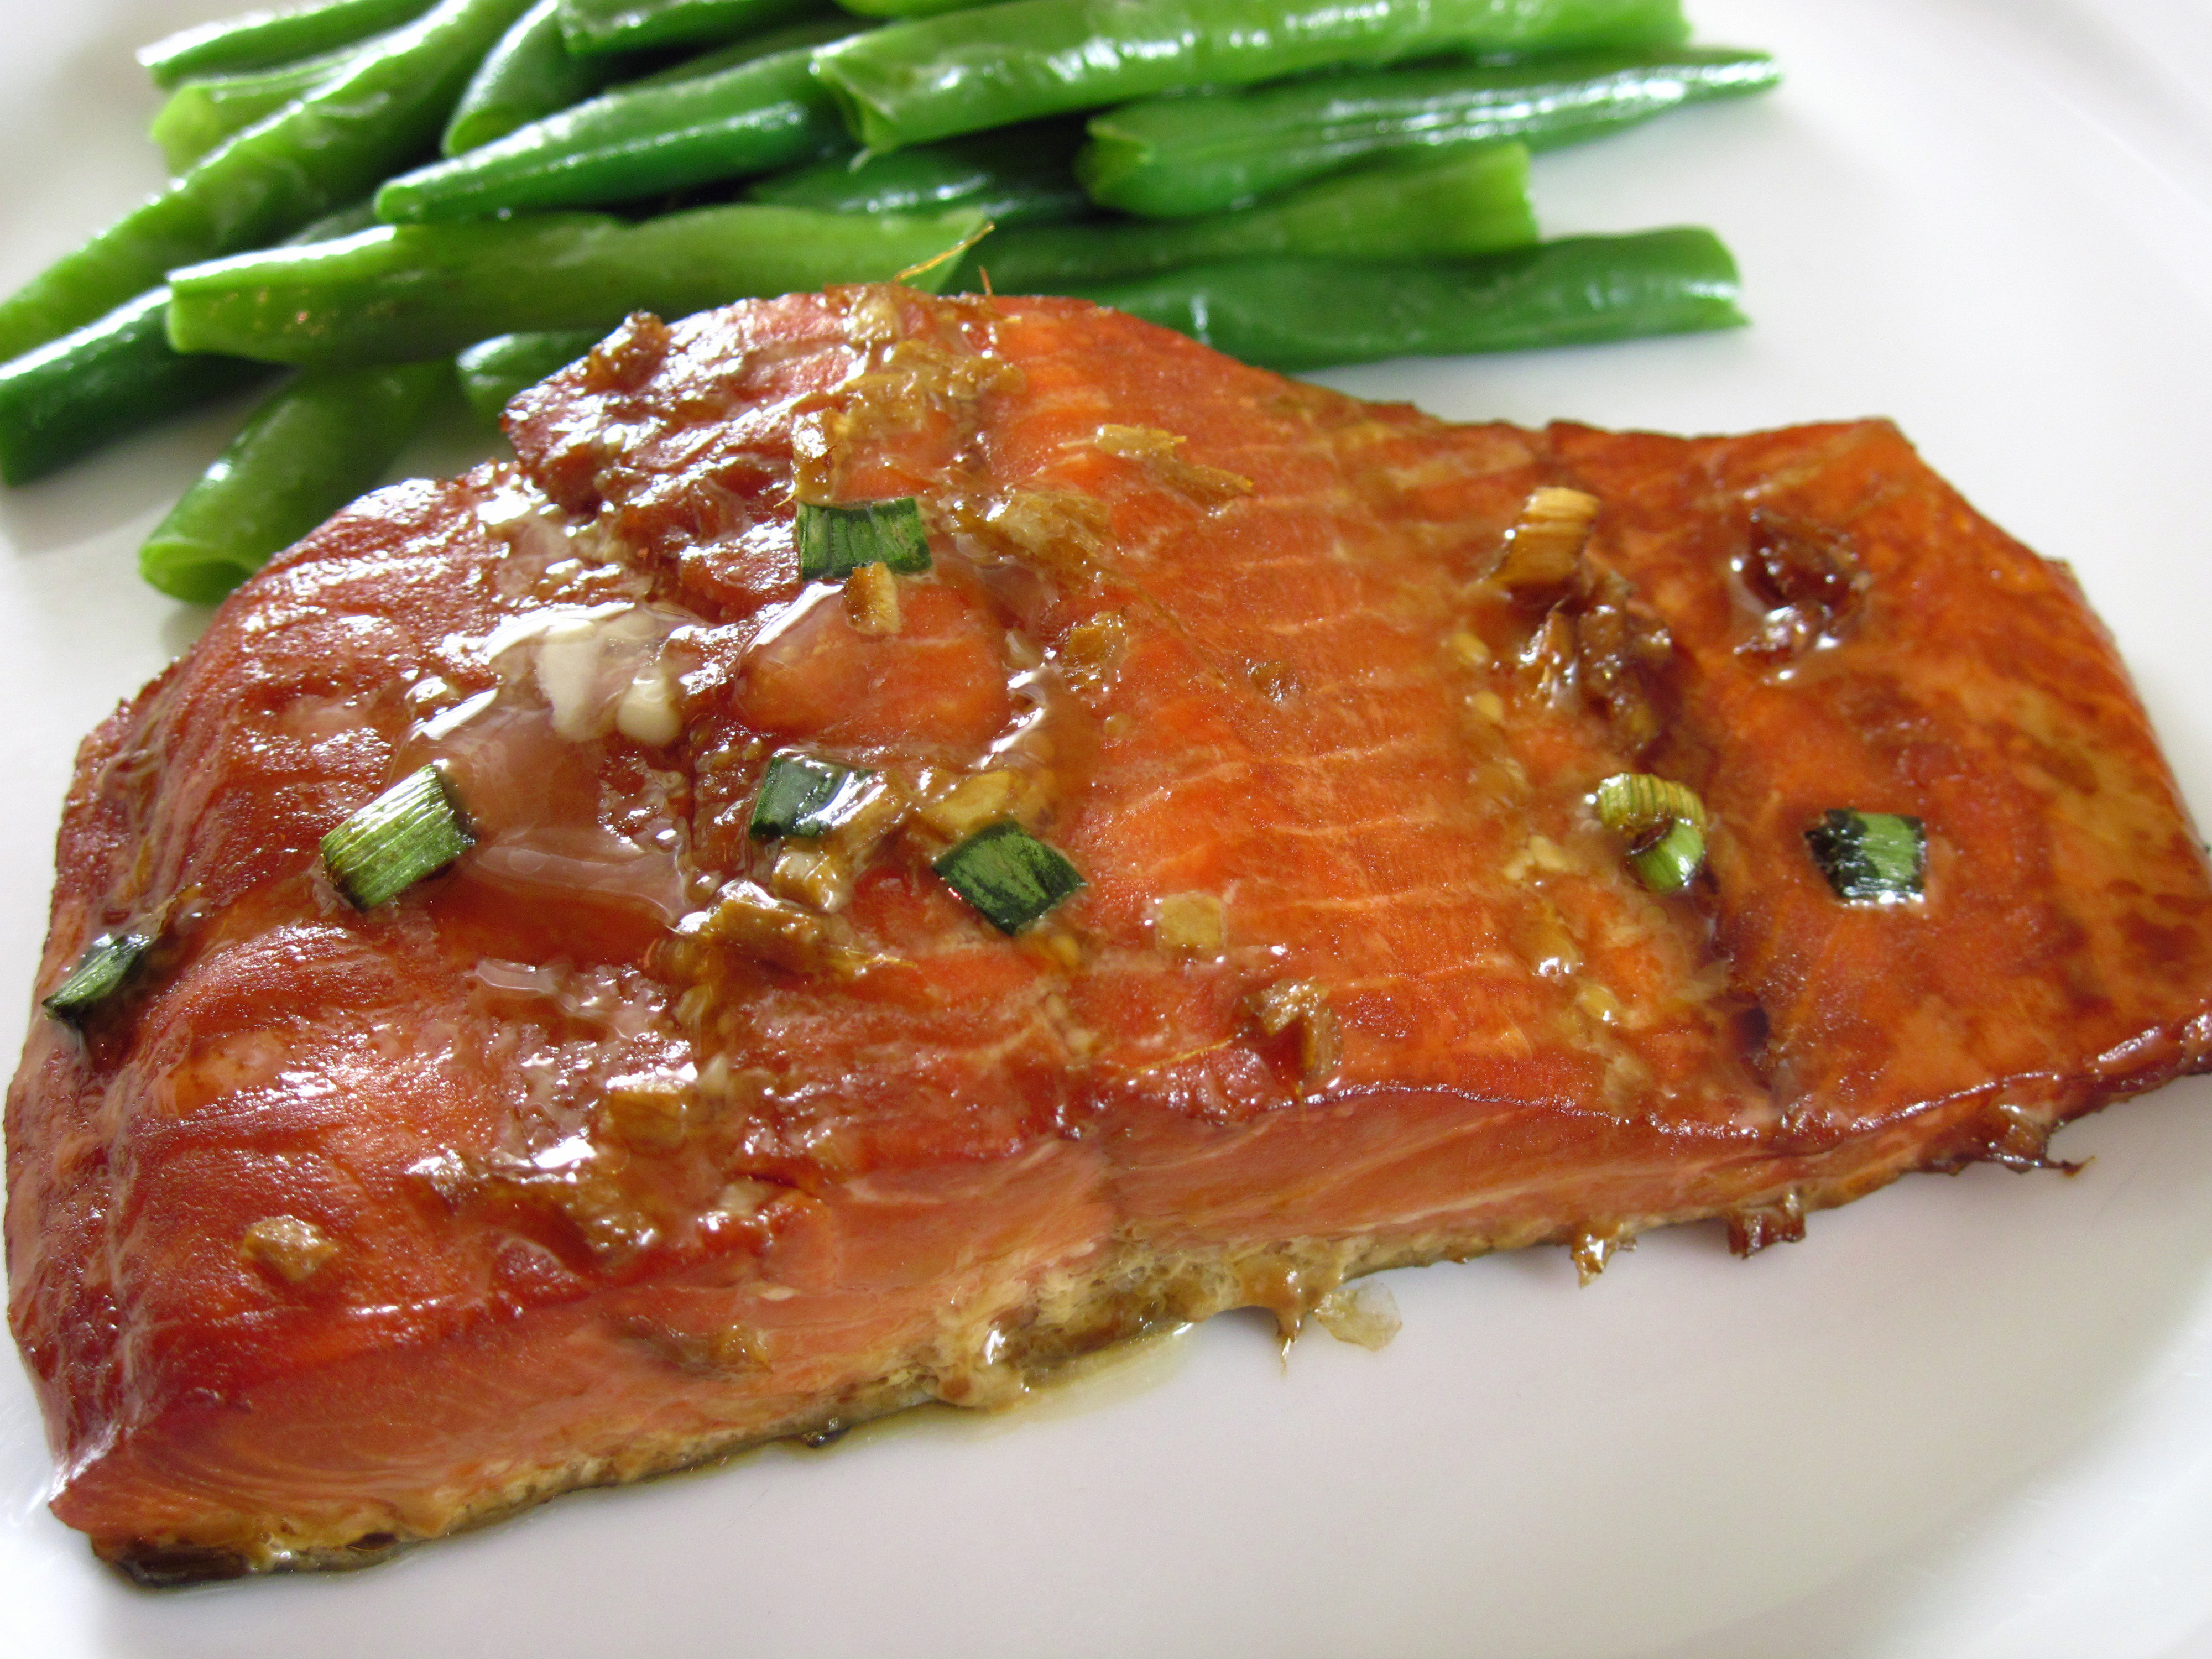
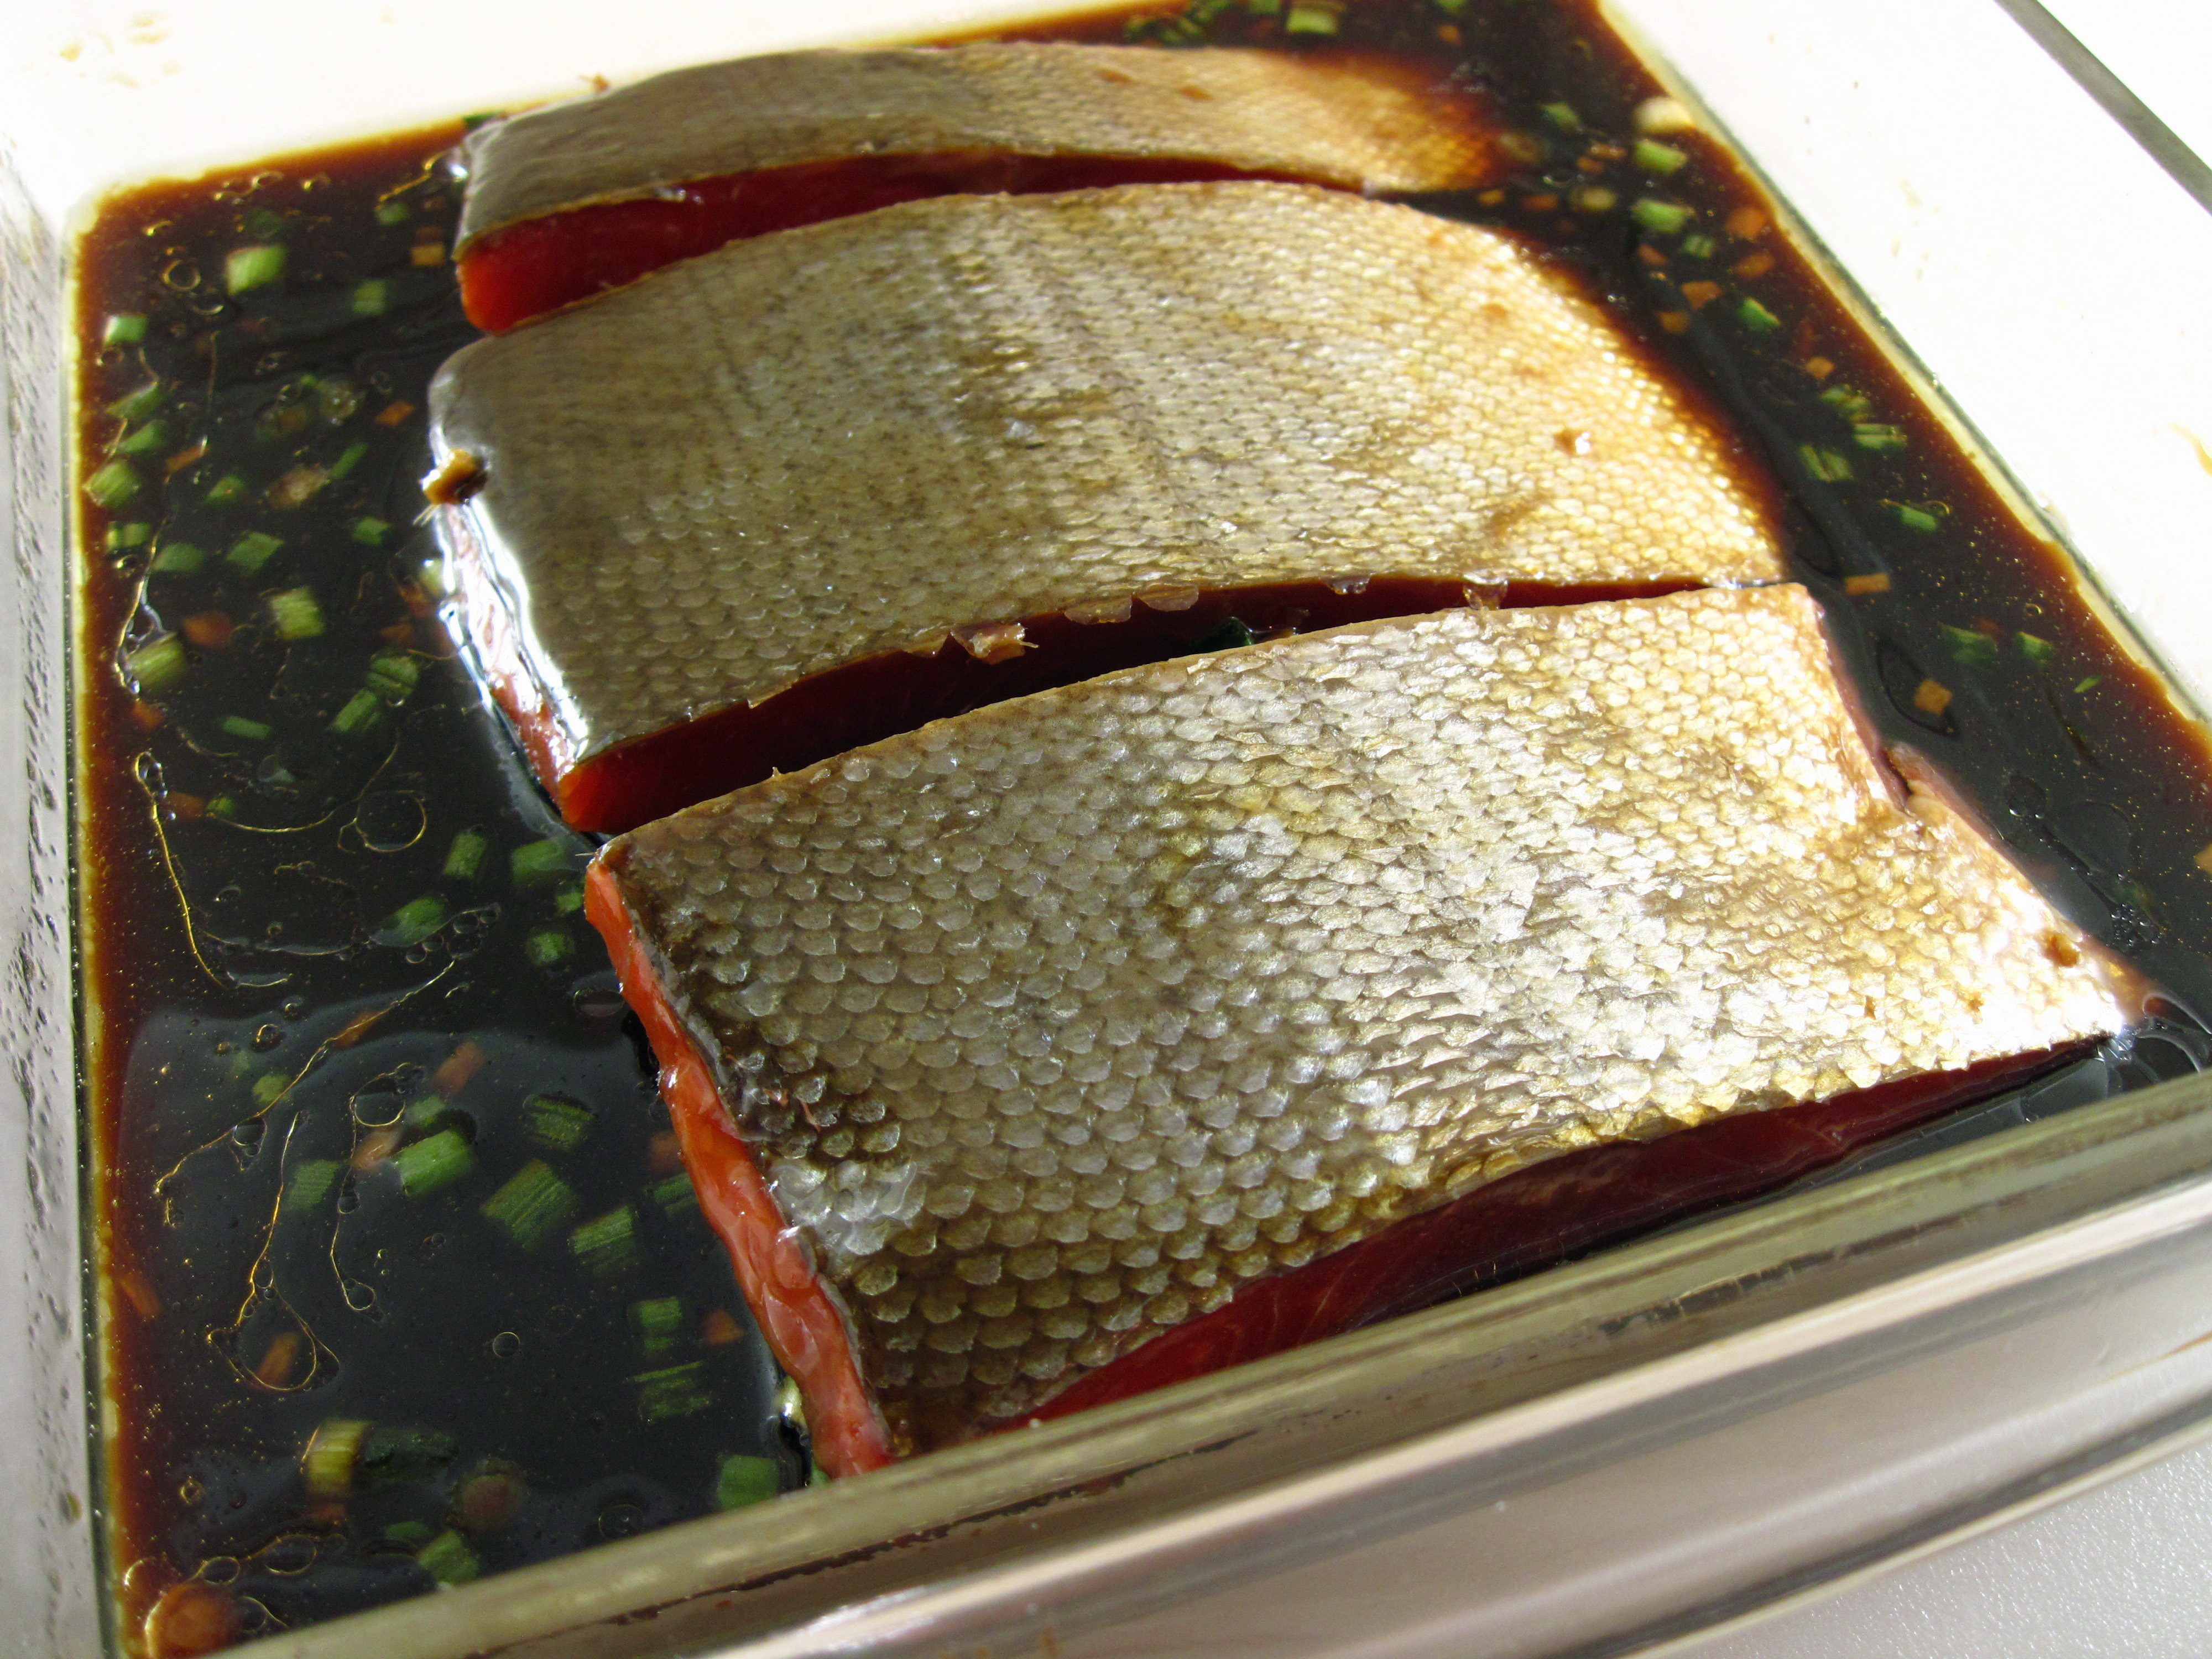
Teriyaki Salmon
By Kath Dedon
.
For many years Teriyaki Salmon was one of my favorite entrées at Ray’s Boathouse in Seattle. Today, under the leadership of Executive Wayne Johnson, the restaurant is still fantastic but I don’t believe they currently offer Teriyaki Salmon.
I’m glad that the recipe can still be found in Ken Gouldthorpe’s 2003 book, Ray’s Boathouse: Seafood Secrets of the Pacific Northwest. The recipes are from the Charles Ramseyer era; he was the Executive Chef at Ray’s for 15 years, from 1991 to 2006.
This Teriyaki Salmon is very easy, but it requires some advanced planning. The marinade is made at least 24 hours before it’s used. This, I believe, is the key to the recipe. The flavors mingle and the sum becomes more than the parts.
The cookbook uses wild coho salmon fillets, but you can use any type of salmon. In fact, the cookbook suggests that it is excellent with other varieties of fish, as well as with chicken and meat.
We were lucky to have some wild sockeye salmon in our freezer that our friends had caught in Alaska. (You know who you are. Thank you! ) I defrosted it and marinated it to make this fantastic Teriyaki Salmon.
a
Teriyaki Salmon
a
.
Teriyaki Salmon
(Adapted from a recipe in Ray’s Boathouse: Seafood Secrets of the Pacific Northwest)
a
This is delicious grilled as it is in the original recipe. However, if you don’t have a grill, or the weather is bad, it is equally good roasted as I did for this recipe. This roasting method is adapted from Christina Orchard’s recipe in Christina’s Cookbook.)
a
a
Serves 4
a
Marinade:
1 cup soy sauce (use wheat-free soy or tamari sauce for gluten-free)
½ cup dry sherry
¼ cup toasted sesame oil
3 tablespoons peeled and chopped fresh ginger
2 green onions, chopped
¼ cup light brown sugar (I usually substitute honey for the brown sugar.)
4 (6-ounces each) salmon fillets, skin on
.
1. Mix the marinade ingredients at least 24 hours before you plan to use it. Refrigerate.
2. Remove the pin bones from the salmon fillets with tweezers or pliers, if desired.
3. Put the salmon fillets in a glass baking dish and pour the marinade over them.
a
I cut the defrosted 15-ounce fillet into two 6-ounce and one 3-ounce fillets.

4. Turn the fillets so they’re skin-side up. Cover, refrigerate and marinate for 4 – 24 hours. (The longer they marinate, the stronger the teriyaki flavor will be. I marinated mine for about 8 hours.)
a
5. Preheat the oven to 400˚.
6. Line a rimmed baking sheet with foil and place the salmon, skin-side down, on the foil.

7. Roast for 8 – 10 minutes, until firm to the touch.
a
Share this:

Ideas for Leftover Turkey
By Kath Dedon
.
Happy day after Thanksgiving (and Thanksgivukkah)! After the big turkey feast, and after sandwiches and reheated turkey and stuffing, you may be looking for ideas for using the rest of the bird.
Here are a few of my favorite recipes for leftover turkey. Just click on the links above the photos to see the recipes.
a
My hands-down favorite recipe for leftover roast turkey is Turkey Carcass Soup! I have made it for years just as it’s written here, and it’s one of our favorite soups of all time.

a
I originally made a Tetrazzini recipe with leftover Cornish game hens, but it would be terrific made with turkey or chicken. This one uses 2 cups of meat to make a small casserole that will serve 3 – 4. If you have 4 cups of leftover turkey meat, it will easily double to make a larger casserole to serve 6 – 8.
Cornish Game Hen (or Chicken or Turkey) Tetrazzini

a
Quick Chicken or Turkey Curry is not a sophisticated curry, but it is a quick, easy, and tasty way to use some leftover poultry. We’ve enjoyed it for years.

I’ve made Pasta with Mediterranean Chicken Sauce using leftover turkey many times. You can stretch just one cup of leftover meat to make a dinner for four.
Pasta with Mediterranean Chicken Sauce

a
What are some of your favorite ways to use leftover turkey? As much as I love these, I’m always on the lookout for new ideas. 😉
a
Share this:

Poblano-Chicken Sausage Chili
By Kath Dedon
.
Meet my new favorite chili – Poblano-Chicken Sausage Chili!
Carrie told me how much she liked Cooking Light’s Poblano-Turkey Sausage Chili. I knew I had to try it, especially since I have some poblano chiles from the Chico Farmers Market in my freezer!*
I used Isernio’s Italian Chicken Sausage instead of turkey sausage simply because I prefer it to any turkey sausage I have tried. Because my poblano chiles are quite hot, I used just one instead of two. The chili was perfect! Both Bob and I loved it.
I know I’ll be making this Poblano-Chicken Sausage Chili again soon. It’s quick and easy enough for a weeknight dinner and the leftovers reheat beautifully for lunch or another dinner.
a
A steaming bowl of Poblano-Chicken Chili

Poblano-Chicken Sausage Chili
(Adapted from a Cooking Light recipe)
Cooking Light uses 2 poblano chiles. Mine are quite hot so I just used one.
Serves 4 – 6
2 teaspoons light olive oil
1 cup chopped onion
3 cloves garlic, minced
8 ounces Italian chicken sausage (If in casings, remove from the casings)
1 tablespoon chili powder
½ teaspoon dried oregano
½ teaspoon ground cumin
1 or 2 poblano chiles, seeded and finely chopped
1 bay leaf
1 cup chicken broth
1 (28-ounce) can diced tomatoes, undrained
1 (15-ounce) can black beans, rinsed and drained
1 (15-ounce) can pinto beans, rinsed and drained
½ cup coarsely chopped fresh cilantro
½ teaspoon freshly ground black pepper
Optional condiments for serving:
Sour cream
Sliced radishes
1. Heat the oil in a large Dutch oven over medium heat. Add the onion and cook, stirring occasionally for about 4 minutes or until it has softened and is starting to brown.
2. Add the garlic and stir for about 1 minute.
3. Add the sausage, chili powder, oregano, cumin, poblano chile(s), and bay leaf. Cook, stirring occasionally for about 4 minutes or until the sausage is browned.
4. Add the broth, tomatoes, and beans. Bring to a boil and then reduce heat to a simmer. Simmer without a lid for about 30 minutes. The chili will thicken up a bit as it simmers.
5. Stir in the cilantro and black pepper. Remove the bay leaf and serve.
*The Chico Farmers Market poblano chiles ready to be broiled.
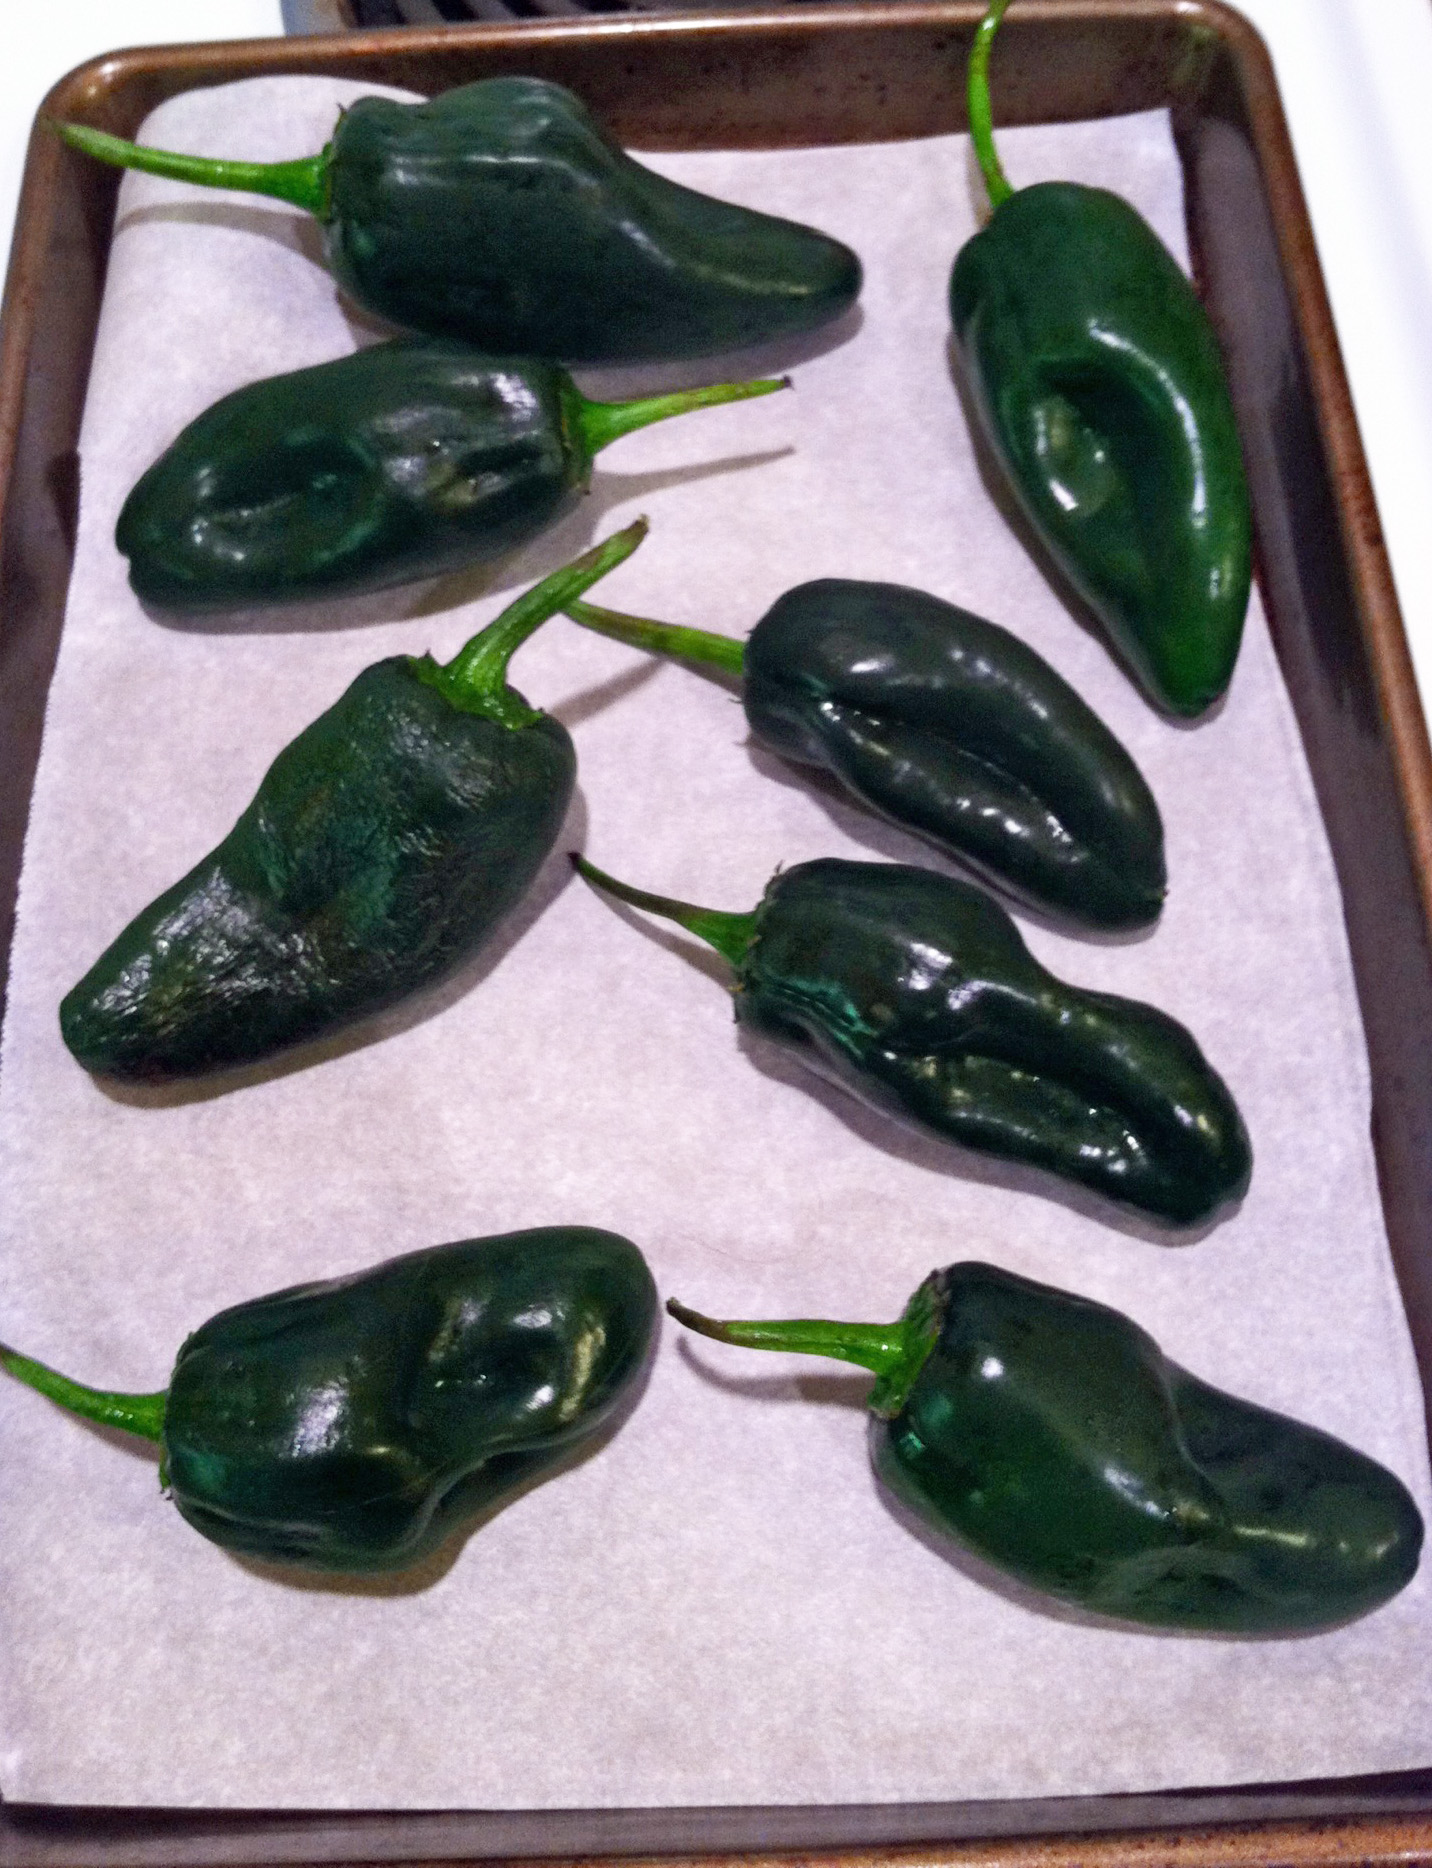
After broiling them for about 5 minutes on each side (until they were charred), I put them in a bowl and covered it with foil. After they had cooled off, I peeled the skin off, slit them down the side and scraped off the seeds. I then spread them out on a baking sheet and put them in the freezer. After they were frozen, I put them in a Ziploc bag in the freezer. I can now pull out one or two at a time to use when I need them.
a
Share this:

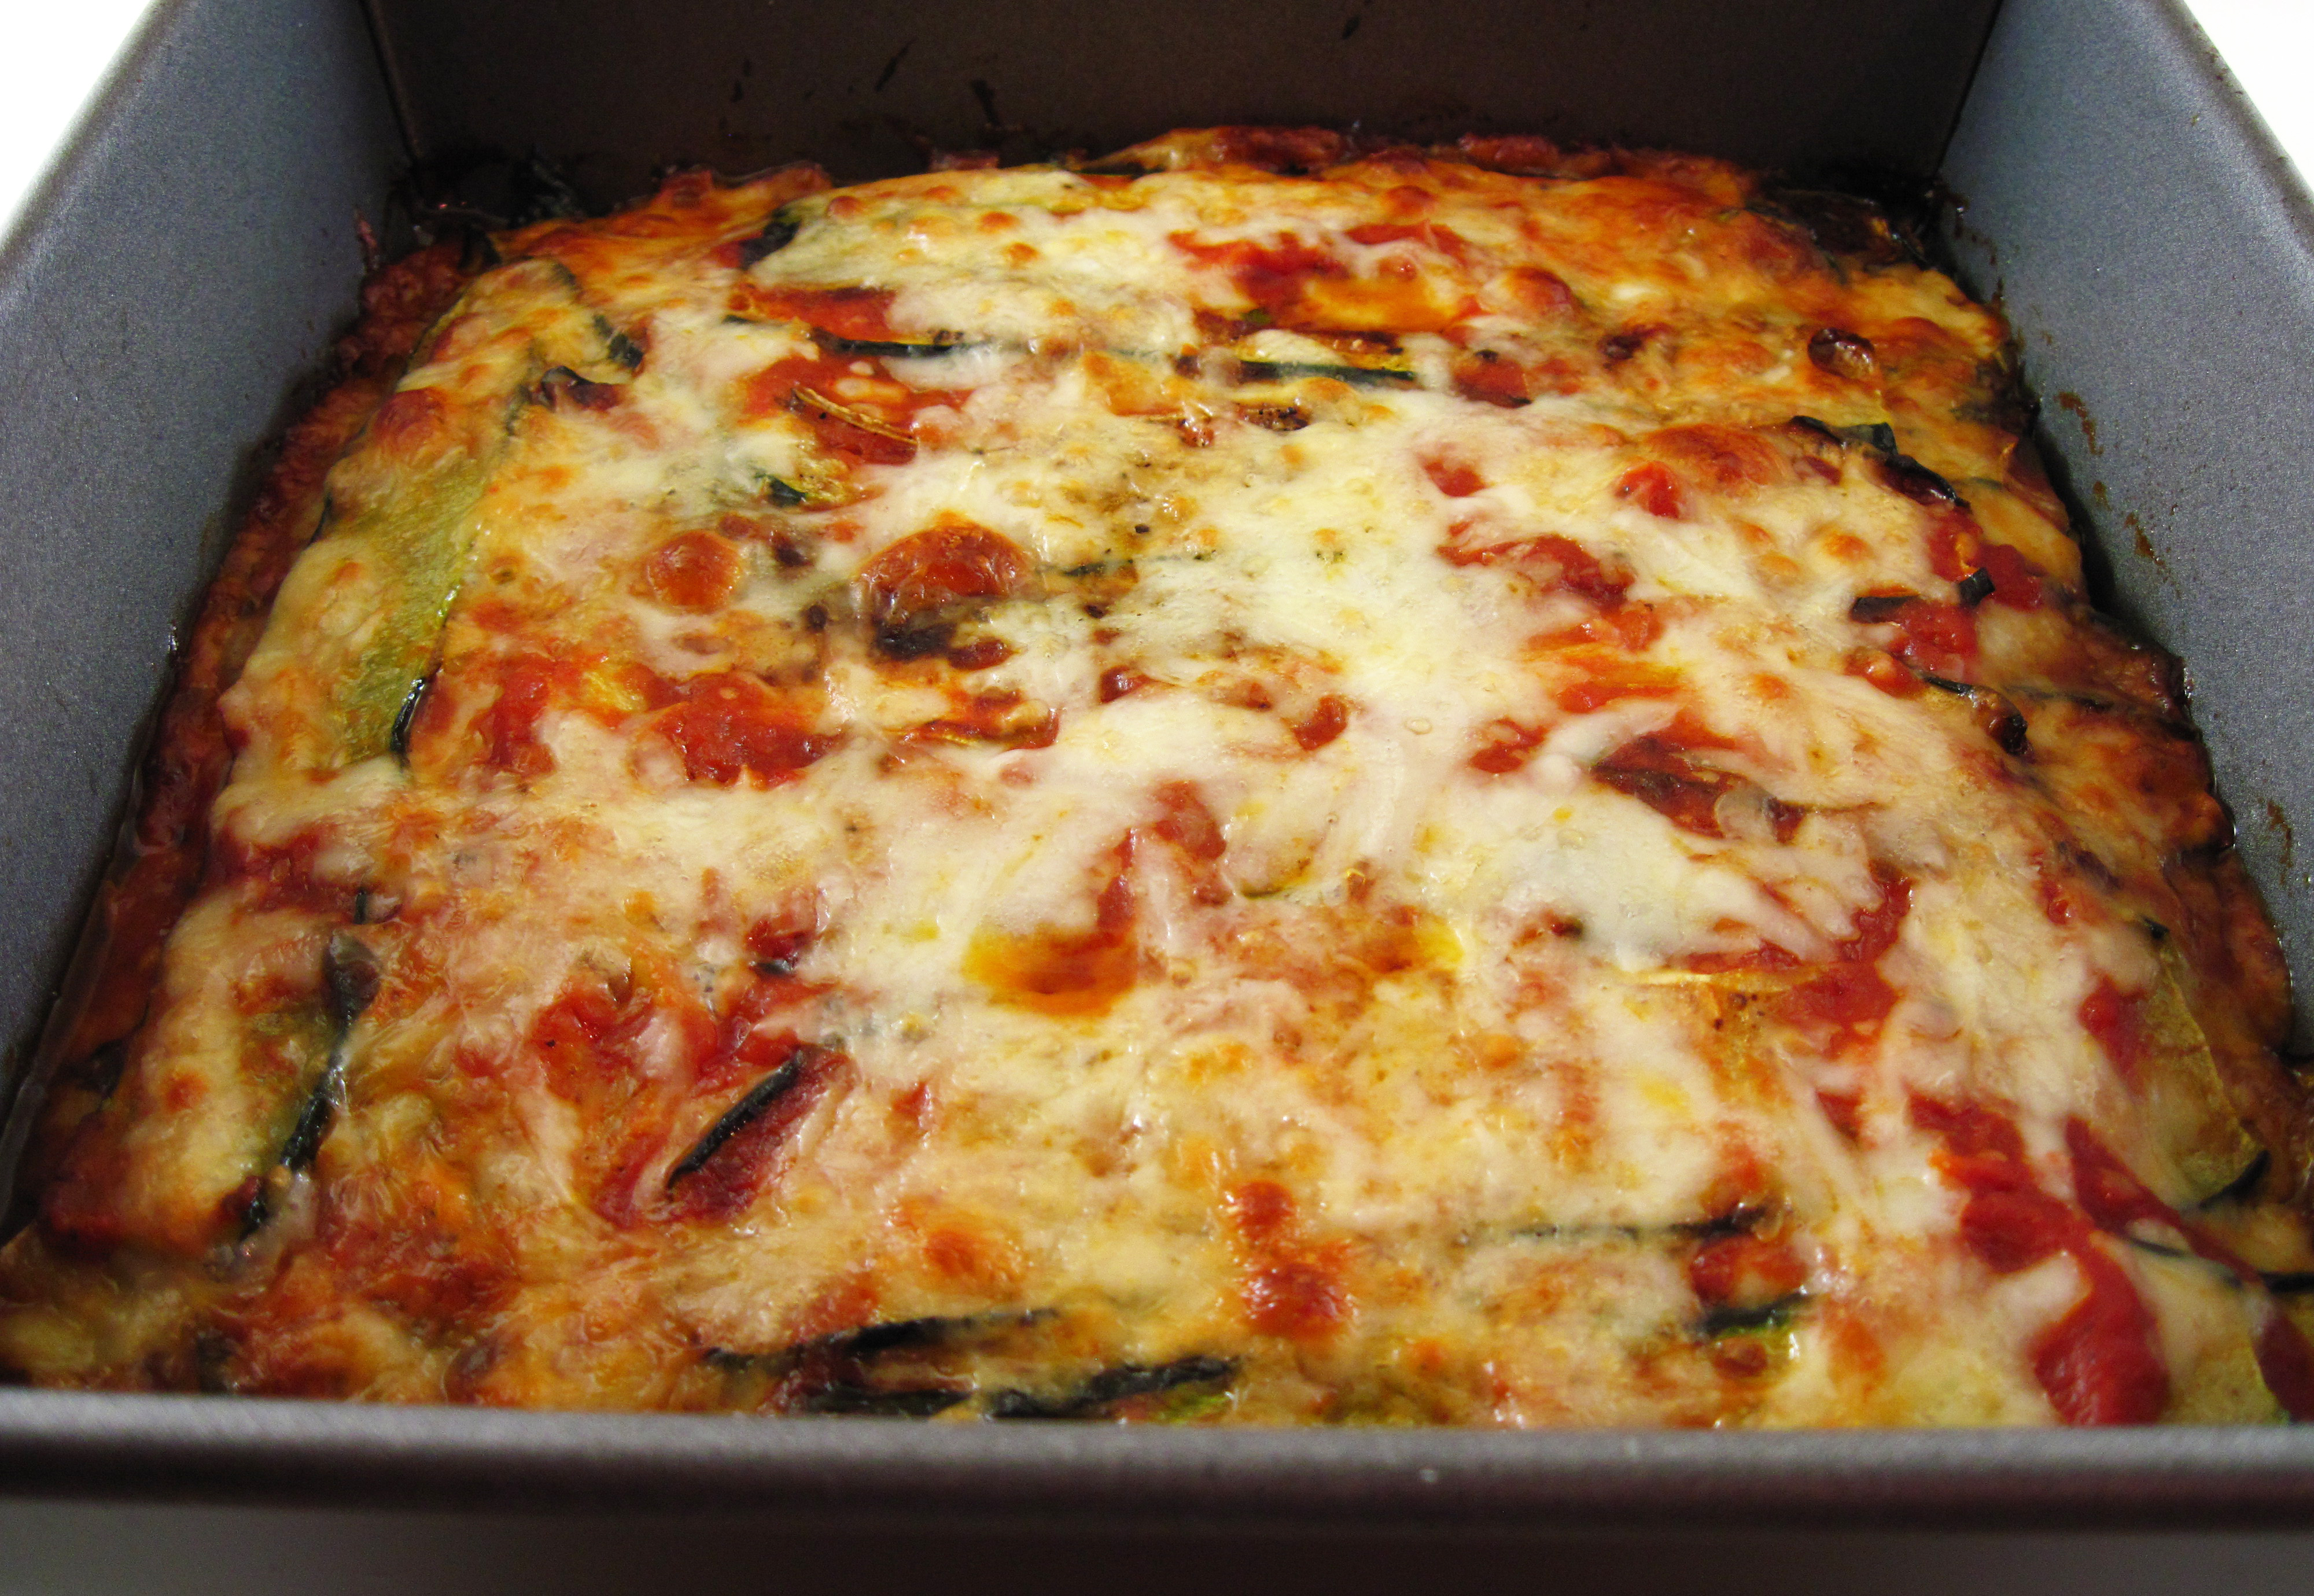
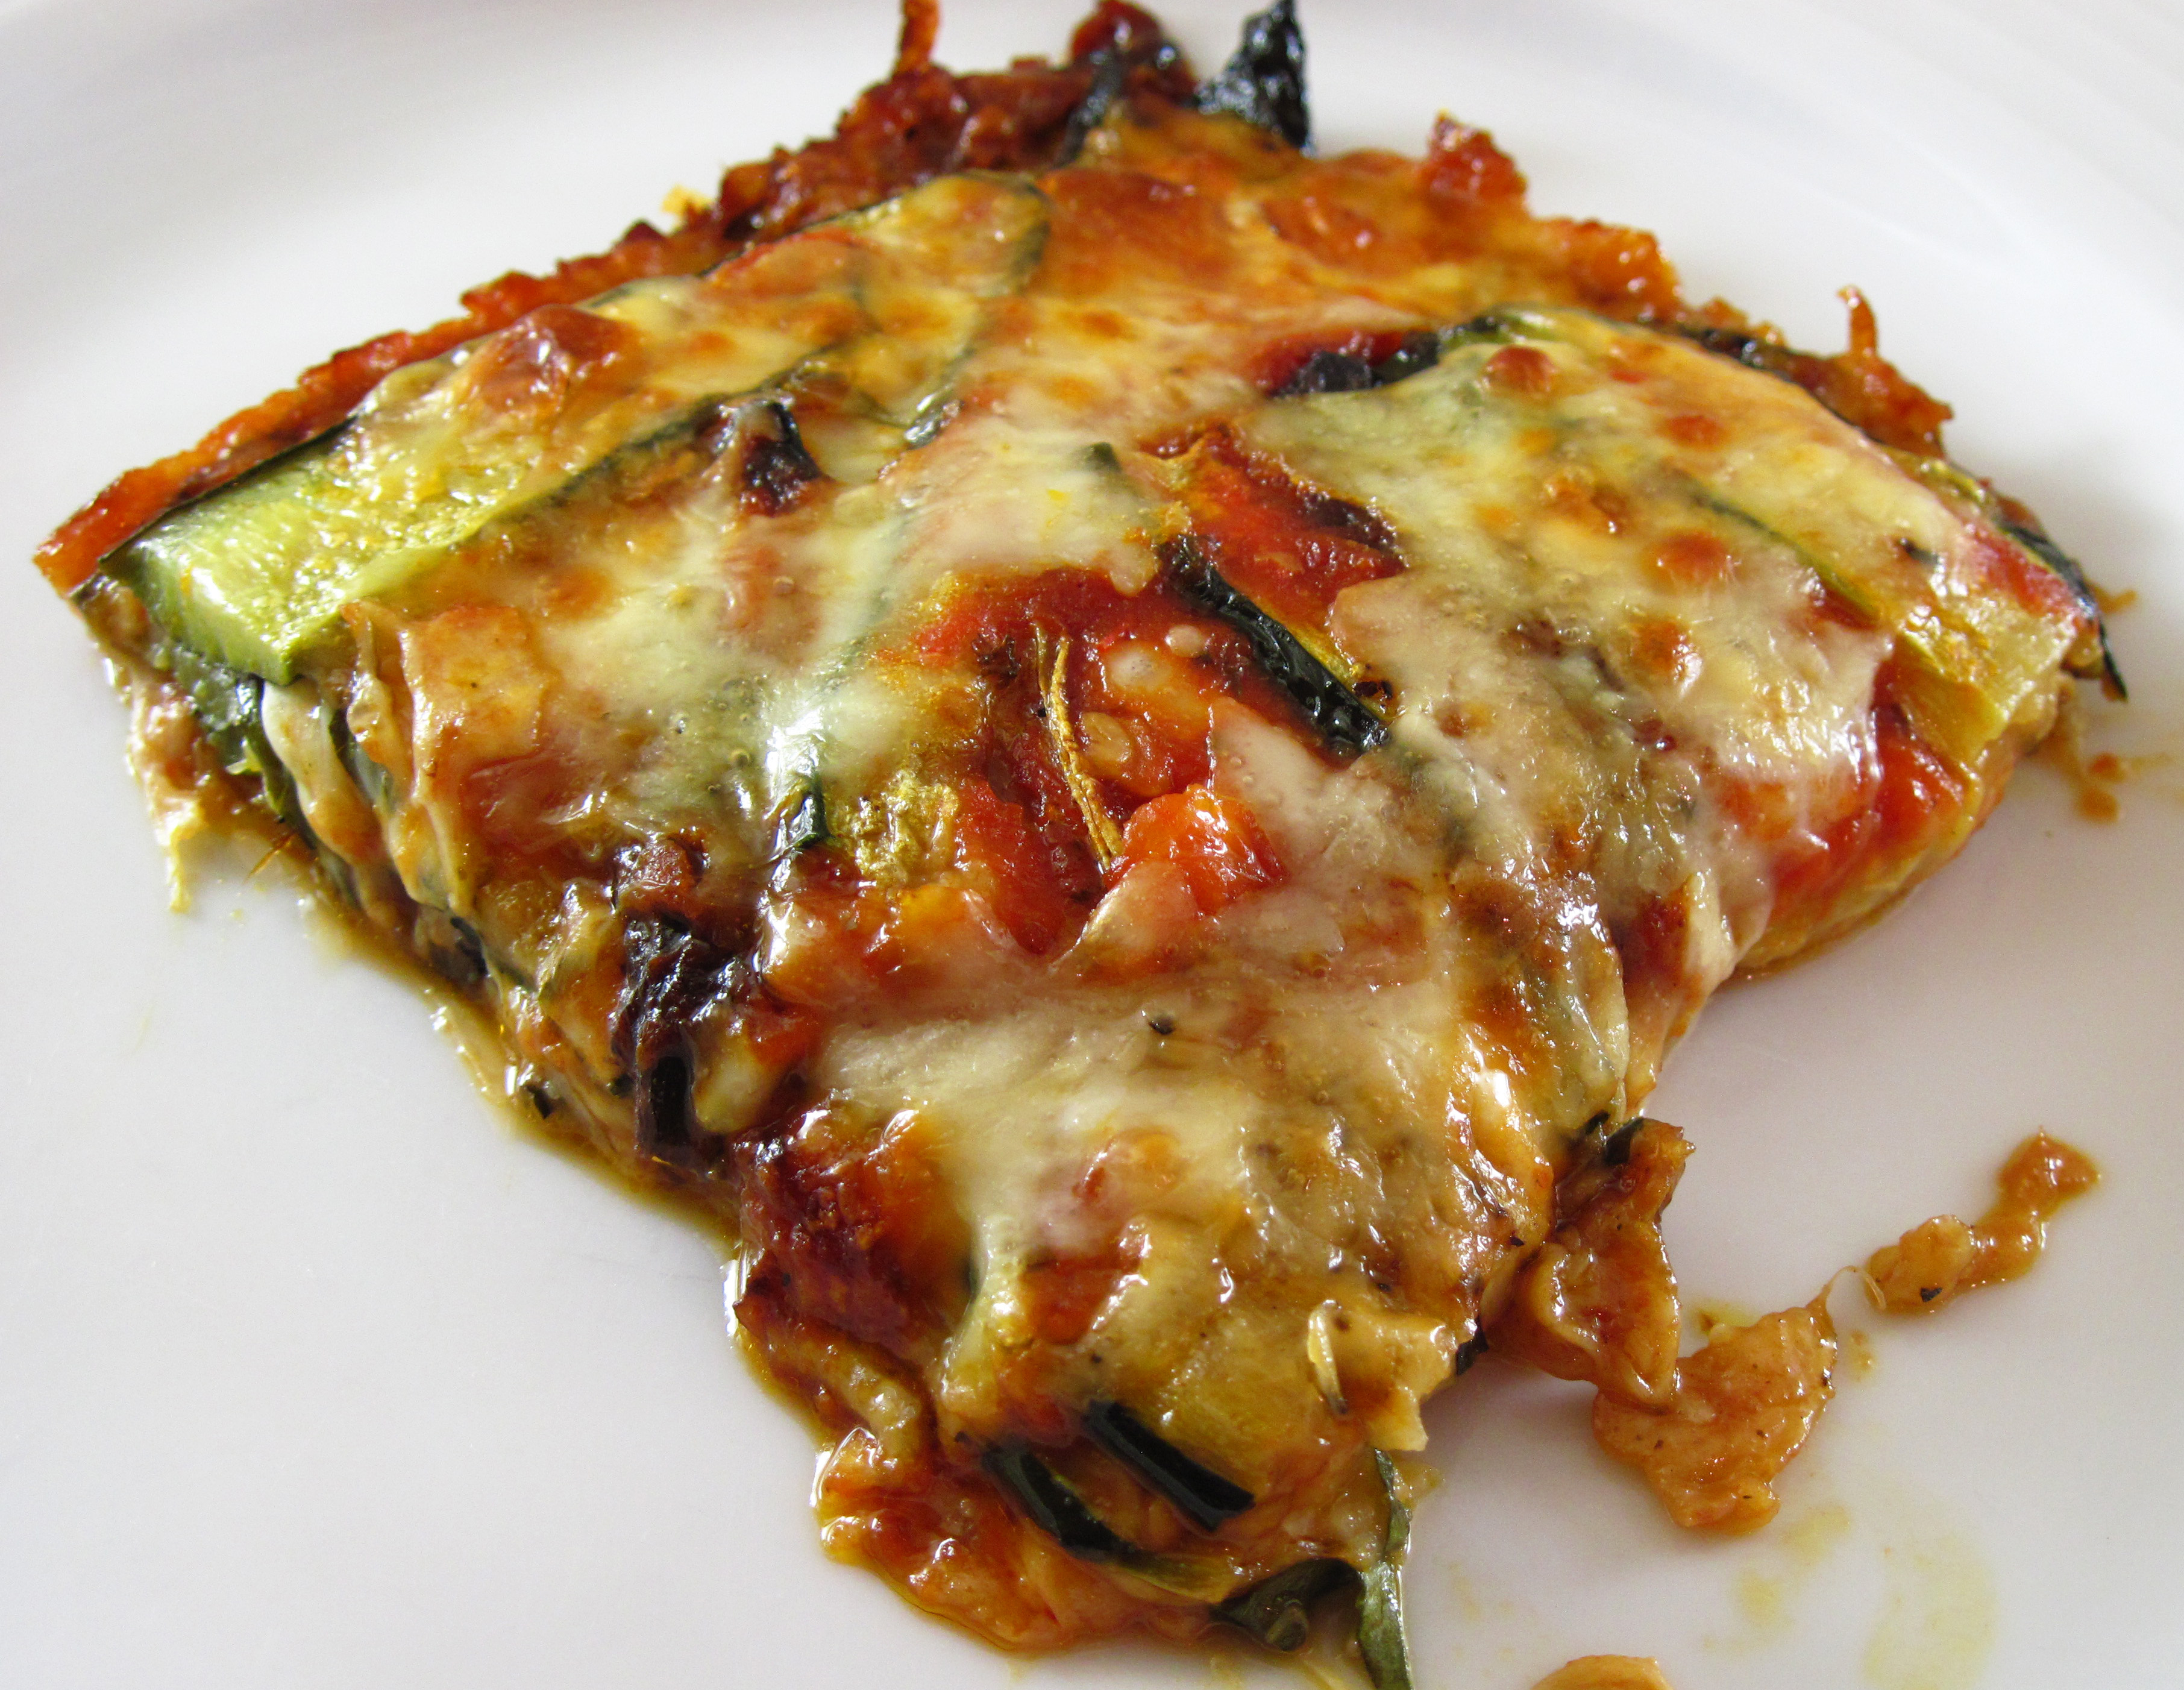
Roasted Zucchini Torta with Tomatoes and Mozzarella
.
Roasted Zucchini Torta with Tomatoes and Mozzarella is a wonderful vegetarian main course. It’s easy to make and leftovers reheat beautifully. It makes a great lunch to pack for school or work the next day.
The recipe is adapted from Jack Bishop’s recipe in The Complete Italian Vegetarian Cookbook. He makes a quick tomato sauce with canned crushed tomatoes, garlic, and basil. I substituted my favorite jarred marinara sauce, Mezzetta Homemade-Style Marinara Sauce.
I have made Roasted Zucchini Torta with Tomatoes and Mozzarella twice now. The first time Bob was home and he seemed to like it. The second time was a few nights ago when he was out of town. He called that night and I mentioned that I was making it for myself. He replied, “That’s good. I really didn’t like it that much.”
Oh, well. If you like zucchini, tomato sauce, and mozzarella cheese give it a try. I think it’s delicious! (I just might have had a piece for breakfast the next morning.)
a

a
Roasted Zucchini Torta with Tomatoes and Mozzarella
(Adapted from Jack Bishop’s recipe in The Complete Italian Vegetarian Cookbook)
Serves 4
4 medium zucchini (about 1 2/3 pounds)
2¼ tablespoons olive oil
1 cup marinara sauce
1½ tablespoons minced basil leaves
8 ounces mozzarella cheese, shredded (about 2 cups)
3 tablespoons freshly grated Parmigiano-Reggiano cheese
a

1. Preheat the oven to 400˚. Arrange the oven racks so they are both in the center area of the oven.
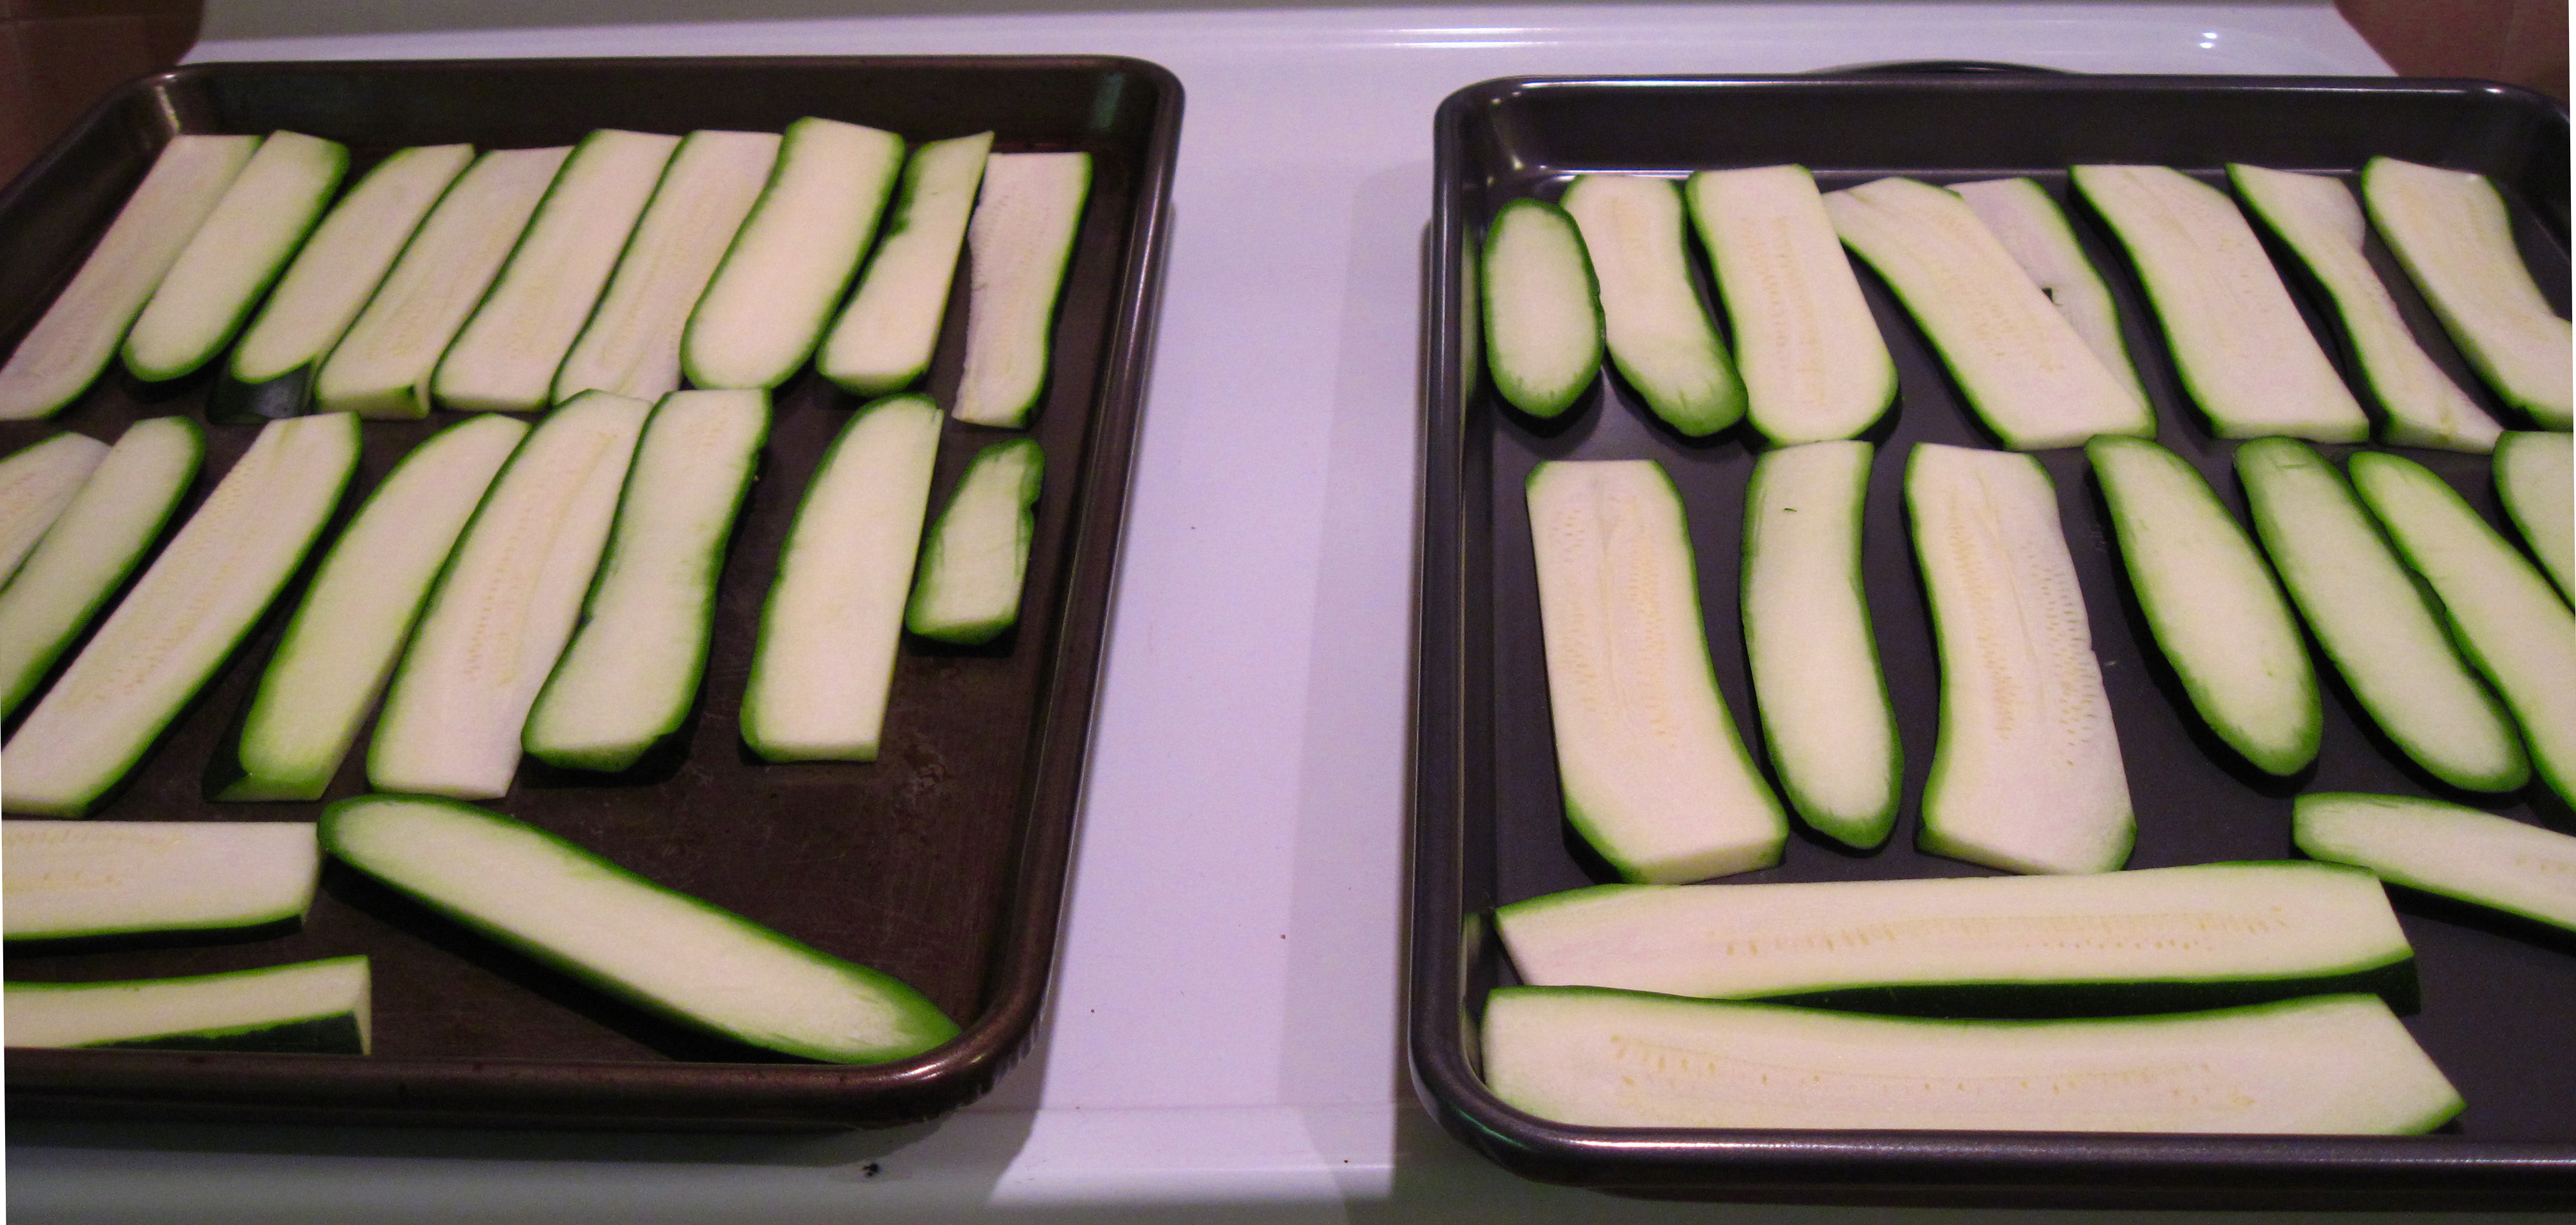
2. Trim the ends off of the zucchini. Make a thin lengthwise slice off the side of one of them. Turn it on the cut side so it’s stable and cut it lengthwise into ¼-inch slices. Repeat with the other zucchini.
a
a
3. Lay the zucchini on 2 large rimmed baking sheets. Use about 2¼ tablespoons of olive oil and lightly brush the oil on both sides of the slices. Sprinkle with a bit of salt and pepper.
4. Roast the zucchini in the oven for about 15 minutes. You’ll probably need to use both oven racks. After 15 minutes, switch the baking sheets on the racks and roast for another 10 minutes, or until the zucchini is starting to brown. Remove from the oven.
a

a
5. Reduce the oven temperature to 350˚.
6. Brush an 8-inch square baking pan with a bit of olive oil. Put a layer of about ¼ of the zucchini in the pan. Brush ¼ cup of the marinara sauce over the zucchini. Top with ½ cup mozzarella cheese and a bit of the grated Parmigiano-Reggiano and the minced basil.
a
First layer of zucchini with the marinara sauce before adding the mozzarella and Parmigiano

a
7. Repeat the layers 3 more times.
8. Bake the torta at 350˚ for about 30 minutes, or until it’s bubbly and has started to brown just a bit.
a
a
9. Cool a bit on a rack for 15 minutes before cutting into servings.
a
a


