Welcome!
You'll find over 470 of my favorite recipes here, including ideas for Quick meals, Cooking for 2, Feasting on Leftovers, and cooking with 5 Ingredients or Less. I'm adding new posts regularly; you can subscribe by email or RSS feed if you'd like to receive the latest recipes. Bon appétit!
Today is the 5th Anniversary of my blog!
By Kath Dedon
a
Today is the 5th Anniversary of my blog! WordPress.com even sent me anniversary greetings! I made public note of my 1st anniversary in 2010 because I was actually kind of amazed that I had kept at it for a full year. And now, here I am on the 5th anniversary. It’s been a fun ride! Looking at my stats, the most popular recipe today is Smoked Sausage and Black-Eyed Peas. I guess everyone needs their good luck black-eyed peas. I know I’m making this great recipe for New Year’s Day tomorrow. As good as it is, it didn’t make the top five of the year. a
Happy New Year with Emeril Lagasse’s Smoked Sausage and Black-Eyed Peas 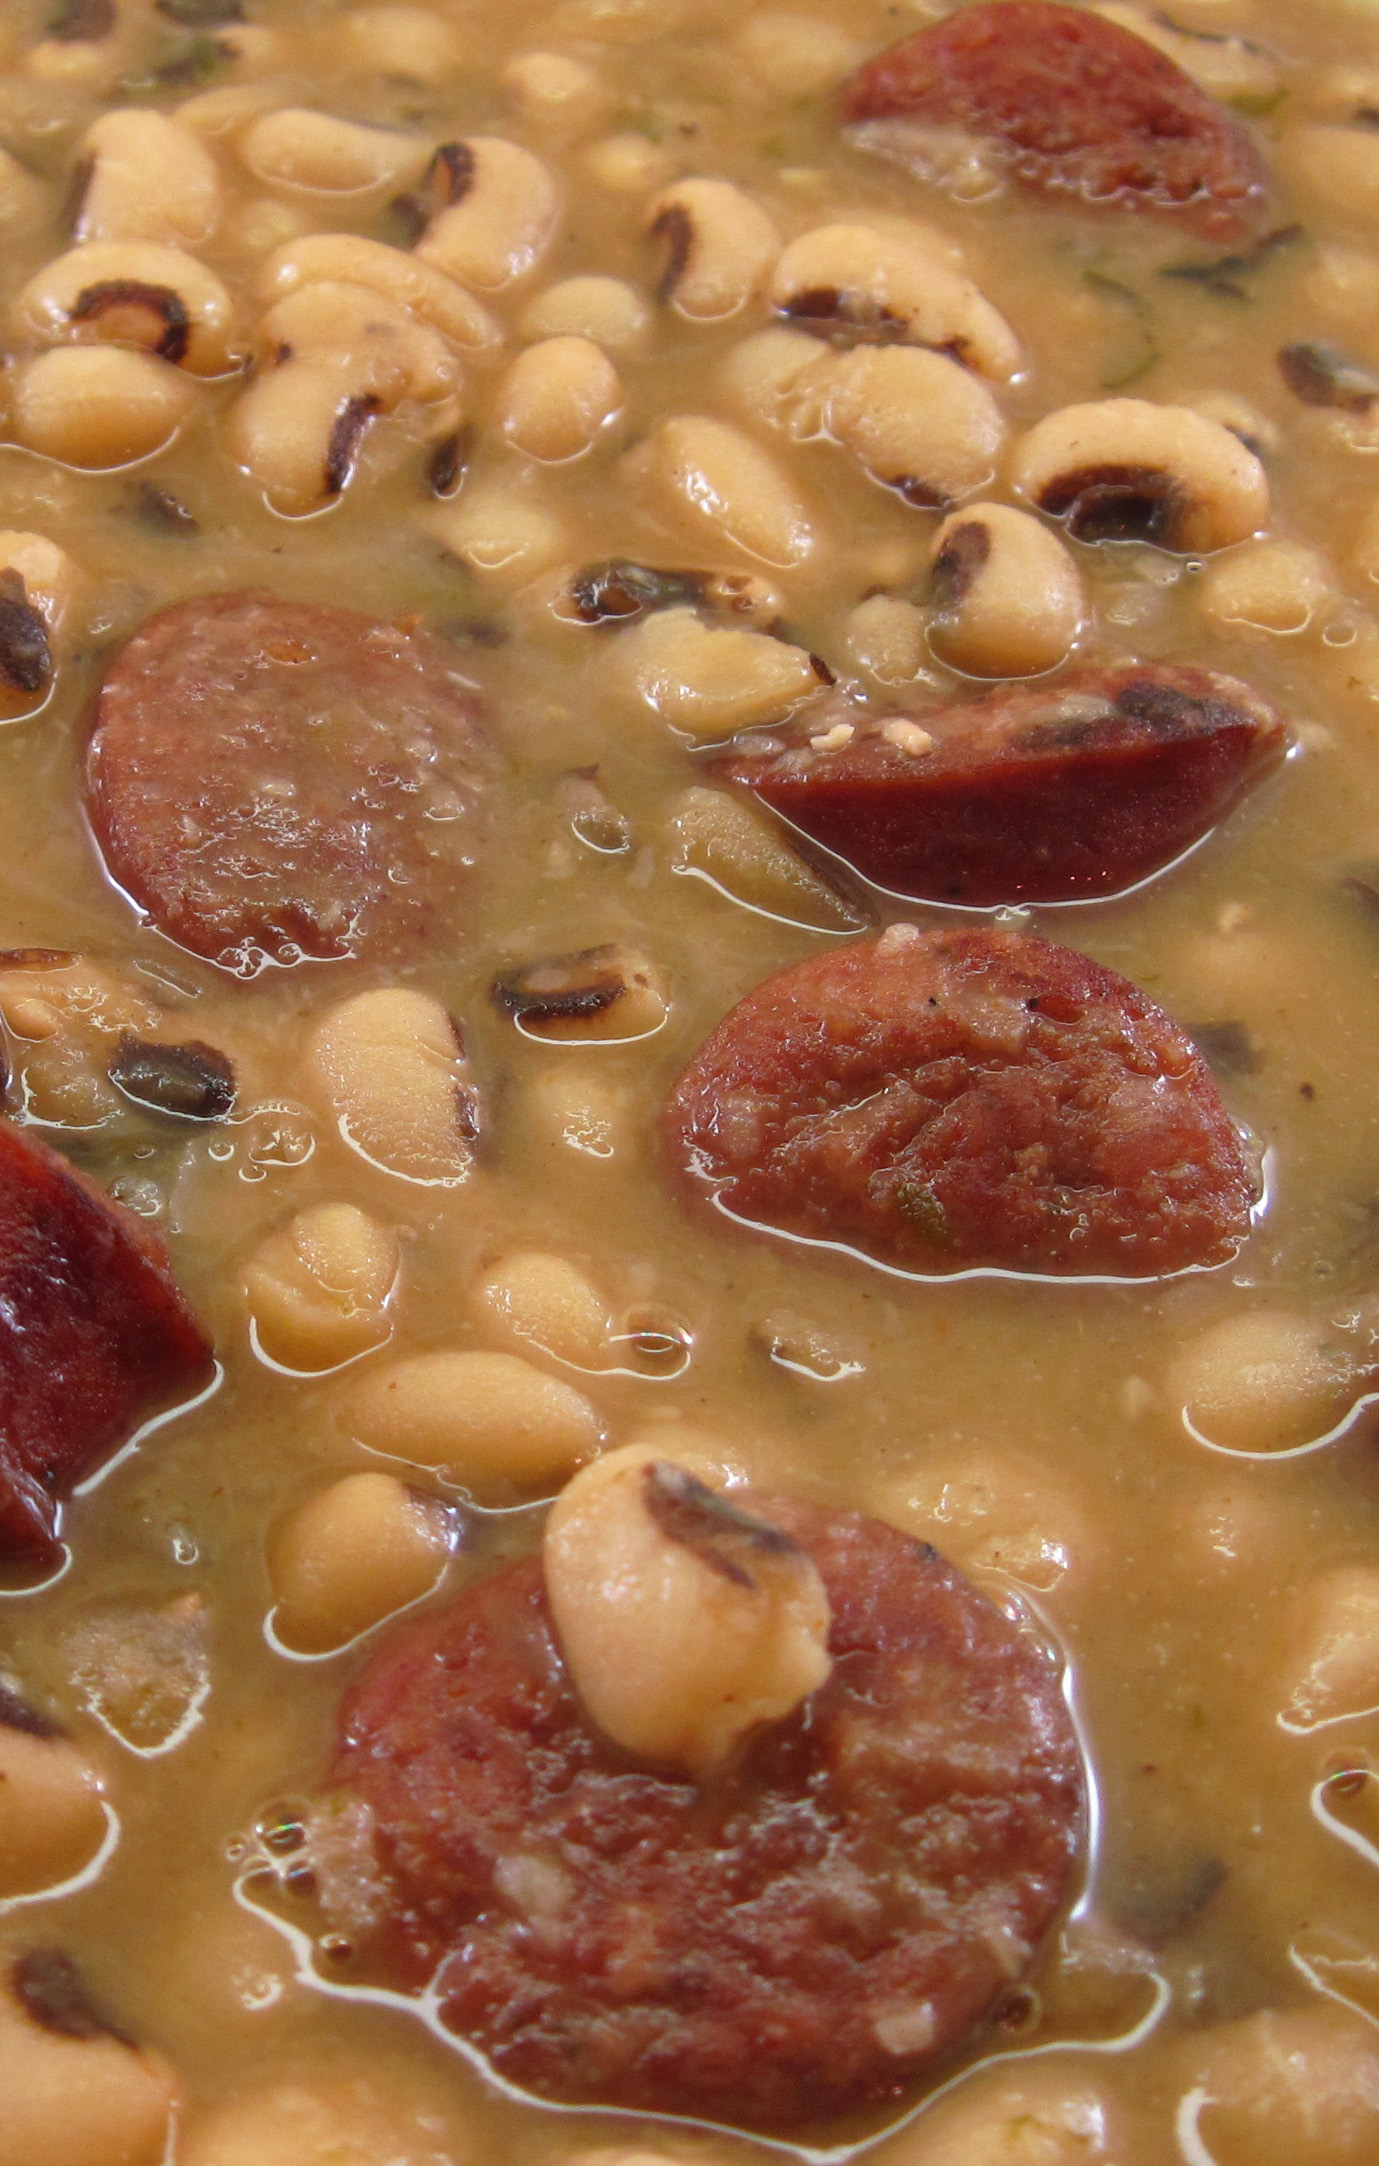
a
Here are the top five recipes for 2014:
#5 Quick and Easy Chicken Noodle Soup has been a favorite in our family for over 15 years.  a
a
a
#4 Boiled Lobster Tails is ridiculously easy for a special occasion. 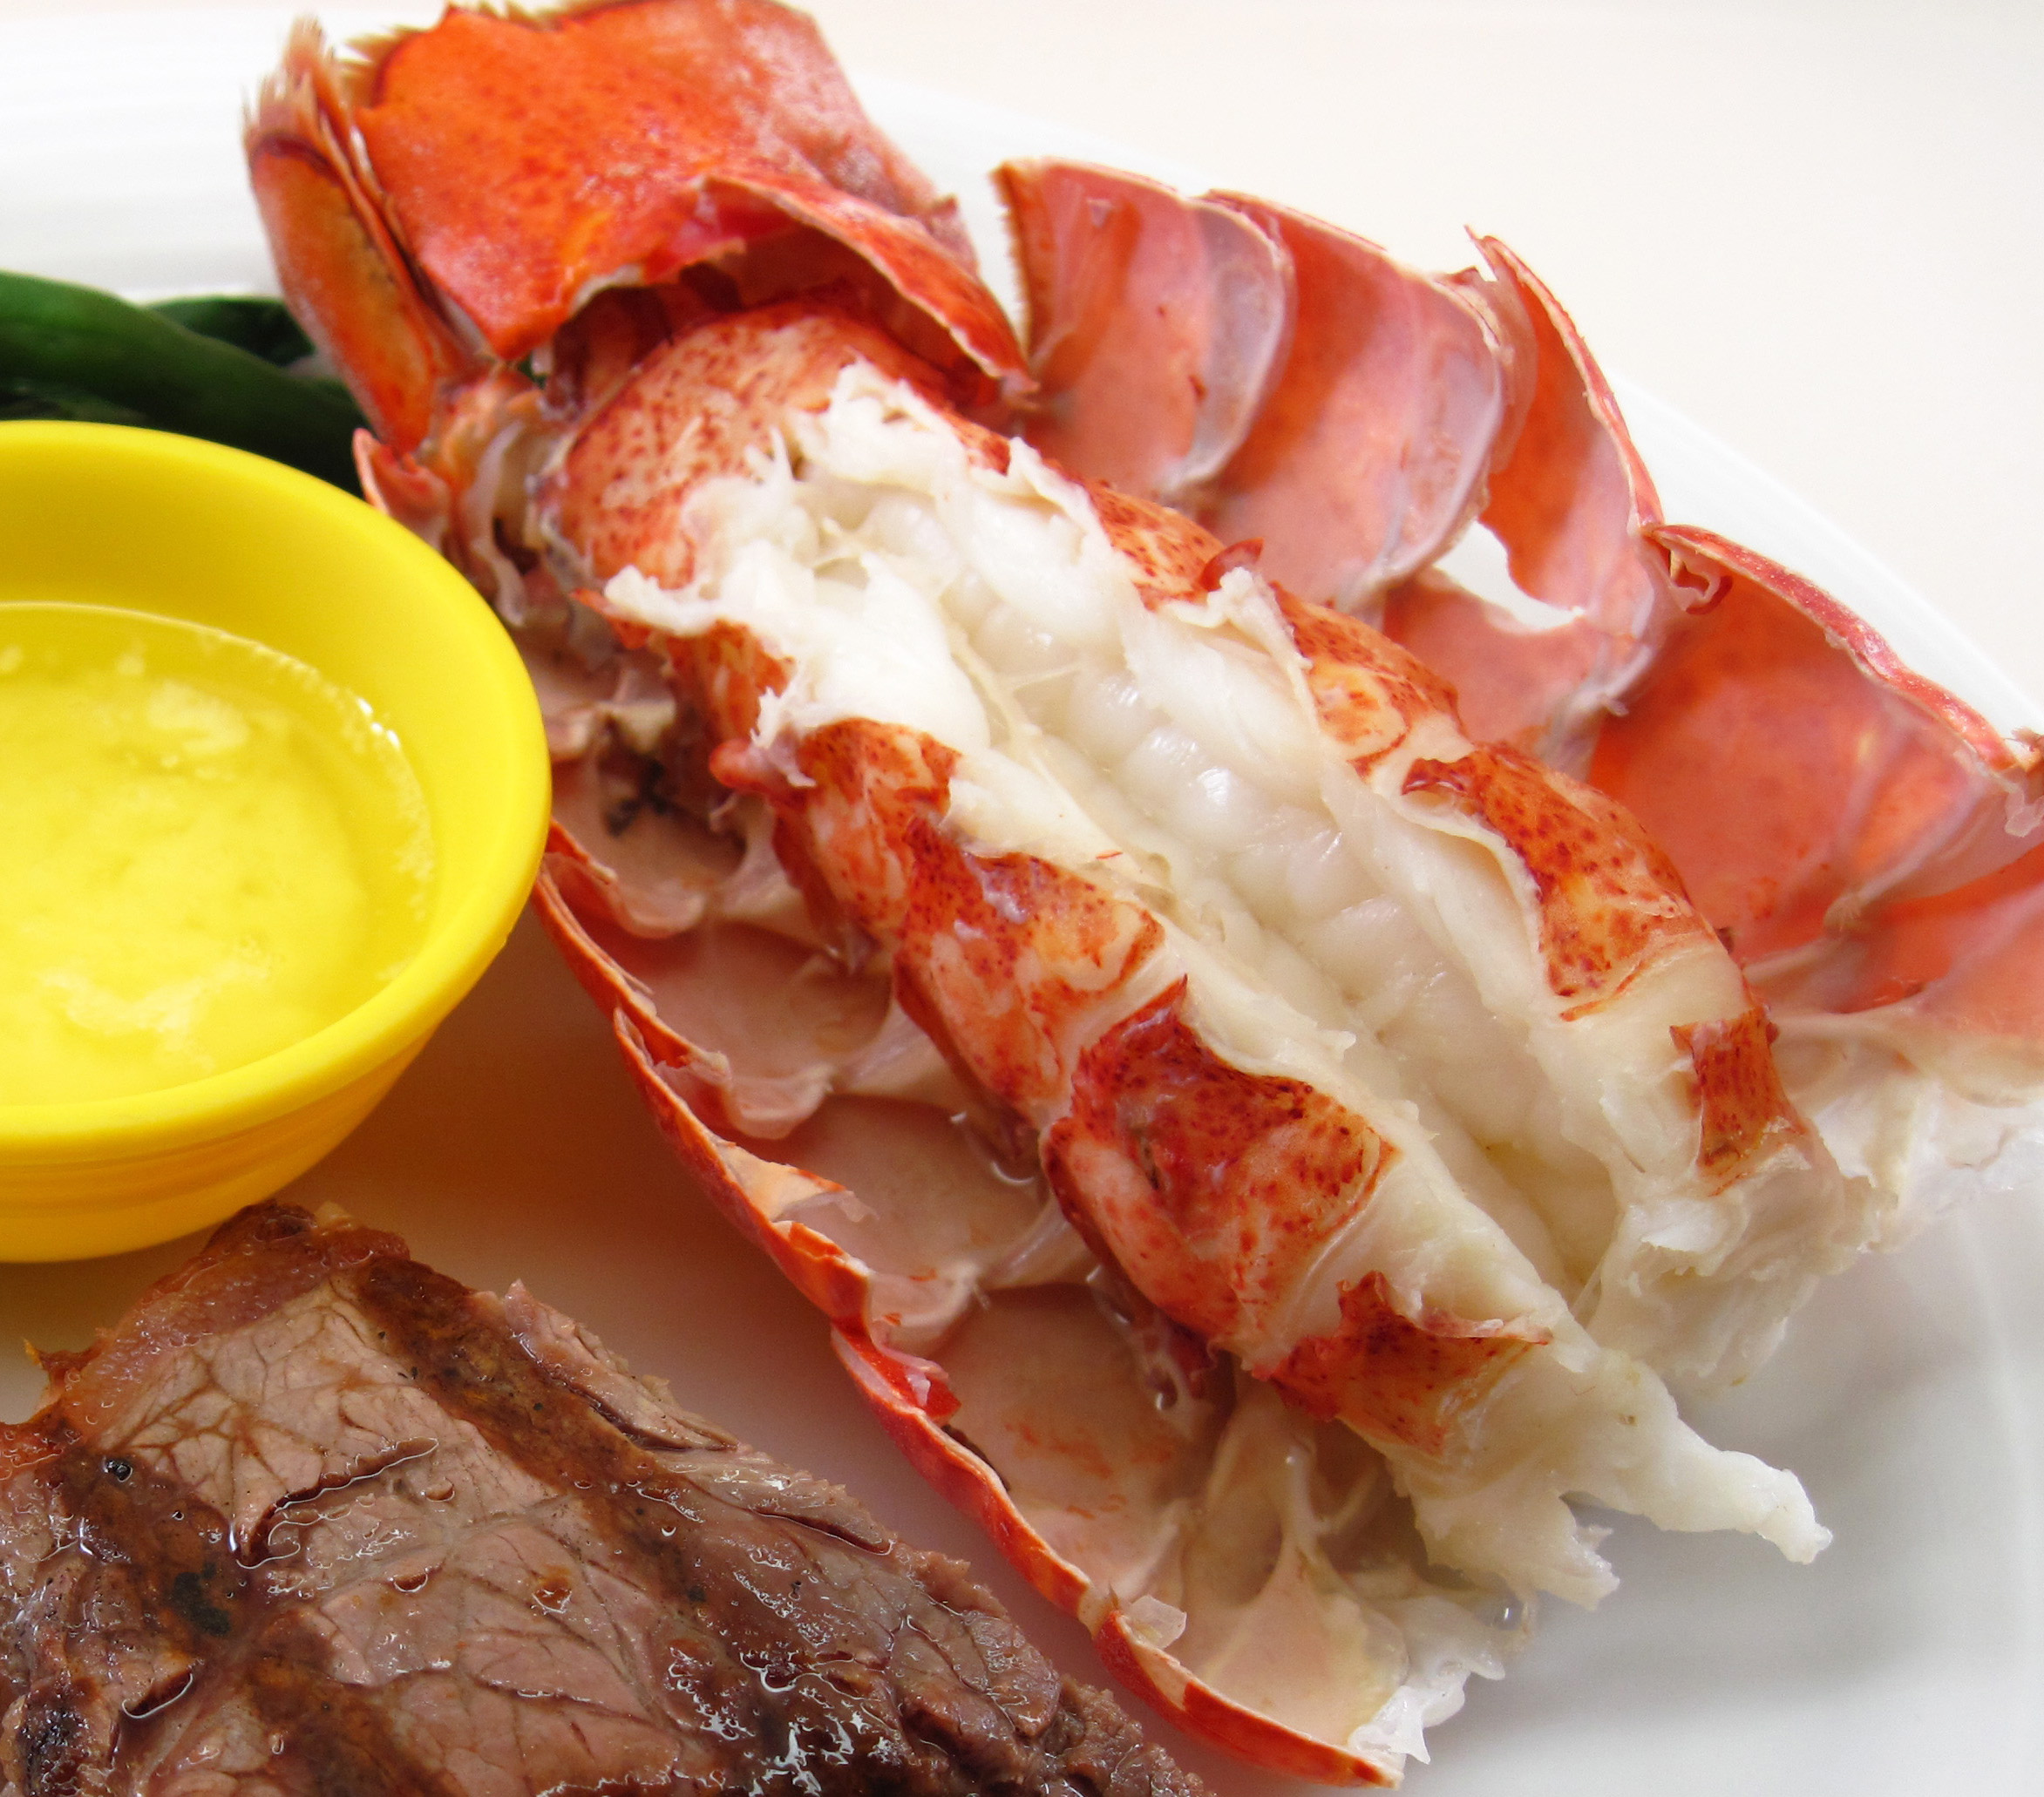 a
a
a
#3 Slow Roasted St. Louis Style Ribs – Yes, you can enjoy great ribs in the dead of winter! 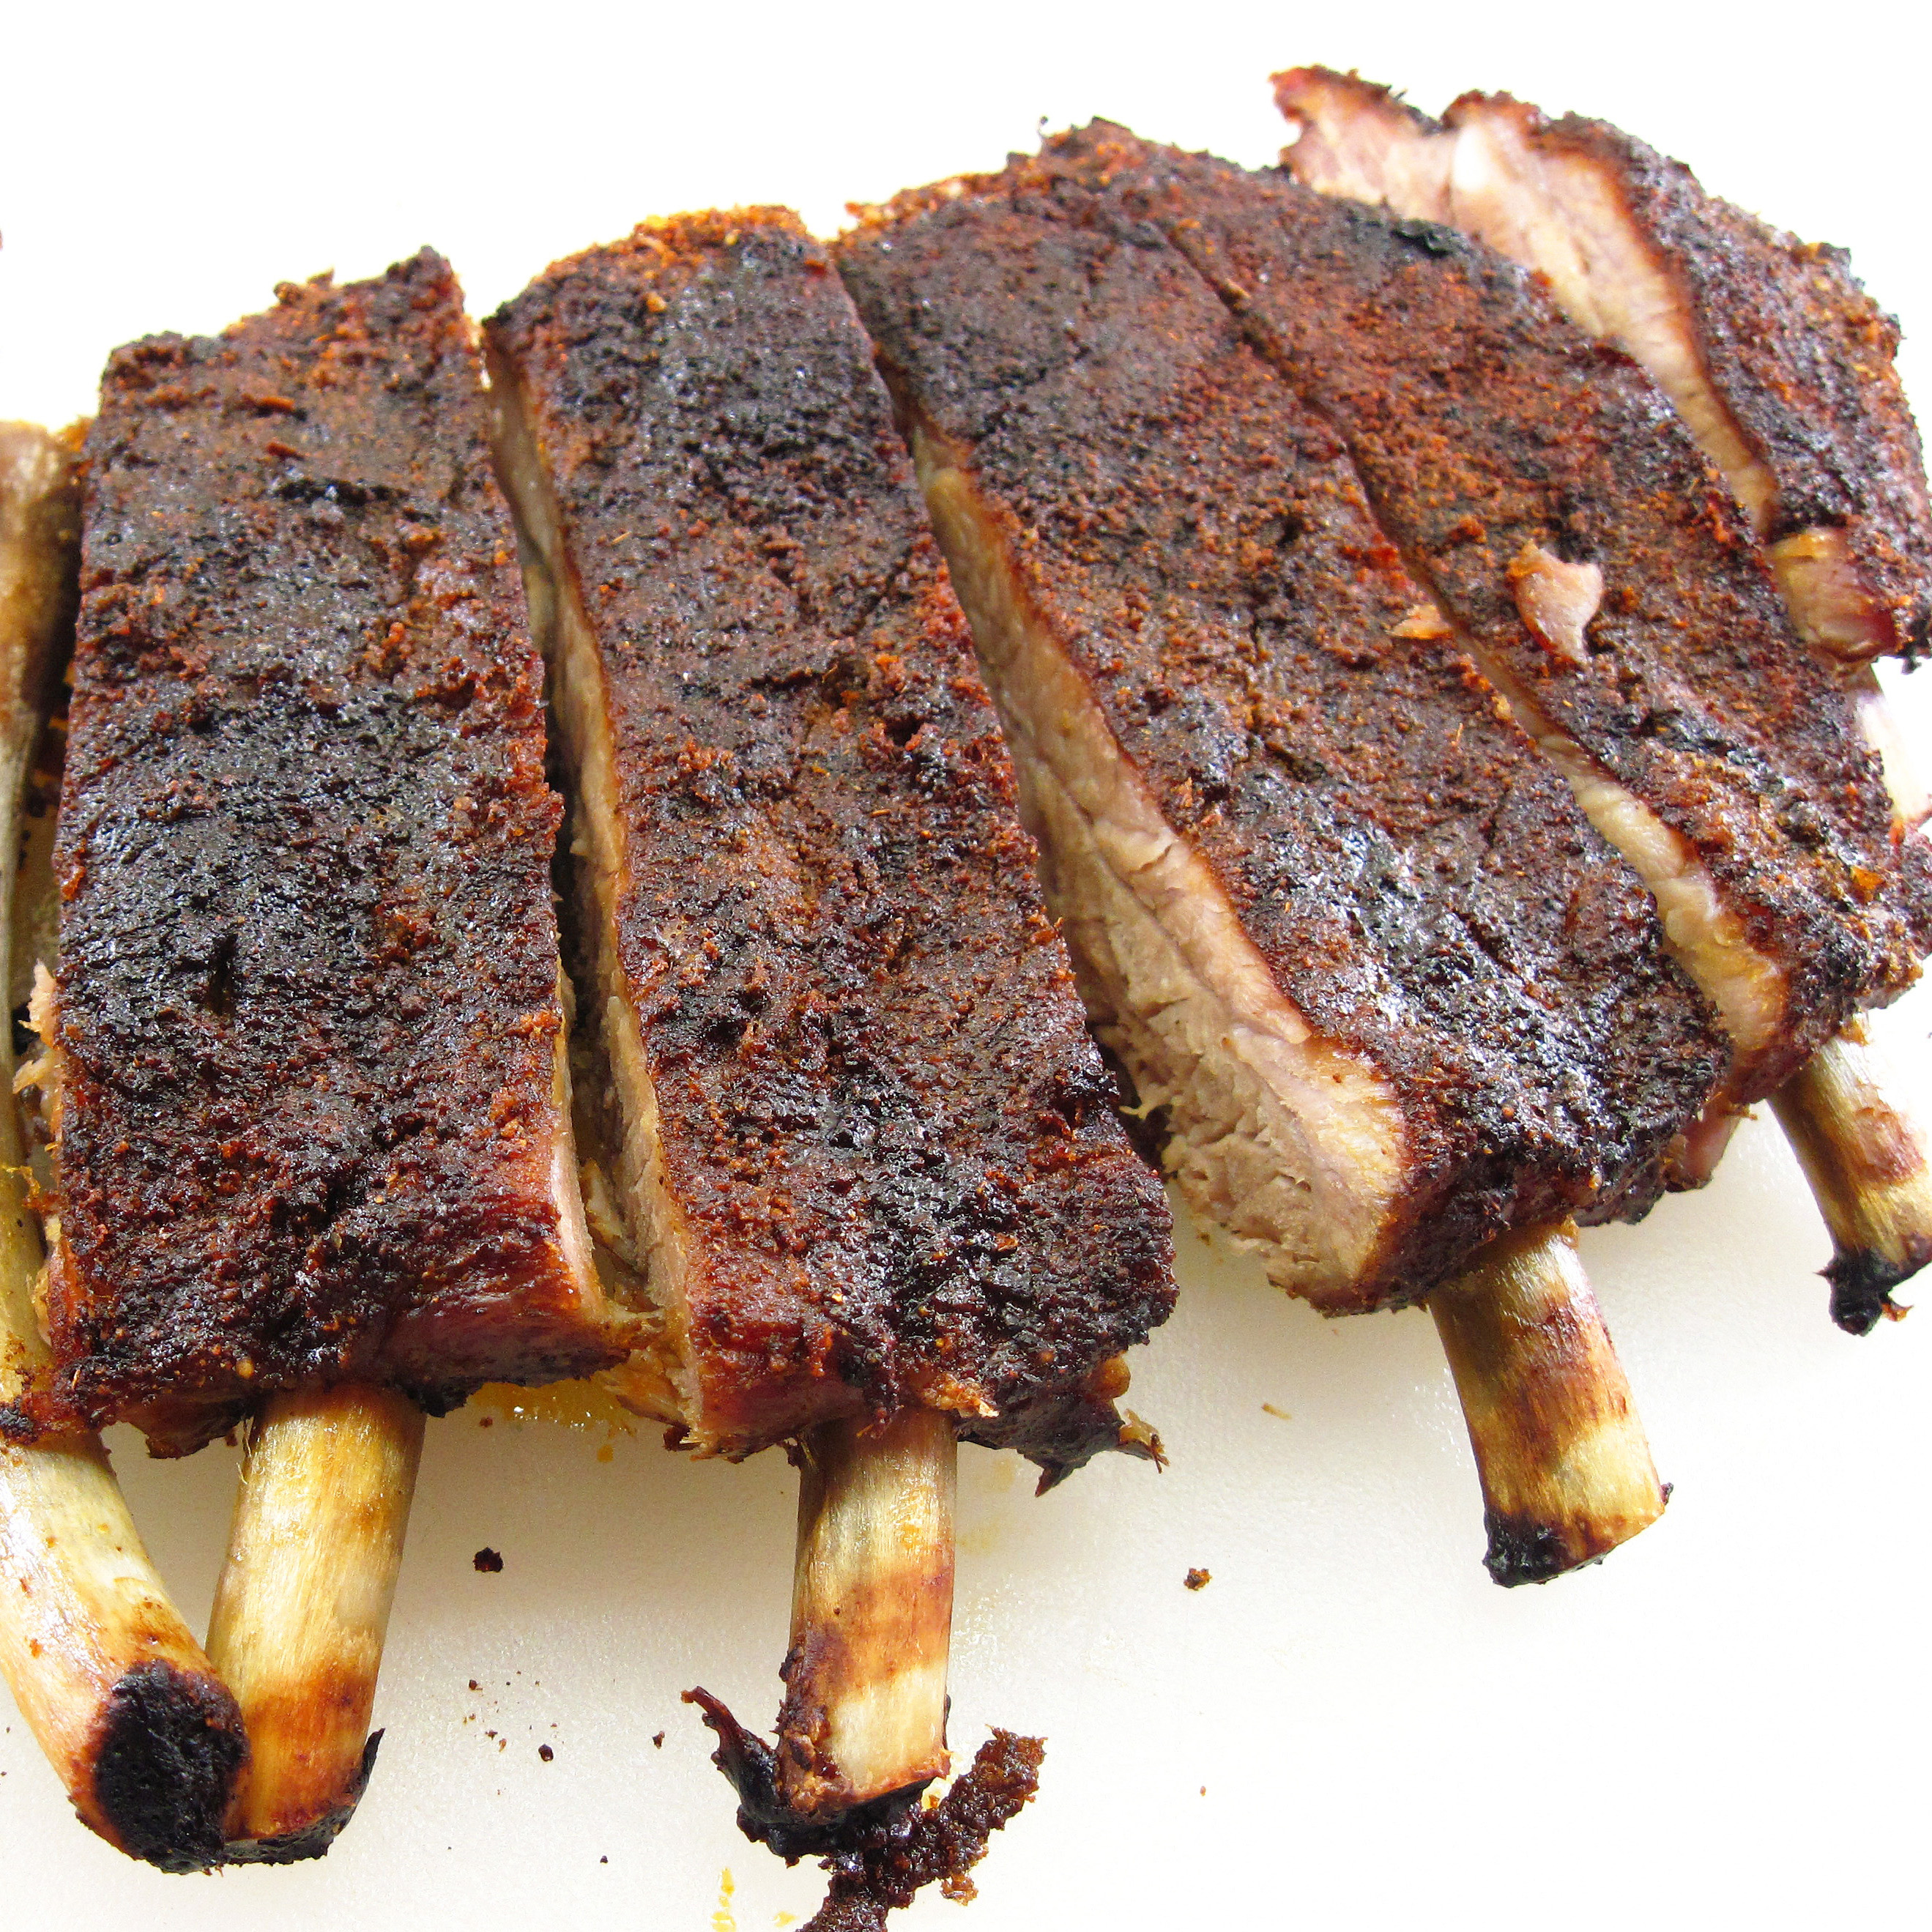 a
a
a
#2 Melt-in-your-mouth Homemade Cheese Crackers Until this year, this cheese cracker recipe was the most popular post on my blog. 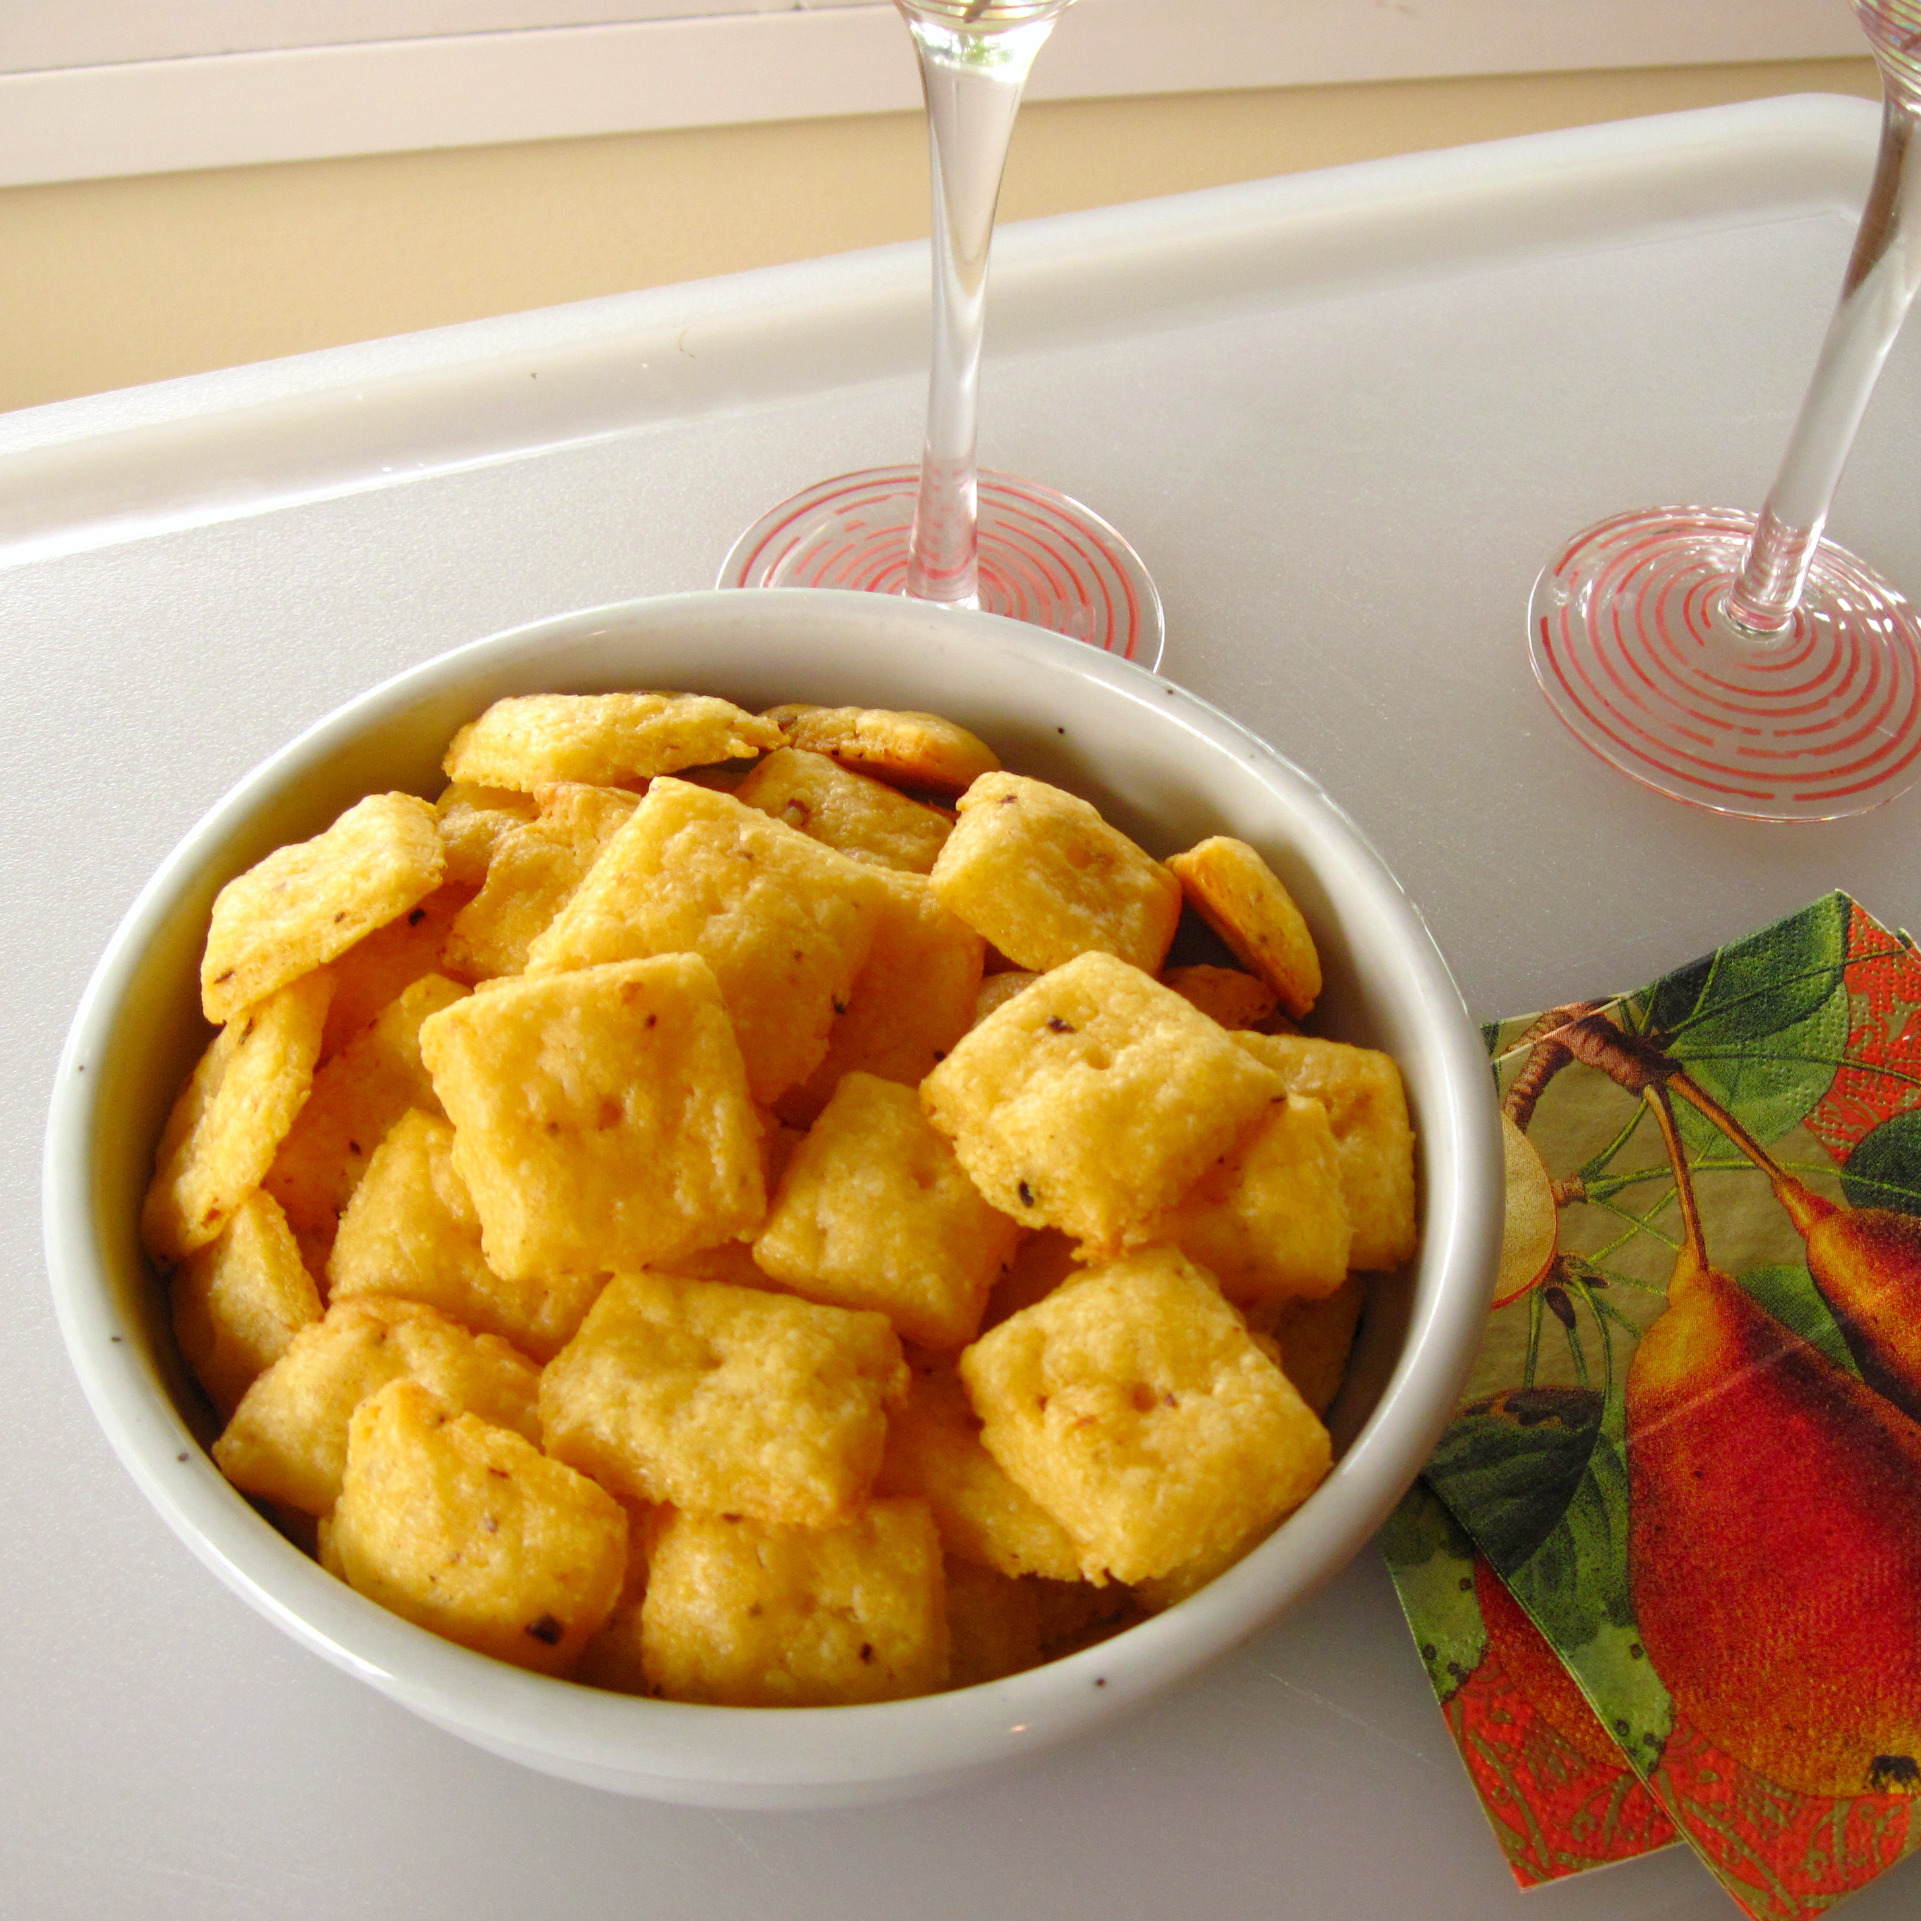 a
a
a
#1 Perfect Rib Eye Roast This recipe was the most popular this year and it also became the #1 recipe of all time, pushing the cheese crackers into second place. It’s also the recipe that has received the most comments, mostly favorable. 😉  a
a
a
I still have a few recipes from 2014 that I will be posting soon – a fabulous Italian Pork Ragu that’s perfect for entertaining, a slow cooker recipe for Polenta that is so easy, and a tasty blueberry muffin that is wheat-(and gluten-)free. And, I’m excited to explore some new cookbooks that I received. (Bob declared that this Christmas was the year of the cookbook. Not that he is complaining.) I’ve already started sticky-noting the recipes I want to try.
a

a
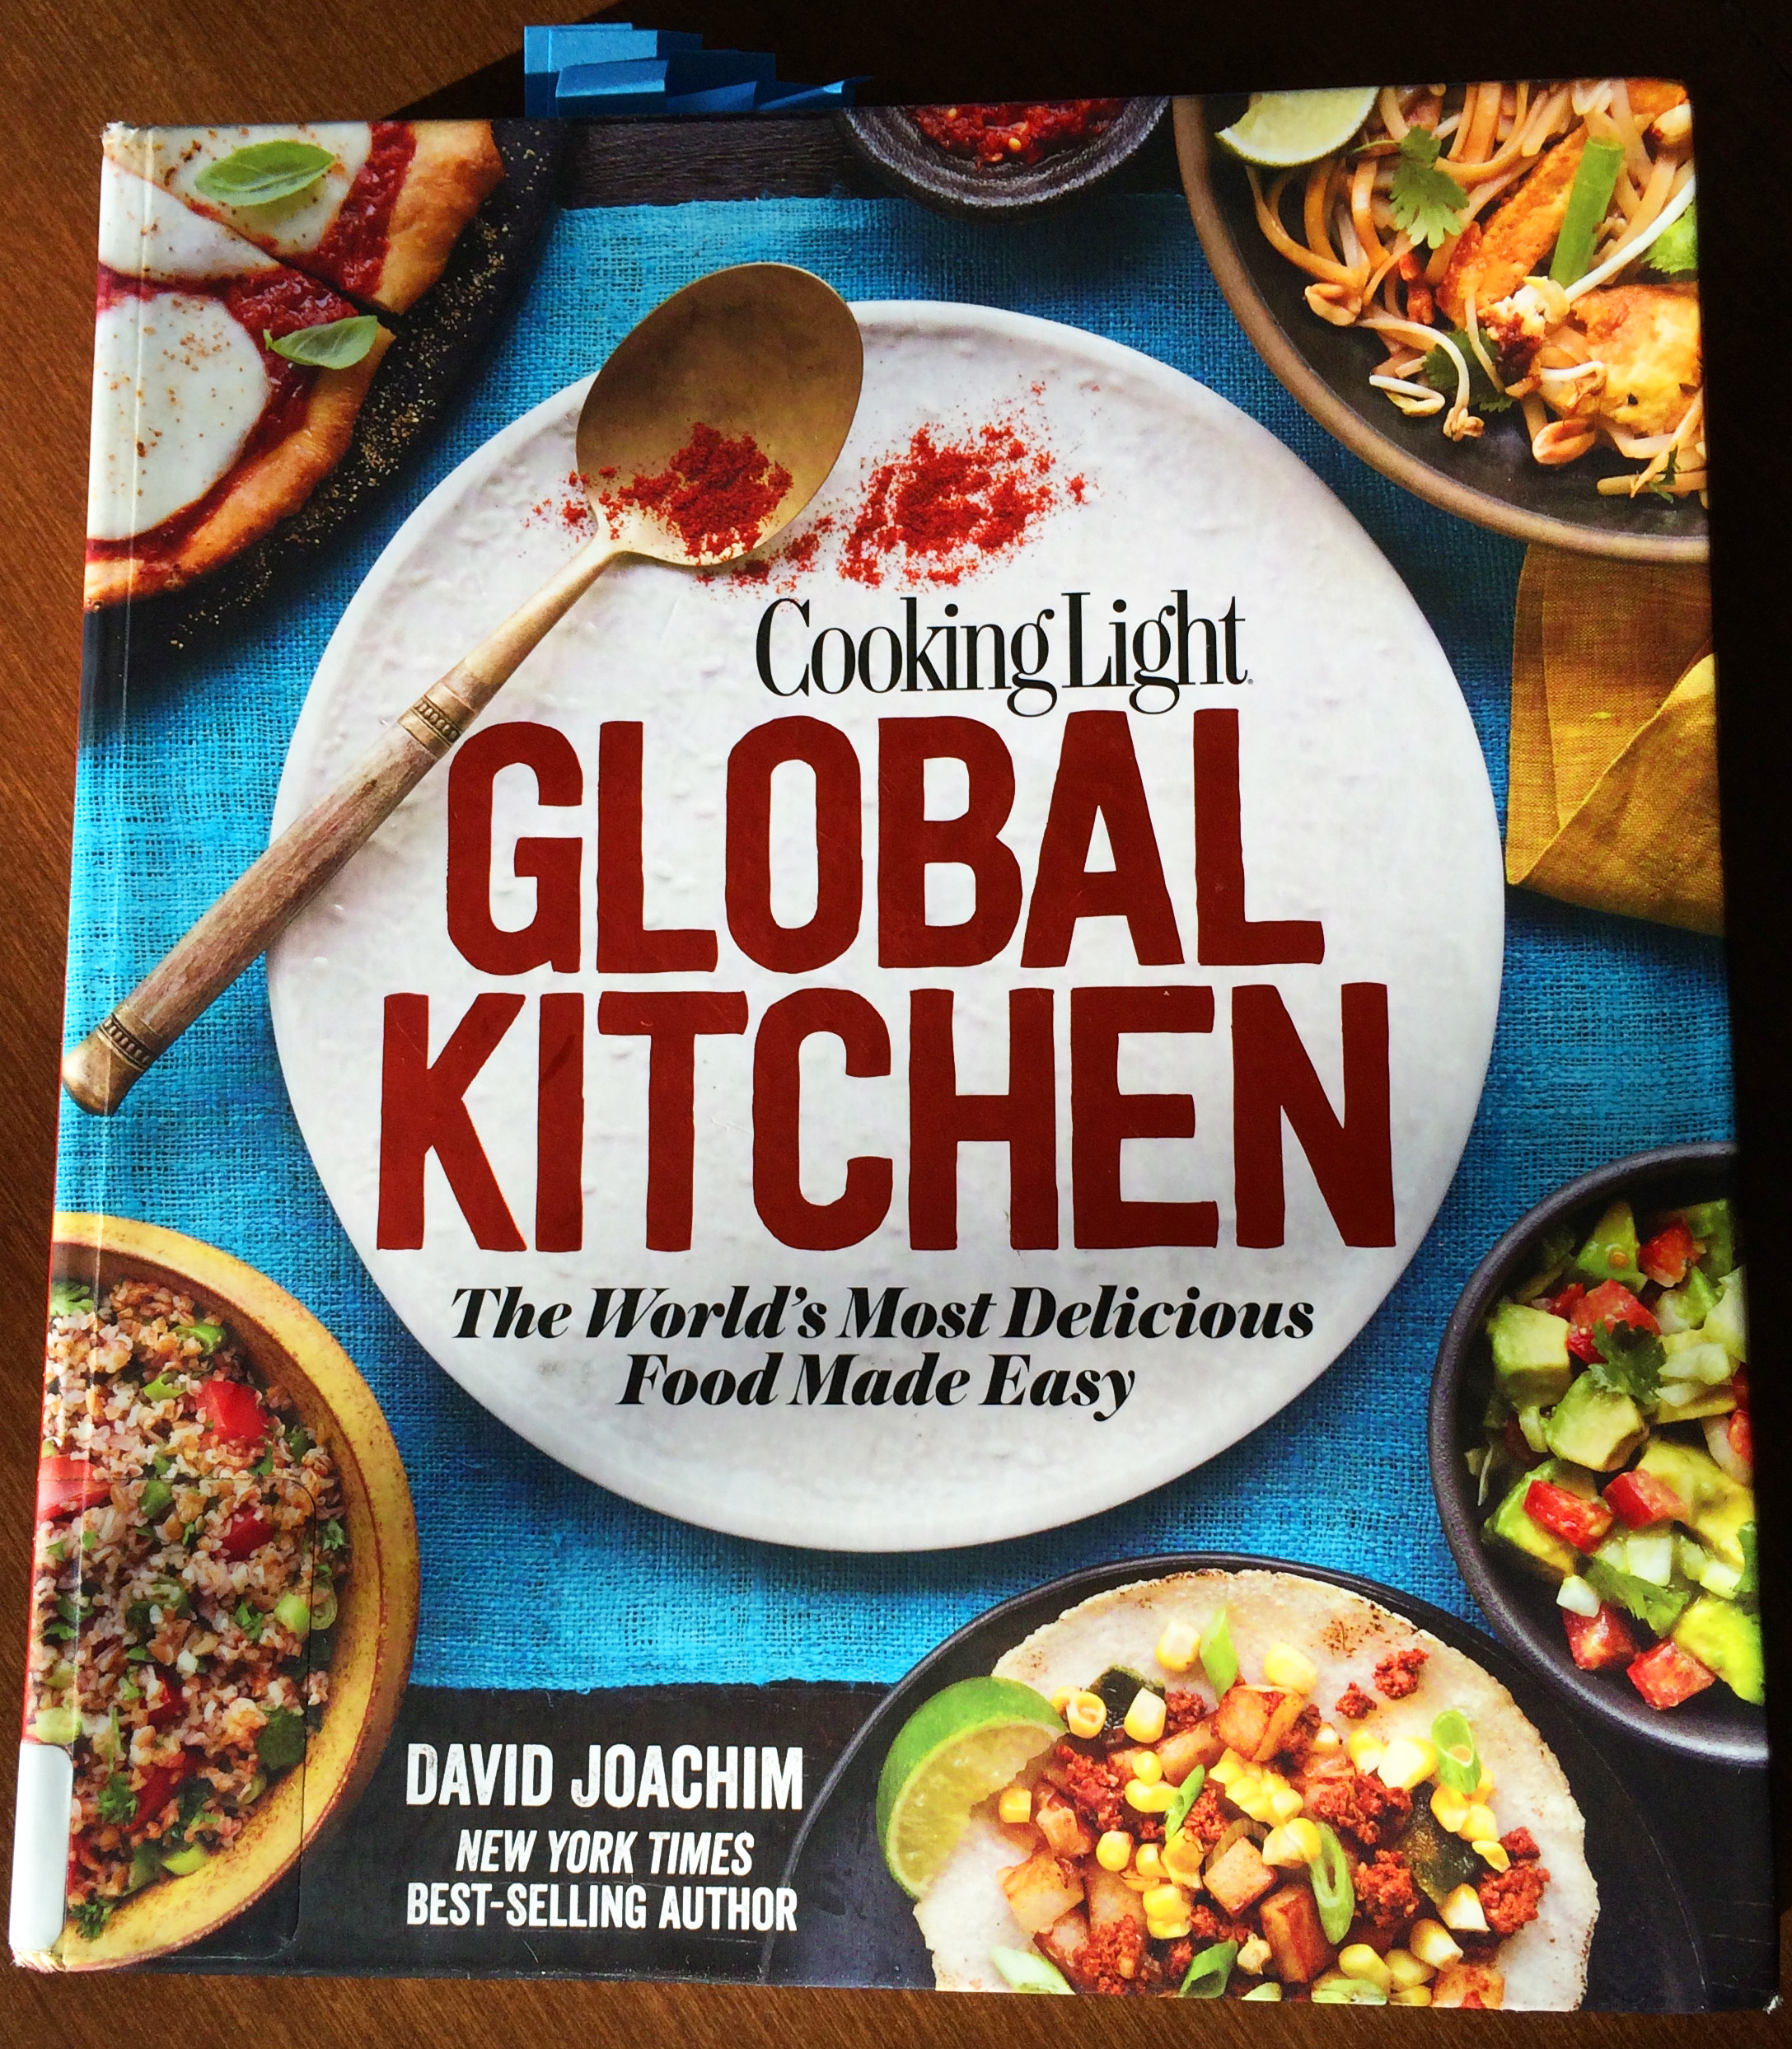
And Byron chose a wonderful cookbook for me, Sharon Kramis’ & Julie Kramis Hearne’s The Dutch Oven Cookbook. However, it’s one that I like so much that it’s a book that I already own. I’m thinking of exchanging it for Cooking Light’s Global Kitchen. I checked this one out from the library and I’m pretty sure I need to add it to my collection.
a
See all those blue sticky notes marking interesting recipes in this library book?
a
So I’ll be busy in the kitchen in 2015. Because I do like to eat well! And I’ll continue to share the good stuff on this blog. So stay tuned. Happy New Year! Thank you so much for taking the time to visit In the kitchen with Kath. I appreciate each and every one of you. I hope you’ll be sharing many happy meals with family and friends in 2015!
Share this:

Almond Flour Pie Crust
By Kath Dedon
I have made Elana Amsterdam’s Paleo Pie Crust two or three times since Thanksgiving. It makes a great grain-free option for pies. Everyone seemed to enjoy it and it’s very easy to make. I thought it was about time I shared it.
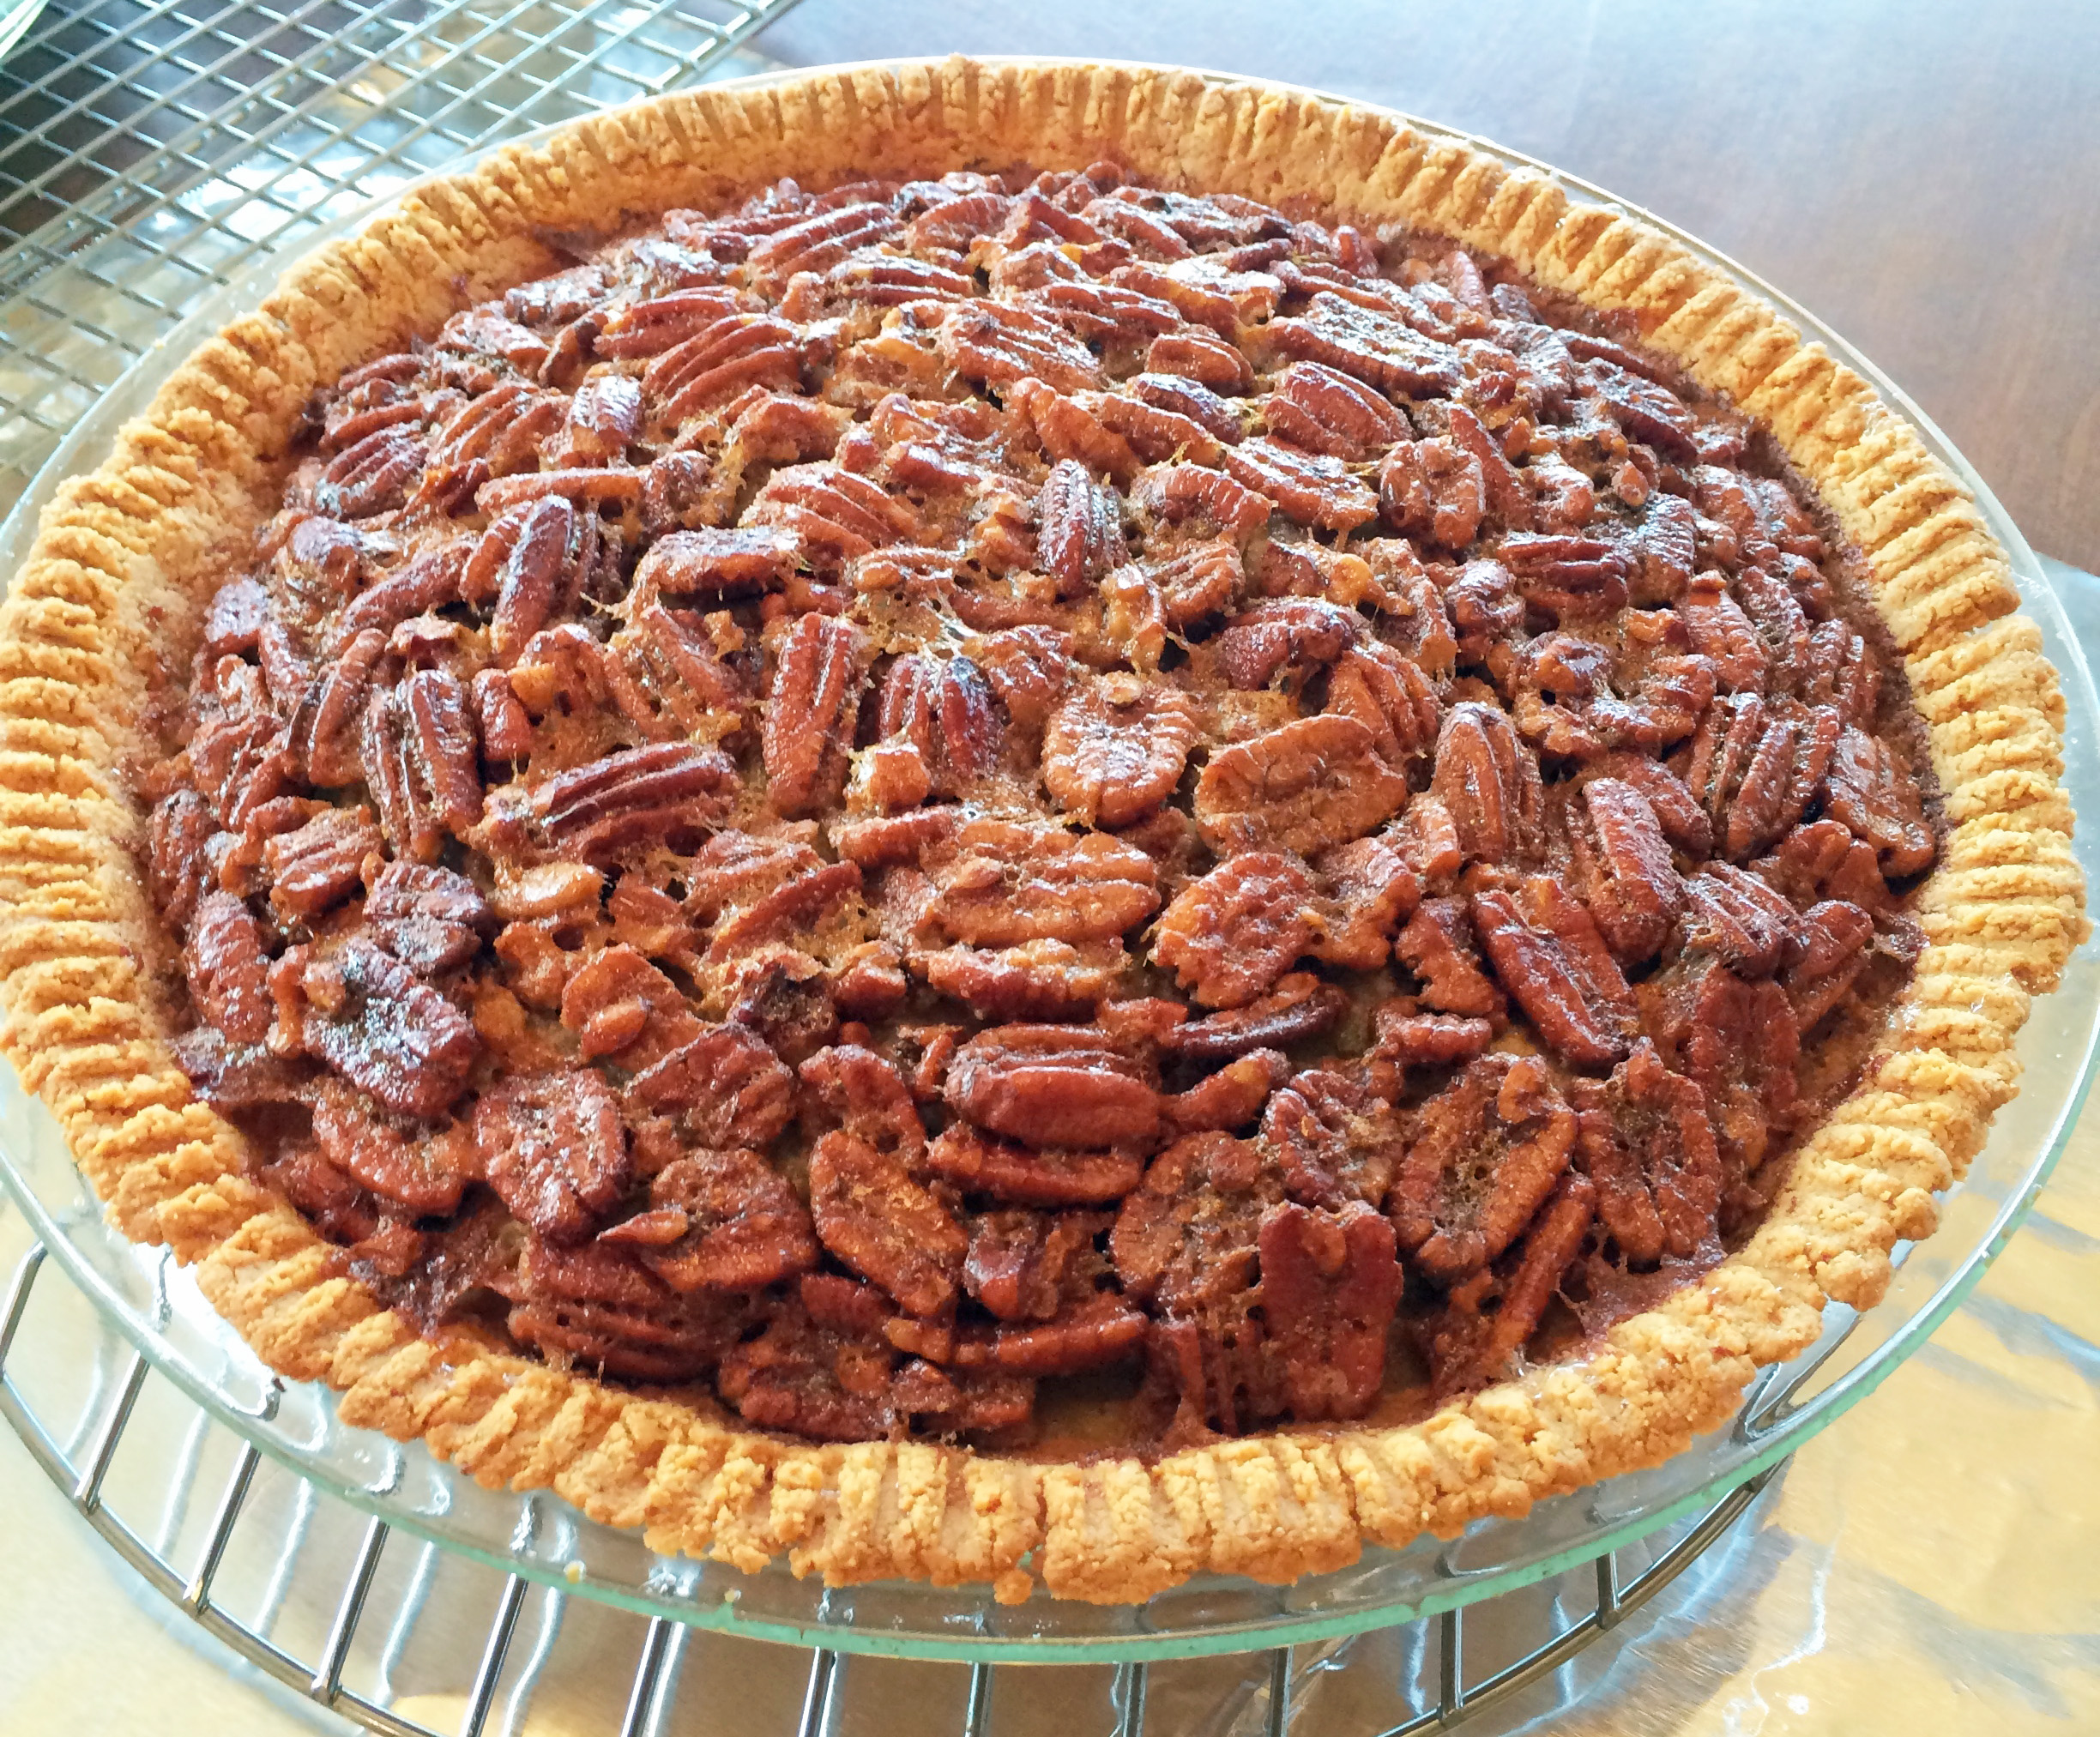
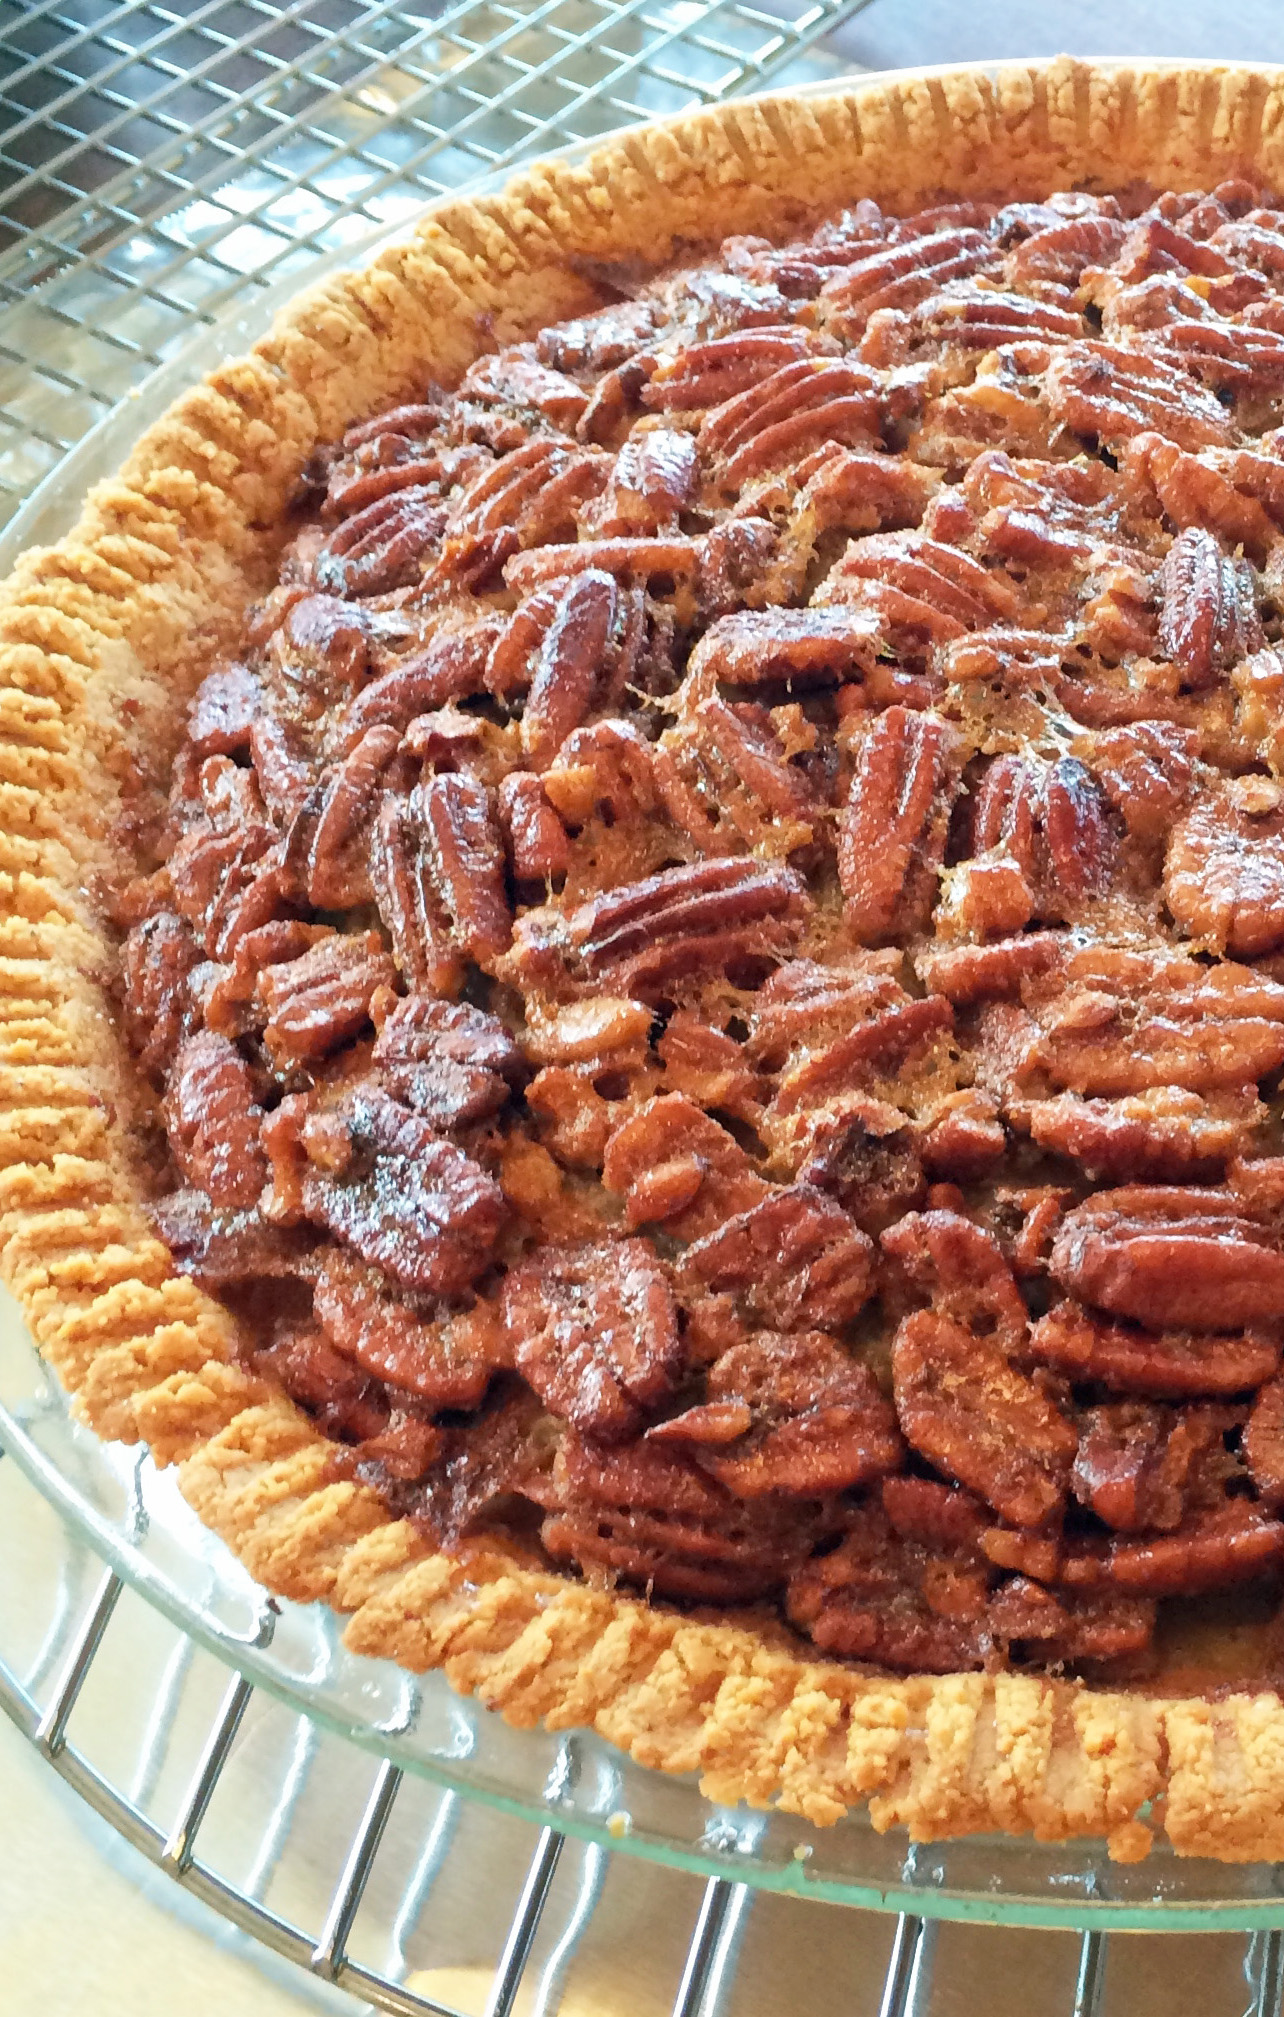
I used this Almond Flour Pie Crust to make pecan pie, but it could be used with whatever filling you like. Elana uses only 2 tablespoons of coconut oil, but I found that 3 tablespoons worked better for me. It was a little crumbly with the smaller amount.
Honeyville Blanched Almond Flour is the flour I used. I can find it at my local Costco. It is a much finer grind than other almond flours or meals. You could probably use other brands, but I haven’t tried any of them.
If you, or someone you love, eats wheat-free, gluten-free, grain-free, or paleo, give this Almond Flour Pie Crust a try. You’ll be their super hero!
Pecan pie in an Almond Pie Crust
 a
a
Almond Flour Pie Crust
(Adapted from Elana Amsterdam’s recipe on elanaspantry.com)
a
Be sure to use the baking sheet in the oven. I found that each time I made the crust, there was oil on the outside of the pie plate after I baked it. I’m not quite sure how to avoid that; I was glad to have used the baking sheet.
2 cups blanched almond flour
¼ teaspoon sea salt
3 tablespoons coconut oil
1 egg

a
- Place a large rimmed baking sheet on a rack in the middle of the oven and preheat to 350˚.
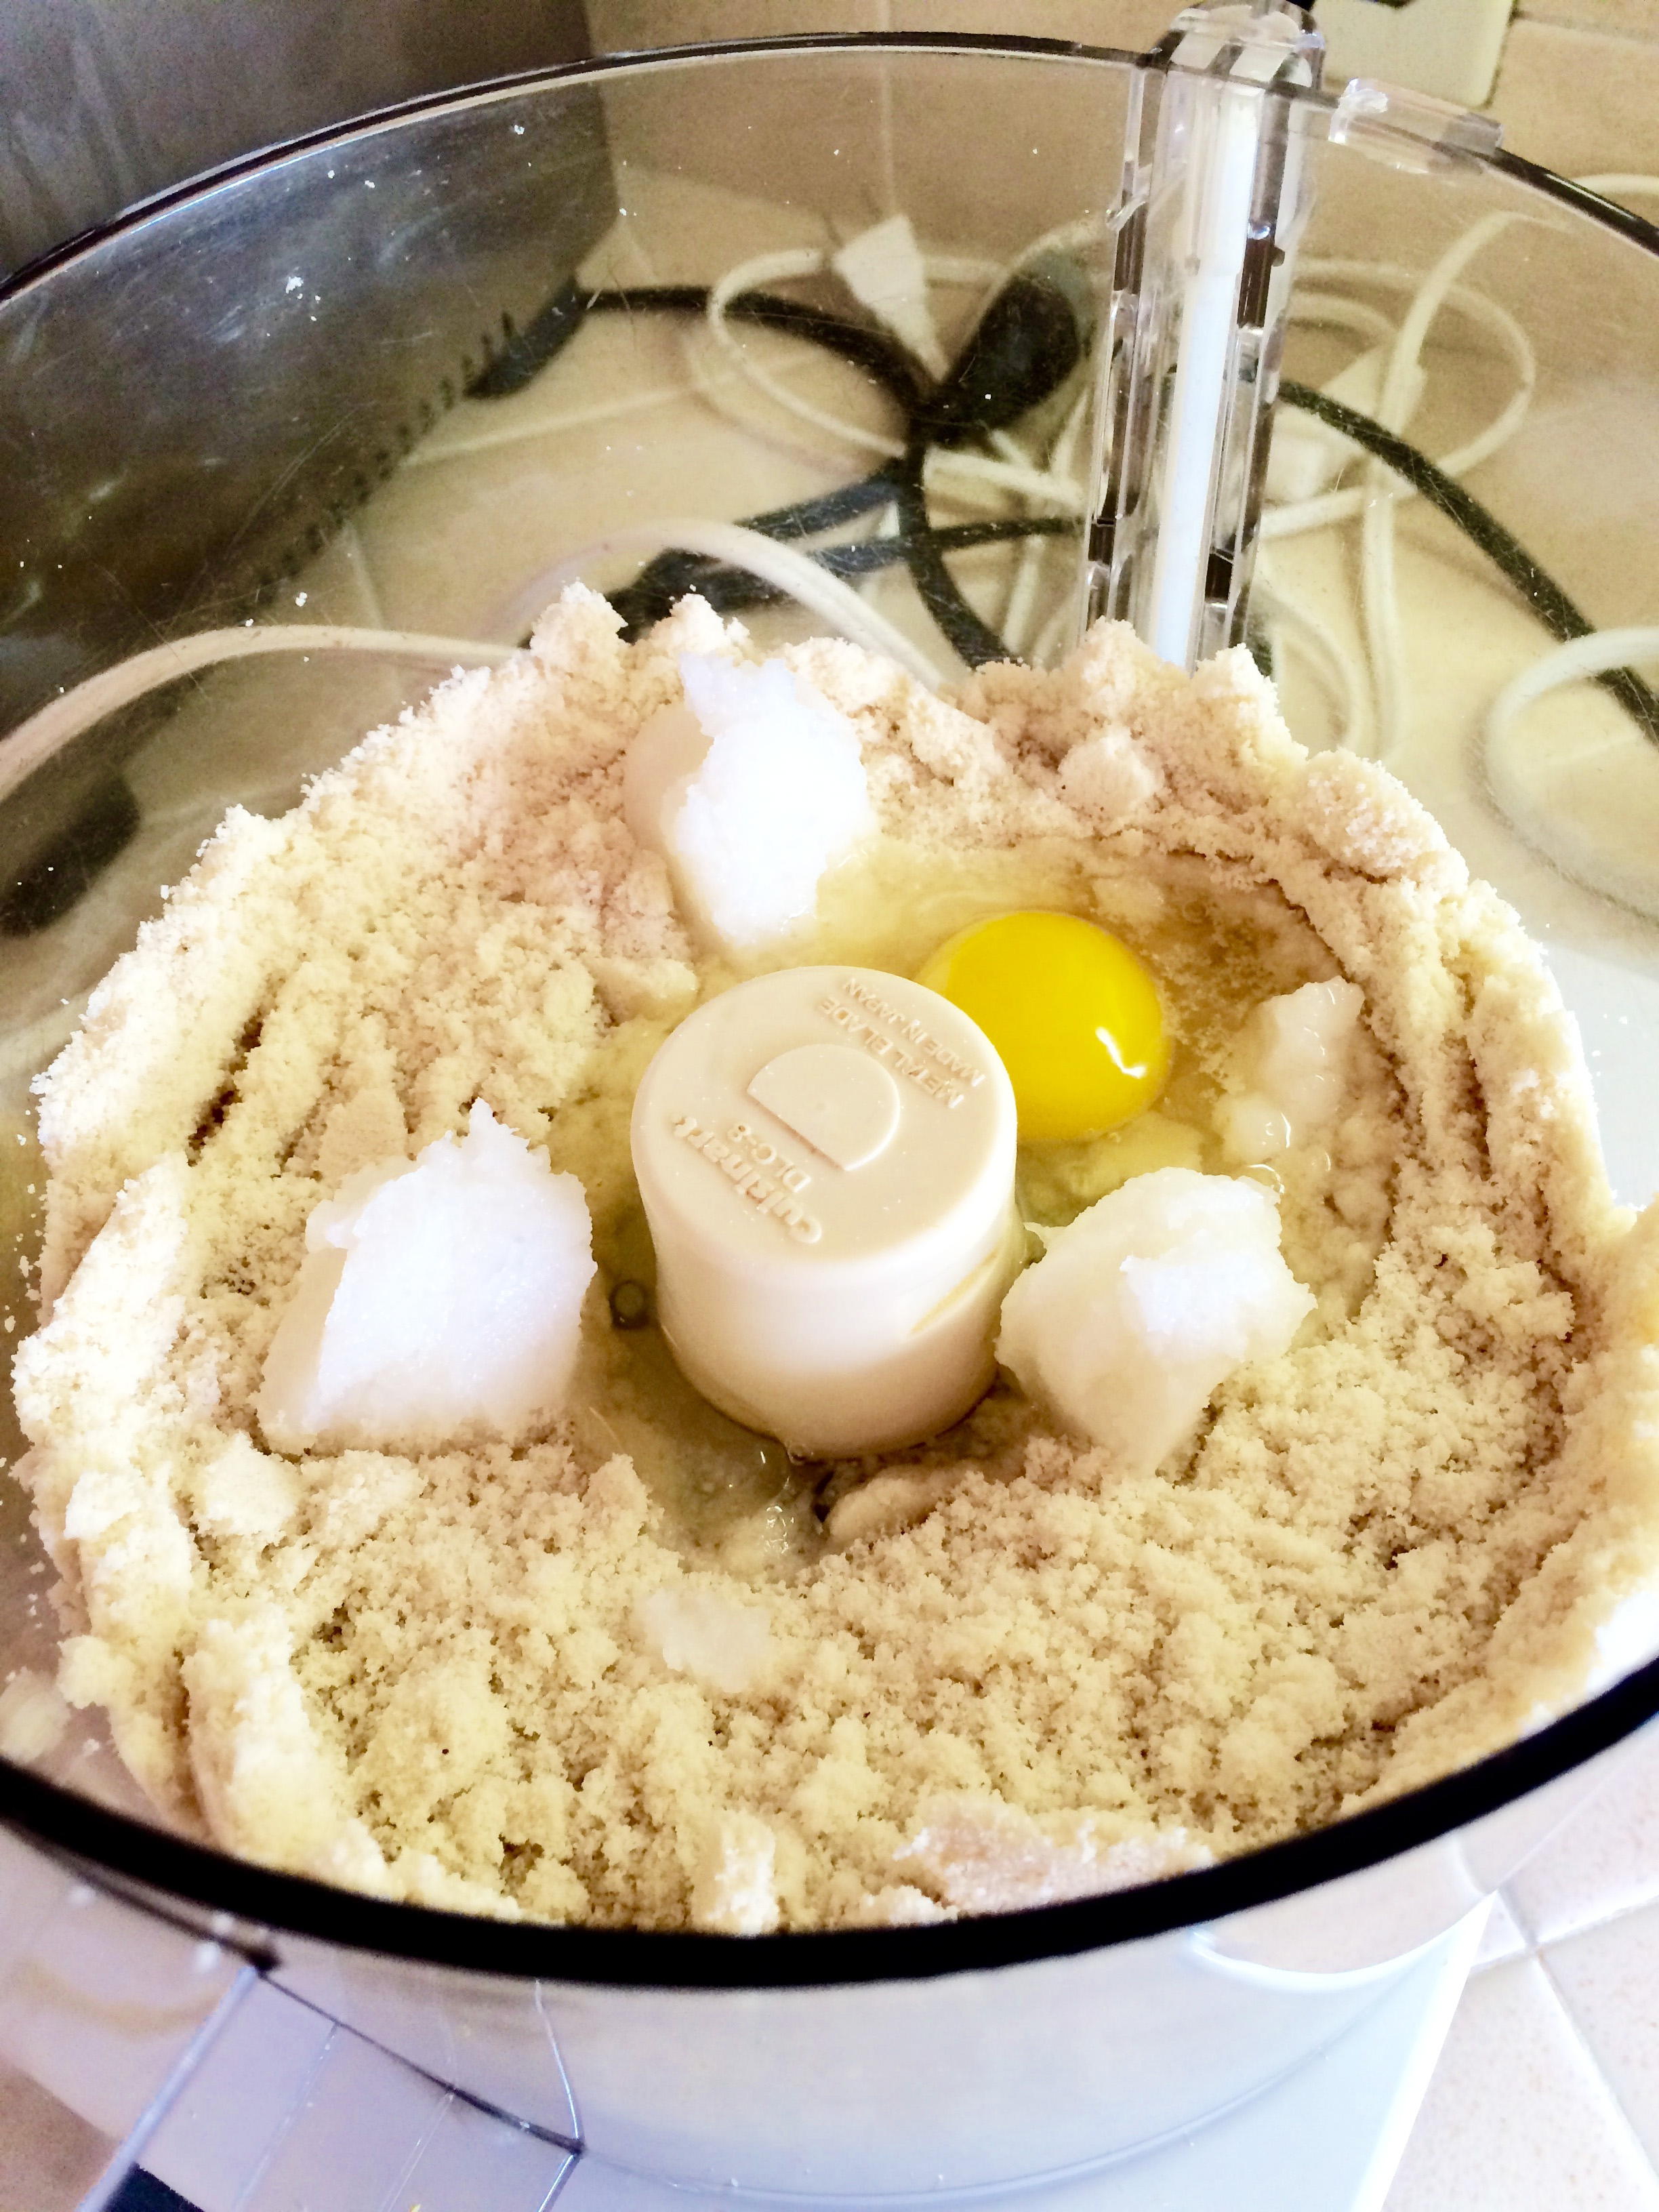
- Put the flour and salt in a food processor and pulse.
- Add the coconut oil and egg and pulse until it comes together.
- Press into a 9-inch pie plate.

- Fill with your preferred pie filling and bake on the preheated baking sheet for 40 – 50 minutes. (Exact time will depend on your filling. 40 minutes was plenty for my pecan pie.)
- Or, for a pre-baked crust, bake it without filling on the baking sheet for 8 – 12 minutes.
Share this:

Curry Dip with Crudités
By Kath Dedon
This Curry Dip with Crudités is a flash from the past for me. Because my dad worked for Northwest Airlines, we luckily had the opportunity to fly often and we were often upgraded to first class. This was back in the day when first class food was pretty delicious.
Northwest served this Curry Dip with vegetables to first class passengers in the late ‘60s and/or early ‘70s. It was quite popular. In fact, I think my mom got the recipe from either the Minneapolis Star or the Minneapolis Tribune, the local newspapers at the time. It had been published at the request of a reader.
The Curry Dip became one of mom’s “go-to” recipes when entertaining. The whole “crudités with dip” thing was quite popular at the time, and this dip was better than average.
Flash forward to the early ‘80s when Bob and I were hosting a dinner party. I wanted an easy appetizer to serve so I called mom to get the recipe. I still have the list of ingredients that I wrote down on Bob’s sailing paper.
It had been years since I last made it, but it turns out that Curry Dip with Crudités is just as good as I remember it. It’s great for the upcoming holiday season because it can be made ahead of time and covered and refrigerated until needed. In fact, it probably is best to make it ahead of time so the flavors “marry”.
I kept it simple with carrot sticks, celery sticks, and sugar snap peas, but you could use any raw vegetables that you like. It’s a great way to get your family and friends to eat a serving of vegetables before they even sit down at the table!
a
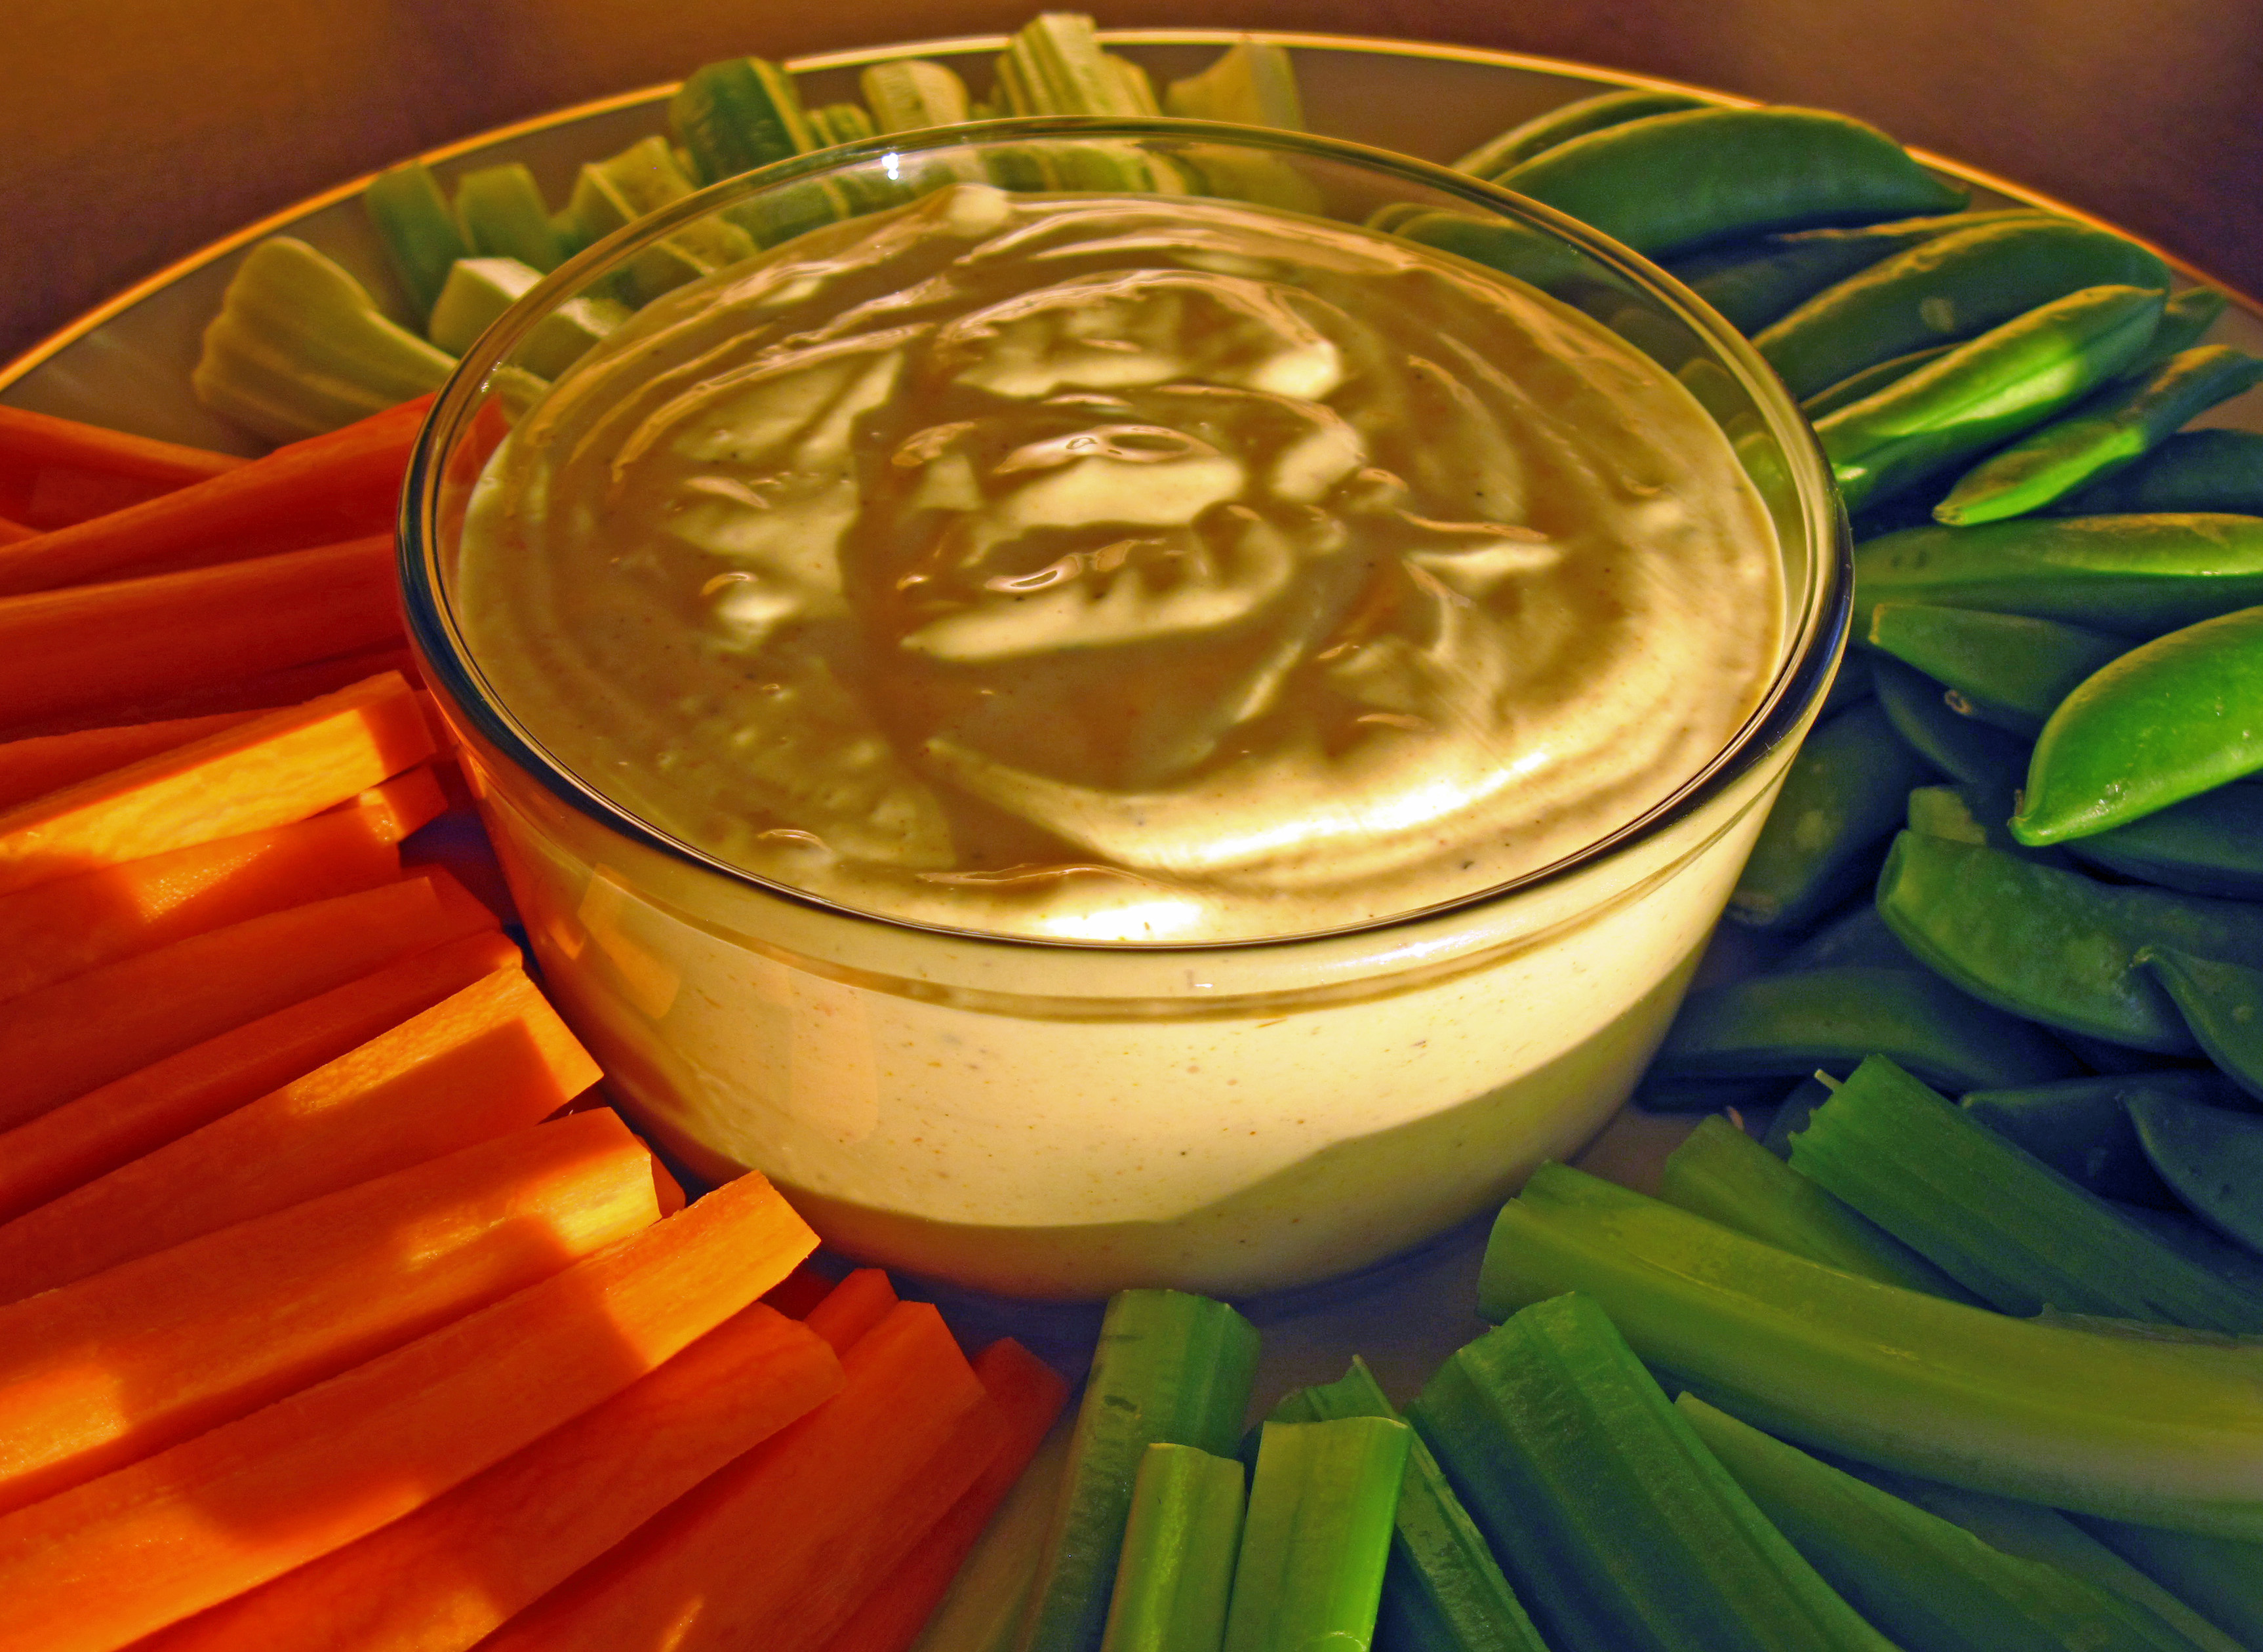
a
Curry Dip with Crudités
(From a recipe that Northwest Airlines served in first class)
I was tempted to use more curry powder, but I stuck with the recipe. I did use a “hot” curry powder, however. The curry flavor is subtle and works well with the other ingredients.
Makes enough dip to easily serve 6 – 8
1 cup mayonnaise
2 teaspoons Heinz chili sauce
½ teaspoon curry powder
1/8 teaspoon dried thyme
½ teaspoon salt
Dash pepper
2 tablespoons tarragon vinegar
1. Whisk all of the ingredients together. (How easy is that?) Cover and refrigerate until serving time.
2. Serve with vegetables of your choice.
a
The list of ingredients I wrote down when I called my mom

a
a

Share this:

Maple (or honey) Sweetened Pumpkin Bread
By Kath Dedon
One of the most popular pins on my Pinterest boards is the one for my Pumpkin Bread, and for good reason. It’s delicious and it is so easy to make.
I have wondered if I could successfully make it using honey or pure maple syrup instead of the 1½ cups of sugar in the original recipe. Yesterday I gave it a try.
I used ¾ cup of grade B maple syrup instead of the sugar. I also eliminated the 1/3 cup of water since I was using a liquid sweetener.
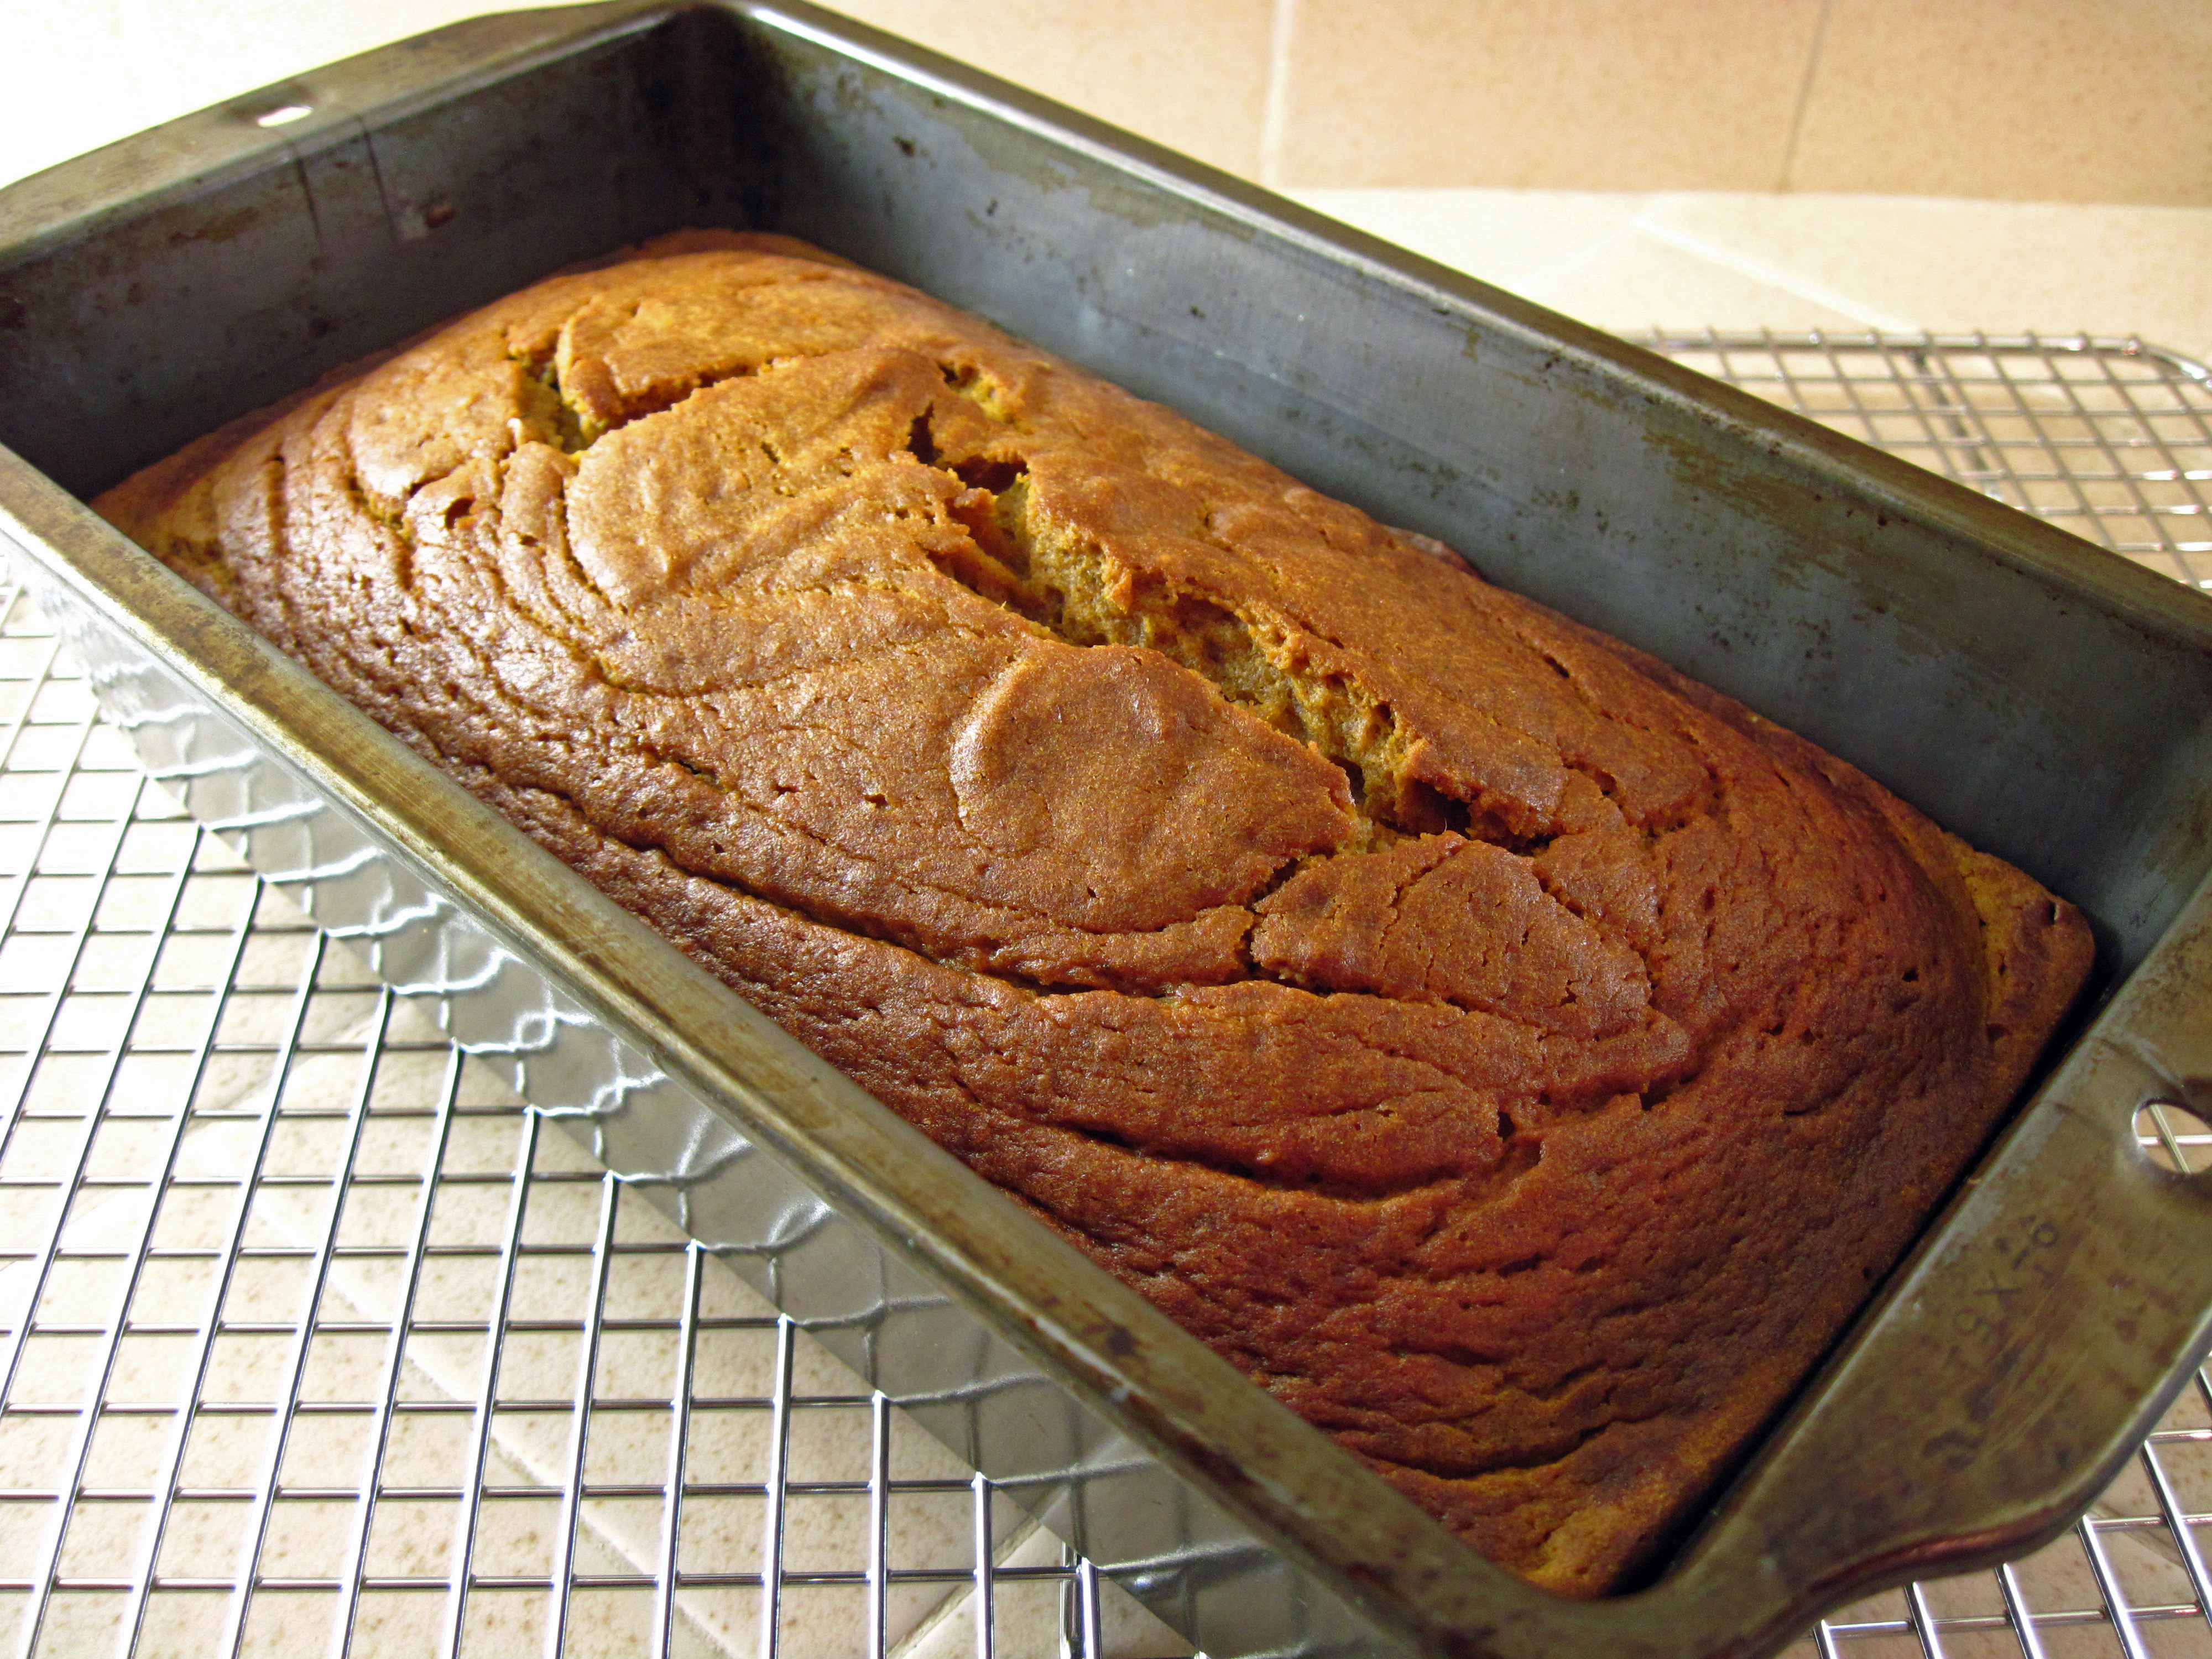
I was quite pleased with the way this Maple Sweetened Pumpkin Bread turned out! It did not rise as high as the original one did, but the texture and the flavor are excellent.
I think next time I’ll try honey instead of maple syrup. I liked the subtle sweetness of this bread, but Bob thought it wasn’t quite sweet enough. I think using honey, which is sweeter than maple syrup, will make it perfect.
I’ll definitely try it again! My favorite way to enjoy pumpkin bread is to toast it and spread butter on it (preferably Kerrygold salted butter!). It’s easy to toast it in a toaster oven. If you have a regular toaster, be sure to cut a thick enough slice so it won’t fall apart.
a
 a
a
 a
a
Maple (or honey) Sweetened Pumpkin Bread
(Adapted from a classroom recipe; original source unknown)
Makes one loaf
1 2/3 cups (200 g of King Arthur’s All Purpose) flour
1 teaspoon baking soda
¾ teaspoon salt
½ teaspoon cinnamon
½ teaspoon nutmeg
½ cup oil
2 eggs
1 cup canned pumpkin
¾ cup pure maple syrup (or honey)
1. Preheat the oven to 350˚.
2. Grease an 9 x 5 – inch bread pan.
3. Mix flour, soda, salt, cinnamon and nutmeg in a bowl.
4. Make a well in this mixture. Pour in the oil, eggs, pumpkin, and the maple syrup or honey. Mix well with a sturdy spoon.
5. Pour into the greased baking pan. Bake for 1 hour or until done.
6. Cool in the pan for about 15 minutes, and then remove the bread from the pan and continue to cool on a wire rack.
a

a
Share this:

Braised Beef Brisket
By Kath Dedon
Braised Beef Brisket is perfect for a rainy Sunday afternoon. Once you get the brisket in the oven, you can settle down with a good book while it braises for three hours. You do have to get up about every half hour to turn the brisket, but how hard is that?
The recipe in Mark Bittman’s How to Cook Everything calls for a whole 5-pound brisket, but I chose a smaller one which was about 2¼ pounds. I didn’t reduce the quantity of the other ingredients because I wanted plenty of sauce. That was a great decision!
Mark says browning the brisket is optional, but I chose to do it because it’s almost always a good first step and it only adds about 10 minutes to the prep time.
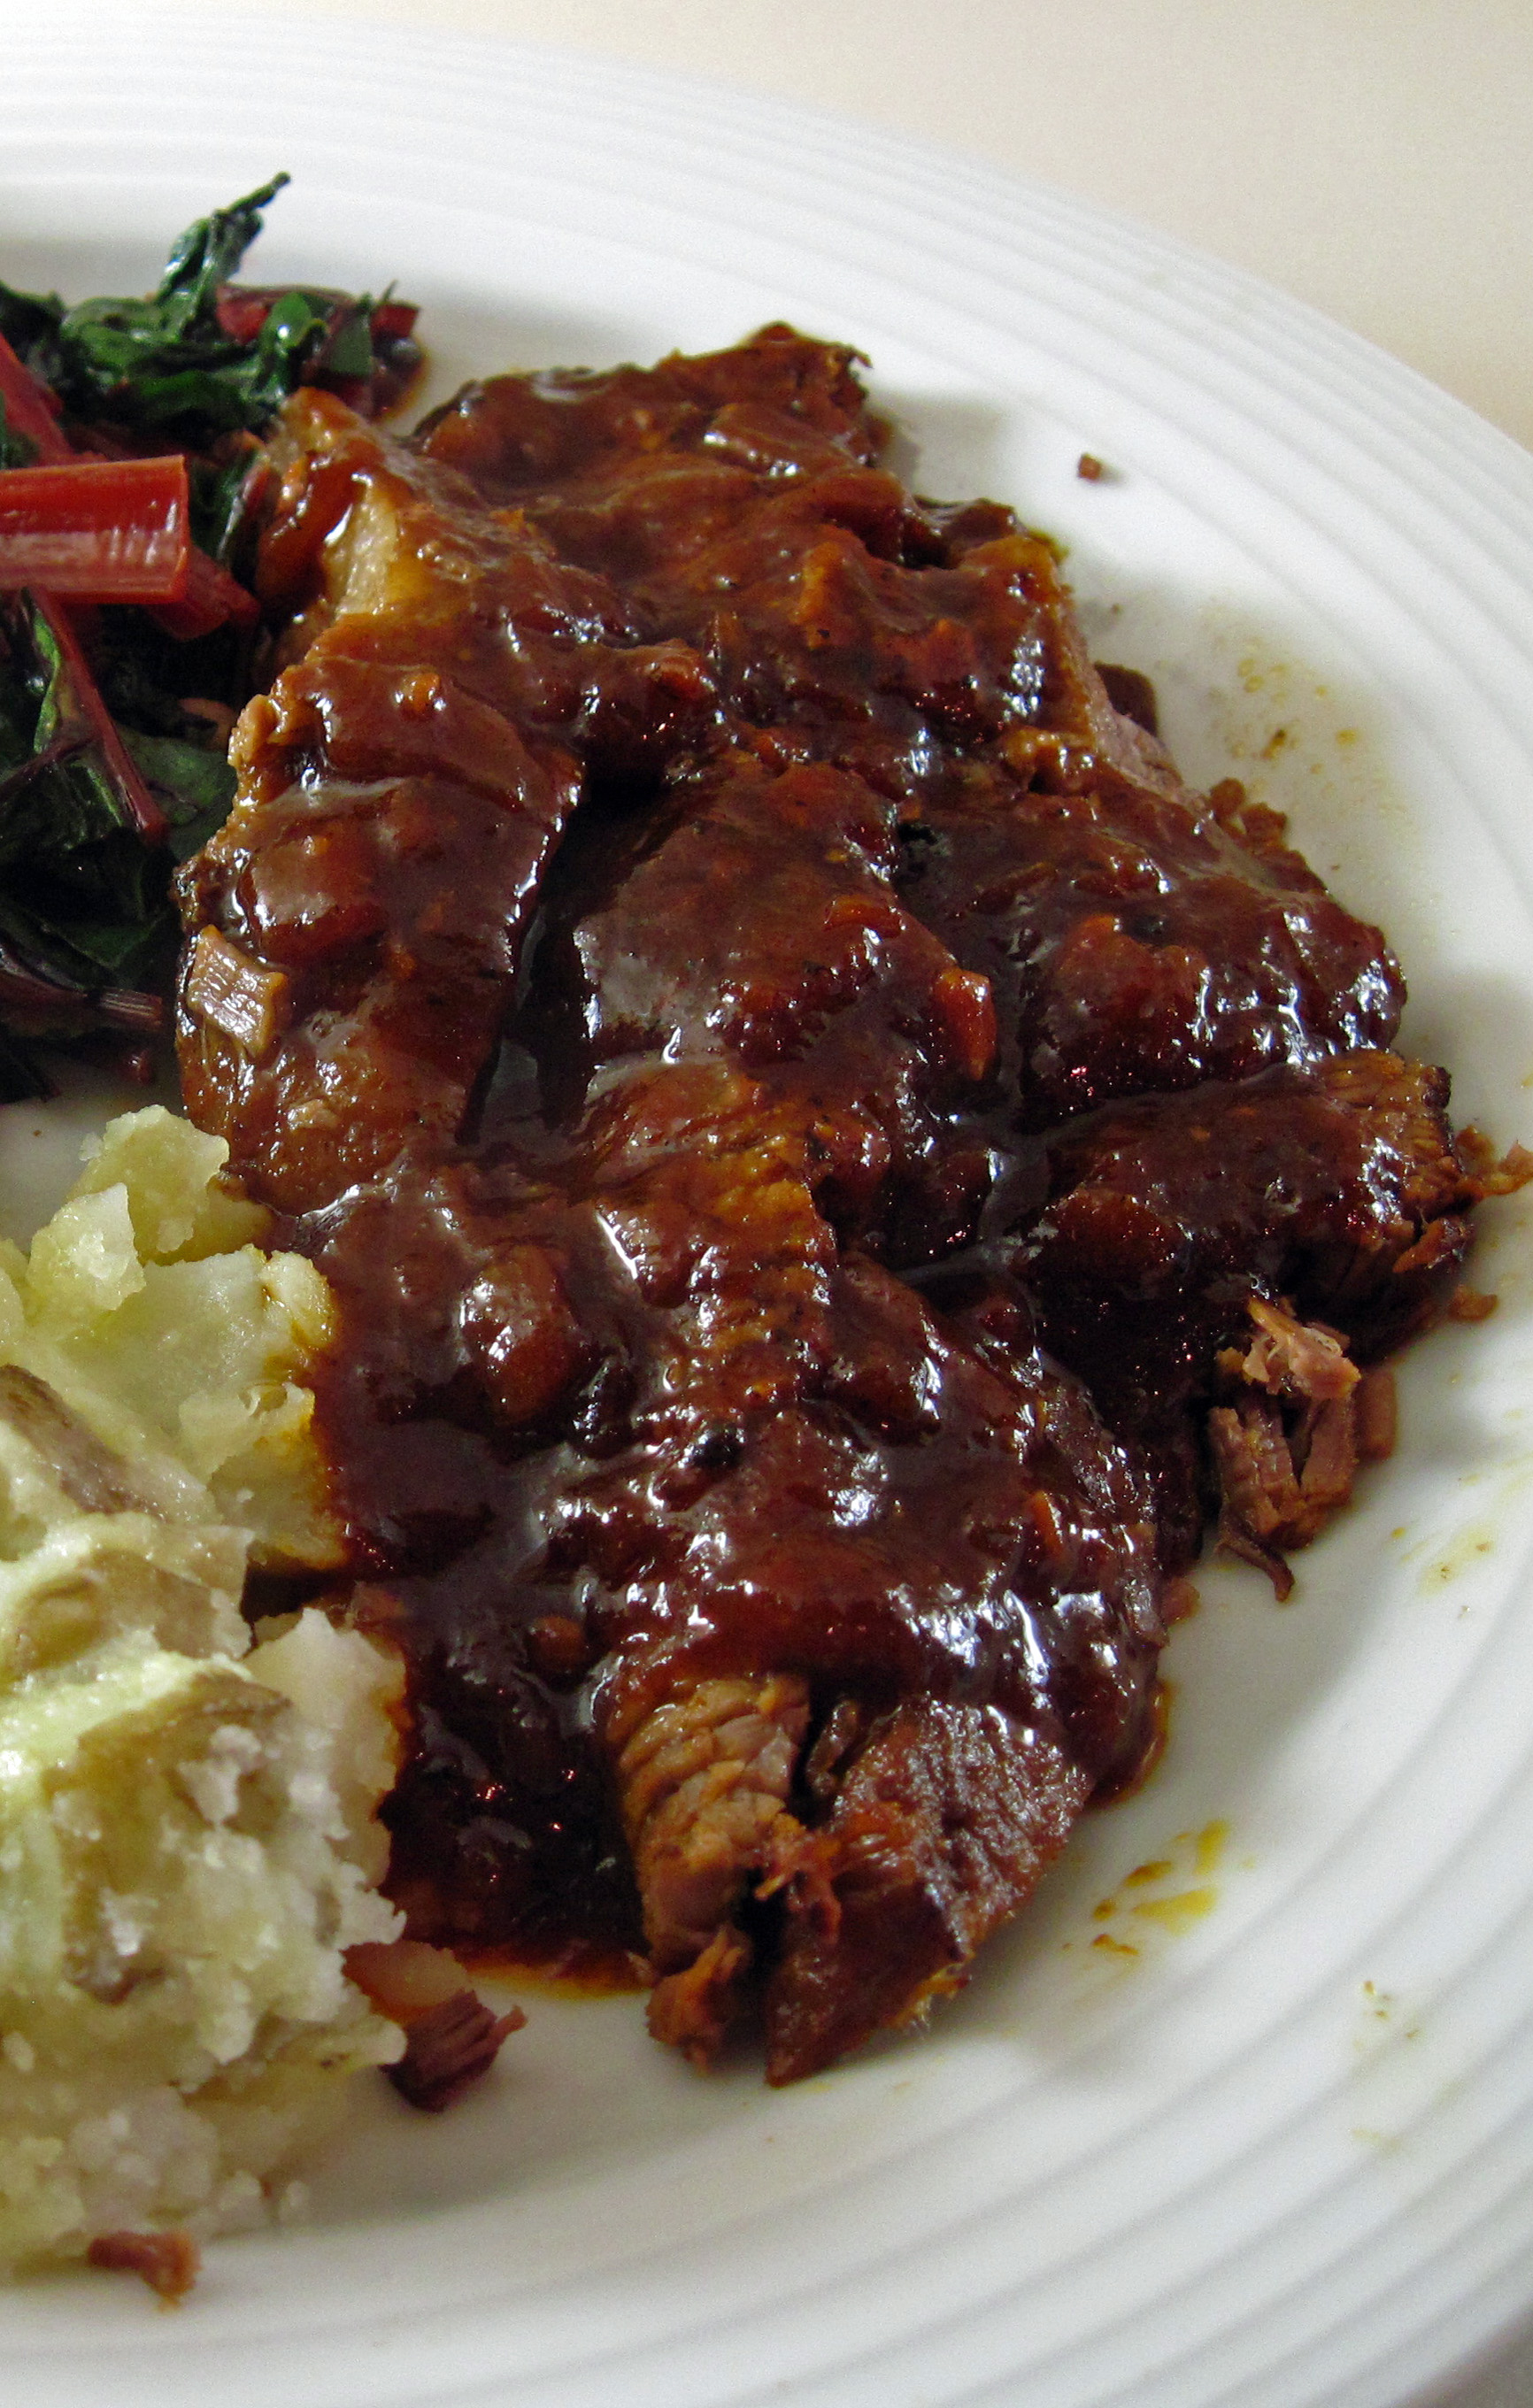
I loved the simplicity of his recipe and it all came together beautifully. The onions pretty much melted into the flavorful sauce. I could just eat the sauce by the spoonful!
Braised Beef Brisket is a great dish for fall. We thoroughly enjoyed it with our Yukon gold potatoes and Swiss chard fresh from the garden!
a
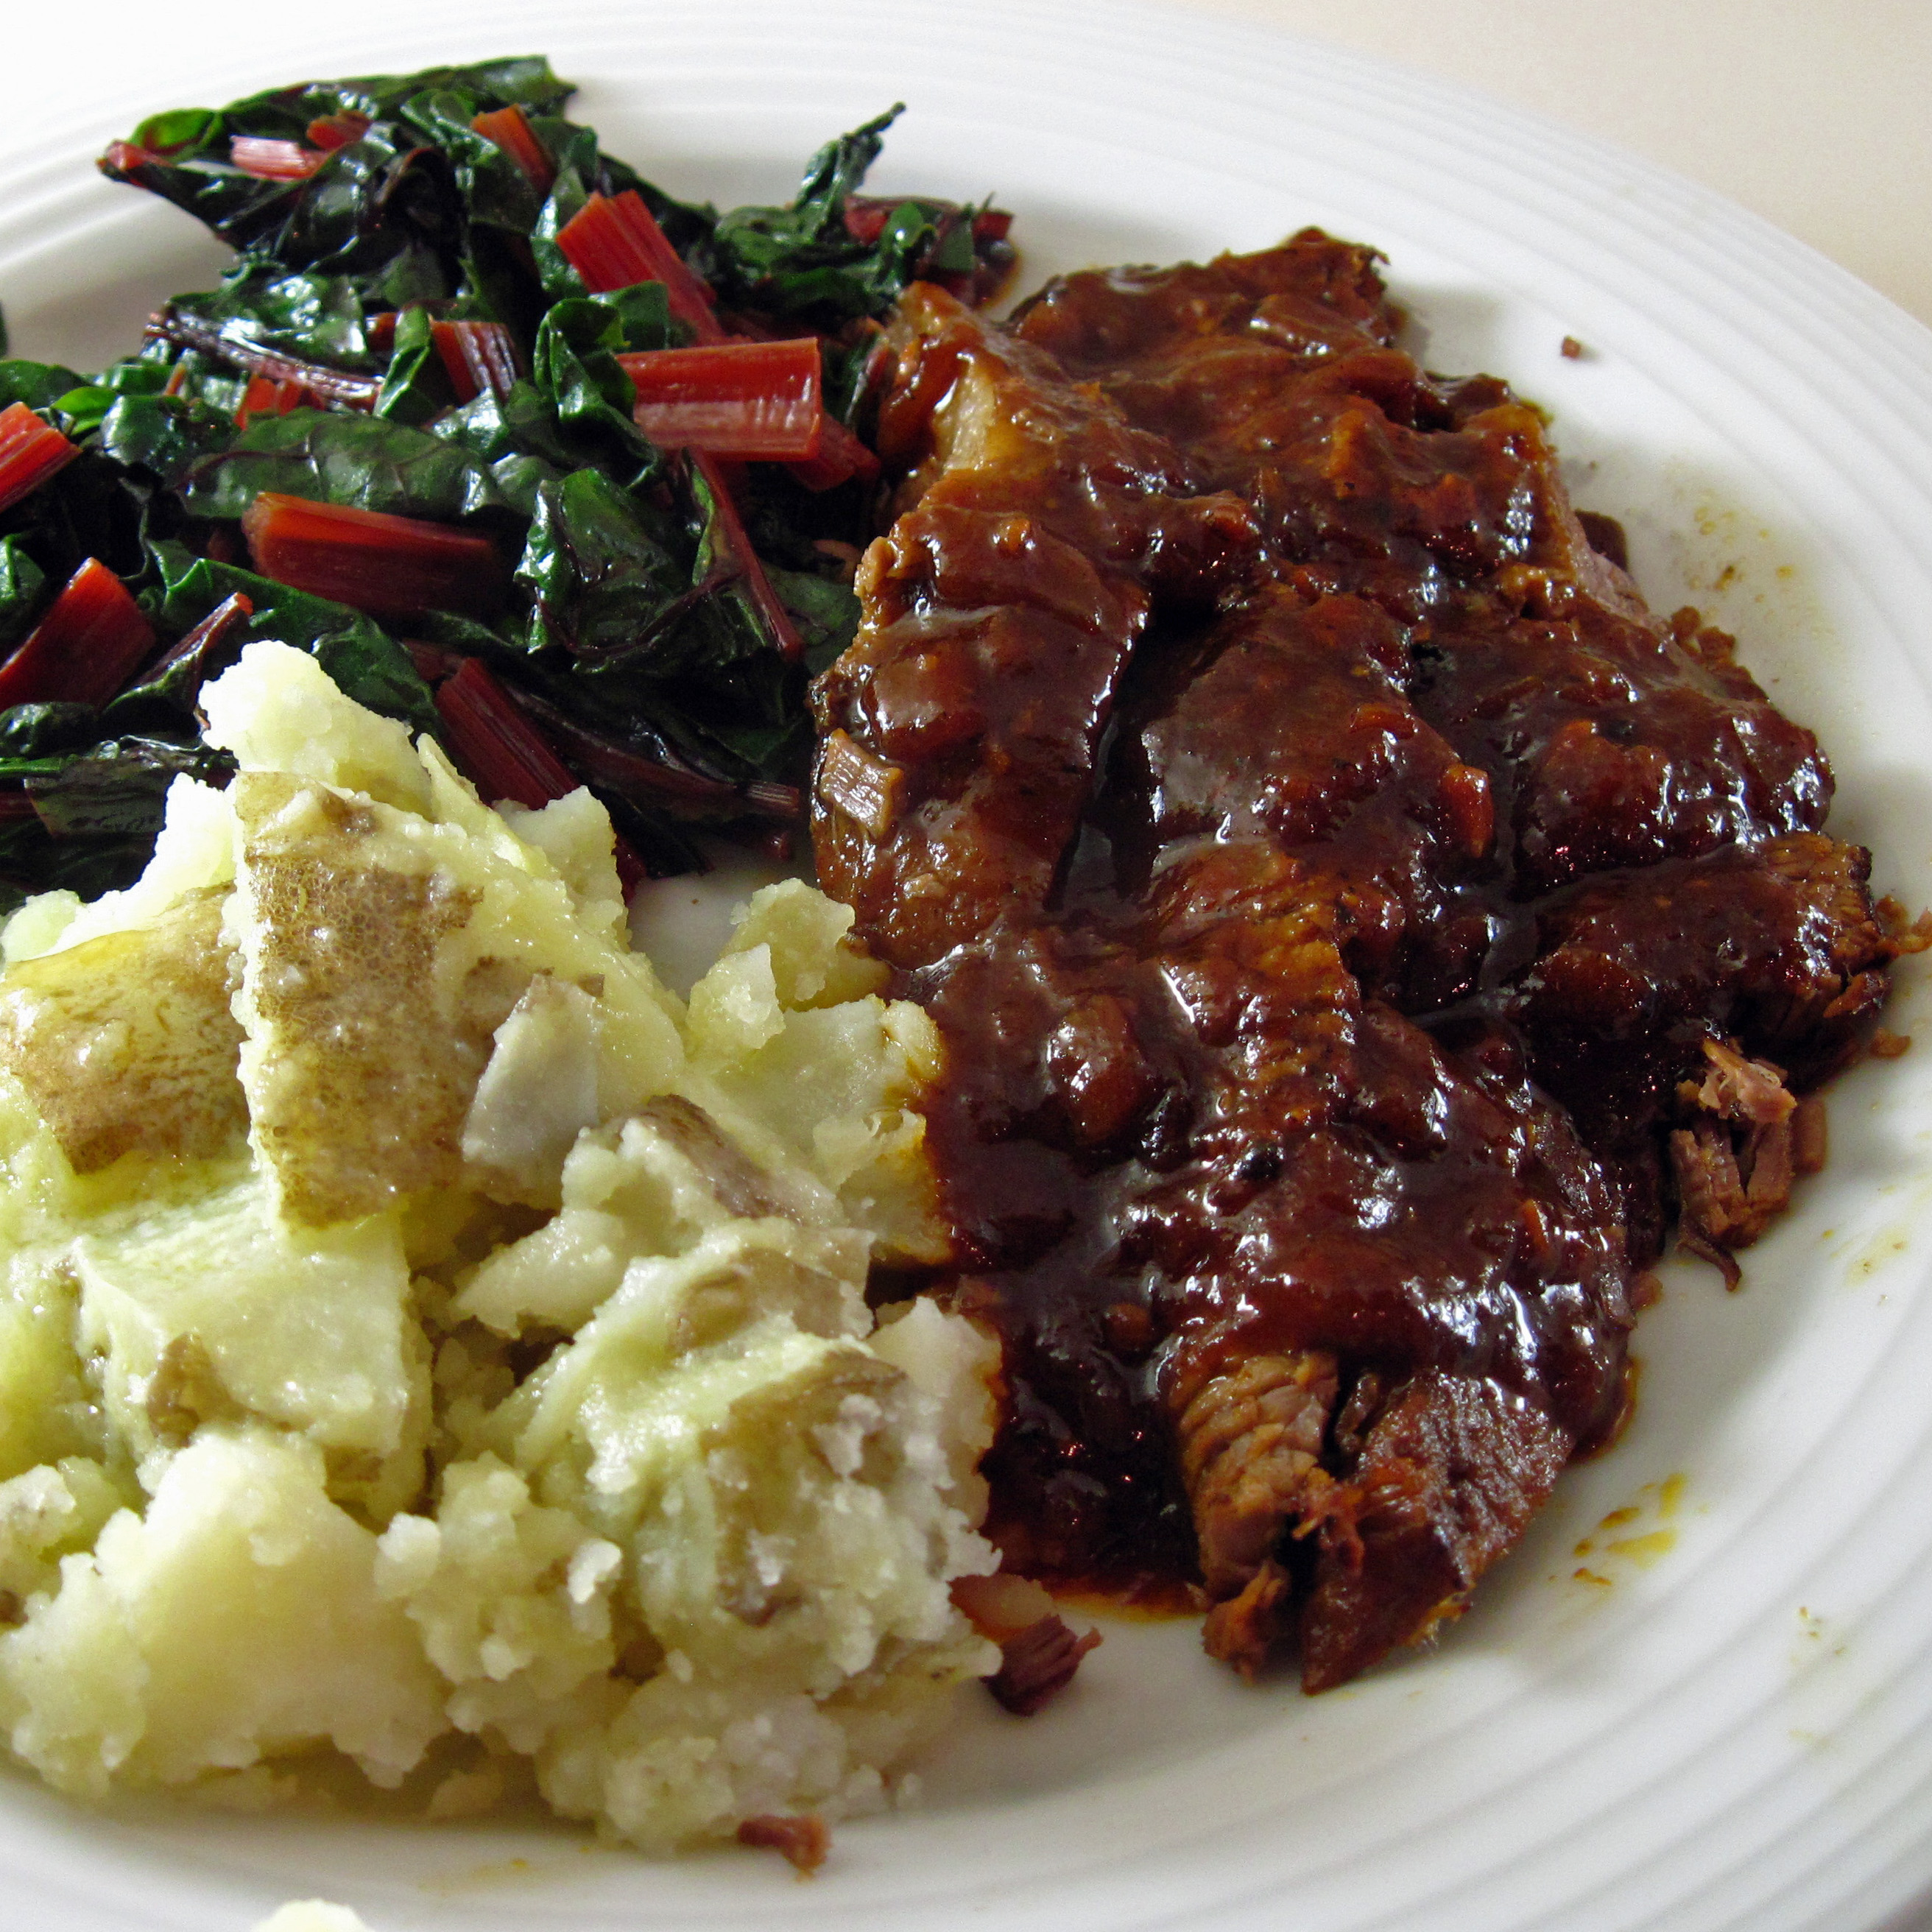
a
Braised Beef Brisket
(Adapted from Mark Bittman’s recipe in How to Cook Everything)
a
a
Serves 4 – 6
(I used a half brisket. You can follow the recipe exactly as it is written using a whole 5-pound brisket to serve 10 or more people.)
a
1 tablespoon oil
Beef brisket (about 2¼ – 2½ pounds)
Salt and lots of freshly ground black pepper
3 tablespoons butter
2 cups chopped onion
3 tablespoons tomato paste
1 teaspoon minced garlic
3 cups chicken broth or water (I used homemade chicken broth)
a
1. Heat the oven to 325˚.
2. Heat a large oven-proof Dutch oven with a lid over medium-high heat. When the pan is hot, add the oil and swirl it around the bottom.
3. Sear the brisket for about 5 minutes; turn it over and sear the other side for 5 minutes.

a
4. Remove the brisket from the pan. Salt and pepper both sides.
5. Using a paper towel, wipe the oil out of the pan.
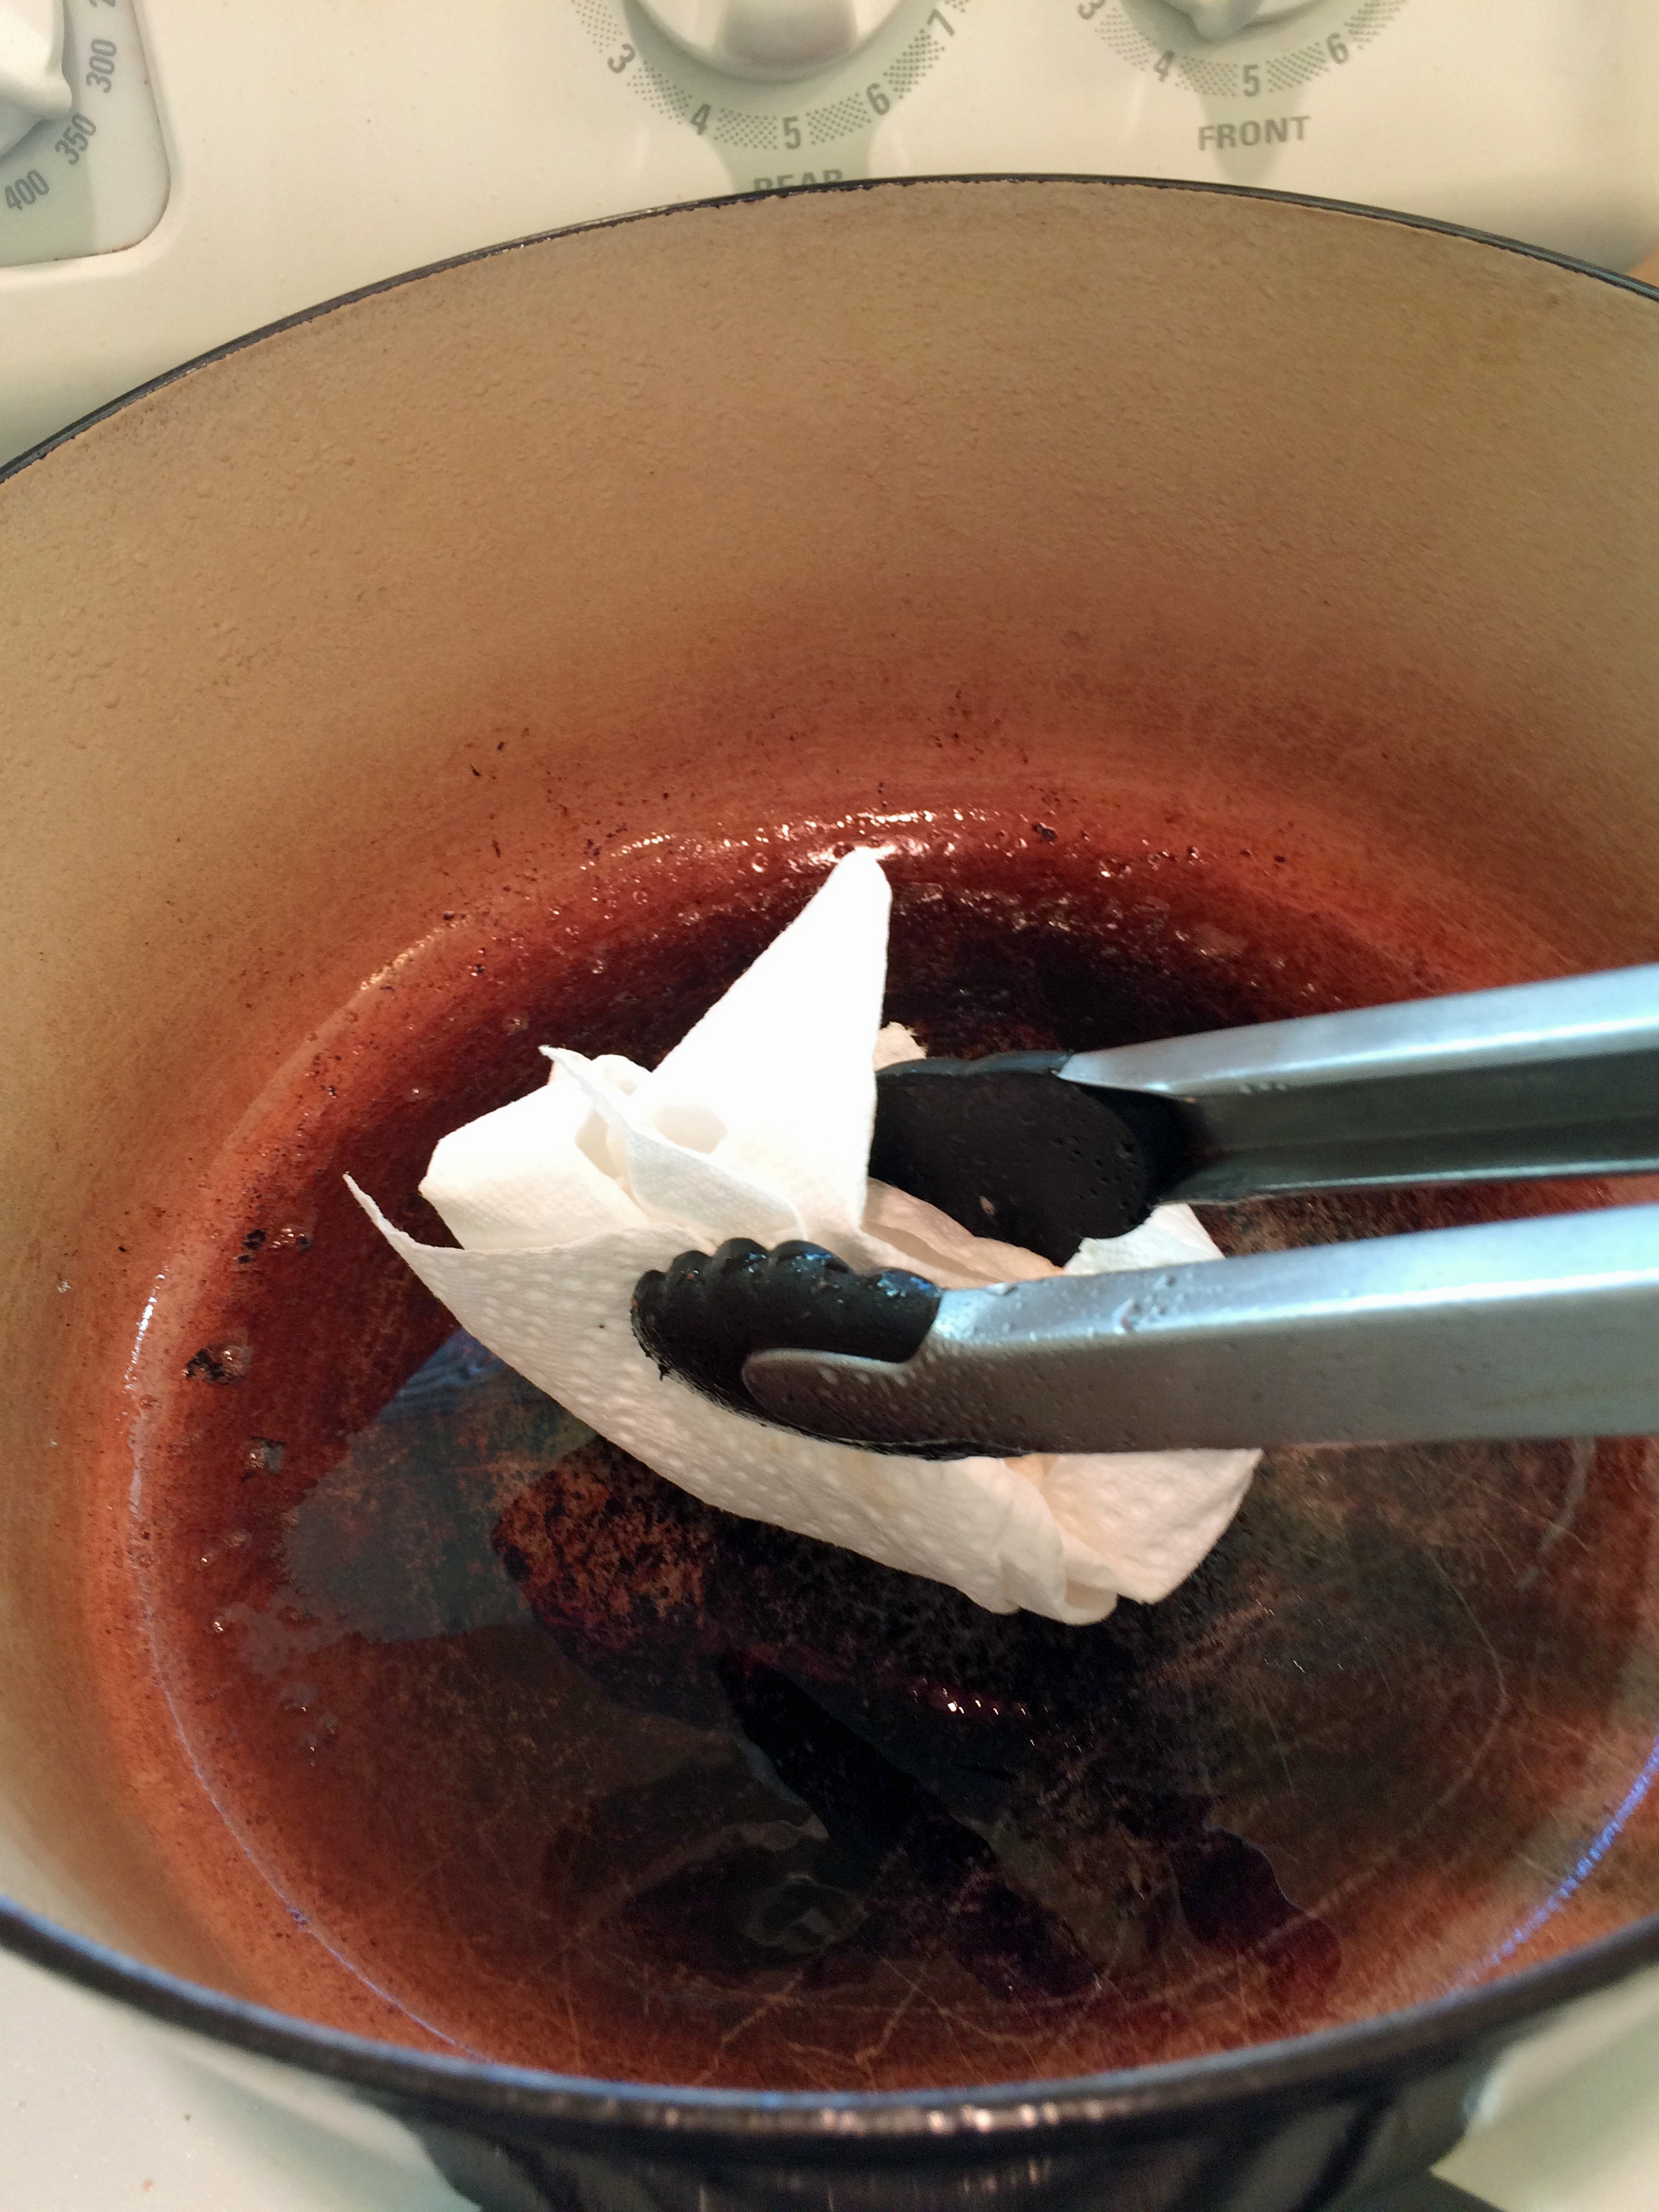
a
6. Reduce the heat on the stove to medium and add the butter to the pan.
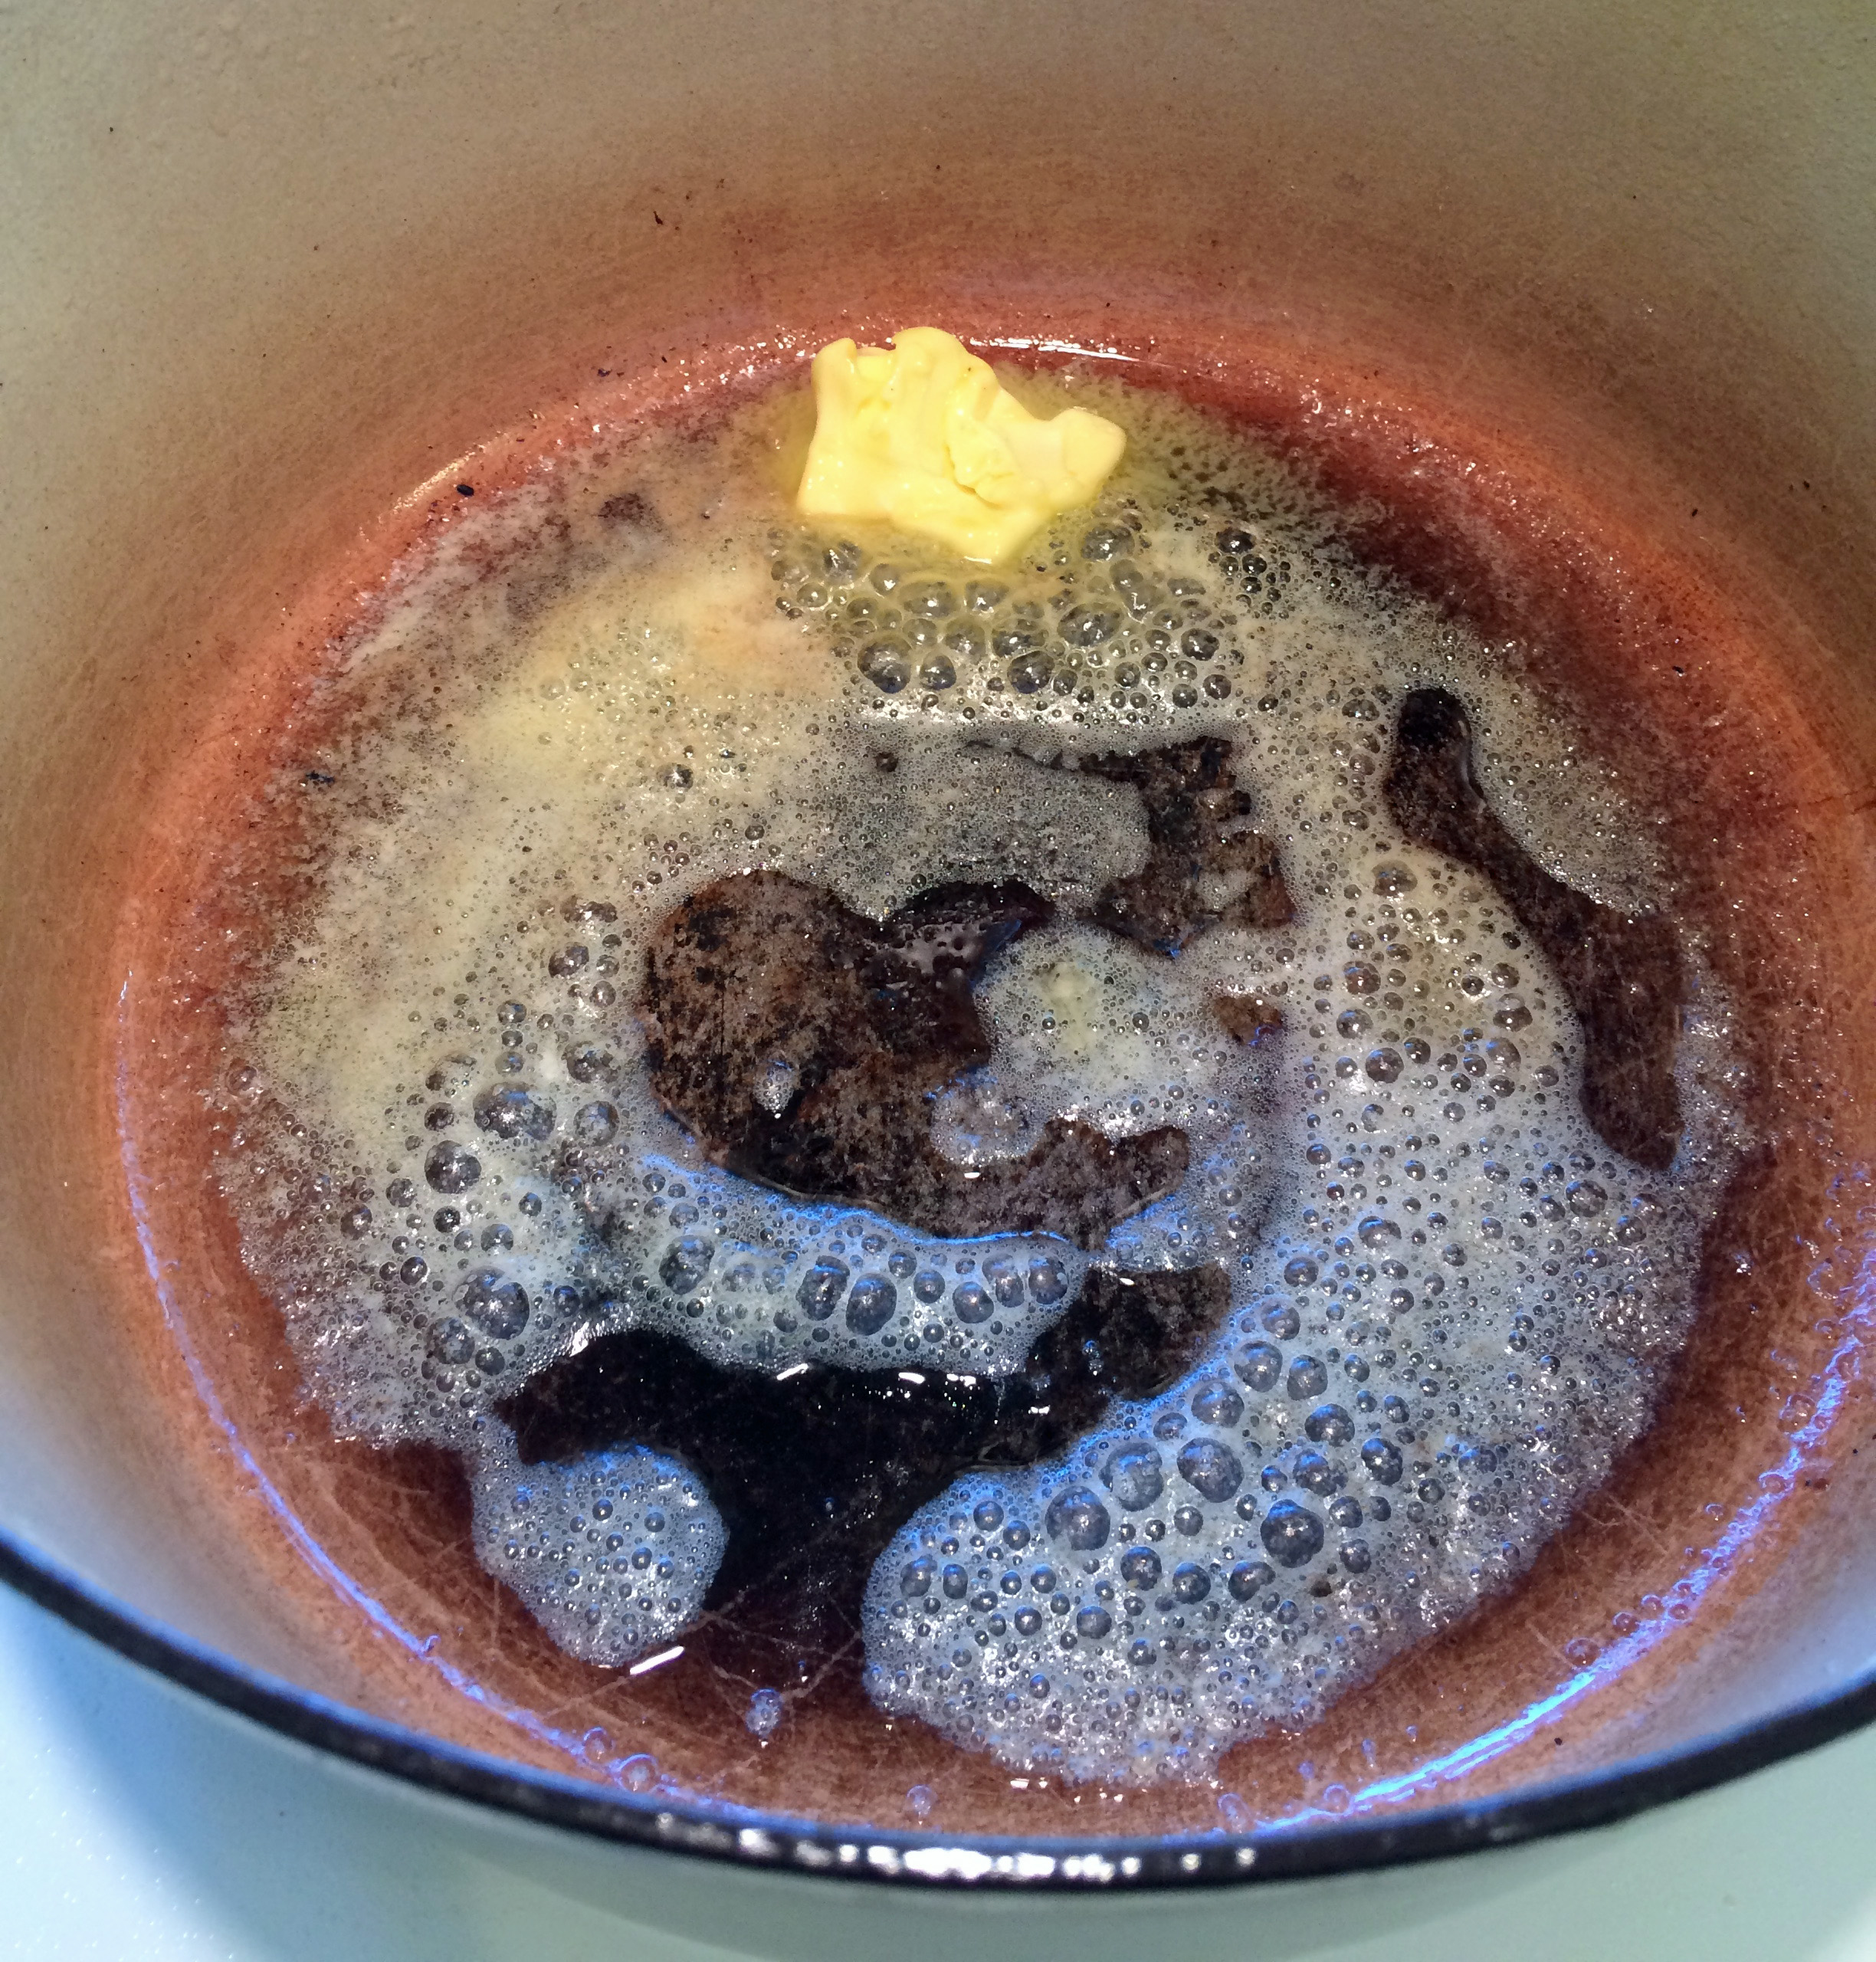
a
7. When the butter is foaming, add the onions to the pan and cook, stirring occasionally, for 10 – 15 minutes, or until softened.

a
8. Sprinkle in some salt and pepper and add the tomato paste and garlic to the pan.
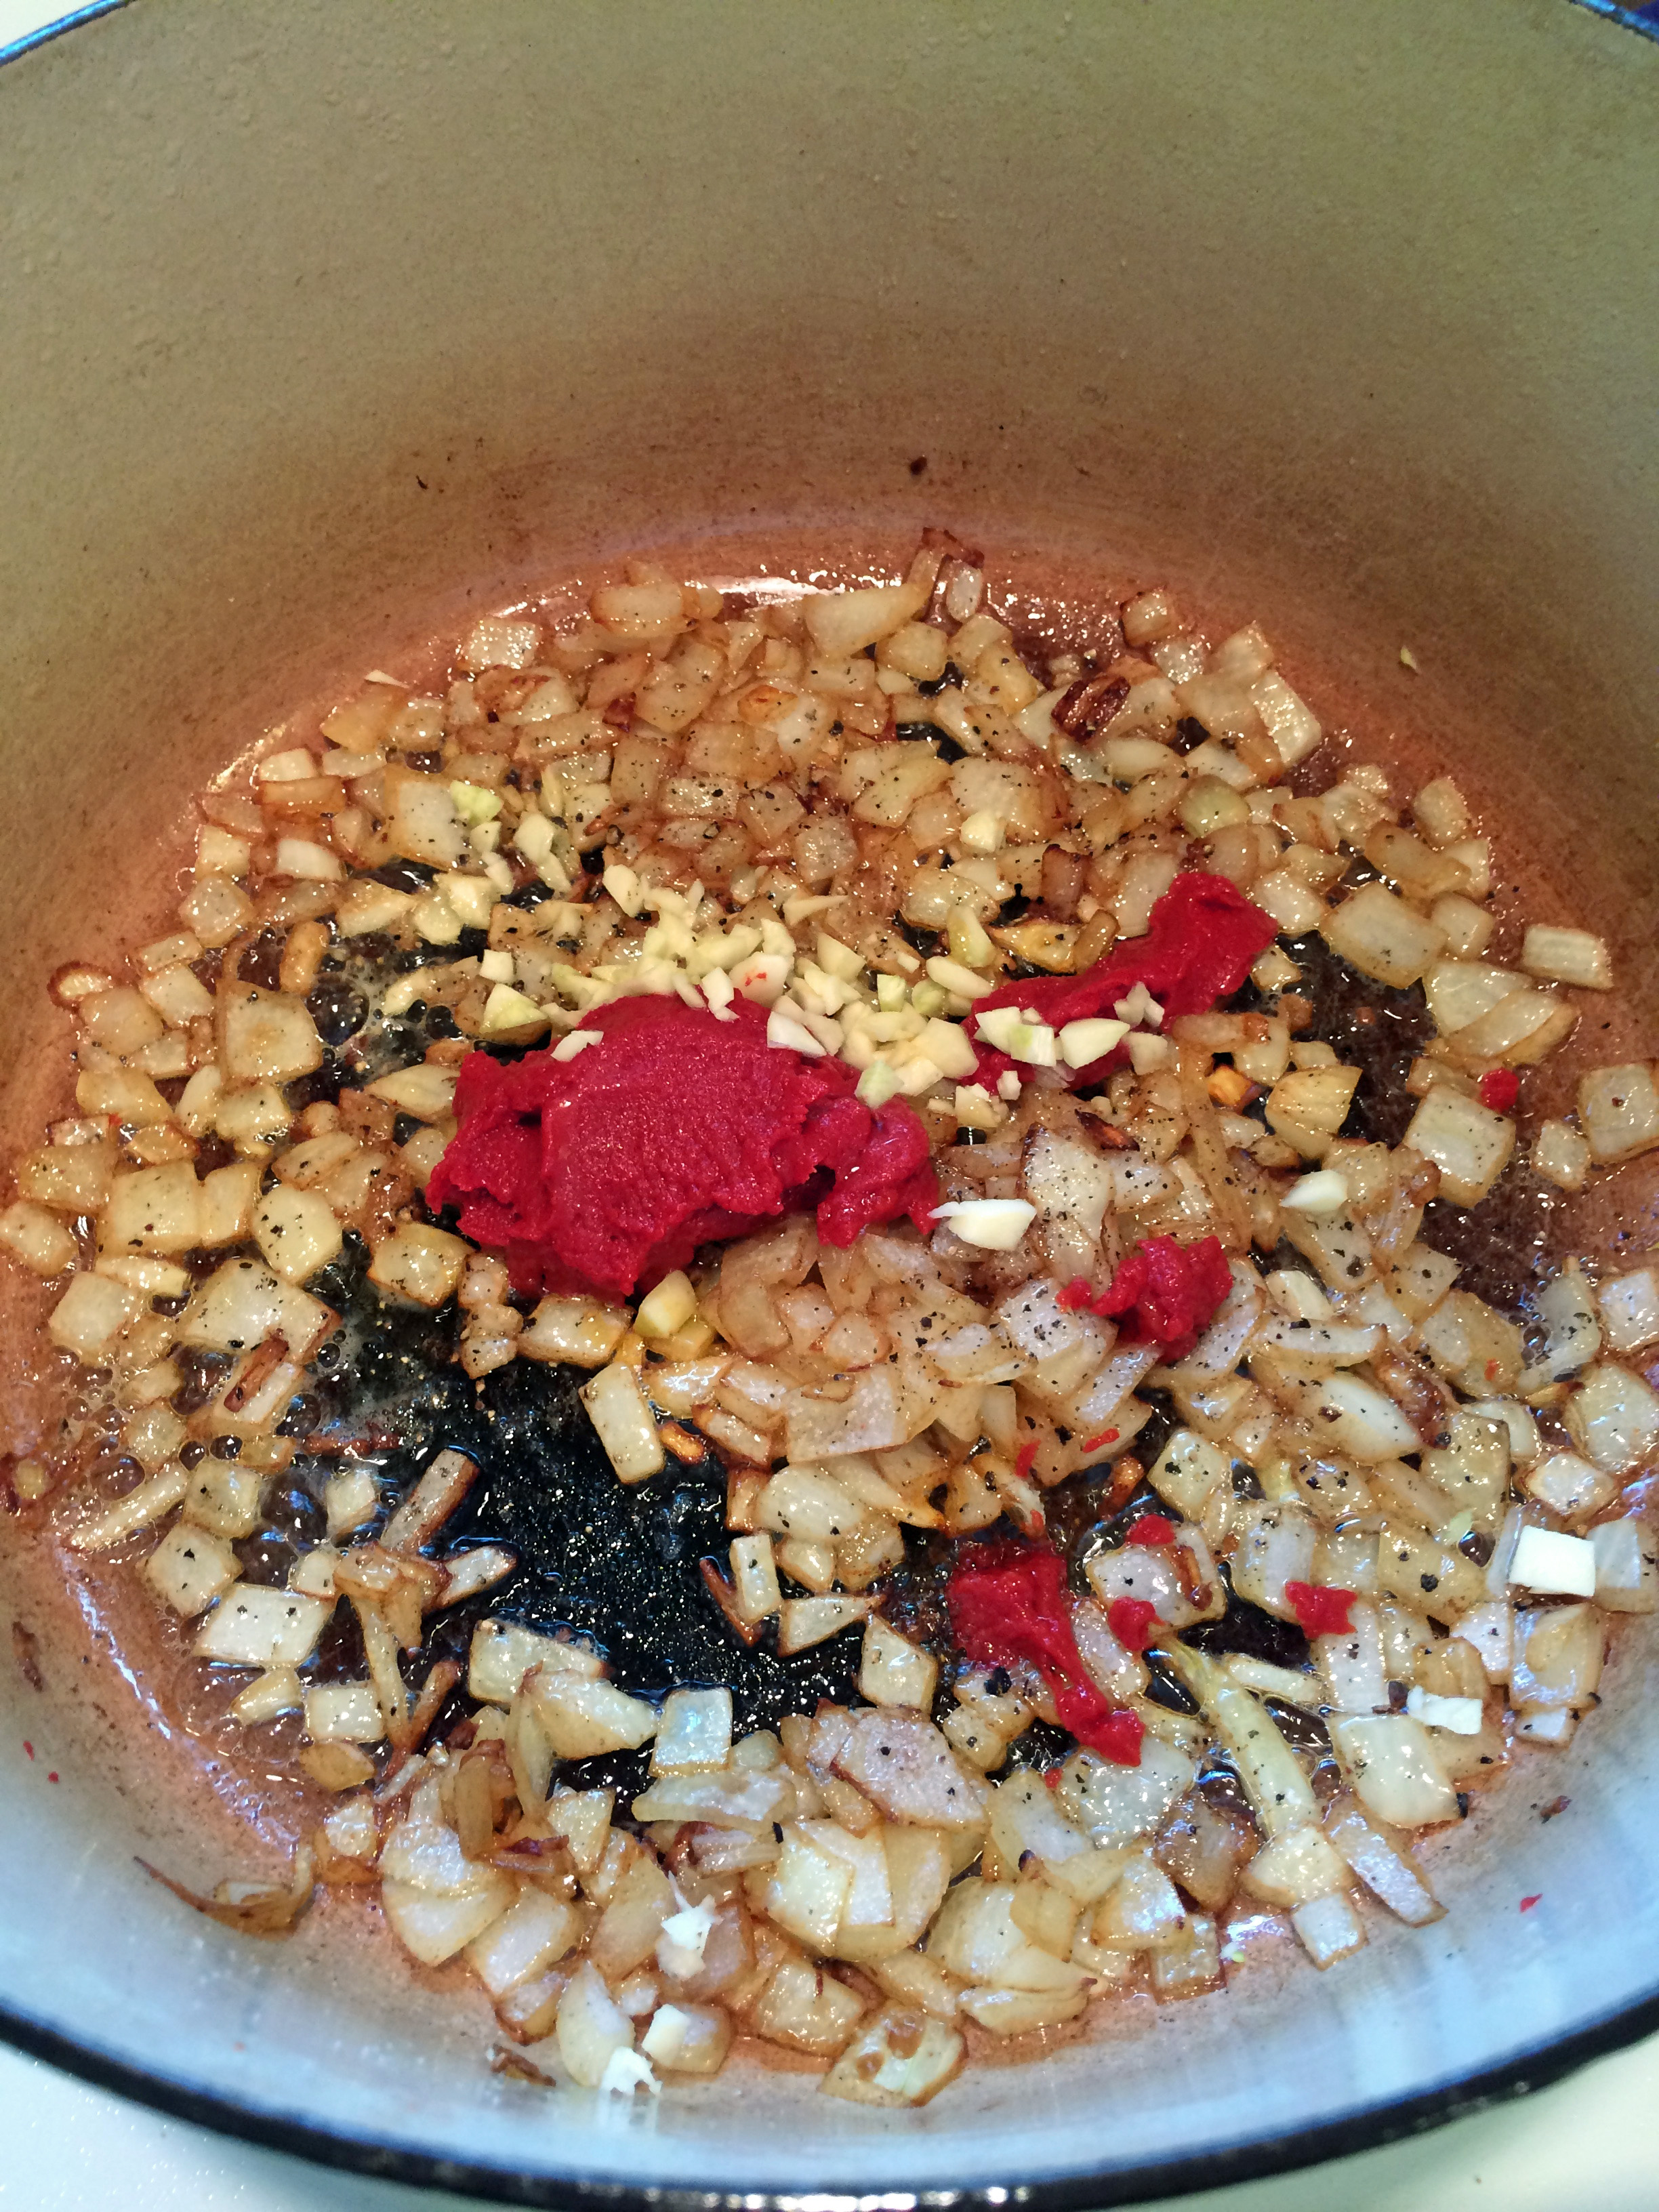
a
9. Stir in the chicken broth.

a
10. Add the brisket to the pan. Cover and put the pan in the preheated oven.
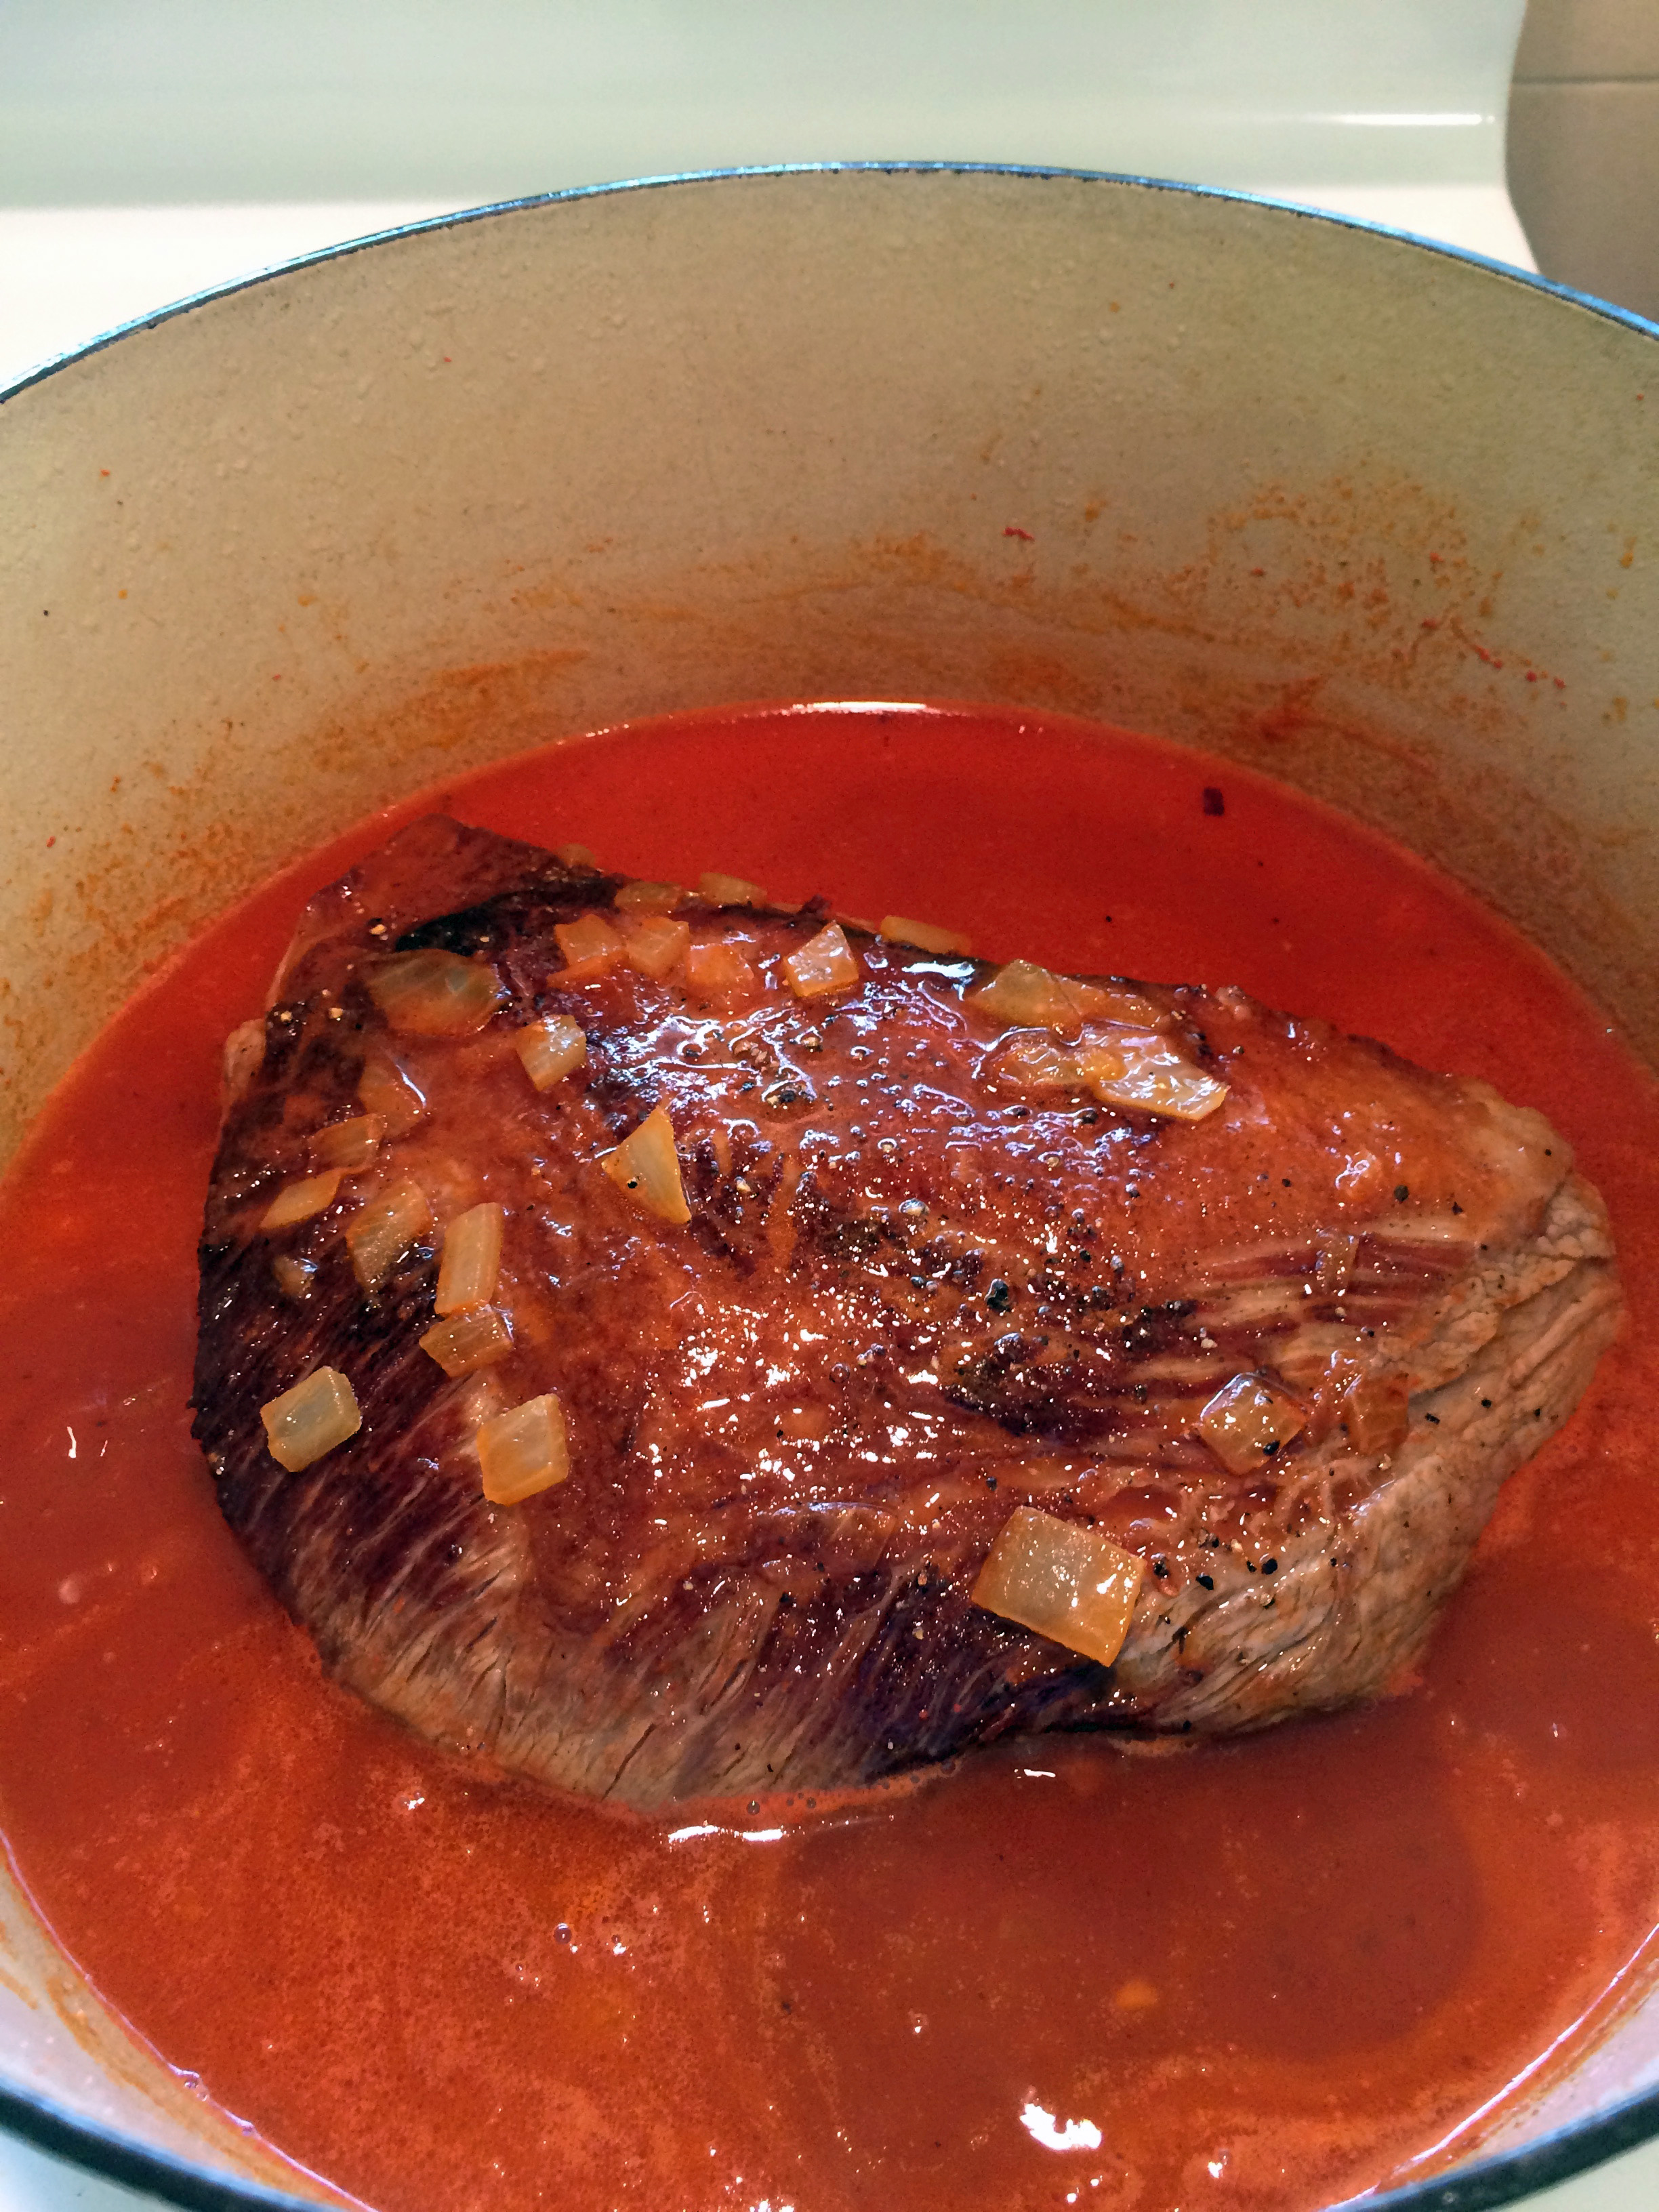
a
11. Cook the brisket for 3 hours, turning it every 30 minutes or so. It should be very tender after 3 hours.
12. Remove the brisket from the pan and put it on a cutting board or platter. Cover with foil and let it rest about 10 minutes.
13. While the brisket is resting, boil the sauce without a lid for a few minutes to boil it down and thicken it a bit.
14. Slice the brisket against the grain and serve it with the sauce.
a
a
Share this:

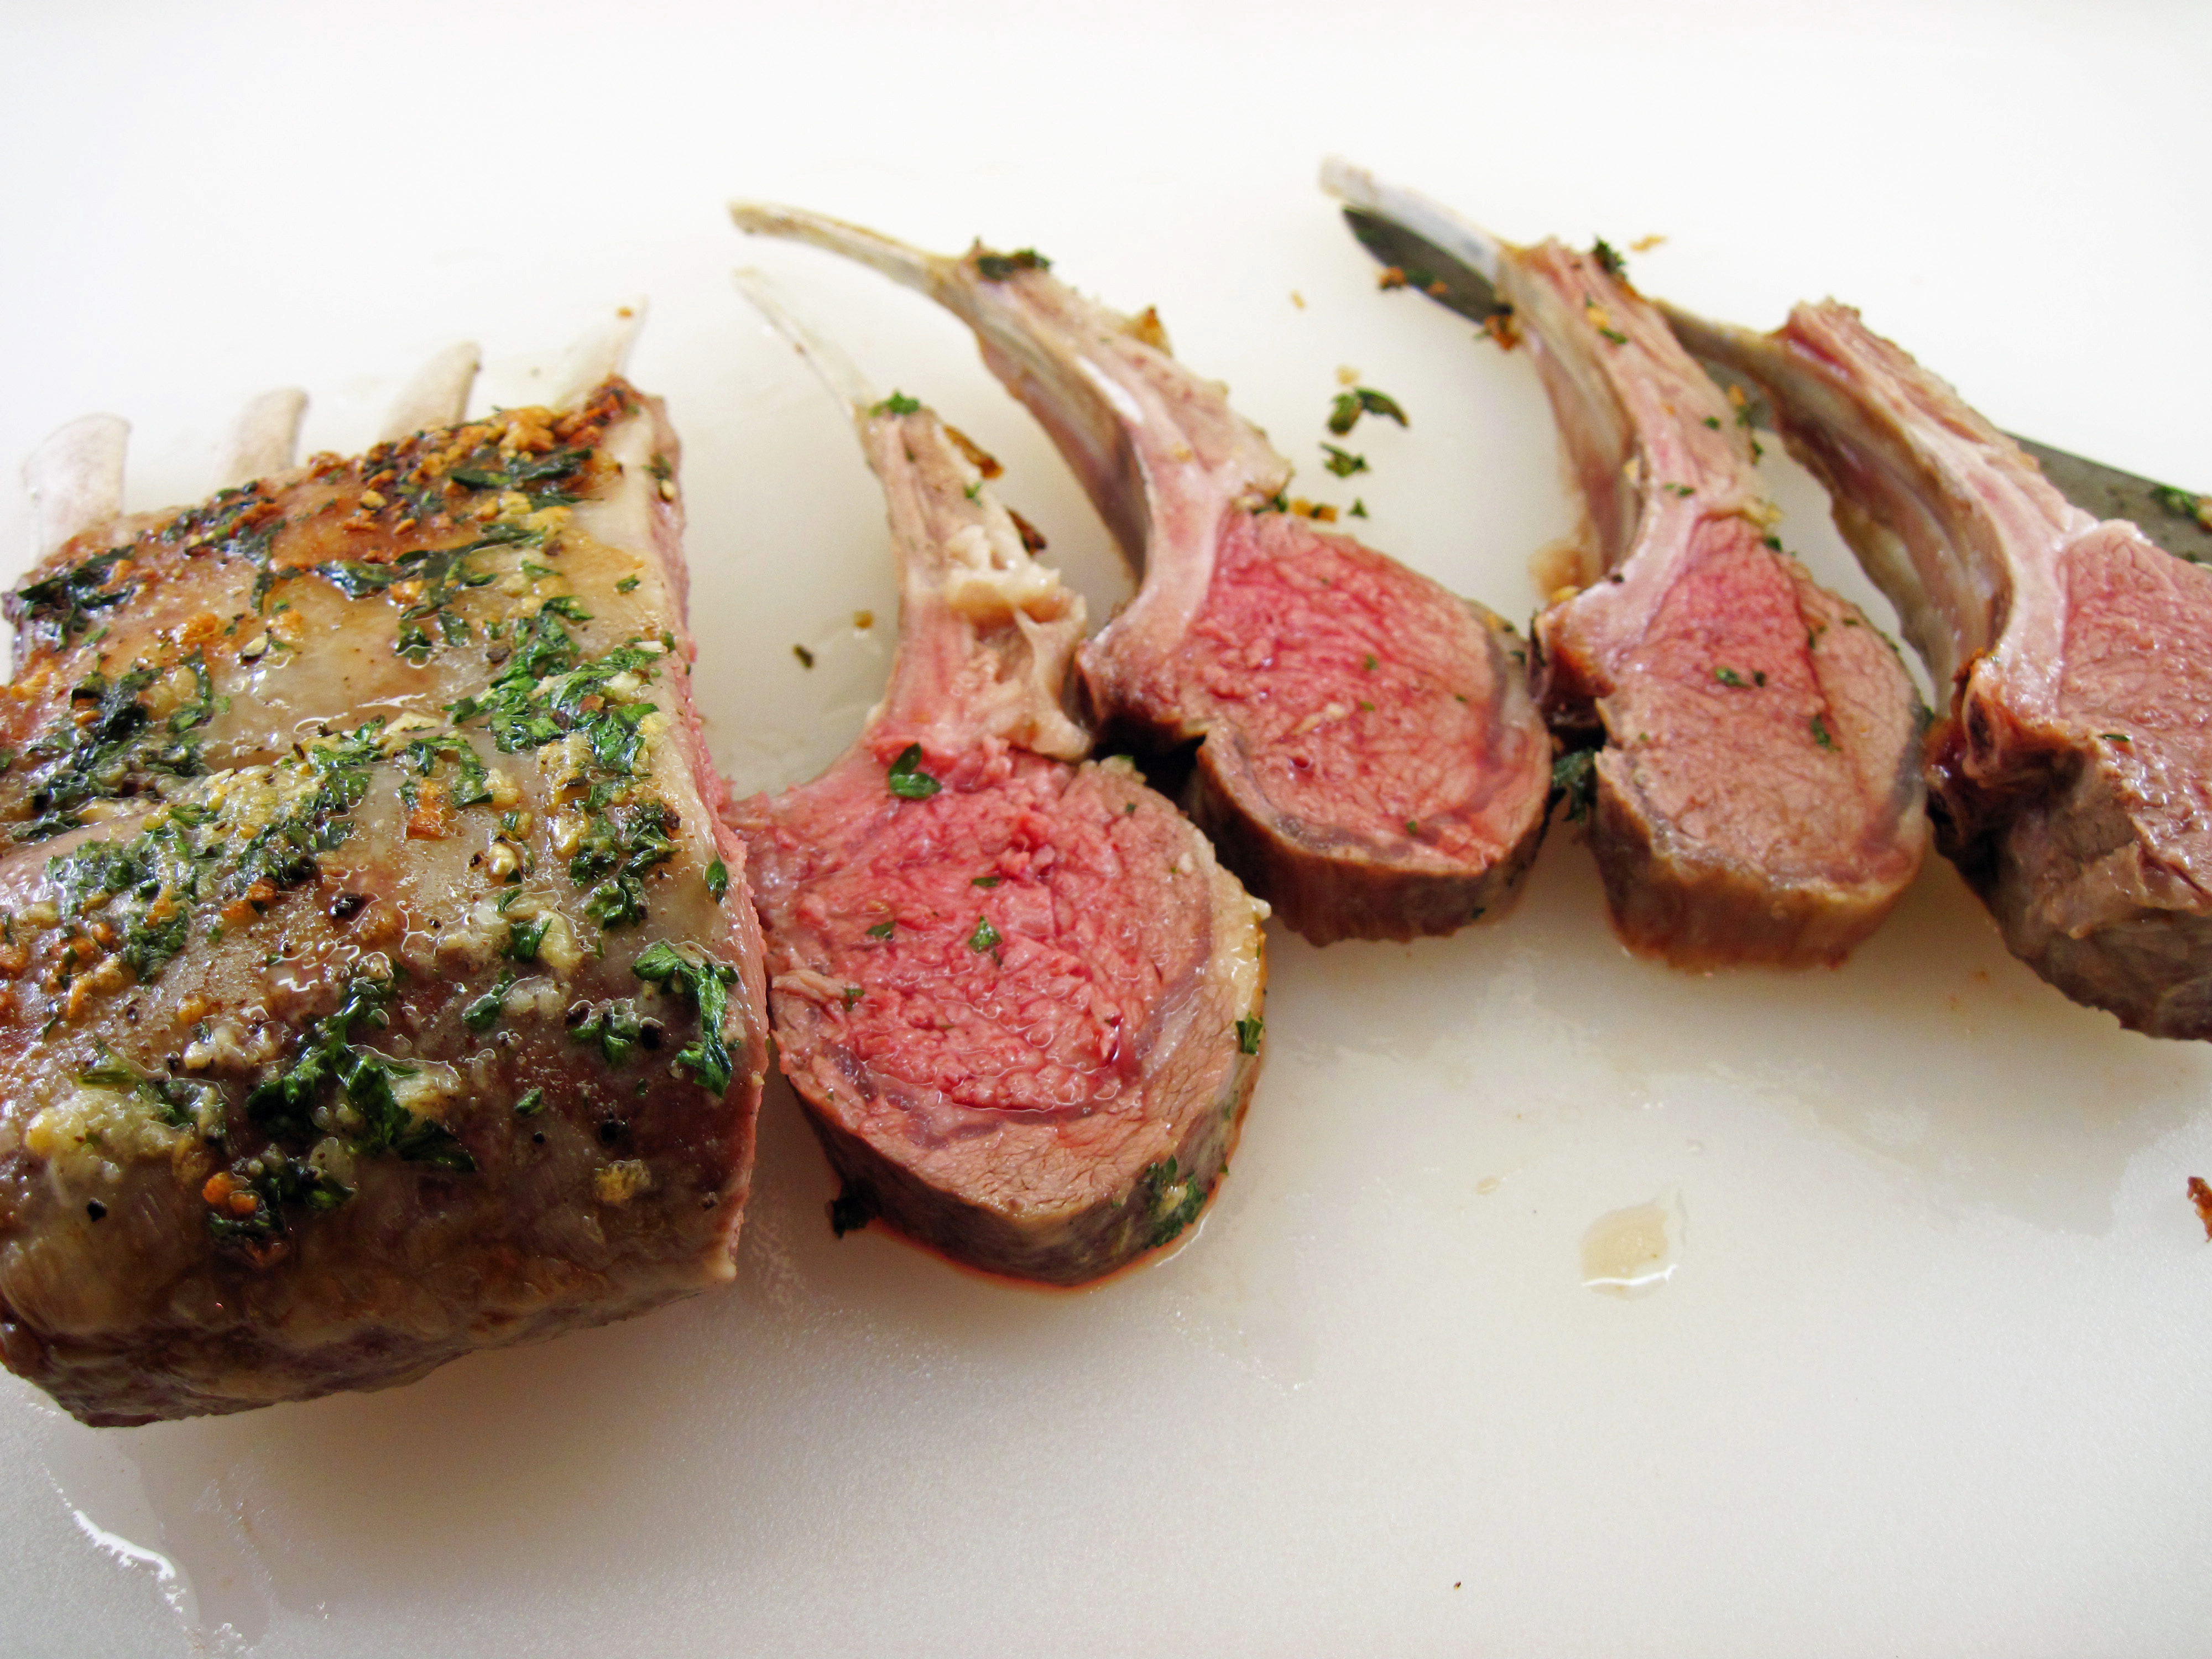
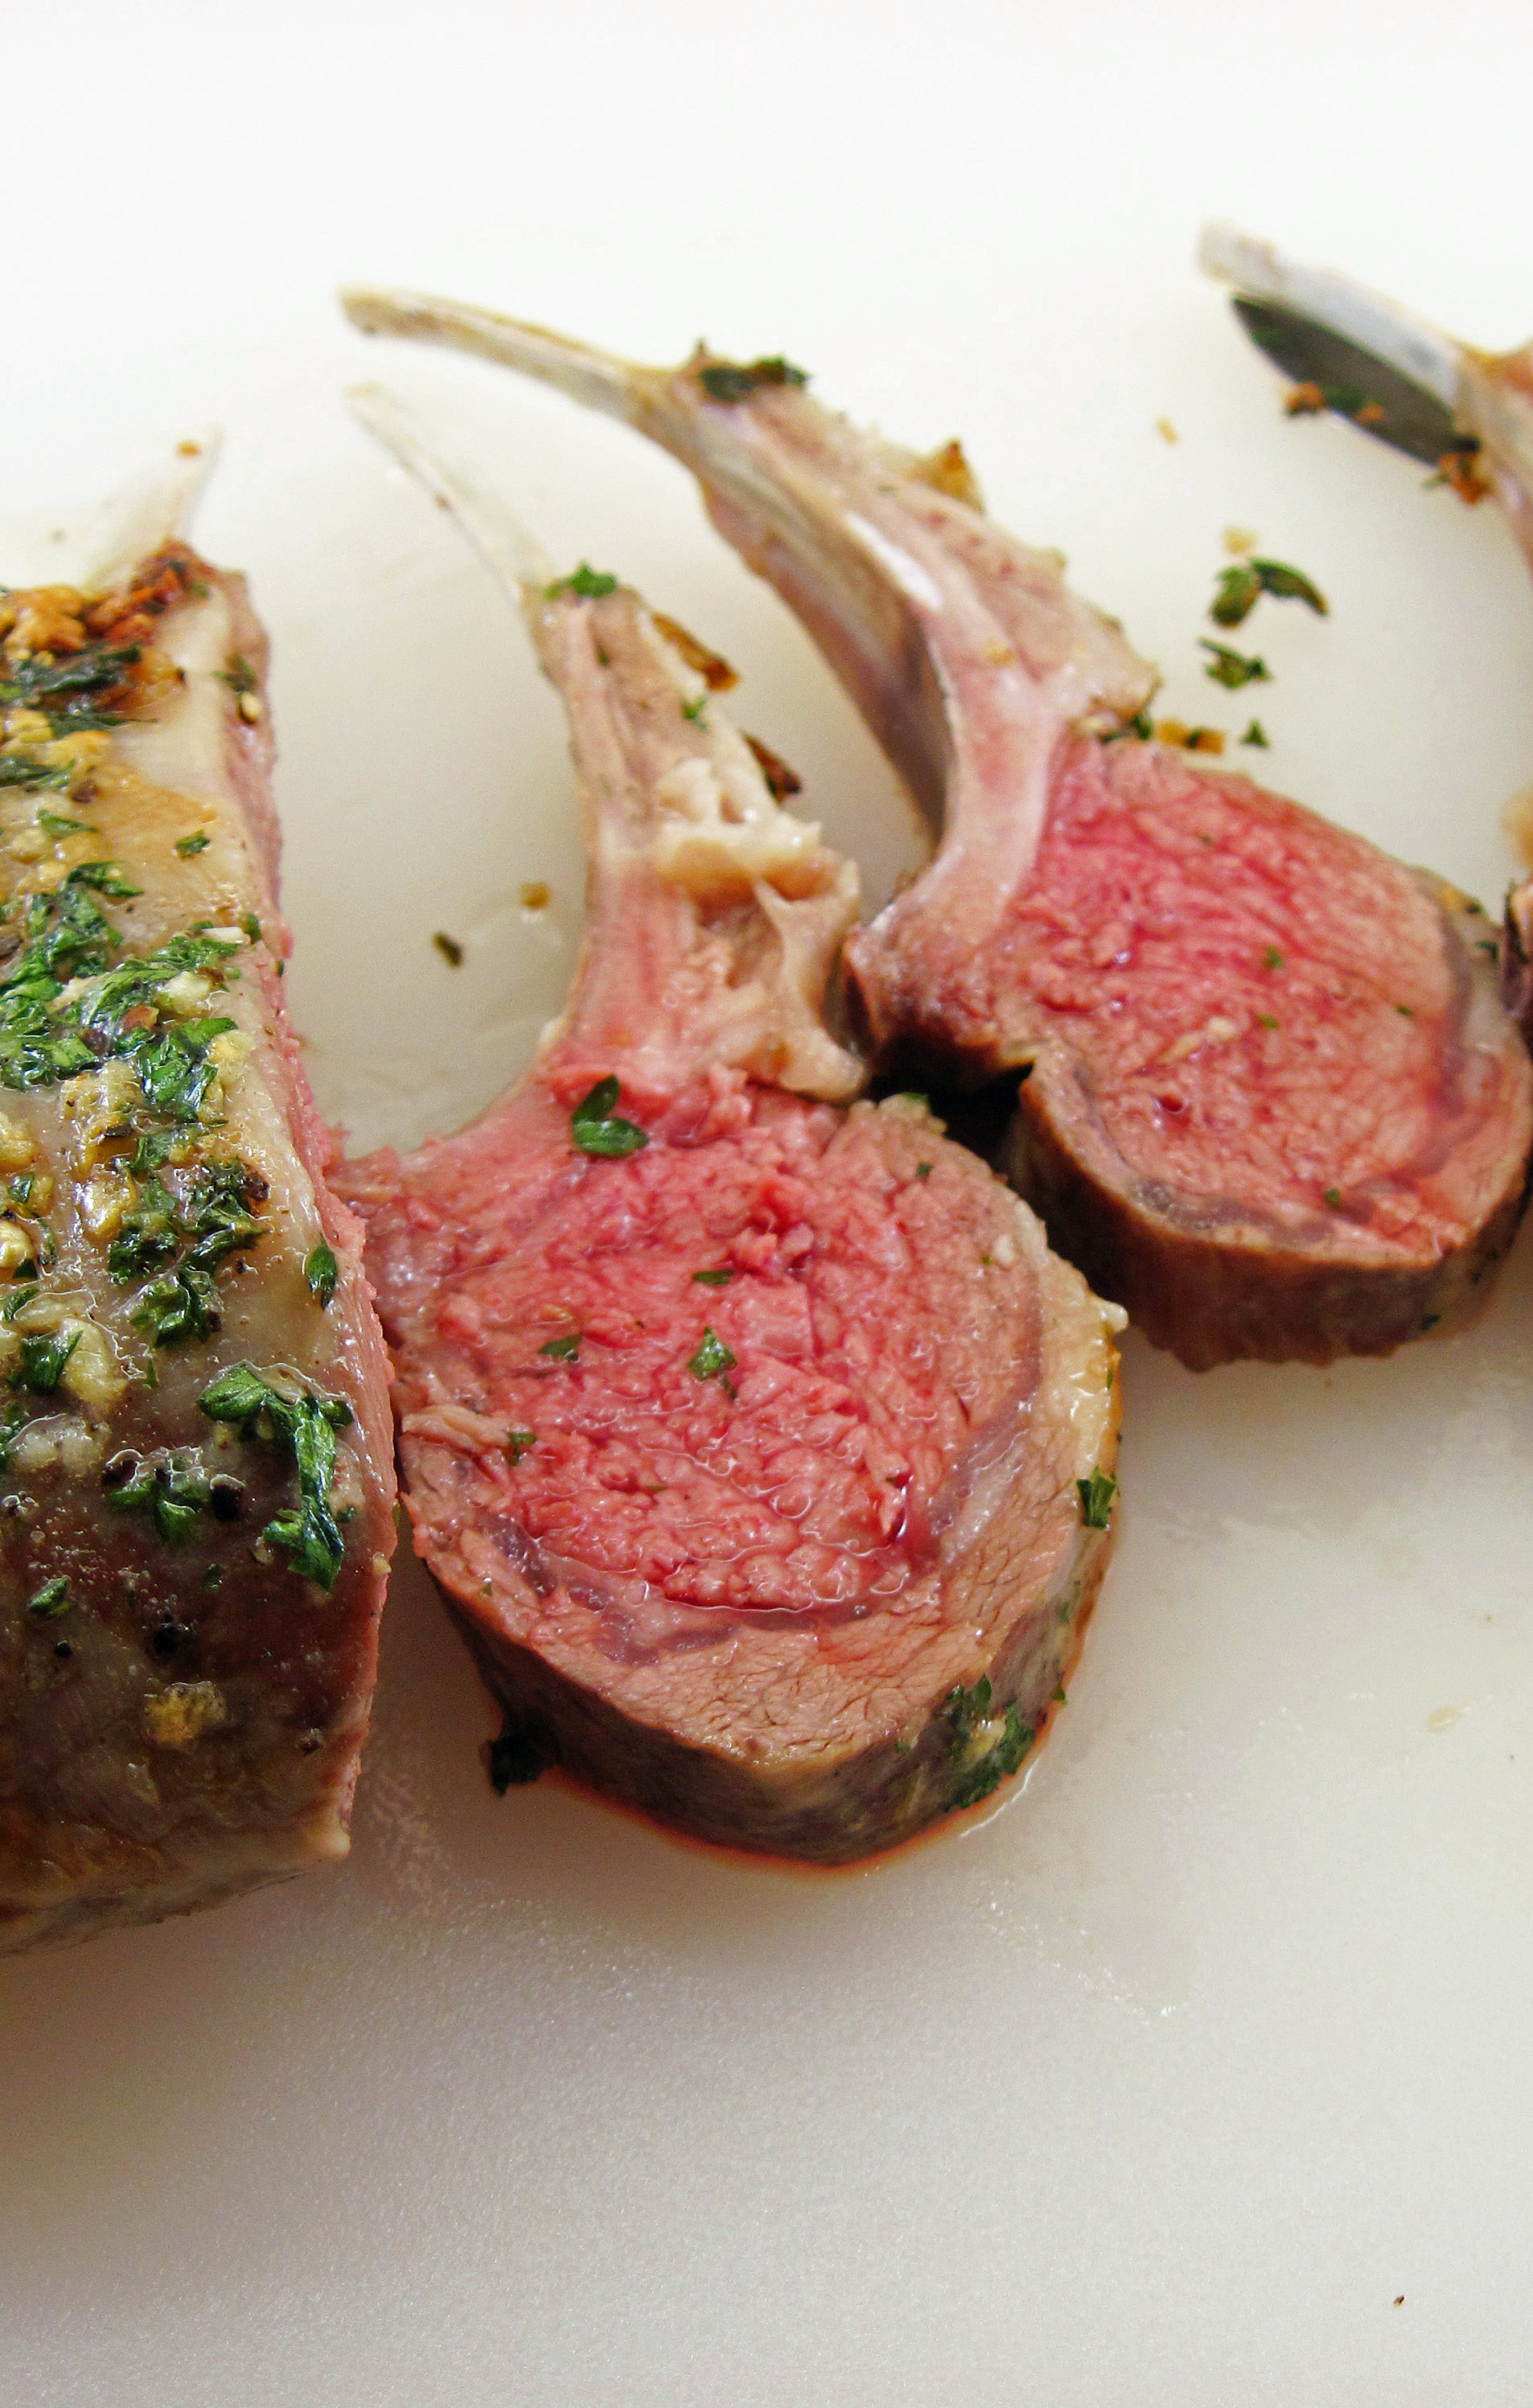
Rack of Lamb for Two
By Kath Dedon
If you and your sweetheart like lamb, this Rack of Lamb for Two is perfect for a special evening at home.
Is it just me, or has rack of lamb become wildly expensive in the past few years? It’s always been expensive, but I don’t recall that it seemed prohibitive 30 years ago. It was something that was part of our regular rotation when we were newlyweds.
On a trip to Costco this week I spotted rack of lamb from Australia for $11.99 a pound. That’s still expensive, but it’s much less expensive than what I see in the grocery store. Having had good luck with other meats from Costco, I decided to give it a try.
I used my favorite recipe from my old Sunset Cooking for Two…or Just for You cookbook. It’s foolproof, and that’s what you want with an expensive cut of meat.
The lamb was fantastic and a real treat! I am glad to know that I can get a top-quality rack of lamb at a more reasonable price at Costco.
I like to make the lamb the star of the meal, so I usually serve it with a simple vegetable and a salad. Serve with a glass of red wine and it feels like a “date night” at home!
a
a
Rack of Lamb for Two
(Adapted from a recipe in Sunset Cooking for Two)
a
a
Serves 2
a
1½ tablespoons butter, at room temperature
1 tablespoon minced parsley
1 small clove garlic, minced or pressed
Dash of salt and pepper
An 8-rib rack of lamb
a
Costco rack of lamb

- Preheat the oven to 400˚.
- Mix the butter, parsley, garlic, salt and pepper together.

- Put the rack of lamb, meat-side up, on a rimmed baking sheet. (I covered mine with foil for easy clean-up.) Spread the butter mixture over the meat.

- Roast for 30 minutes.
- Remove lamb from the oven. Cover with foil and let it rest for 10 minutes.
- Cut the roast into individual chops and serve.
a
a
Share this:

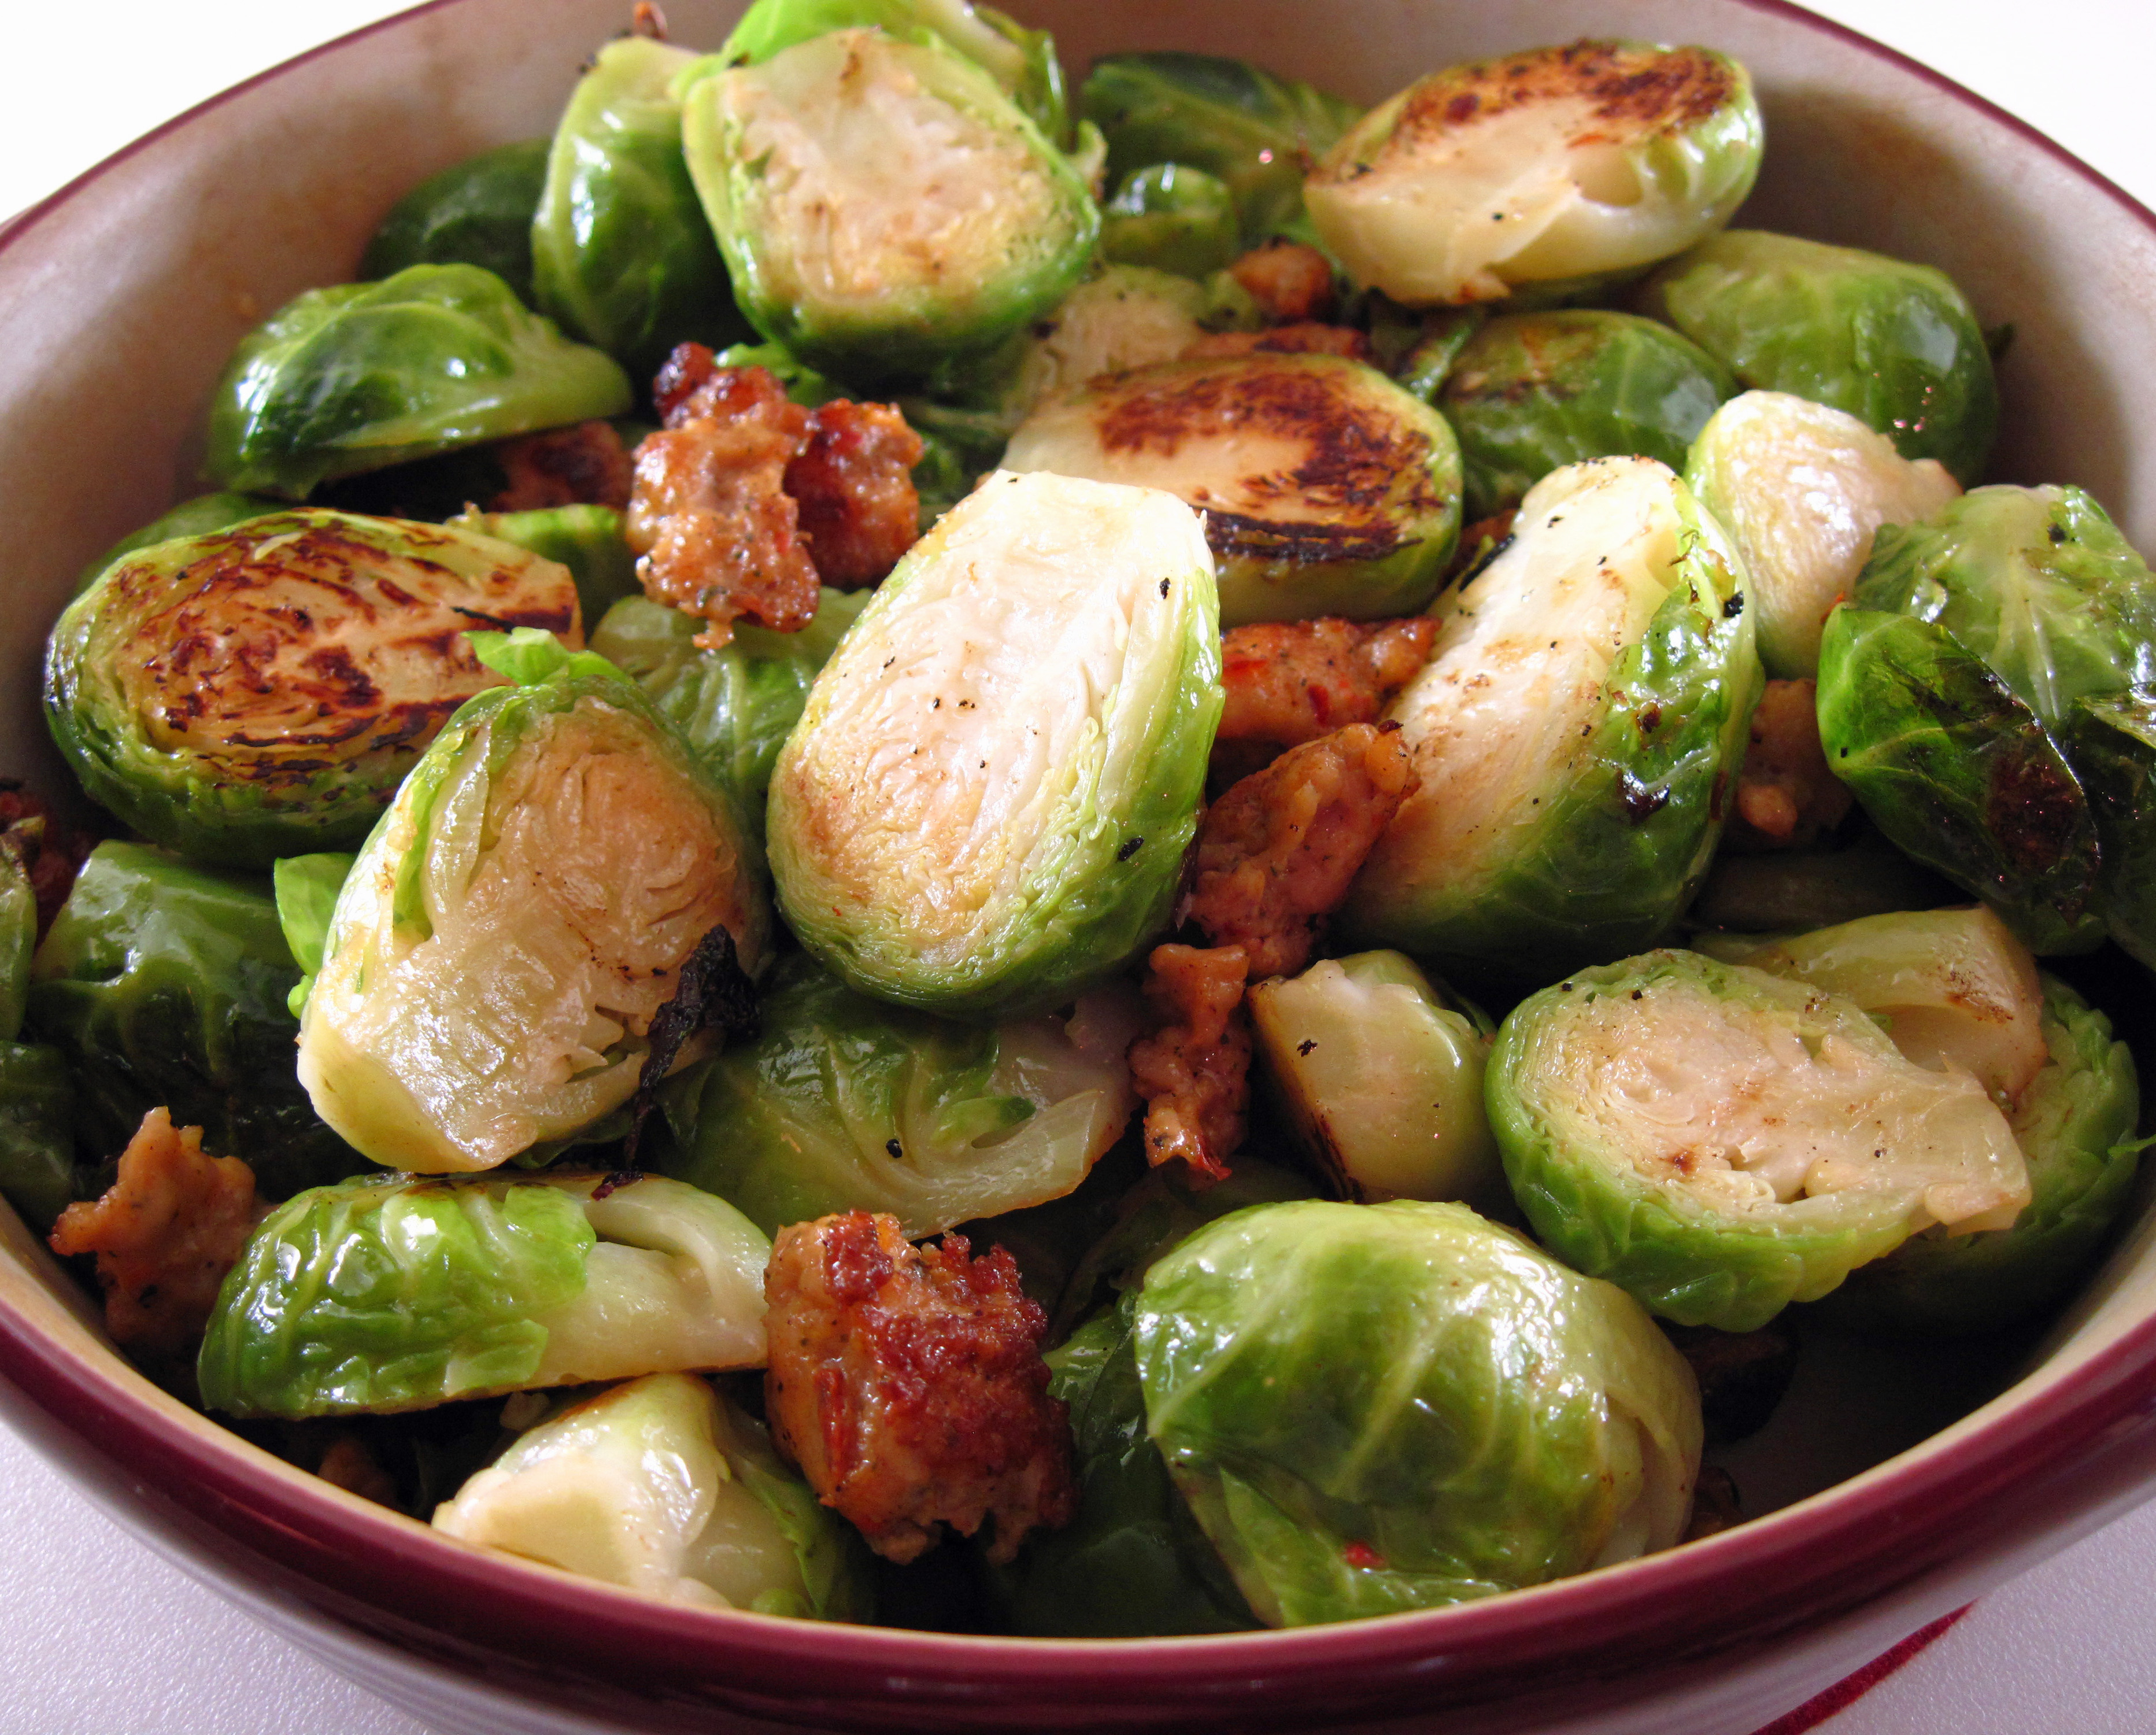
Brussels Sprouts with Sausage
By Kath Dedon
Today I present a new recipe, Brussels Sprouts with Sausage, from Mark Bittman’s brand-new cookbook, How to Cook Everything Fast: A Better Way to Cook Great Food. I can’t wait to get my hands on it; I pre-ordered it and it will be delivered 1 week from today.
One could argue that I already have too many cookbooks, including several by Mr. Bittman. So why do I need this new tome of 2,000 recipes? If you’re at all familiar with my blog, you know that I am a Mark Bittman “groupie”. I love his simple instructions and relaxed attitude. Don’t have a certain ingredient? Use something else. In fact, he usually offers suggestions for substitutions. The message in all of his books: Don’t make cooking harder than it needs to be. Cooking delicious meals with real food does not need to be difficult.
I always learn new and useful information from his books. Even his most basic cookbook, aptly titled How to Cook Everything the Basics, taught me a thing or two. My current favorite roast chicken recipe is from that book.
Anyway, I am eagerly awaiting my new Mark Bittman cookbook.
The Seattle Times recently published an article about Bittman and included two recipes from the new book: Fastest Chicken (or Eggplant) Parm and Brussels Sprouts with Chorizo. Since I had Brussels sprouts in the refrigerator I decided to try that one.
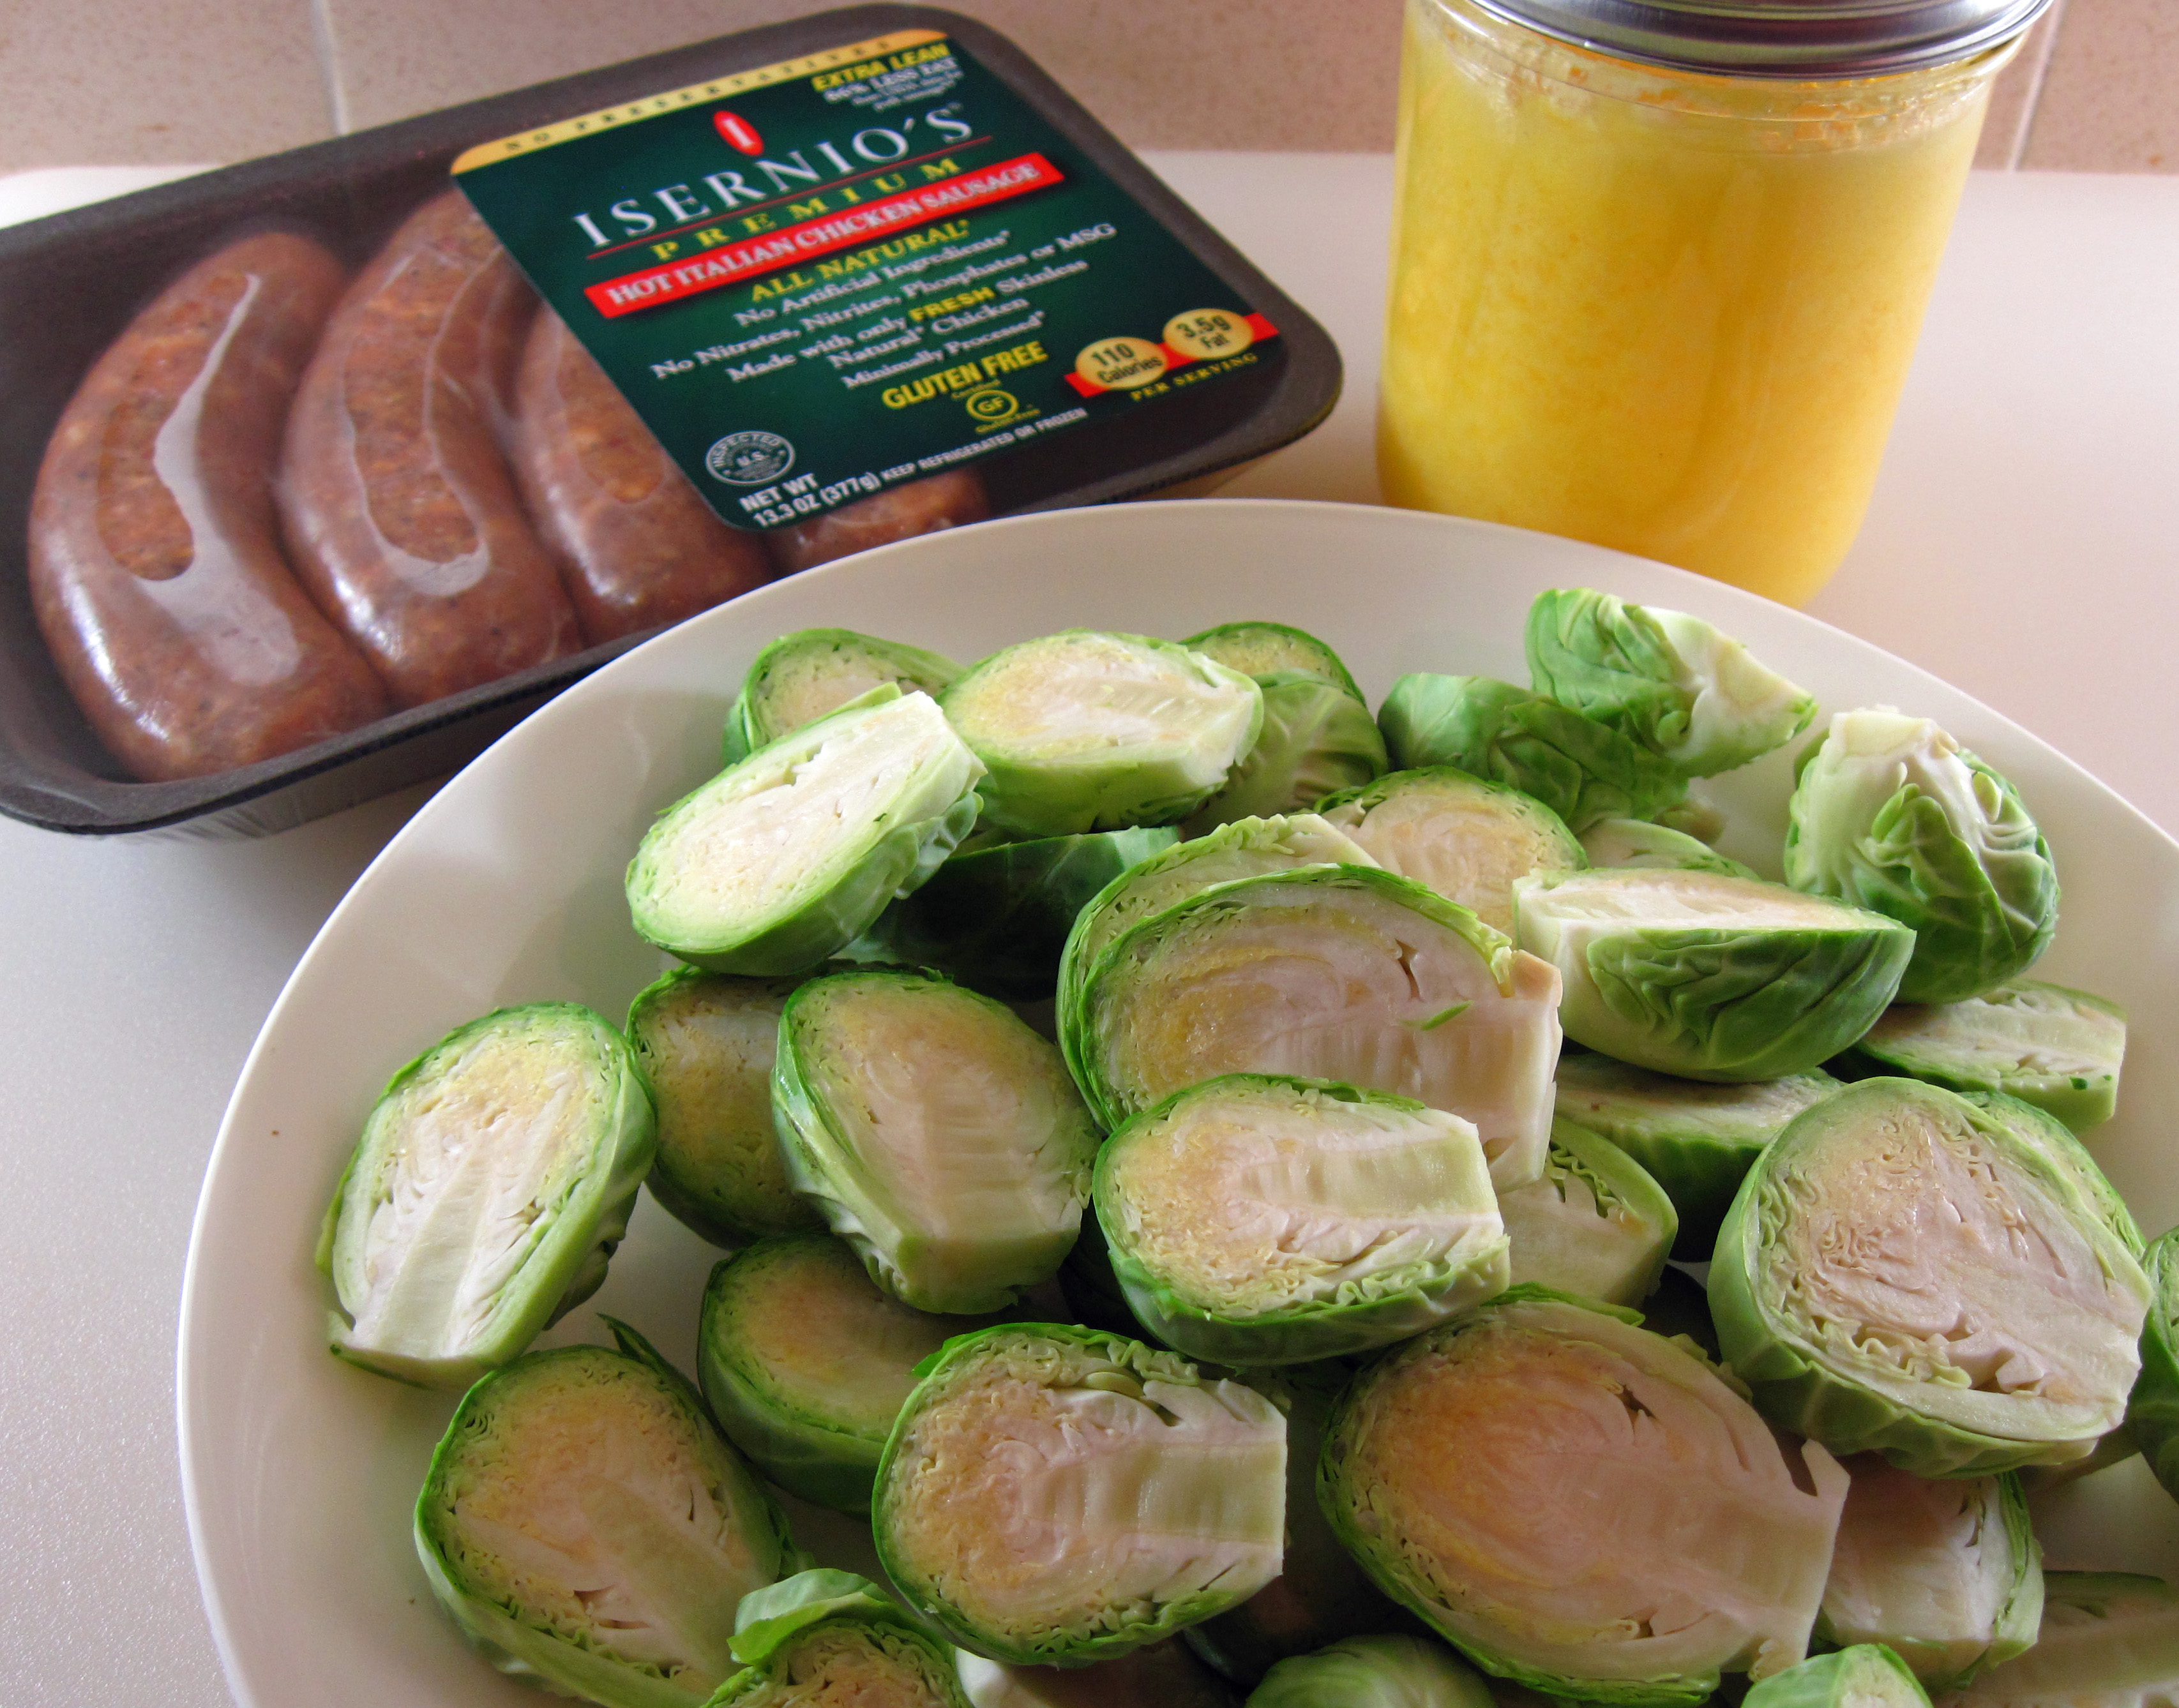
I wanted to use Isernio’s Chorizo, but the store I chose was out of it. They did have Isernio’s Hot Chicken Sausage so I bought that. Bittman had suggested that chorizo, sausage or bacon could be used for the recipe. The sausage was really good, but I think chorizo would make it even better!
I really liked this recipe for Brussels Sprouts with Sausage. It takes just a small amount of sausage to deliver a lot of flavor, especially if you pick a hot variety. It’s a great side dish to serve with grilled or roasted meat or fish. It could also be paired with a substantial meatless dish to make an almost vegetarian meal. (The article did mention that several Times readers said they liked to use Soyrizo, a vegan meat substitute. So that’s an option as well.)
a
P.S. If you’re in the Seattle area you can hear Mark talk about his new book and fast cooking at 7:30pm on October 14 at Town Hall. 🙂 http://goo.gl/ffWM6o
a
a
Brussels Sprouts with Sausage
(Adapted from a recipe in Mark Bittman’s How to Cook Everything Fast)
a
I used ghee since I had just made a fresh batch, but you can also use olive oil as the original recipe suggests.
a
a
Serves 4
a
2 tablespoons ghee (or olive oil)
3.3 ounces fresh hot Italian sausage (each Isernio link is about 3.3 ounces)
1½ pounds Brussels sprouts
½ cup water
Salt and pepper to taste
a
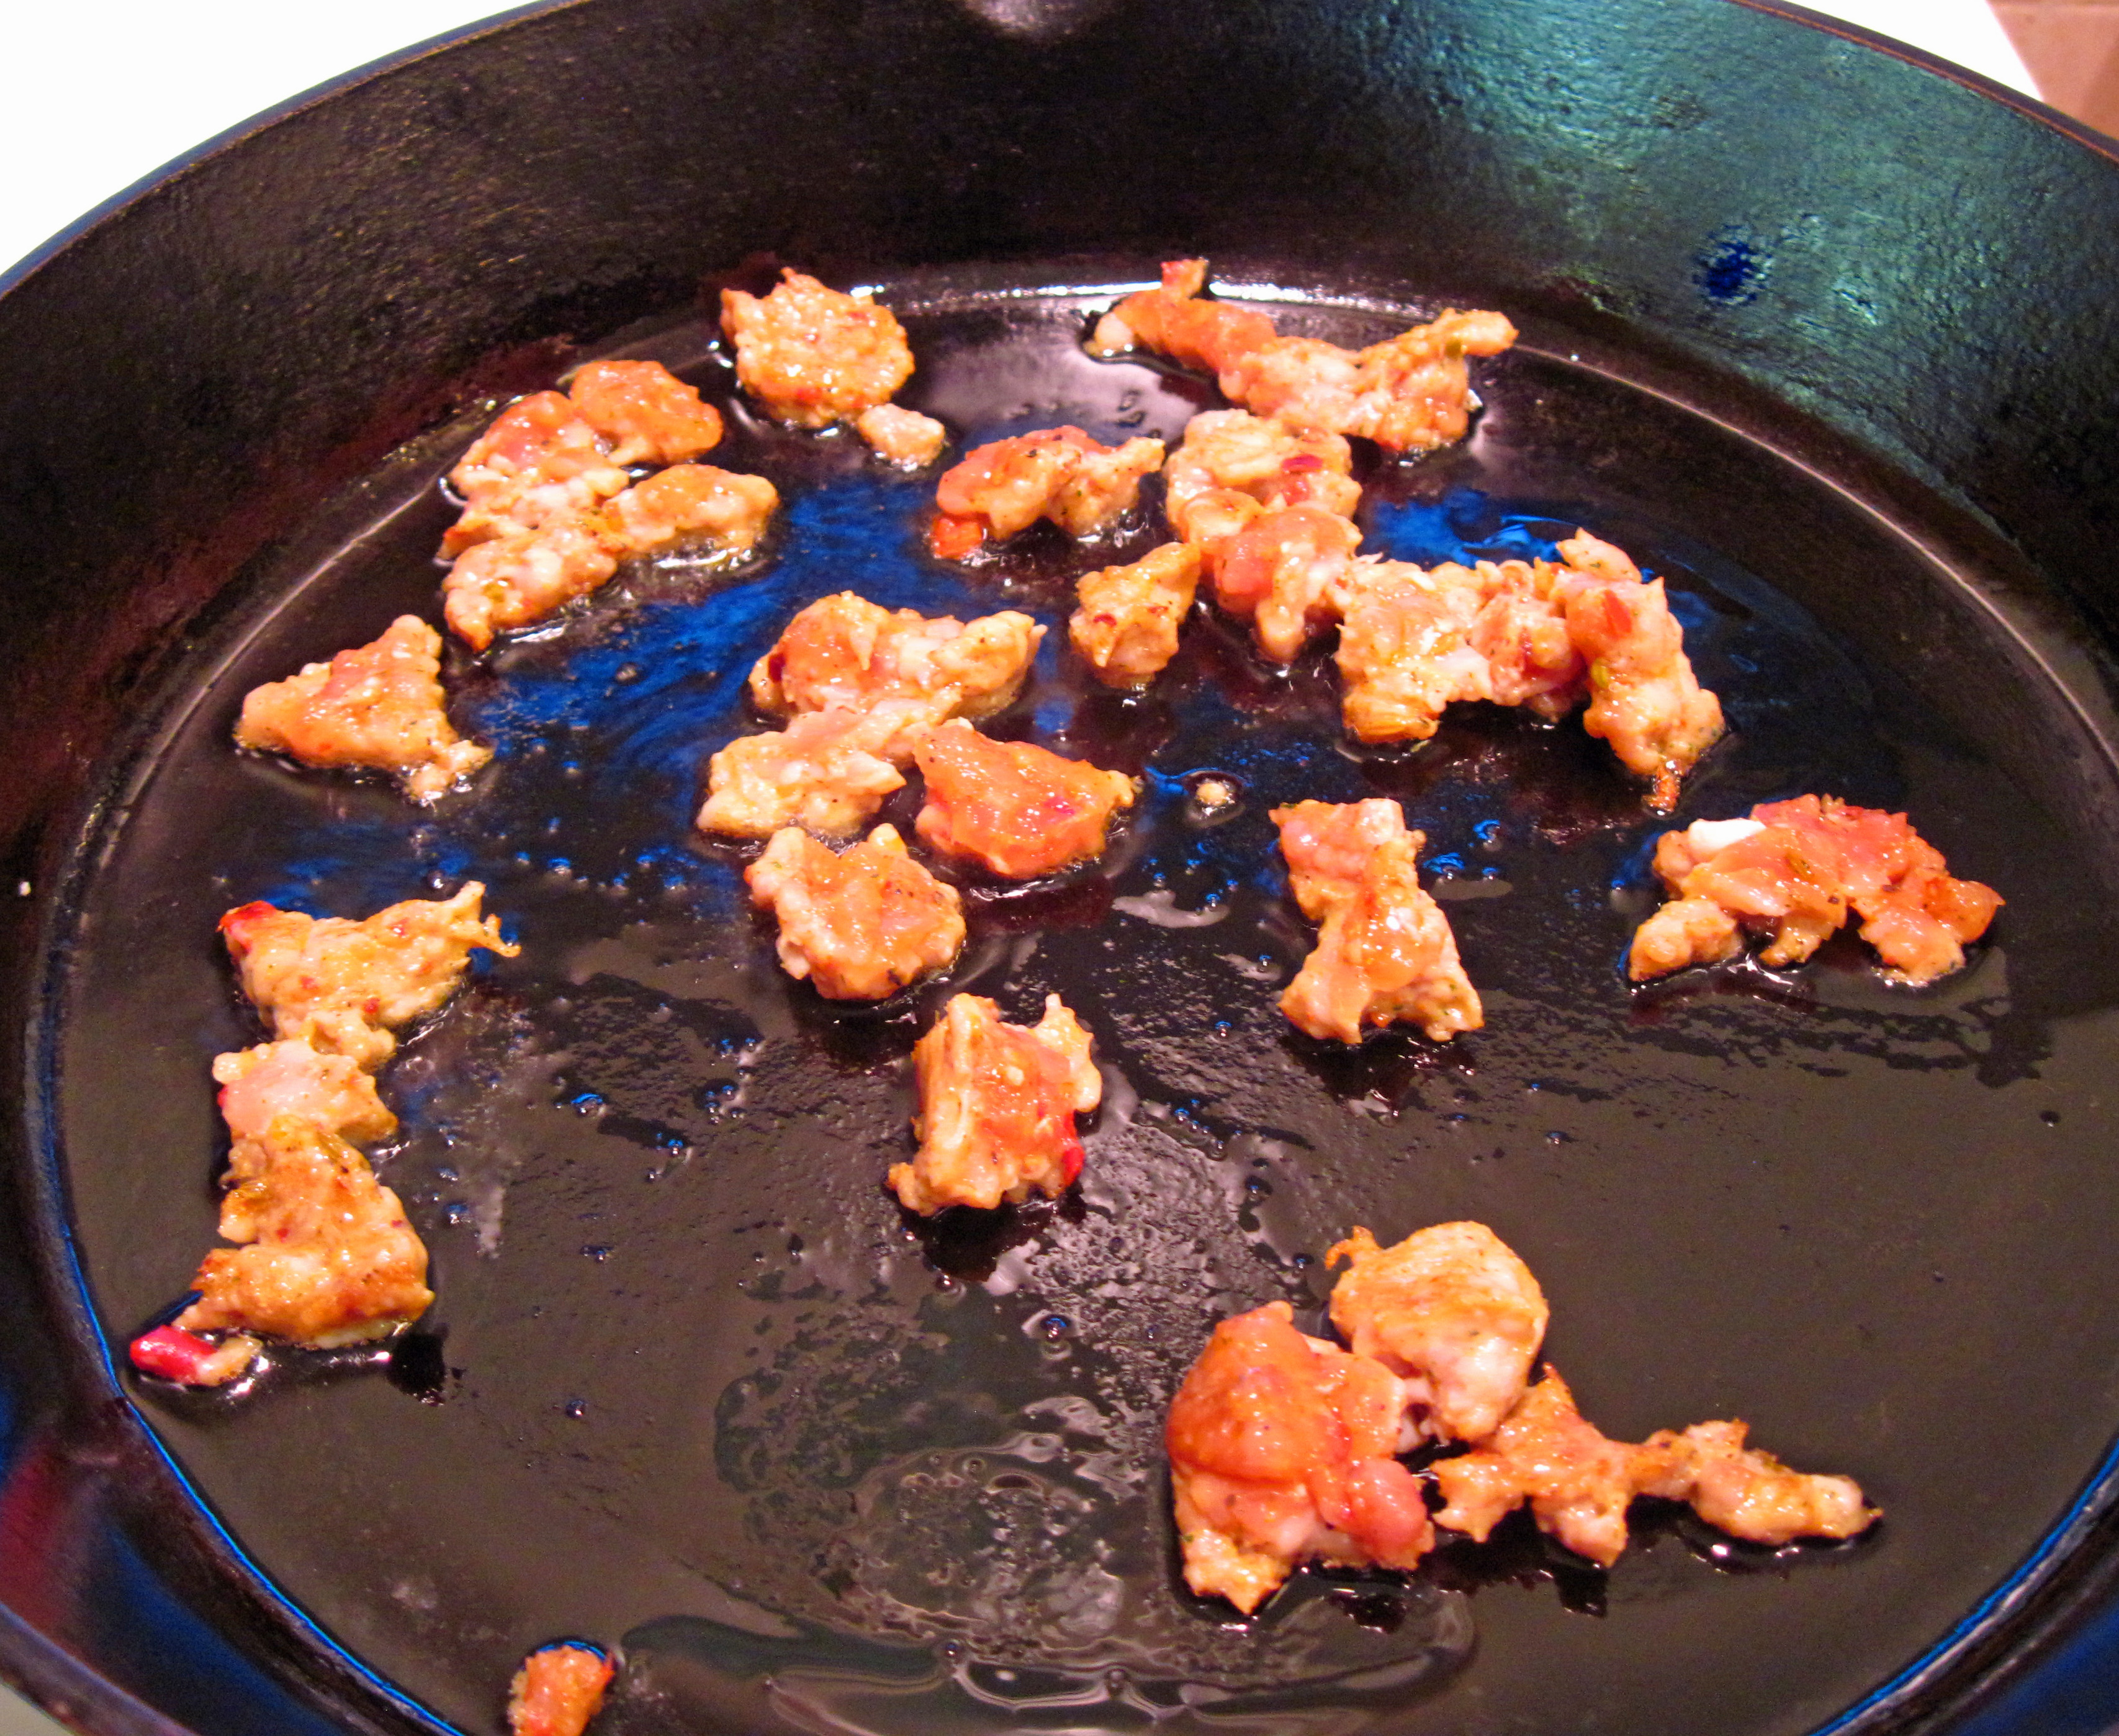
Ingredients: Sausage (I used only one link), ghee, and Brussels sprouts
a
- Trim the Brussels sprouts and cut them in half.
- Heat the ghee in a large skillet over medium heat. Add the sausage and cook, stirring occasionally, for about 3 – 5 minutes.
a
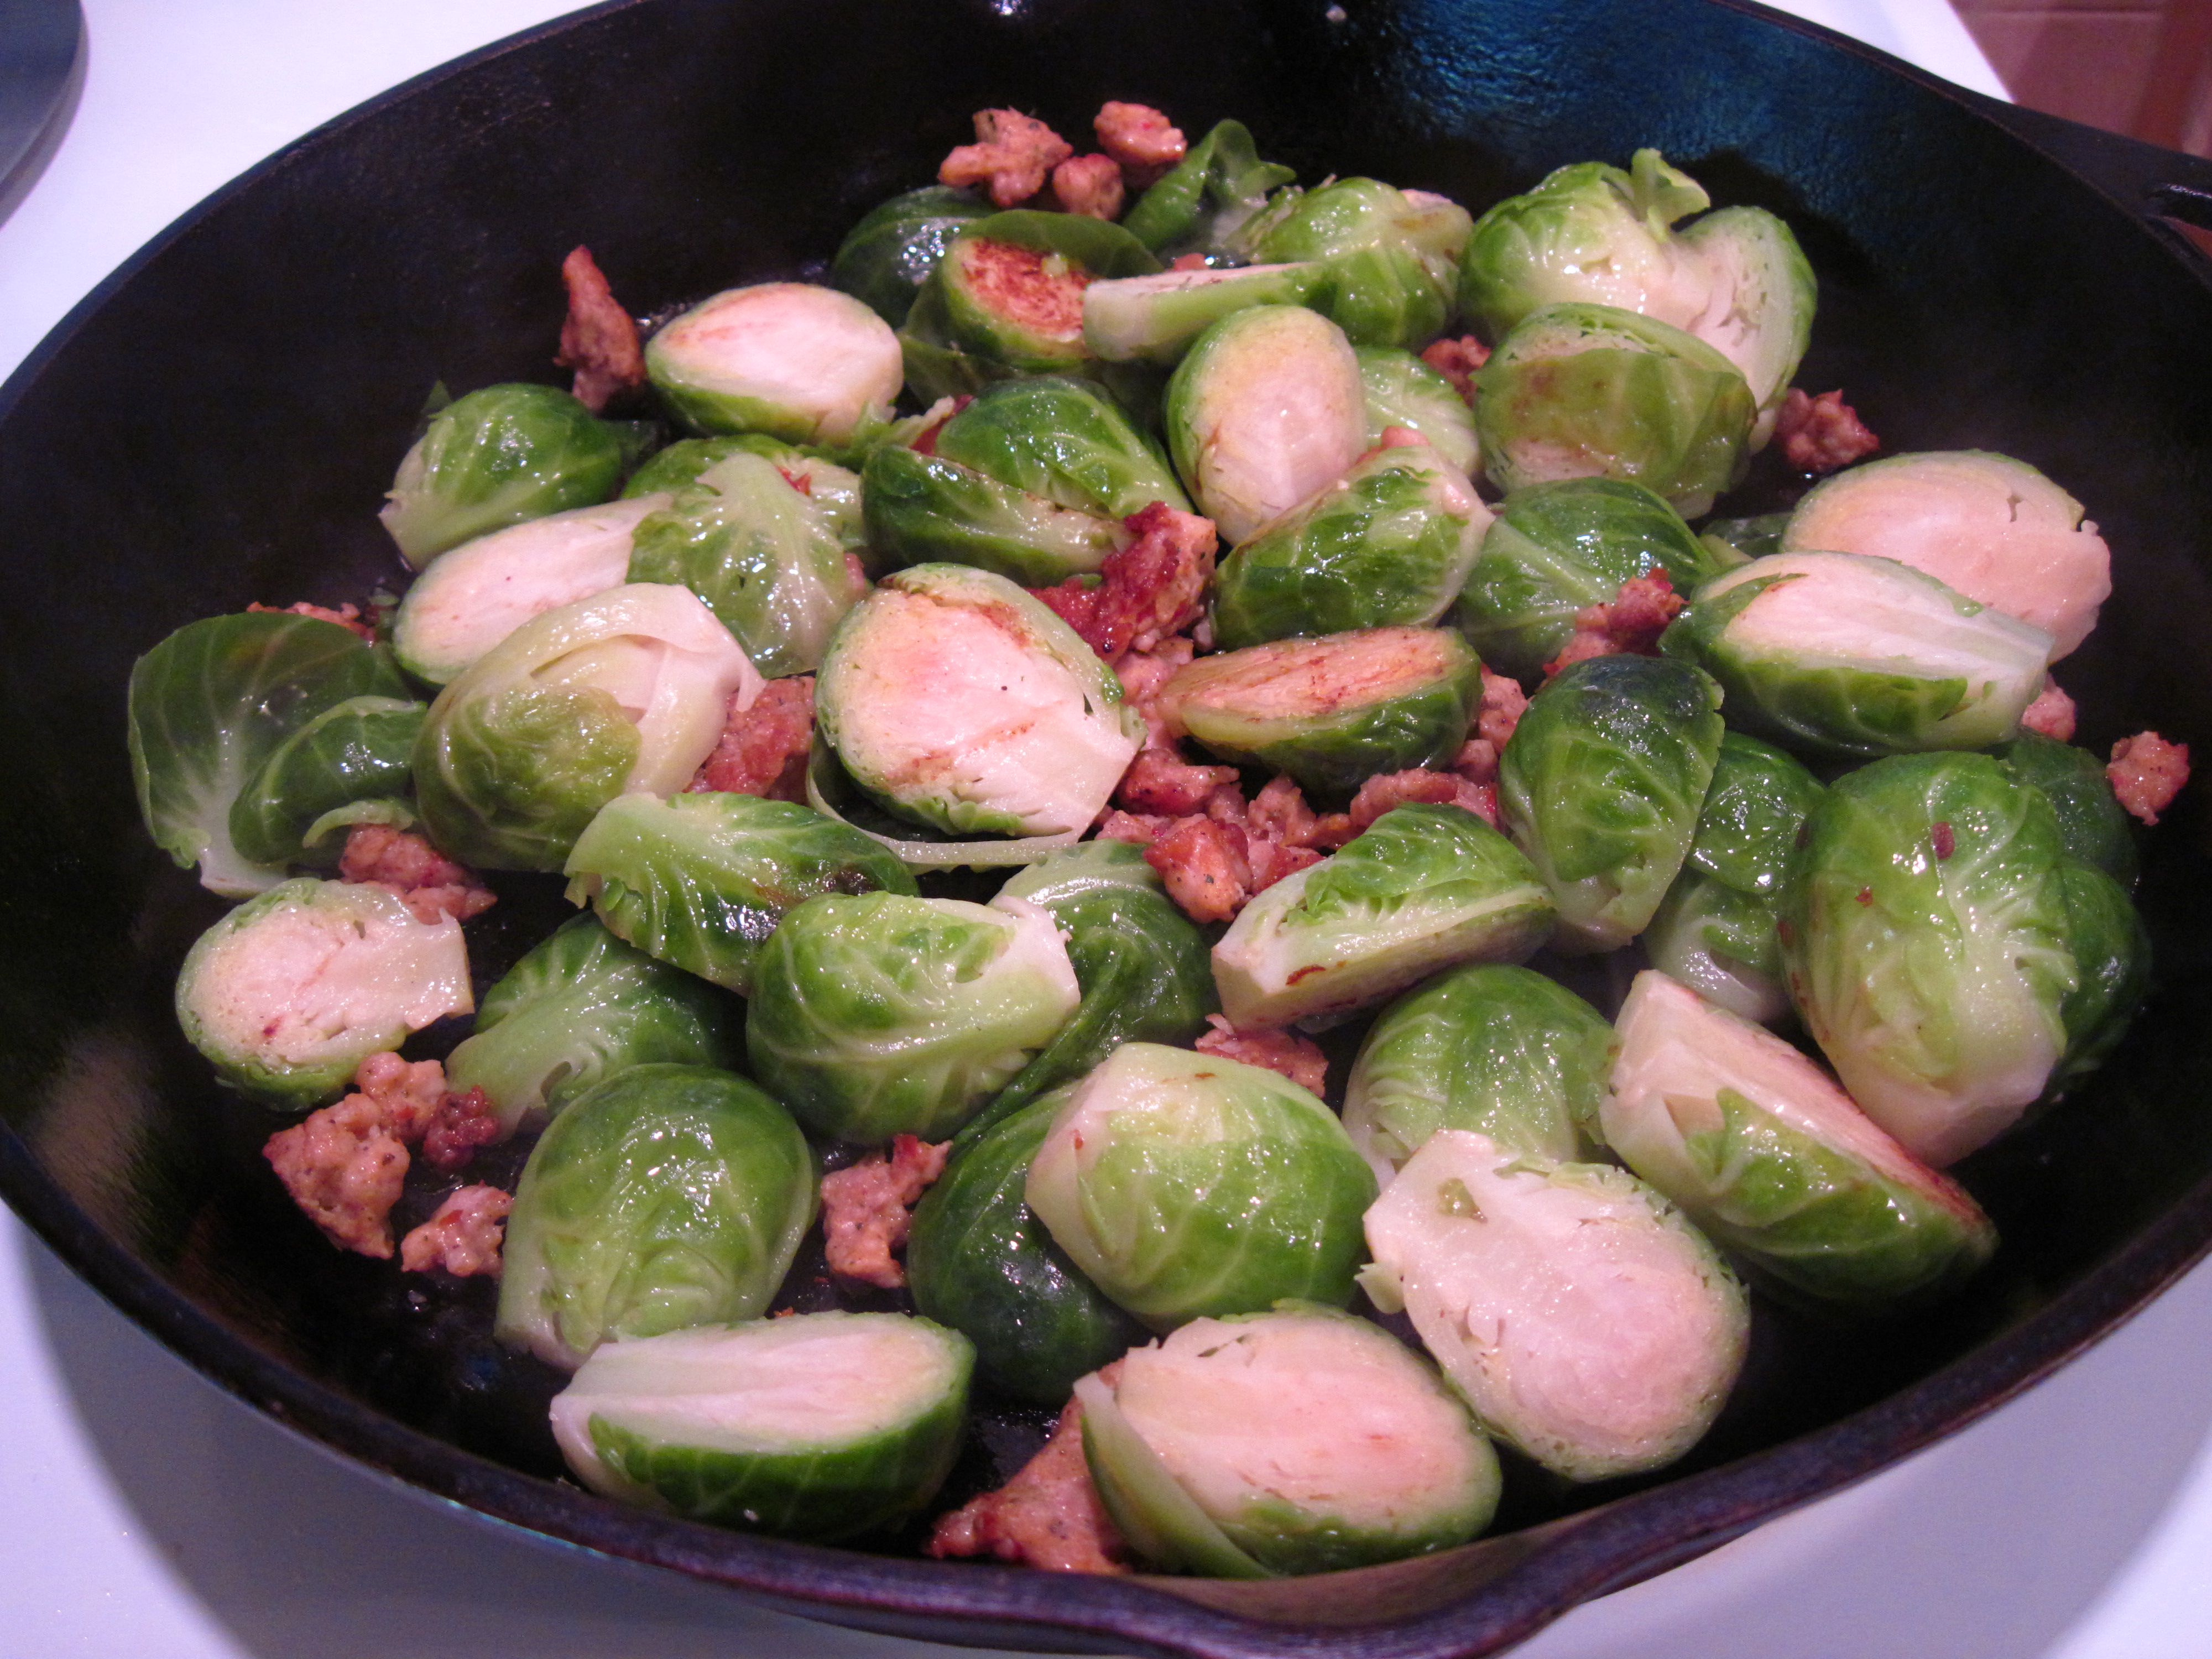
- Add the Brussels sprouts to the skillet. Add the ½ cup of water. Sprinkle with salt and pepper. Cover and cook for about 10 minutes, or until just tender. (Smaller sprouts may take less time.) Check on them a time or two and add a bit more water, if necessary.
Sprouts after cooking for about 10 minutes
a
- When the sprouts are just about done, remove the cover and raise the heat to medium high. Cook, stirring just once or twice, for a couple of more minutes. The liquid should evaporate and the sprouts should be starting to get brown.
- Taste and add more salt and pepper if necessary. Serve hot or warm.
a

Share this:

Cucumber Tomato Salad with Feta Cheese
By Kath Dedon
a
Yesterday was Labor Day and we had a simple family dinner. I grilled cheeseburgers and Metropolitan Market’s superior nitrite-free hot dogs. Laura was thrilled that I had bought some cream cheese and made caramelized onions so she could have a “Seattle dog”. (I have to say that the sweet-salty-creamy combo is quite good.)
The burgers and dogs were clearly the stars of the meal. I wanted a side dish that would be simple and fresh to serve with them. With our abundance of cherry tomatoes, a recipe on Jeanette’s Healthy Living sounded perfect. I swapped cherry tomatoes for the 2 tomatoes that Jeanette used, and 1 English cucumber for the 2 regular. She added extra-aged goat cheese to her salad. Knowing that Byron doesn’t like goat cheese, I used feta.
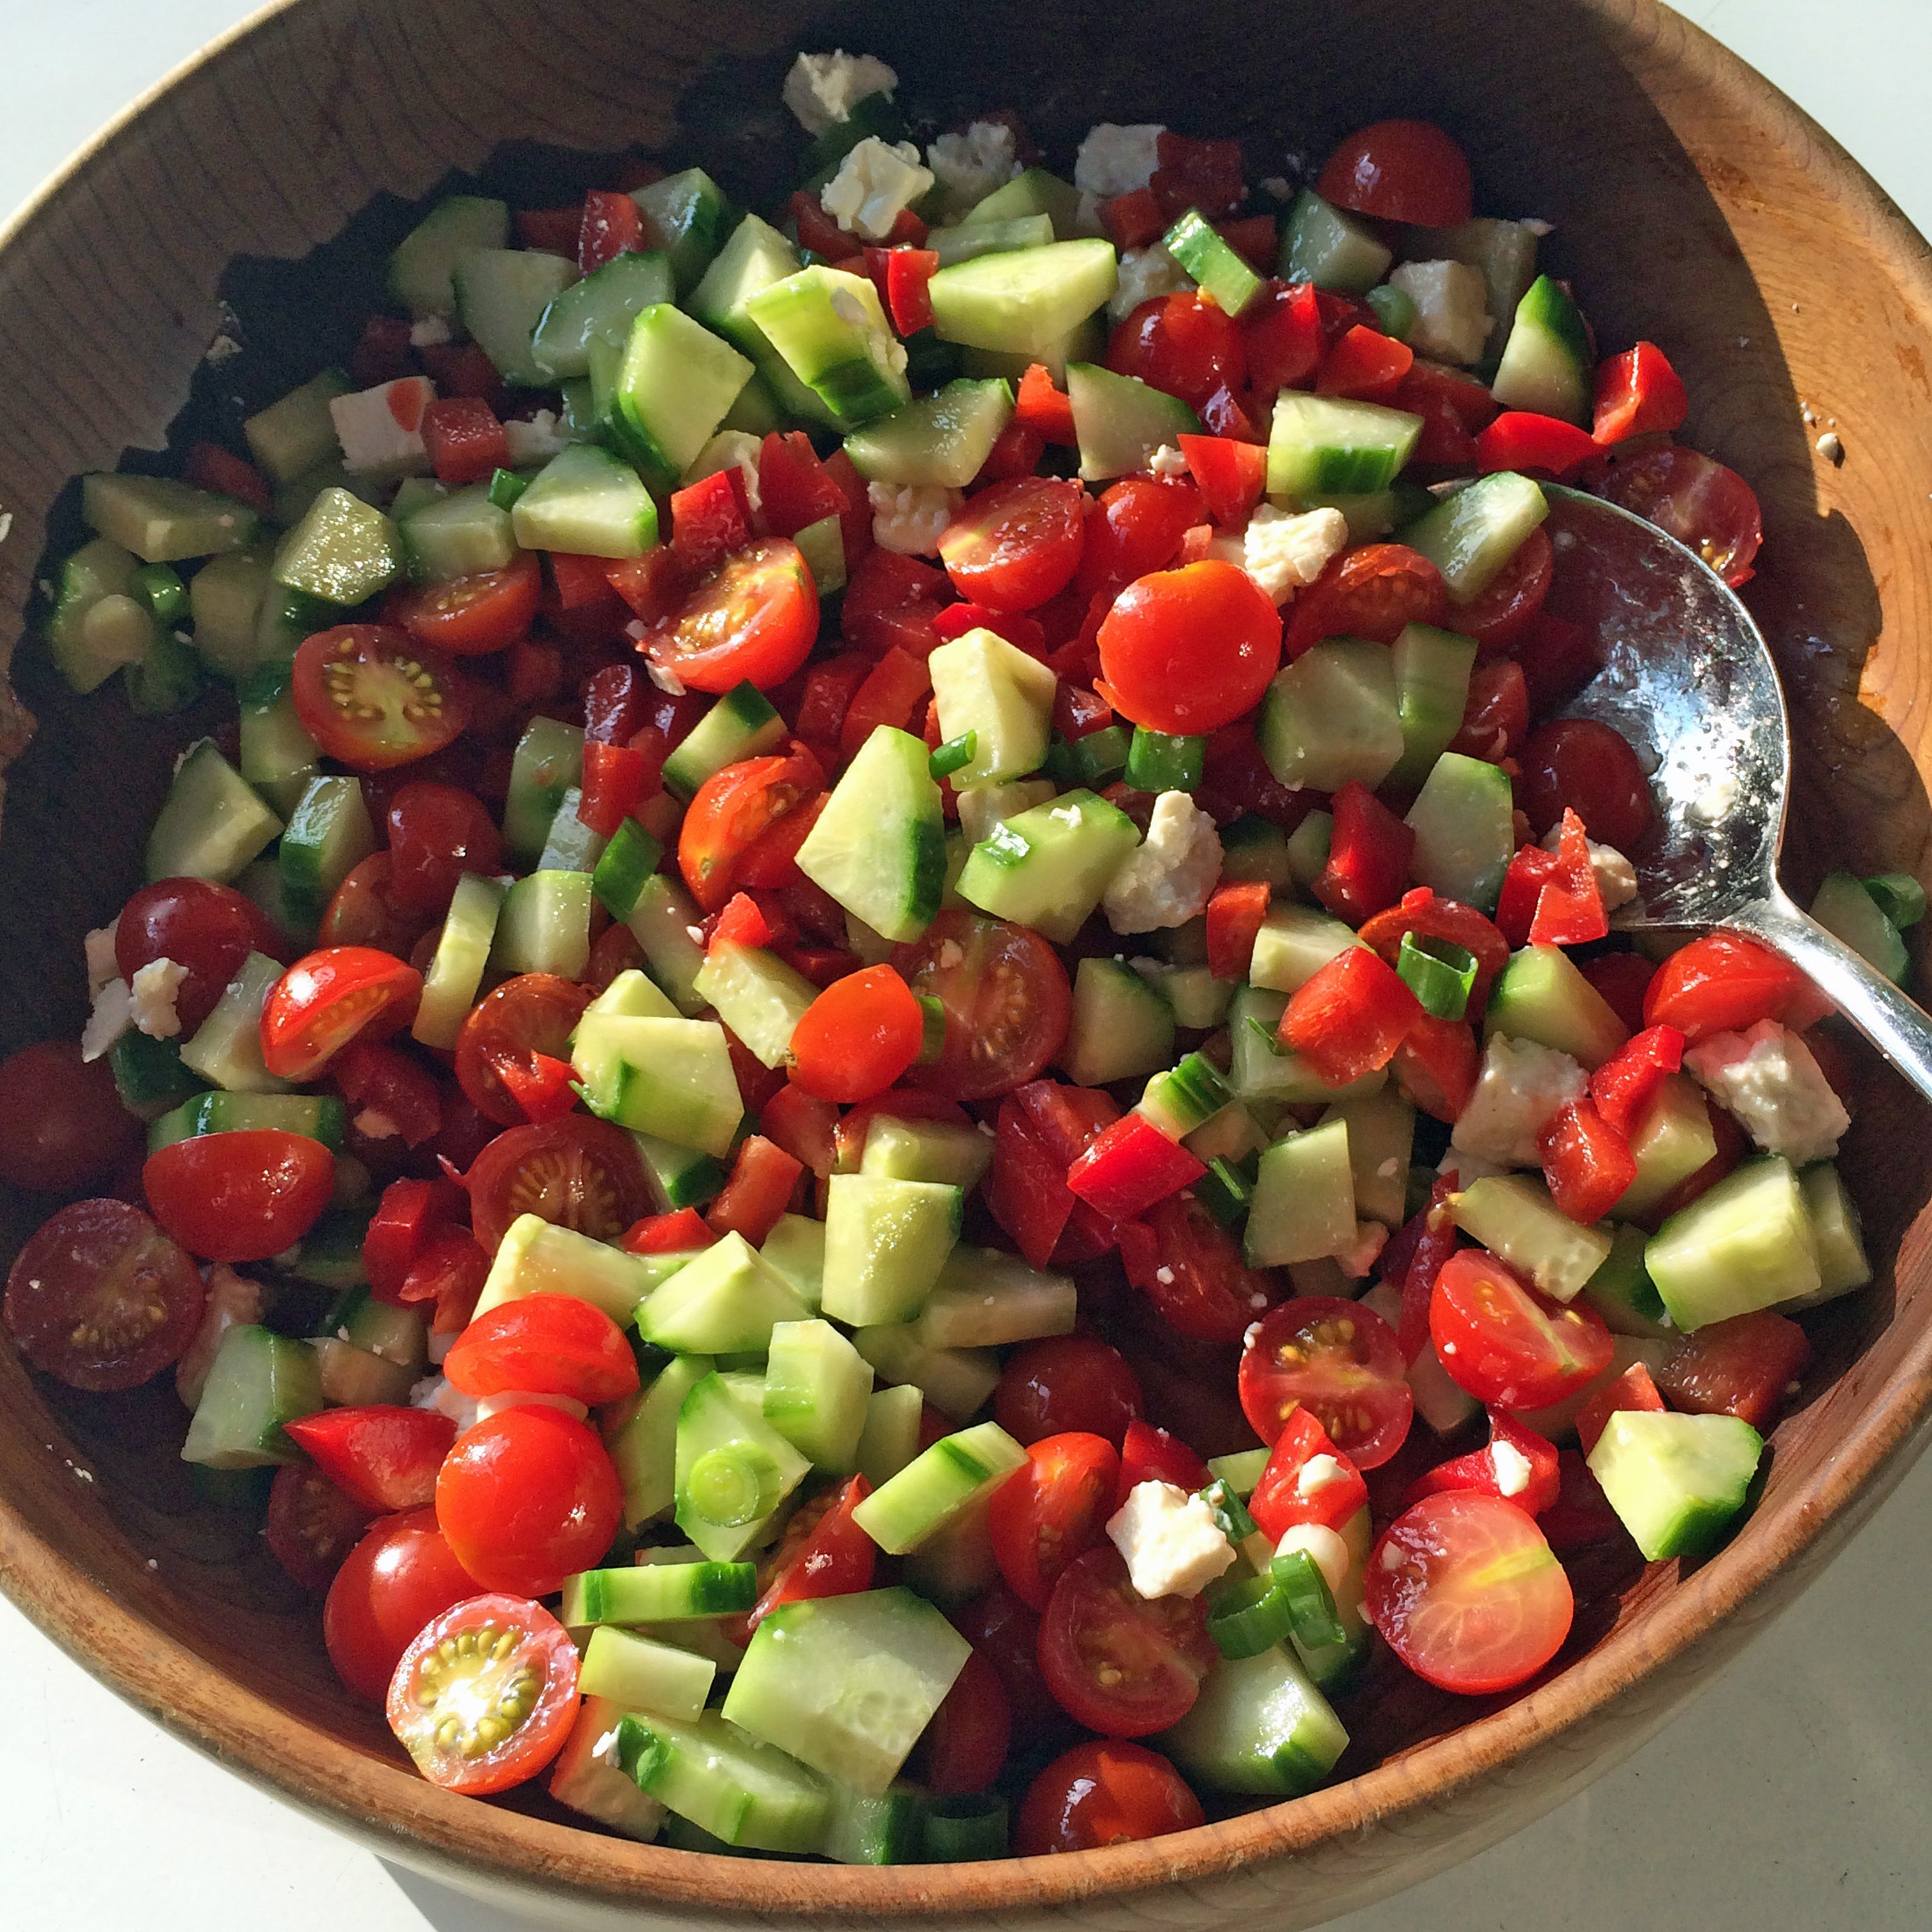
The Cucumber Tomato Salad with Feta Cheese was the perfect side dish with the rest of the meal. I only took one quick iPhone photo of the salad, but I just had to share the recipe. It’s so quick and easy to put it together. I highly recommend it, especially if you have fabulous homegrown tomatoes. It’s like summer in a bowl!
a
a
Cucumber Tomato Salad with Feta Cheese
(Adapted from a recipe on the Jeanette’s Healthy Living blog)
a
a
If you use regular cucumbers you may want to seed them. It’s not necessary with the English cucumber.
a
Serves 4 – 5
a
1 long English cucumber, peeled (or 2 regular cucumbers)
2 – 3 cups cherry tomatoes, cut in half (or 2 tomatoes, chopped)
1 red pepper, chopped
1 green onion, cut into thin slices
2 -3 ounces Feta cheese, cut or crumbled into small pieces
A drizzle of extra virgin olive oil
A drizzle of white balsamic vinegar
a
- Cut the peeled cucumber into quarters lengthwise and then slice.
- Toss all of the ingredients together in a bowl.
Could that be any easier?
a
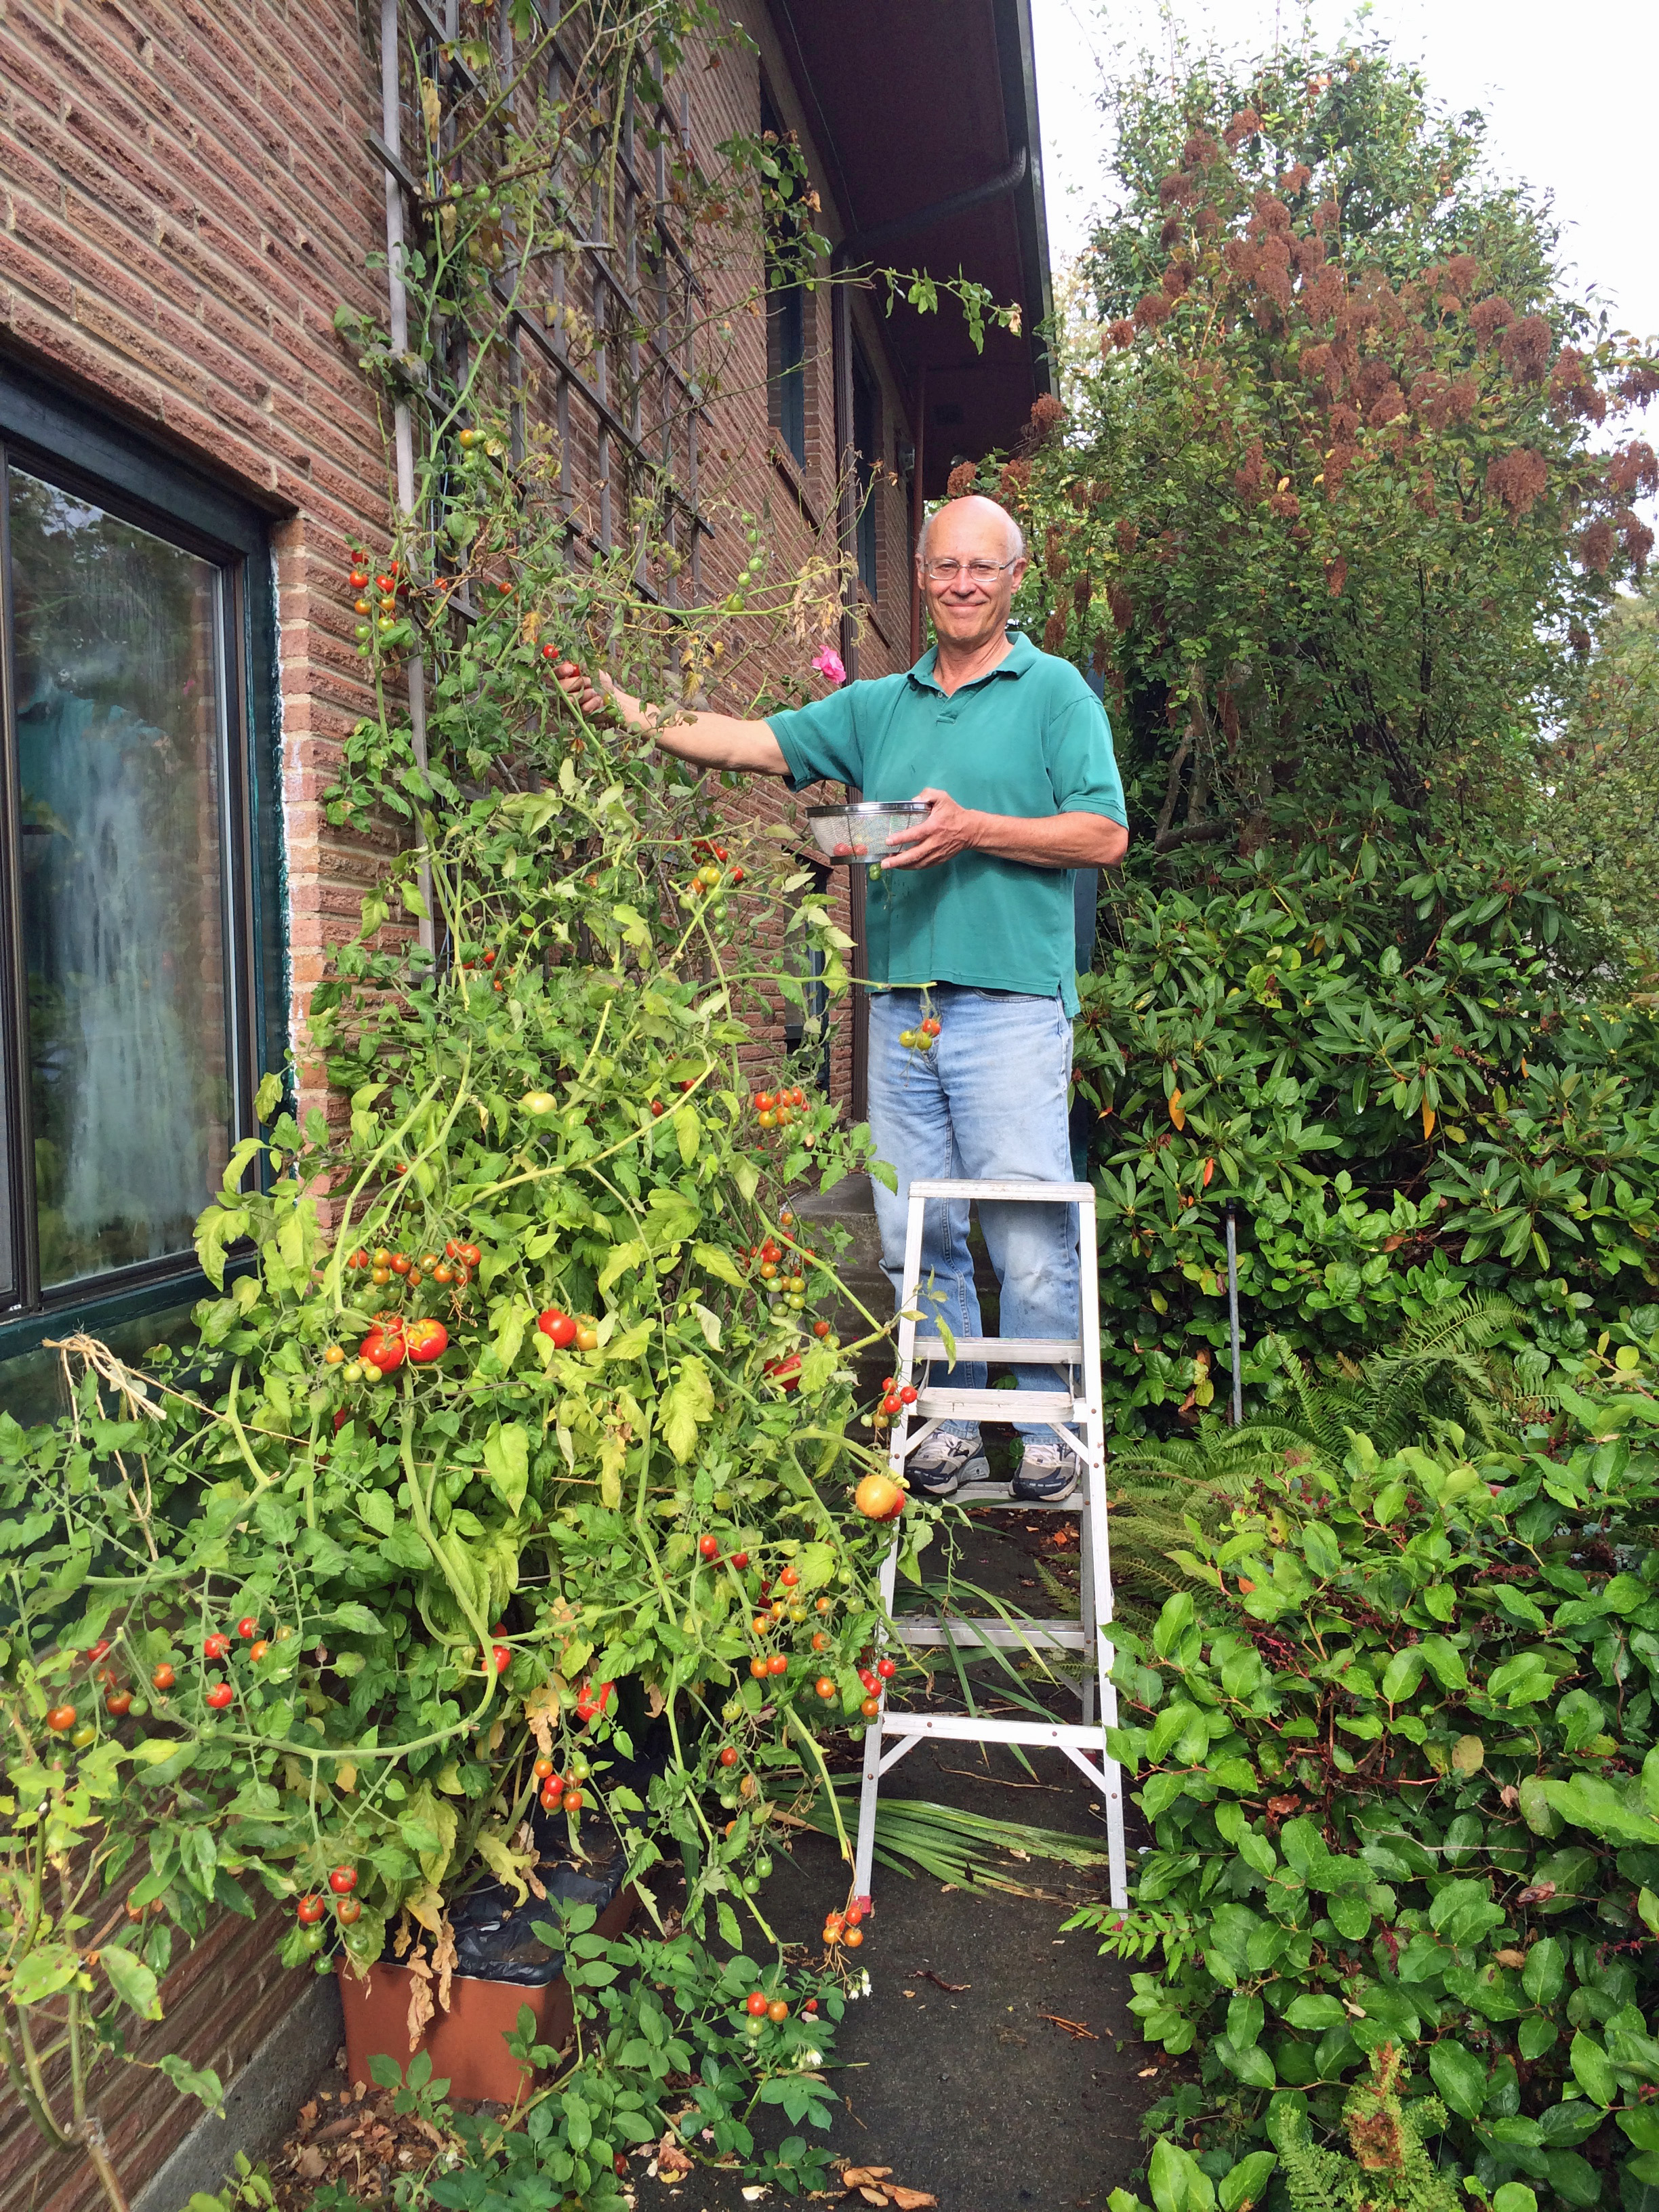
We need a ladder to harvest the cherry tomatoes from our 9-foot plant!
 a
a

a
Share this:

A Day Trip to Paradise
By Kath Dedon
a
I have no recipes for you today. This post is all about a fantastic day trip for those of you living in or visiting the Pacific Northwest.
How many people can say that they can take a day trip to Paradise? Last weekend Bob and I did just that. Paradise is the main, and most popular, visitors area in Mt. Rainier National Park.
a

Knowing that Mt. Rainier National Park is wildly popular in July and August, we knew we should probably get an early start. We left the house at 8:00am and headed south via highway 161 through Puyallup, South Hill, Graham and Eatonville. We learned that the traffic is pretty horrible through Puyallup and South Hill, not because there is so much traffic, but because the numerous traffic lights are not coordinated to keep the traffic moving. We’d take a different route next time.
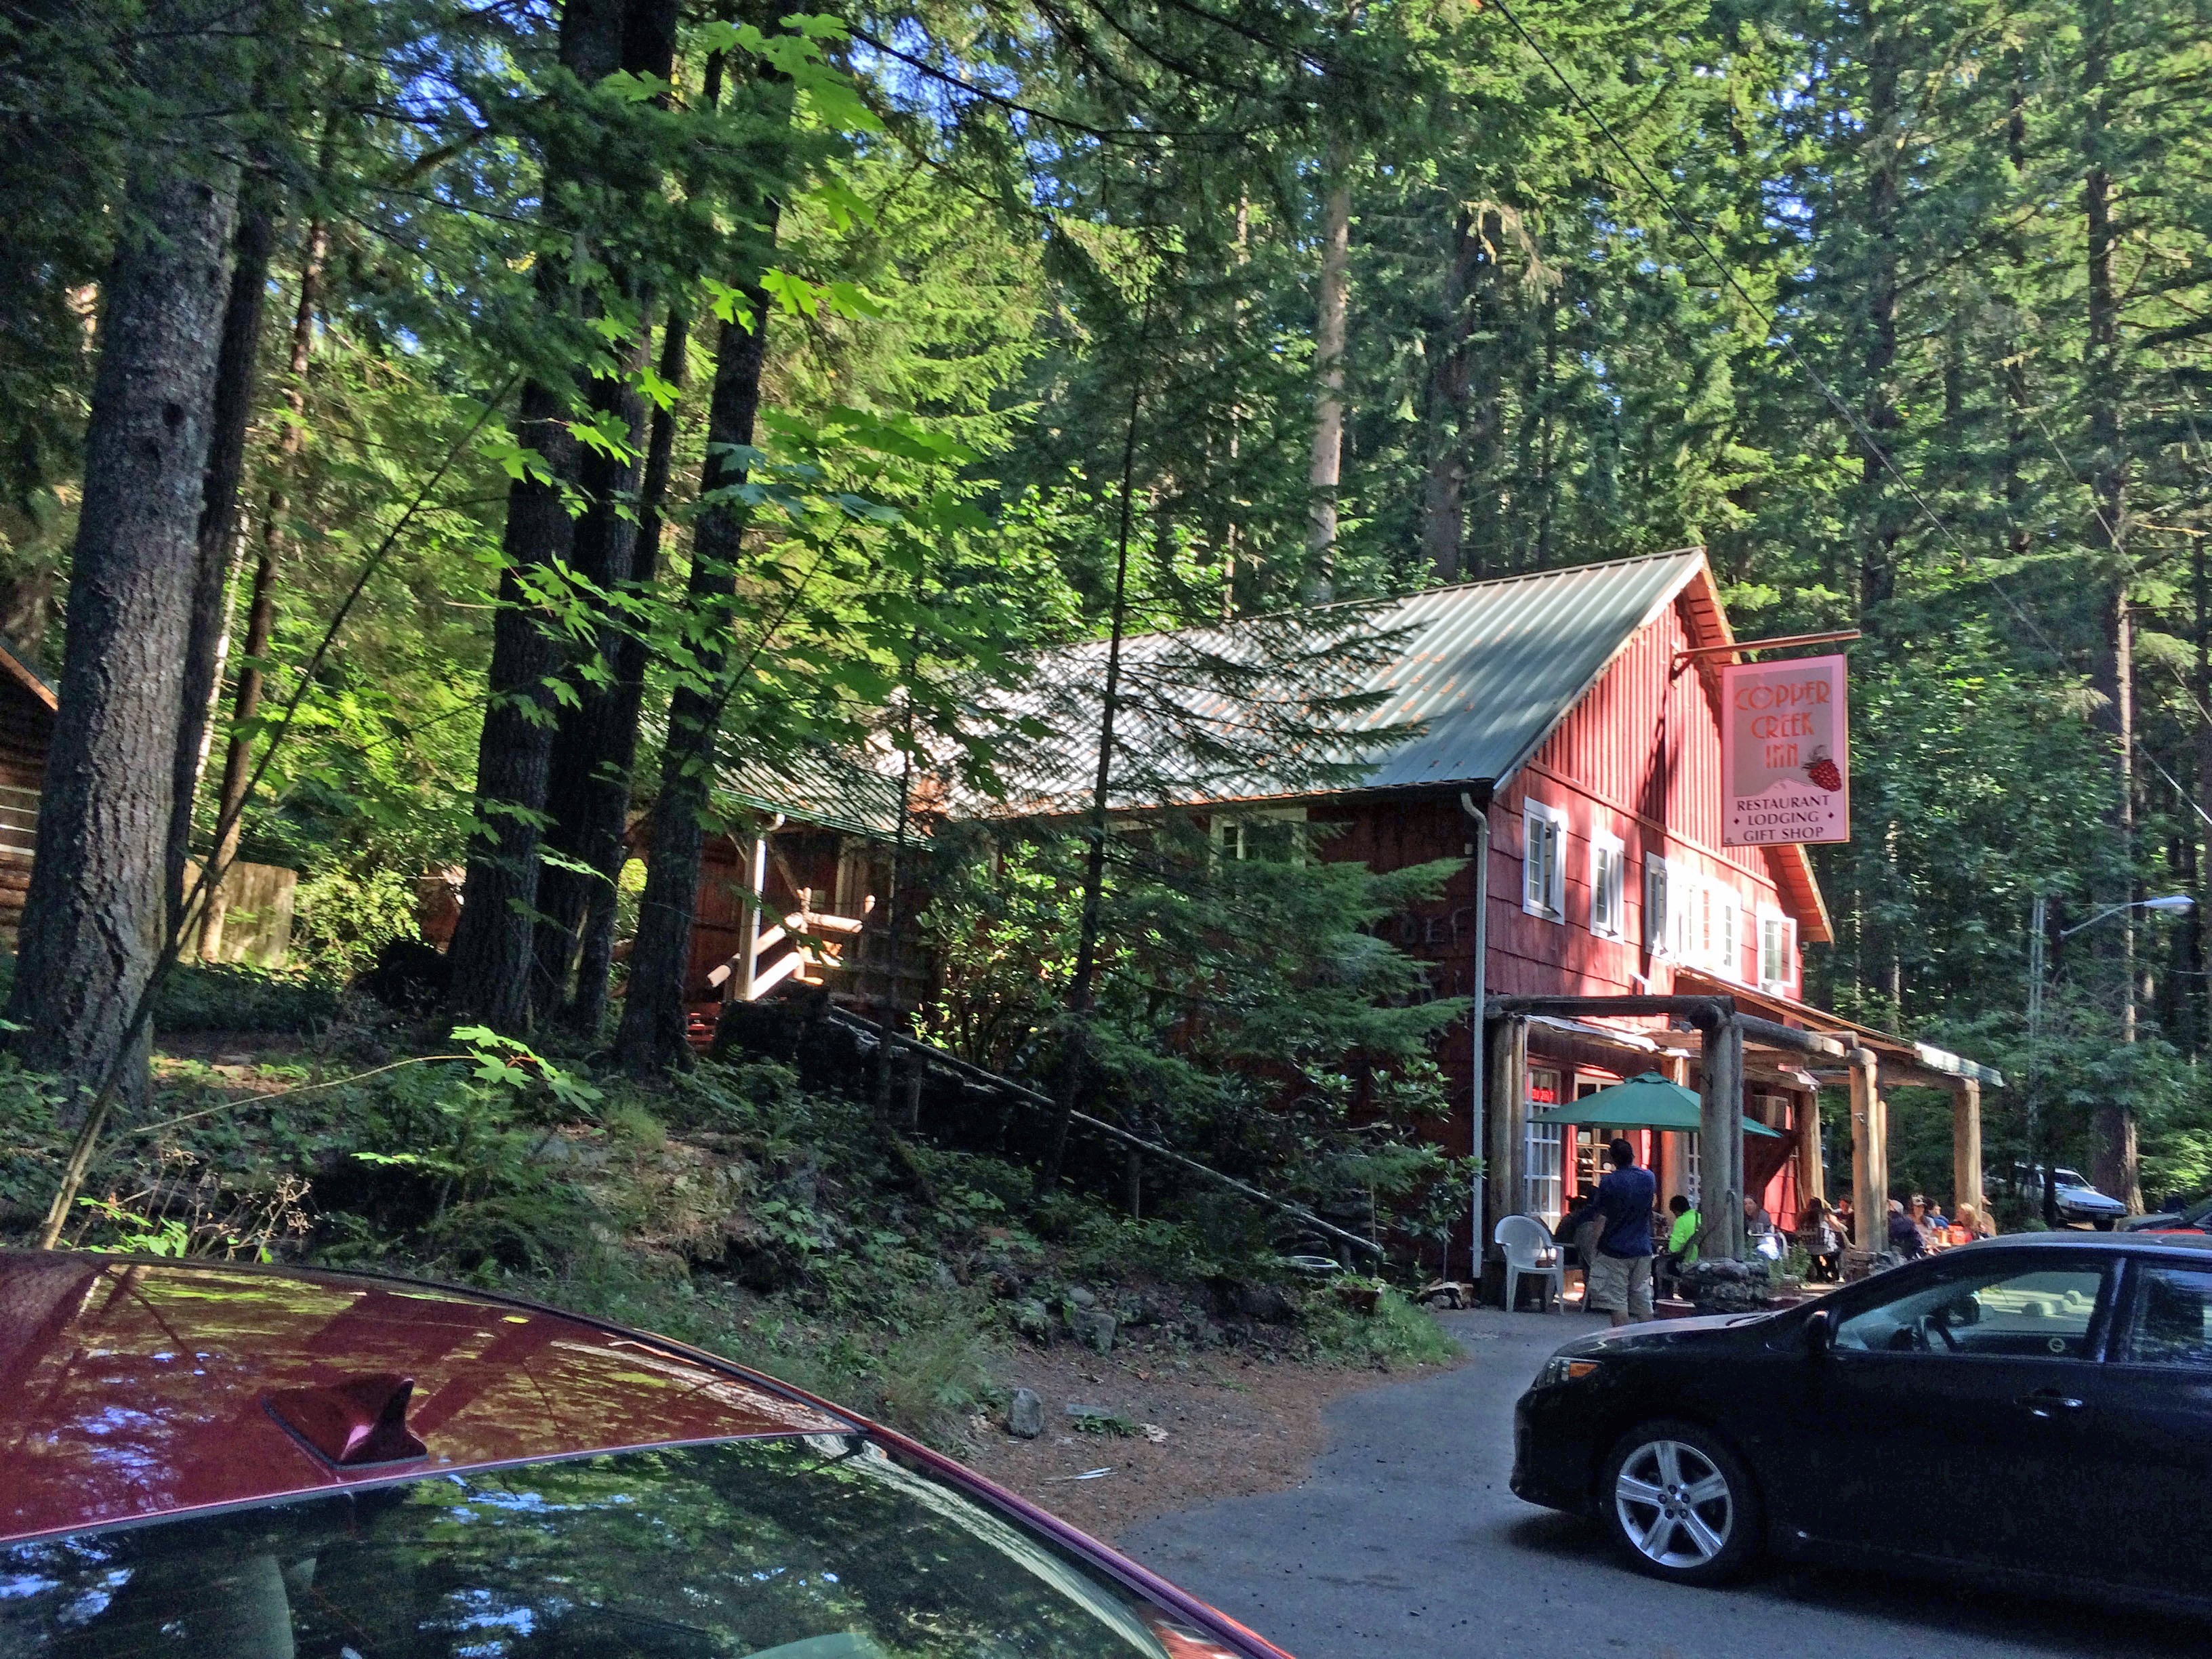
We reached our first destination, the Copper Creek Inn and Restaurant, at about 10:00 and stopped for breakfast. The restaurant is just 2 miles from the Nisqually entrance to Mt. Rainier National Park and has been popular since 1946. We felt lucky to get a table right away because it was full of people who were obviously on their way to the Park.
Breakfast was fantastic! The eggs and hash browns were perfect. Bob’s ham was delicious. The toast was made with homemade bread and served with blackberry jam and raspberry butter. As we were getting ready to leave, we got a glimpse of a big tray of homemade dough for hoagie rolls ready to be baked for the lunch menu’s French dip sandwiches. They serve breakfast, lunch, and dinner. Don’t miss it if you have the opportunity to eat there.
a
Copper Creek Inn and Restaurant
After breakfast we continued on to the Park. It costs $15 a day for a car and its occupants to enter the park, but if you are over 62 you can get a lifetime pass for all of the National Parks in the whole country for just $10. Such a bargain! I told Bob that we should perhaps get an RV and travel from park to park. (Just kidding!!)

It took 30 or 40 minutes driving on a winding road to reach Paradise. When we were about halfway there, we began seeing signs that said the parking lots were full. “Be prepared to drive through.” We remained optimistic that we would find some place to park.
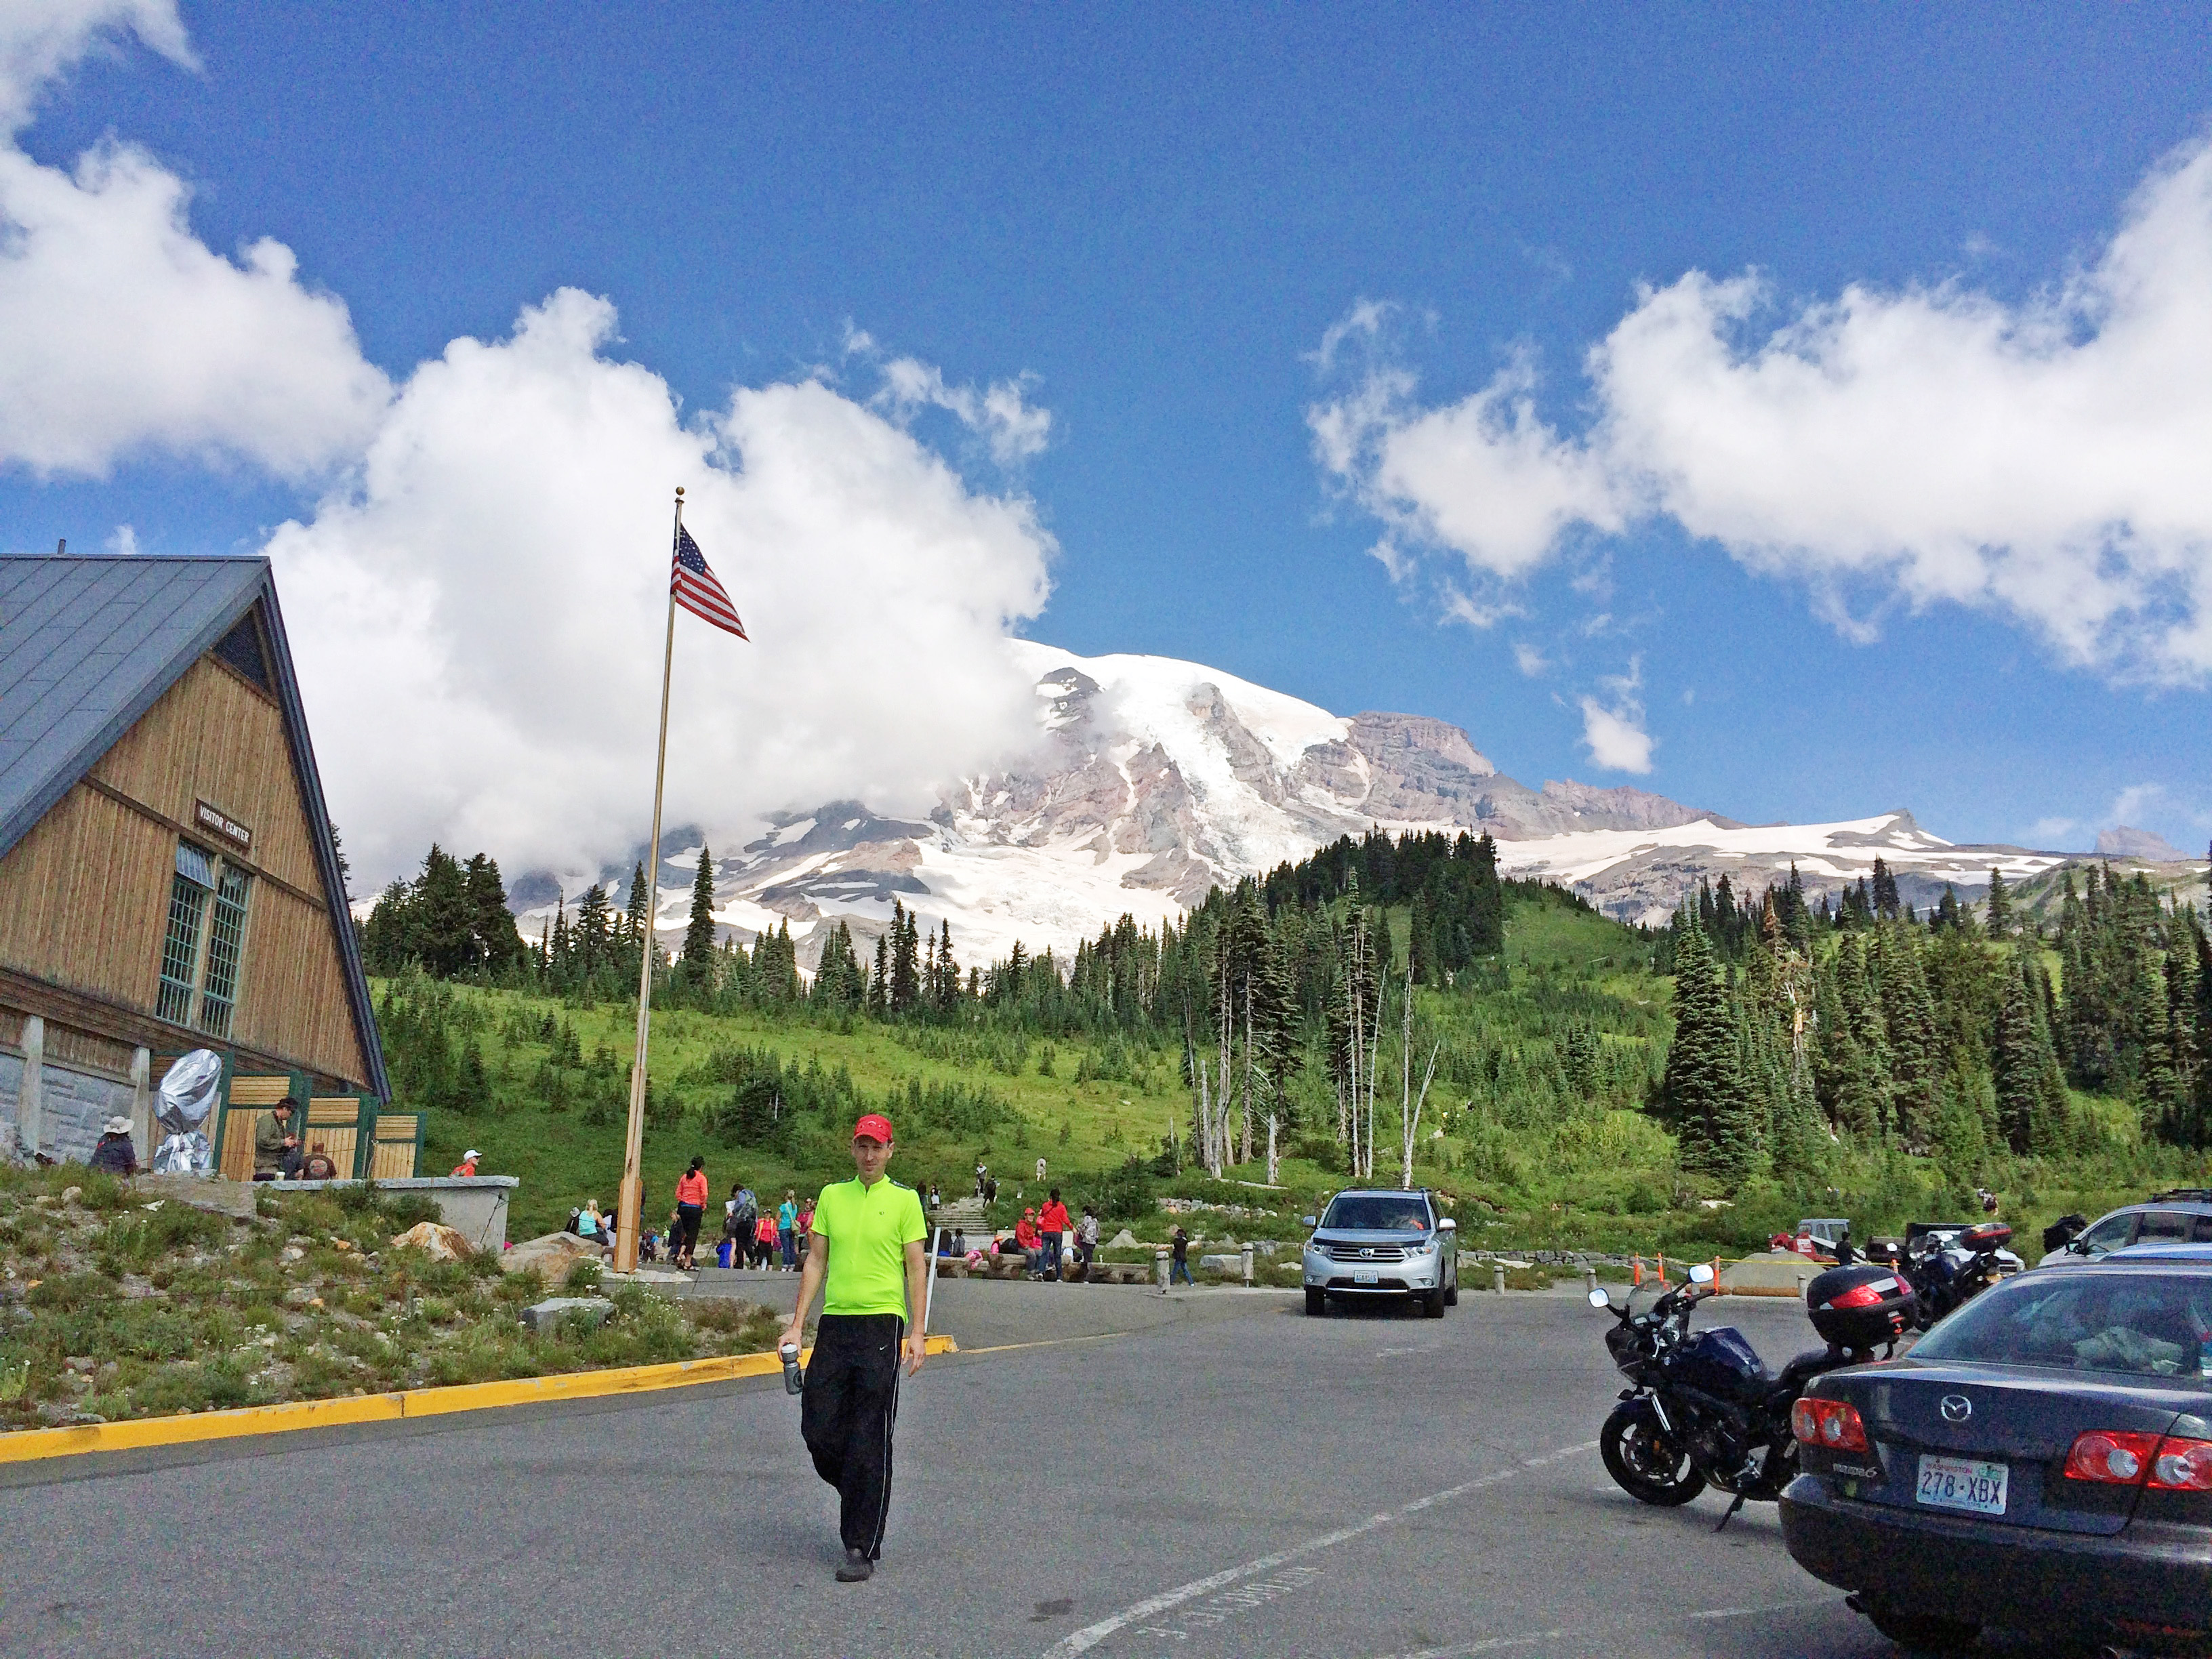
As we got closer to the parking lots, we noticed people parking on the shoulder and hiking in the rest of the way. We got to the main parking lot at about 11:40 and, sure enough, it was full with cars circling around. We noticed a family getting ready to leave, and parked behind them waiting to pull in when they left.
a
The view of “The Mountain” from the parking lot at Paradise (#18 on the map below). See the man heading towards us in the biking outfit? He and his family were about to leave their parking space which they bequeathed to us. He and his son(?) prepared their bikes to ride down the mountain and the rest of the family took the car.
a
Read more about the map and the other points of interest here.
aRe
It was so crowded around the parking lots and visitor center (#18 on the map). There were people from all over the world, as evidenced by all of the different languages we heard. We were amazed, though, that once we got out on the trails, there weren’t that many people.
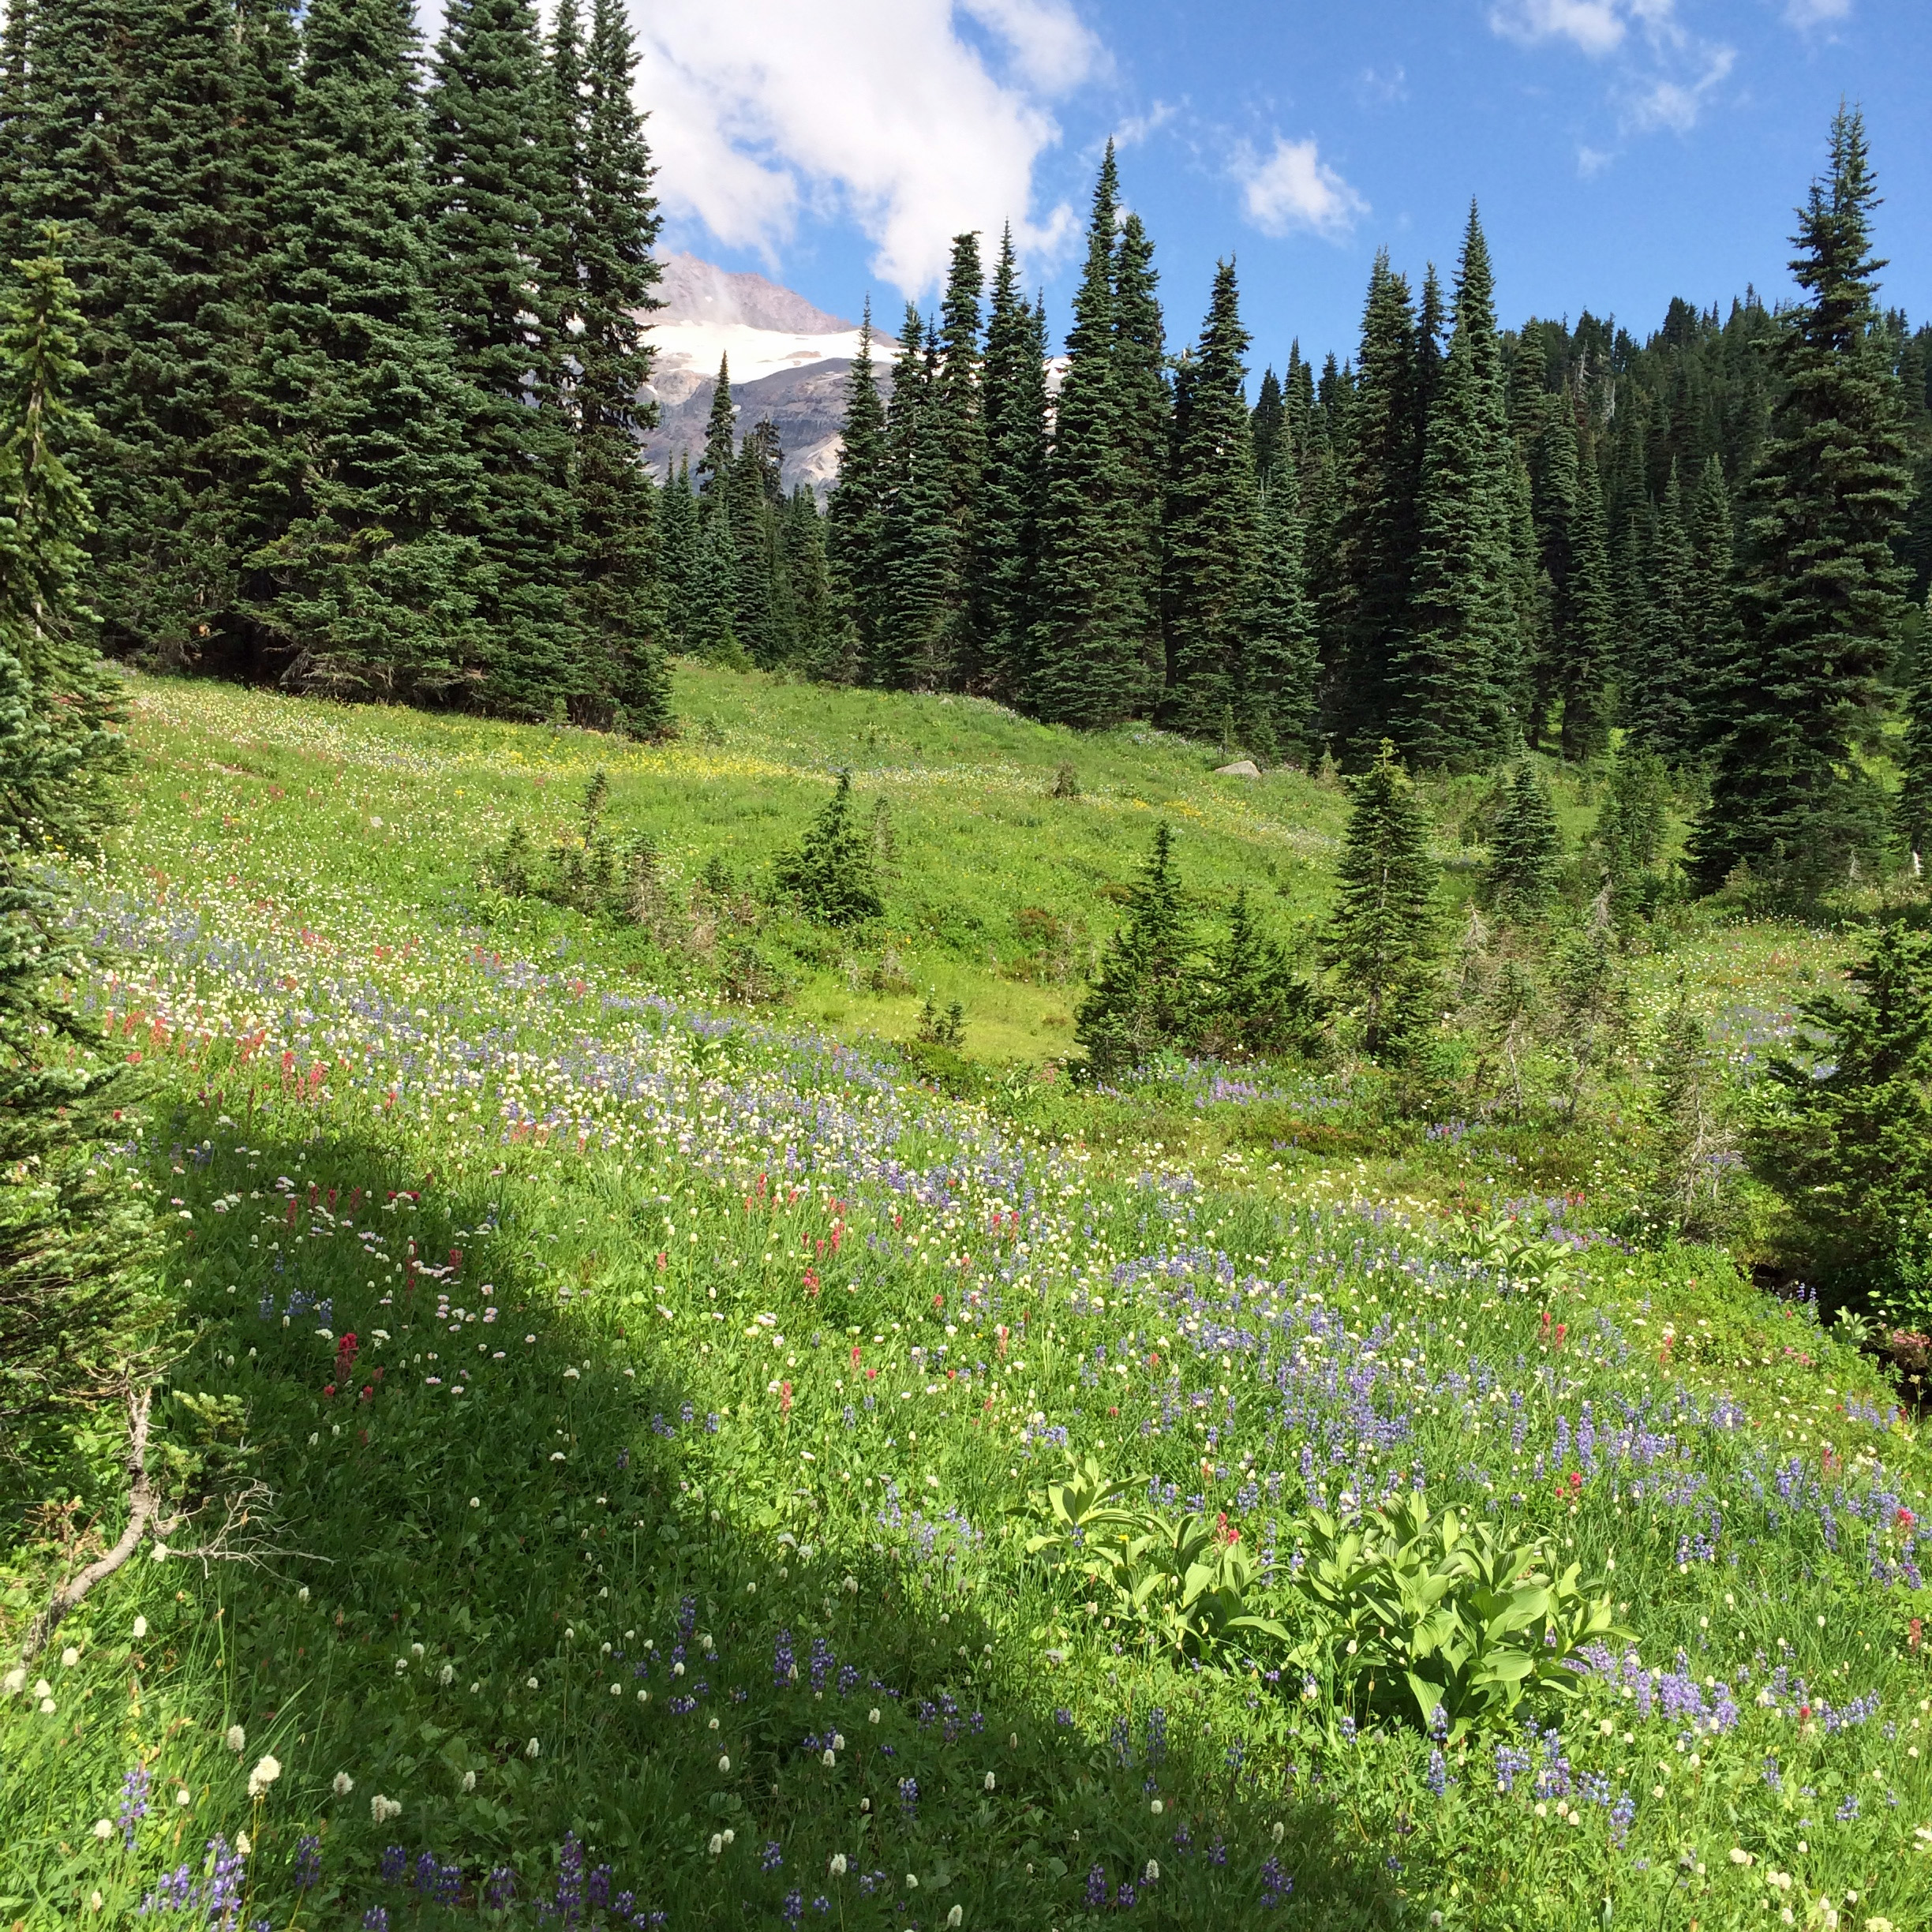
We hiked around the trails for about an hour and a half and were delighted to see that we were not too late for the wildflowers. They were beautiful!
 a
a
 a
a
Love the Indian Paintbrush!

a
We especially enjoyed the Nisqually Vista Trail (#21) which took us through meadows of wildflowers and then led us to the Trail to the Nisqually Glacier View (#19.) It went along a ridge with a fabulous view of the Nisqually Glacier and a roaring glacial river.
 a
a
 a
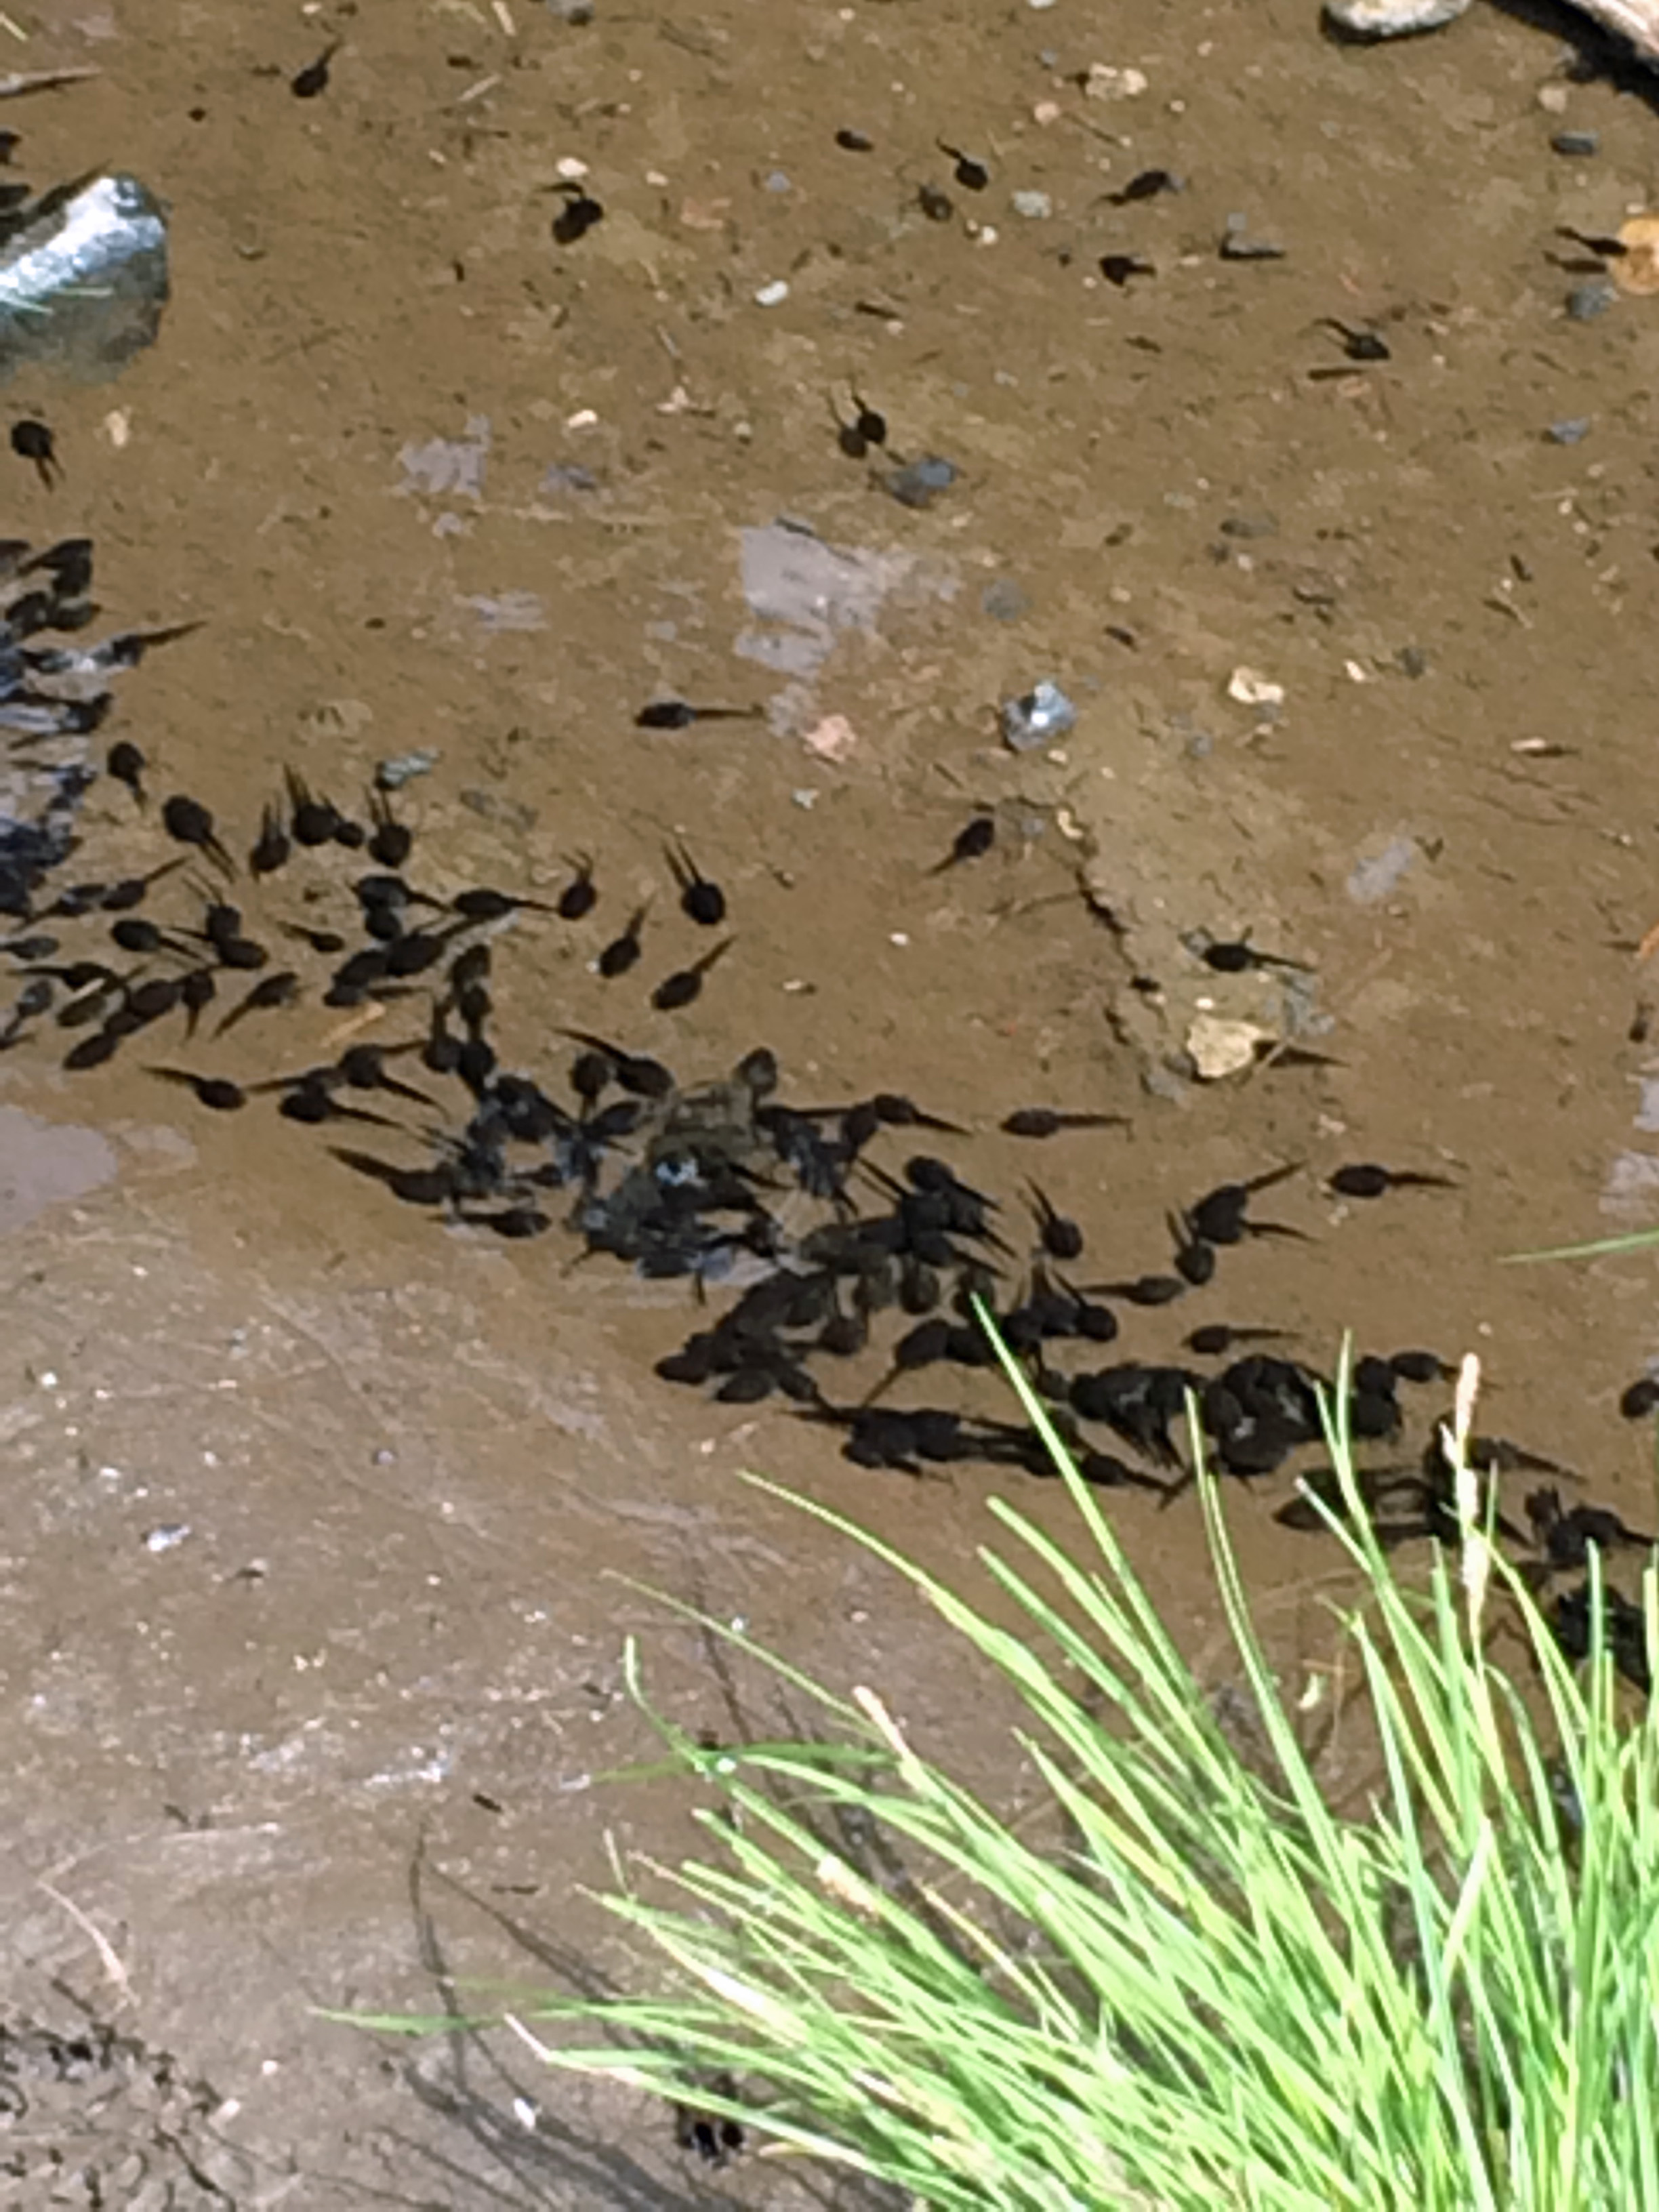
a
Tadpoles in a little pool!
 a
a
The Nisqually Glacier
 a
a
Roaring glacial river – wish my photo could have captured the sound

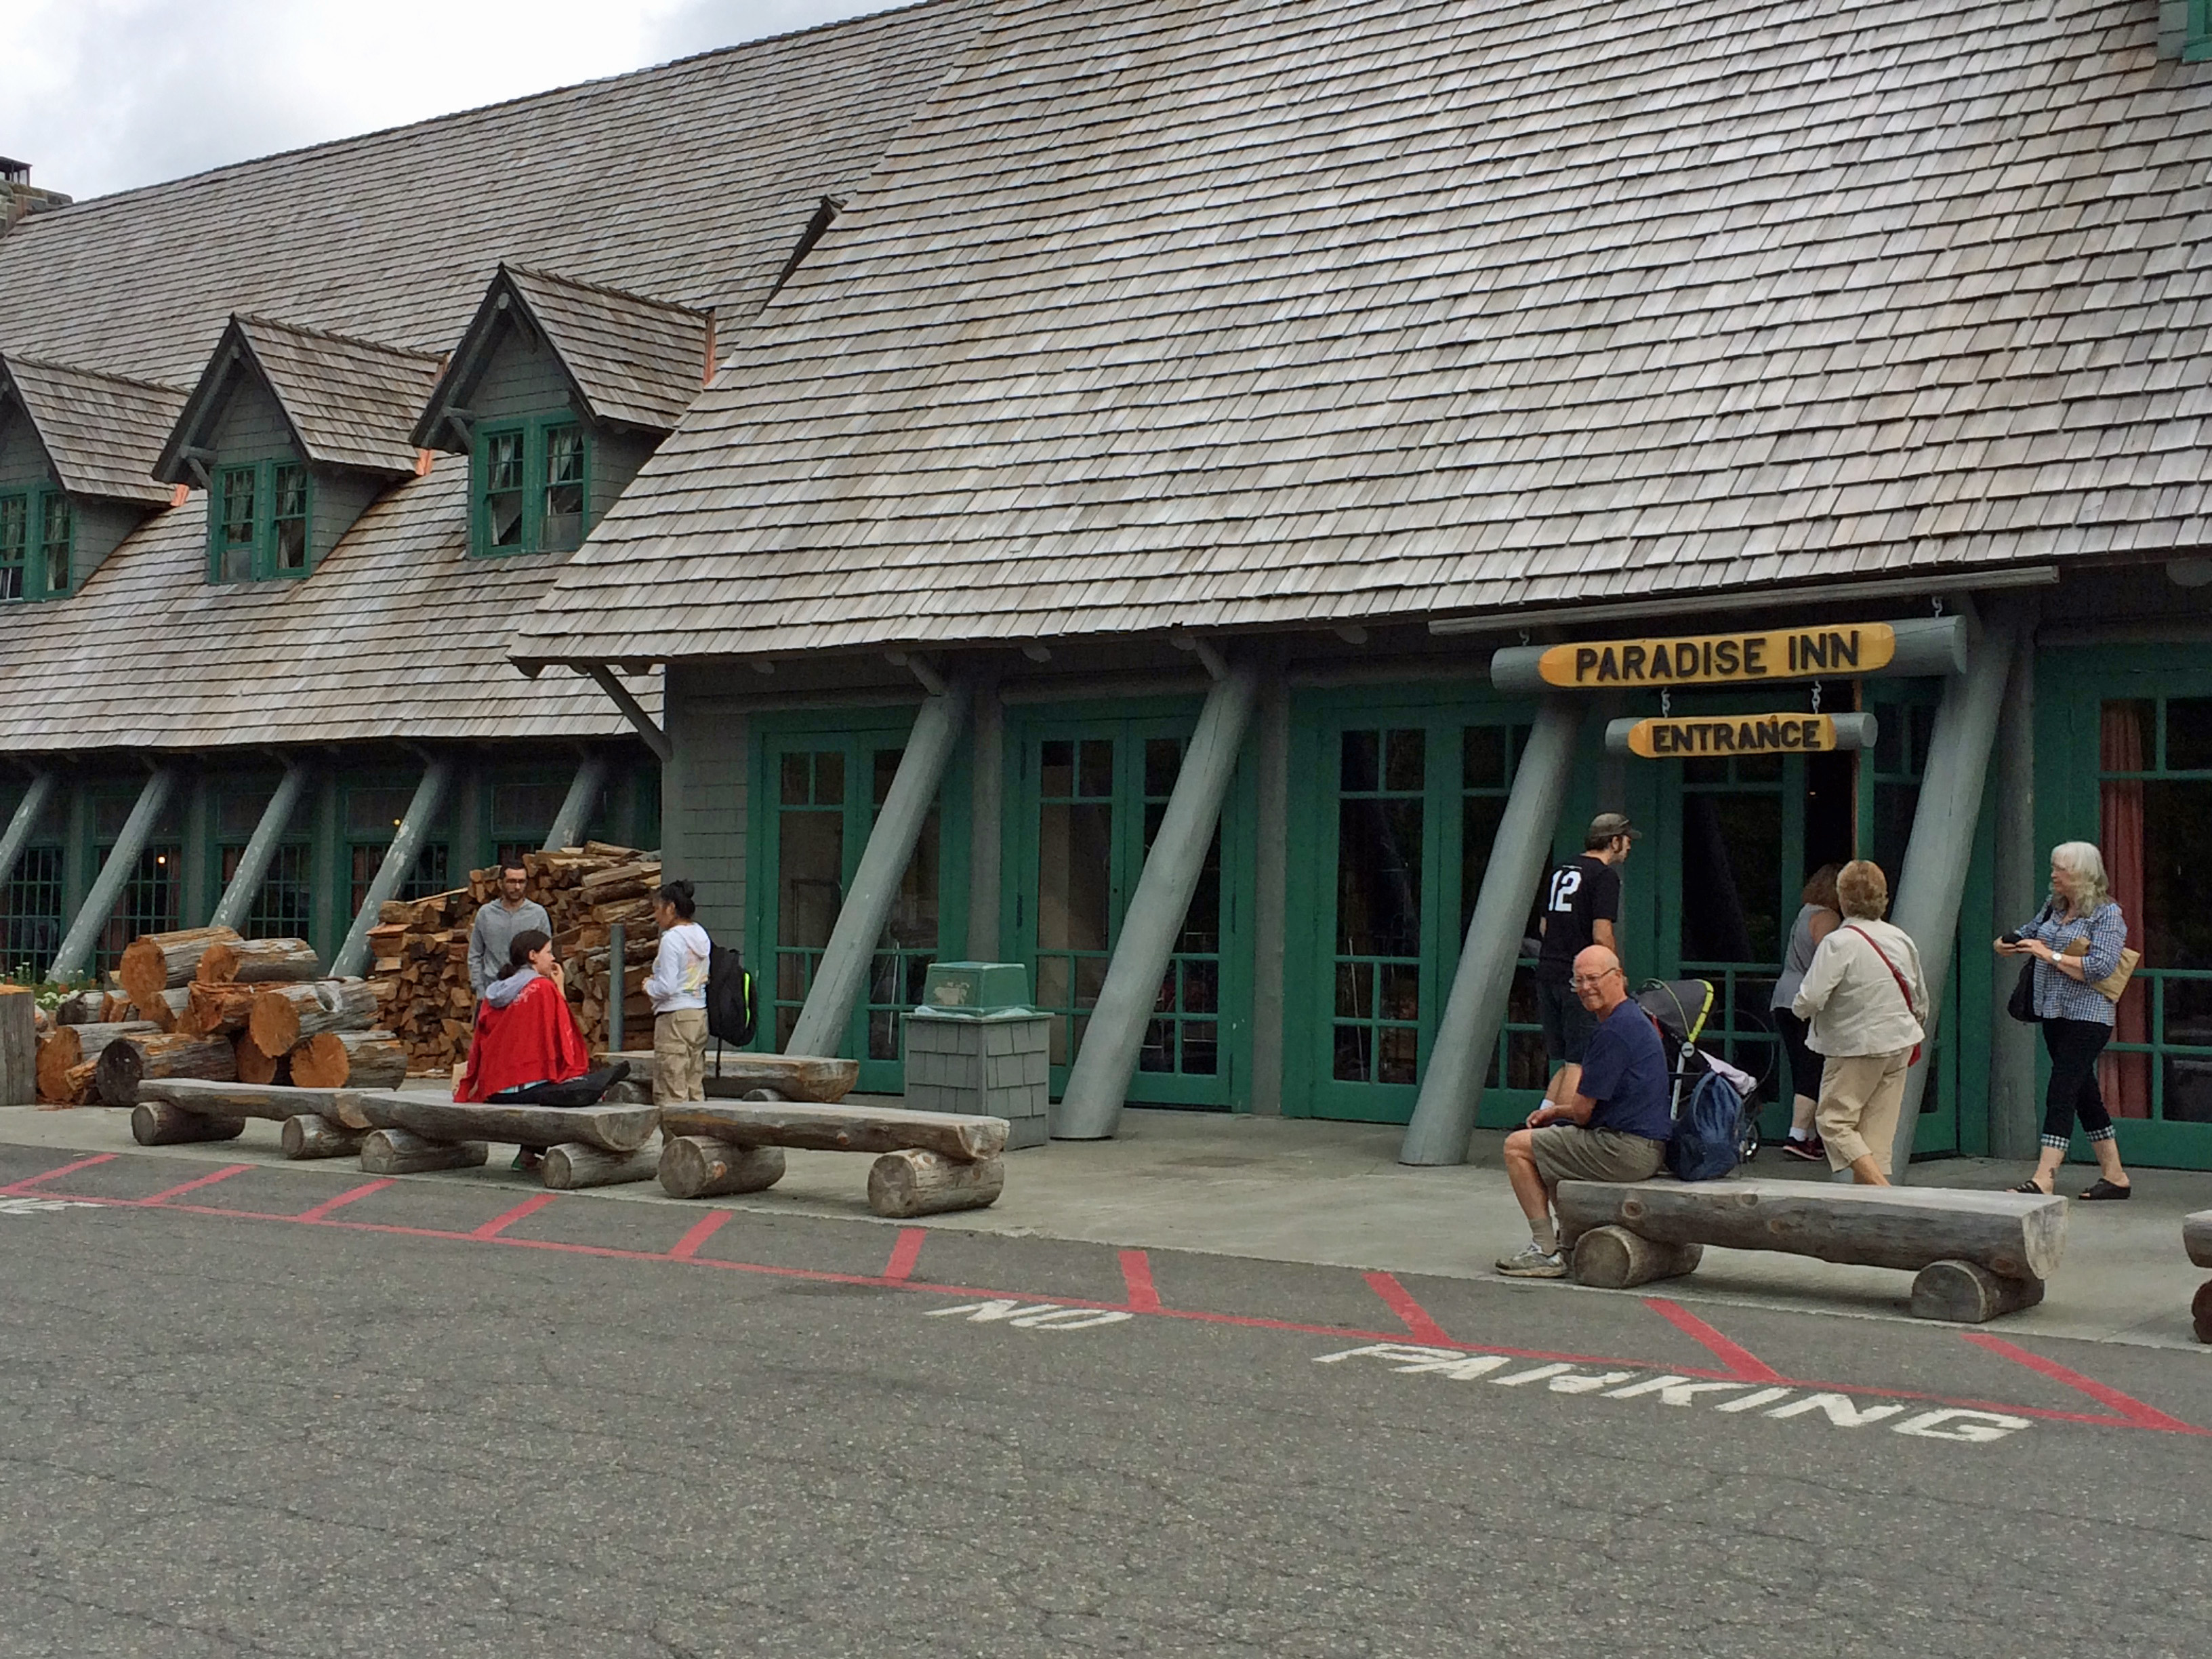
When we found our way back to the parking lot, we went in to the Paradise Inn, which was built in 1916. It’s a rustic, but beautiful, building. There’s a lovely dining room available. I don’t know how it is, but they say they use organic and local ingredients.
Paradise Inn
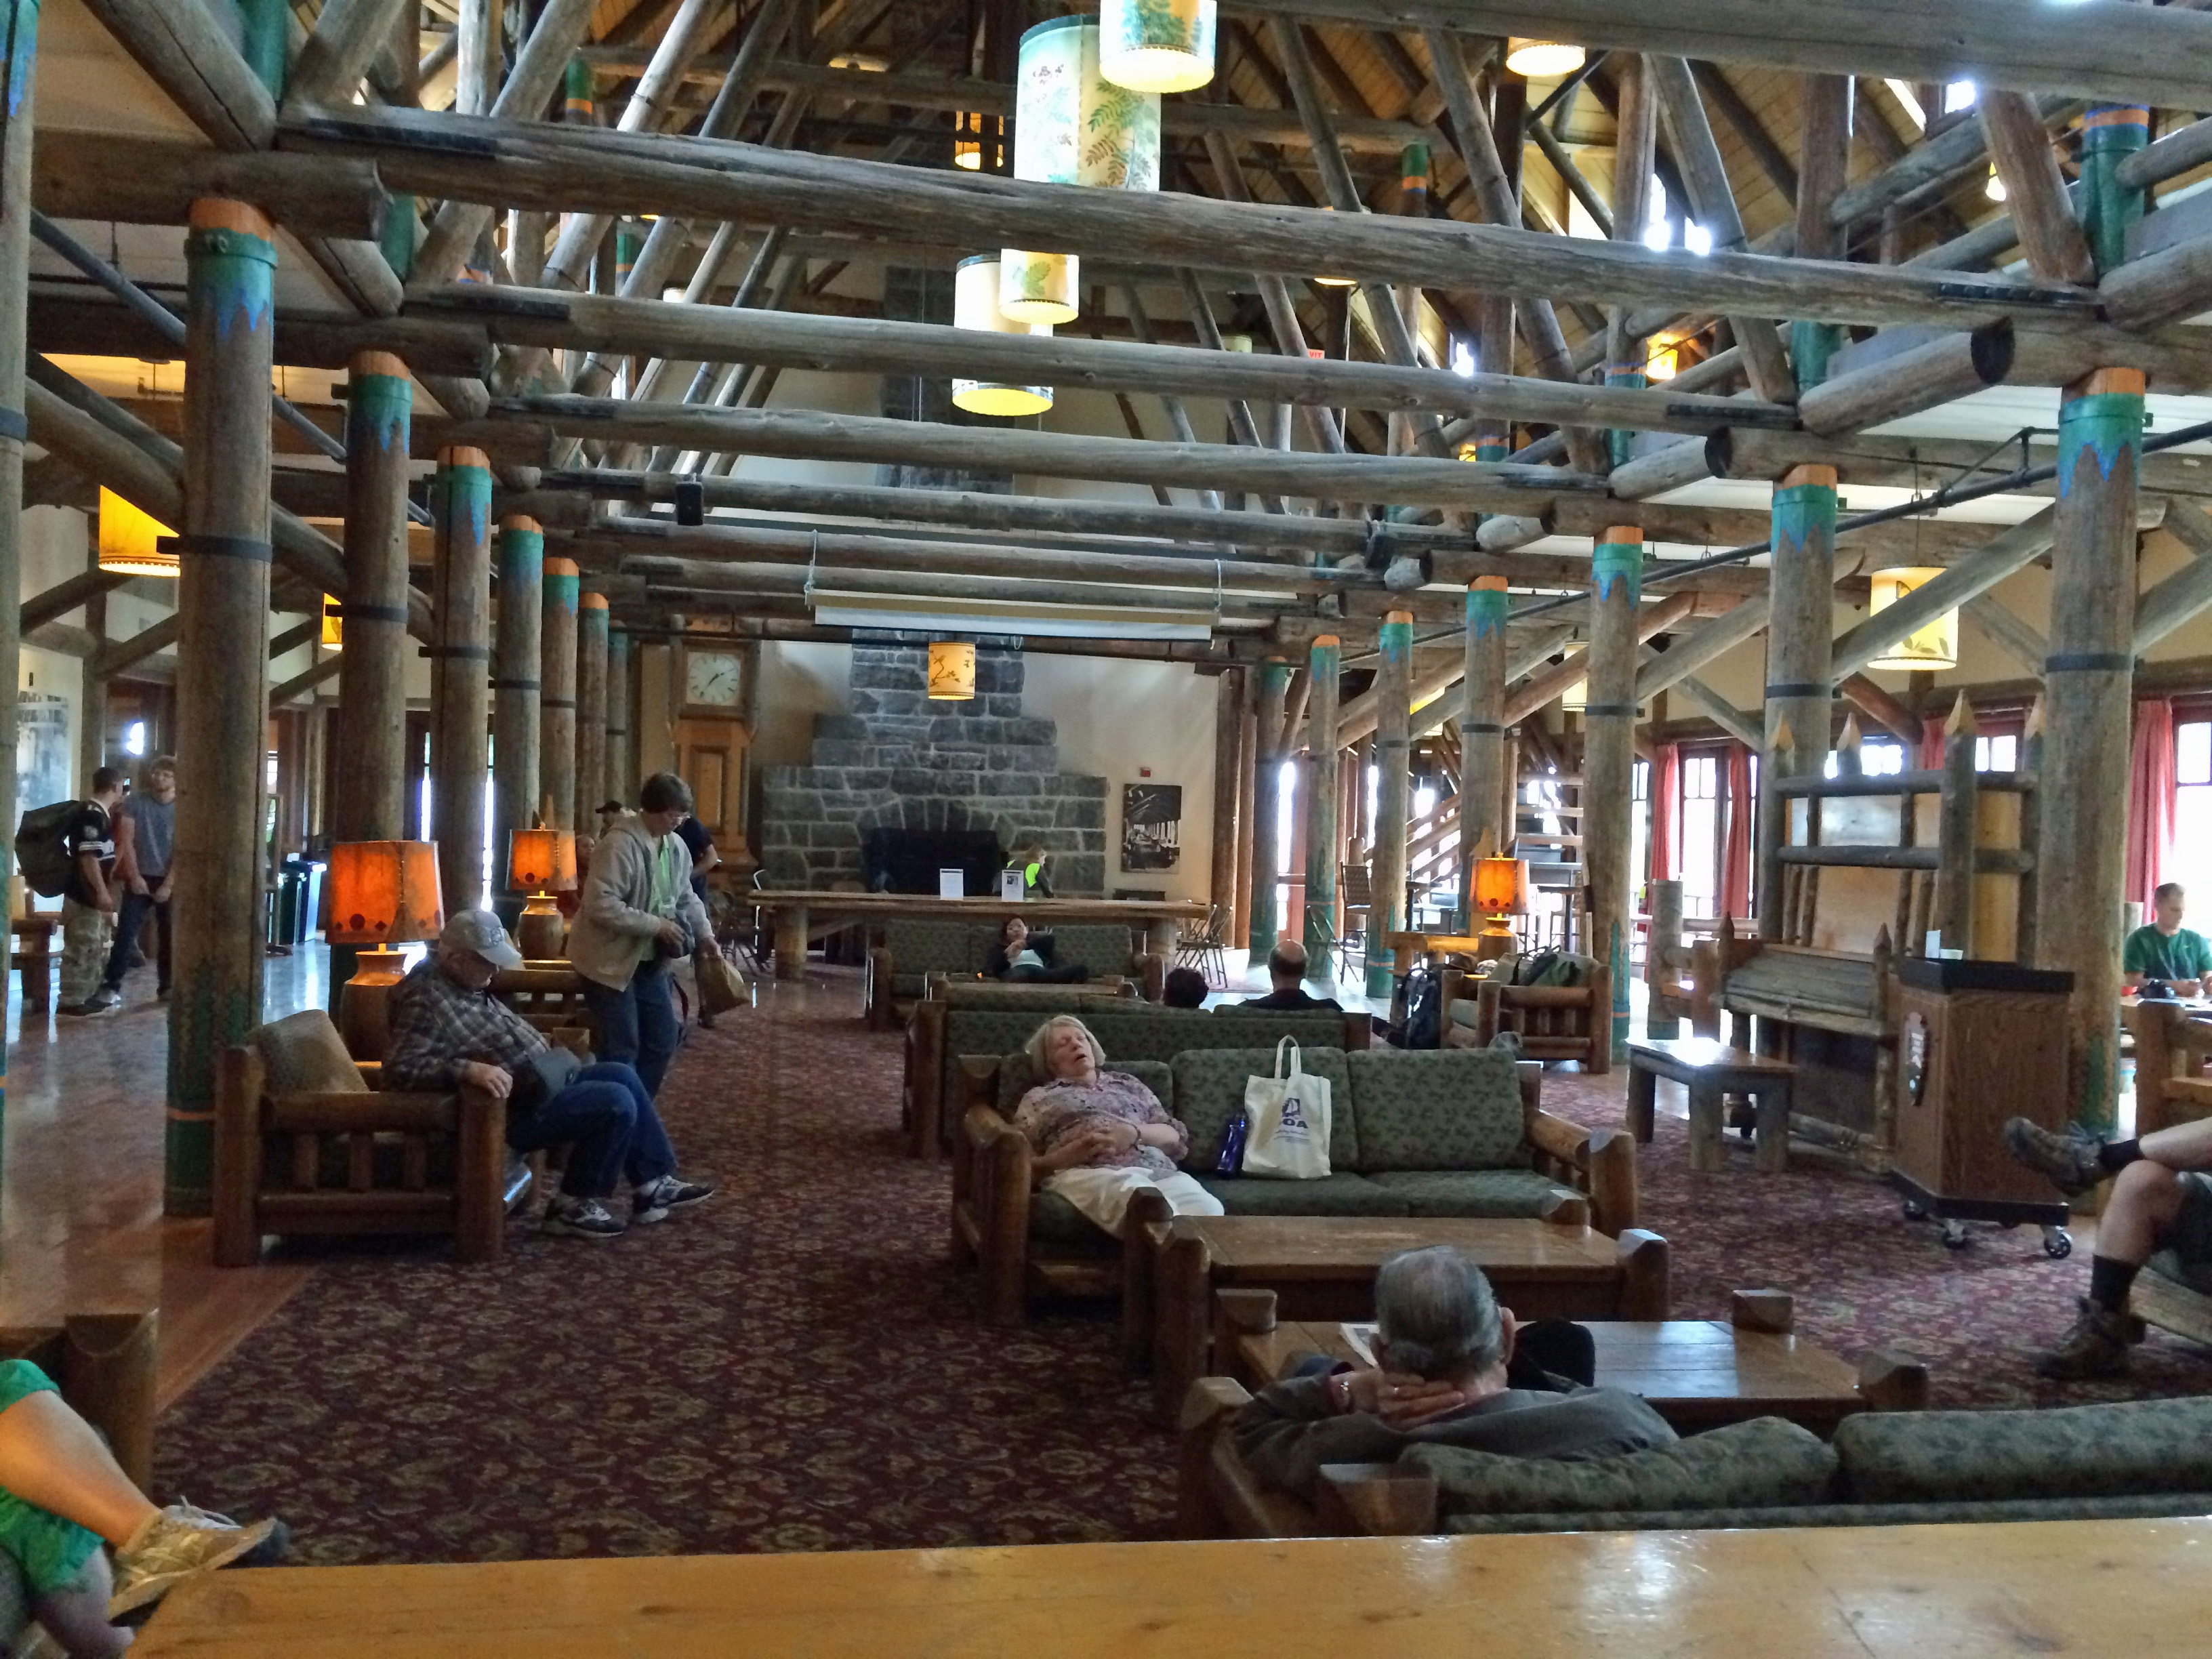
Inside Paradise Inn – bustling with activity….and nappers
a
After viewing the lodge we went back to our car and continued east to the Grove of the Patriarchs (#8). Once again, the small parking lot was full, but we have a small car and Bob managed to squeeze it into a spot.
At the Grove of the Patriarchs we went on the 1.5 mile loop trail to see an amazing forest of some of the largest and oldest trees in the area. Over the years, many of them have fallen over the trail, so they were cut where they fell to clear the path.
 a
a

In order to get to the “grove” with the most amazing trees, you have to cross a wobbly bridge over a creek. It’s suggested that you go one person at a time.
 a
a
A LARGE fallen tree
 a
a
 a
a
Leaving the “grove” and getting ready to cross back over the bridge, Bob observed that the creek looked like a very promising fly fishing creek. I know he made a mental note to check it out in the future.

a
There were picnic tables available, so we pulled out our picnic lunch. Bob was so excited to have fried chicken, even though it was from the deli and not homemade. I was happy with leftover roast chicken.

a
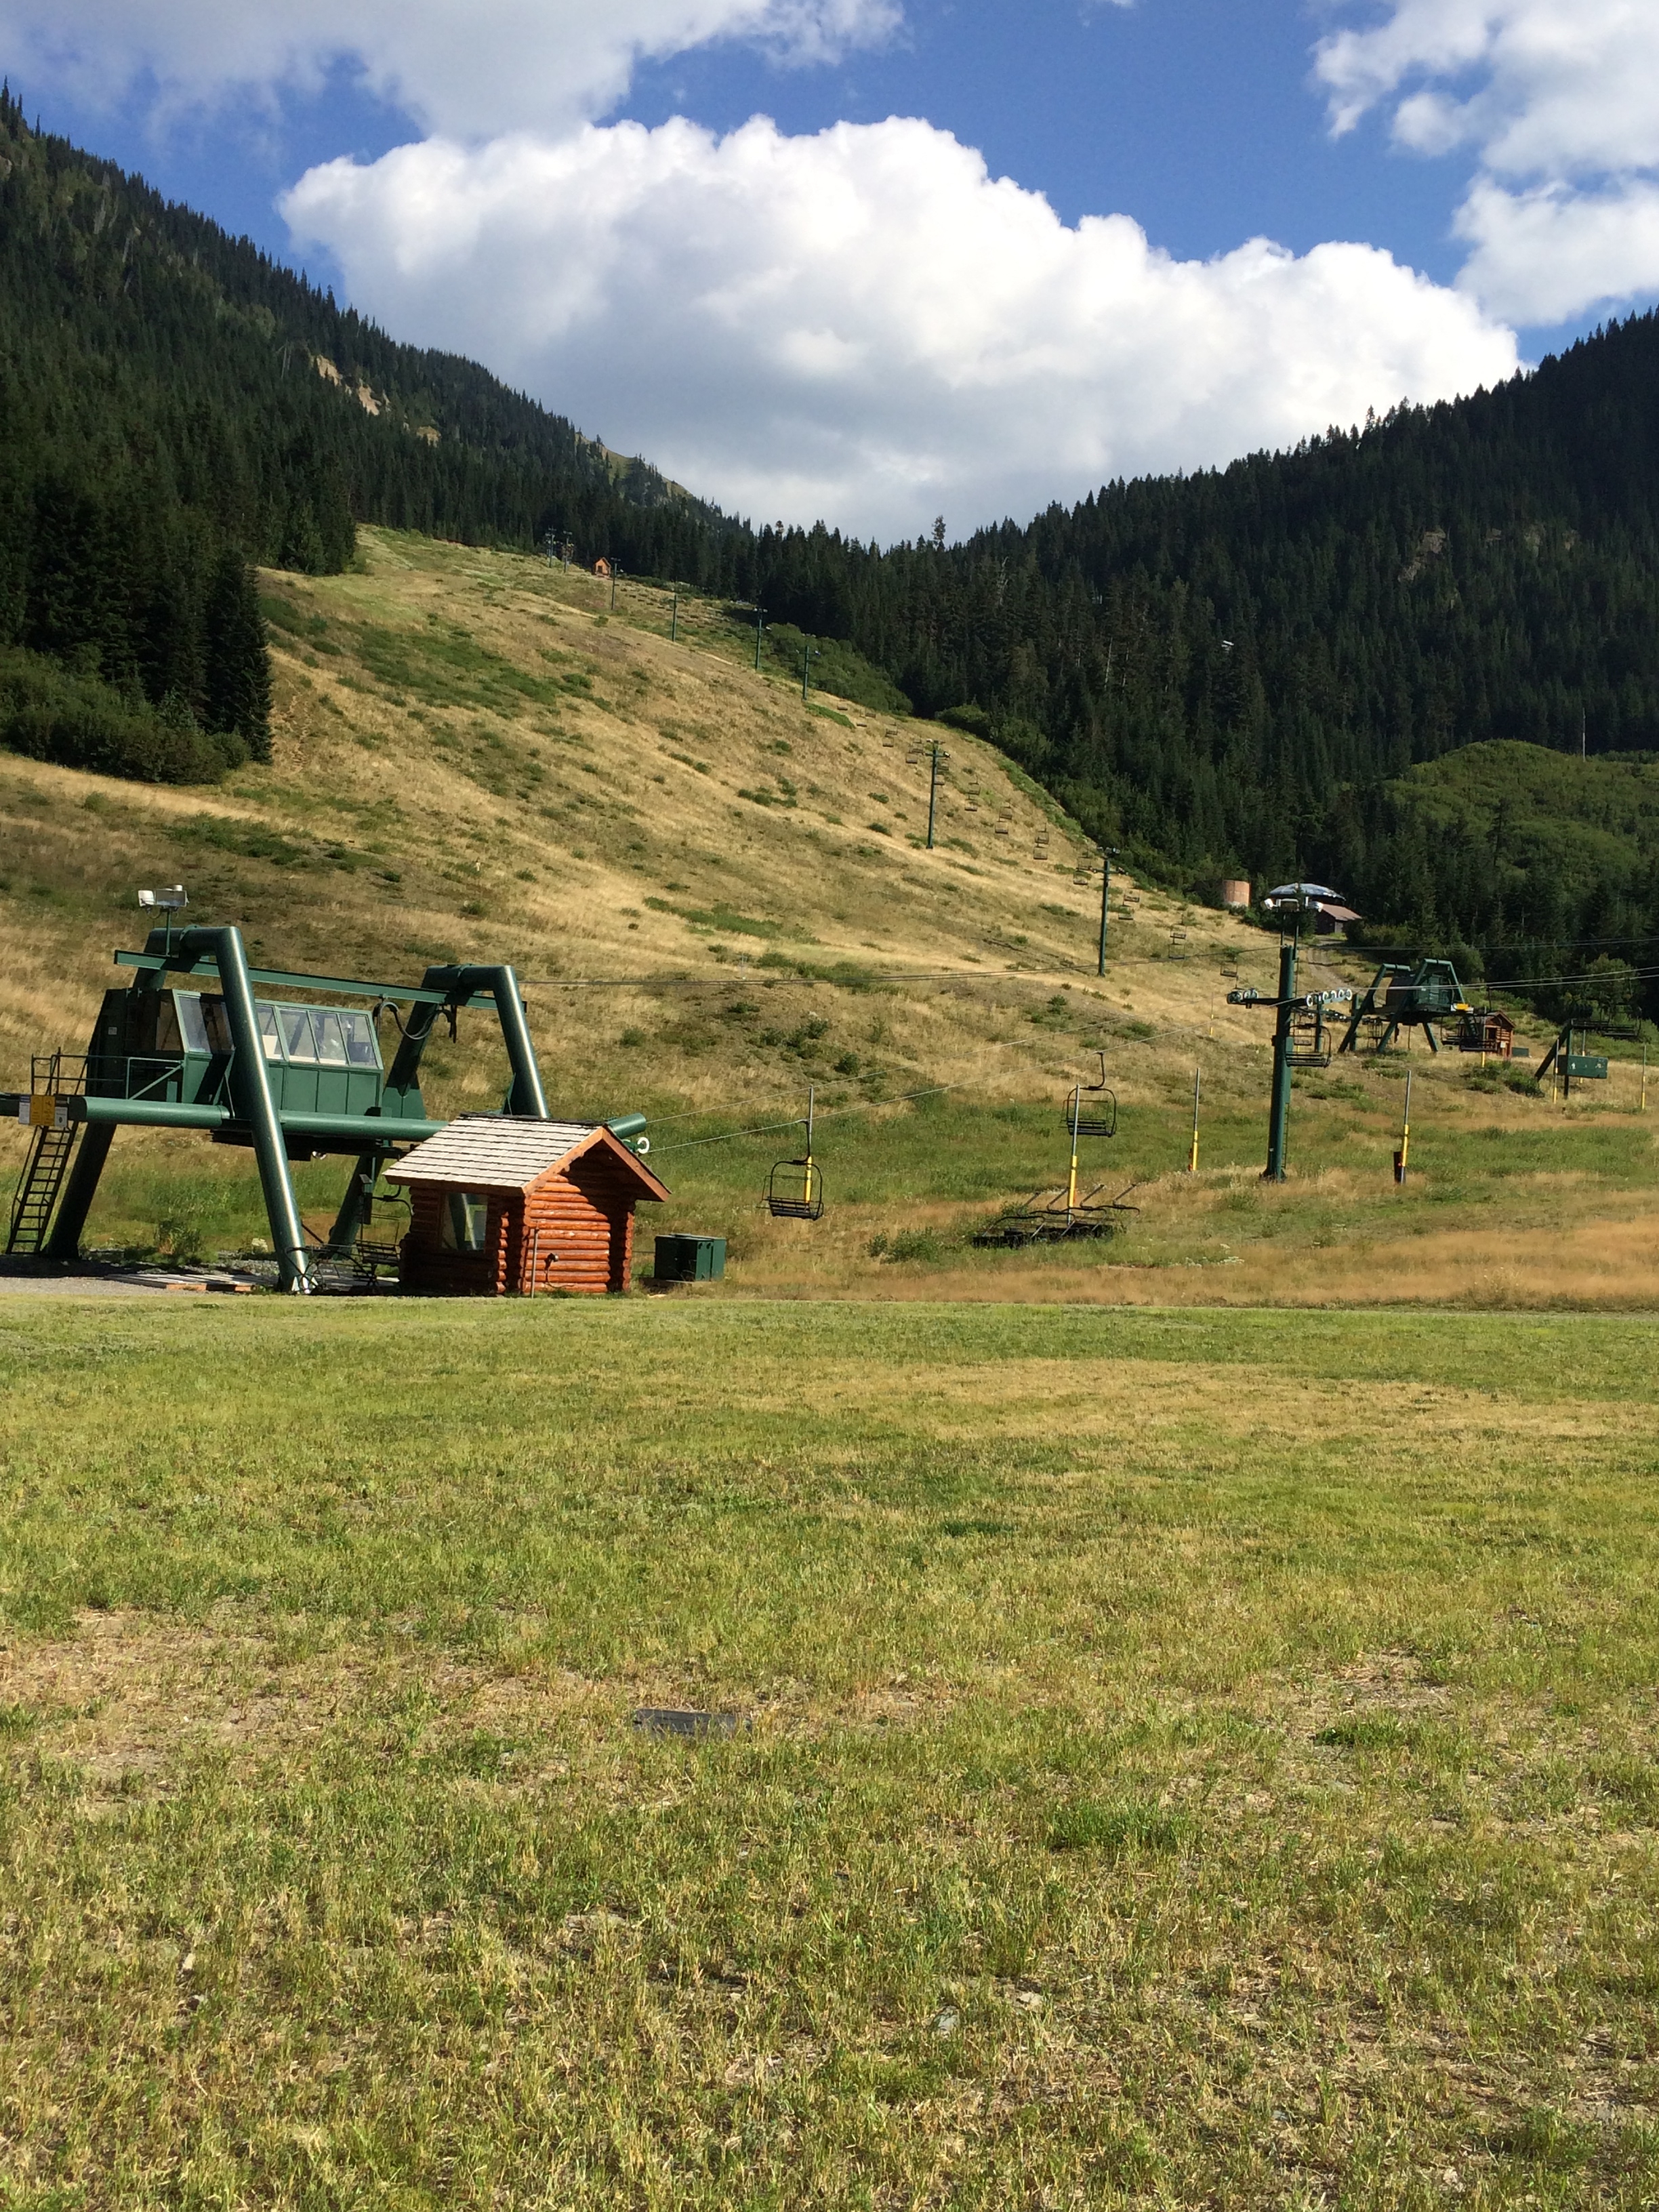
After lunch we headed north on 410 to take a different route home. We decided to take the 6-mile side trip up to Crystal Mountain just to see what it looks like in the summer. We were amazed at how busy it was! They have really developed a popular summer destination. Once more, there was NO PARKING in the main lot. We parked illegally since we were only going to take a quick look. There were a lot of people like us, just up to visit. There was a also wedding party getting ready to take the gondola up to the restaurant for a wedding.
A slope at Crystal Mountain Ski Area in the summer
We quickly looked around, and then returned to 410 and continued north and west to Enumclaw and then north on 169 through Maple Valley to head home. The drive home was really much prettier than the morning drive and it was nice to see different sights.
We arrived home at about 6:30 and felt like we had had a full day. It turned out to be more of an expedition than I was expecting, but it was so much fun to be out in the mountain air on a beautiful summer day. There’s a reason the visitor center and the Inn were named Paradise. It is really beautiful and I highly recommend it!
a

a
Share this:

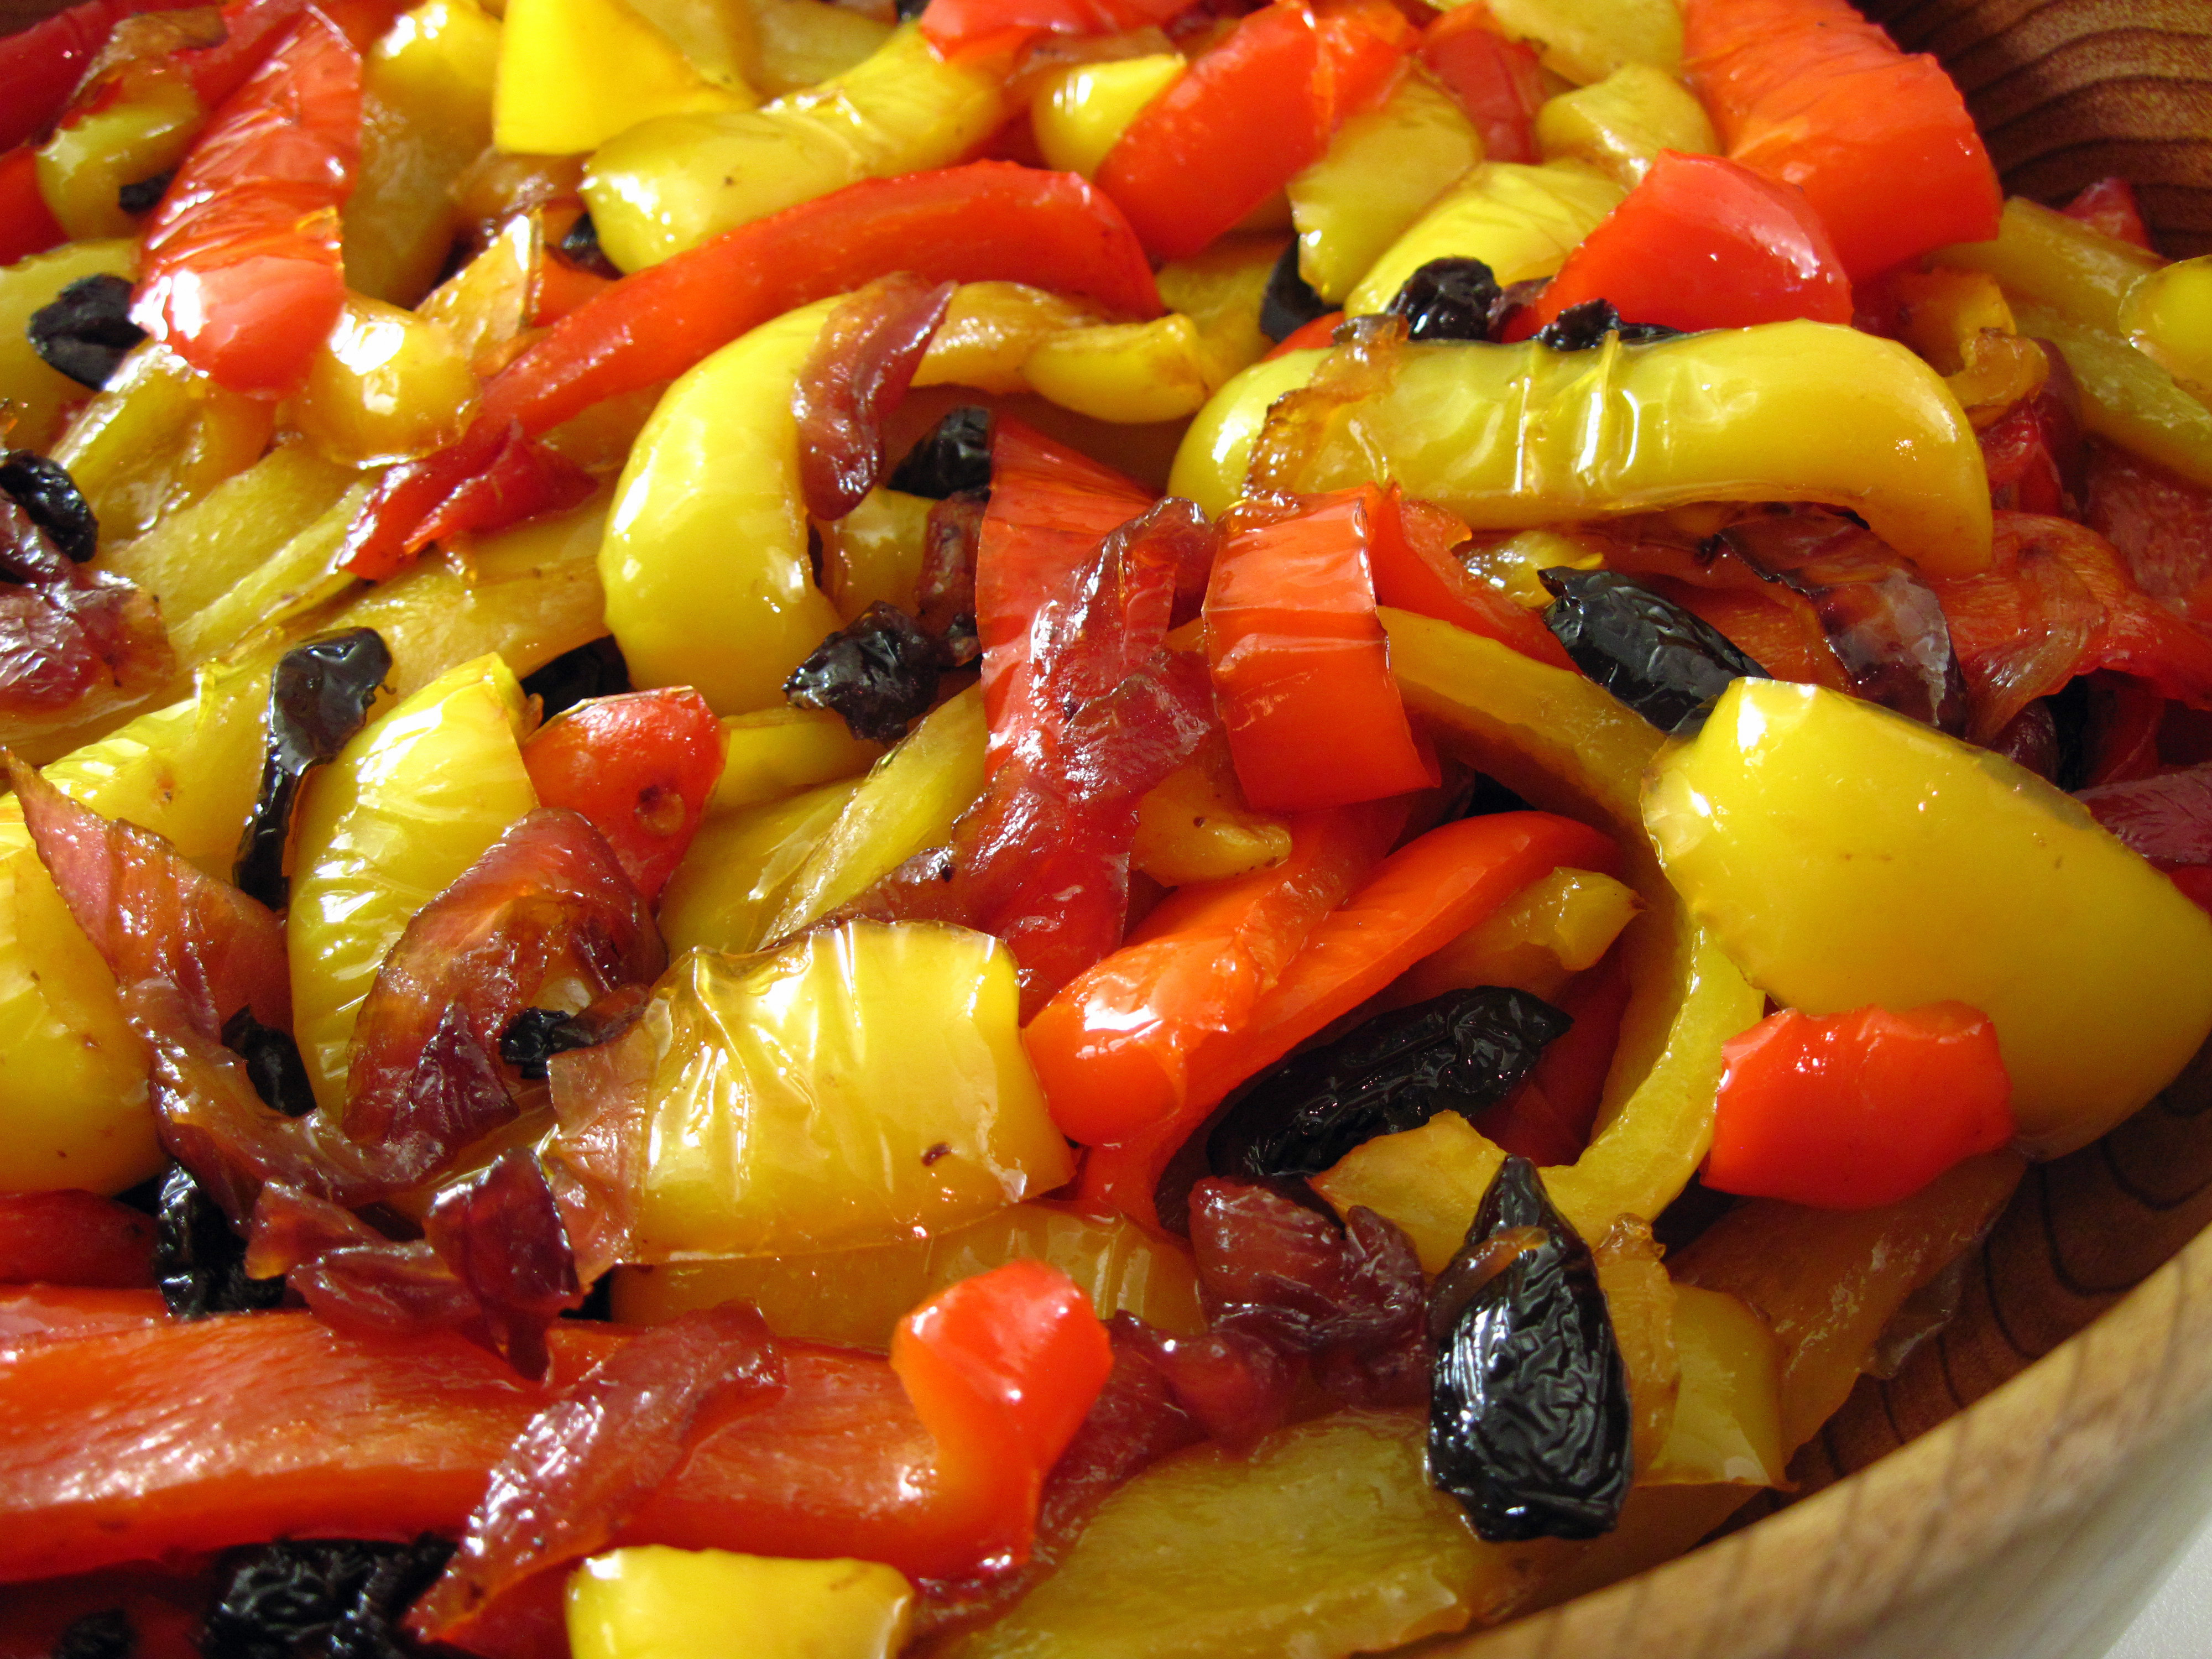
Sweet-and-Sour Peppers with Oil-Cured Olives
By Kath Dedon
I have made Sweet-and-Sour Peppers with Oil-Cured Olives twice in the last three days. It is that good, and it is very easy to make.
The recipe is adapted from one in Domenica Marchetti’s The Glorious Vegetables of Italy, which is an inspiring cookbook with a lot of gorgeous photos. I didn’t change much, but I did lower the salt a bit and substituted 1 tablespoon of honey for the 1 tablespoon of sugar that Domenica uses.
We loved this simple preparation as a side dish, but it also makes a great antipasto offering. Domenica suggests using it in a frittata, on a pizza, or tossed with pasta.
Sweet-and-Sour Peppers with Oil-Cured Olives is perfect for summer entertaining since it can be made ahead of time. It’s fantastic served hot, warm, or at room temperature. If you make it in advance and refrigerate it, let it come to room temperature before serving.
a
a
Sweet-and-Sour Peppers with Oil-Cured Olives
(Adapted from Domenica Marchetti’s recipe in The Glorious Vegetables of Italy)
Serves 4 – 6
I made the recipe to take to a dinner party, so I chose to double it to serve 10 – 12. It was easy to do, but I used 2 large skillets because it would have been difficult to prepare the 8 peppers in one pan.
Ingredients for 4 – 6 servings (for one pan)
3 tablespoons extra virgin olive oil
2 large red peppers, cut lengthwise into ¾-inch strips
2 large yellow peppers, cut lengthwise into ¾-inch strips
1 cup thinly sliced red onion (about ½ large)
¾ teaspoon fine sea salt
1 tablespoon honey
3 tablespoons white wine vinegar
¼ cup (about 45g) oil-cured olives (about 15 olives)
1. Prepare all of the ingredients so they are ready to go. (This technique is known as “mise en place” and it really does make the cooking process easier.)
2. I like to cut the ribs out of the peppers for a better presentation.

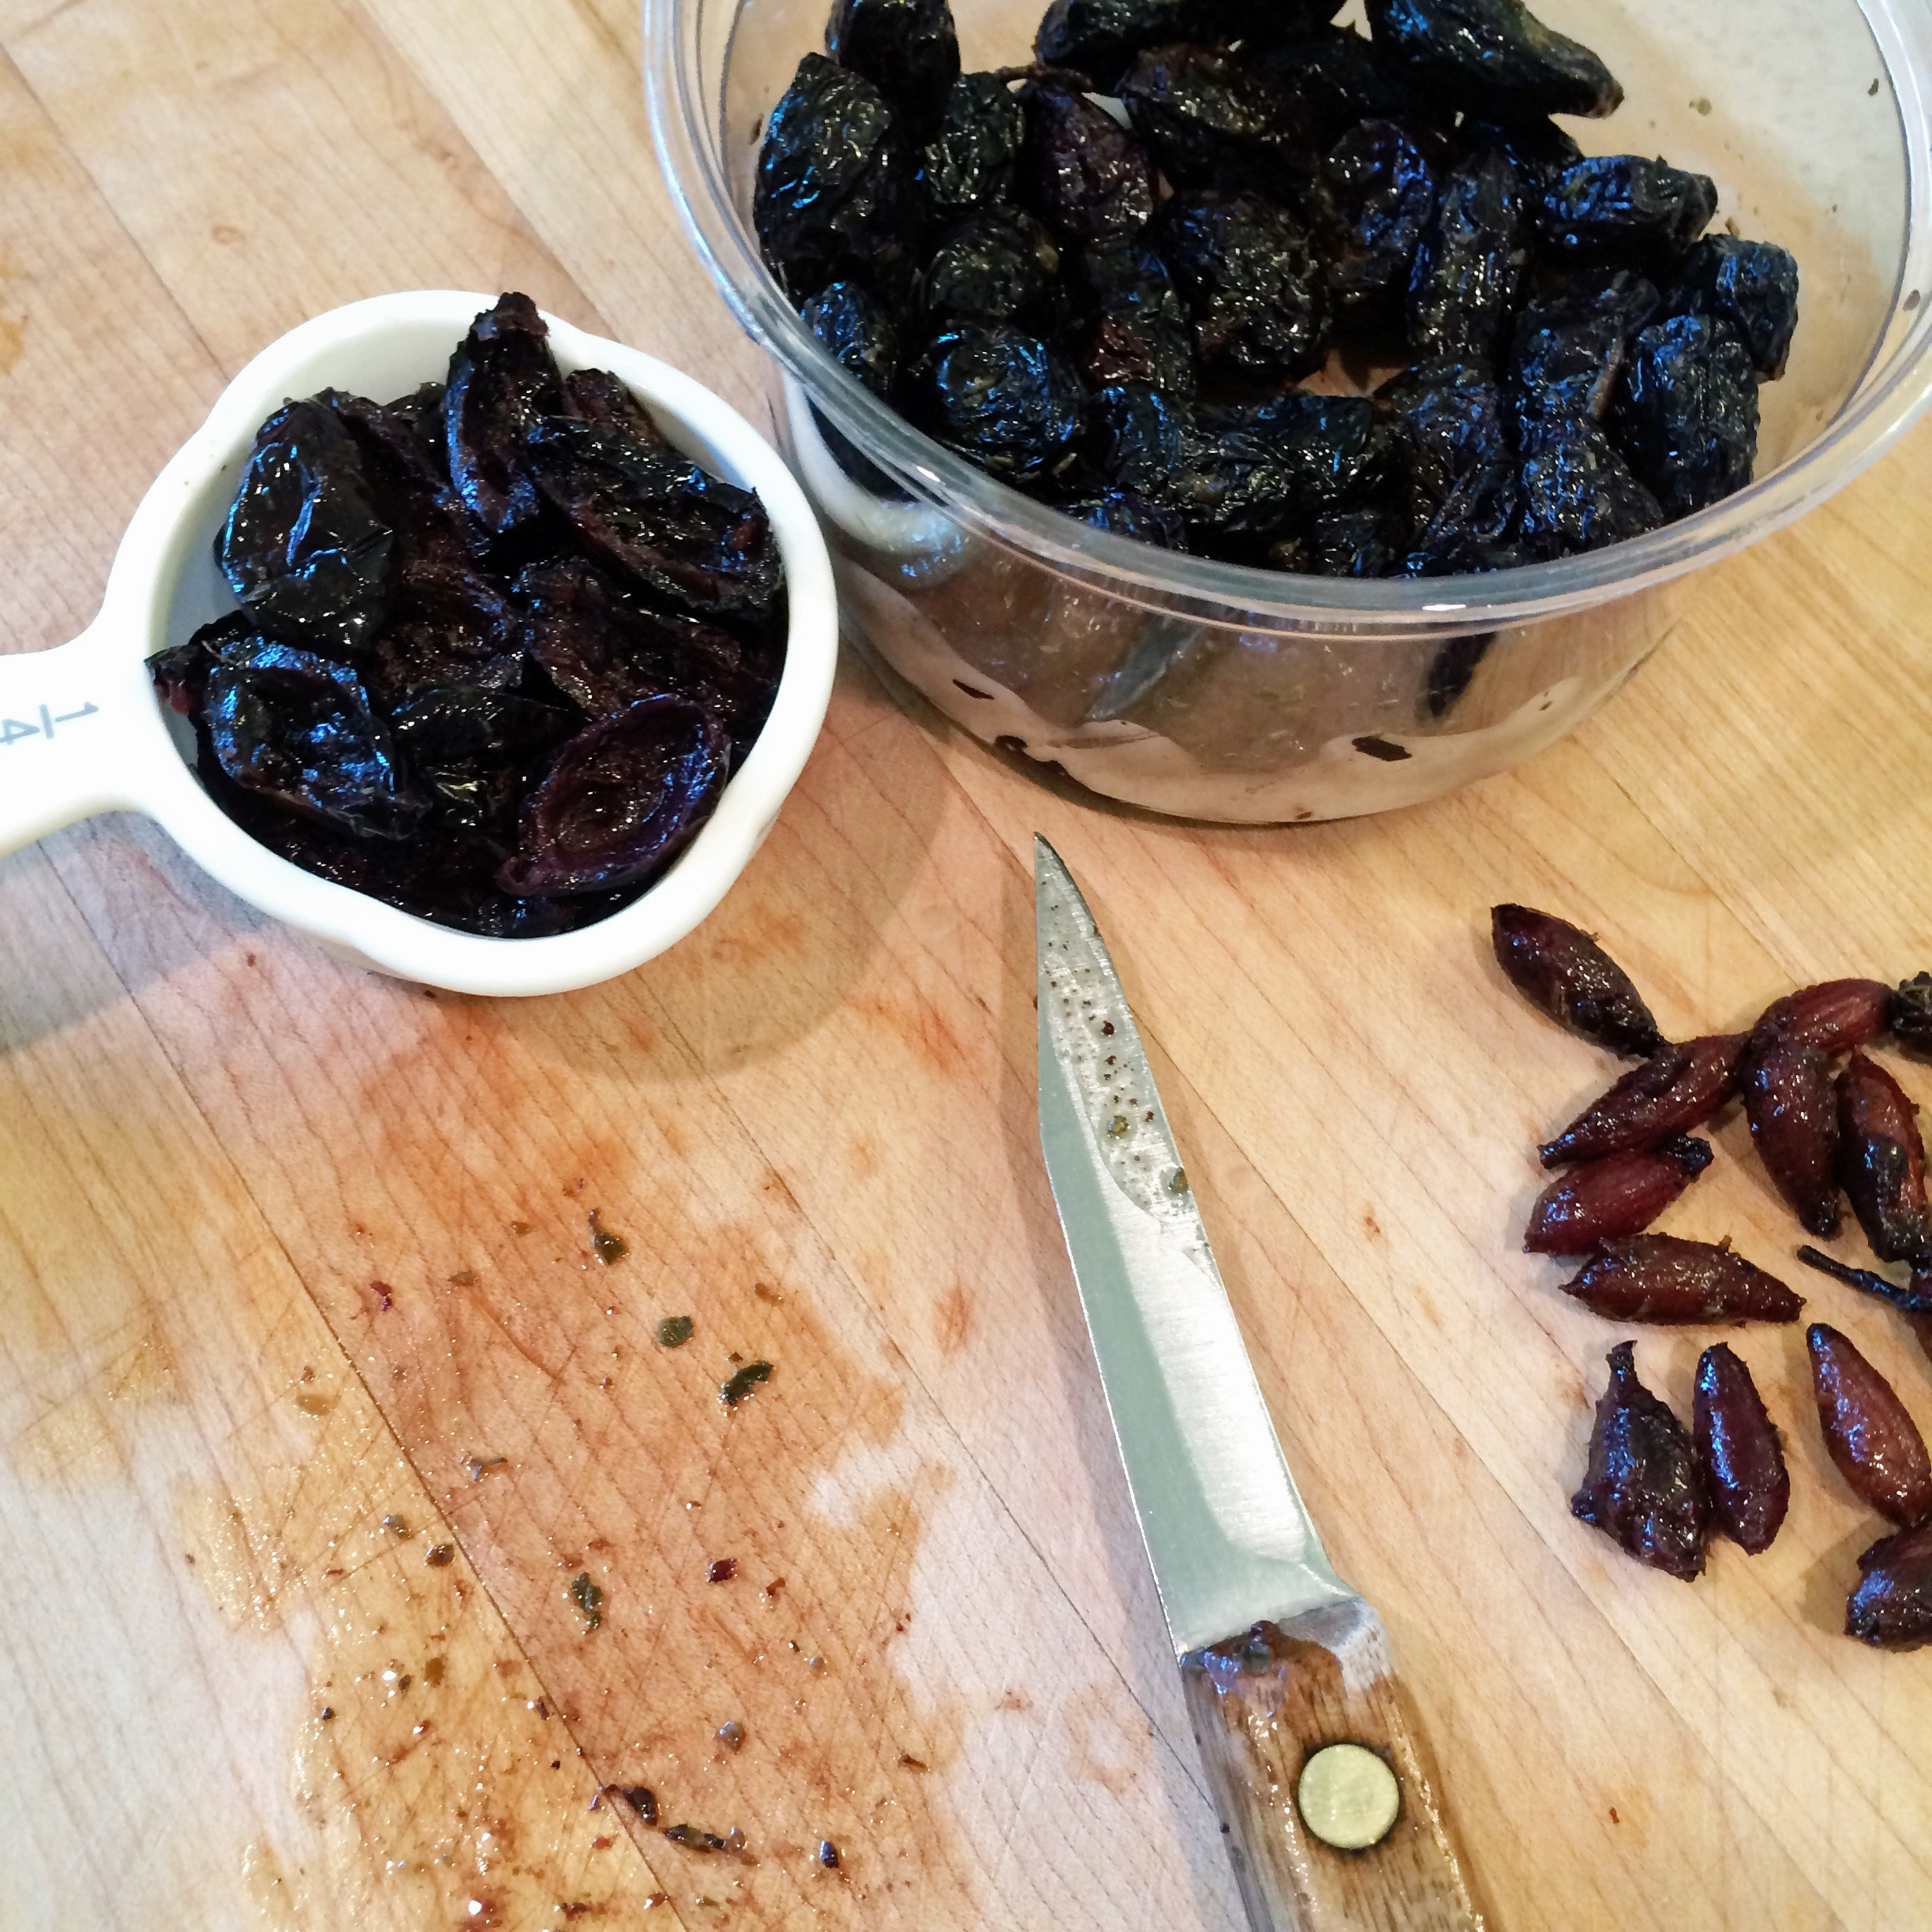
3. Cut the pits from the oil-cured olives, and cut them in half.
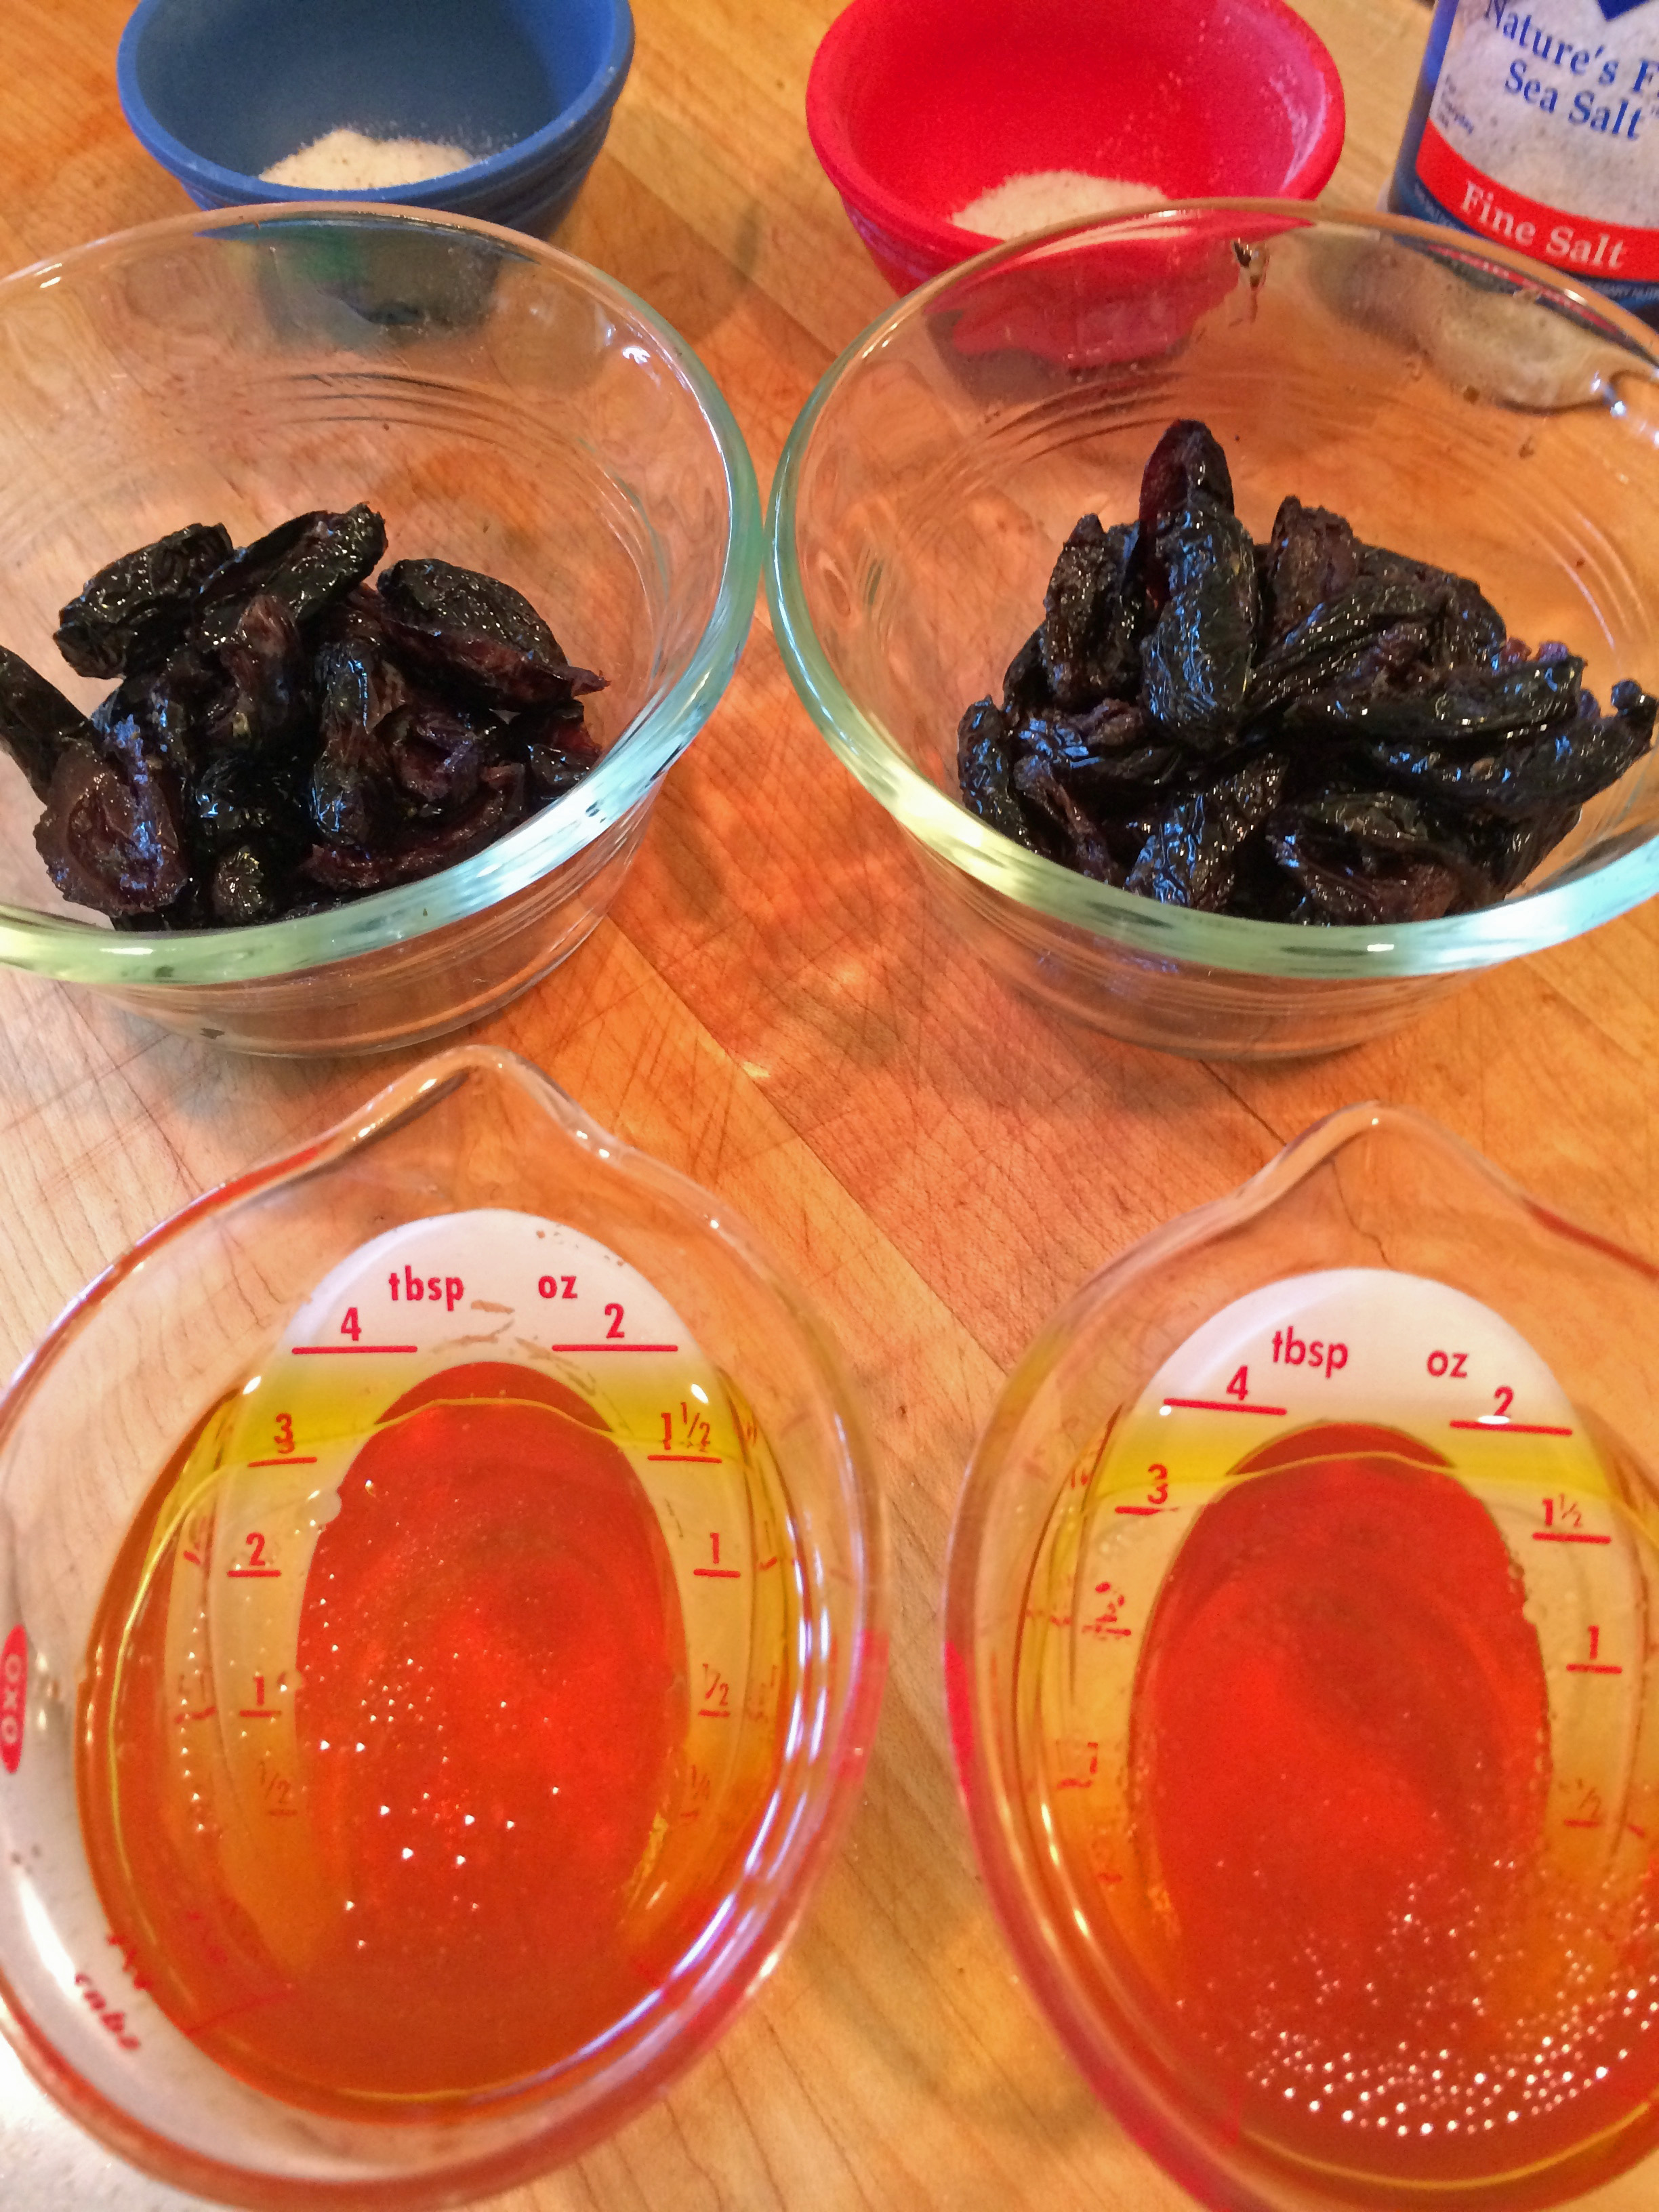
4. Measure the white wine vinegar.

5. Add the honey to the vinegar.
a
Two sets of “mise en place” ingredients for 2 skillets when I doubled the recipe.
Salt, olives, honey and vinegar
a
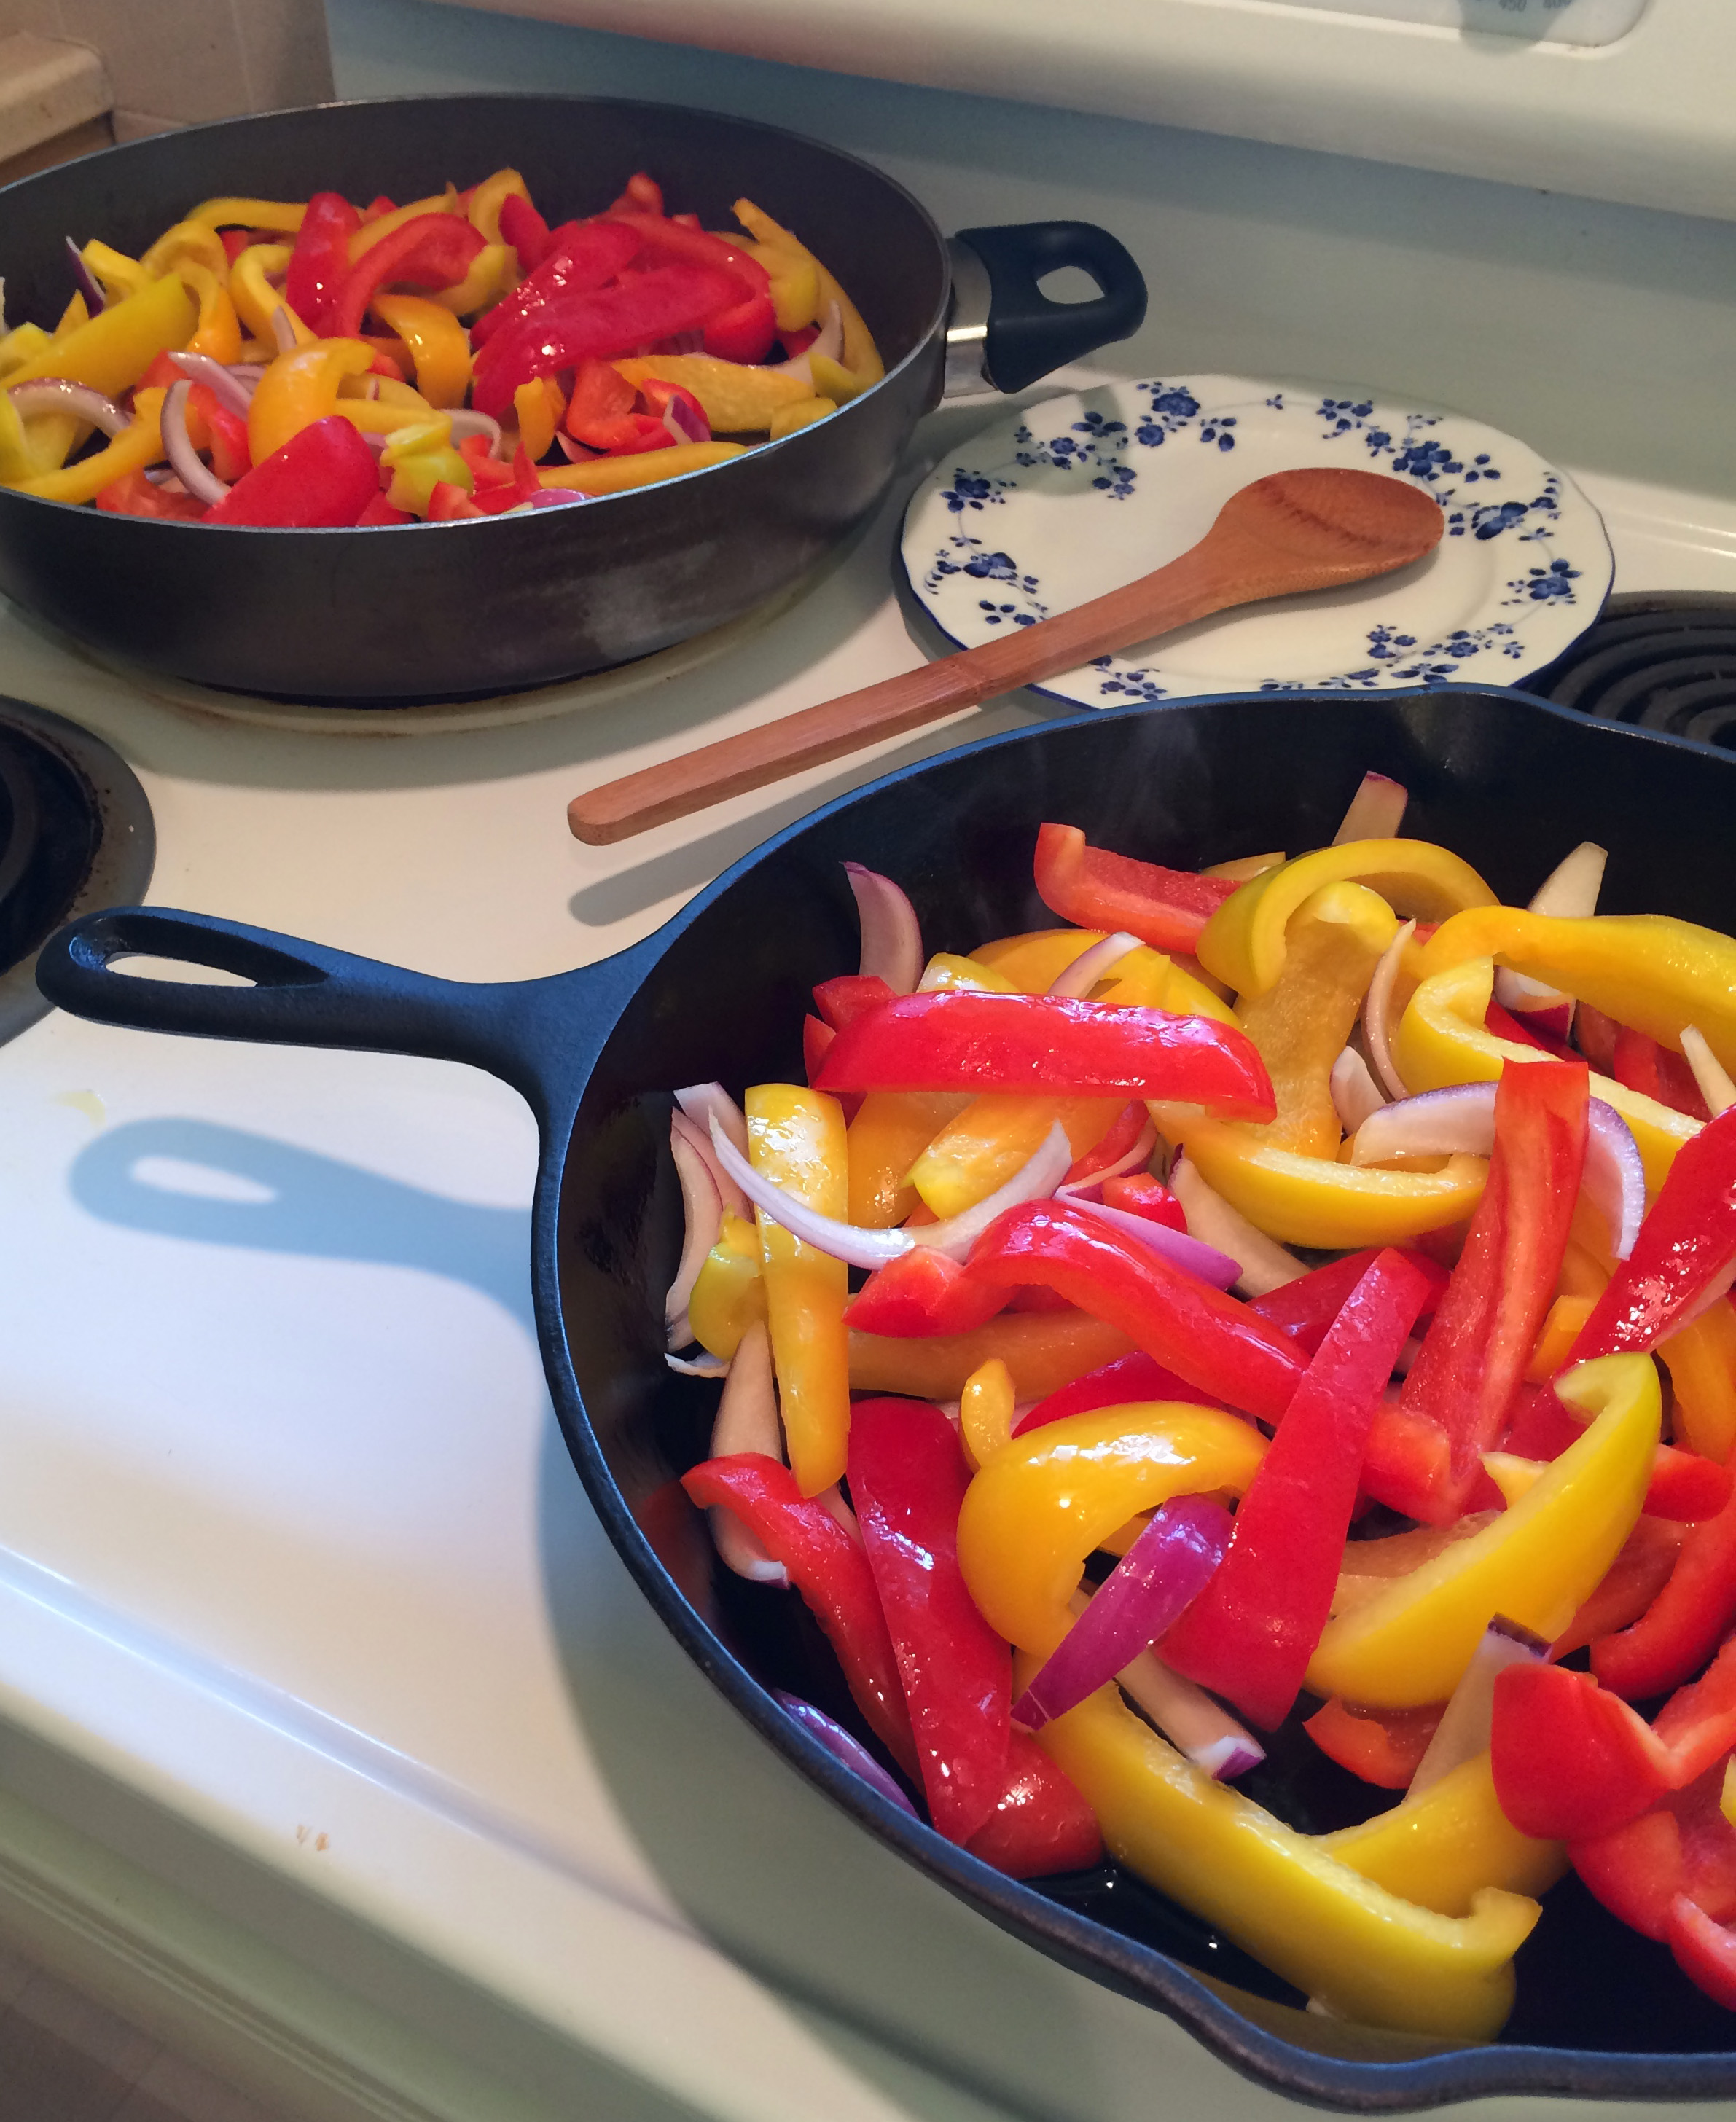
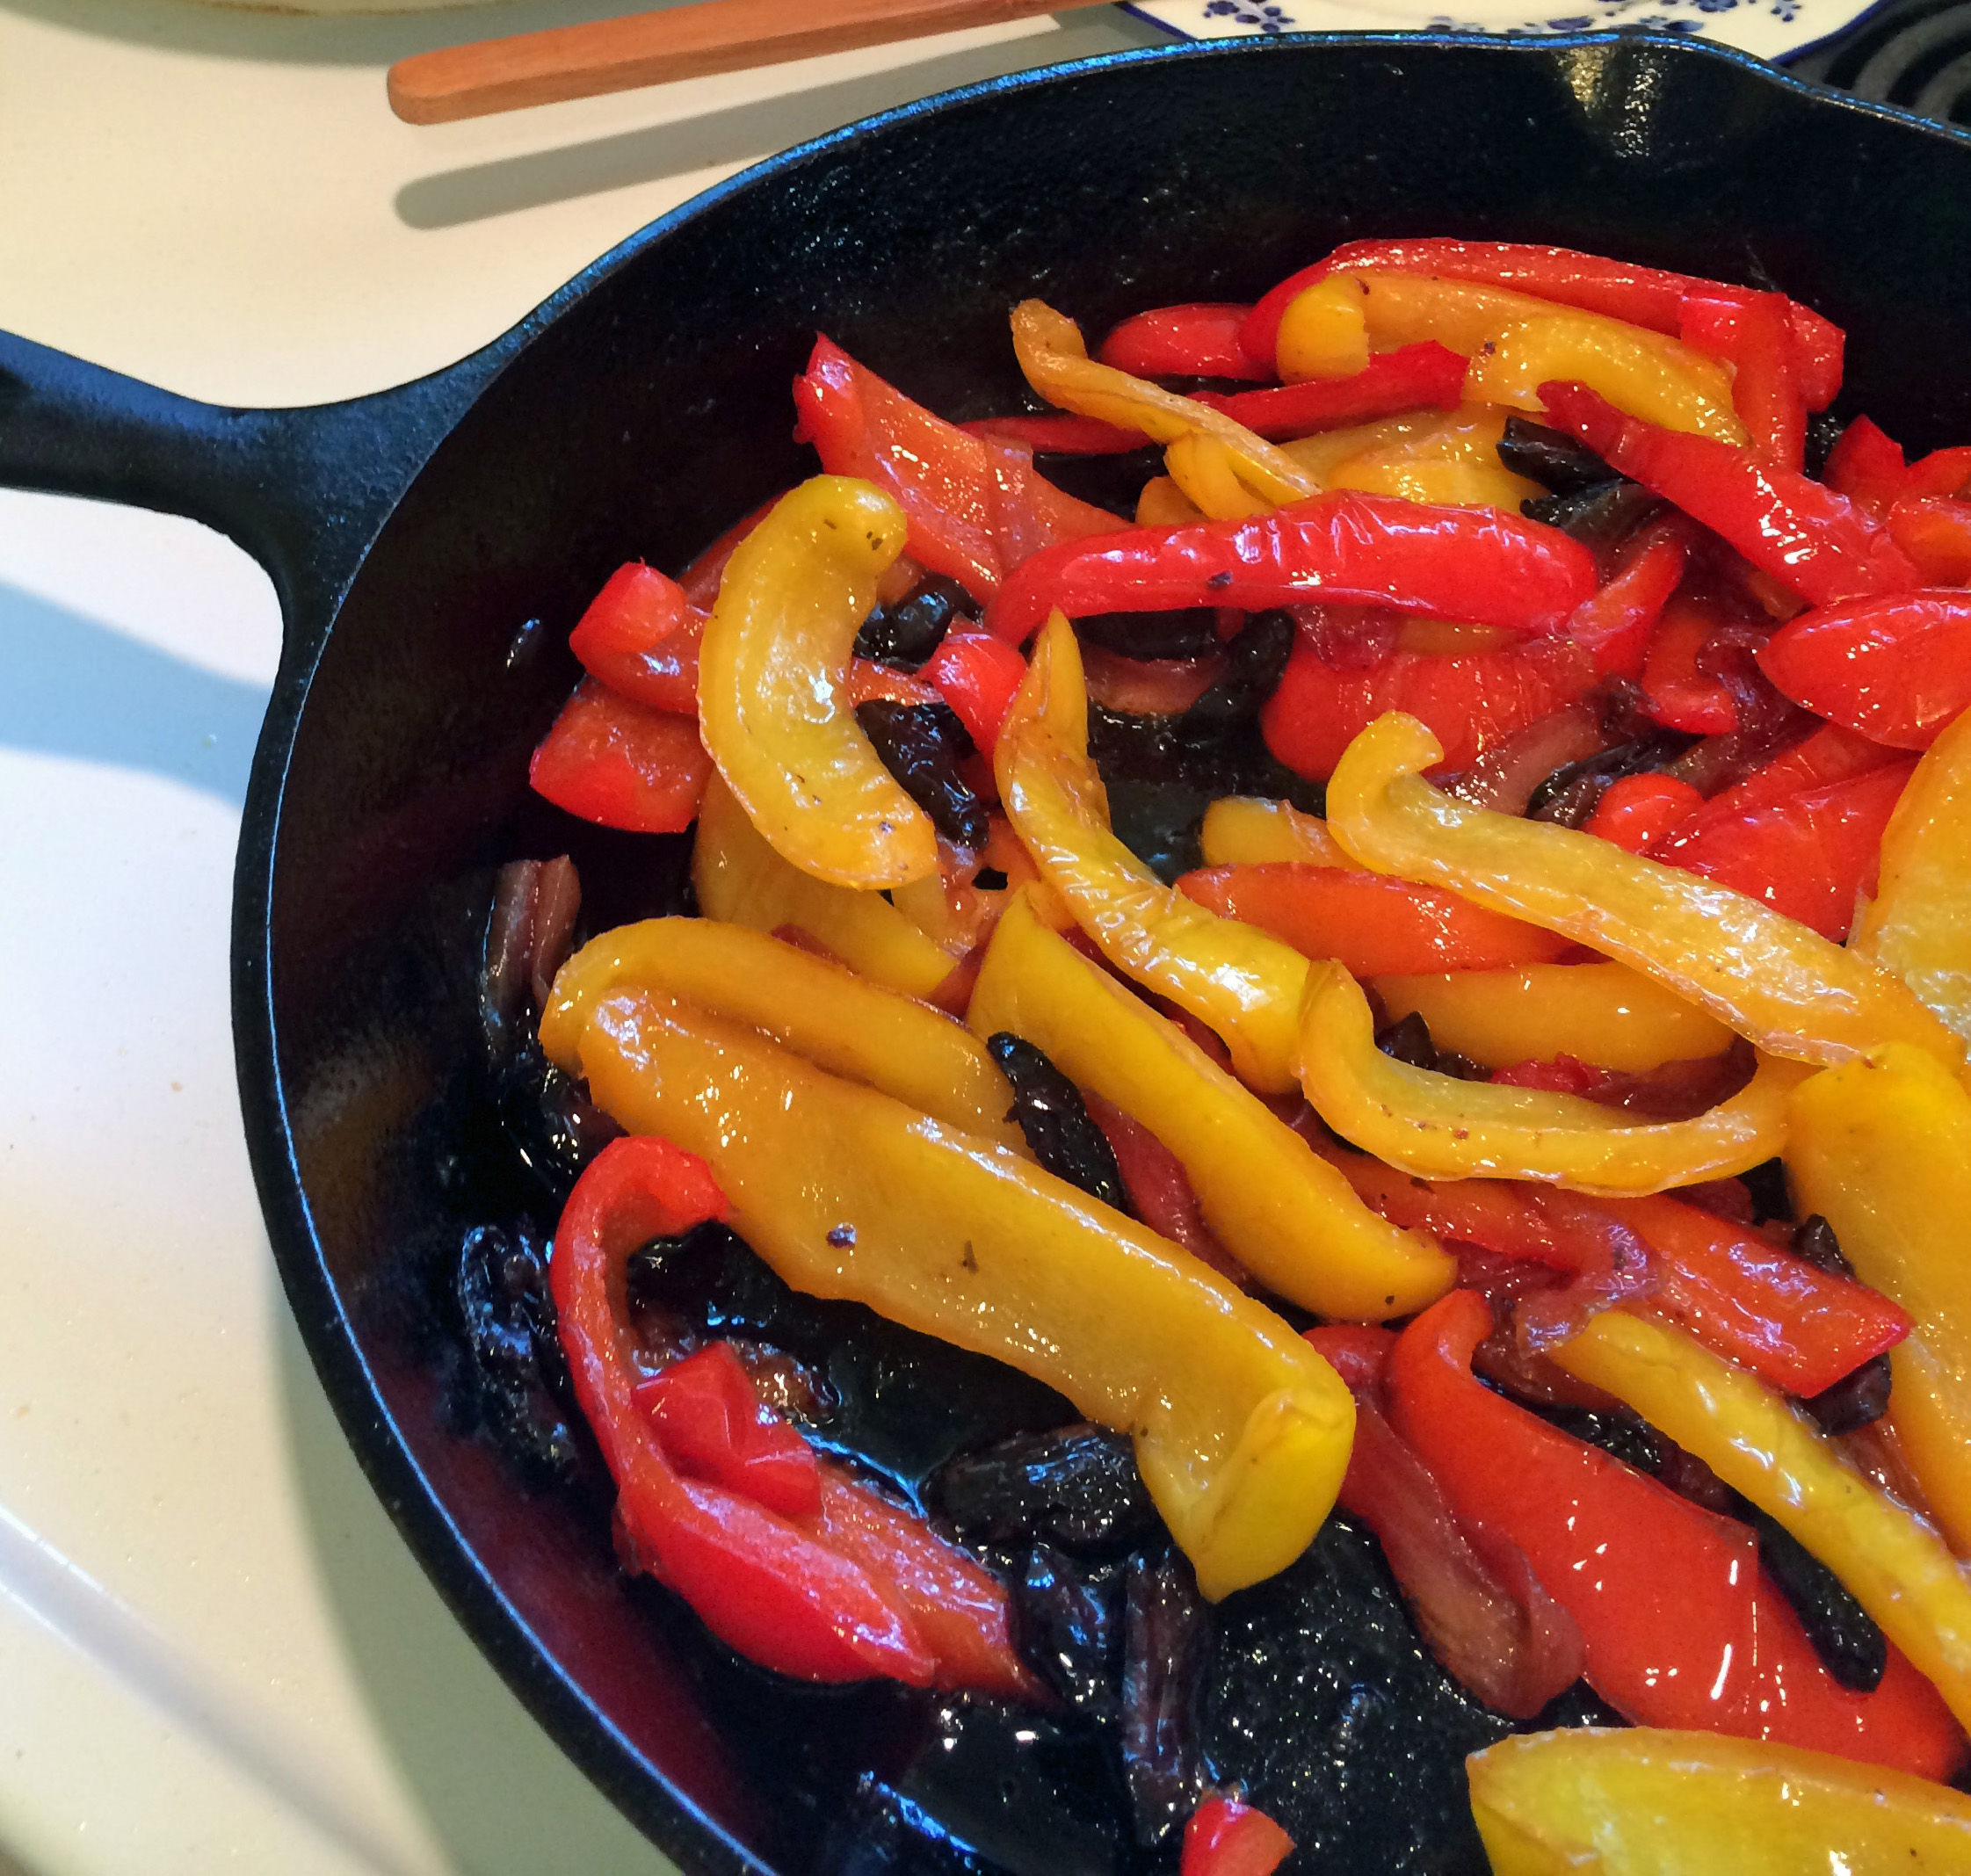
6. Heat the olive oil in a large skillet over medium heat. When it is shimmering, add the peppers and the onions. Cook, stirring occasionally, for about 15 minutes, or until the peppers are starting to soften.
I used 2 skillets when I doubled the recipe.a
a
7. Sprinkle the salt over the peppers. Continue to cook, stirring occasionally, for an additional 15 minutes. The peppers and onions should be soft and just starting to brown a bit.
8. Stir the honey and the vinegar together to make sure the honey is well-blended in the vinegar. Pour the mixture over the peppers. Raise the heat to medium-high and cook, stirring, for about 2 minutes or until most of the vinegar has evaporated.
9. Stir in the olives and cook, stirring, for another 2 minutes.
a
a
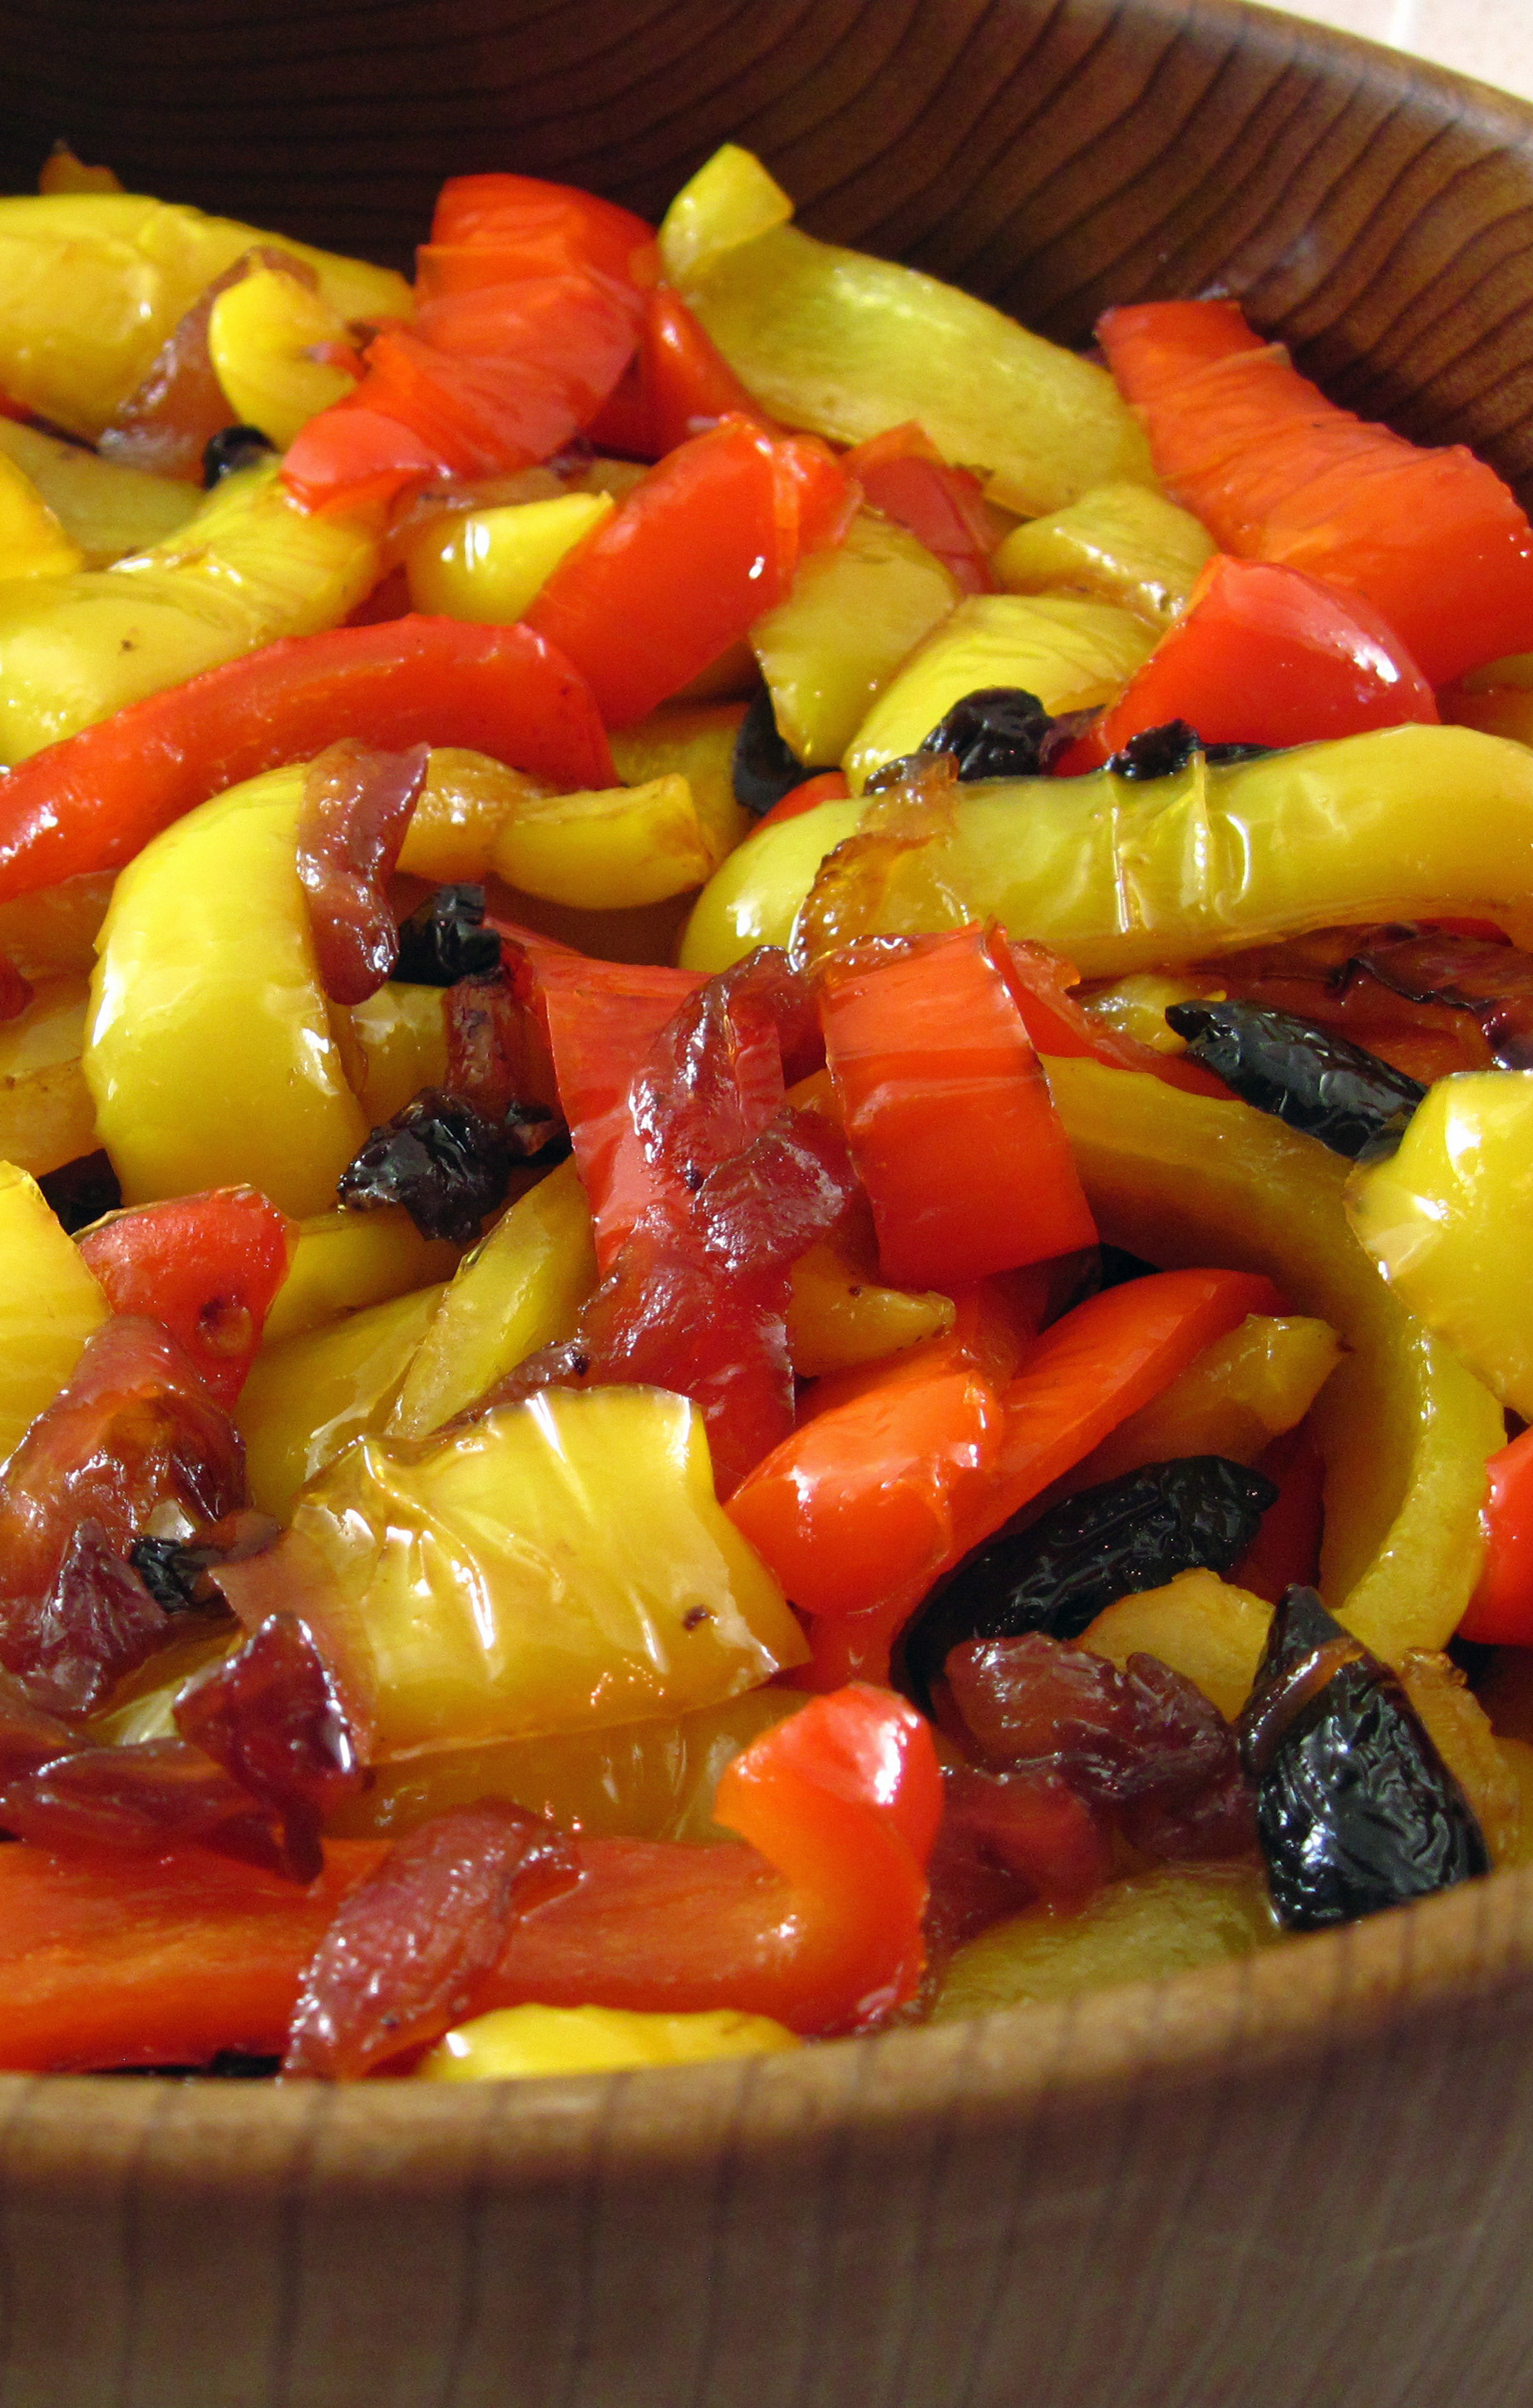
10. Put the peppers in a serving bowl and serve hot, warm, or at room temperature.
a
And, yes, I did wear my onion goggles to slice the onion! 🙂

a
a


