Welcome!
You'll find over 470 of my favorite recipes here, including ideas for Quick meals, Cooking for 2, Feasting on Leftovers, and cooking with 5 Ingredients or Less. I'm adding new posts regularly; you can subscribe by email or RSS feed if you'd like to receive the latest recipes. Bon appétit!
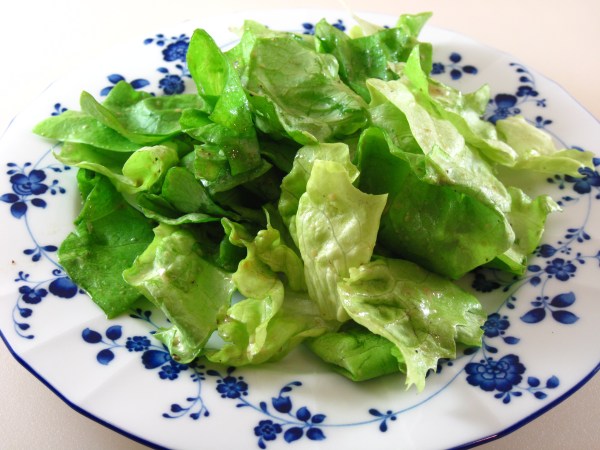
Green Salad with Mustard Dressing
By Kath Dedon
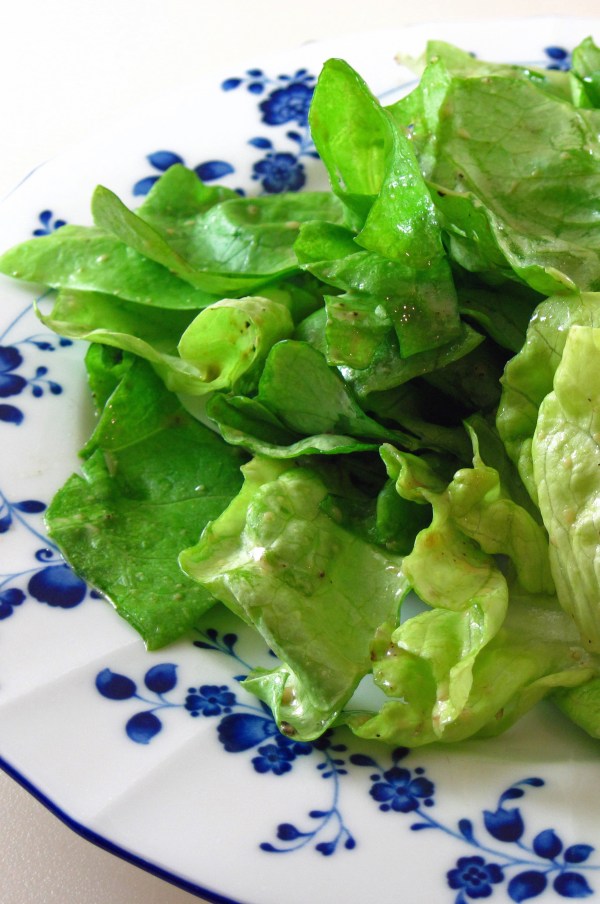
Jacques Pépin has a simple salad in his new book, Jacques Pépin Heart & Soul in the Kitchen that is terrific! Green Salad with Mustard Dressing is great for entertaining because you can do all of the prep ahead of time. Just toss the lettuce with the dressing when it’s time to serve.
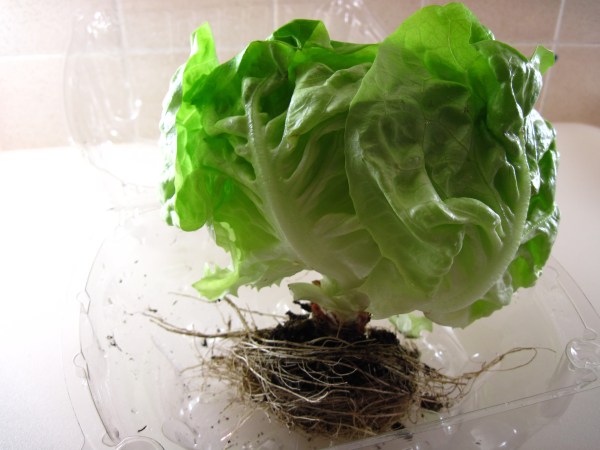
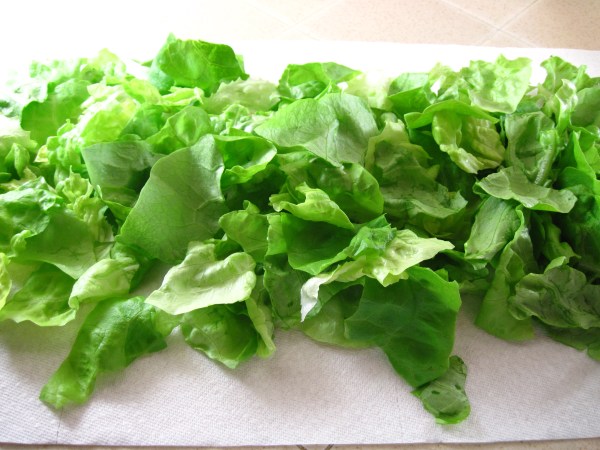
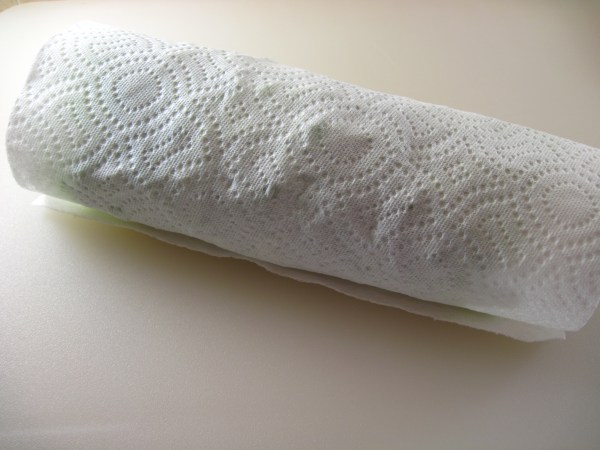
I used a head of “Living Butter Lettuce” because I think it is the freshest lettuce available this time of year. The secret to making a great salad is to use the best lettuce you can find, wash it really well, and make sure it is thoroughly dry. I give the washed leaves a spin in a salad spinner. I then dump the accumulated water out of the spinner and spin the leaves two more times to get them as dry as possible. After drying them, I roll them up in paper towels, put them in a plastic bag and refrigerate them until I’m ready to toss the salad. The paper towels help to absorb any moisture that may be left.
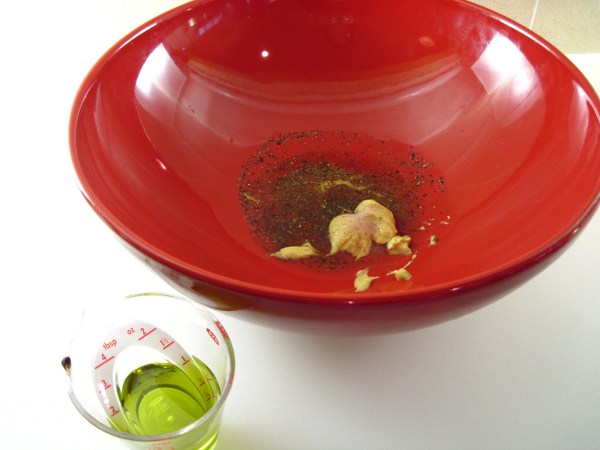
The Mustard Dressing can be mixed in the salad bowl ahead of time. It is fine to leave it at room temperature until you are ready to serve. The dressing is a classic French vinaigrette. The ingredients are perfectly balanced and the quantity is just right for the 8 – 9 cups of lettuce that Jacques uses in the recipe.
I would encourage you to try this simple Green Salad with Mustard Dressing just as it is written, especially if the rest of the menu is complex or rich. I think you’ll enjoy it. But don’t hesitate to make it your own by adding a few other salad ingredients to it. Thinly sliced radishes and avocado would be good. Or homegrown cherry tomatoes this summer!
Green Salad with Mustard Dressing
(Adapted from Jacques Pépin’s recipe in Jacques Pépin Heart & Soul in the Kitchen)
Serves 4 – 6 (Jacques says this serves 4, but I found that it easily served 6 as part of a large meal.)
..
Living Butter Lettuce
9 cups torn butter, Boston, or Bibb lettuce (I used a head of “living butter lettuce”.)
2 teaspoons Dijon mustard
2 teaspoons red wine vinegar
1 teaspoon water
1/3 teaspoon sea salt (I used a heaping ¼ teaspoon of salt.)
½ teaspoon freshly ground black pepper
2 tablespoons extra-virgin olive oil
- Thoroughly wash the lettuce and dry in a salad spinner.
- Spread the lettuce out on paper towels and gently roll it up in the towels.
.
3. Put the lettuce in a plastic bag and refrigerate until you’re ready to serve.

.
4. Mix the mustard, vinegar, water, salt and pepper together in a salad bowl.
.
5. Slowly whisk the olive oil into the other dressing ingredients.

.
6. When ready to serve, put the lettuce in the salad bowl and toss it well so the dressing is evenly distributed. Serve immediately.
.
.
Share this:

Turmeric Chicken with Sumac and Lime
By Kath Dedon
.
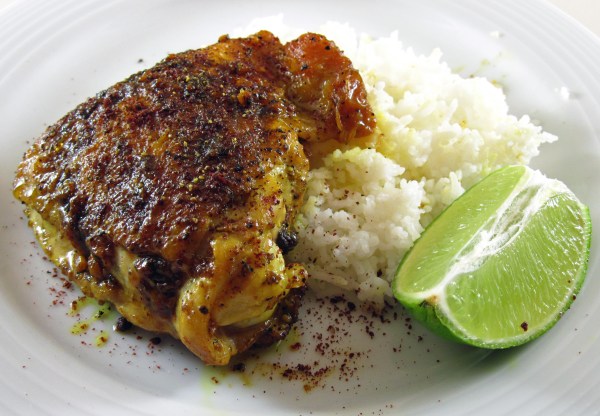
I’ve made Turmeric Chicken with Sumac and Lime twice and it’s a winner! The recipe is from Louisa Shafia’s beautiful cookbook, The New Persian Kitchen. I’ve checked the book out of the library twice. There are so many recipes that I want to try! Carrie got the book for Christmas and has already made several recipes. She has given them all rave reviews. I think this is a book that I will be adding to my library.
I made one major change to the recipe. Carrie made it as written and told me it was delicious but too salty. The recipe calls for 1 tablespoon of sea salt in the turmeric rub. That just seems like too much for four chicken thighs. I used just 1 teaspoon of sea salt and it was perfectly seasoned.
Looking at the ingredients, the recipe seems pretty ordinary but they all work together to make a fabulous, and quick, chicken dinner. Served with steamed rice and a big salad it’s a great main dish. Turmeric Chicken with Sumac and Lime is sure to be part of my regular rotation and I’m looking forward to trying a lot of the other recipes in the book.
.
Turmeric Chicken with Sumac and Lime
(Adapted from Louisa Shafia’s recipe in The New Persian Kitchen)
.
.
Serves 4
.
1 teaspoon ground turmeric
1 teaspoon sea salt
2 teaspoons freshly ground pepper
4 bone-in chicken thighs
2 tablespoons oil
¾ cup water
4 cloves garlic, minced
1 juicy lime, quartered
Sumac, for garnish
- Preheat the oven to warm, and put an oven-proof plate in to warm up.
- Mix the salt, pepper, and turmeric together.
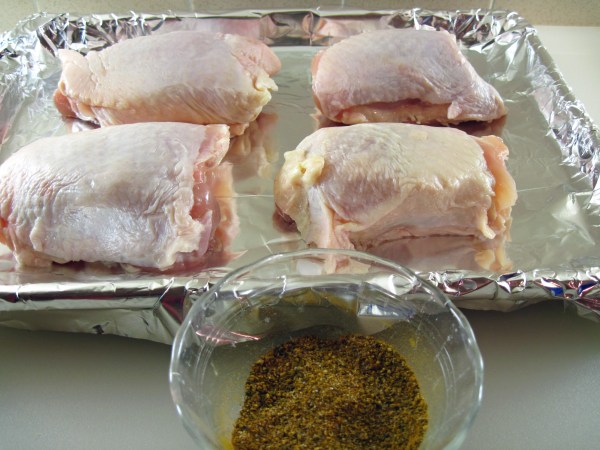
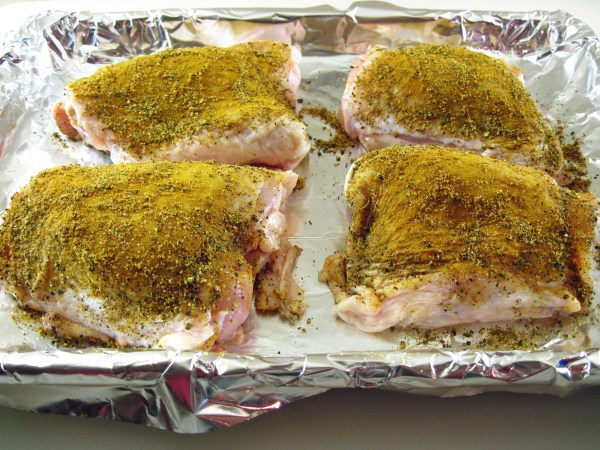
- Put the chicken thighs on a rimmed baking sheet. (I lined it with foil for easy clean up.)
 .
.
4. Rub all of the turmeric mixture all over both sides of the chicken thighs.
a
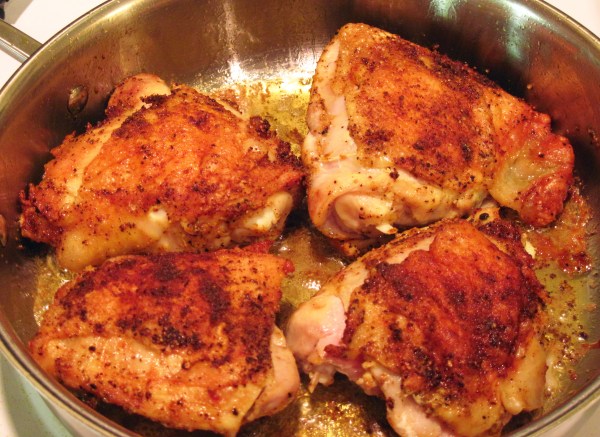
5. Heat the oil in a skillet over medium heat. When hot, put the chicken thighs in skin-side down. Cook for about 7 minutes. Turn the thighs over and cook for an additional 7 minutes.
a
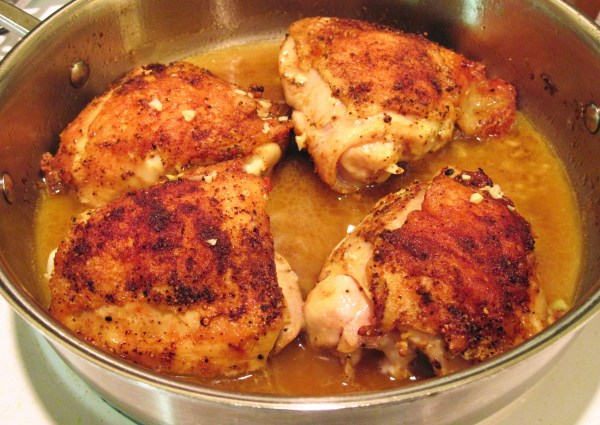
6. Reduce the heat to low. Add the water and garlic, stirring the garlic in the liquid.
a
7. Cover and simmer for 20 – 25 minutes, until done. (They will measure at least 165° with an instant-read thermometer.)
8. Remove the thighs to the warm plate in the oven. Increase the heat on the stove to high and cook the sauce for just a couple of minutes, stirring occasionally, to reduce it a bit.
9. Pour the sauce over the chicken. Dust with a bit of sumac and serve with a lime quarter to squeeze over the thigh.
a

a
Share this:

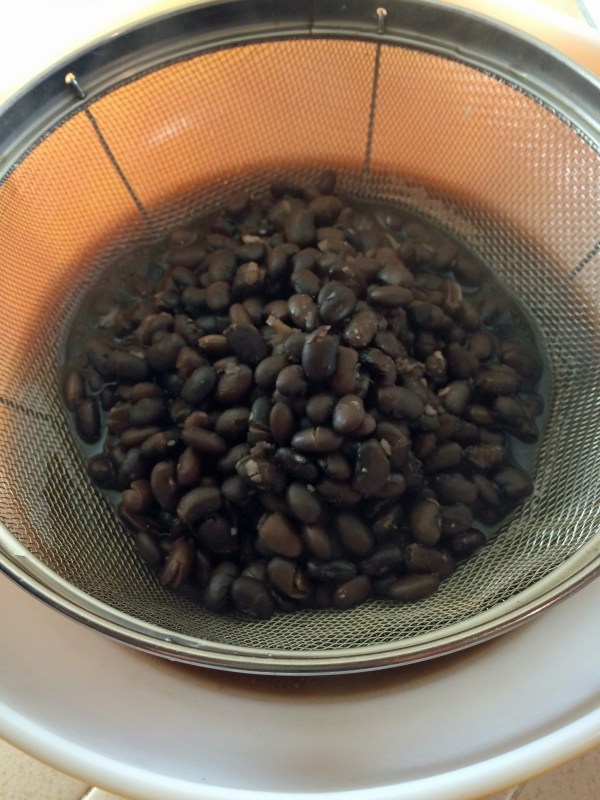
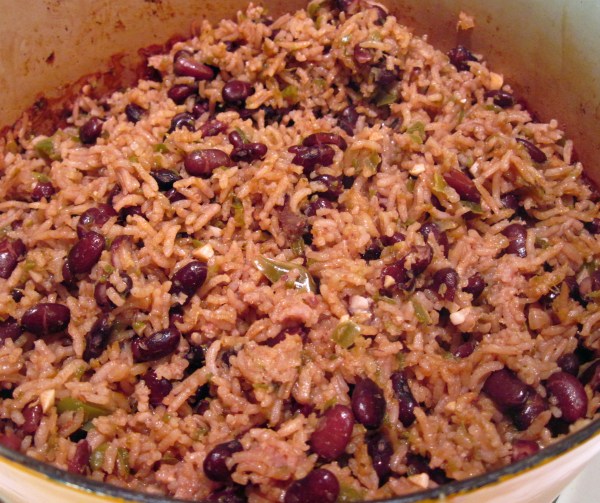
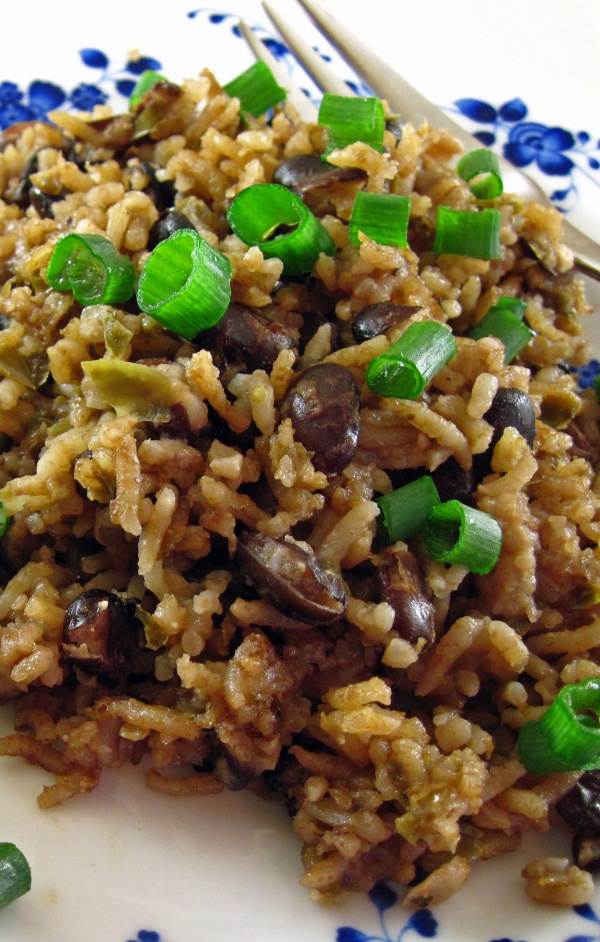
Cuban-Style Black Beans and Rice
By Kath Dedon
.
Cuban-Style Black Beans and Rice makes a fabulous vegan main dish on its own. It’s perfect for Meatless Monday. I am not a vegetarian, but I do enjoy flavorful vegetarian meals now and then.
It was also the perfect side dish with the Slow Cooker Cuban-Style Pork Roast with Mojo Sauce that I recently made. So this Cuban-Style Black Beans and Rice is a great main dish or side dish.
The recipe is adapted from the America’s Test Kitchen’s The Complete Vegetarian Cookbook. It’s very easy to make, but you want to remember to soak the beans the night before you want to make it. ATK did all of their usual testing and determined that you get the best results if you soak the beans in salted water. The skins of the beans are softer and less likely to split when you cook them.
They do offer a quick soak method if you forget to soak your beans the night before. Simply bring the water, salt, and beans to a boil in a large pot. Remove from the heat, cover and let sit for one hour. Drain and rinse the beans and proceed with the recipe.
If you try Cuban-Style Black Beans and Rice, I hope you’ll enjoy it as much as we did!
.
Cuban-Style Black Beans and Rice
(Adapted from a recipe in ATK’s The Complete Vegetarian Cookbook)
.
.
Serves 6 – 8 as a main dish, or 8 – 10 as a side dish
.
To soak the beans
1½ tablespoons table salt (I used sea salt.)
1 cup dried black beans, picked over and rinsed
2 quarts cold water
1. Dissolve the salt in the water. Soak the beans at room temperature for at least 8 hours or overnight. Drain and rinse.
.
To Cook the Beans
4 cups water
2 large green bell peppers, halved, stemmed, and seeded
1 large onion, peeled leaving root end on the onion, and halved crosswise
1 head garlic (5 of the cloves peeled, minced, and reserved for the rice, the remaining head halved crosswise and left unpeeled)
2 bay leaves
1 teaspoon salt
.
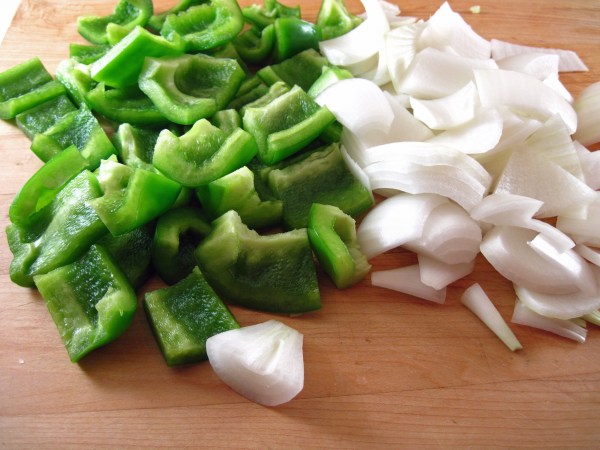
1. In a large Dutch oven, put the 4 cups of water, the drained beans, 1 bell pepper half, the root end half of the onion, the halved unpeeled garlic head, the bay leaves, and the 1 teaspoon of salt. (Reserve the other 3 pepper halves, the half onion, and the 5 cloves of minced garlic for the rice.)

2..
2. Bring to a boil, then reduce heat, cover and cook at a simmer for 30 – 40 minutes, or until the beans are just tender.
3. Discard the pepper, onion, garlic, and bay leaves. Drain the beans over a large bowl. Measure and reserve 2½ cups of the bean liquid to use with the rice. Add water to make 2½ cups, if you don’t quite have enough. Don’t wash the pot.
.

.
To Finish with the Rice
The reserved pepper halves and half onion
2 tablespoons vegetable oil
4 teaspoons ground cumin
1 teaspoon dried oregano (or 1 tablespoon minced fresh oregano)
1 tablespoon tomato paste
The reserved 5 cloves of minced garlic
1½ cups long-grain white rice, rinsed several times until the water runs clear
Cooked black beans
The 2½ cups of reserved bean cooking liquid
2 tablespoons red wine vinegar
1½ teaspoons salt
2 green onions, sliced thin
Lime wedges, for serving
4. Adjust oven rack to the middle position and preheat the oven to 350°.
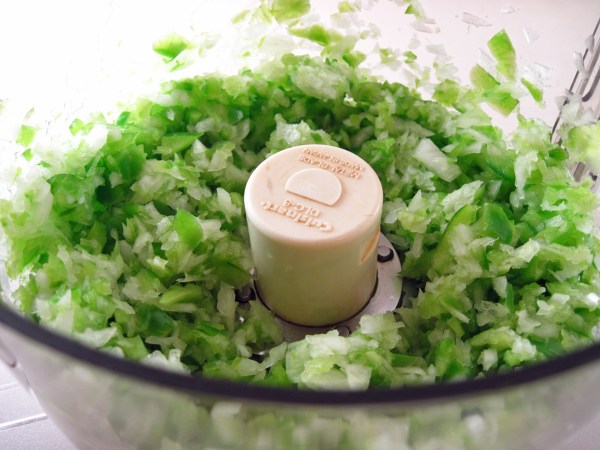
5. Cut the remaining pepper halves and onion half into 2-inch pieces.
.
6. Pulse the pepper and onion in a food processor about 8 times, until the pieces are about ¼-inch, stopping to scrape the bowl down as needed.
.
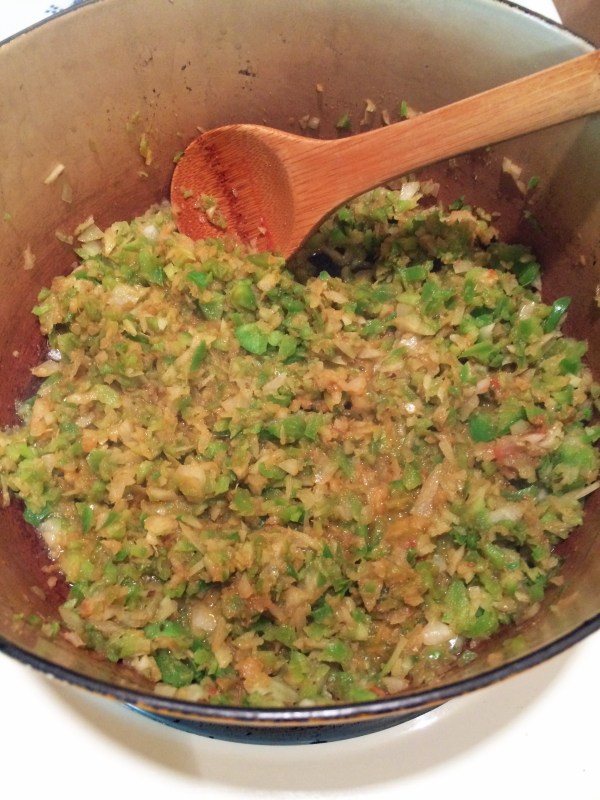
7. Heat the oil in the now-empty pot that you used for the beans until it is shimmering.
8. Add the peppers and onion, cumin, oregano, and tomato paste to the oil. Cook, stirring frequently, until the vegetables are softened and just starting to brown. This will take about 15 minutes. Stir in the reserved minced garlic and cook about 30 seconds. Stir in the rice and cook, stirring, for about 30 seconds.
.
9. Stir in the black beans, the reserved bean cooking liquid, the vinegar, and the 1½ teaspoons salt.
10. Bring the pot to a boil, cover, and put in the preheated oven. Cook for about 30 minutes, until the liquid is absorbed and the rice is cooked. Fluff the rice with a fork and let it sit uncovered for 5 minutes before serving.
.
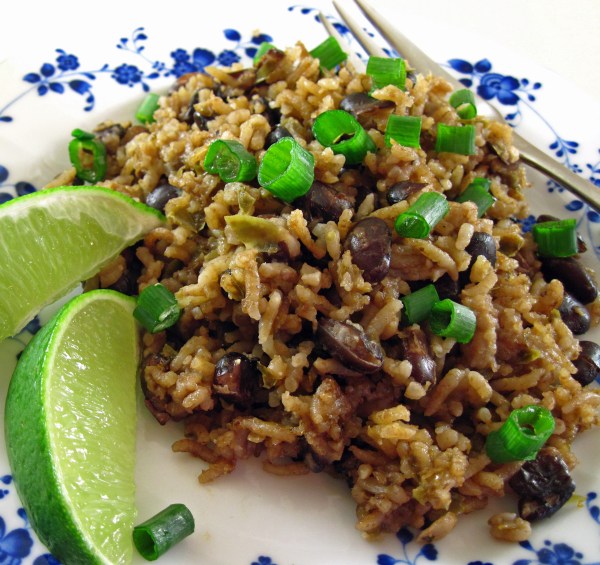
11. Serve with the green onions and lime wedges.

.
.
Share this:

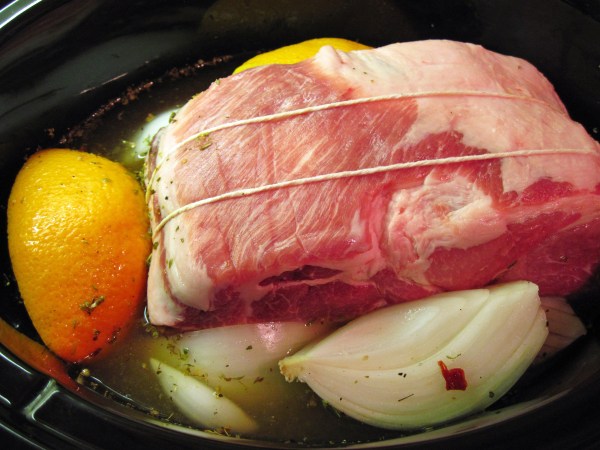
Slow Cooker Cuban-Style Pork Roast with Mojo Sauce
By Kath Dedon
.
This Slow Cooker Cuban-Style Pork Roast with Mojo Sauce was a huge hit at a recent family dinner! I researched different methods to make it and settled on America’s Test Kitchen’s version in Slow Cooker Revolution Volume 2. They developed a tasty method that could be quickly started in a slow cooker without marinating it overnight.
The delicious pork could be used for tacos or, a Seattle favorite, Paseo-style sandwiches. I chose to serve it with another ATK recipe, Cuban-Style Black Beans and Rice. The Black Beans and Rice could stand alone as a vegetarian entrée, but it was great with the pork. (I’ll be sharing that recipe soon.)
If you’re looking for an easy slow cooker entrée, look no further than this Slow Cooker Cuban-Style Pork Roast with Mojo Sauce. It’s a winner!
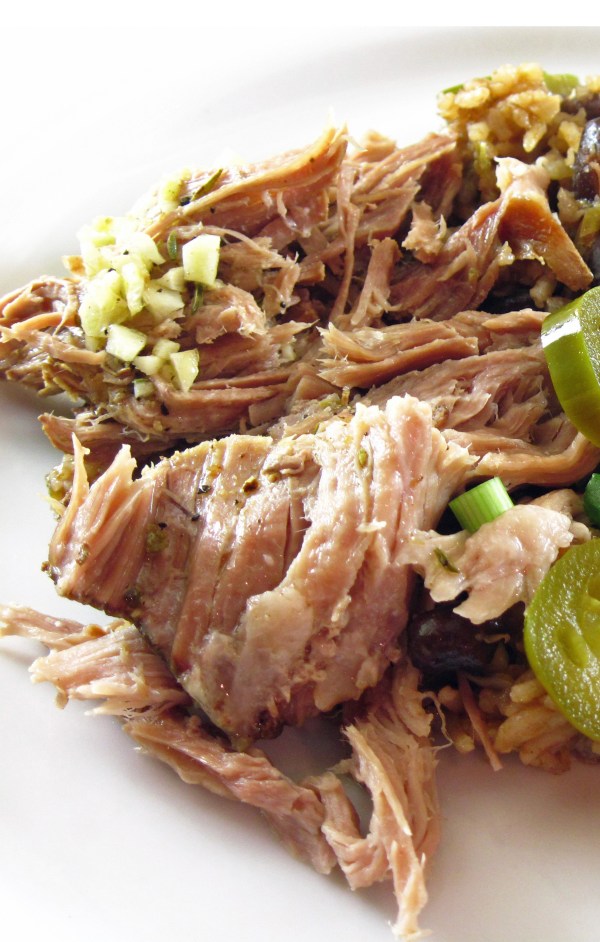
Pork roast with Mojo Sauce (see the minced garlic on the roast from the sauce?) served with Cuban-Style Black Beans and Rice. Green onions and pickled jalapenos were great garnishes.

.
Slow Cooker Cuban-Style Pork Roast with Mojo Sauce
(Adapted from a recipe in America’s Test Kitchen’s Slow Cooker Revolution Volume 2: The Easy-Prep Edition)
.
.
Serves 6 – 8
.
For the pork
2 cups water
1 onion, peeled and quartered through the root end
1 tablespoon minced canned chipotle chile in adobo sauce
1 teaspoon dried oregano
1 teaspoon ground cumin
1 teaspoon kosher salt
½ teaspoon pepper
1 orange, halved
The juice of 1 lime
1 (4-pound) boneless pork shoulder roast
.
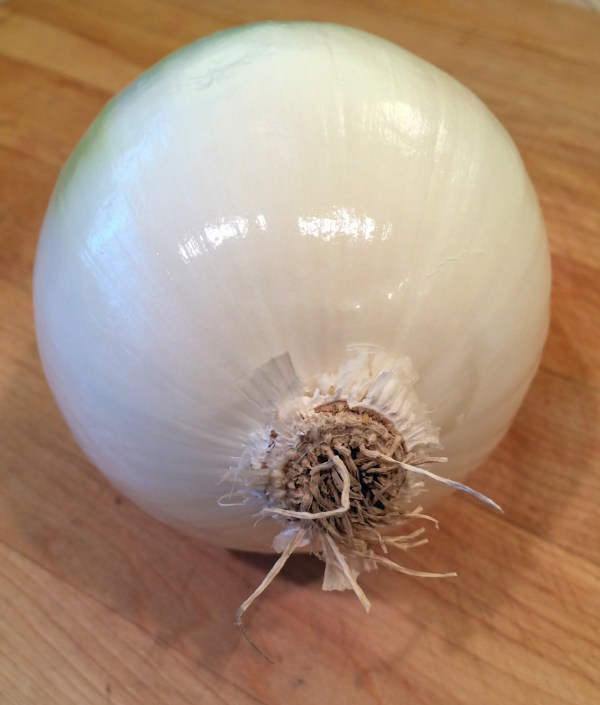
Onion, peeled, ready to be quartered through the root end
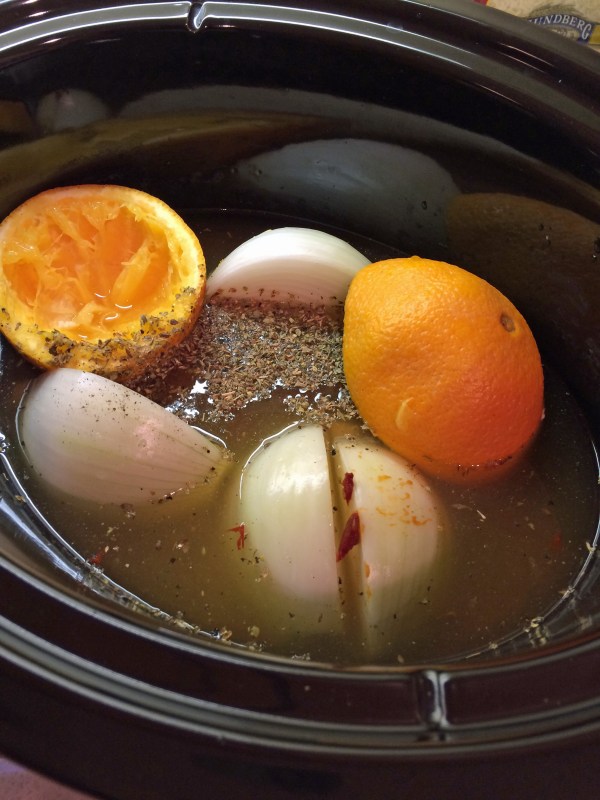
- Combine the water, onion, chipotle chile, oregano, cumin, salt, pepper and lime juice in the slow cooker.
- Juice the orange. Remove any seeds and reserve ¼ cup of the juice for the Mojo Sauce. Add the rest of the juice and the orange halves to the slow cooker.
.
3. Tie the roast with kitchen twine. Season it with salt and pepper and add it to the slow cooker. Cook on low for 8 – 9 hours, or on high for 5 – 6 hours. (I cooked it on low for 9 hours and then let it stay in the slow cooker on warm for about another hour.)
.
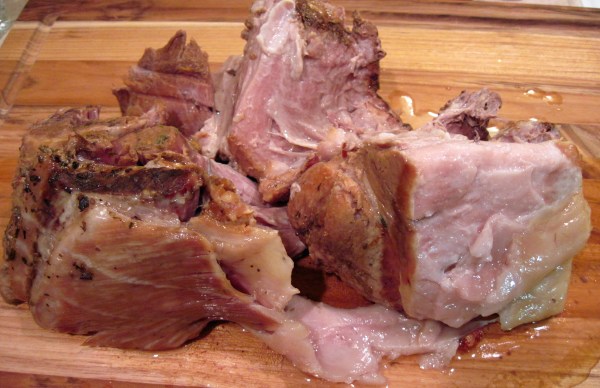
4. Remove the roast to a cutting board. (The cooking liquid can be discarded.) Tent with foil and let it rest for about 15 minutes. Then shred the meat with two forks and serve with the Mojo Sauce.
Falling-apart-tender, ready to be shred with forks
.
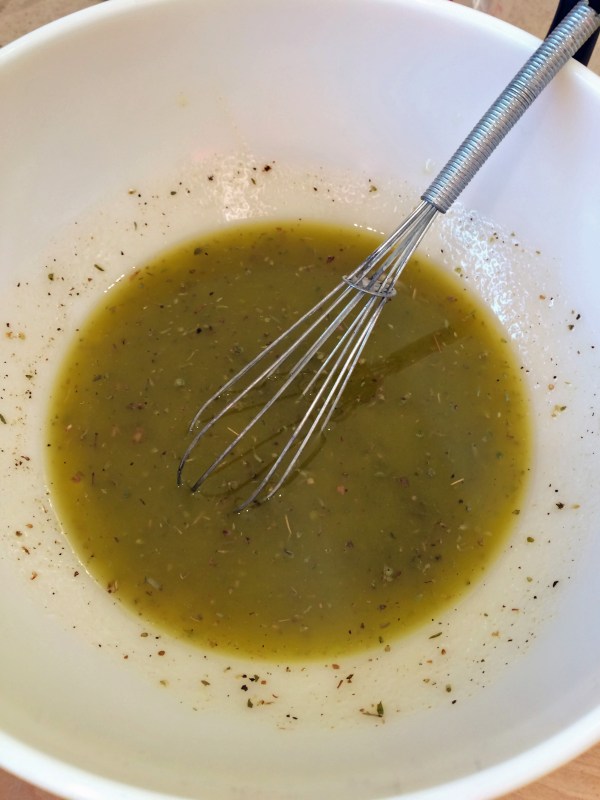
Mojo Sauce
The reserved ¼ cup orange juice
½ cup olive oil
¼ cup white vinegar
4 cloves garlic, minced
1 teaspoon kosher salt
1 teaspoon pepper
1 teaspoon dried oregano
½ teaspoon ground cumin
.
- Whisk the sauce ingredients together and serve with the pork.
I packed a great lunch with some of the leftovers!

.
.
Share this:

Curried Lentil Soup
By Kath Dedon
.
I made this Curried Lentil Soup a couple of weeks ago and we really enjoyed it. I found myself craving it so I made it again and took photos to share with you.
The recipe, from America’s Test Kitchen’s The Complete Vegetarian Cookbook, is very easy to make. I chose to keep it vegetarian and used Swanson’s vegetable broth and it was great, but you could use chicken broth if you don’t need it to be strictly vegetarian. Homemade vegetable or chicken broth would surely take it to a higher level.
The recipe calls for 4½ cups of vegetable broth and 1½ cups of water. Since Swanson’s vegetable broth comes in 4 cup cartons, I used 4 cups of broth and 2 cups of water.
So I’ve made Curried Lentil Soup twice this month. I’m sure it’s a soup I’ll be making again. It makes a great, wholesome, warming meal for a winter night. Serve it with a simple salad and some bread and you’re all set!
.

.
Curried Lentil Soup
(Adapted from the recipe in ATK’s The Complete Vegetarian Cookbook)
ATK used a blender to blend 3 cups of the soup and then returned it to the pot. I used an immersion blender right in the pot to blend it a bit. I recommend using an immersion blender if you have one. If you use a blender, it should be large enough that it’s not too full with 3 cups of soup. If not, do it in batches. While blending, use an oven mitt to hold the cover on. Hot soup can send blender lids, and soup, flying if you’re not careful.
Serves 4
2 tablespoons olive oil
1 large onion, chopped fine (about 1 ½ cups)
2 carrots, peeled and chopped
3 cloves of garlic, minced
1 teaspoon curry powder
1 (14.5-ounce) can diced tomatoes, drained (I used petite diced.)
1 bay leaf
1 teaspoon fresh thyme
1 cup lentils, picked over and rinsed
¼ teaspoon salt
½ cup dry white wine
4 cups vegetable broth
2 cups water
3 tablespoons minced fresh parsley
Freshly ground pepper, to taste
- Heat the oil in a large pot. Add the onion and carrots and cook, stirring occasionally for about 2 minutes.
 .
.
2. Add the garlic and curry powder and cook, stirring, until fragrant, about 30 seconds.
3. Add the tomatoes, bay leaf and thyme and cook for another 30 seconds.
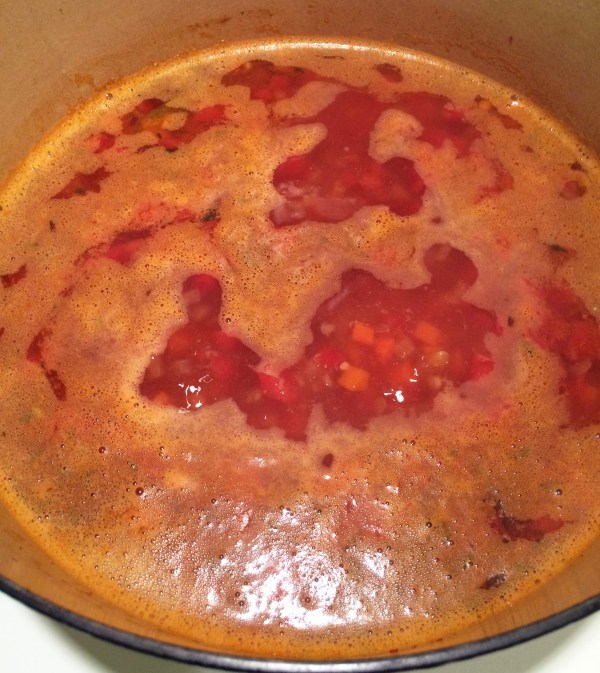
4. Add the lentils and ¼ teaspoon salt. Stir, cover, and cook over medium-low heat for 8 – 10 minutes, until the vegetables have softened and the lentils have darkened a bit.

5. Increase the heat to high, add the wine and bring to a boil, stirring up any browned bits. Add the broth and water and bring to a boil. Reduce the heat so the soup is simmering, put the lid on ajar and simmer for 30 – 35 minutes, until the lentils are tender.
.

6. Discard the bay leaf. Use an immersion blender in the pot to blend the soup a bit. (Or put 3 cups of the soup in a blender, blend it and add it back to the pot. See note at the start of the recipe.)
7. Stir in parsley and serve.
a

a
Share this:

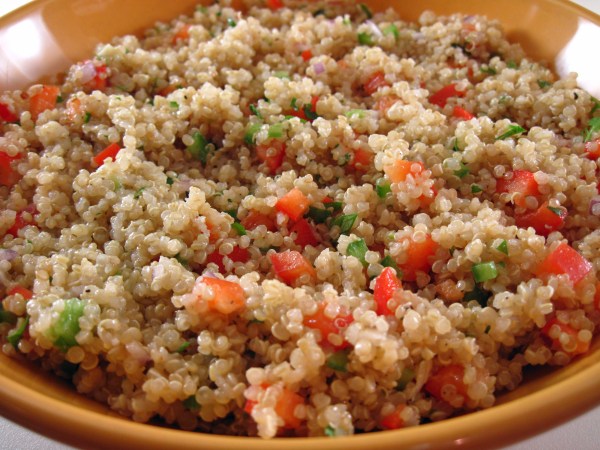
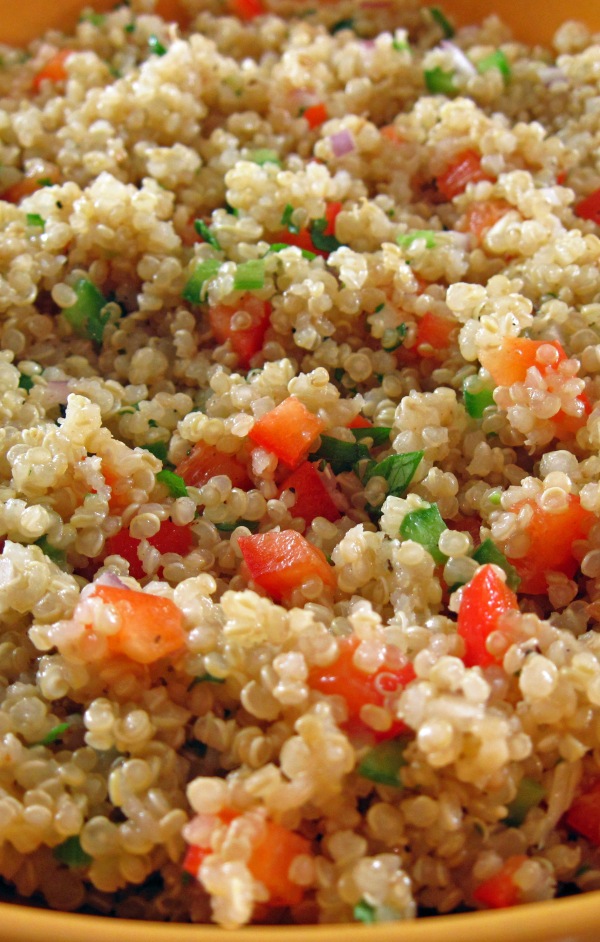
Quinoa Salad with Bell Pepper and Cilantro
By Kath Dedon
.
This Quinoa Salad with Bell Pepper and Cilantro is from the America’s Test Kitchen’s The How Can It Be Gluten Free Cookbook. They wanted to give the salad a “Latin flavor” in a nod to quinoa’s Peruvian roots.
I loved the simplicity of this salad. It was quick and easy to make. Leftover salad was still great the next day so it would be perfect packed in a lunch.
America’s Test Kitchen developed a way to cook the quinoa so that it would not be overcooked and it would not clump together. I thought it worked quite well and I’ll be using their method whenever I cook quinoa in the future.
I was really pleased with the way this Quinoa Salad with Bell Pepper and Cilantro turned out. But, really, consider this just a quinoa salad template. You could increase the vegetables a bit, or add cooked black beans or leftover cooked chicken. Make it your own!
If you’re interested in learning more about quinoa, check out this interesting article on Well-being Secrets: 27 Science-Backed Health Benefits of Quinoa.
.
.
Quinoa Salad with Bell Pepper and Cilantro
(Adapted from ATK’s recipe in The How Can It Be Gluten Free Cookbook)
.
.
Be sure to buy prewashed quinoa. If the package does not say that it’s prewashed, you’ll have to rinse it well to remove the saponins that coat it so it won’t be bitter. But it will be difficult to toast the wet quinoa, so I suggest buying prewashed quinoa which is available in most grocery stores.
.
Serves 4
.
1 cup prewashed white quinoa
1½ cups water
¼ teaspoon sea salt
½ red bell pepper, stemmed, seeded, and chopped fine
½ jalapeno chile, stemmed, seeded, and minced
2 tablespoons finely chopped red onion
1 tablespoon minced fresh cilantro
2 tablespoons lime juice
1 tablespoon extra-virgin olive oil
2 teaspoons Dijon mustard
1 garlic clove, minced
½ teaspoon ground cumin
Additional sea salt and pepper, to taste
- Put the quinoa in a medium saucepan and toast over medium-high heat for about 5 minutes, stirring often.
- Stir the water and salt into the quinoa. Bring to a boil. Cover, reduce heat, and simmer for about 12 minutes. The quinoa will have absorbed almost all of the water and will be almost tender.
- Spread the quinoa out on a rimmed baking sheet and set aside for about 20 minutes. The quinoa will absorb the rest of the water and become tender.
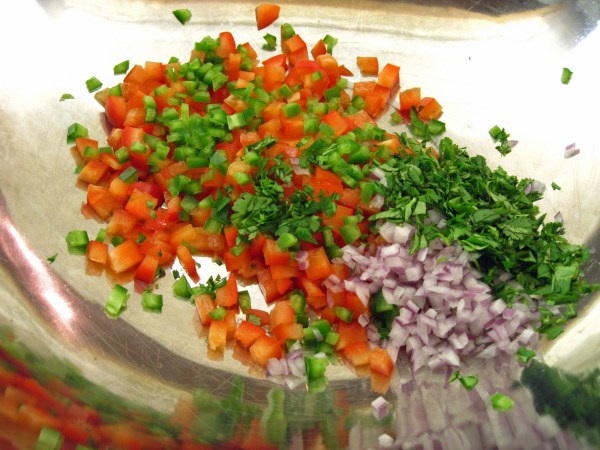
- While the quinoa is set aside, chop the vegetables and put them in a large bowl. When the quinoa is done resting, stir it together with the vegetables.
Chopped vegetables in my stainless steel mixing bowl
.
- Whisk the lime juice, olive oil, mustard, garlic, and cumin together. Pour the dressing over the salad and toss well so it’s evenly distributed.
- Season to taste with salt and pepper and serve.

..
.
Share this:

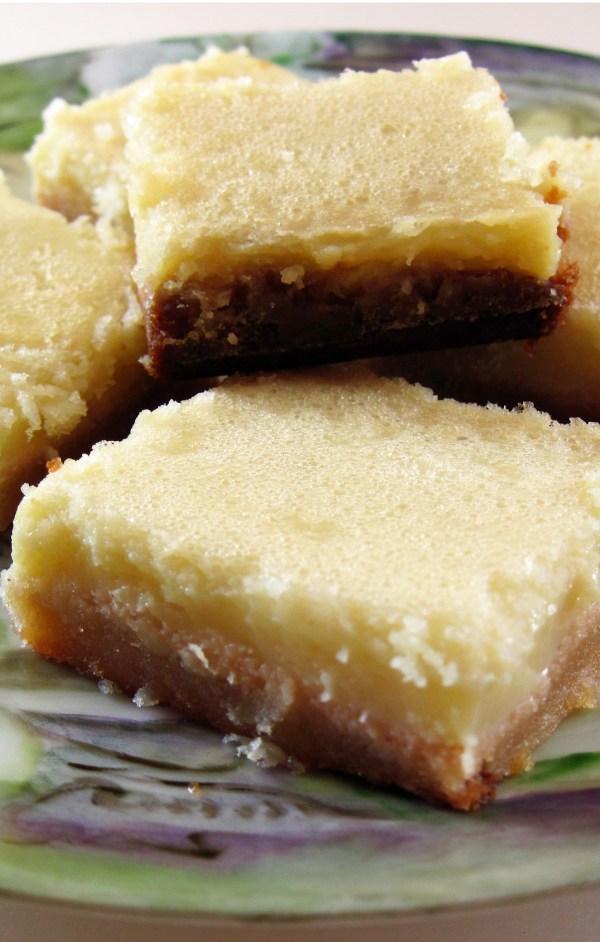
Gluten Free Lemon Bars
By Kath Dedon
.
One of the treats that I made over the holidays was Gluten Free Lemon Bars using some fabulous Meyer lemons from our friends’ tree in California. (Thank you, Mike and Liz!) They were a hit with everyone!
I adapted Elana Amsterdam’s recipe from The Gluten Free Almond Flour Cookbook. She likes to use agave nectar to sweeten desserts, but I prefer to use honey, maple syrup or maple sugar. For this recipe I used honey.
I also substituted melted butter for the grapeseed oil that Elana used because I think butter just makes it better.
I used the blanched almond flour from Honeyville that Elana recommends. It’s a much finer grind than most other almond flours. I’m happy to say that I can buy it at my Costco store.
If you don’t have Meyer lemons you can make the Lemon Bars with regular lemons. Just be sure to use freshly squeezed lemon juice.
Do give these Gluten Free Lemon Bars a try, especially if you’re looking for a gluten-free, naturally sweetened treat. This recipe is a keeper!
.

.
Gluten Free Lemon Bars
(Adapted from Elana Amsterdam’s book, The Gluten Free Almond Flour Cookbook)
a
Makes 16 bars
a
Crust
1½ cups blanched almond flour
½ teaspoon sea salt
2 tablespoons melted unsalted butter (or grapeseed oil)
1 tablespoon honey (or agave nectar)
1 tablespoon vanilla extract
a
Topping
¼ cup melted unsalted butter (or grapeseed oil)
¼ cup honey (or agave nectar)
3 large eggs
½ cup freshly squeezed lemon juice
a
- Preheat the oven to 350˚.
- Grease an 8-inch square baking pan with a bit of oil or butter. Dust with some almond flour.
- Stir the salt into the almond flour.
- Mix the butter, honey, and vanilla together until they are well-combined and then mix well with the almond flour.
- Press the crust mixture into the baking pan, pressing with your fingers so it is spread evenly.
- Bake the crust for 15 – 17 minutes, until lightly golden.
- While the crust is baking, put the topping ingredients in a blender and blend until the mixture is smooth.
- Pour the topping mixture on top of the crust and bake for 15 to 20 minutes, until lightly golden.
- Put the baking pan on a cooling rack for 30 minutes. Then put the pan in the refrigerator for 2 hours so the topping will set.
- Cut into 16 bars.
a

a
a
Share this:

3-Ingredient Peanut Butter Cookies
By Kath Dedon
.
If you have a jar of regular peanut butter you can whip up a batch of these 3-Ingredient Peanut Butter Cookies very quickly.
I was searching the Internet for a wheat-free, dairy-free cookie that could be made with maple sugar and I stumbled upon Mary Younkin’s recipe on her Barefeet In The Kitchen blog. She uses sugar, peanut butter, and an egg. It seemed like it would be simple to substitute maple sugar.
Still, I was skeptical. So I was very pleasantly surprised that these cookies were SO quick and easy to make and great-tasting, too.
One tip: I have read that natural peanut butter, like Adams, will not work as well in cookies. For best results use a “regular” peanut butter, like Skippy or Jif.
If you have a jar of peanut butter you still have time to bake these 3-Ingredient Peanut Butter Cookies for Santa!
.

.
3-Ingredient Peanut Butter Cookies
(Adapted from Mary Younkin’s recipe on Barefeet In The Kitchen)
.
.
Makes 16 – 18
.
1 cup sugar (I used maple sugar.)
1 cup peanut butter
1 egg
.
- Preheat the oven to 350˚ and line a large baking sheet with parchment paper or a Silpat mat.
- If using maple sugar, sift it through a fine mesh strainer to break up any lumps.
- Stir the sugar, peanut butter, and egg together until the mixture is well-blended.
- Scoop the dough with a cookie scoop (I used a 2-tablespoon one which made large cookies) or roll the dough into 1-inch balls.
- Place the dough on the prepared baking sheet. Press the dough down with the tines of a fork in a criss-cross pattern.
- Bake for 12 minutes. Let them cool on the baking sheet for 2 minutes and then remove to a wire rack to cool completely.
.

.
Share this:

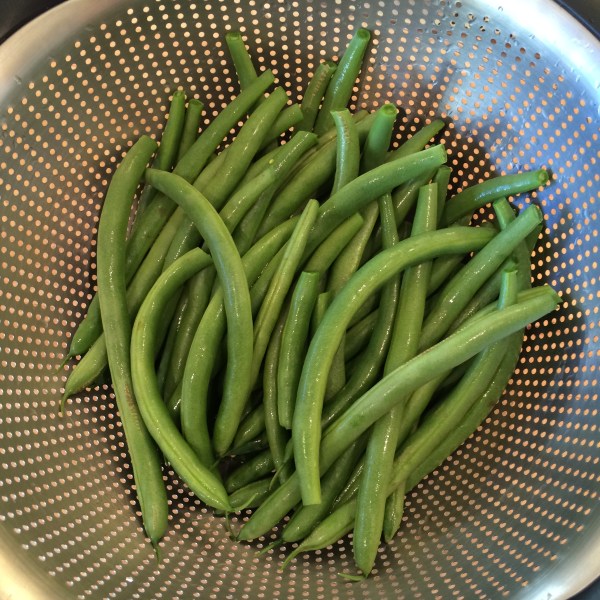
Green Beans Amandine
By Kath Dedon
.
Michael Symon’s Green Beans Amandine from his 5 in 5 for Every Season cookbook struck me as being a perfect holiday side dish. It’s quick, easy, and has enough butter and almonds to raise it above an everyday vegetable dish.
Symon uses 1/2 cup of almonds, 1/2 cup sliced shallots, and 4 tablespoons of butter for one pound of green beans. He cooks the raw beans in a skillet with the butter and shallots for about 5 minutes. He then adds the almonds and finishes them with a bit of lemon zest and lemon juice. Quick and easy.
After doing a bit more research, I decided to adapt the recipe using a Julia Child technique. In The Way to Cook Julia blanched the green beans in salted water. This can be done a few hours before you want to serve them if you give them an ice water bath right after draining. You then wrap them in a kitchen towel and refrigerate them until you’re ready to reheat them. When reheating, Julia suggested adding “several tablespoons” of butter. And she said you could add toasted almonds which was considered “ultra chic” in the 1930s.
Although Julia’s method required an extra step, it struck me that the actual last-minute part of the cooking was simplified which is appealing to me when making a holiday meal.
I really liked these Green Beans Amandine! They were simple and yet fancy enough to be part of our holiday meal. The aroma of the browning butter and almonds was mouth-watering. The few beans that were left over were still delicious the next day after gently reheating them in the microwave. I’ll definitely be making these again. I might try Michael Symon’s recipe next time to see how it compares.
a
Green Beans Amandine were great with a rib roast!

a
Green Beans Amandine
Adapted from Michael Symon’s recipe and Julia Child’s technique
a
a
Serves 6
a
1 1/4 pounds green beans, washed and trimmed
4 tablespoons unsalted butter
1/2 cup sliced almonds
Salt and pepper, to taste
a
a
- Bring about 6 quarts of water to a boil. Add about a tablespoon of salt and the green beans. Cook for 4 – 5 minutes, until the beans are done. (My beans were quite large; I cooked them for 5 minutes.)
- While the beans are cooking, get a large bowl of ice water ready.
- When the beans are done, drain them and immediately submerge them in the ice water. Leave them in the ice water for 3 – 4 minutes.

a
4. Drain the beans again, and then lay them out on a clean dish towel.

5. Roll them up in the towel, place the towel in a plastic bag and refrigerate until you’re ready to use them. (Can be refrigerated for up to 4 or 5 hours.)
6. When ready to serve, melt the butter in a large skillet. Add the almonds and beans and cook, stirring often, until the beans are reheated. (It took about 5 minutes to reheat my beans.)
7. Season to taste with salt and pepper and serve.
a

a
Share this:

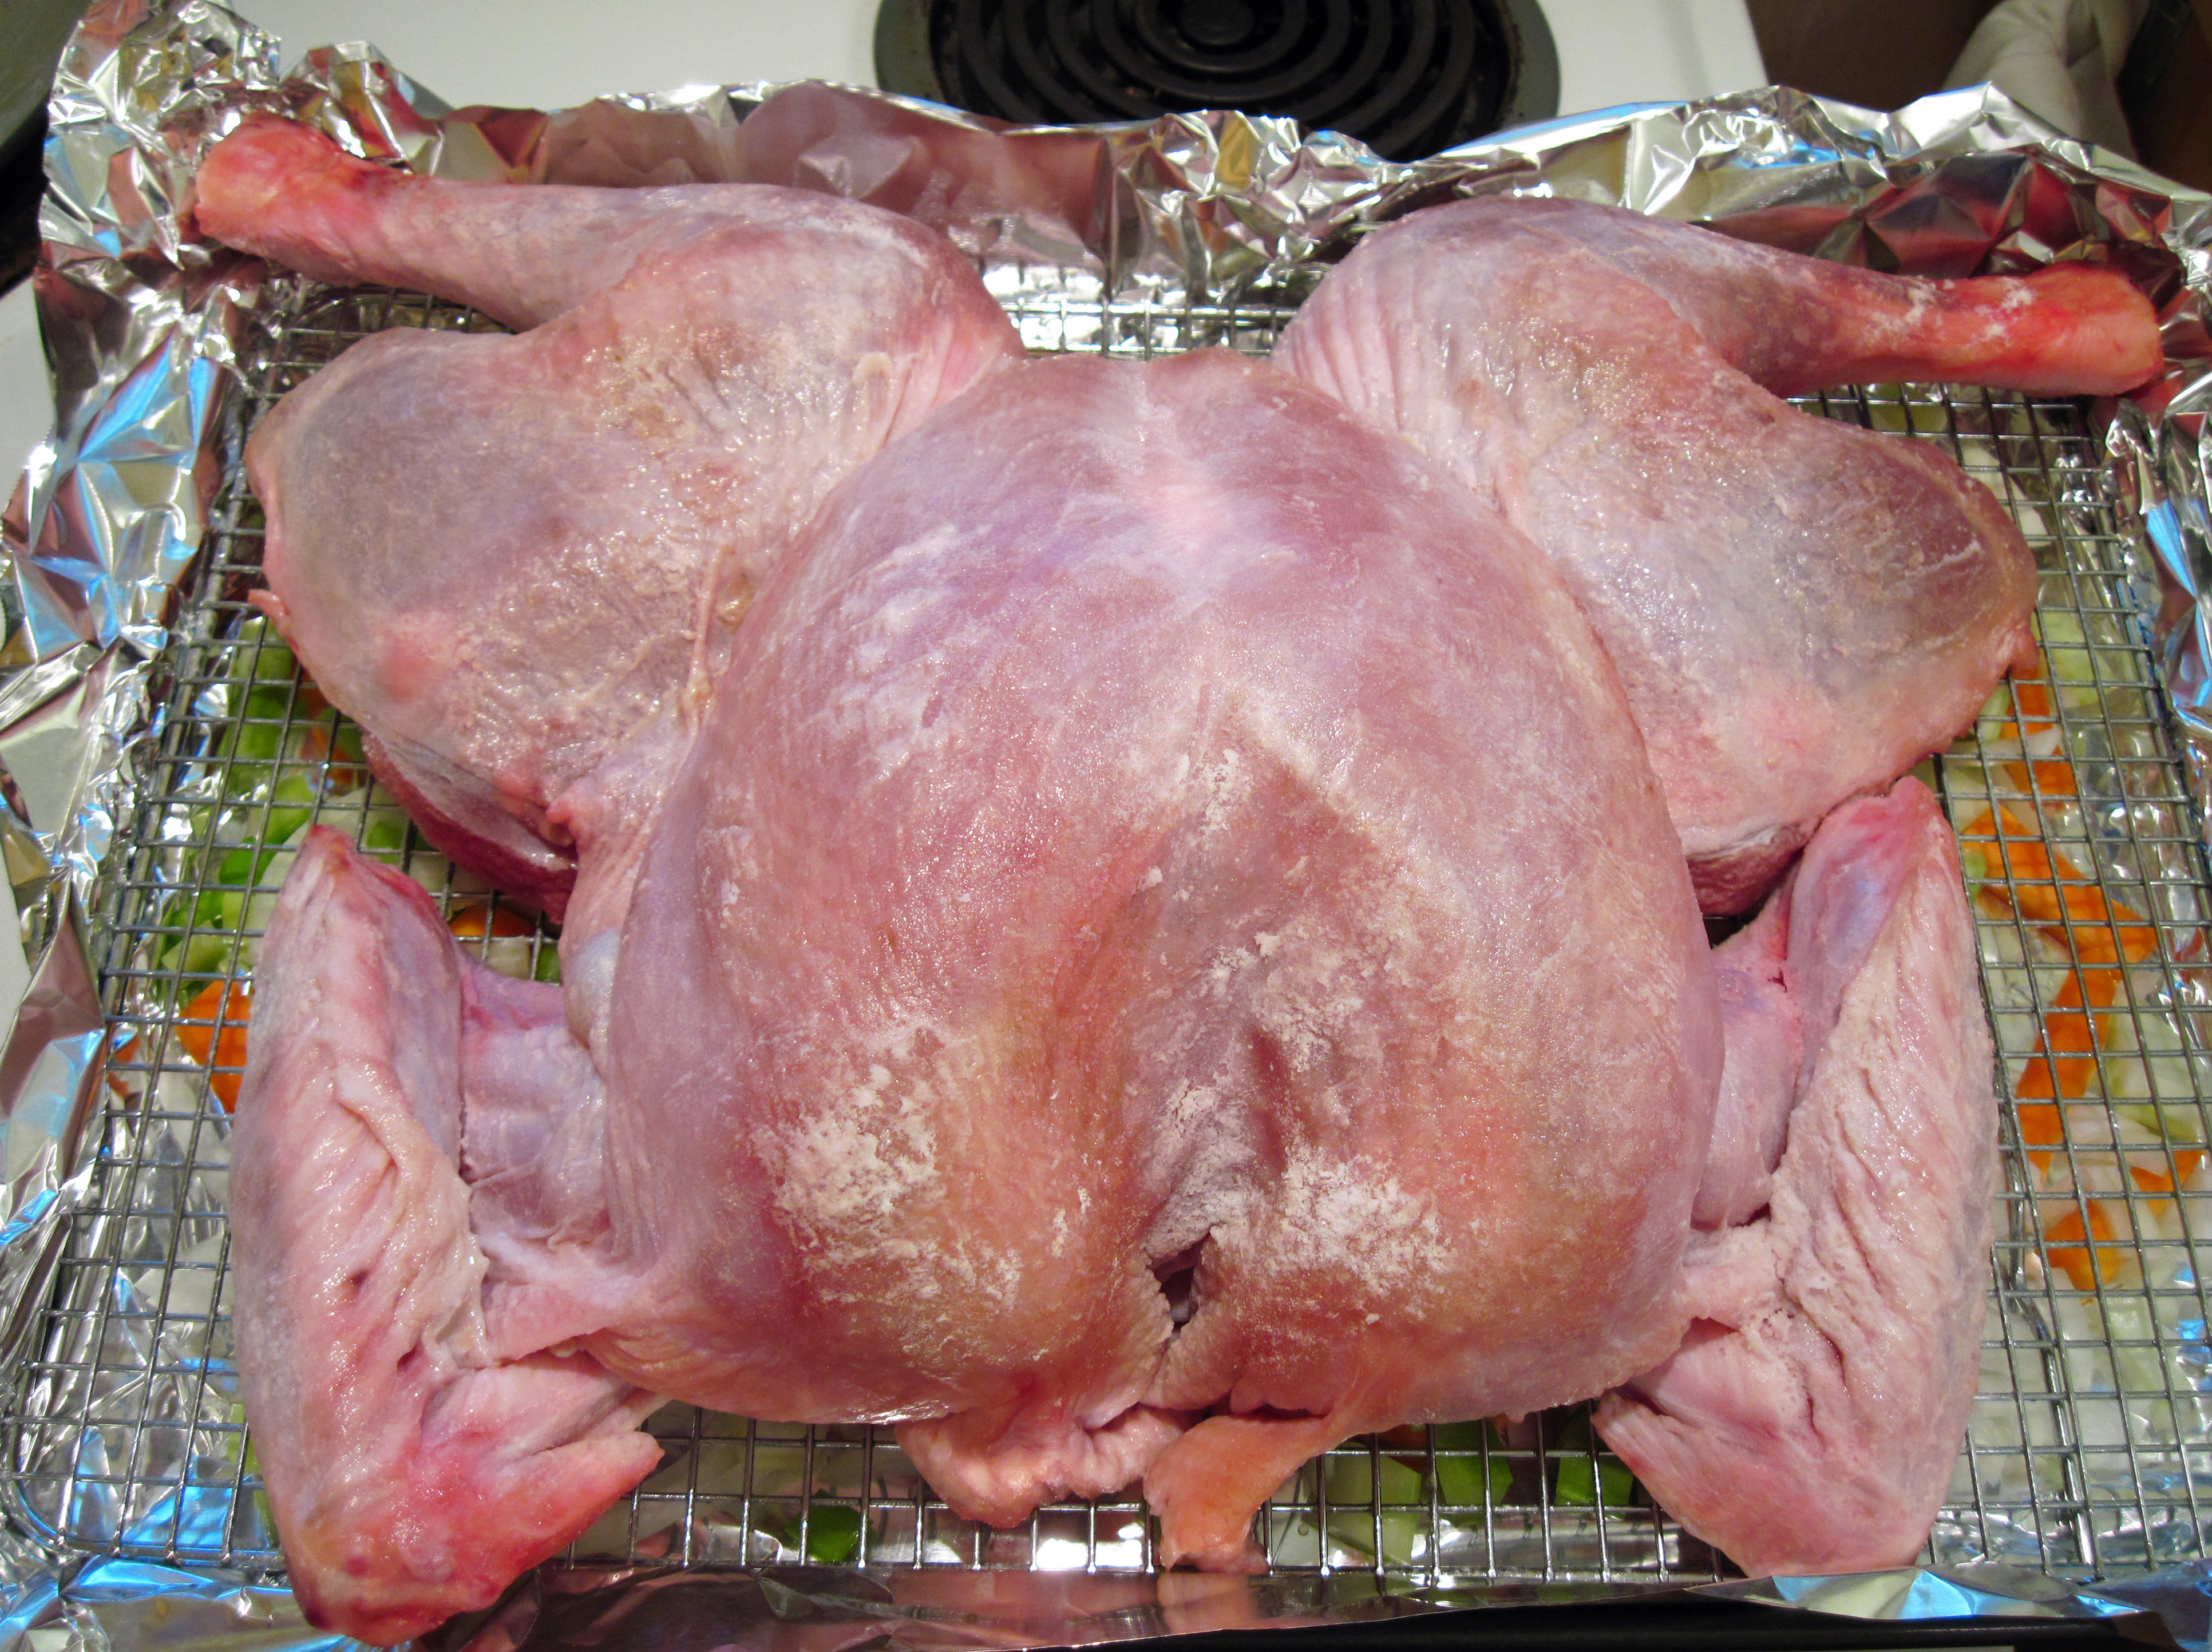
Crisp-Skinned Butterflied Roast Turkey
By Kath Dedon
.
This Crisp-Skinned Butterflied Roast Turkey may be the best turkey I have ever made and it’s relatively easy. This recipe is from Serious Eats’ J. Kenji López-Alt. He’s been recommending this method for the last few years. Read what he has to say about it here.
In a nutshell, I found everything he said about this turkey to be true. It cooks much faster than roasting it conventionally, the skin is beautifully crisp, and the meat is juicy and delicious. You can add the backbone to the neck and giblets to make great turkey broth for gravy. Plus, there was enough room in the oven, with the turkey’s low profile, for me to use the second oven rack to slide in the casserole dish with the cornbread dressing to heat up.
I used Kenji’s dry brine which he says leads to a juicier bird with a crispier skin. You can, however, use this roasting method without brining the turkey.
Update 11/16/23: Do not brine a Kosher, enhanced (like Butterball) or self-basting turkey. They have already been treated with salt. Just spatchcock and roast them. The organic turkey I used had no seasoning added.
I bought the turkey on November 2 and found that my supermarkets did not have fresh turkeys available yet. After reading an article in the San Francisco Chronicle rating several west coast turkeys, I decided to buy an O Organics (Safeway) frozen turkey. I have to say that it was a good looking bird in its raw state and delicious after roasting. The quality of the turkey probably had something to do with the success of my Crisp-Skinned Butterflied Roast Turkey.
I used a large rimmed baking pan with a rack for the recipe. Kenji says you could also use the top of a broiler pan if you don’t have a large rack.
If you’re looking for a fast and easy way to roast a turkey this holiday season, I highly recommend this Crisp-Skinned Butterflied Roast Turkey! The recipe may look long because I tried to make each step really clear, but, trust me, this is one of the easiest turkeys I have ever roasted!
.
EDIT (December 3, 2018): This is the only way I have roasted a turkey since this post. Three months after making this in 2015, I bought a Nordic Ware Natural Aluminum Commercial Baker’s Big Sheet. Its dimensions are 21 x 15 x 1 inches. It’s larger than the standard half-sheet I used in these photos, but it still fits in all standard ovens. It is the perfect size for roasting a 12.5-pound butterflied (aka spatchcocked) turkey, but I have found many other uses for it. It’s great to have the roomy pan for cookies, sheet pan meals, or granola.
.
Ok, so it’s not a Norman Rockwell beautiful roast turkey, but it was excellent! 🙂

.
Crisp-Skinned Butterflied Roast Turkey
(Adapted from J. Kenji López-Alt’s method on Serious Eats)
.
Although Kenji says you can use a 12 – 14 pound turkey, I found that my 12.5 pound turkey barely fit in the pan. You may want to stick with a turkey that’s no more than 12 – 12.5 pounds.
Be sure to allow adequate time to defrost a frozen turkey in the refrigerator. I bought the turkey on Tuesday. On Saturday it was defrosted enough to proceed, but it was still just a bit icy inside. The rule of thumb is to allow 24 hours for every 4 – 5 pounds.
For best results, dry brine the turkey, but this step can be skipped. You can just butterfly the turkey and roast it.
a
a
Special equipment: Rimmed baking sheet, wire rack or broiler pan top
a
To dry brine the turkey:
Use an unseasoned turkey, one that is not Kosher, enhanced, or self-basting
2 tablespoons kosher salt (use just 1 tablespoon if using regular salt)
1 tablespoon baking powder
a
- Butterfly the turkey. Remove the neck and the giblets from inside the turkey. Throw the liver out; reserve the neck and other giblets for broth. I also cut off the tail part (known as the “Pope’s nose”) to use for the broth. Turn the turkey on its breast and, using poultry shears, cut out the backbone. Turn it over, splay the wings and the legs, and press down hard on the breastbone to flatten it. You’ll hear a couple of cracking sounds. Check out Kenji’s excellent slide show to see step by step directions. (I enlisted Bob to butterfly the turkey for me and he did a great job!)
- Put the butterflied turkey on a rack in a large rimmed baking sheet. Stir the salt and the baking powder together and sprinkle it all over the turkey. Rub it in a bit. Place the turkey in the refrigerator, uncovered, for 12 – 24 hours. (You can brine it for up to 3 days, but if you brine it for more than 24 hours, cover it loosely with plastic wrap or cheesecloth to prevent moisture loss.)
.
Turkey with salt/baking powder mixture sprinkled on it ready to go in the refrigerator

a
Roasting the Turkey
a
1 large onion, peeled and roughly chopped
2 large carrots, scrubbed and roughly chopped
2 stalks celery, roughly chopped
1 (12 – 12.5) butterflied turkey (dry brined, if desired)
1 tablespoon oil
Kosher salt and black pepper (use salt only if you did NOT dry brine the turkey)
a
- Put an oven rack in the middle position and preheat the oven to 450˚.
- Line a large rimmed baking sheet with heavy duty foil. Make the edge of the foil go up the sides if your turkey extends a bit over the edge of the pan.
- Scatter the chopped vegetables in the pan.
.
Note how I made the foil go up over the rim of the pan.

a
- Place the rack directly on the vegetables and put the turkey on the rack.
- Pat the turkey dry with paper towels. (If you did NOT brine the turkey, sprinkle it liberally with kosher salt and black pepper.) Drizzle the oil over the turkey and rub it all over.
- Put the turkey in the oven with the legs towards the back of the oven and roast the turkey for about 80 minutes, or until an instant read thermometer registers 165˚. (I checked mine at 85 minutes and the temperature was well beyond 165˚, so do check at 80 minutes.) If your oven roasts unevenly, you made want to rotate the pan halfway through the roasting.
- Remove the turkey on the rack to a new baking sheet or cutting board. (I found this easiest to do using a sturdy fork to lift up a corner of the rack so I could get a grip on it with an oven mitt.)
- Carefully pick up the foil with the veggies and turkey broth in the pan. Fold the edges up and pour the broth through a strainer into a measuring cup. These drippings can be added to your gravy.
- Cover the turkey loosely with foil and let it rest 20 – 30 minutes.
- Carve the turkey and serve.
a
Turkey stock for gravy
(This can be made while the turkey is roasting, or the day before if you dry brine the bird.)
a
1 tablespoon oil
Turkey neck, giblets (except liver) turkey back, and tail
1 onion, peeled and roughly chopped
1 carrot, peeled and roughly chopped
1 large stalk of celery, roughly chopped
1½ quarts low sodium chicken broth
a
- Heat the oil in a large skillet.
- Add all of the turkey parts and cook, stirring occasionally until browned.
- Add the vegetables and continue to cook until they have softened a bit and are beginning to brown.

a
- Remove the turkey and vegetables to a 3 – 4 quart saucepan.
- Pour a bit of the chicken broth into the skillet to deglaze the pan, stirring and scraping the bottom of the pan. Pour this deglazed liquid into the saucepan.
- Add the rest of the chicken broth to the sauce pan. Bring to a boil and then reduce to a low simmer. Simmer for 45 minutes and then strain.

a
- Use the broth to proceed with your favorite gravy recipe, or use Kenji’s recipe.
a

a


